March Eggs

 - by KitchenPantryScientist

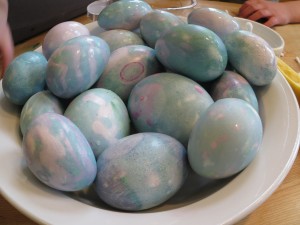
Between basketball games and homework this weekend, we stood barefoot on cartons of raw eggs and painted hard boiled ones with lemon juice and baking soda.

Why the eggfest? We’re making videos for some April KidScience app experiments!

Here are a few still shots of our lovely creations:

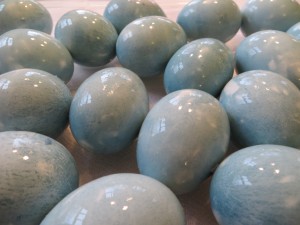
We soaked hard-boiled eggs in cabbage juice overnight. Then, we painted them with citric acid (lemon juice) and sodium bicarbonate (baking soda.)Click here for detailed directions and more about the science.

Citizen Science

 - by KitchenPantryScientist

Want to help scientists out with real research projects? It just takes a click of the mouse to get involved with experiments that may someday be published in scientific journals and make a difference in the world.

 Scistarter.com is a great starting point to help you find a project that fits your interests.


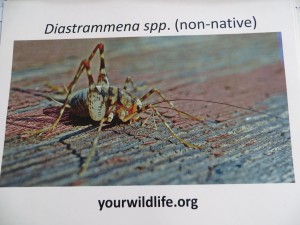
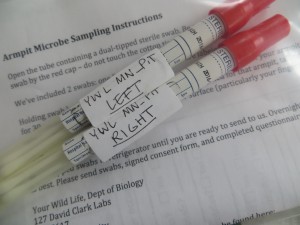
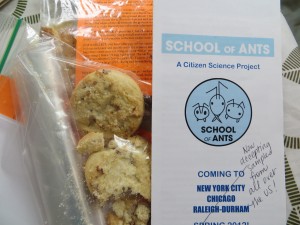
To get involved in Citizen Science, you don’t need a degree or any scientific background at all. It’s not expensive. You might just need a plastic bag or a pair of binoculars. Depending on your interest, you can do anything from taking a video of someone playing with your dog,  collecting ants, recording severe weather in your own back yard, to swabbing for microbes in your home school or sports stadium. You can even keep track of when your neighborhood outdoor hockey rink freezes and thaws or look for Camel Crickets  in your basement.

Who knows? You might discover a new ant species, learn something new, or even participate in a study that helps make the world a better place.

Spring Break Boredom-Busters on KidScience App

 - by KitchenPantryScientist

Whether you’re home or away, science can make any vacation more fun.  You can collect data for real citizen science research projects by searching SciStarter.com or do your own experiments.  KidScience app, based on the science projects on this website, puts fun science experiments at your fingertips on your iPhone, iPod Touch or iPad, no matter where you are.

I showed Kare11 viewers three of our favorite KidScience experiments: Red Cabbage Litmus PaperFizzy Balloons and Marshmallow Slingshots (using stuffed animals like Angry Birds to learn a little about the conservation of energy. Click here to watch the TV segment.

How will you mix a little science into your spring break?

Kitchen Science

 - by KitchenPantryScientist

“Are you a good cook?” was the first thing Dr. Tsneo Suzuki asked when I sat down in the office next to his cancer research lab at the University of Kansas. I stared at the picture of his wife, who I later learned had passed away from breast cancer, and wondered whether I should be offended.

After all, I was in my twenties and had five years of molecular biology experience under my belt. But I understood why he asked the question. Once you figure out how to test a hypothesis, most science experiments involve following recipes, which scientists call protocols. Generally, if you can read directions and mix things together in the correct order, in the right proportions, you can do things like amplify DNA and clone genes into bacteria.

So I truthfully answered “Yes, I’m a pretty good cook,” and got the job.

Food preparation is like a science experiment. If you can follow a recipe, you should get something close to what you set out to make, because often the ingredients will interact with each other to make something new. This is the very definition of a chemical reaction. Everything you cook with, from water to baking soda, is just a collection of molecules.

Here’s a collection of some food science experiments on my website. Since I love to cook, I hope to add more in the future! Leave a comment if you have other favorite kitchen science experiments, and I’ll try to add them to the list.

Testing Foods for Starch– Add a drop of iodine and watch for color change to detect starch.

Crock Pot Microbiology: Making yogurt from scratch is a delicious experiment

Yeast Experiment: Pyramids, Pasteur and Plastic Baggies– Grow yeast in a plastic bag to see how they make bread rise.

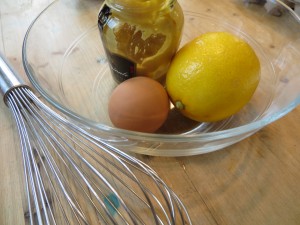
Emulsions: Mayonnaise and Vinaigrette– Mix the un-mixable using surfactants.

Curds and Whey: Make glue and plastic from milk and vinegar.

Gluten Ball– Explore the protein that makes bread chewy.

Red Cabbage Juice CO2 experiment– Use the pH-sensitive pigment in red cabbage to illustrate how CO2 can acidify liquids (and why soda is bad for your teeth.)

Homemade Petri Plates: test surfaces around your kitchen and house for microbes.  Use to test fingers before washing, after washing with water alone, after washing with soap, and after using hand sanitizer.

So remember, cooking can make you a better scientist, and doing science can make you a better cook.


Crock Pot Microbiology: Yogurt

 - by KitchenPantryScientist

Microbes are always fighting for space.

Bacteria and fungi try to outnumber other tiny competitors using chemical warfare, among other things.  That’s why many antibiotics (which kill certain bacteria) are actually produced by other bacteria. One reason foods like yogurt and cheese, which are made by beneficial bacteria like Lactobacillus acidopholis, don’t easily spoil is that these bacteria  can turn milk sugars into lactic acid. This makes their environment toxic to some of their competitors, like pathogenic bacteria.  Luckily, we humans aren’t harmed by lactic acid and can enjoy its tangy flavor.

To grow bacteria in labs, scientists have to take care of them the way you’d take care of a pet.  You have to give them the type of food they like, the right amount of oxygen and moisture, and keep them at their optimal temperature.

The same principles apply to growing the bacteria that make yogurt.  You prepare the bacteria’s food by heating some milk and letting it cool to a temperature that the bacteria can tolerate. Then, you add the bacteria and let them grow for about eight hours.  During that time, the bacteria will happily divide, multiply and eat milk sugar. In the process, they’ll produce lots of lactic acid which changes the way the proteins and fats in the milk interact, forming a more solid food product.

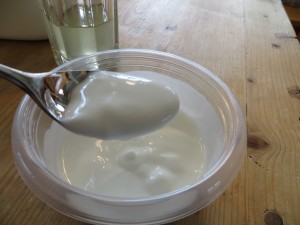
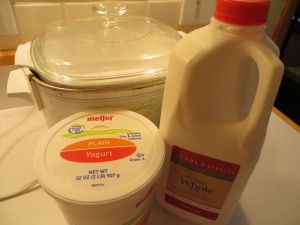
We made yogurt in our crock pot, which turned out to be a lovely bacterial incubator. The end product was a little runny, but putting it through cheese cloth (or a coffee filter in a plastic bag with the tip cut off) gives you thicker yogurt.  It is delicious!  Here’s how we made it, thanks to directions from Stephanie O’Dea:

Ingredients: 8 cups (half-gallon) of whole milk , 1/2 cup grocery store yogurt  (must contain live/active culture), thick bath towel, slow cooker

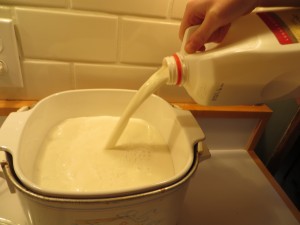
Turn crock pot on to low. Add an entire half gallon of milk. Cover and cook  for 2 hours and 30 minute. Unplug your crock pot, but leave the cover on. Let it sit for 3 hours so your bacteria will not be overheated when you add them.
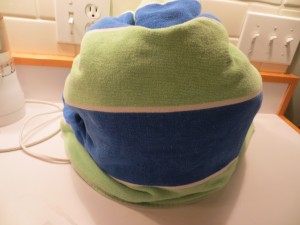
After 3 hours, put 2 cups of your warm milk  in a bowl. Whisk in 1/2 cup of the live/active culture yogurt. Dump the bowl contents back into the crock pot and stir well. Wrap a heavy bath towel all the way around the unplugged crock pot as insulation and let your bacteria grow for 4-8 hours or until thickened.  Refrigerate and enjoy with fruit, honey, or granola.  As I mentioned, you can strain the yogurt if you prefer a thicker consistency, and your homemade yogurt will make a great starter culture for the next batch!

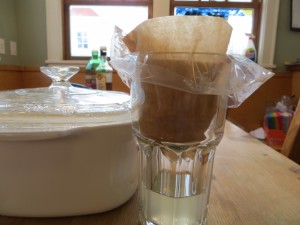
If you don’t have cheesecloth, you can strain your yogurt through a coffee filter in a plastic bag with a corner cut off.

Happy kitchen microbiology!

Homemade Petri Plates- Microbial Zoos

 - by KitchenPantryScientist

IMG_3669I’m re-posting this project we did two years ago, since I’m making plates today for a hand-washing experiment that the kids and I will do after school. Stay tuned!

Did you know that every surface in your home is teeming with microorganisms? Culturing microbes from your home on petri dishes lets you grow some of them as colonies  that you can see with your naked eye. You might already have what you need in your kitchen cupboard.  If not, the ingredients are readily available at most grocery stores. I demonstrated this experiment on Kare11 and you can watch it here, following the yeast experiment.
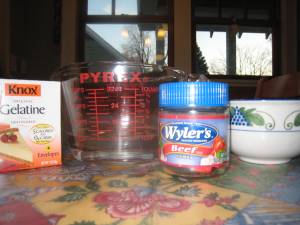
IMG_3658To make petri plates, you’ll need disposable containers (see below),  beef bouillon cubes or granules, plain gelatin or agar agar*, water, sugar and Q-tips. (*Agar-agar can be found with Asian groceries in some grocery stores.) **Gelatin will melt if it gets too warm, and some strains of bacteria can liquify it, which is why scientists in labs use agar to make their plates.  The idea to use agar for plates originally came from Angelina Hess, who used agar for canning food.

For containers, you can use foil muffin tins, clear plastic cups covered with plastic baggies, clear Tupperware with lids, or real petri dishes.  We’re going to use clear deli containers, so that we can recycle while we learn.  (Containers must be heat-resistant enough to pour warm agar into.)

Start by making microbial growth medium (or microbe food, as we like to call it.) Mix together:
1 cup water  
-1 Tbs. agar-agar (
OR one and one half packages gelatin, which is about one and a half oz or 12g)

1 bouillon cube (or 1 tsp. granules)
2 tsp. sugar

The next step requires adult assistance, since it involves very hot liquid.  Bring the mixture to a boil on the stove or in the microwave, stirring at one minute intervals and watching carefully until the gelatin or agar is dissolved.  Remove the boiling liquid from heat and cover.  Let cool for about fifteen minutes.

IMG_3662

Pour the medium carefully into clean containers, until 1/3 to 1/2 full.  Loosely place lids, foil or plastic baggies over containers and allow dishes to cool completely.  The geltin or agar should make the growth media hard like jello.  When your plates have hardened, store them in a cool place, like a refrigerator, before using.  Plates should be used in 2-3 days.  When you are working with the plates, try to keep the lids on loosely whenever possible, so that they are not contaminated by microorganisms floating around in the air.  If you’re planning to use muffin tins, simply place them in a muffin pan, fill them with agar, and when they’re cool, put them in individual zip-lock baggies.  With other containers, put the lids on tightly once the plates harden.

IMG_3670

IMG_3676IMG_3679

When the plates are ready, shake the condensation (water droplets) off the lids of the containers and put them back on.  If you have a clear container, you can draw a grid of four sections on the bottom of the plate with permanent marker. (If using muffin tins, label each bag with the surface you are checking.)  Decide which surfaces you’d like to test.

Label your plates with the names of the surfaces you want to test.   Be sure to label the bottom of the plate since the lid will move.  You should be able to see through the agar to see your lines and your writing.  If you want to, you can label a separate plate for each surface, but we had three kids and three plates, so we made sections.  TV remotes, kitchen sinks, computer keyboard, doorknobs and piano keys are great surfaces to check.  You can even touch your finger to the plate, cough on a plate, or leave one open to the air for half an hour to see what’s floating around!  (See the photo at the top of this post for a better picture of how your plate might look.)

Rub a clean Q-tip around on the surface you want to test.  Then, remove the lid from the plate and gently rub the Q-tip across the section of the plate labeled for that surface If you’re careful, the agar shouldn’t break.  If it does, it’s no big deal.  When you’re done, set the plates on a flat surface with their lids loosened and taped on (do not invert them.)
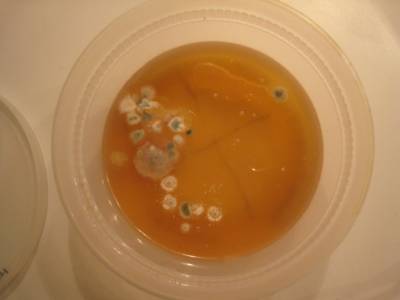
Here’s what grew on one of our plates (pictured above): The large, fuzzy colonies are fungi and the small, whitish ones are probably bacteria.

See what grows! You will mostly see fungi (molds), but you may also see some tiny clear or white spots that are colonies formed by millions of bacteria.  Record and draw how your plates look in your science notebook.  Keep track of how long it takes things to grow and the shapes, sizes and colors of the microbial colonies that grow on their plates.  Sciencebuddies.org has this great page on interpreting what you find growing on your plates!  If you want to learn more about microbes, search for the words fungi and bacteria on the website cybersleuthkids.com and it will give you some great links to microbiology websites.  Microbes are everywhere, but that very few of them are harmful, and many of them are essential for good health.

Wash your hands after handling the plates, and throw the plates  away when you are done.  Remember, if you washyour hands with regular hand soap for the length of time that it takes to say the ABCs, you’ll remove most of the harmful bacteria and viruses on them.  (One side effect of this experiment is the sudden urge to disinfect computer keyboards and remote controls.)
 

Epic Fail: Sneeze Experiment

 - by KitchenPantryScientist

One of the first things you learn when you do science is that experiments don’t always turn out the way you hope they will. And that’s OK. If at first you don’t succeed….

We tried to measure how far a sneeze would throw visible droplets by putting grape juice in our mouths and tickling our noses with feathers dipped in pepper. Sadly, no matter how hard we tried, we couldn’t seem to sneeze with grape juice in our mouths. Laughing so hard we spit the juice out was one unexpected outcome. We decided to try it again in the future using petri dishes spaced at intervals to avoid the grape juice problem.

Since there was no school today and it was ten degrees below zero (F), we tried throwing boiling water into the air to see if it would freeze before it hit the ground. Once again, our experimental conditions were less than perfect, and although some of the water froze into an icy cloud, the majority hit the ground with a splash. The experiment would have worked better at -20F, but it was still fun!

Amazing Flu Virus Animation

 - by KitchenPantryScientist

Cover your cough and wash your hands! Later this week, we’ll post an experiment that illustrates how far the biggest drops from your sneeze or cough can travel. (The smaller ones can go much further.)

Here’s an amazing animation created by medical animator David Bolinsky and narrated by NPR’s Robert Krulwich that shows you how a flu virus can trick a single cell into making a million more viral particles that can go on to infect other cells, until your immune system stops them.

Creative Science: ScienceOnline

 - by KitchenPantryScientist

In a few weeks, I’ll be heading to North Carolina to attend Science Online 2013, an “un-conference” of online science communicators, writers, artists and video-makers. It will be next to impossible to choose which sessions to attend, since people will be talking about everything from writing science narrative to drawing science comics and using science to write fiction. I’ll be co-moderating a session on writing for kids with Elizabeth Preston, Editor of Muse magazine (which my 12-YO loves) and giving a short talk on why I made KidScience app.

To make the meeting even more fun, there will be a Cyberscreen film festival and an art show for participants, which inspired me to pull out my paintbrushes from college and do a quick “self portrait with microbes.” It’s been so much fun to paint again that I might go buy another canvas today and paint a “Still Life with Bacteria.”


My musician friend helped me make my silly “science song” sound amazing so I can use it on my website and for videos like the one above that I made for KidScience app.

How do you mix up science, music, film and art? Do you know any science project that can morph into art projects, like red cabbage litmus paper collages or photographing tie-dye milk patterns? I’d love to hear your ideas!  I’ll let you know about the cool things I learn and fun resources I discover at ScienceOnline in early February!