Tag: art’
Homemade Holiday Light-Up Ornaments and Crystal Snowflakes
- by KitchenPantryScientist
Use science to make your holidays shine! Here are a few fun ornaments adapted from projects in my book “STEAM Lab for Kids.” Basic instructions can be found below. Buy your own copy of “STEAM Lab for Kids” anywhere books are sold to learn more about the “Science Behind the Fun!” Happy Holidays!
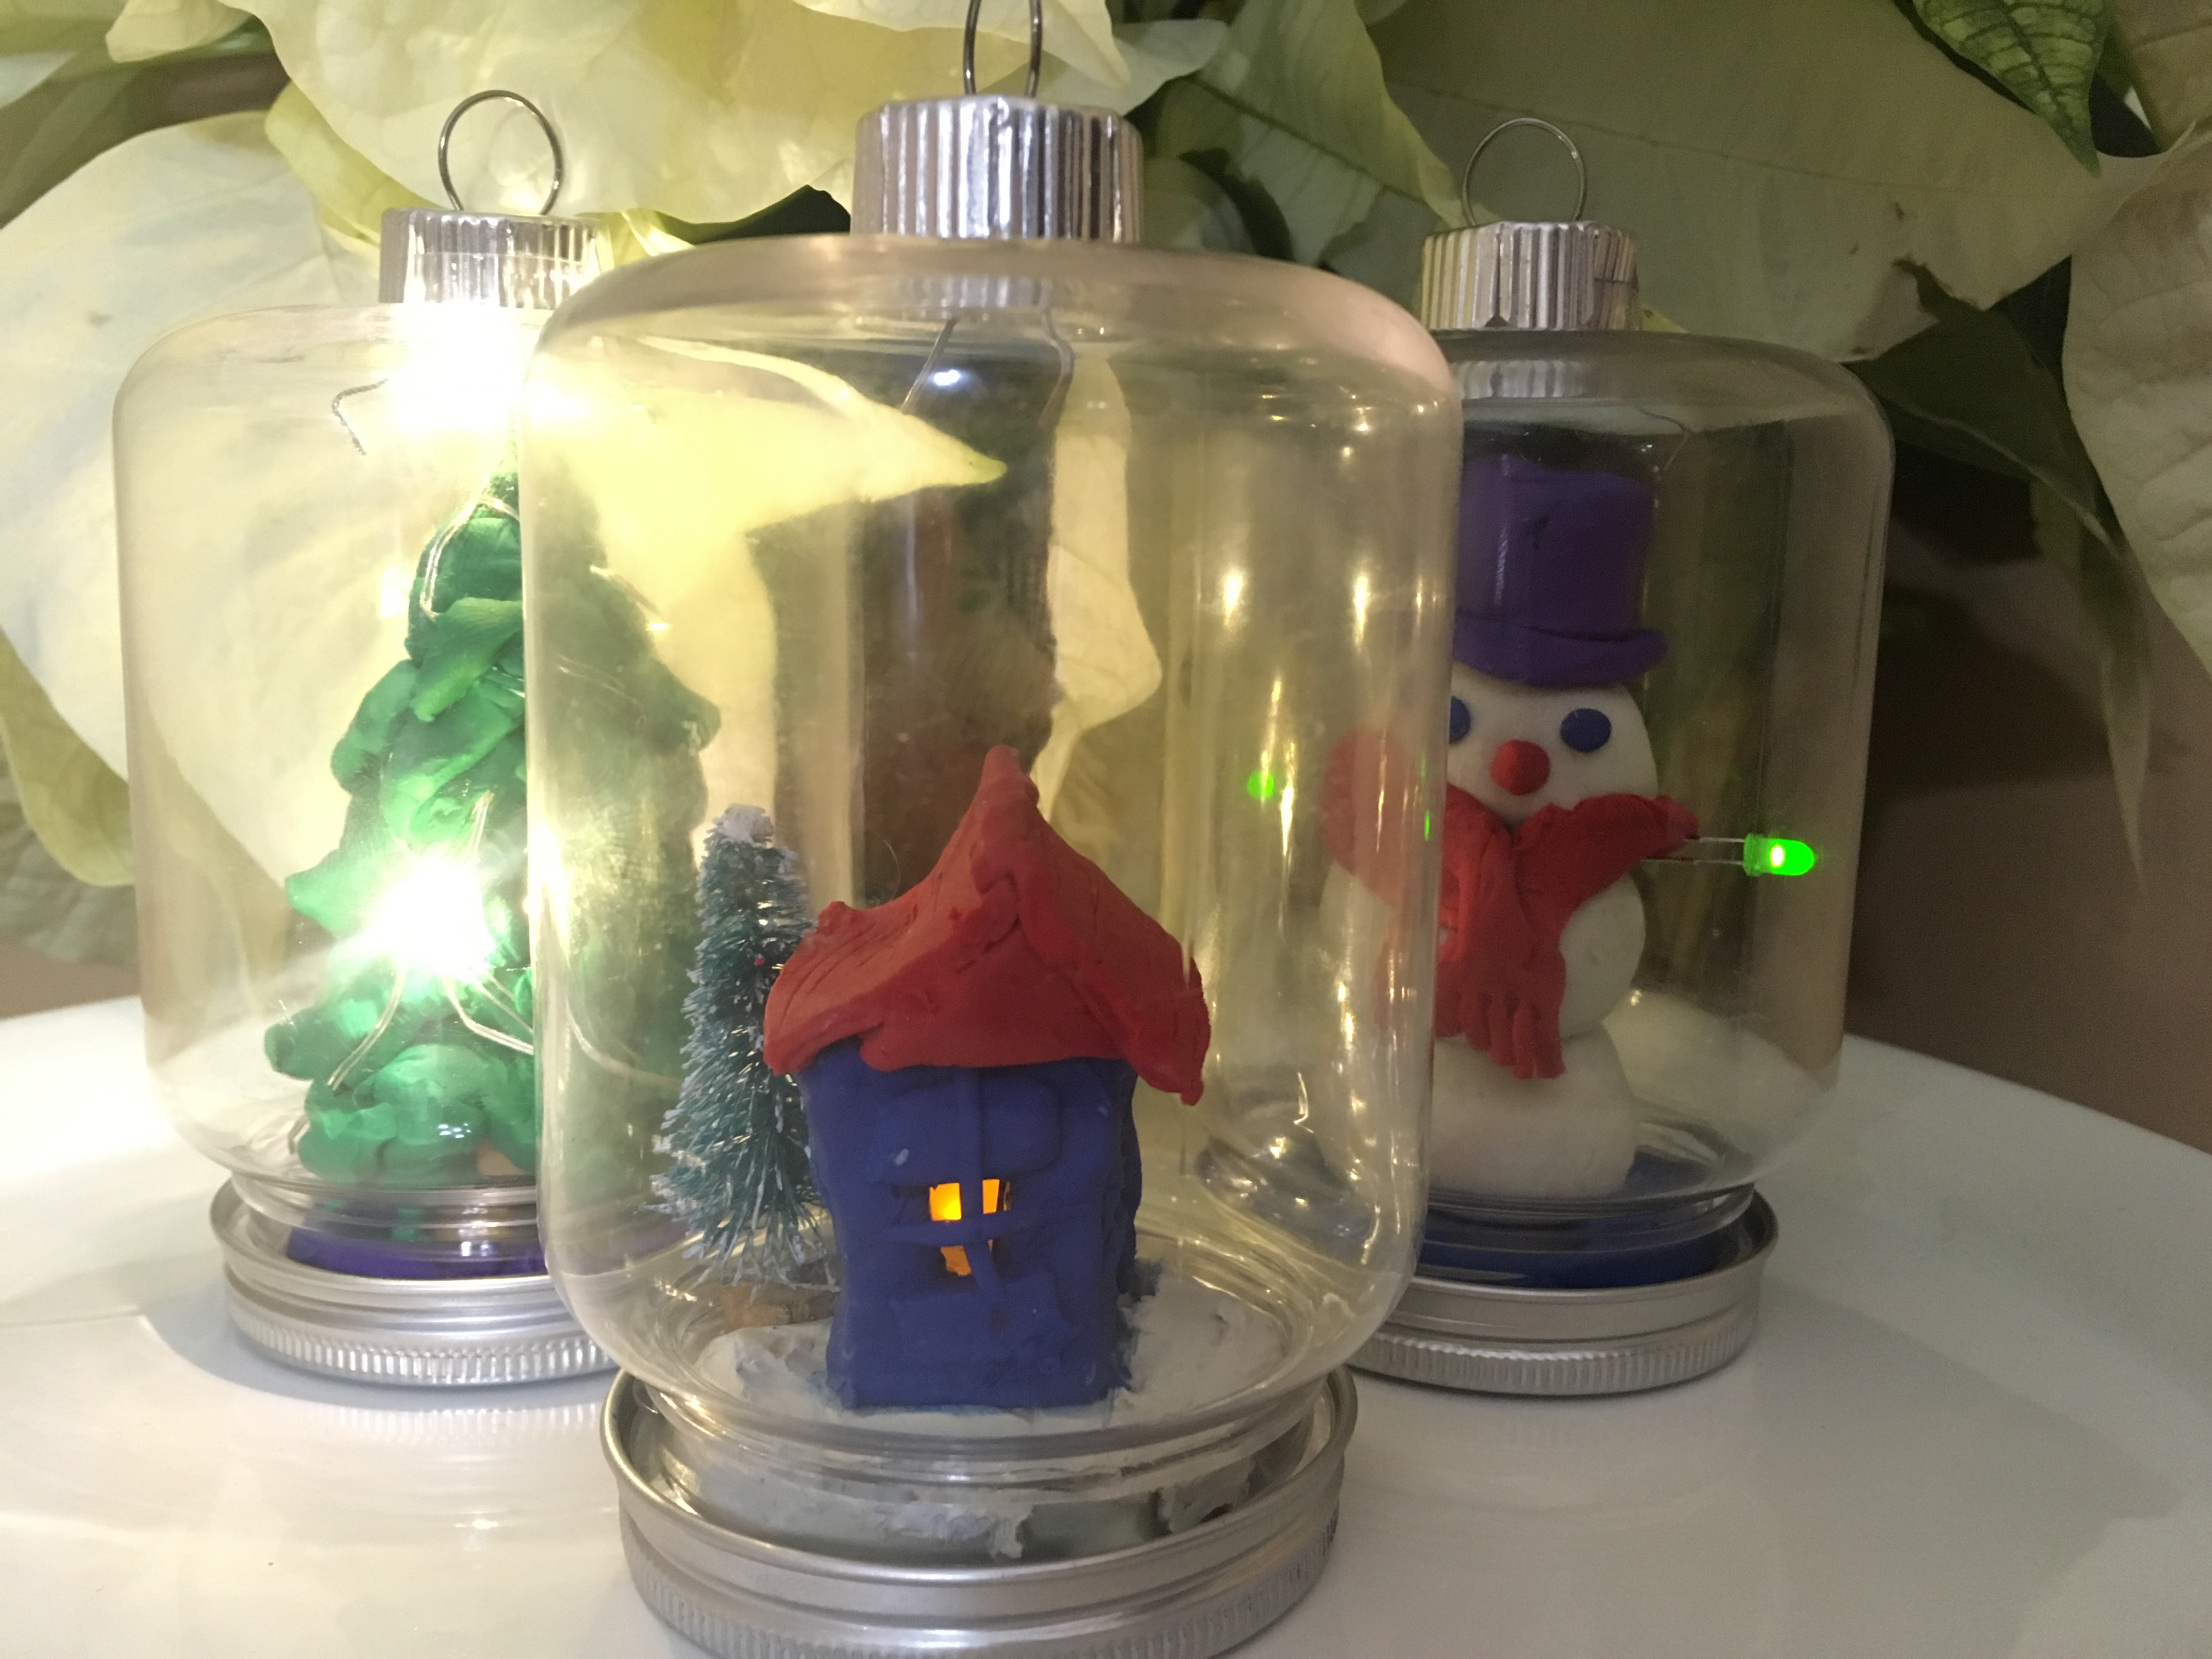
LED ornaments (or jar globes) made using circuit from Light-Up Creatures (STEAM Lab for Kids (Quarry Books 2018)
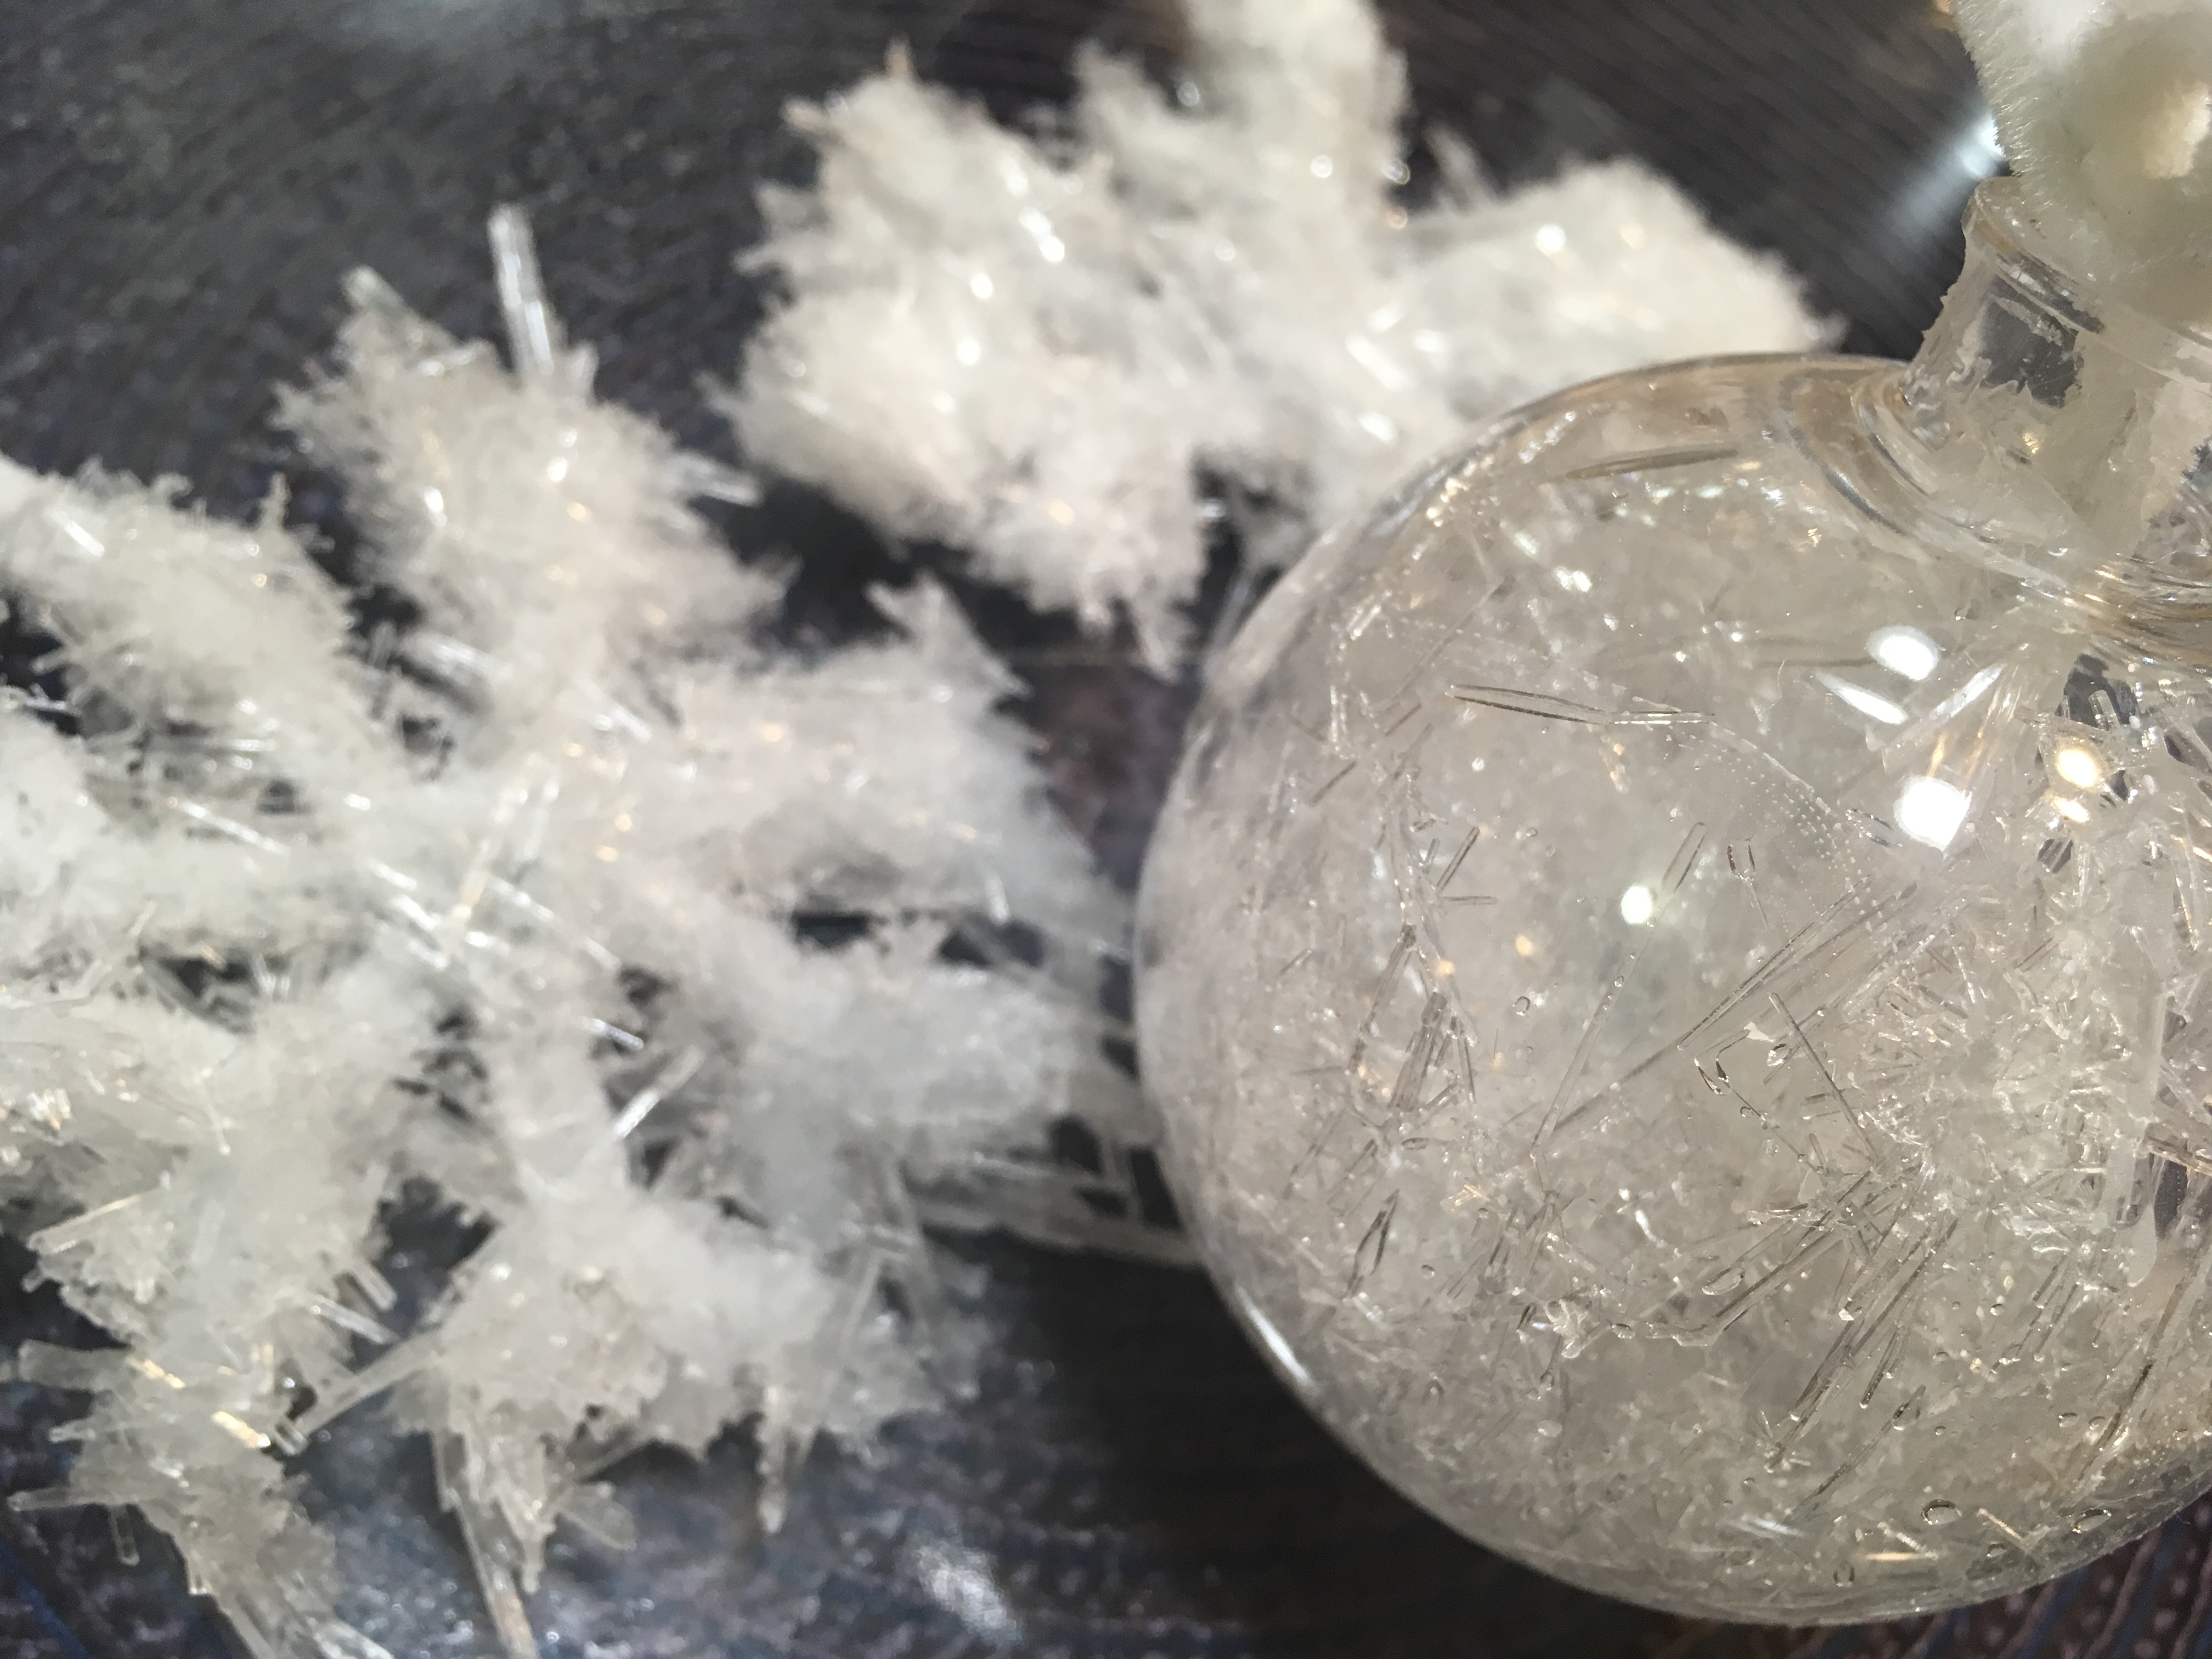
Epsom salt crystals from STEAM Lab for Kids (Quarry Books 2018)
LED Ornaments and Jar Globes:
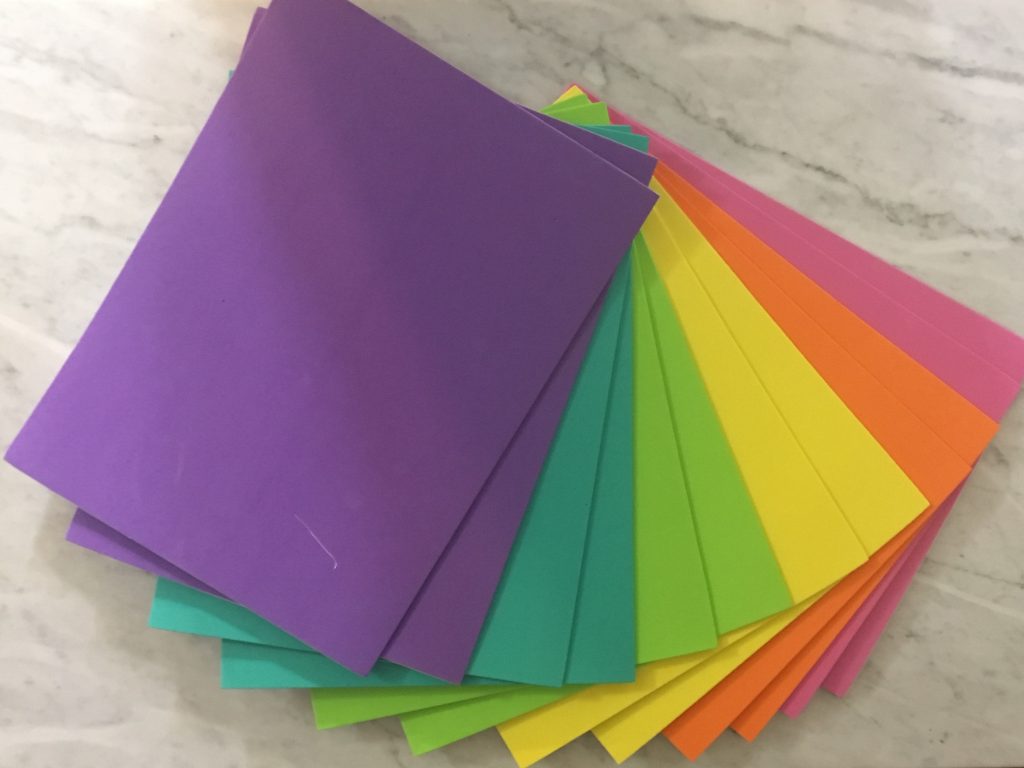
To make LED ornaments, buy plastic jars or ornaments with removable bases. Use sculpting clay (the kind that won’t harden) to design a scene and add LEDs connected to a coin-cell battery to light your creation. LEDs can be ordered online. See images below.
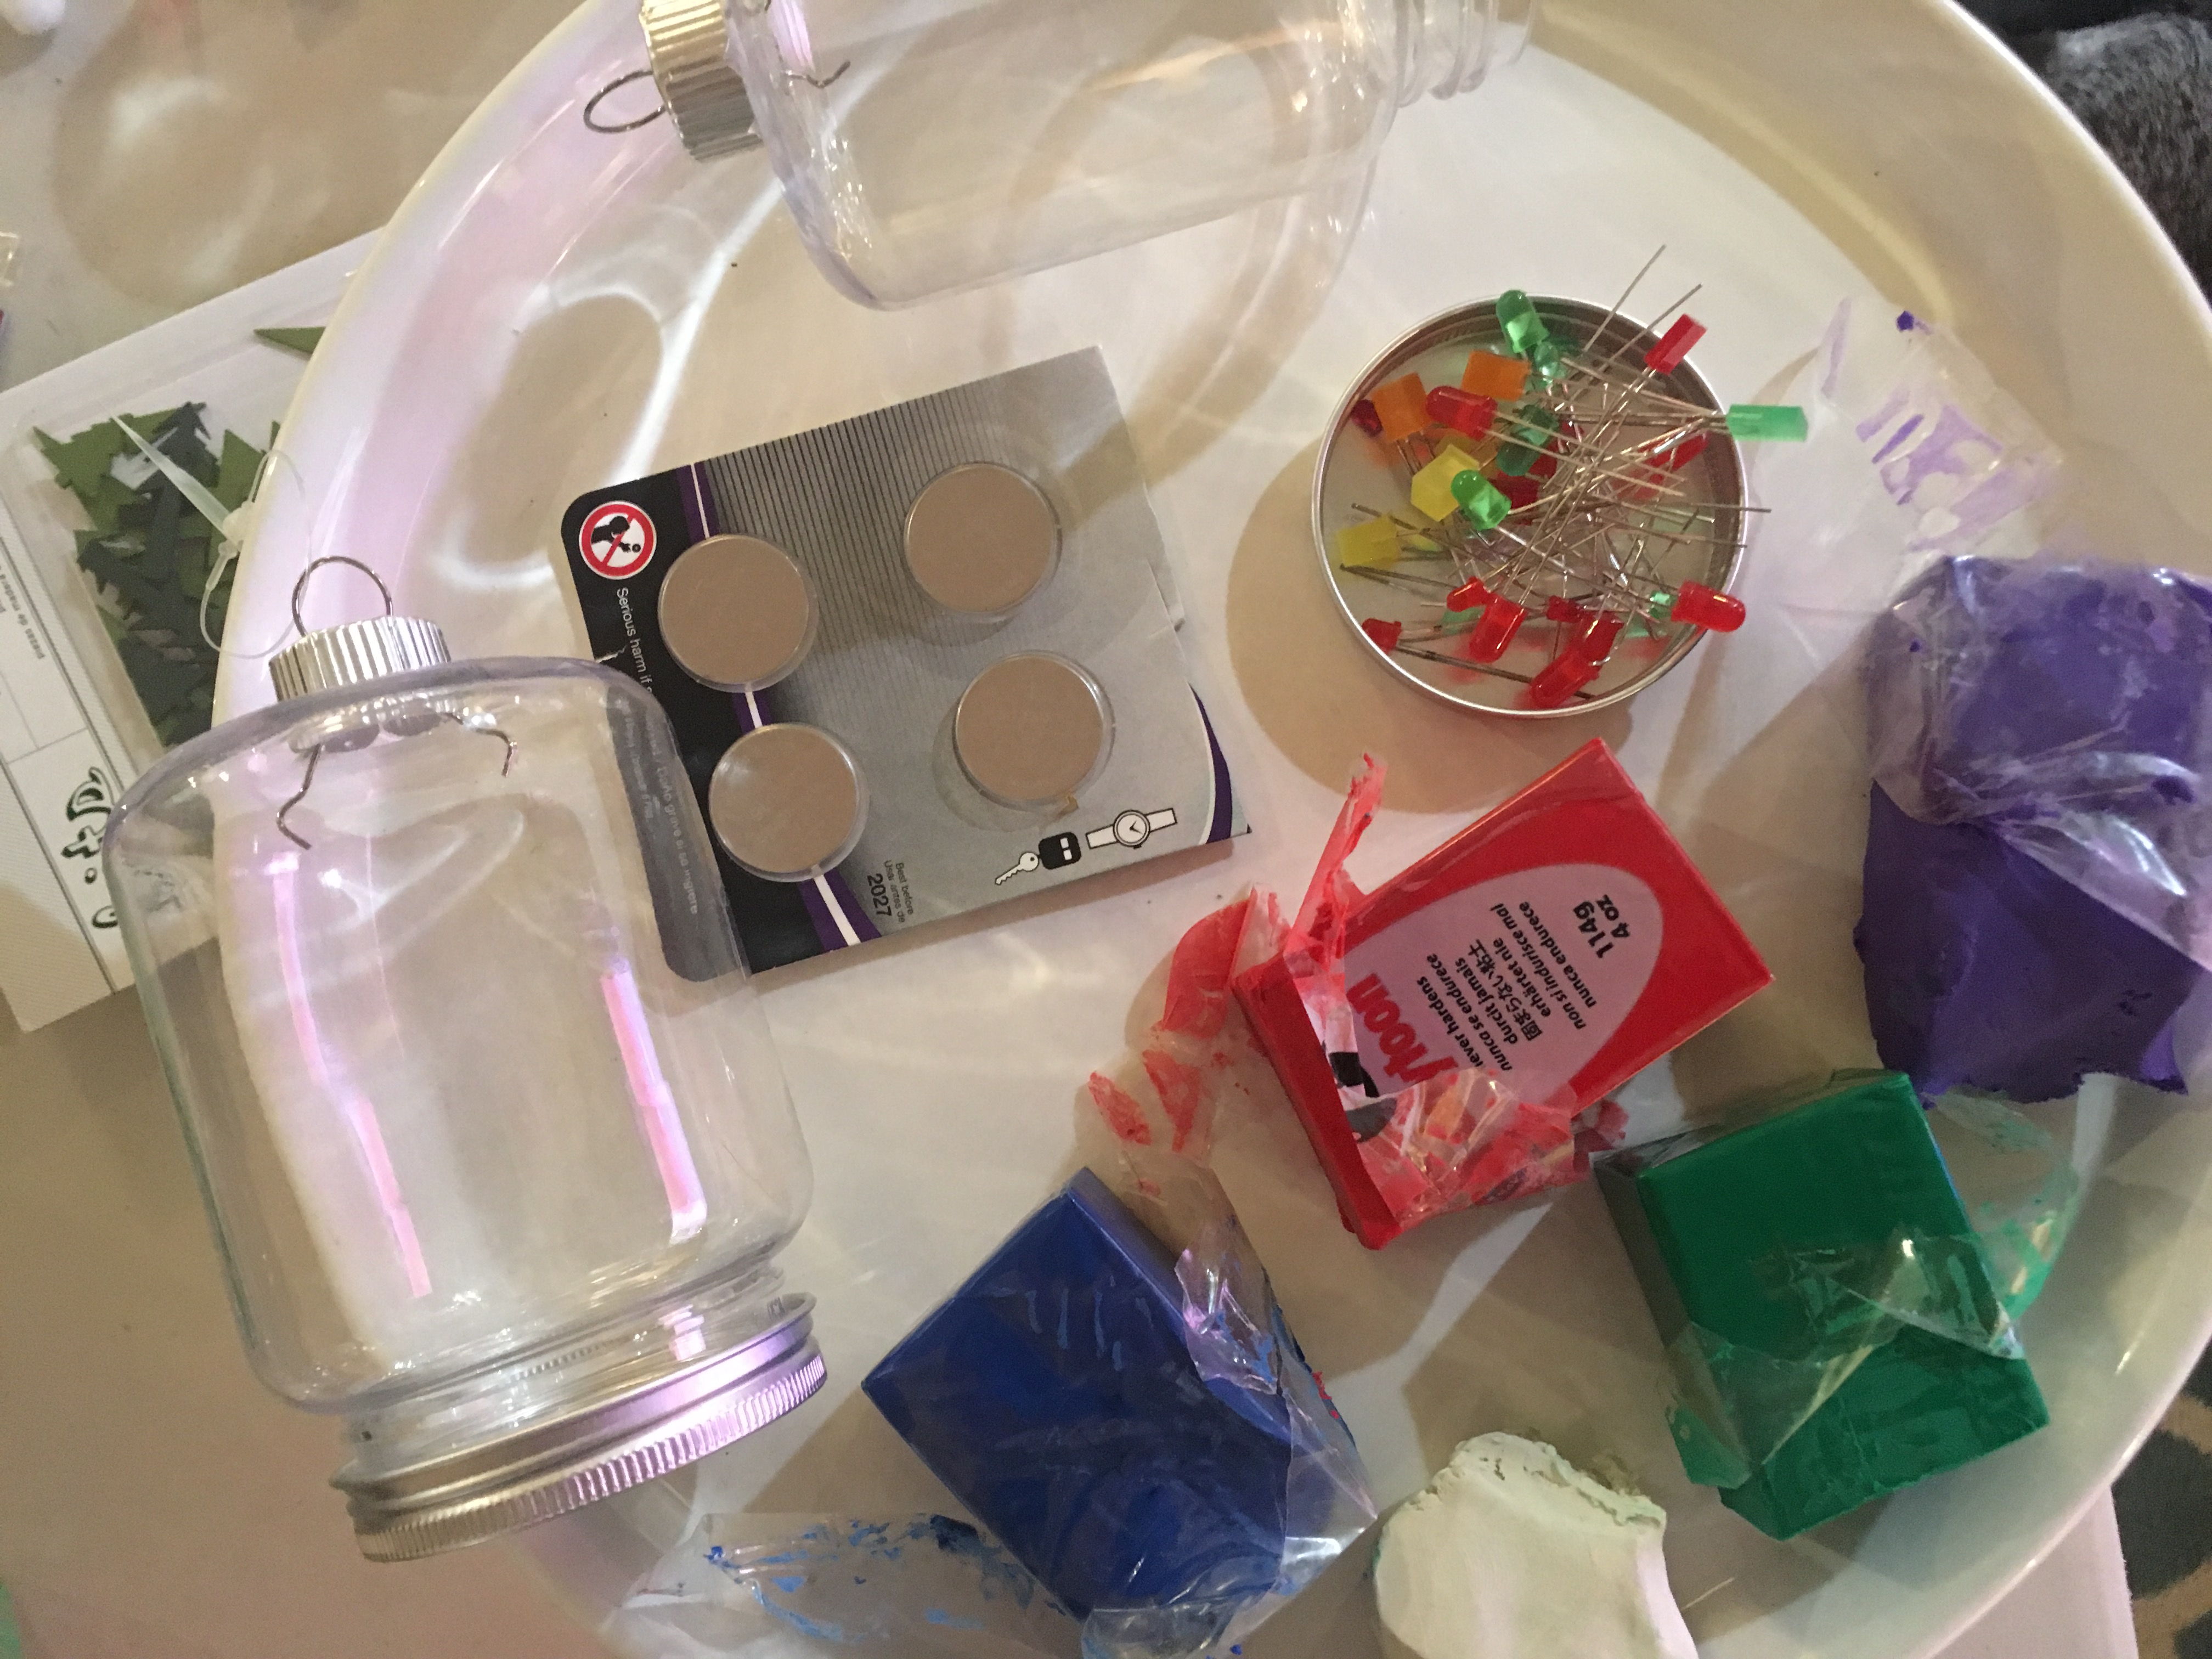
supplies for building LED-lit ornaments
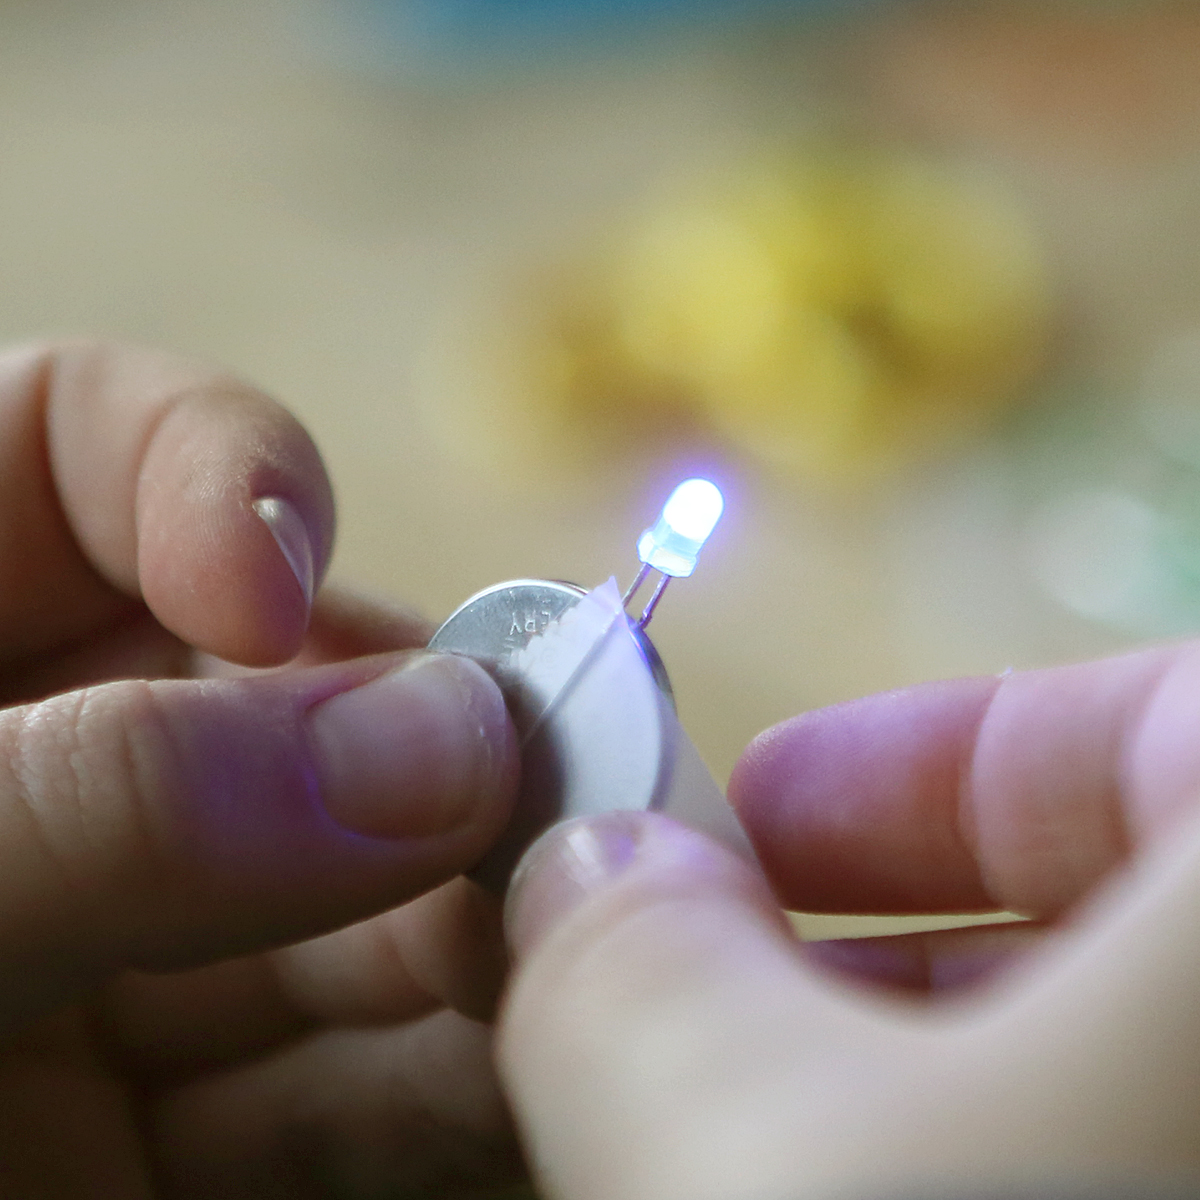
Connect the legs of the LED so that each leg touches a different side of the battery to complete the circuit. If it doesn’t light, try switching the legs to the opposite sides. (Image from STEAM Lab for Kids-Quarry Books 2018)
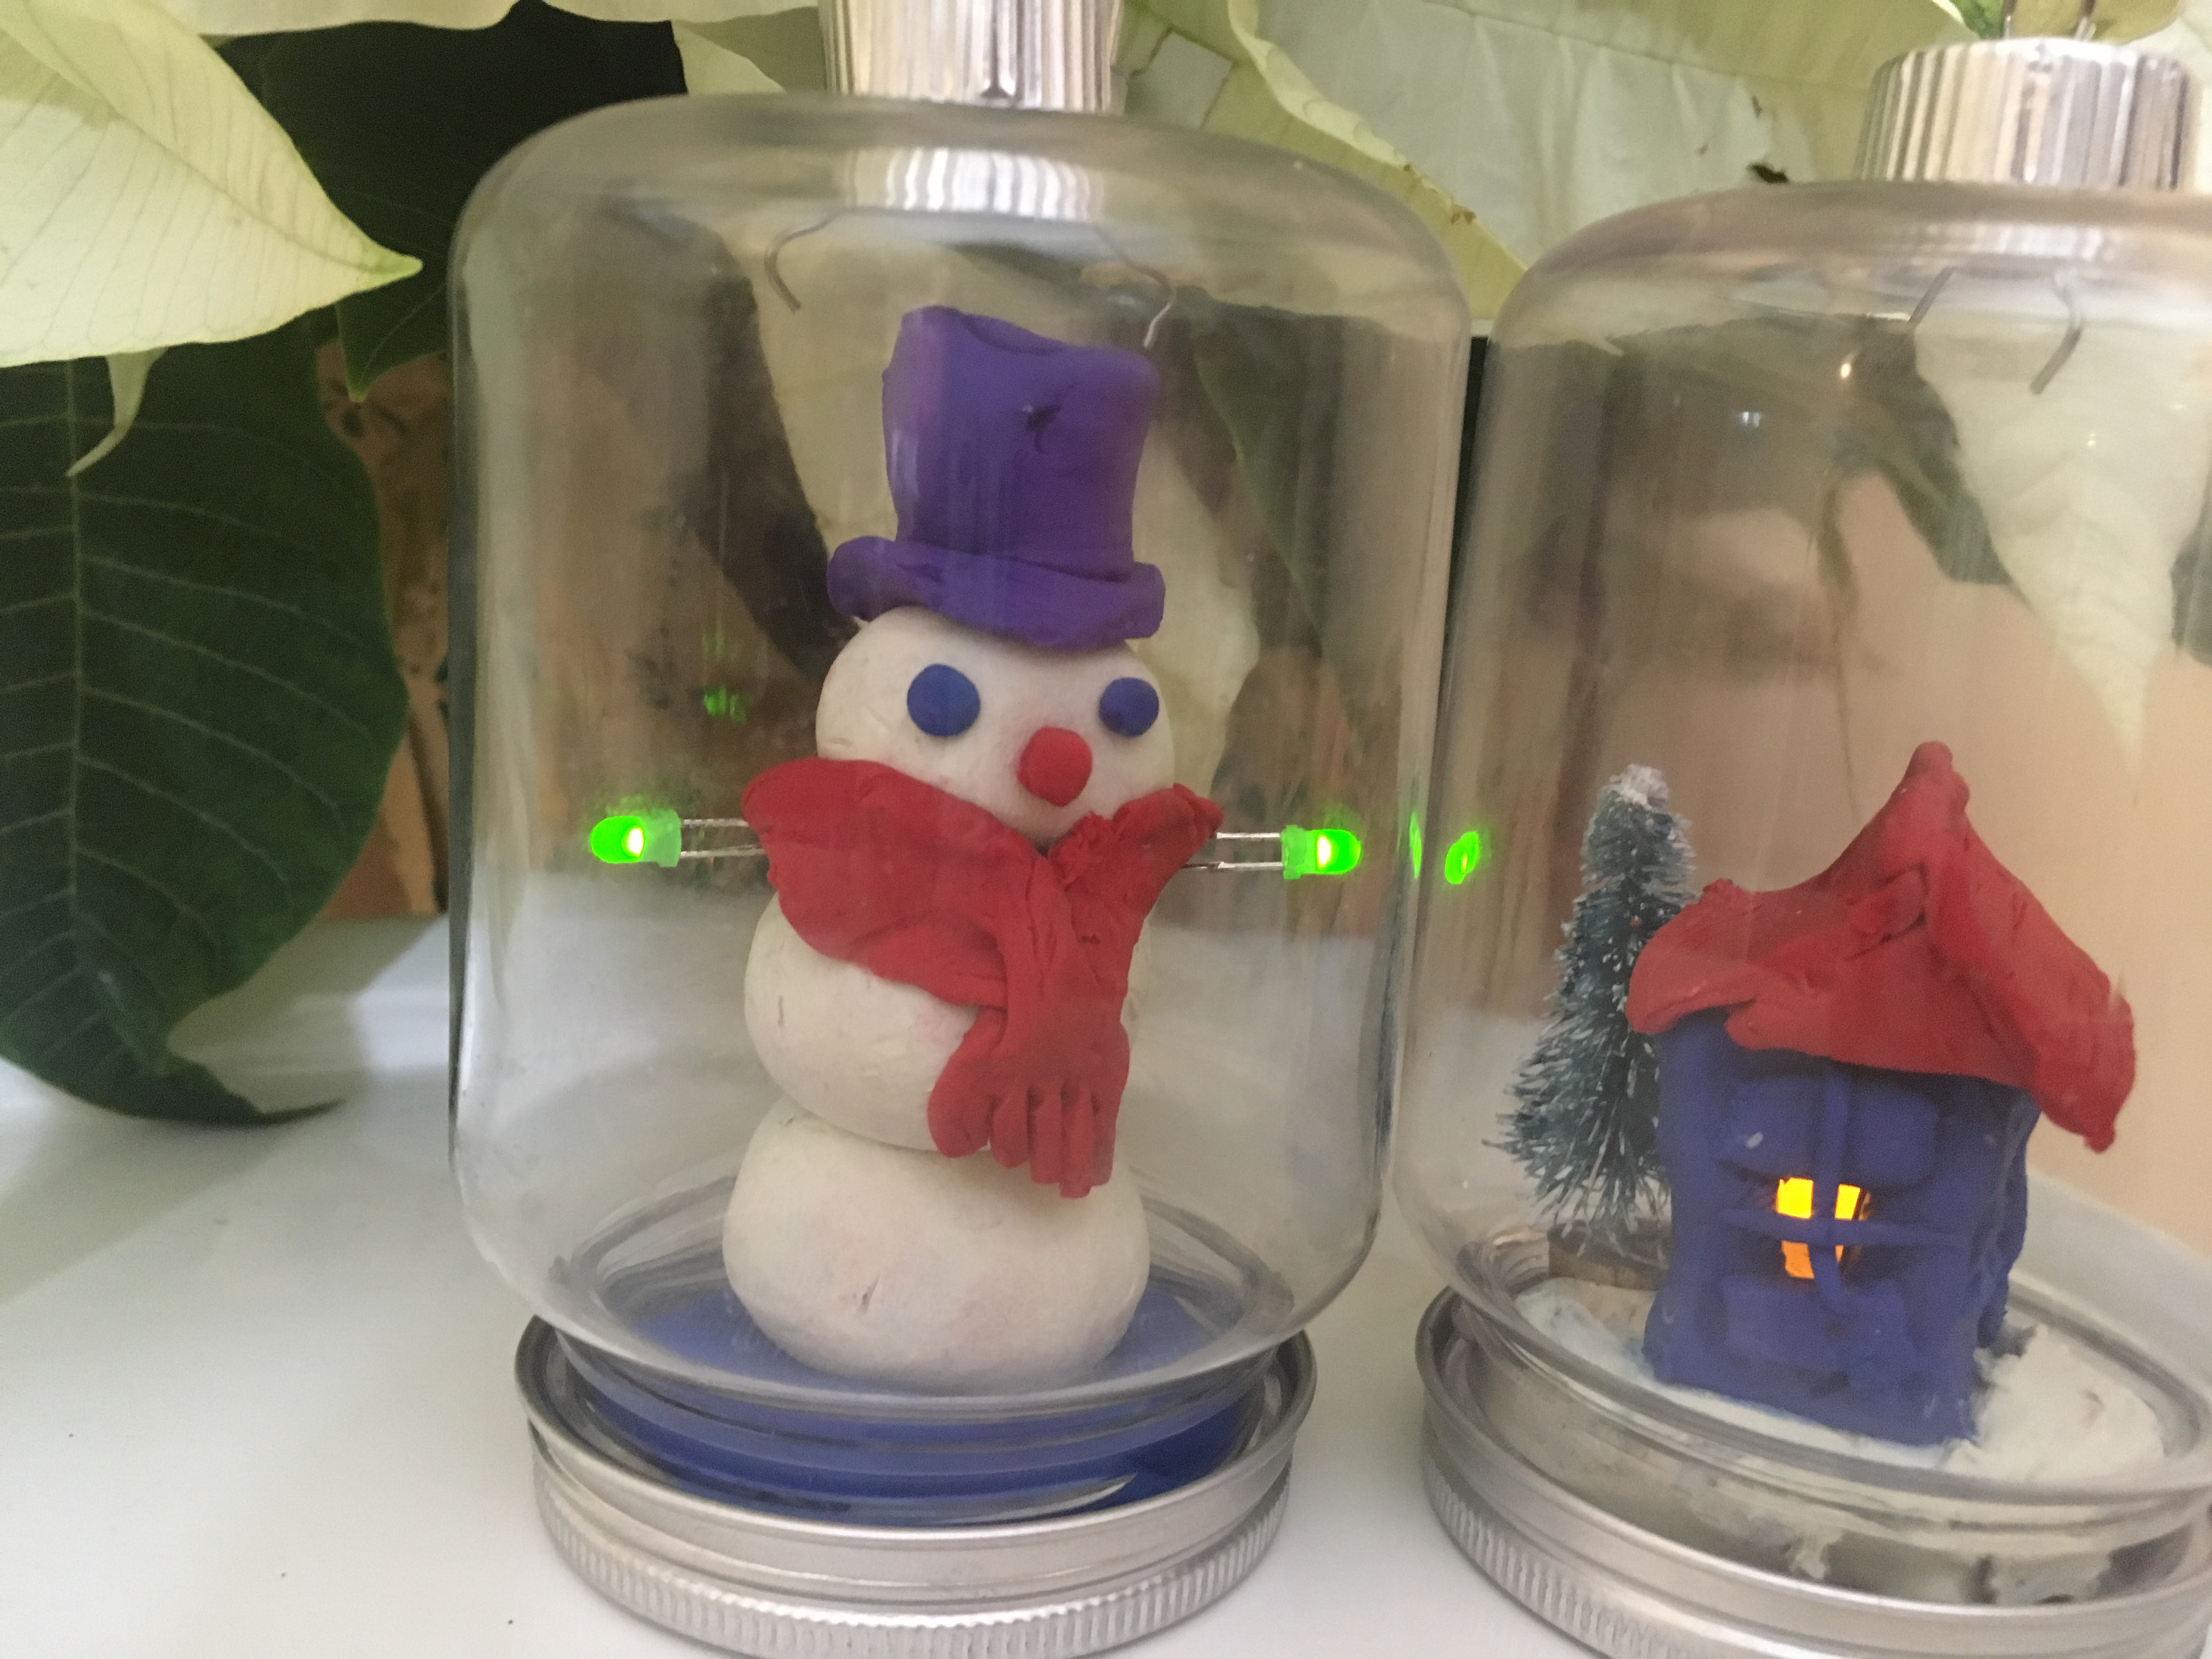
Hide the battery in the clay, keeping the connection tight so the LEDs stay lit. You can have more than one LED on a single battery. Put the bottom back on the jar and Voila!
Epsom Salt Crystal Ornaments:
(Warning: Hot liquids require adult supervision.) To make the Epsom Salt crystals, dissolve 3 cups of Epsom salts in 2 cups of water by heating and stirring until no more crystals are visible. This creates a supersaturated solution. Allow the solution to cool slightly. Hang pipe cleaners formed into snowflakes in jars or hollow ornaments and pour the solution in. When long, needle-like crystals have formed, remove the pipe cleaners from the jars. You can leave them in the ornaments, and drain the liquid.

Hang pipe cleaners in supersaturated Epsom salt solution, or add them to ornaments and fill them with solution.
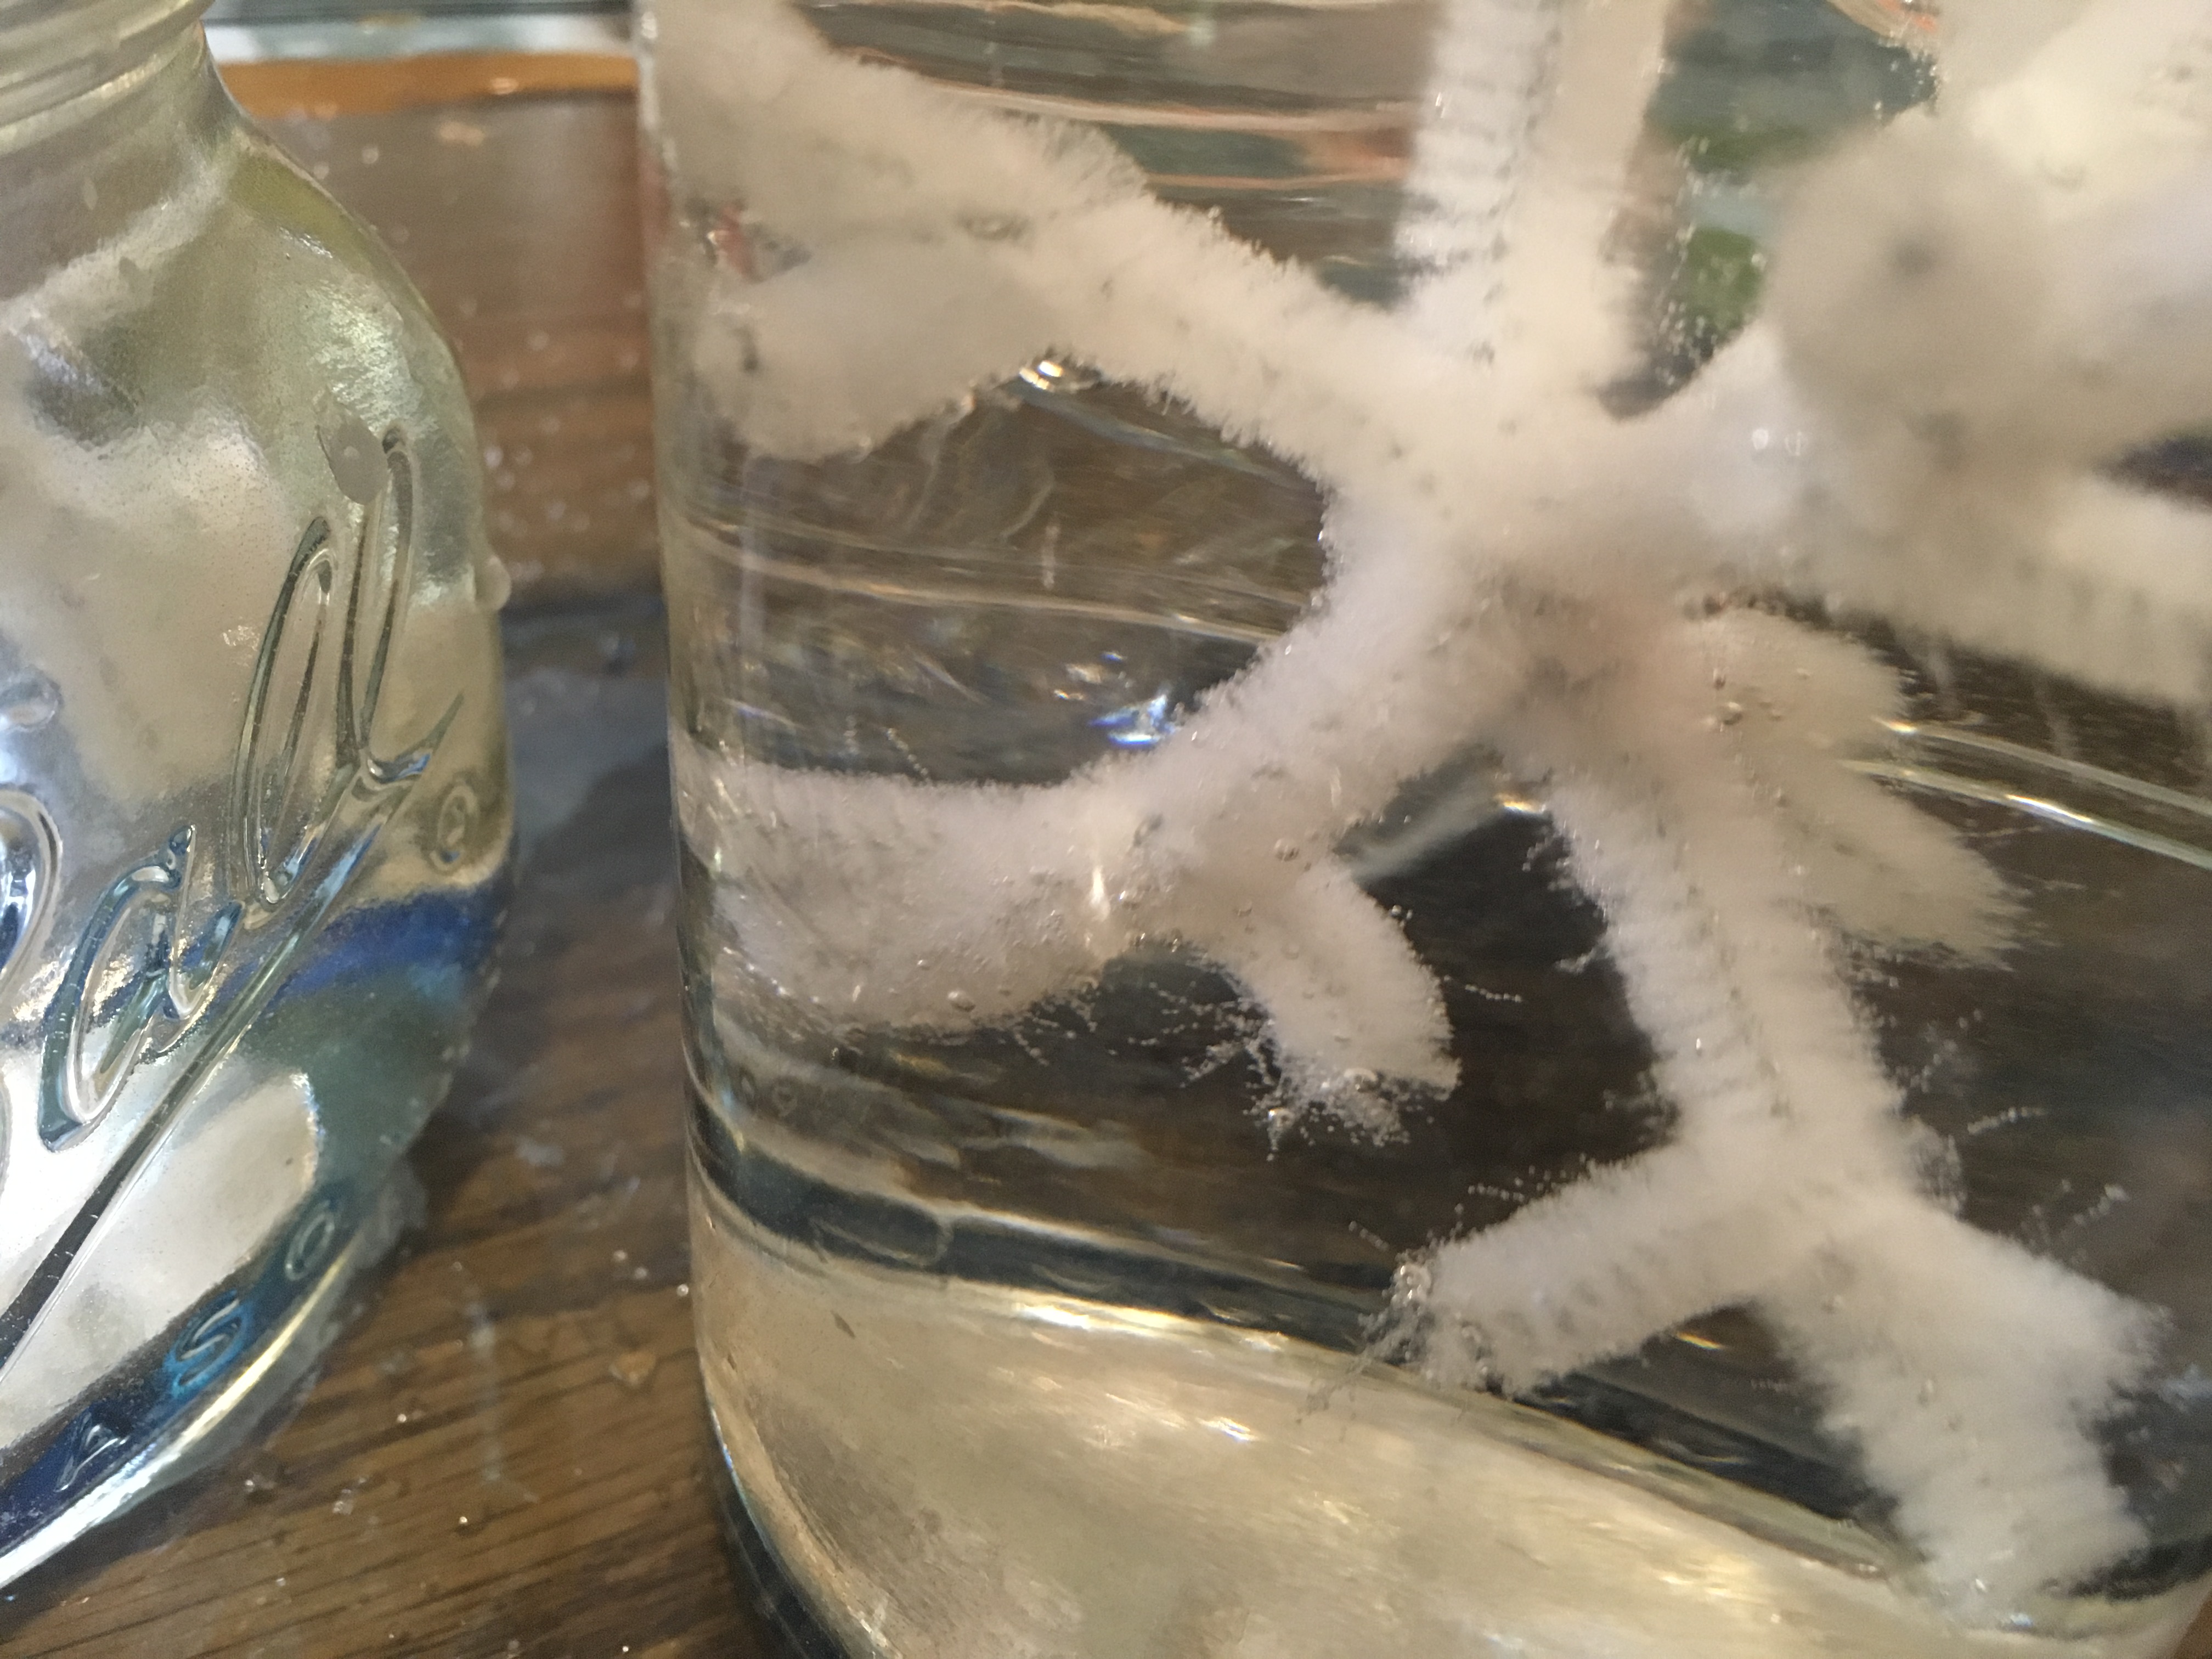
Wait for the crystals to grow. (4-12 hours.)
Remove the pipe cleaners from the solution. Knock off excess crystals.
Holiday Science: Candy Cane Art
- by KitchenPantryScientist
Crying over broken candy canes? Cry no more. Make art!
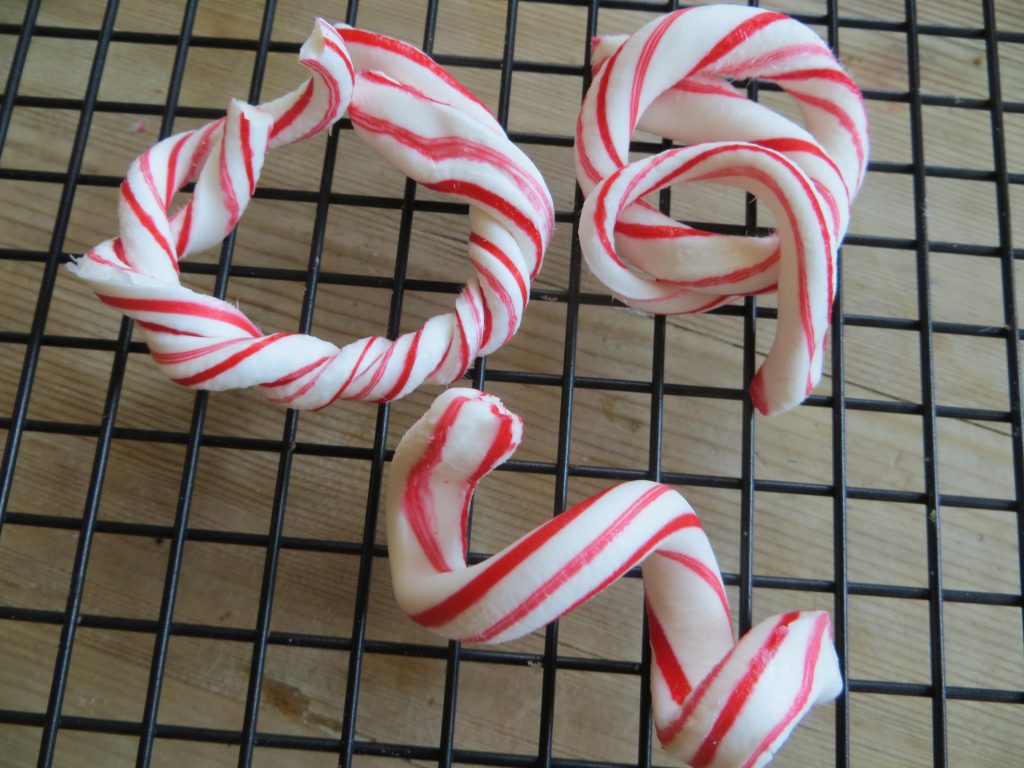
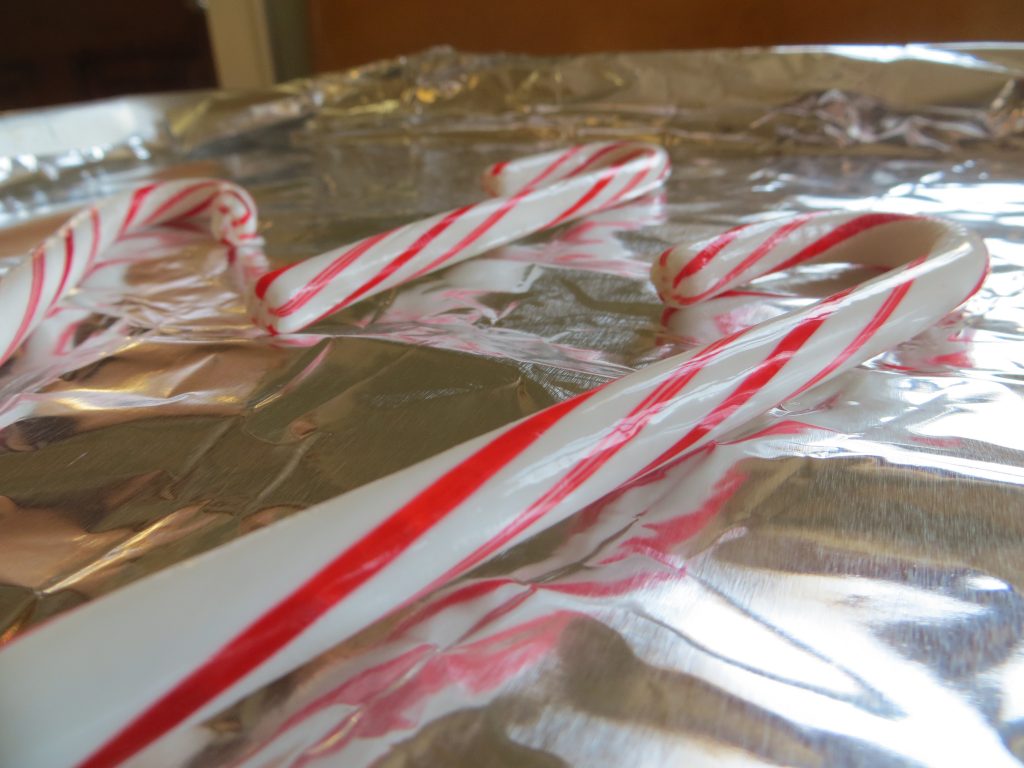
Candy Cane Art- image KitchenPantryScientist.com
This project is from “Amazing (Mostly) Edible Science,” by Andrew Schloss. For a cookbook full of delicious recipes and the Science-Behind-the-Fun, buy my book Kitchen Science Lab for Kids: Edible Edition here!
*Melted candy can get dangerously hot, so parental supervision is required!
You’ll need:
-candy canes (broken or whole), wrappers removed
-heavy-duty aluminum foil
-a cookie sheet
-a wire cooling rack
-an oven
What to do:
- Preheat oven to 250F.
- Cover cookie sheet with foil
- Place candy canes on foil, not touching each other
- Bake candy canes for around 10 minutes and have an adult check them. They should be stretchy, but not too hot to touch.
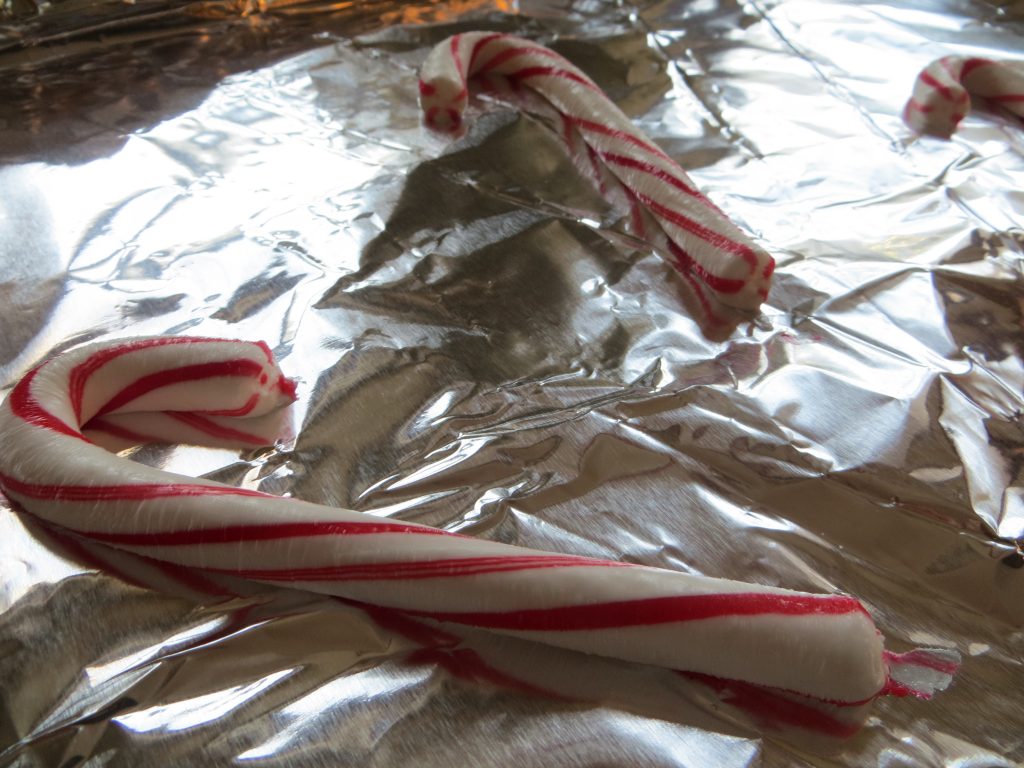
- When the candy canes are ready, bend, fold, twist and pull them into cool shapes. Try pulling one long and wrapping it around a chopstick to make a spiral. What else could you try?
- If the candy gets to brittle to work with, put it back in the oven for a few minutes to make it soft again.
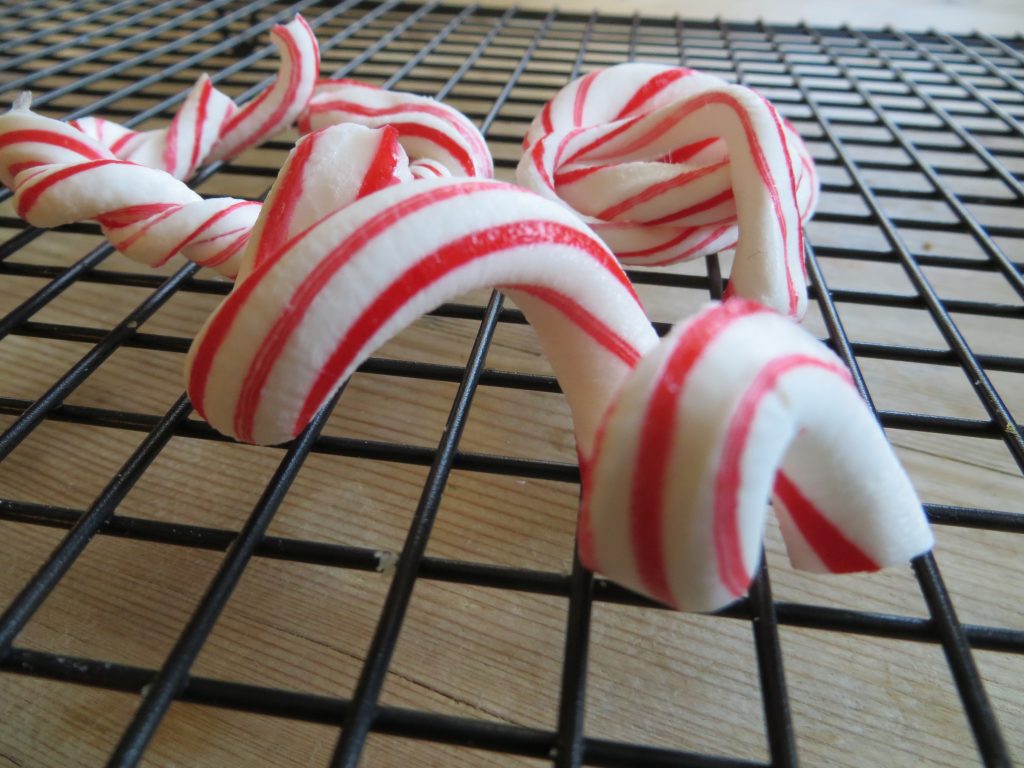
Candy Cane Art- image KitchenPantryScientistcom
The science behind the fun:
If you looks at the ingredients of candy canes, they’re usually made of table sugar (sucrose), corn syrup, flavoring, and food coloring. Glucose and fructose are sweet-tasting molecules that stick together to make up most of the sugars we eat, like table sugar (sucrose) and corn syrup. You can think of them as the building blocks of candy.
At room temperature, candy canes are hard and brittle, but adding heat changes the way the molecules behave. Both table sugar and corn syrup contain linked molecules of glucose and fructose, but corn syrup has much more fructose than glucose, and the fructose interferes with sugar crystal formation. According to Andrew Schloss, “the corn syrup has more fructose, which means the sugar crystals in the candy don’t fit tightly together. The crystals have space between them, which allows them to bend and move without cracking.”
Here’s a great article on the science of candy-making.
If you’re looking for holiday gifts for a science-loving kid, my books Chemistry Lab for Kids, Kitchen Science Lab for Kids and Outdoor Science Lab for Kids include over 100 fun family-friendly experiments! They’re available wherever books are sold.
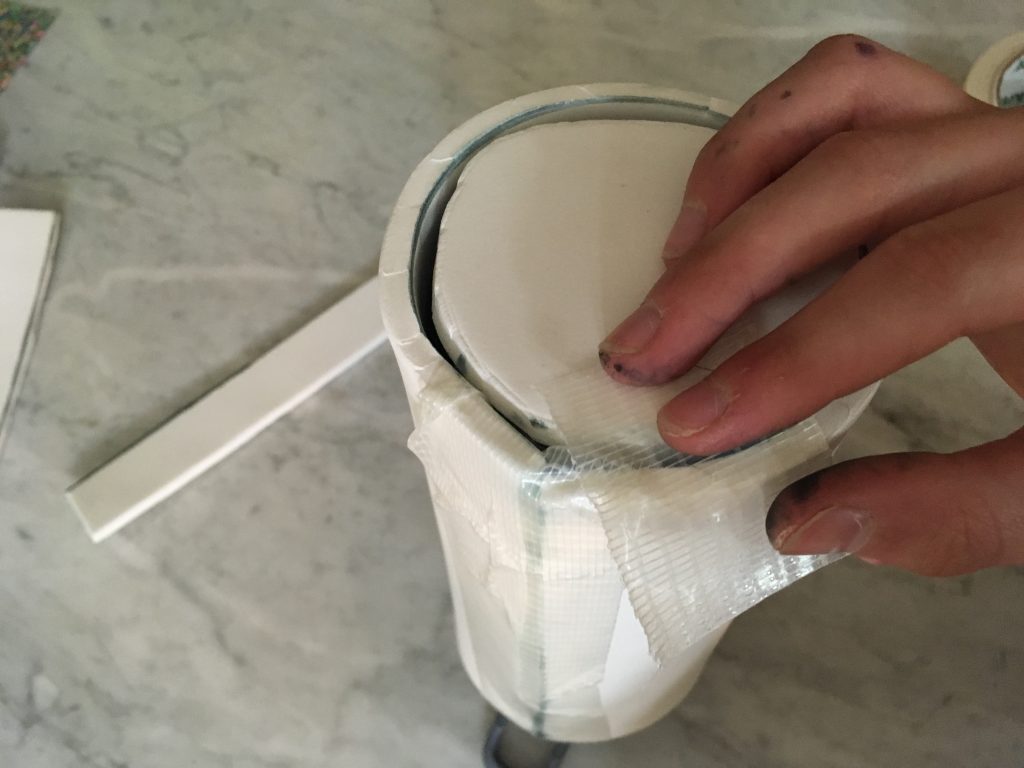
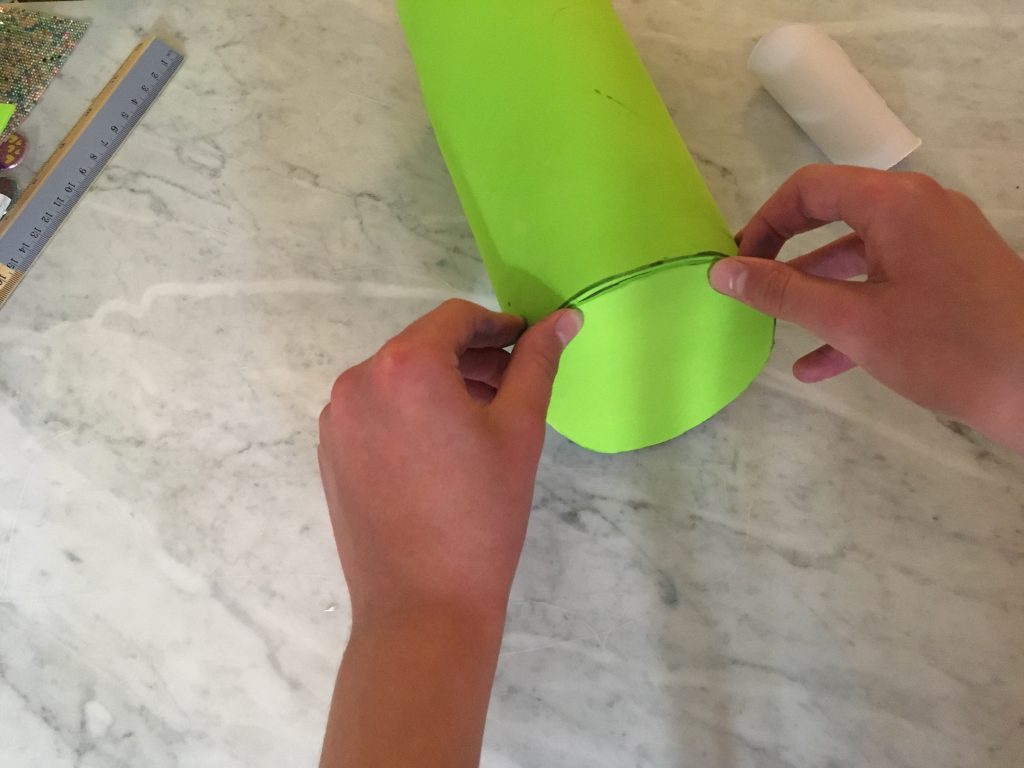
Homemade Water Bottle Insulator (Back to School Science)
- by KitchenPantryScientist
Combine science and art to engineer and decorate a custom water bottle jacket as unique as you are. Test different every-day insulators to see what works best to to keep water cold all day long!
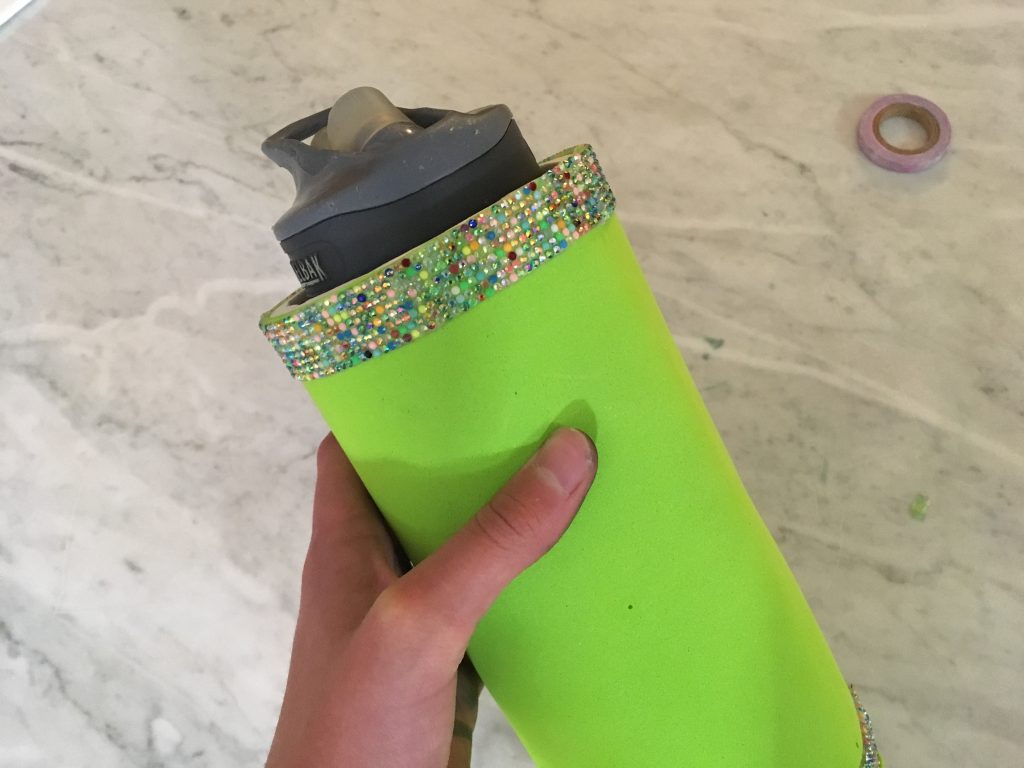
water bottle jacket- KitchenPantryScientist.com
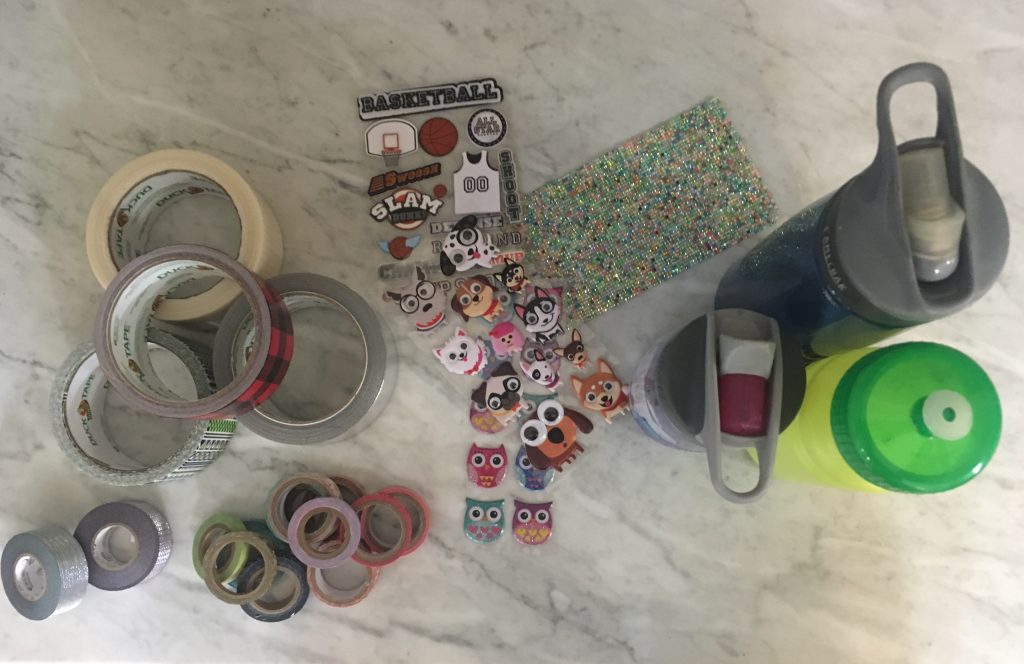
You’ll need:
-a washable plastic water bottle
-flexible insulating material, like craft foam, bubble wrap or fabric batting
-decorating materials, like stickers, ribbons or foam stickies
-a thermometer (optional)
-4 disposable empty water bottles or cans that are the same size (optional)
What to do:
(Optional) Test insulators by insulating each of the empty cans or bottles with different material. Fill each of them with the same amount of hot tap water and check the temperature of each periodically to see which material does the best job of slowing cooling of the water. The one that keeps water hot the longest is the best insulator, since it slows the movement of heat from one area to another.
Use the best insulator to build an insulating case for your water bottle. Make it big enough so that your bottle will slide out for washing. We used thick craft foam and covered it with adhesive craft foam. Shipping folders made of bubble wrap work well too! Here’s how we built ours…

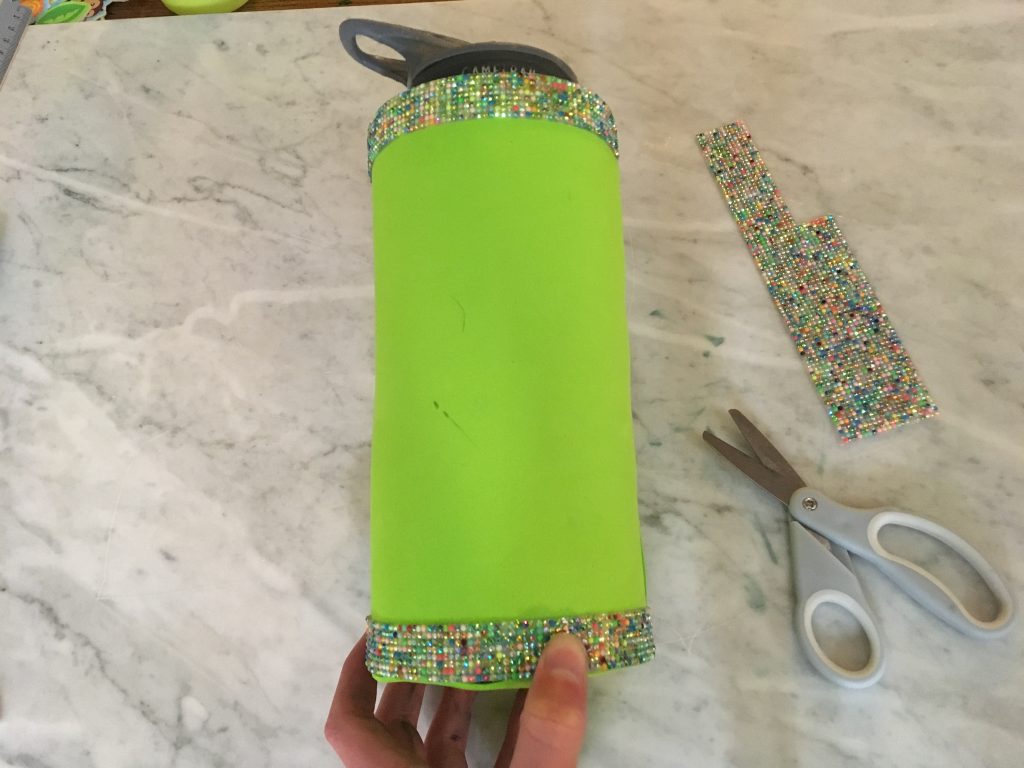
Add some ice water to the bottle and you’re good to go! Just remove the jacket when you wash the bottle.
STEAM Lab for Kids: hot glue casting, candy molecules and tesselations
- by KitchenPantryScientist
Looking for fun, creative summer projects? I showed off some projects from STEAM Lab for Kids this morning on WCCO MidMorning!
Marbling Science
- by KitchenPantryScientist
I’ve always wanted to try paper marbling and knew there must be some science involved. So, we gave it a go, and the results were stunning!
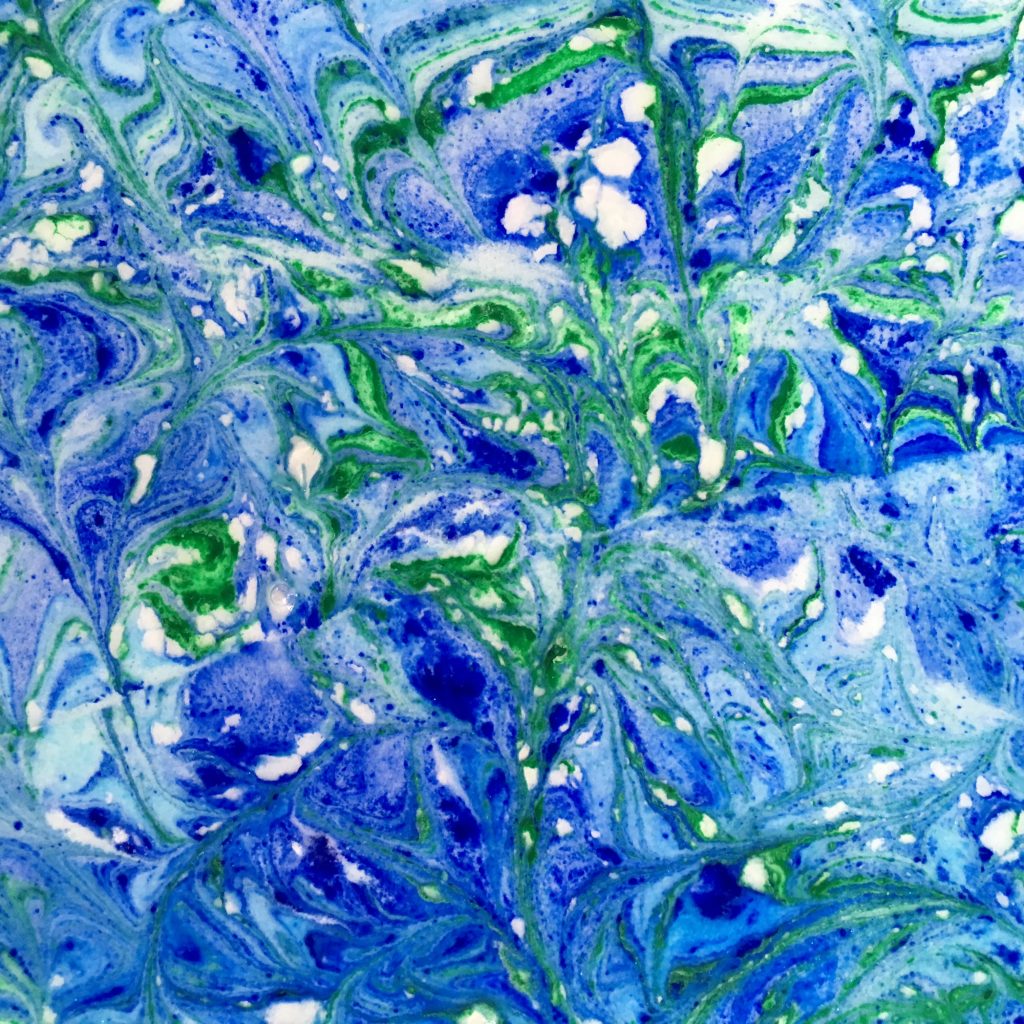
tempera paint marbling- photo by kitchenpantryscientist.com
![IMG_1586[1]](https://kitchenpantryscientist.com/wp-content/uploads/2016/09/IMG_15861-1024x768.jpg)
paper marbled with the Innovation marbling kit (Boku-Undo Suminagashi) from DickBlick.com – photo by kitchenpantryscientist.com
We tried two methods: one with liquid starch (made from cornstarch) and tempera paint, and another with a marbling kit. Both worked well, but look very different.
The Science Behind the Fun: Water molecules like to stick together, a property which scientists call surface tension. This property allows very thin layers of ink to float on water, mixing in beautiful patterns when you break the surface tension with detergent, a tool like a paintbrush, or movement. To marble paper, you have to use dye or paint that floats on the water where it can be easily transferred to paper. Alternately, you can make the liquid underneath more dense than the dye or paint, to help the dye float.
When transferring the ink or paint designs, it helps to use paper that’s been coated with a chemical called a mordant, that combines with substances (usually dyes) to make large molecules that stay in one place. (Iodine is another mordant, which is used to stain bacteria.)
Here’s a video of my 10YO making designs using the pre-made marbling kit…(More info at the bottom of this post.)
Since I like to do experiments using non-toxic, inexpensive ingredients most people have on hand, we first tried a method that uses cornstarch to thicken the bottom liquid layer and tempera paint as the dye. It requires pre-treatment of paper, like inexpensive watercolor paper from Target, with the mordant aluminum sulfate (alum), which you can find at your local coop or grocery store.
You’ll need:
-watercolor paper (cheap stuff from Target works just fine)
-two large, flat trays, like 9×13 pans
-2 tps. Alum (aluminum sulfate crystals)
-a sponge brush
-2 Tbs. corn starch
-eye dropper
-tempura paint (the more colors, the merrier)
-newspaper
- Dissolve 2 tsp alum in 3/4 cup water. Avoid inhaling powder.
- Mark one side of your watercolor paper with an A and use a sponge brush to apply alum solution evenly to that side of the paper.
![IMG_1480[1]](https://kitchenpantryscientist.com/wp-content/uploads/2016/09/IMG_14801-e1473219315556-768x1024.jpg)
- Let the paper dry overnight, or speed drying with a blow dryer.
- Make a double recipe of liquid starch by dissolving 4 Tbs. corn starch in 1/2 cup cold water. Bring 6 cups water to a boil in a sauce pan. Add the cornstarch solution to the water, stir well and boil for 1 minute. Turn the heat to low and simmer for 2 more minutes, stirring occasionally.
- Pour 3 cups of the hot liquid starch into one 9×13 pan and let cool.
- Pour 3 cups of cold water into the other pan.
- Prepare paint by mixing tempura paint with water until it has the consistency of half-and-half or whole milk.
- When starch is cool, drip paint onto the surface of the starch using an eyedropper, or something similar. Rinse dropper between colors.
![IMG_1503[1]](https://kitchenpantryscientist.com/wp-content/uploads/2016/09/IMG_15031-1024x1024.jpg)
- Swirl paint, or use toothpicks to drag out patterns.
![IMG_1521[1]](https://kitchenpantryscientist.com/wp-content/uploads/2016/09/IMG_15211-1024x768.jpg)
- Carefully place your paper on the paint, alum side-down. Let it sit for a minute or two.
![IMG_1527[1]](https://kitchenpantryscientist.com/wp-content/uploads/2016/09/IMG_15271-e1473220884288-768x1024.jpg)
- Carefully peel the paper off of the paint and gently place it, face up, in the water pan.
![IMG_1532[1]](https://kitchenpantryscientist.com/wp-content/uploads/2016/09/IMG_15321-1024x768.jpg) Let it sink and move it back an forth gently to rinse off excess paint.
Let it sink and move it back an forth gently to rinse off excess paint. - Set the paper on a piece of newspaper to dry.
![IMG_1582[1]](https://kitchenpantryscientist.com/wp-content/uploads/2016/09/IMG_15821-e1473221209774-768x1024.jpg)
- Make more marble paper in the same paint pan. When you’re ready, repeat using the rest of the cornstarch.
The Innovation marbling kit (Boku-Undo Suminagashi) from DickBlick.com pictured below includes pre-made low density dyes that you drip onto a tiny floating disc of paper in a tray of water. It’s tons of fun and yields beautiful results. I got the kit at Blick art supplies, and used the paper they recommended, which may have been pre-treated with a mordant.
![IMG_1536[1]](https://kitchenpantryscientist.com/wp-content/uploads/2016/09/IMG_15361-e1473219139648-768x1024.jpg)
Have fun!
Homemade Pigmented Clay Paint
- by KitchenPantryScientist
I learned how to make this fun, clay-based paint at the Minnesota State Fair’s Eco Experience Progress Center. It’s colored with natural pigments(pigments are molecules that give things color) and doesn’t give off the same chemical fumes as some of the paints you might find in a hardware store. I love the earthy colors you can mix up with elemental pigments like iron oxide, zinc oxide and black iron oxide. It’s fun to mix up a little blue too, using Ultramarine Blue dried pigments.
![IMG_1362[1]](https://kitchenpantryscientist.com/wp-content/uploads/2016/08/IMG_13621-e1472689101230-768x1024.jpg)
To make this paint, you’ll need:
flour
cold water
hot water
EPK powdered clay (also called EPK Kaolin) -Can be ordered online. We got ours at continentalclay.com.
dried pigments, like the ones I mention above. -We got ours at dickblick.com
Safety tips: Check the warnings on dried pigments before you purchase them. Some are toxic and must be handled carefully. Avoid inhaling pigments.
To make your paint:
1. In a bowl, stir together 1/2 cup flour and 1/2 cup cold water. Mix well.
2. Add 1/4 cup hot water and mix well.
3. Add 1/4 cup EPK powdered clay and stir until smooth.
4. Continue adding flour and water until the paint has the consistency you want.
![IMG_1354[1]](https://kitchenpantryscientist.com/wp-content/uploads/2016/08/IMG_13541-1024x768.jpg)
5. Divide the paint into several containers and mix in pigment for color.
![IMG_1361[1]](https://kitchenpantryscientist.com/wp-content/uploads/2016/08/IMG_13611-1024x768.jpg)
6. Use paint on paper or canvas.
7. Paint may be stored in the refrigerator for a week or so.
Creative Science: ScienceOnline
- by KitchenPantryScientist
In a few weeks, I’ll be heading to North Carolina to attend Science Online 2013, an “un-conference” of online science communicators, writers, artists and video-makers. It will be next to impossible to choose which sessions to attend, since people will be talking about everything from writing science narrative to drawing science comics and using science to write fiction. I’ll be co-moderating a session on writing for kids with Elizabeth Preston, Editor of Muse magazine (which my 12-YO loves) and giving a short talk on why I made KidScience app.
To make the meeting even more fun, there will be a Cyberscreen film festival and an art show for participants, which inspired me to pull out my paintbrushes from college and do a quick “self portrait with microbes.” It’s been so much fun to paint again that I might go buy another canvas today and paint a “Still Life with Bacteria.”
![]()
My musician friend helped me make my silly “science song” sound amazing so I can use it on my website and for videos like the one above that I made for KidScience app.
How do you mix up science, music, film and art? Do you know any science project that can morph into art projects, like red cabbage litmus paper collages or photographing tie-dye milk patterns? I’d love to hear your ideas! I’ll let you know about the cool things I learn and fun resources I discover at ScienceOnline in early February!