Category:Biology Experiments’
Ten Environmental Science Projects for Earth Day
- by KitchenPantryScientist
 April 22nd is Earth Day, but there’s no reason we can’t celebrate all month long. Besides hiking and exploring, here are some of our favorite environmental science projects. Just click on the experiment names for directions and photos. You can find more fun ecological experiments in my books “Kitchen Science Lab for Kids”, “Outdoor Science Lab for Kids,” “Biology for Kids,” “Ecology for Kids” and “Chemistry for Kids.”
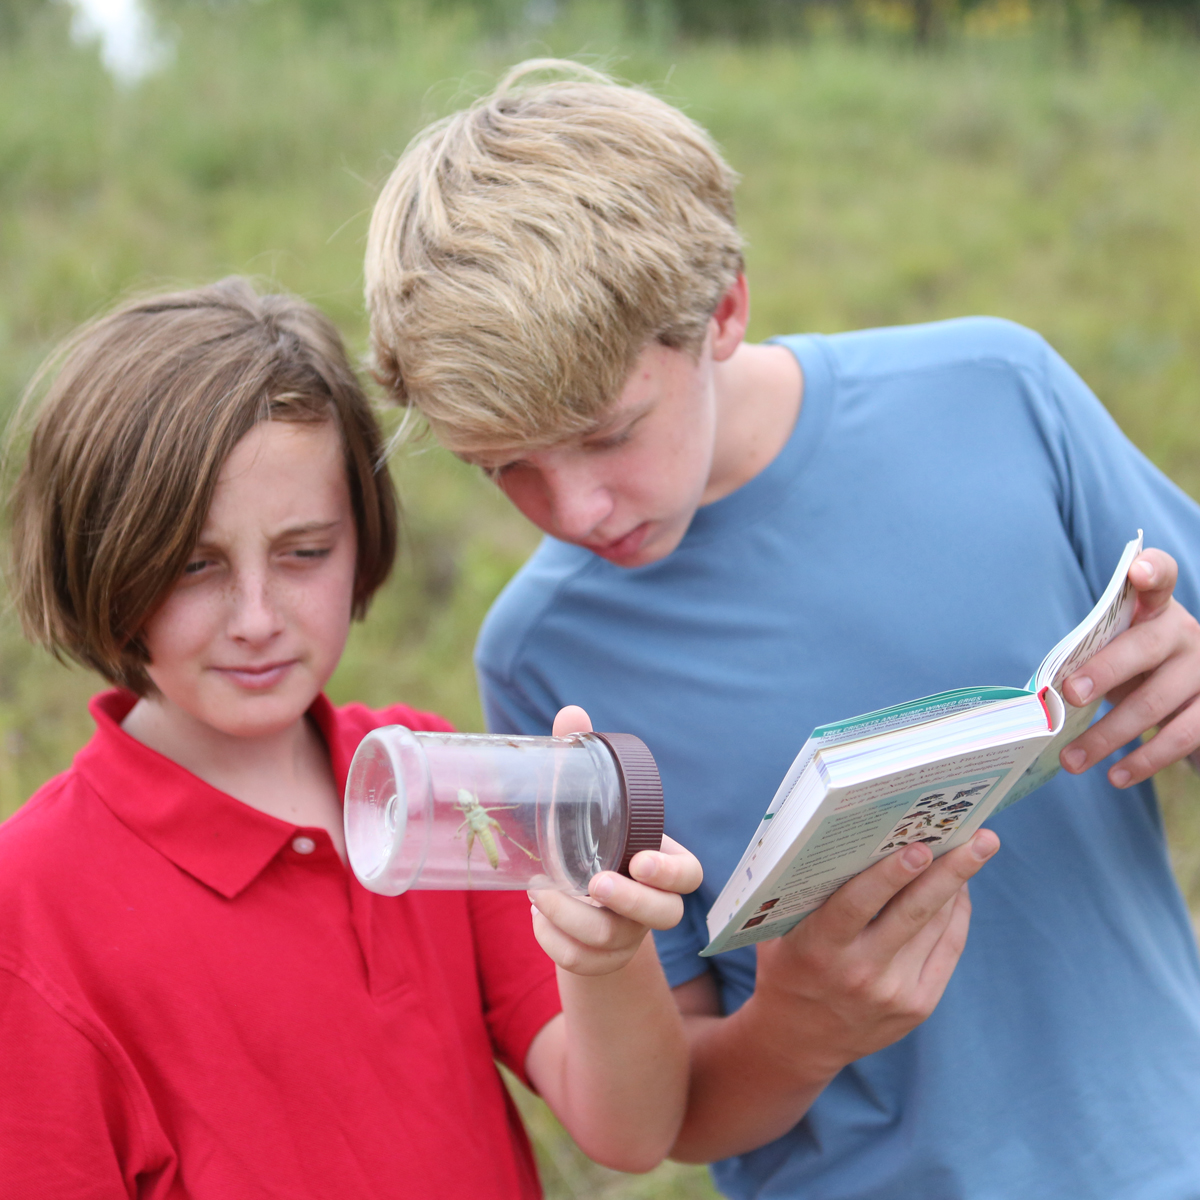
Homemade Sweep Nets: Make a sweep net from a pillowcase and a hanger to see what arthropods are hanging out in your favorite outdoor spaces.

Homemade Sweep Nets from Outdoor Science Lab for Kids (Quarry Books)
Window Sprouts: Plant a bean in a plastic baggie with a damp paper towel to see how plants need only water and air to sprout roots and leaves. Here’s a short video demonstrating how to make a window garden.

Window Sprouts from Kitchen Science Lab for Kids Quarto Books
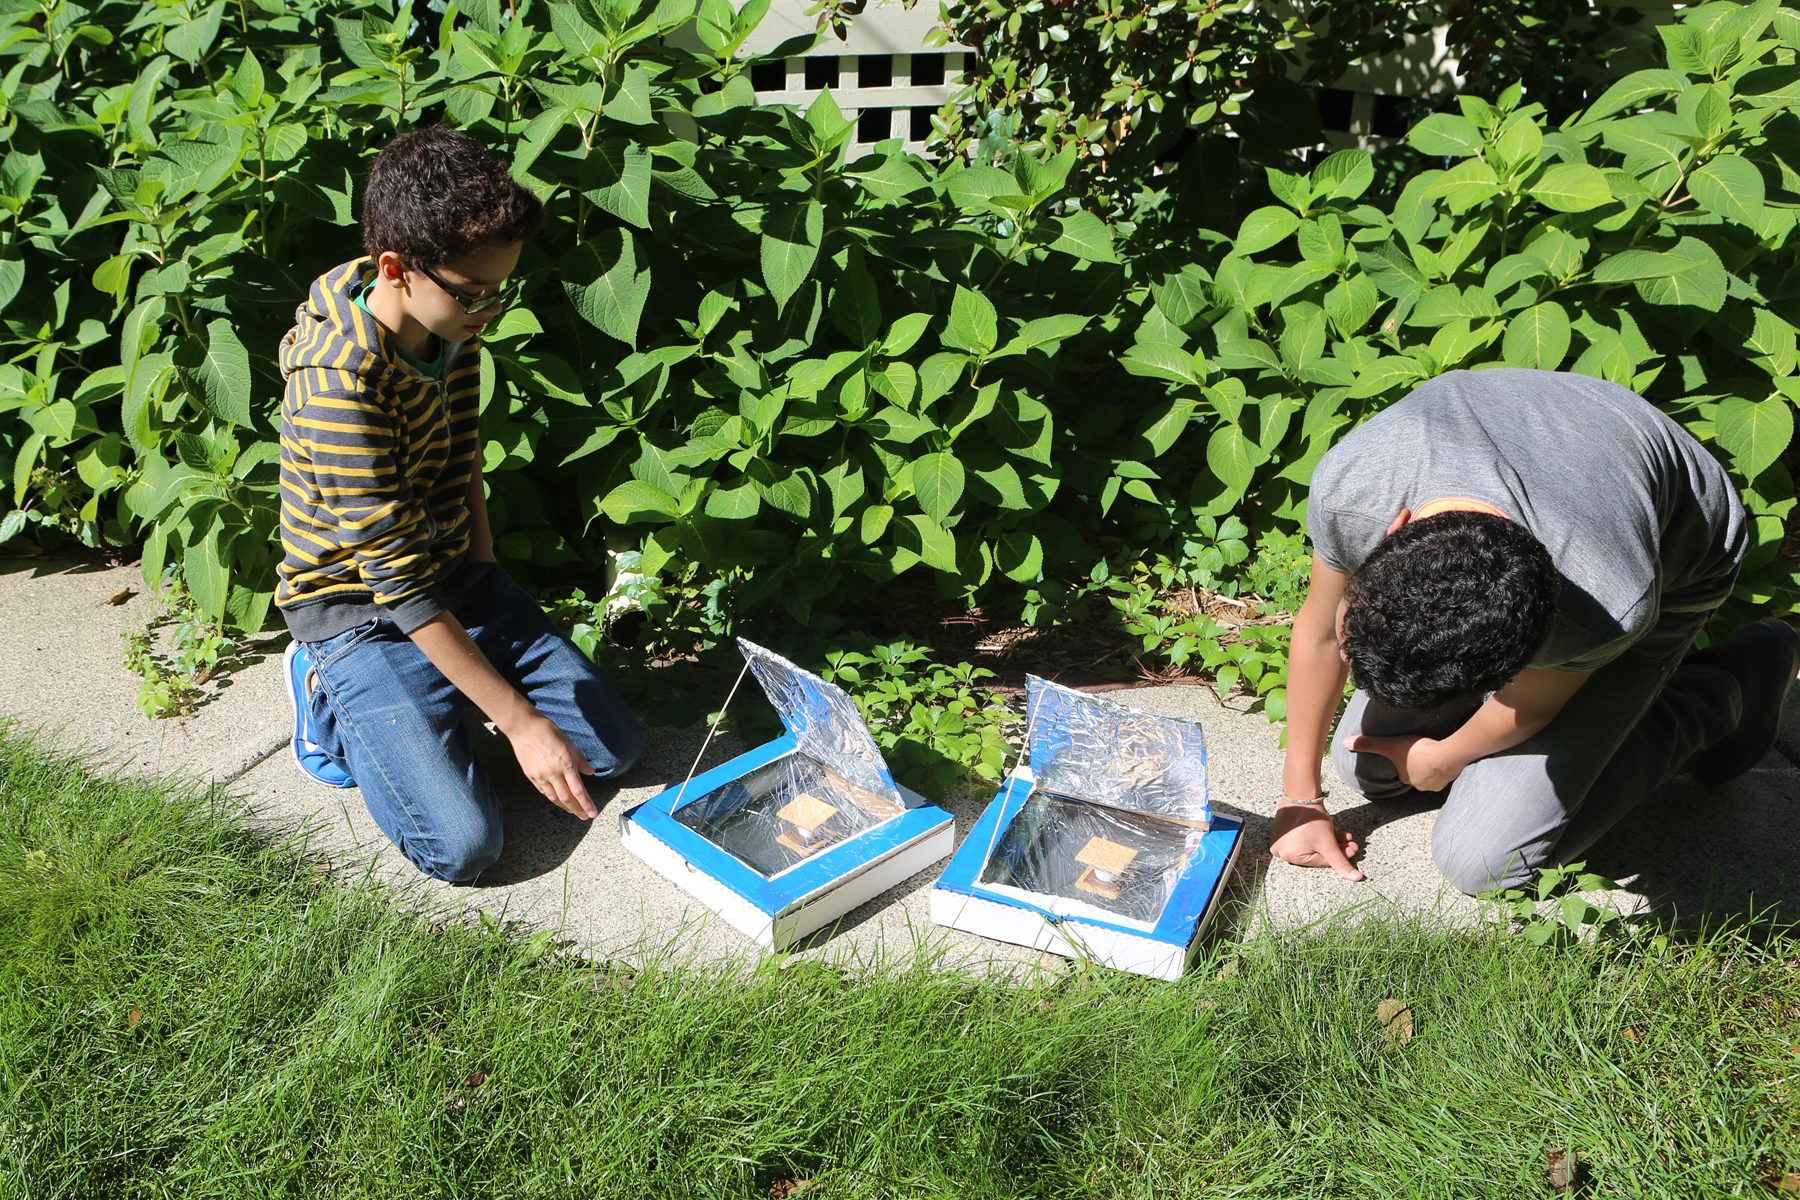
Homemade Solar Oven: Using a pizza box, aluminum foil, plastic wrap, and newspaper, you can harness the sun’s energy to cook your own S’mores!
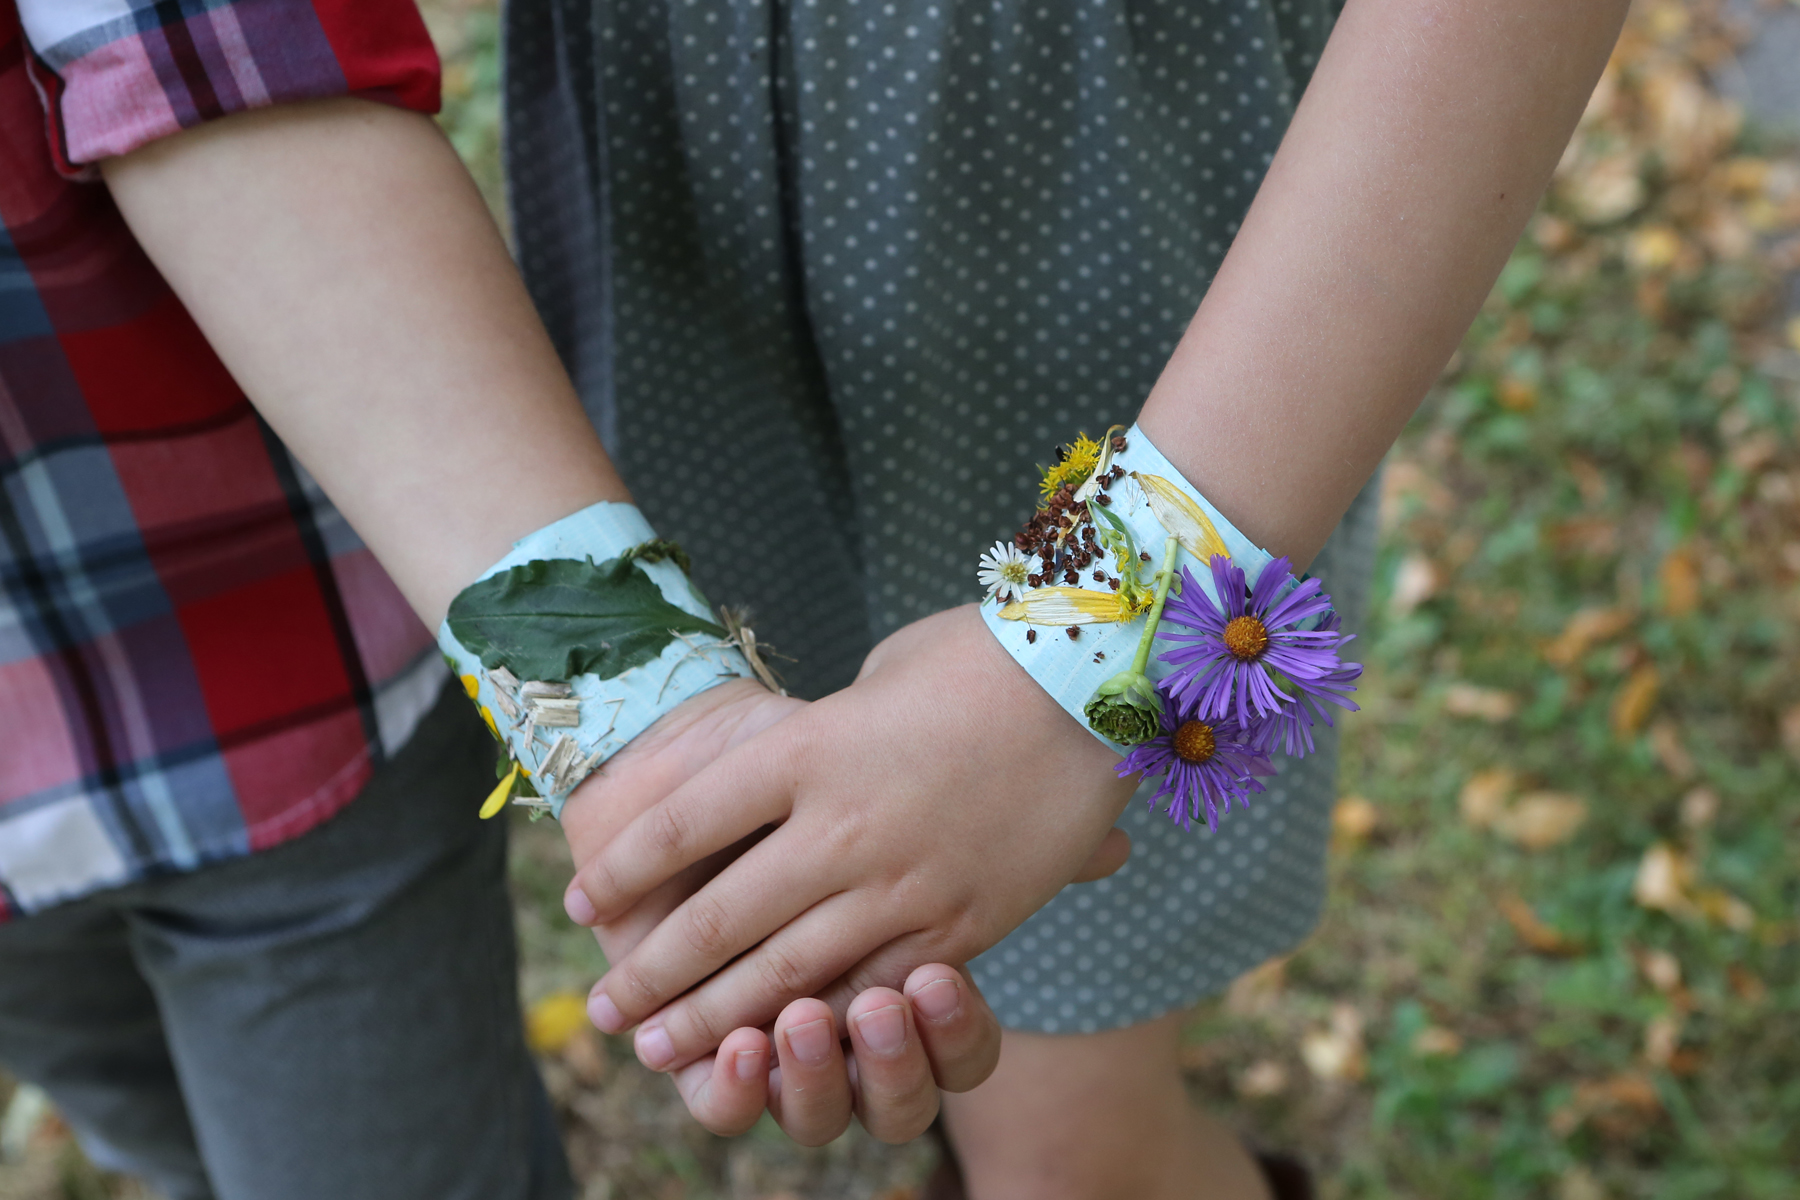
Nature Walk Bracelets: Wrap some duct tape around your wrist (inside out) and take a walk, sticking interesting natural objects like leaves and flowers to your bracelet. It’s a great way to get outdoors and engage with nature. Bring a bag along so you can pick up any trash you find.
Carbon Dioxide and Ocean Acidity: See for yourself how the carbon dioxide in your own breath can make a water-based solution more acidic. The project illustrates why adding too much carbon dioxide to Earth’s atmosphere can be harmful to ocean creatures.
Ocean Acidification Experiment from Kitchen Science Lab for Kids (Quarry Books)
Plant Transpiration: See how trees “sweat” in this survival science experiment.
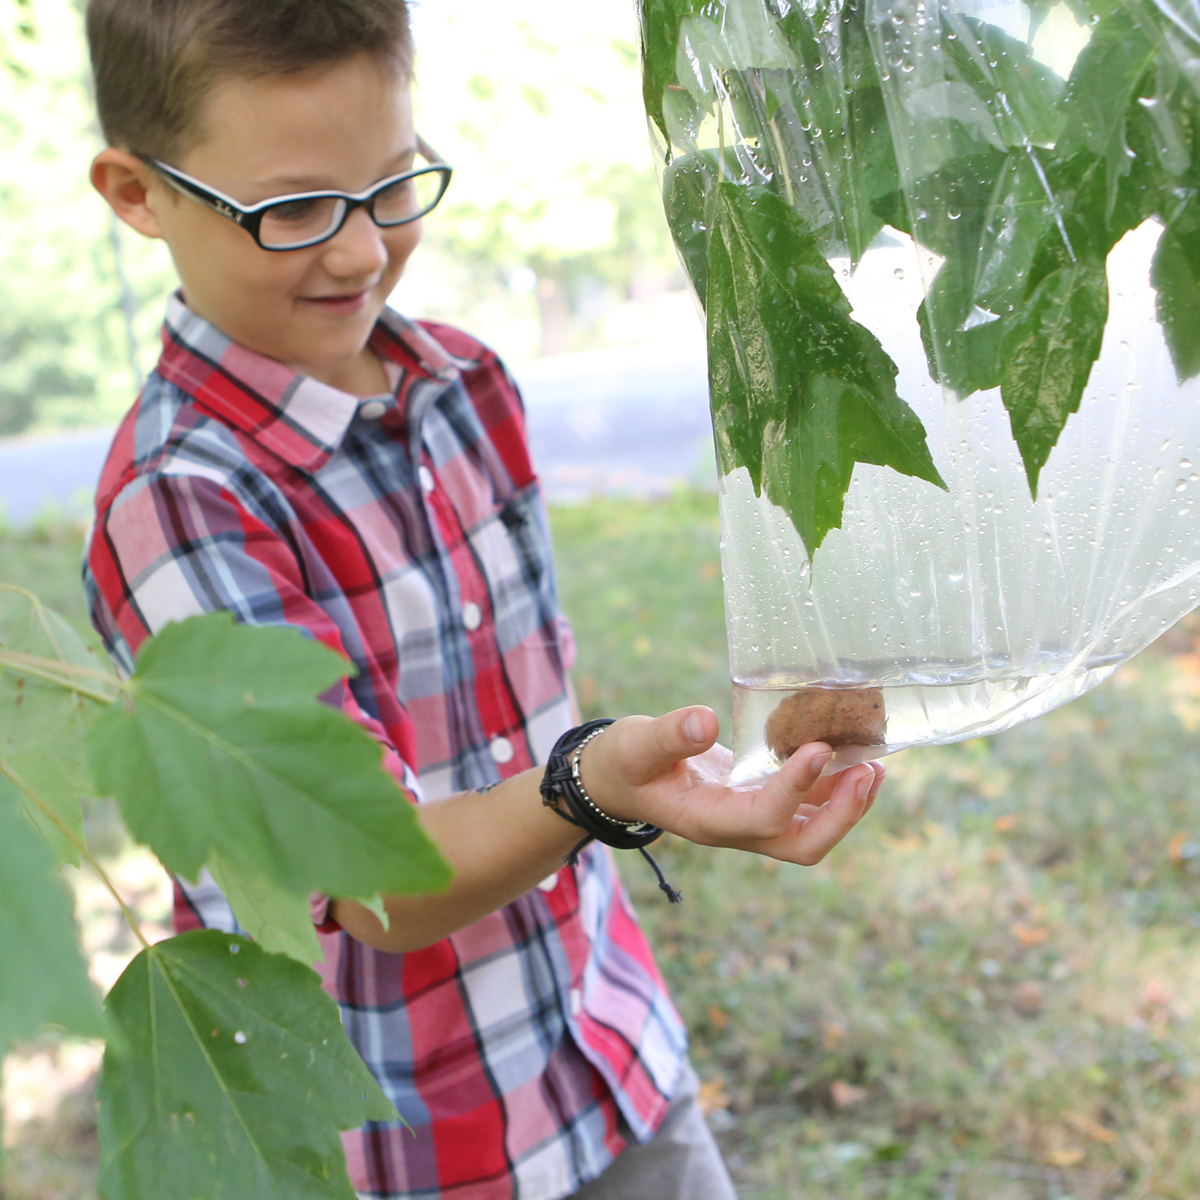
Plant Transpiration experiment from Kitchen Science Lab for Kids
Earthworm Experiment: Do you know what kind of earthworms are living in your back yard?
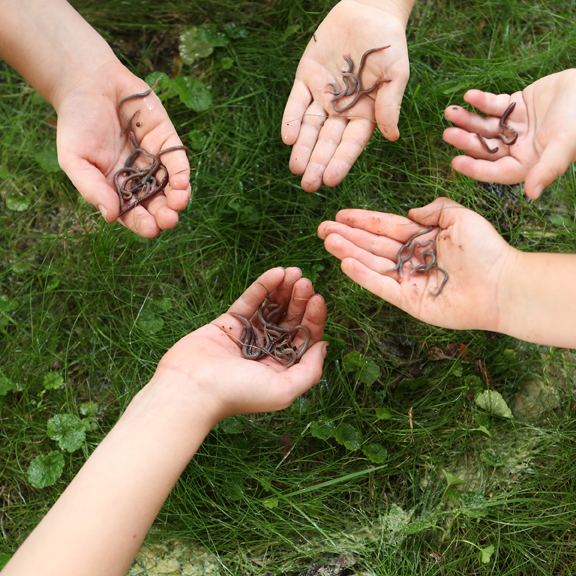
Earthworm Eruption from Outdoor Science Lab for Kids (Quarry Books 2018)
Composting: Be a composting detective. Bury some things in your back yard (away from power cables) and dig them up in a few months to see how they look. Composting reduces methane gas emissions (a greenhouse gas) from dumps.

Composting Experiment from Outdoor Science Lab for Kids
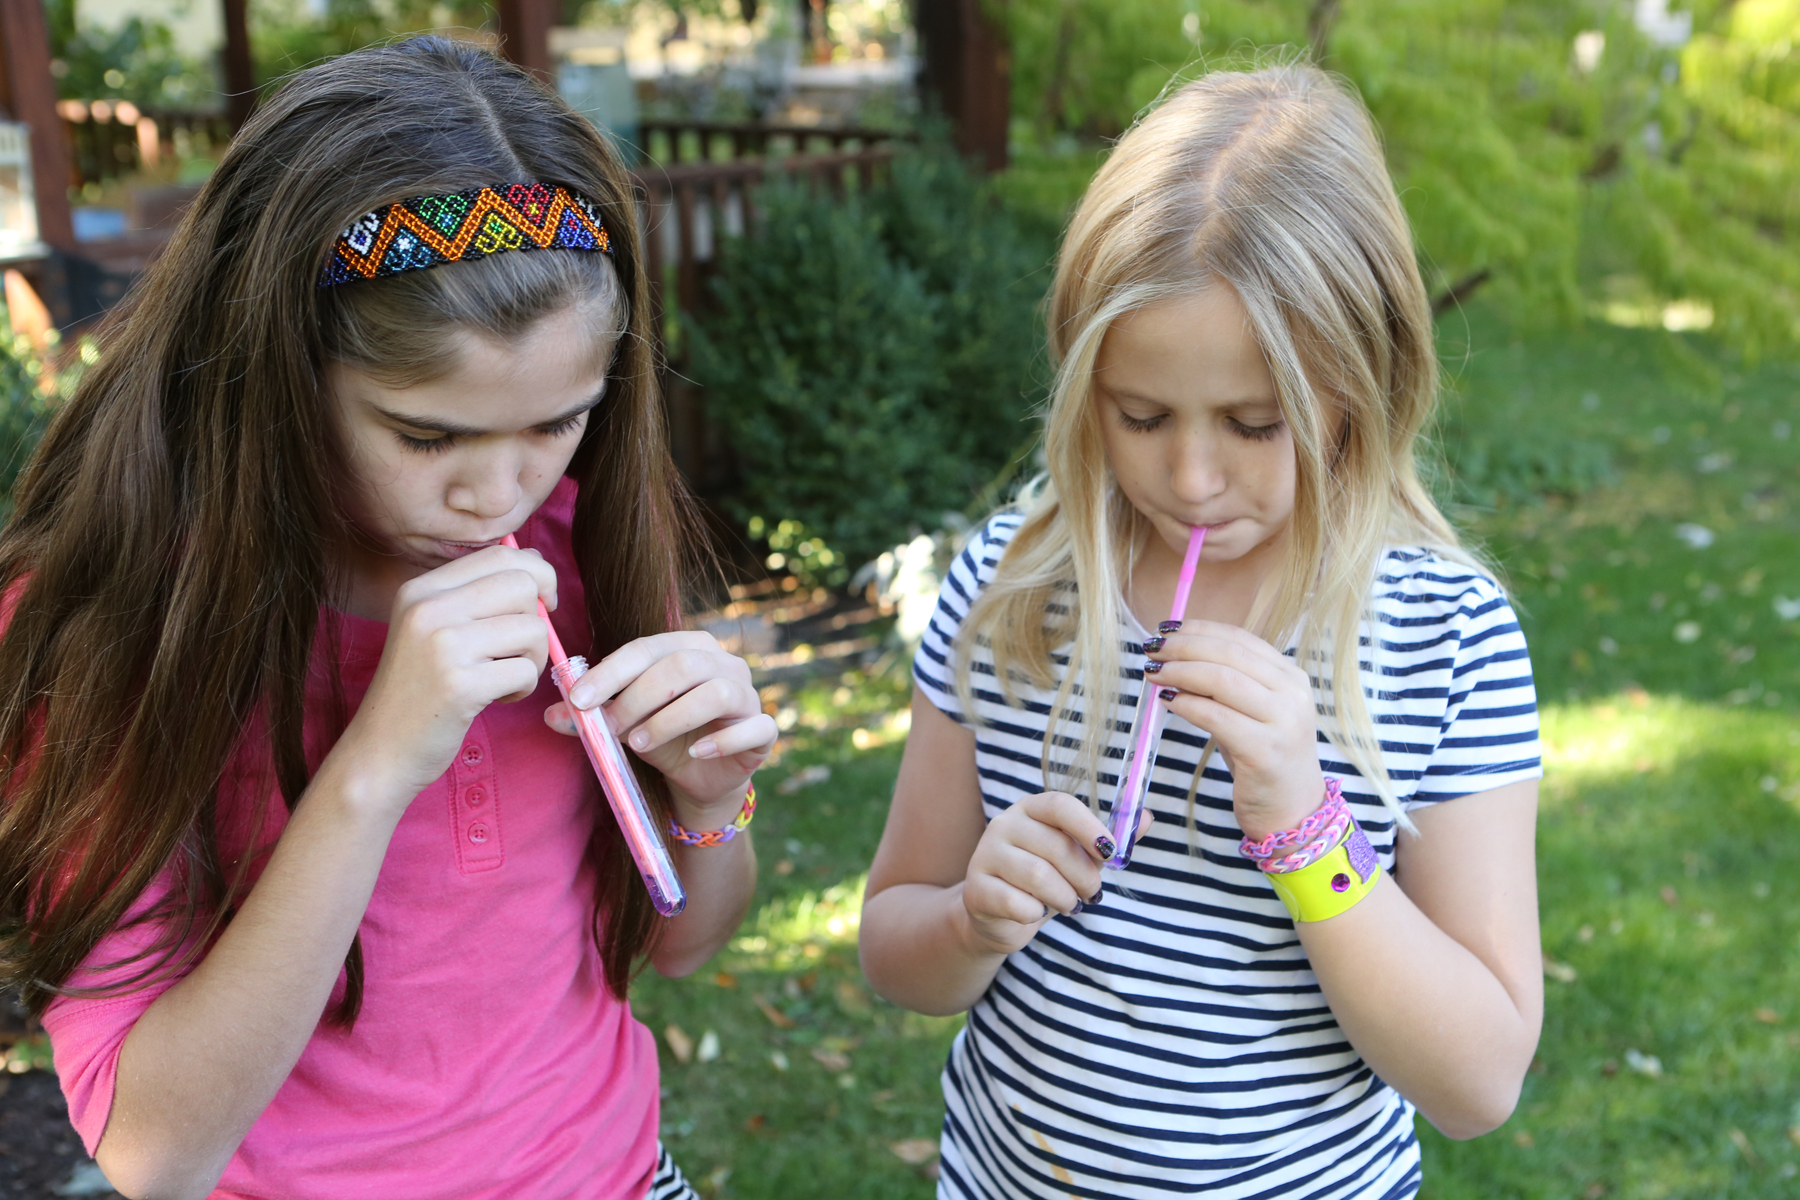
Diffusion and Osmosis: See for yourself how the chemicals we add to water, put on our streets to melt ice, and spray on our lawns and crops can move into our soil, ground water, rivers, lakes and oceans.
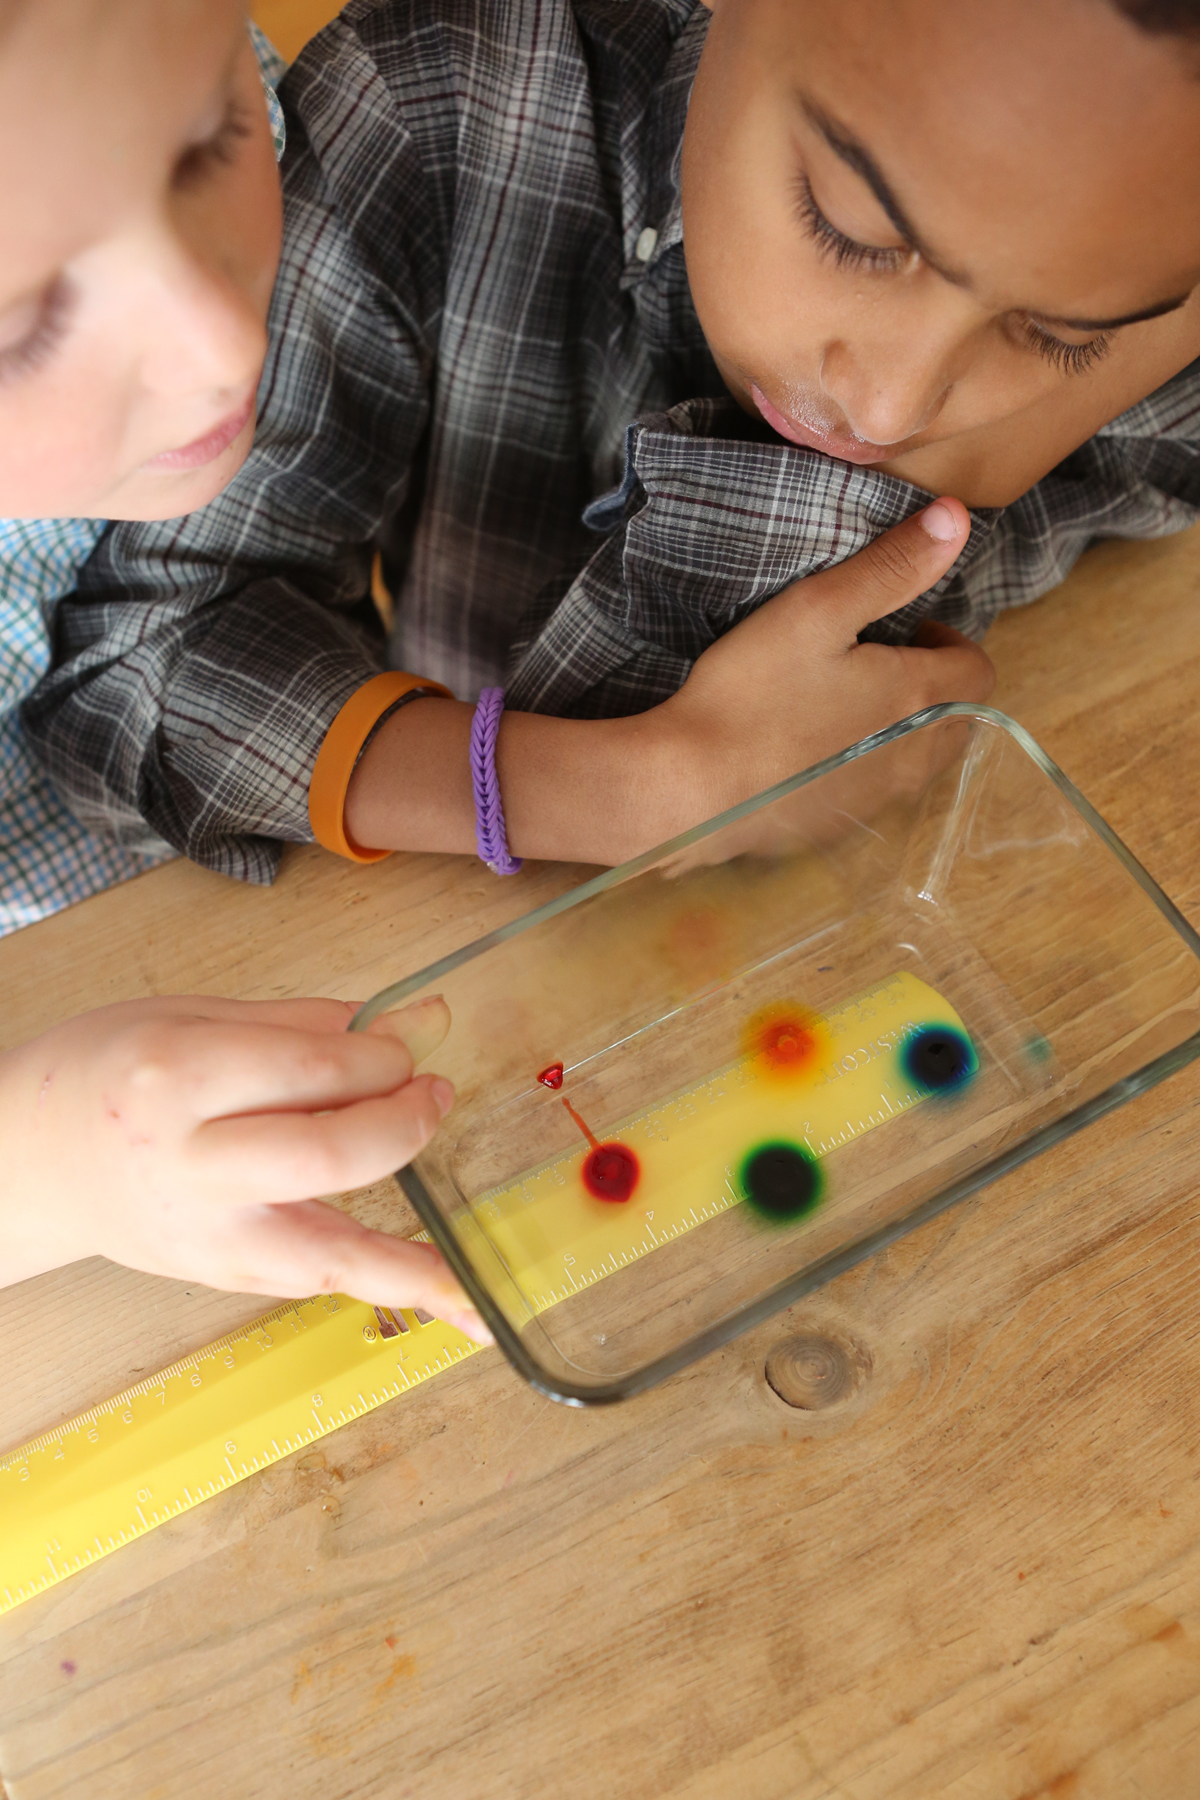
Diffusion Experiment from Kitchen Science Lab for Kids (Quarry Books)
Solar Water Purification: This project illustrates the greenhouse effect and is a fun “survival science” experiment. Requires hot sun and some patience!

Solar Water Purification from Kitchen Science Lab for Kids
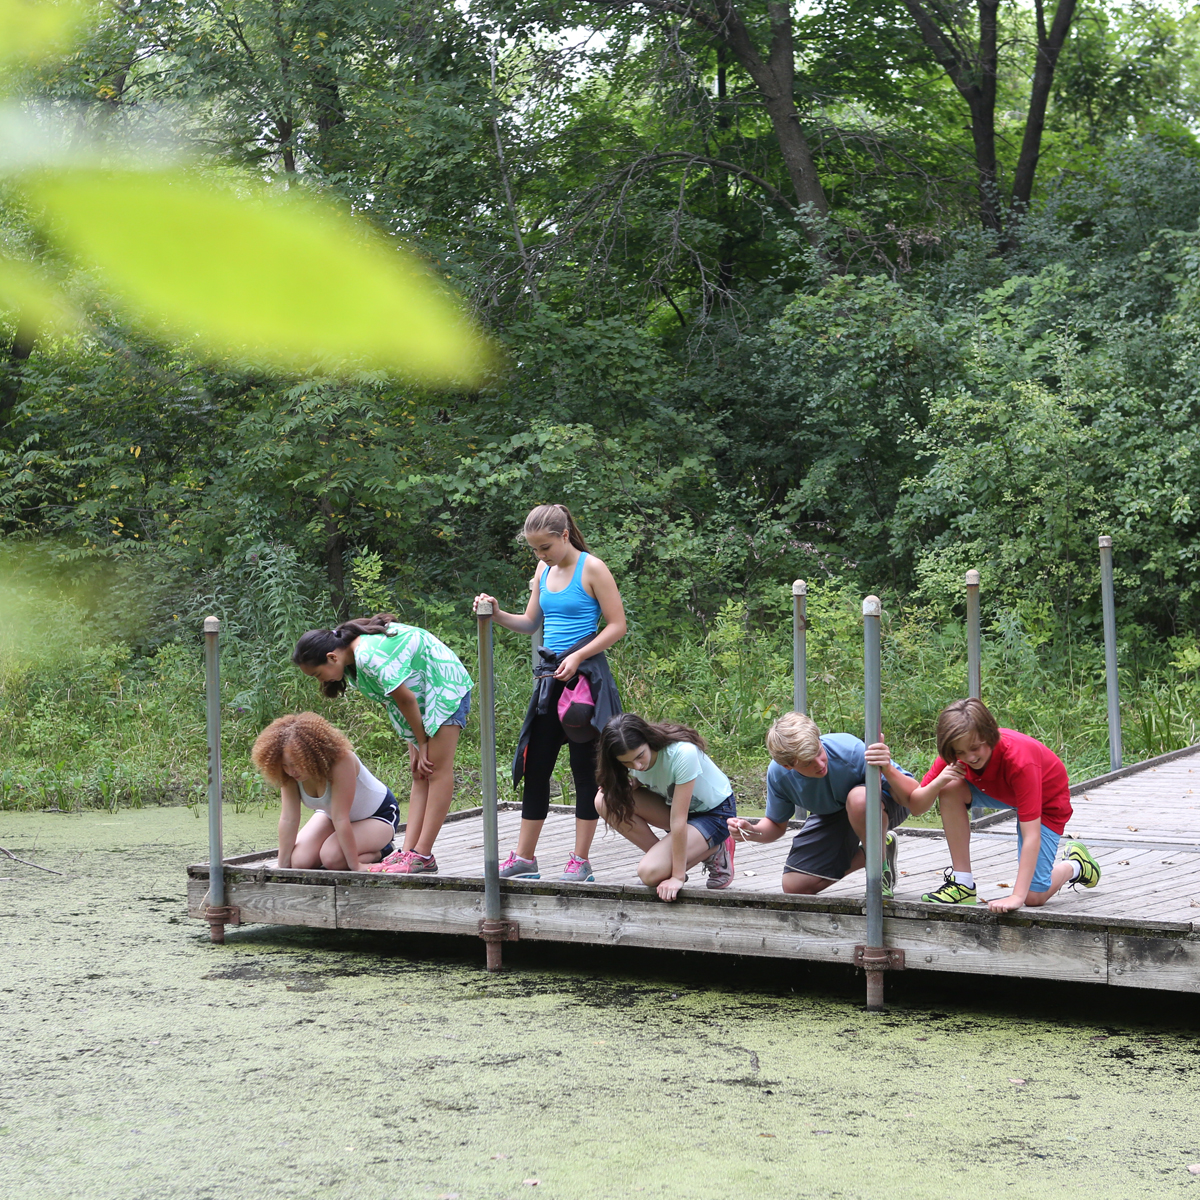
Citizen Science: Don’t forget about all the real environmental research projects you can participate in through Citizen Science programs all around the world!
For mores activities and games, check out NASA’s Climate Kids website, to see a kid-friendly diagram of the water cycle, click here, or just get outside and enjoy the beautiful planet that sustains and nurtures us.
14 DIY Halloween Science Projects for Kids
- by KitchenPantryScientist
Turn your kitchen table into the coolest mad science lab in the neighborhood. Click on the project name for a link to instructions and to read about the “Science Behind the Fun.” Most of these projects can be found in my book “Kitchen Science Lab for Kids,” the perfect gift for any young scientist!

1. Frankenworms– Bring gummy worms to “life” using baking soda and vinegar.
2. Alien Monster Eggs– Make creepy, squishy monster eggs.
3. Oozing Monster Heads– Combine science and art to create Halloween fun.
4. Bag of Blood– Amaze your friends with this magical science trick.
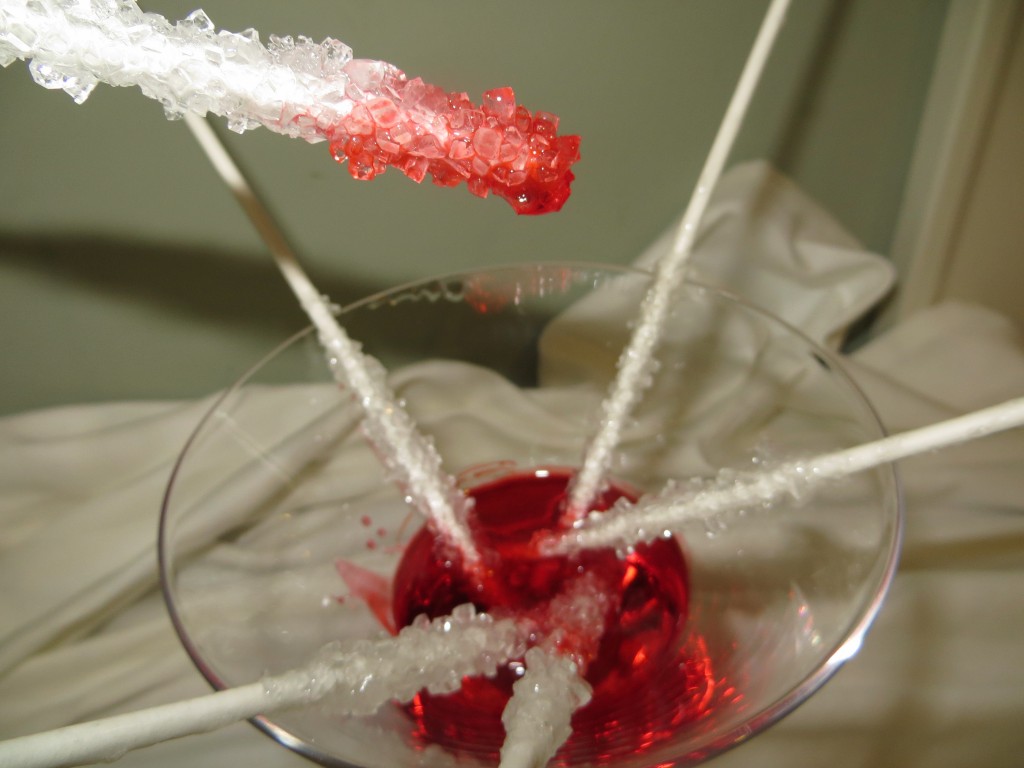
Vampire Rock Candy (kitchenpantryscientist.com)
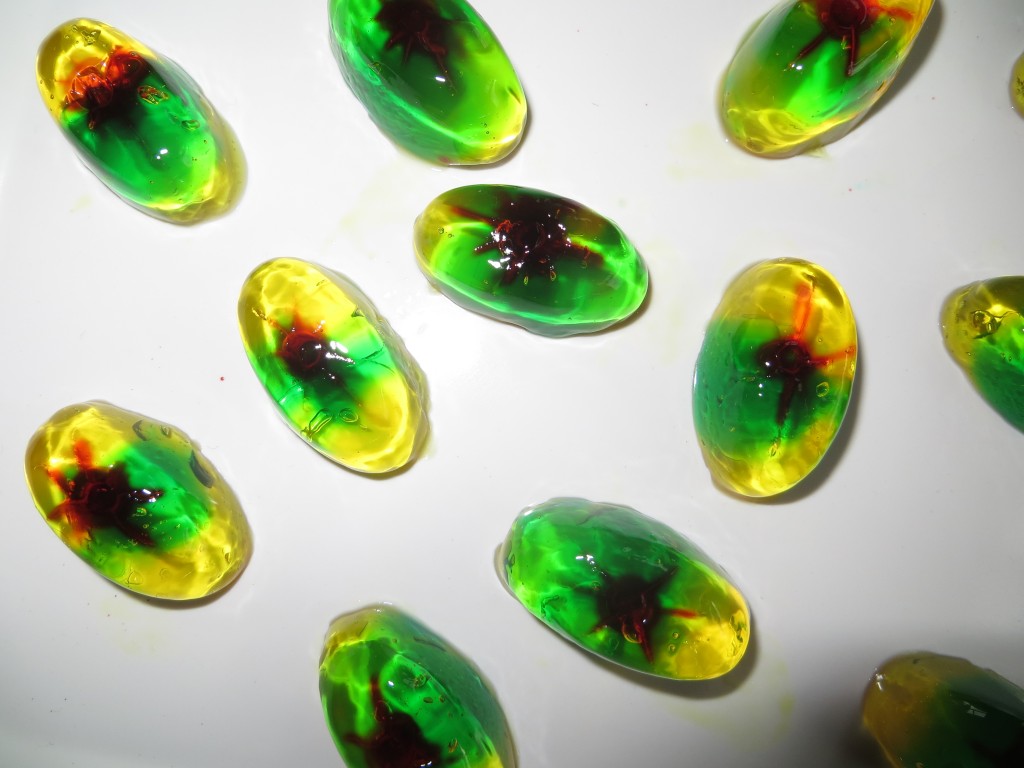
Jell-O Eyeballs
kitchenpantryscientist.com
Vegetable Vampires kitchenpantryscientist.com
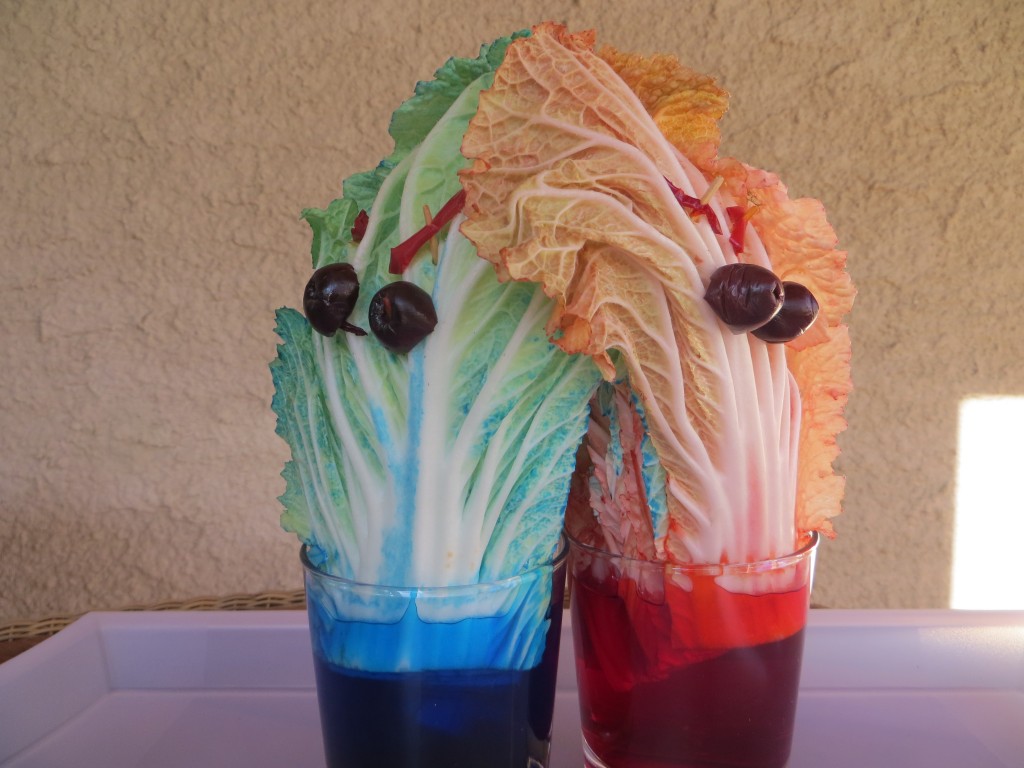
9. Magic Potion– Make a color-changing, foaming potion using red cabbage and water.
10. Halloween Soda Explosion– The classic Diet Coke and Mentos explosion is perfect for Halloween.
11. Foaming Alien Blood– Bring the X-Files to your kitchen with this creepy green fake blood
12. Mad Scientist’s Green Slime– Because everyone loves slime
13. Homemade Fake Blood– It’s simple to make non-toxic fake blood in your kitchen.
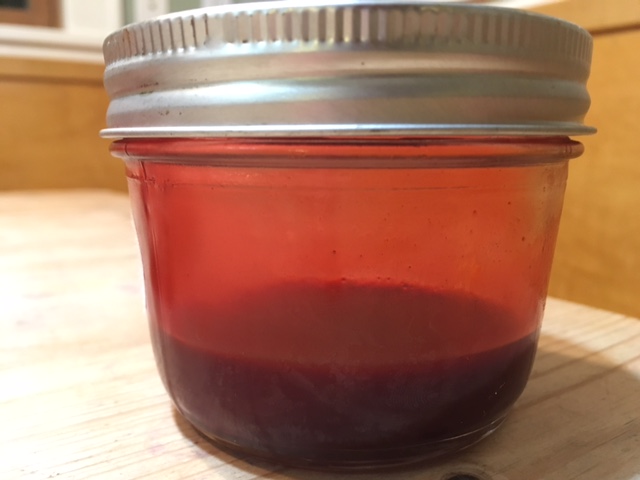
edible fake blood
14. Fizzy Balloon Ghosts– Draw scary faces on balloons and inflate them using baking soda and vinegar.
Five Ways to Dye Eggs Using Science
- by KitchenPantryScientist
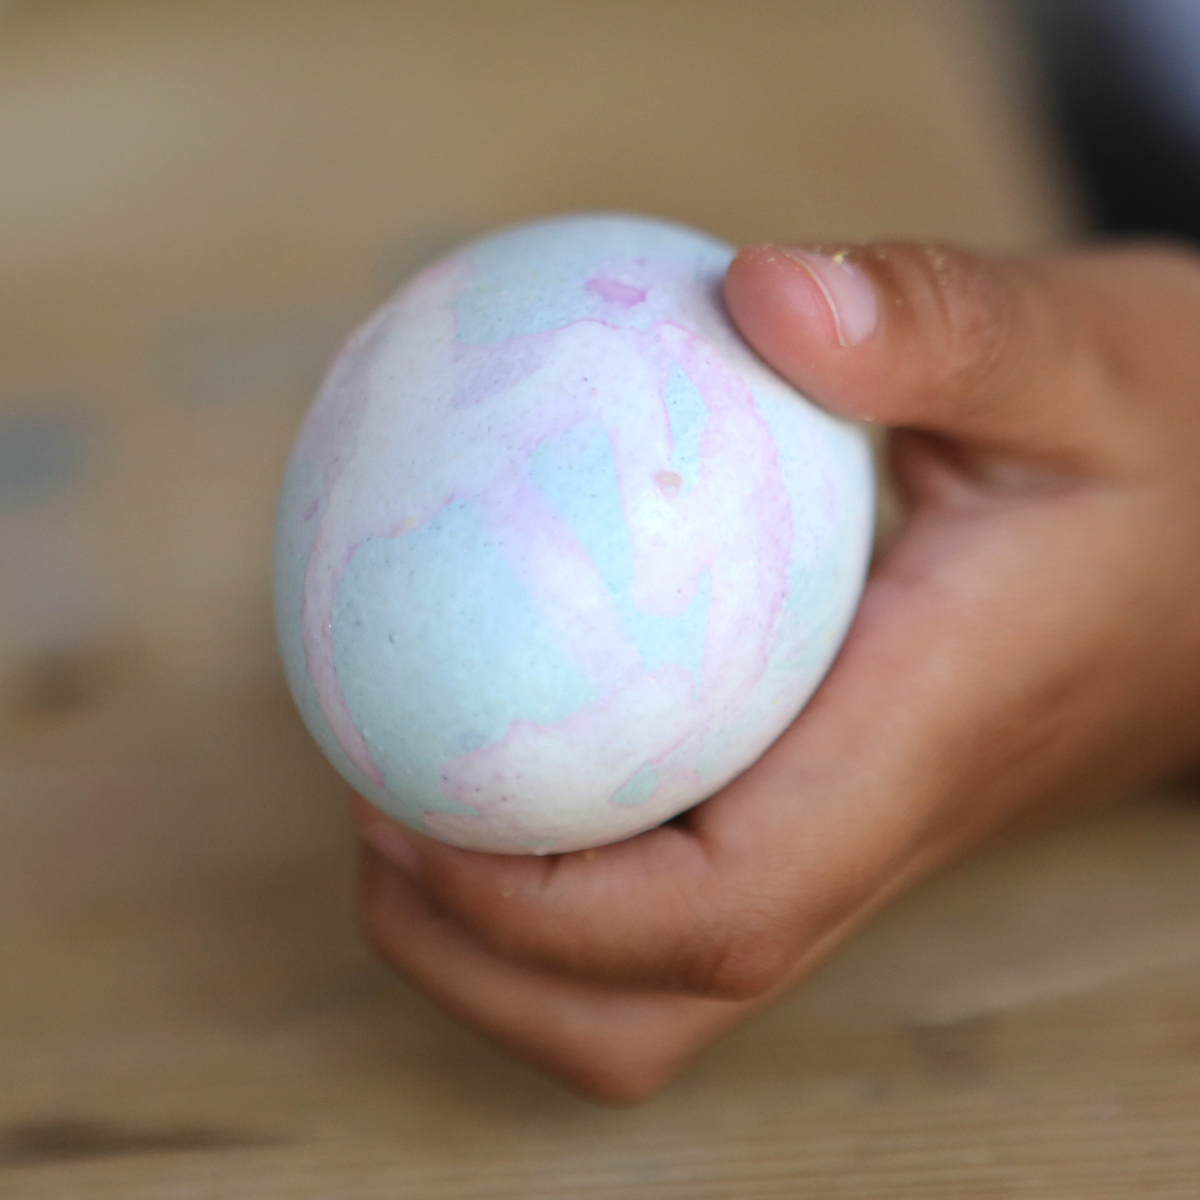
It’s fun to create colorful, swirling marbled designs on eggs, and there’s science behind the fun! Here’s a brief description of each. Click on the blue titles for more instructions and science explanations.
Olive Oil Marbling: You’ll need hard boiled eggs, olive oil, vinegar, and food coloring. We used green, yellow and brown food coloring to make robin’s egg colors.

Whipped Cream Faux Marbling: You’ll need hard boiled eggs, a shallow container, cool whip or whipped cream, food coloring, and a toothpick. (Project from Star Wars Maker Lab -DK Books)

Lemon-Painted Eggs: Dye eggs with cabbage juice and use lemon juice and backing soda to “paint” pink and blue designs on the purple eggs. (Project from STEAM Lab for Kids- Quarry Books)
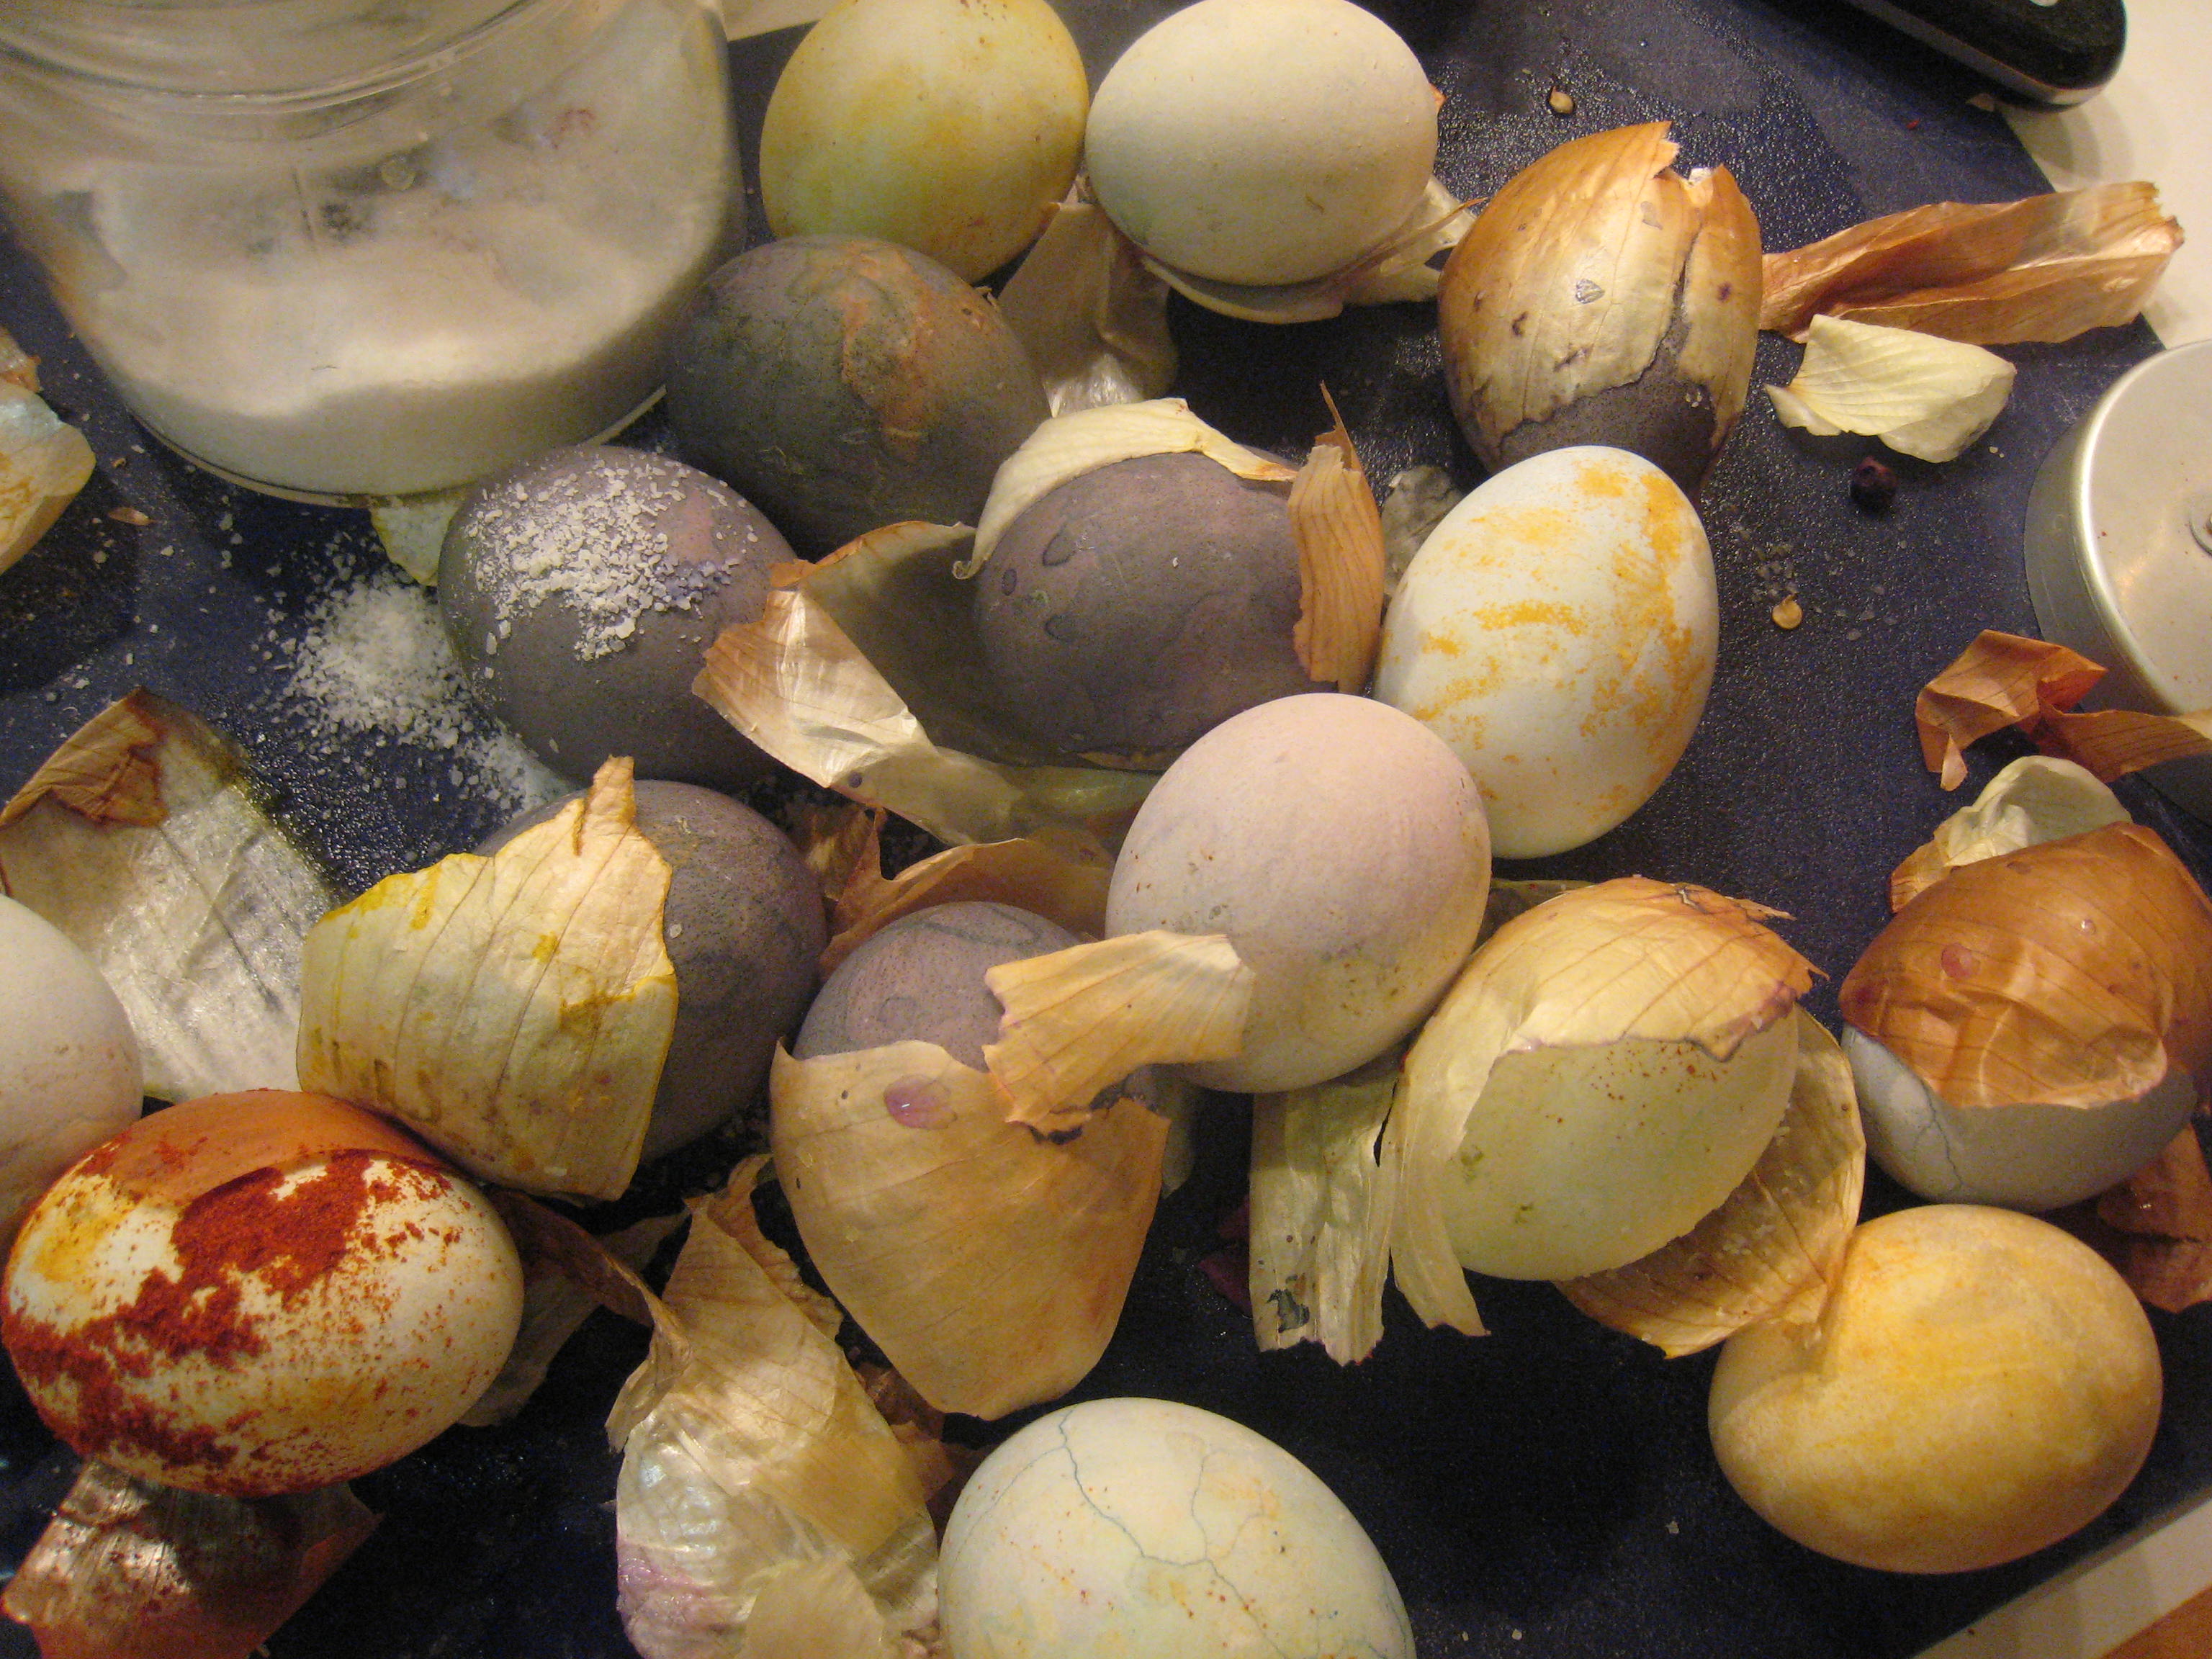
Natural Dyes: Experiment with fruit, coffee, tea, spices, veggies and even onion skins to create beautiful, natural egg dyes.
Nail Polish Marbling: This one is obviously inedible, but it’s a fun craft project! You’ll need eggs with the yolks and whites blown out, a container that can be thrown away, nail polish in two or more colors, and water. (Project from STEAM Lab for Kids-Quarry Books)

The science behind the marbling fun: Egg dyes and food coloring require an acidic environment to form bonds. That’s why you add vinegar (also called acetic acid) to water and dye when coloring eggs. Things that are less dense than water, like olive oil and nail polish, float on top of water, allowing you to create designs that can be transferred onto your eggs.
Homemade Gelatin Printing Plates for Leaf Prints
- by KitchenPantryScientist
When dissolved in hot water and allowed to cool, gelatin molecules trap water to create what scientists call a colloid, or a gel. When glycerin is added to a gel, it becomes slippery, so paper won’t stick to it and can be used to make beautiful prints that capture the character and anatomy of a leaf. I’m obsessed with this fun, easy science/art project. Parental supervision is recommended when adding the boiling water to the gelatin.

You’ll need:
1.5 cups vegetable glycerin ( around 375 ml) (I’d recommend ordering this online, since it’s cheaper.
1/2 cup cold water
112 grams powdered plain gelatin (four 1oz boxes of plain Knox gelatine, near Jell-O in the grocery aisle
1 and 1/2 cups boiling water
heat-resistant mixing bowl
kitchen strainer/sieve (optional)
liquid measuring cup
large, flat container, such as a casserole dish or rimmed baking sheet
paper towels
paper
a small paint roller or brayer
liquid acrylic paint
leaves

Directions”
- Place 1/2 cup cold water in a bowl.
- Pour half of the glycerin liquid into the water and mix slowly to avoid bubbles.
- Sprinkle the gelatin powder into the water/glycerin and stir/mash together.
- Add boiling water and stir carefully, mashing up the lumps until the gelatin dissolves.
- Put the mixture through the sieve to remove any lumps of undissolved gelatin.
- Add the remaining glycerin to the strained gelatin mixture.
- Slowly stir to thoroughly blend all ingredients, being careful not to introduce bubbles.
- Pour the mixed liquid into the large, flat container.
- Use a paper towel to skim any bubbles off the surface of your gelatin mix
- Let the gelatin sit undisturbed for an hour or two, and then put it in the refrigerator for 2 hours.
- While the plate solidifies, find some fresh leaves. Use a book or app to try to identify the leaves you picked.
- When the gelatin plate is ready, you can leave it in the container or remove it. (I left it in the casserole dish.) Use the roller to apply paint to the gelatin
- Lay some leaves on the paint and use a finger to smooth each part of the leaf down into the paint. To highlight the veins on the leaf, lightly roll paint over the leaf.
- Carefully put a piece of paper down on top of the leaves and paint. Use your fingers to smooth the top sheet of paper and transfer the paint. Lift the paper to reveal the leaf prints.
- Peel the leaves off the painted gel and place them between two sheets of paper to make a positive print. Smooth the paper to transfer the paint and separate the paper to see the images.
- The gelatin plate can be reused with different paint colors. Just wash the gel plate with a wet paper towel between uses, and store it between pieces of saran wrap. It should keep for a few weeks.

Invisible Ink
- by KitchenPantryScientist
Write secret messages using baking soda and water and make the big reveal using a bright yellow spice called turmeric!

(safety note: small children should be supervised around rubbing alcohol. It is poisonous.)
You’ll need:
1 Tbsp. baking soda
1 tsp. turmeric
rubbing alcohol
cotton swabs
paper
Instructions:
For invisible ink, mix 1 Tbsp. baking soda into 1/2 cup water
For revealing paint, mix 1 tsp. turmeric into 1/2 cup rubbing alcohol (isopropanol)
- Use a cotton swab dipped in invisible ink to write a message or draw a picture on a piece of paper.
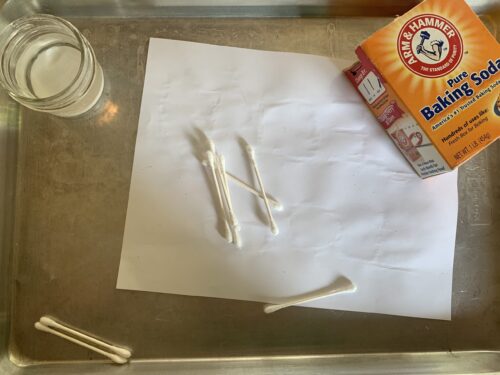
- Let the ink dry
- Use a second cotton swab dipped in revealing paint to make the message appear, as if by magic.
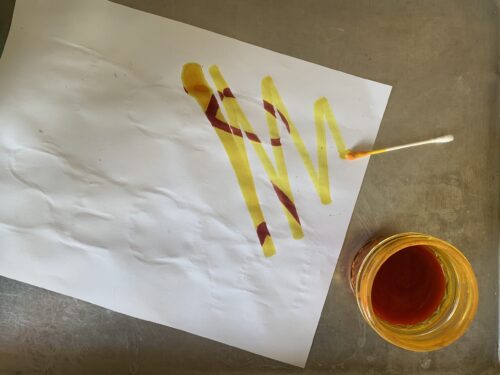
The Science Behind the Fun:
Baking soda is white, and when it dries, you can’t see it against the white paper because it is camouflaged and blends into the paper. Turmeric is a kind of chemical called an acid-base indicator that changes color depending on whether it’s in a solution with a high pH, called a base, or a solution with a low pH, called an acid. Baking soda is a base, and turns the turmeric bright red where you wrote the message. Paper has a neutral pH (isn’t an acid or a base), and the turmeric on the paper stays yellow.
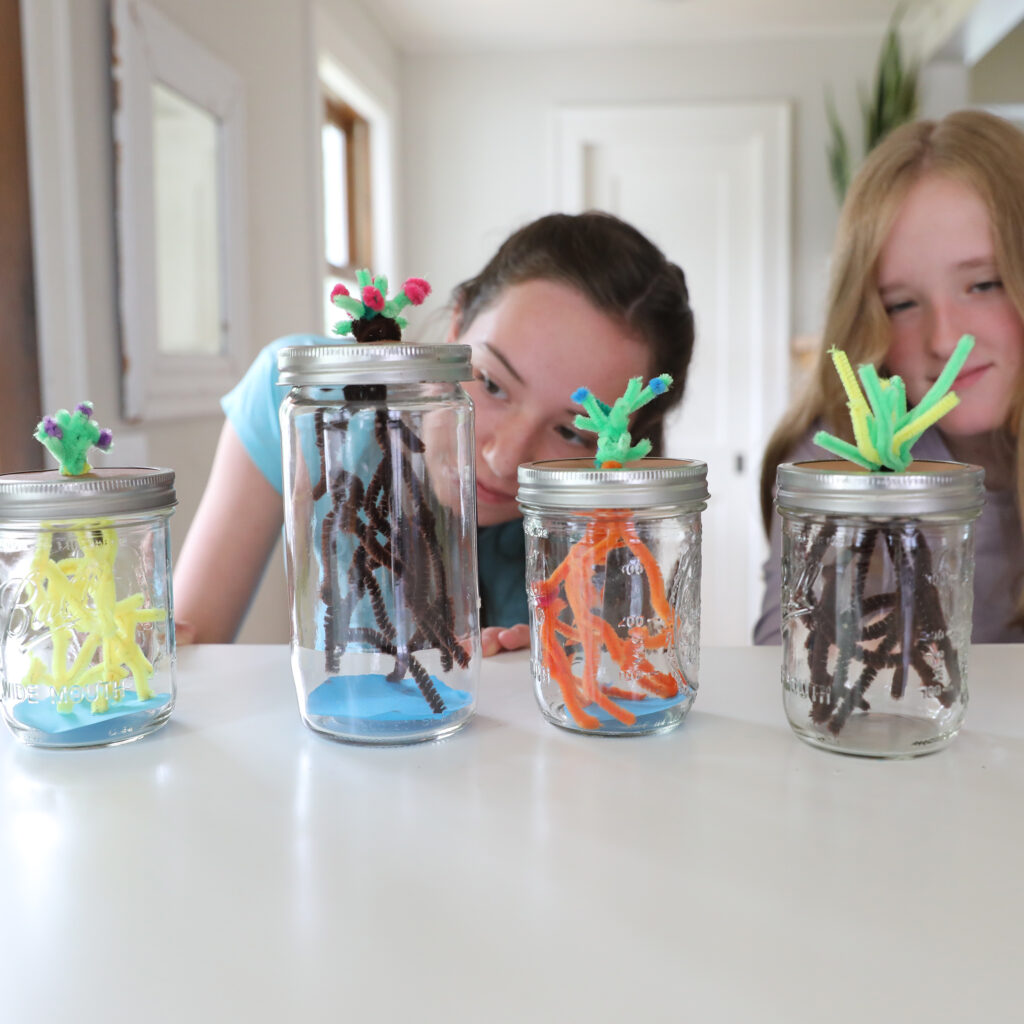
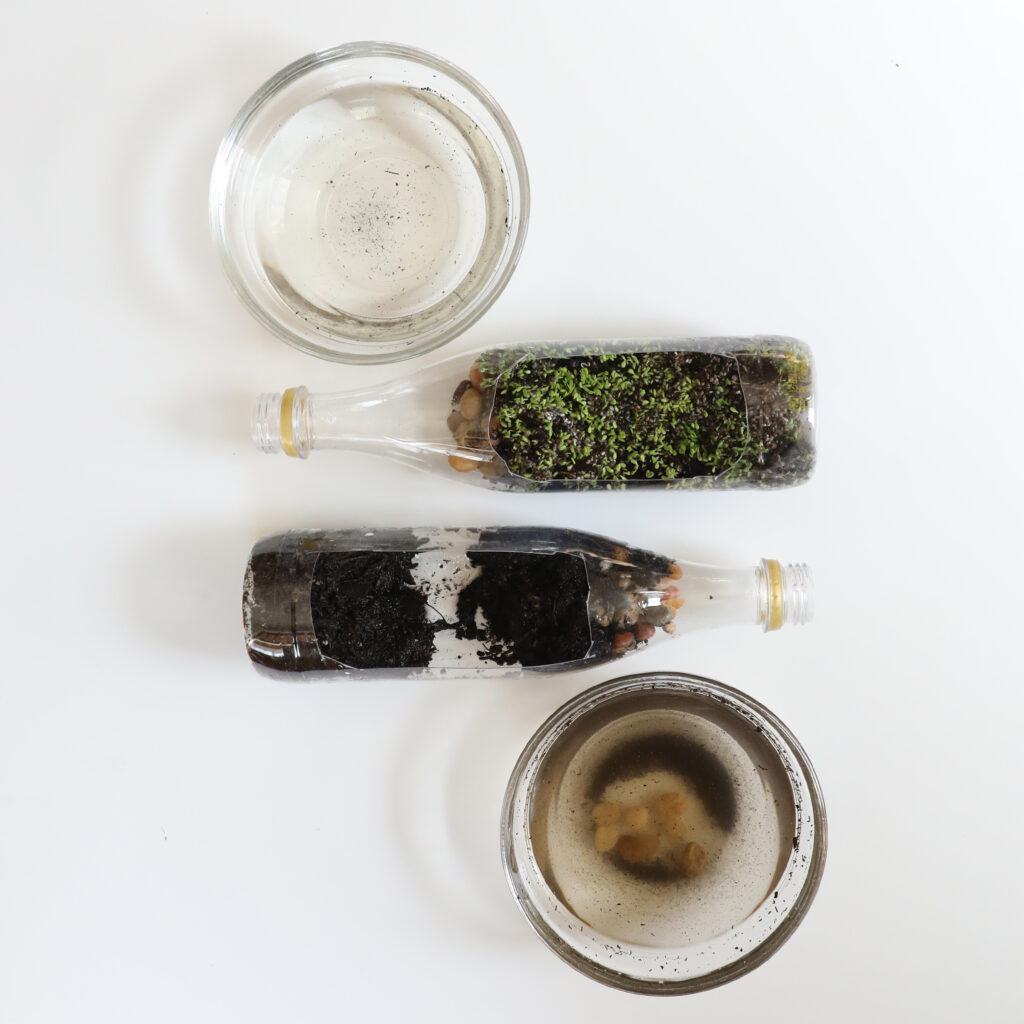
Ecology for Kids
- by KitchenPantryScientist
I’m really excited about my newest book, Ecology for Kids. It’s full of activities perfect for Earth Day, or any day when kids want to get their hands into some fun biology projects that teach them about Earth’s ecosystems. ( Ecology for Kids is available everywhere books are sold.)
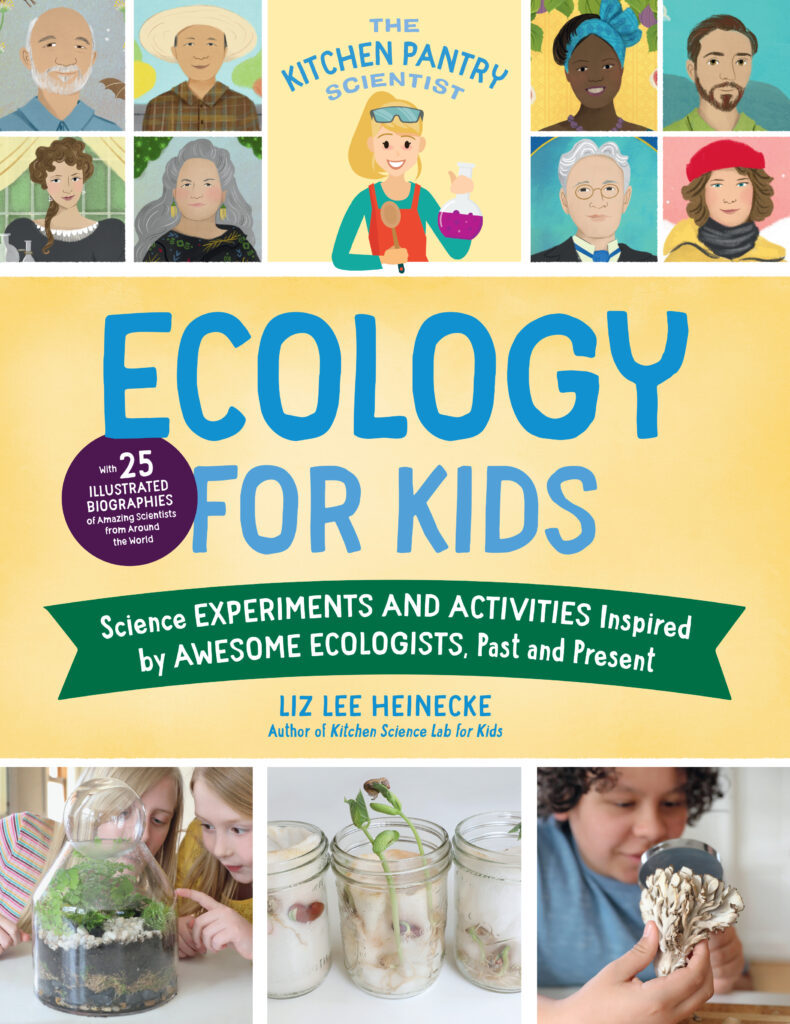
Click here to watch a TV segment where I demonstrate how to make terrariums (rainforest ecosystems) and expanding cacti (desert ecosystems). I also illustrate ocean acidification using color-changing purple cabbage juice, baking soda, vinegar and carbonated water.
The book was illustrated by Kelly Anne Dalton and photographed by Amber Procaccini. Here’s a peek at a few images from the book, which contains biographies of 25 inspiring ecologists, paired with projects that help kids explore the work of those scientists.
Homemade herb garden and flower seed paper
- by KitchenPantryScientist

This fun project teaches kids about paper science and lets you keep a little bit of summer growing all year long. You can find instructions on the video below, from my Kitchen Pantry Scientist YouTube channel. (Follow me there for loads of fun science projects!)
Summer Science- Biology for Kids
- by KitchenPantryScientist
My latest book is out just in time for summer! Biology for Kids pairs short bios, beautifully illustrated by artist Kelly Anne Dalton, with related science projects, including step-by-step instructions and color photographs. (Available everywhere books are sold.) Amazon link here.
Here’s a TV segment where I demonstrate a few projects from the book:
And you can take a peek inside here:
Two “Buggy” Biology Projects for Kids
- by KitchenPantryScientist
Summer is almost here, and so are the bugs! Here’s a short video segment featuring two inspiring scientists, paired with fun projects from my new book, “Biology for Kids” (available everywhere books are sold.)
New Book! The Kitchen Pantry Scientist Biology for Kids
- by KitchenPantryScientist
So excited for Biology for Kids’ book release on May 11th! Here’s a sneak peek at a few projects from the book. Pre-order now from your favorite bookseller or click here to order.