Tag: density’
Marbling Science
- by KitchenPantryScientist
I’ve always wanted to try paper marbling and knew there must be some science involved. So, we gave it a go, and the results were stunning!

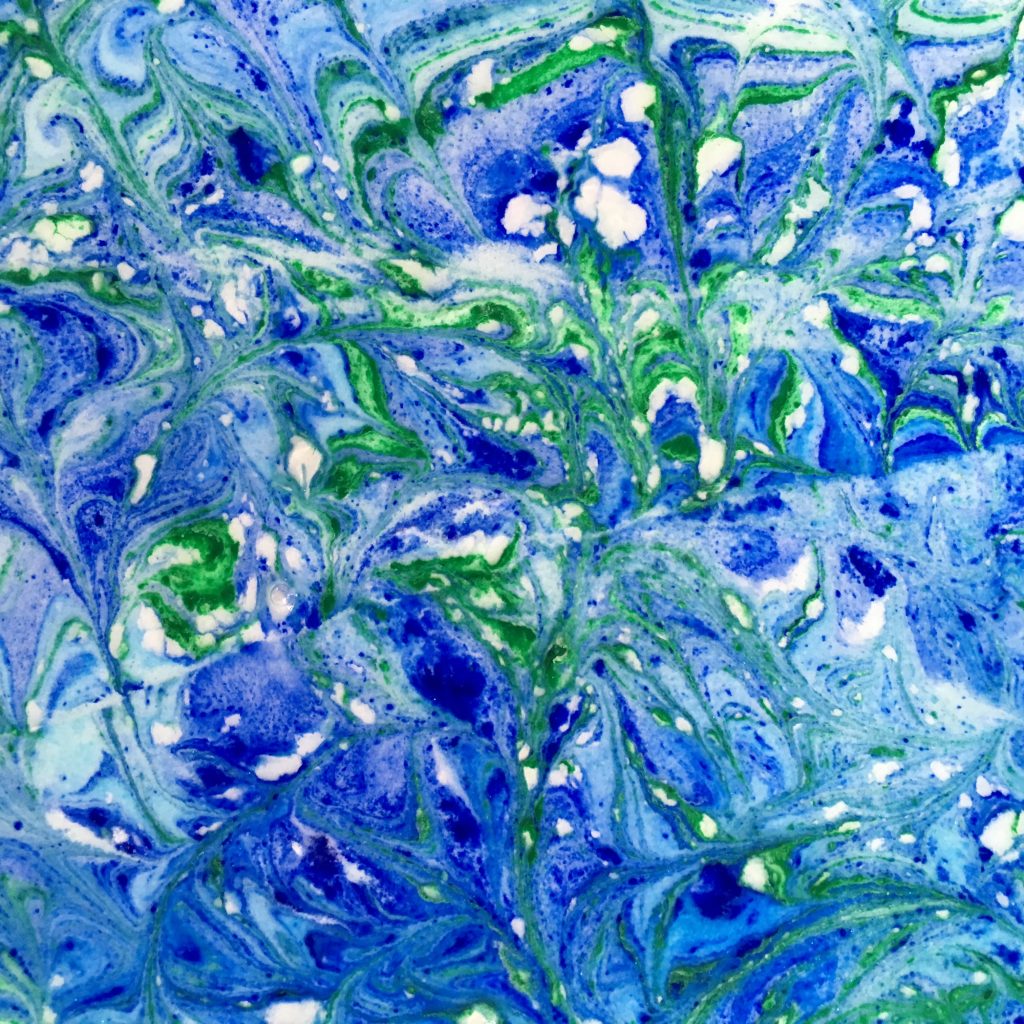
tempera paint marbling- photo by kitchenpantryscientist.com
![IMG_1586[1]](https://kitchenpantryscientist.com/wp-content/uploads/2016/09/IMG_15861-1024x768.jpg)
paper marbled with the Innovation marbling kit (Boku-Undo Suminagashi) from DickBlick.com – photo by kitchenpantryscientist.com
We tried two methods: one with liquid starch (made from cornstarch) and tempera paint, and another with a marbling kit. Both worked well, but look very different.
The Science Behind the Fun: Water molecules like to stick together, a property which scientists call surface tension. This property allows very thin layers of ink to float on water, mixing in beautiful patterns when you break the surface tension with detergent, a tool like a paintbrush, or movement. To marble paper, you have to use dye or paint that floats on the water where it can be easily transferred to paper. Alternately, you can make the liquid underneath more dense than the dye or paint, to help the dye float.
When transferring the ink or paint designs, it helps to use paper that’s been coated with a chemical called a mordant, that combines with substances (usually dyes) to make large molecules that stay in one place. (Iodine is another mordant, which is used to stain bacteria.)
Here’s a video of my 10YO making designs using the pre-made marbling kit…(More info at the bottom of this post.)
Since I like to do experiments using non-toxic, inexpensive ingredients most people have on hand, we first tried a method that uses cornstarch to thicken the bottom liquid layer and tempera paint as the dye. It requires pre-treatment of paper, like inexpensive watercolor paper from Target, with the mordant aluminum sulfate (alum), which you can find at your local coop or grocery store.
You’ll need:
-watercolor paper (cheap stuff from Target works just fine)
-two large, flat trays, like 9×13 pans
-2 tps. Alum (aluminum sulfate crystals)
-a sponge brush
-2 Tbs. corn starch
-eye dropper
-tempura paint (the more colors, the merrier)
-newspaper
- Dissolve 2 tsp alum in 3/4 cup water. Avoid inhaling powder.
- Mark one side of your watercolor paper with an A and use a sponge brush to apply alum solution evenly to that side of the paper.
![IMG_1480[1]](https://kitchenpantryscientist.com/wp-content/uploads/2016/09/IMG_14801-e1473219315556-768x1024.jpg)
- Let the paper dry overnight, or speed drying with a blow dryer.
- Make a double recipe of liquid starch by dissolving 4 Tbs. corn starch in 1/2 cup cold water. Bring 6 cups water to a boil in a sauce pan. Add the cornstarch solution to the water, stir well and boil for 1 minute. Turn the heat to low and simmer for 2 more minutes, stirring occasionally.
- Pour 3 cups of the hot liquid starch into one 9×13 pan and let cool.
- Pour 3 cups of cold water into the other pan.
- Prepare paint by mixing tempura paint with water until it has the consistency of half-and-half or whole milk.
- When starch is cool, drip paint onto the surface of the starch using an eyedropper, or something similar. Rinse dropper between colors.
![IMG_1503[1]](https://kitchenpantryscientist.com/wp-content/uploads/2016/09/IMG_15031-1024x1024.jpg)
- Swirl paint, or use toothpicks to drag out patterns.
![IMG_1521[1]](https://kitchenpantryscientist.com/wp-content/uploads/2016/09/IMG_15211-1024x768.jpg)
- Carefully place your paper on the paint, alum side-down. Let it sit for a minute or two.
![IMG_1527[1]](https://kitchenpantryscientist.com/wp-content/uploads/2016/09/IMG_15271-e1473220884288-768x1024.jpg)
- Carefully peel the paper off of the paint and gently place it, face up, in the water pan.
![IMG_1532[1]](https://kitchenpantryscientist.com/wp-content/uploads/2016/09/IMG_15321-1024x768.jpg) Let it sink and move it back an forth gently to rinse off excess paint.
Let it sink and move it back an forth gently to rinse off excess paint. - Set the paper on a piece of newspaper to dry.
![IMG_1582[1]](https://kitchenpantryscientist.com/wp-content/uploads/2016/09/IMG_15821-e1473221209774-768x1024.jpg)
- Make more marble paper in the same paint pan. When you’re ready, repeat using the rest of the cornstarch.
The Innovation marbling kit (Boku-Undo Suminagashi) from DickBlick.com pictured below includes pre-made low density dyes that you drip onto a tiny floating disc of paper in a tray of water. It’s tons of fun and yields beautiful results. I got the kit at Blick art supplies, and used the paper they recommended, which may have been pre-treated with a mordant.
![IMG_1536[1]](https://kitchenpantryscientist.com/wp-content/uploads/2016/09/IMG_15361-e1473219139648-768x1024.jpg)
Have fun!
Rainbow Sugar-Water Density Columns
- by KitchenPantryScientist
You can make colorful columns that demonstrate the concept of liquid density at your own kitchen table with just water, sugar and food coloring. An eyedropper, siphoning bulb, syringe (minus a needle,) or anything else that allows you to slowly drip liquid from one cup to another are useful for the layering step. If you have a tall, thin glass, like a cordial glass, or a test tube, it’s easy to see the layers in your gradient!
Start with two cups of hot tap water and measure half a cup into each of four cups. To the first cup, add 2 Tbs. sugar, to the second add 4 Tbs. sugar, to the third, 6 Tbs. sugar and to the fourth, 8 Tbs. sugar. Stir until the sugar dissolves. If the sugar won’t dissolve, an adult may microwave the cup for 30 seconds and stir again. Always use caution with hot liquids. If the sugar still won’t dissolve, try adding a Tbs. warm water.
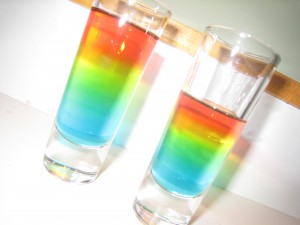
Now, add 2 drops food coloring to each cup. We added red to the cup with 2Tbs, yellow to the one with 4Tbs, green to the to the one with 6Tbs, and blue to the cup with 8Tbs.
Density is mass (how many atoms are in an object) divided by volume (how much space an object takes up.) Sugar molecules are made up of lots of atoms stuck together. The more sugar you add to a half cup of water, the more atoms it will contain and the denser it will be. Less dense liquids float to the top of more dense liquids. Which of your sugar solutions is the most dense? The one with the most sugar in it (8 Tbs.)
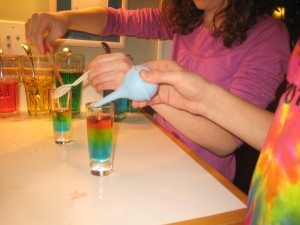
Put the most dense sugar solution(blue in this case) in the bottom of a tall, thin glass or test tube. Now, use your dropper to gently drip the next densest liquid (green) on top of the blue layer. It works best to drip the sugar solution against the side of the cup just above the surface of the liquid. You can also drip it onto the back of a spoon, like in the photo above. Add the yellow layer, and finally the red layer, which only contains 2Tbs sugar per half cup and is the least dense.
What happens if you mix the layers up? They won’t separate back out like oil and water would, because the sugar will disperse (spread) equally through the mixture.
Researchers sometimes use density gradients to isolate different parts of cells by breaking the cells up, putting the cell debris on top of a density gradient and spinning it in a centrifuge. Cellular fragments of different shapes and molecular weights move through the gradient at different rates.
Float or Sink
- by KitchenPantryScientist

You’re never too young to enjoy a good science experiment. This is a great project that requires very few supplies and very little effort for adult involved. It’s easy enough for a toddler to do and is a perfect activity for a cold or rainy day.
-Fill up a large bowl or tub with as much water as you’re comfortable cleaning up. (Safety Mama, if there were one, would remind you to always supervise young children around any amount of water!)
-Place a large towel under the bowl on some waterproof surface. (The kitchen floor works very well for us.)
-Have your child find several small objects around the house that they’d like to use in the experiment. Suggest they find some things that they think will float and some they think will sink. Do a quick check to make sure they won’t destroy anything that you want to keep dry.
-Ask them whether they think the object will float or sink and then let them try it out.
If they want, they can make a chart of their predictions and the results. Your child’s science notebook would be a great place to do this! (see science notebook post if you don’t already have one!)
Here’s some science for you parents, in case your kids want to know what’s happening. You can impress them with your vast knowledge:
One way to see how density affects things is to look at how things sink or float in water.
If something is more dense that water, it will sink, and if less dense than water, it will float.
In case they ask, which they always do:
Density is a measure of how much mass is contained in a given unit volume. Put simply, if mass is a measure of how much ‘stuff’ there is in an object, density is a measure of how tightly that ‘stuff’ is packed together.
Or, just tell them they’ll learn about it in science class someday!