Tag: food’
Color-Changing Chia Seed Pudding
- by KitchenPantryScientist
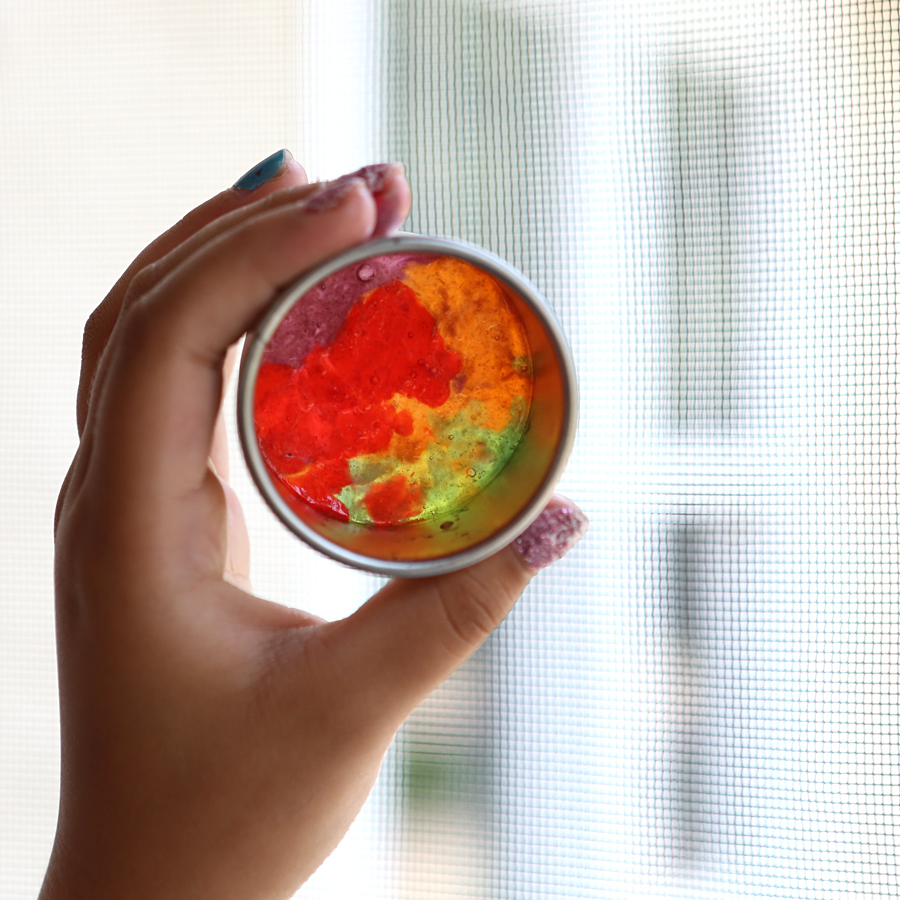
Chia seeds are superfoods with a powerful combination of fiber and nutrients, but what makes them really special is their ability to absorb up to twelve times their own weight in water and produce a clear gel that makes an excellent thickener. With coconut milk, natural sweetner and chia seeds, kids can make a fun, delicious no-cook pudding. Add butterfly pea powder to the mix to turn the pudding blue, and then squeeze in some lemon juice to make it turn pink.

The Science Behind the Fun: Colorful pigments called anthocyanins give butterfly pea flower its blue color. When you mix it with an acids such as lemon juice, it turns purple or pink. The color change occurs because the acid changes their shape, causing them to reflect light differently.
- 5 tablespoons food-grade chia seeds
- 1 14-ounce can light coconut milk
- 2 tablespoon honey or maple syrup
- 1 tsp vanilla
- Tiny pinch kosher salt
- 1/2 teaspoon butterfly pea flour
- fresh lemon juice
- Fresh fruit or jam to mix into the pudding (optional)
Mix the chia seeds, coconut milk, honey, vanilla, salt and pea flower together. Stir until the seeds are evenly distributed and refrigerate overnight, stirring occassionally.
To make the color change, stir in some lemon juice and add more honey to taste. Top with fresh fruit or jam.
Store in refrigerator for up to three days.
Note: If you don’t like the seeds, blend the mixture before refrigerating. To make chocolate pudding, leave out the butterfly pea powder and add 1/4 cup cocoa powder to the mixture.
Hard Candy Stained Glass- Edible Science
- by KitchenPantryScientist
Most clear hard candy has what scientists call a glass structure. It’s a disorganized jumble of three kinds of sugar: glucose, fructose and sucrose, which can’t assemble into organized crystals, so it remains transparent when you melt it and allow it to re-harden.
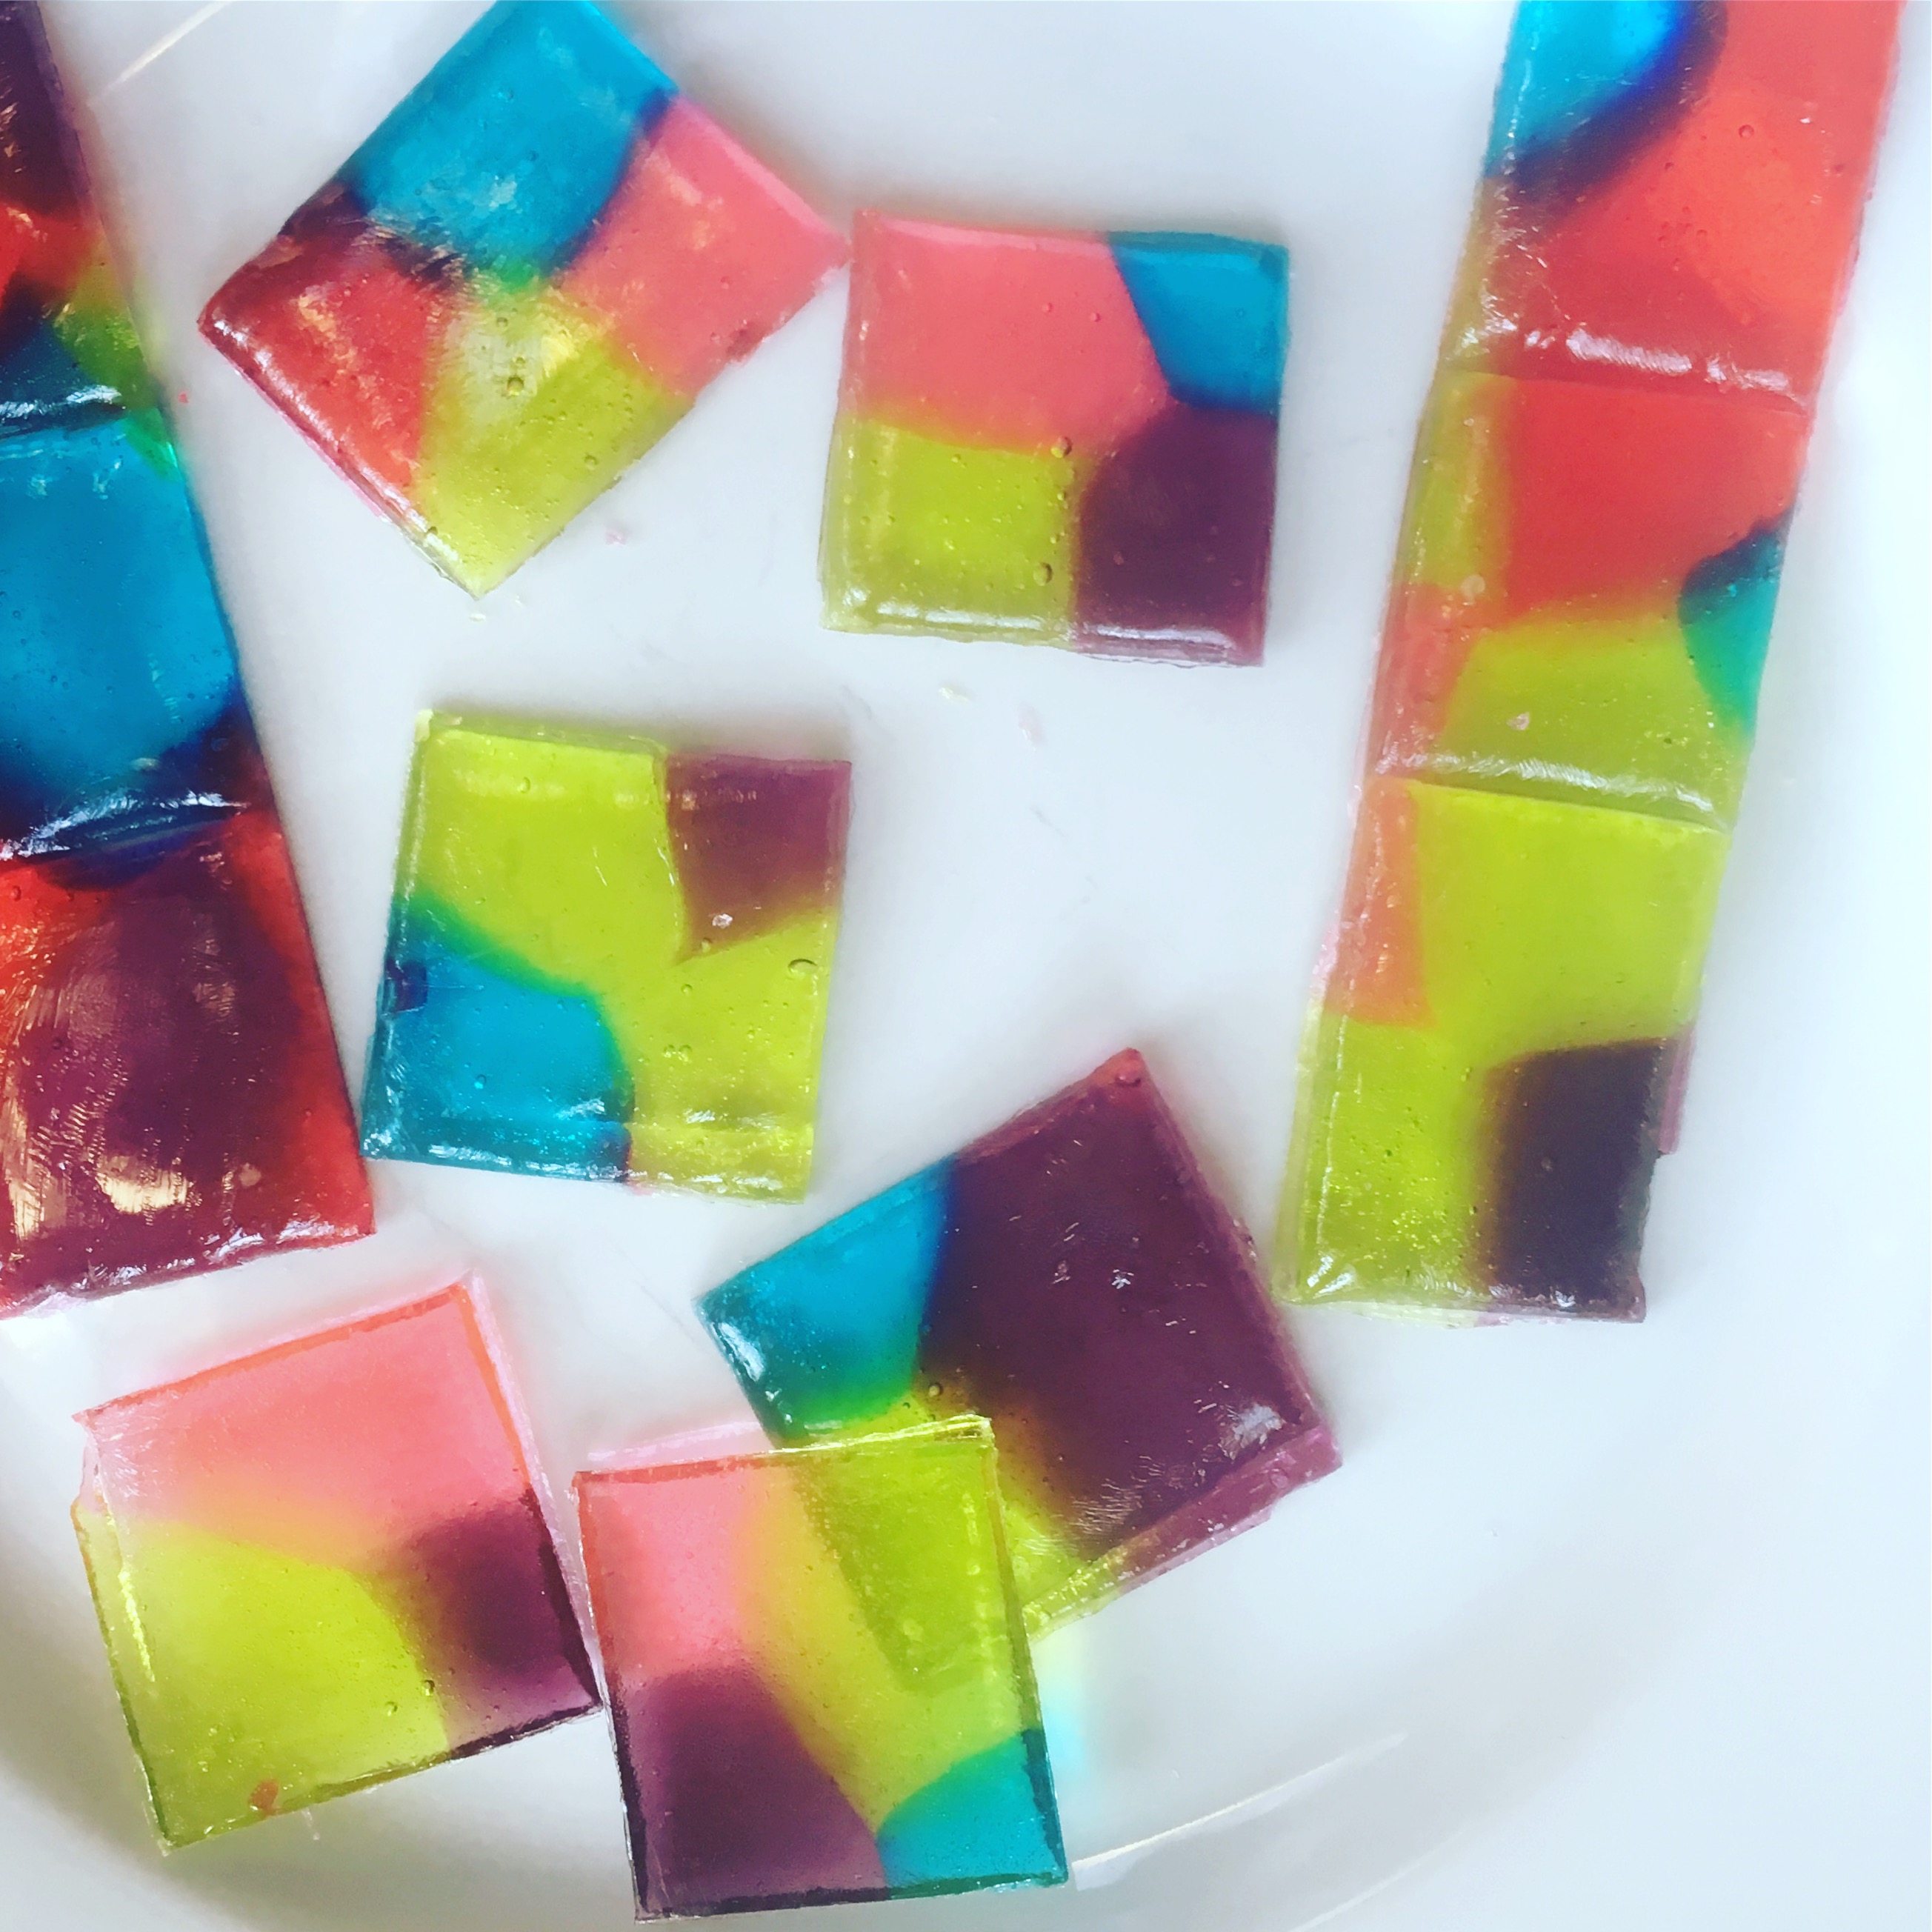
Hard Candy Stained Glass “STEAM Lab for Kids” Quarry Books 2018
To make stained glass for our gingerbread house windows, I adapted the crushed stained glass candy project from my book “STEAM Lab for Kids.” The challenge was figuring out how to create perfect rectangles. After some trial and error, I discovered that scoring the candy when it was still warm and soft created weak points, which allowed me to snap the candy into clean shapes once it had hardened.
Stained Glass Candy “STEAM Lab for Kids” Quarry Books 2018
You’ll need:
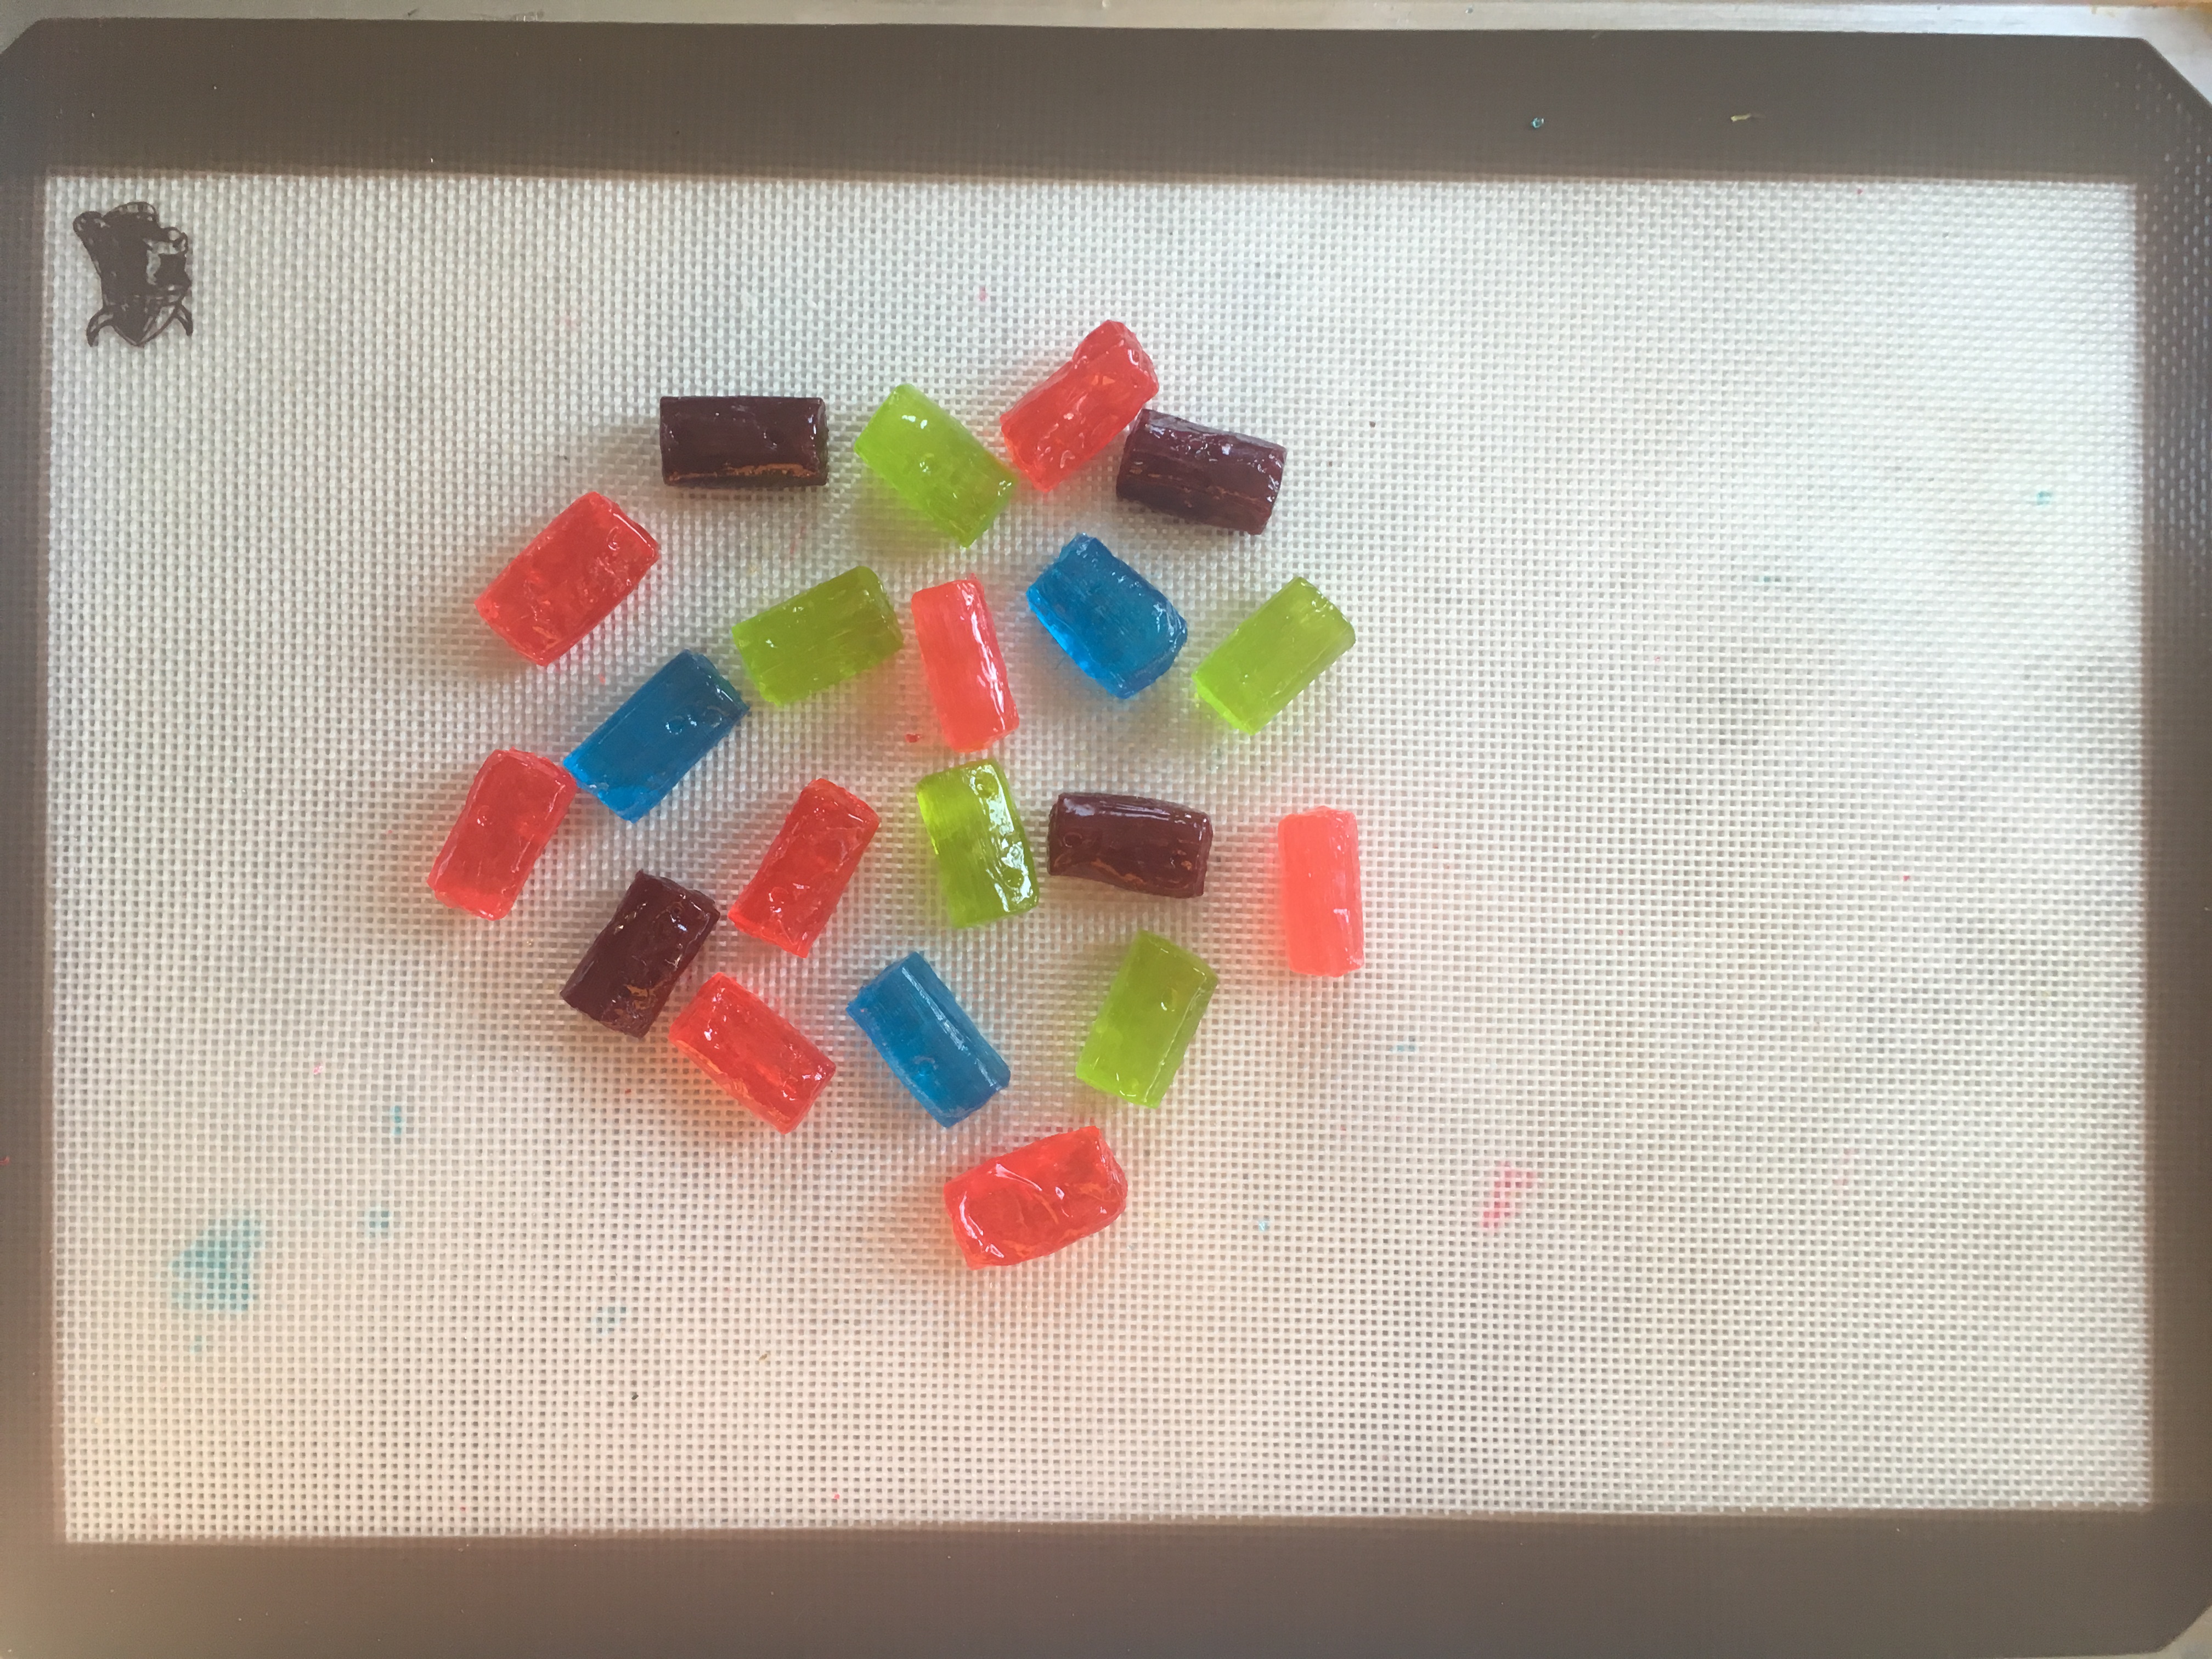
-Jolly Ranchers, Life Savers or another clear, hard candy
-a baking sheet (spray or grease the baking sheet, if not using a silicon liner)
-a silicon liner for the baking sheet, if you have one
-a metal spatula or dough scraper
-an oven
Safety tip: Adult supervision recommended. Hot, melted candy can cause burns. Don’t touch it until it has cooled.
What to do:
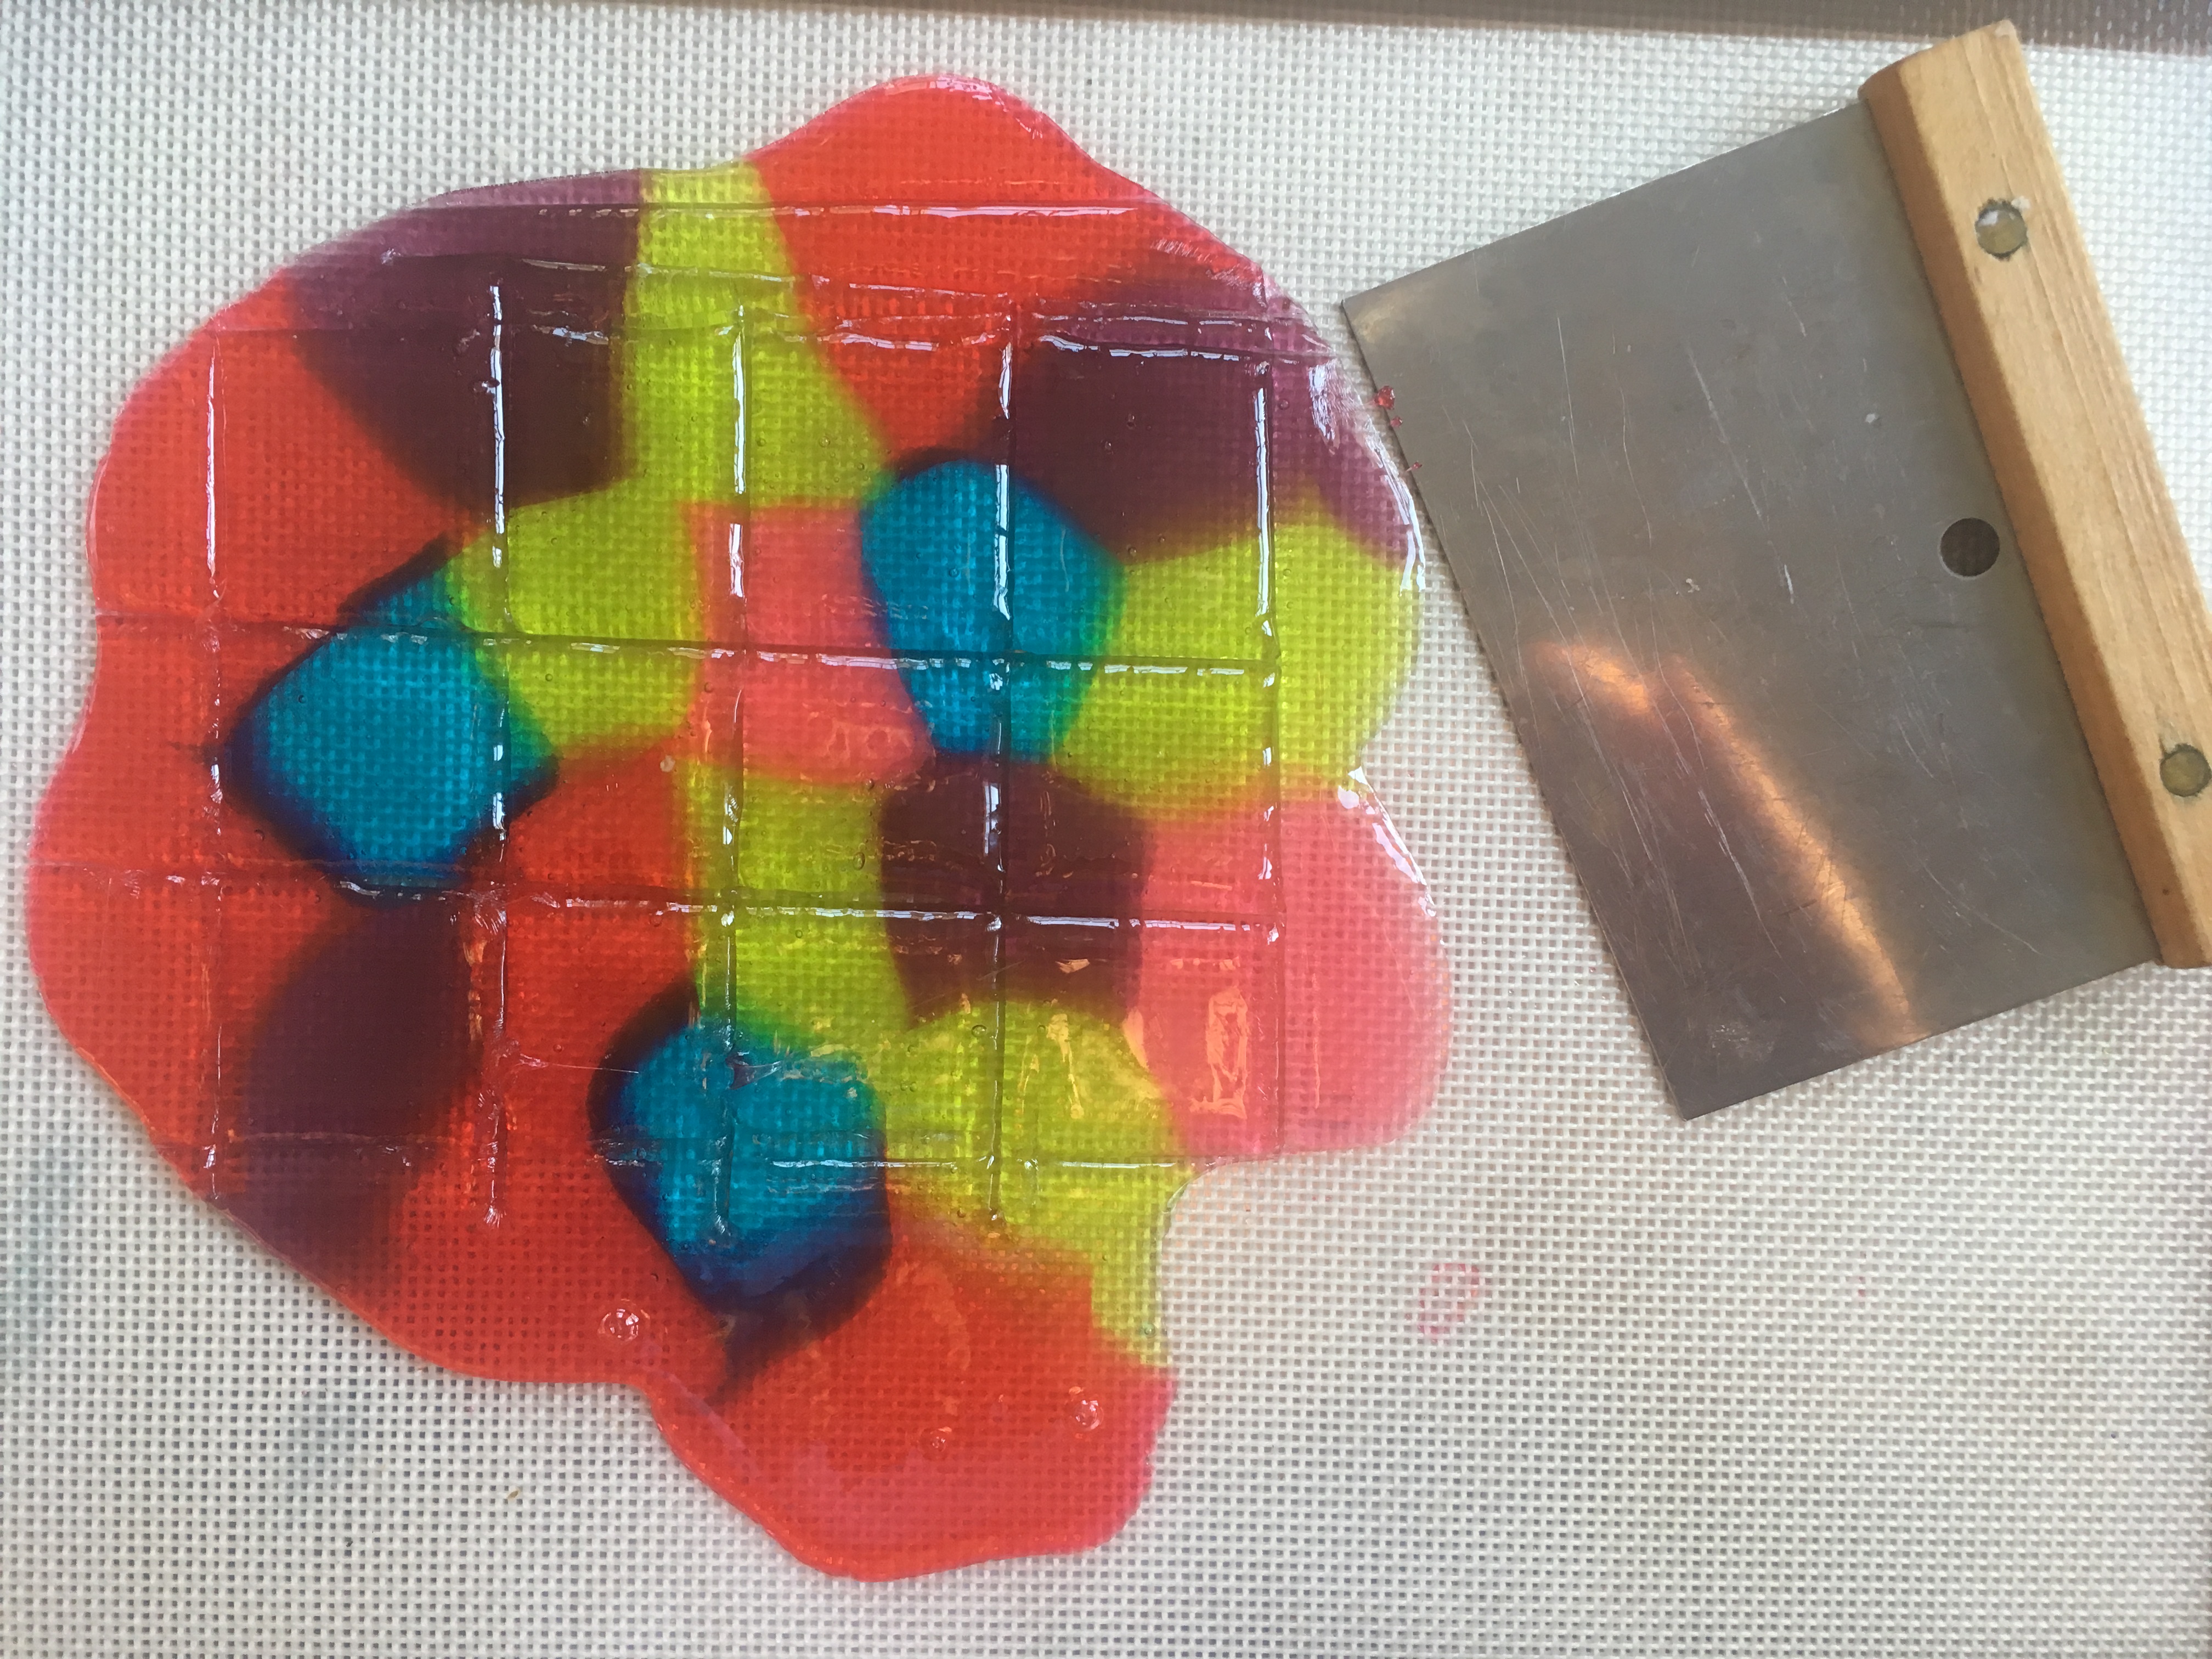
- Pre-heat the oven to 350F.
- Unwrap the candy and arrange the pieces on a baking sheet so that they’re close together, but not touching.
Stained Glass Candy “STEAM Lab for Kids” Quarry Books 2018
- Bake the candy for 7 to 8 minutes, or until it has melted.
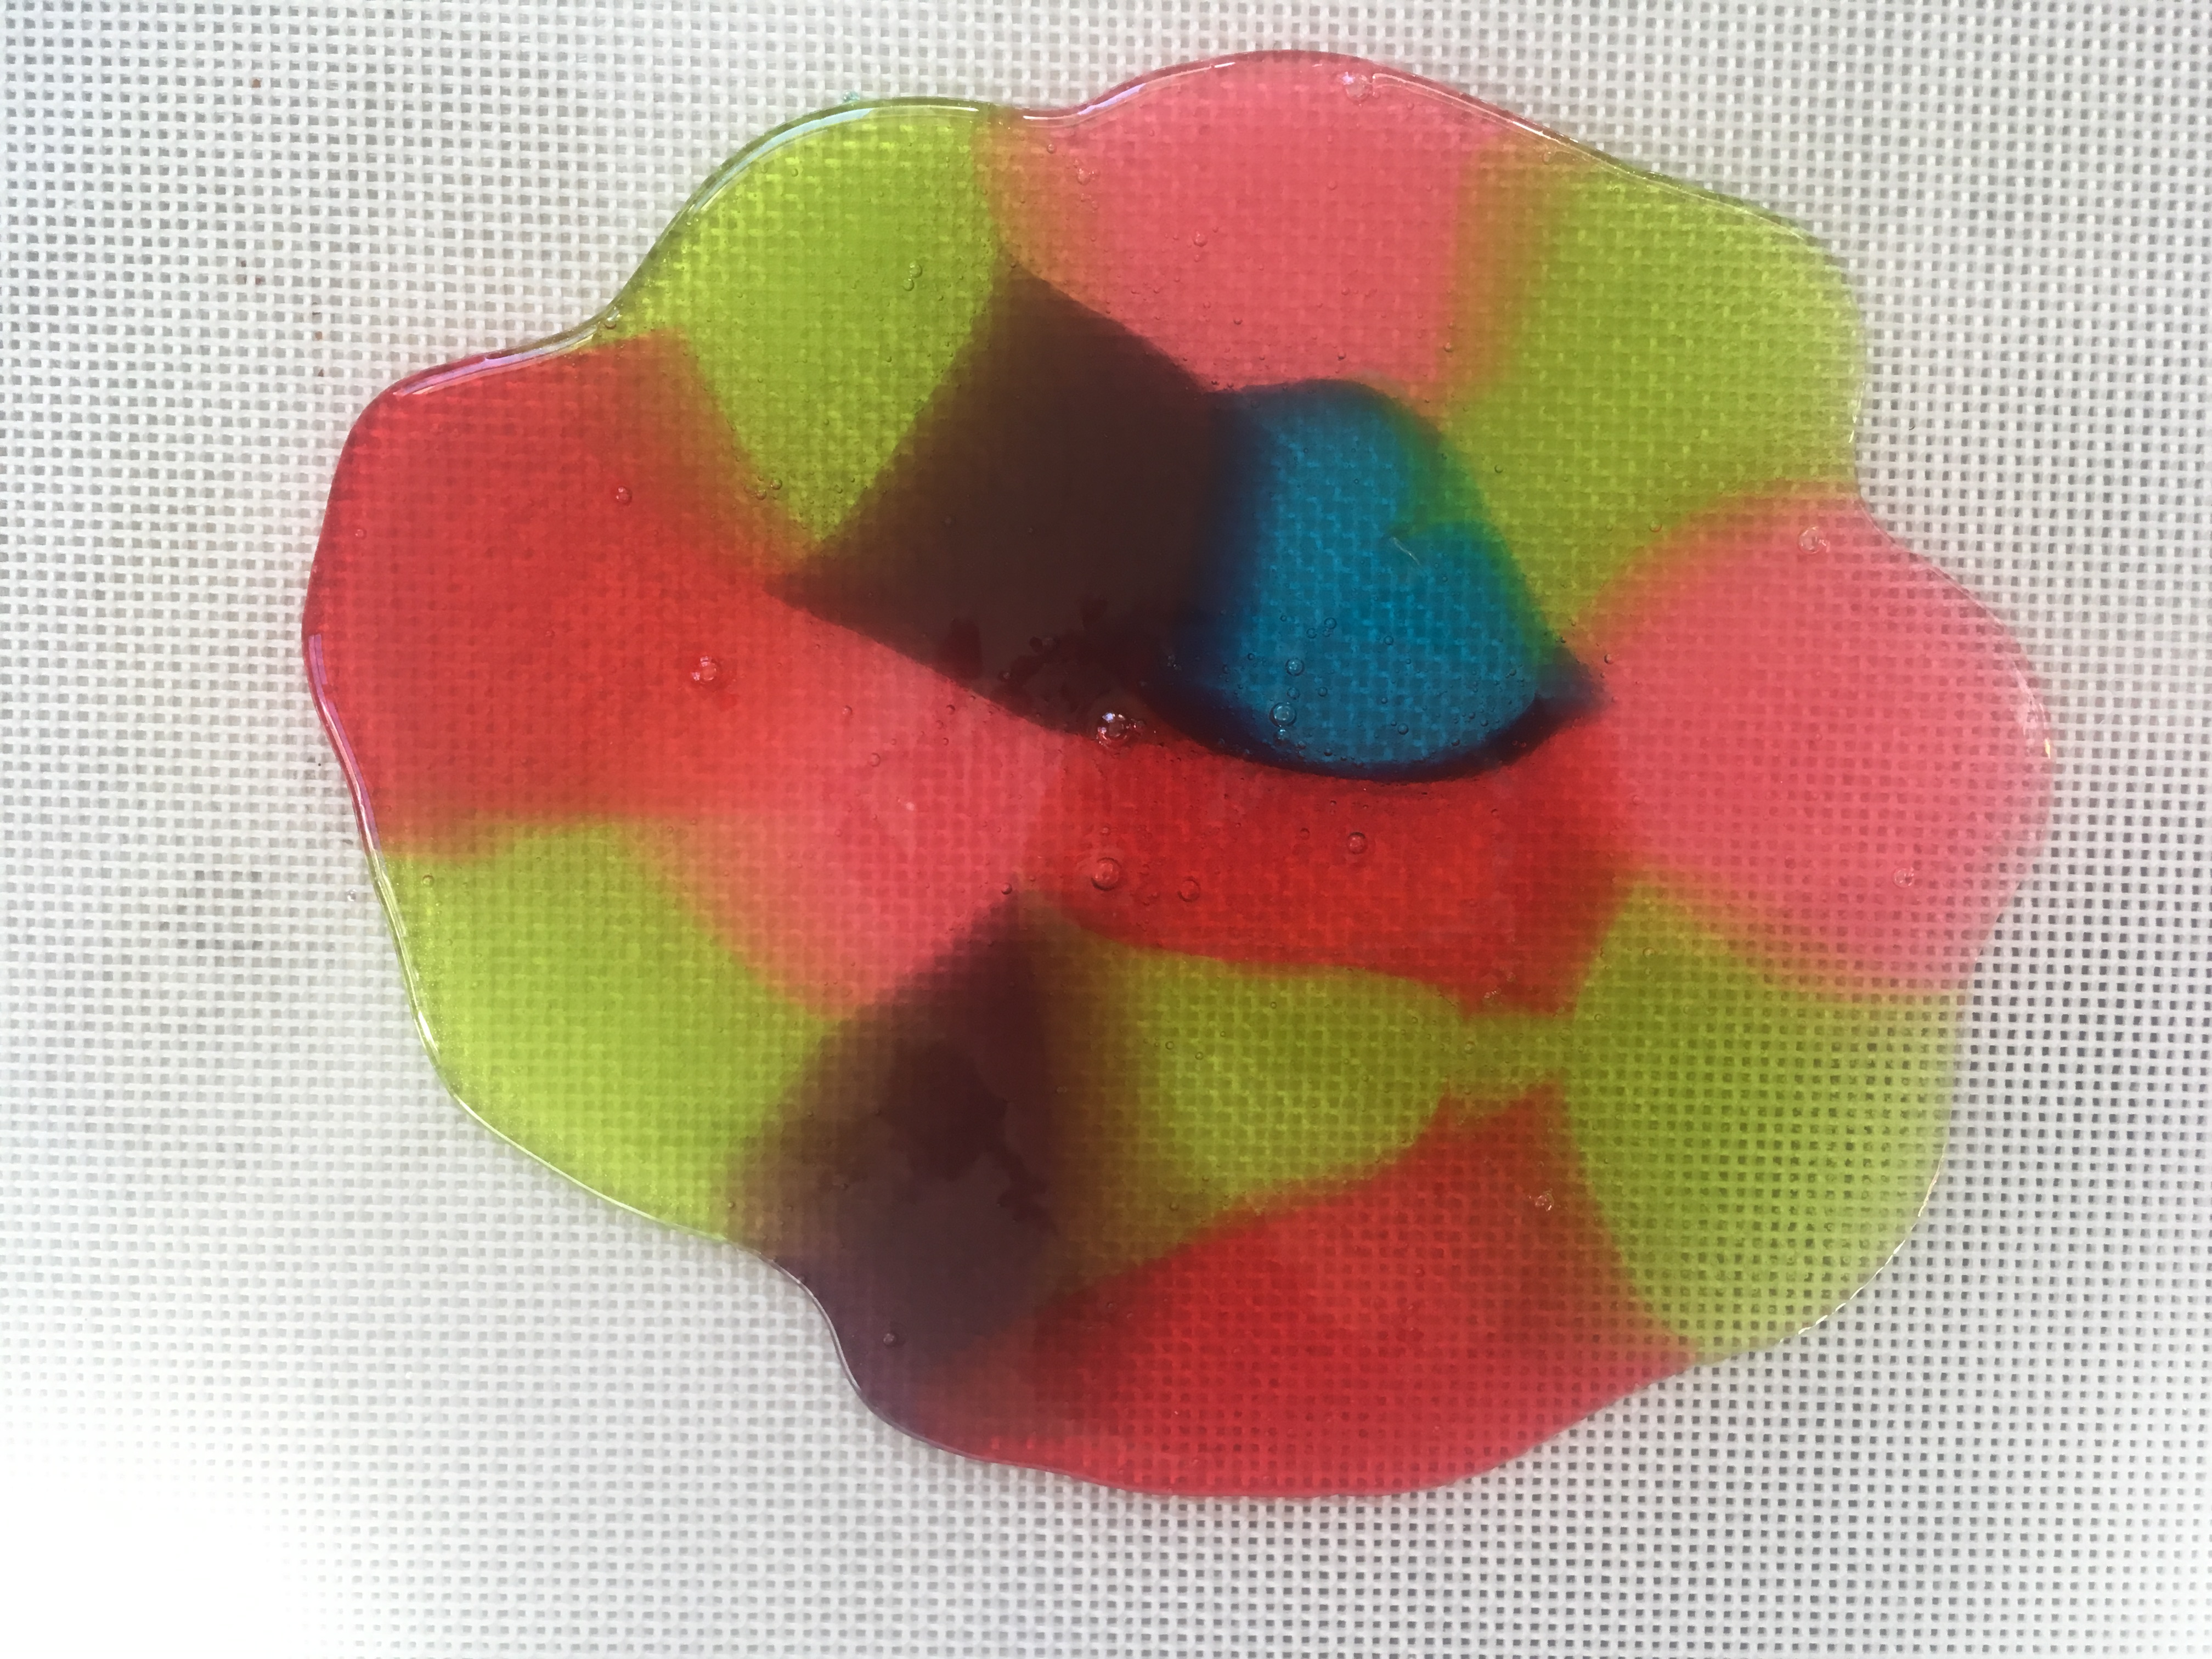
- Remove the candy from the oven. Tilt the baking sheet, if needed, to fill gaps.
- Use the spatula to score (make lines in) the candy, creating whatever shapes/sizes you need.
Stained Glass Candy “STEAM Lab for Kids” Quarry Books 2018
- When the candy has cooled, snap it carefully along the lines you made. (See photo at the top of this post.)
- Eat your creations, or use them to decorate some edible architecture.

Stained Glass Candy “STEAM Lab for Kids” Quarry Books 2018
- Try crushing the candy before you melt it for different visual effects. What else could you try?
Stained Glass Candy “STEAM Lab for Kids” Quarry Books 2018
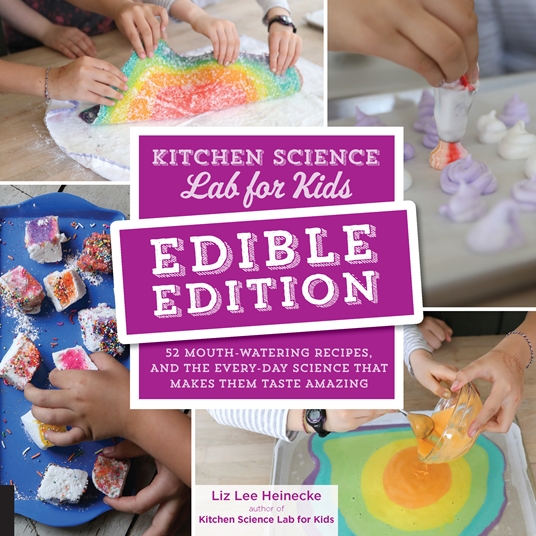
Kitchen Science Lab for Kids: Edible Edition
- by KitchenPantryScientist
Seven weeks from today, my new book “Kitchen Science Lab for Kids: Edible Edition” hits shelves everywhere books are sold, and there are some great pre-order sales going on now! Kitchen Science Lab for Kids, Edible Edition gives you 52 delicious ideas for exploring food science in your own kitchen by making everything from healthy homemade snacks to scrumptious main dishes and mind-boggling desserts.
Here’s a sneak peek into the book….
When you step into your kitchen to cook or bake, you put science to work. Physics and chemistry come into play each time you simmer, steam, bake, freeze, boil, puree, saute, or ferment food.
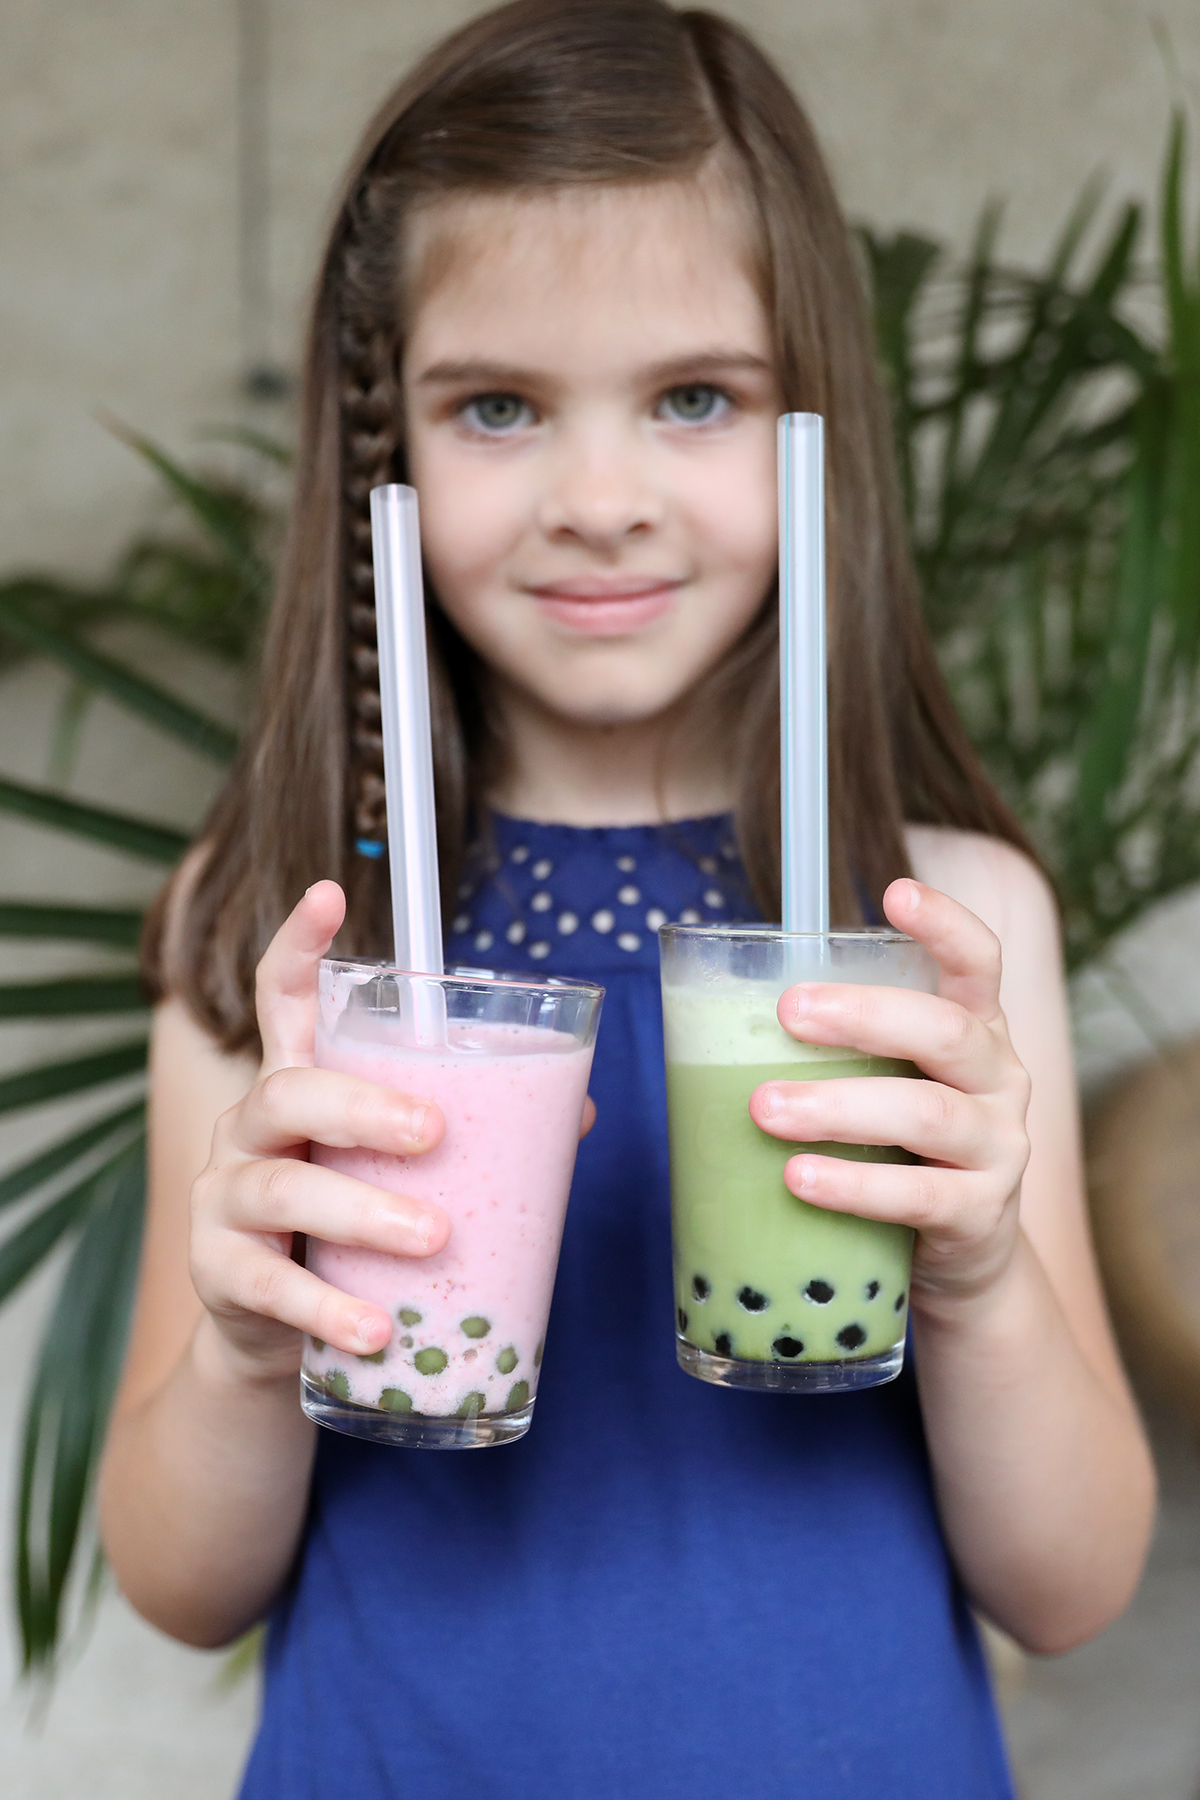
Make boba smoothies to learn about tapioca science. (Image from Kitchen Science Lab for Kids: Edible Edition 2019)
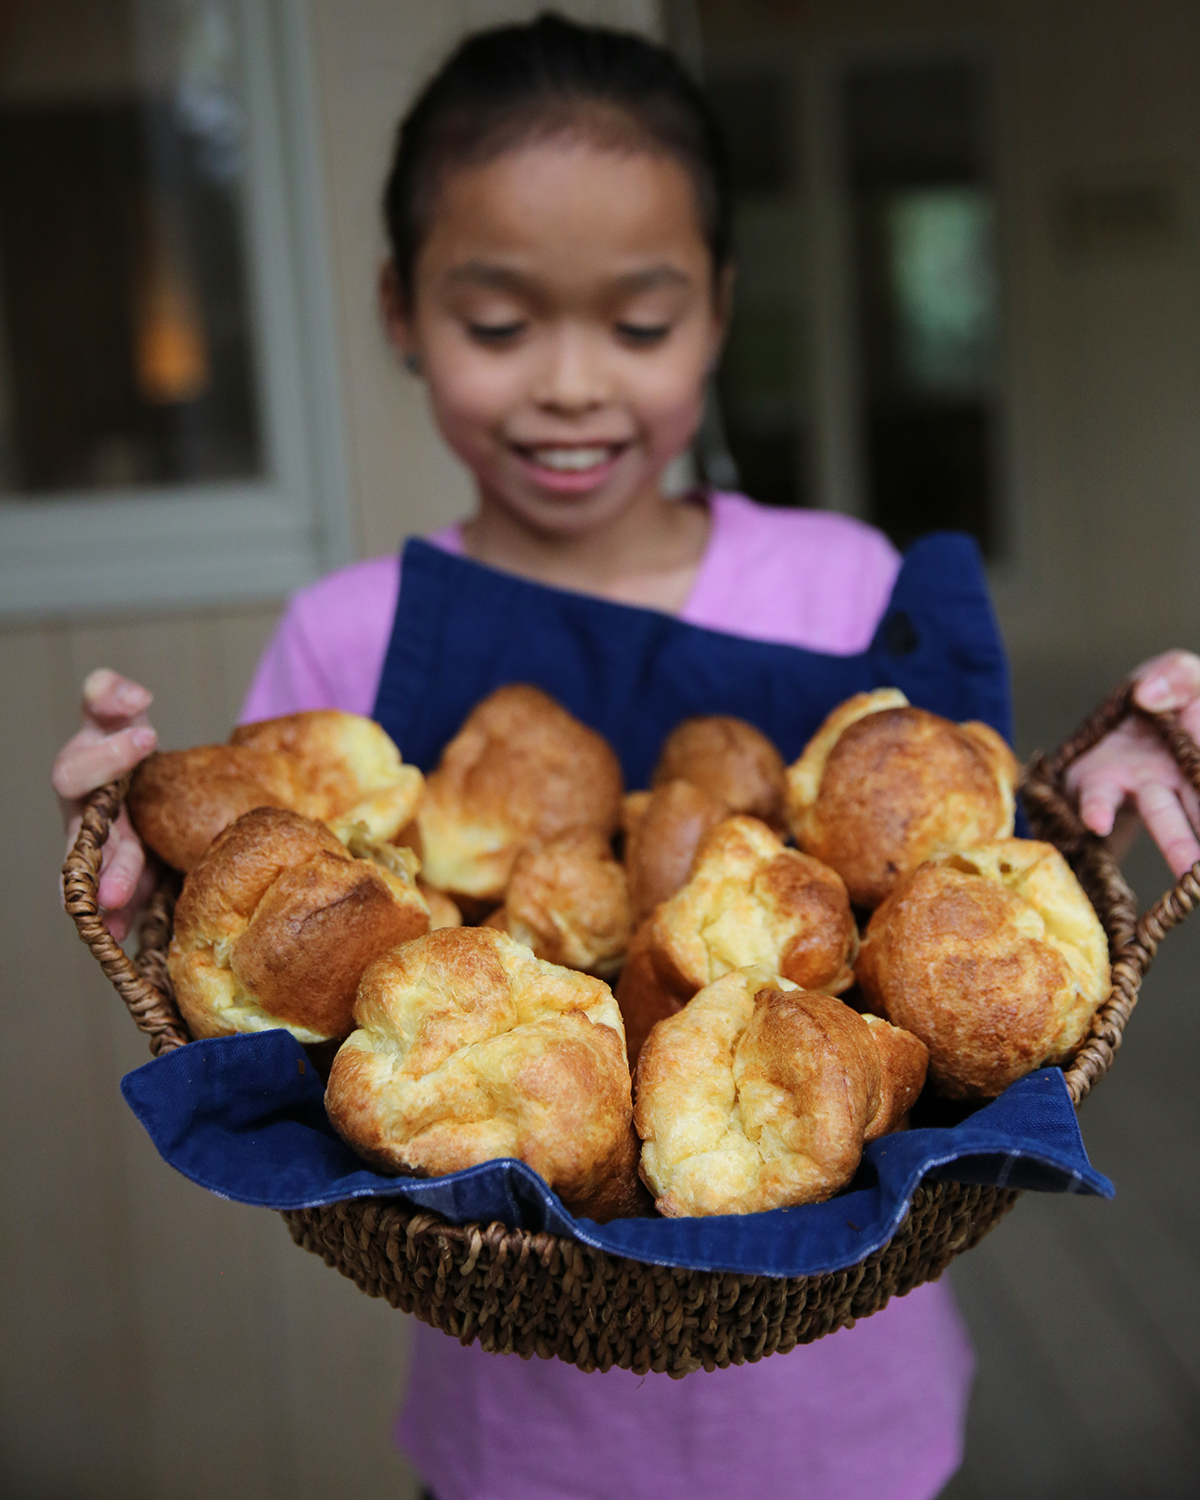
Use steam pressure to make delicious popovers expand like balloons! (Image from Kitchen Science Lab for Kids: Edible Edition 2019)
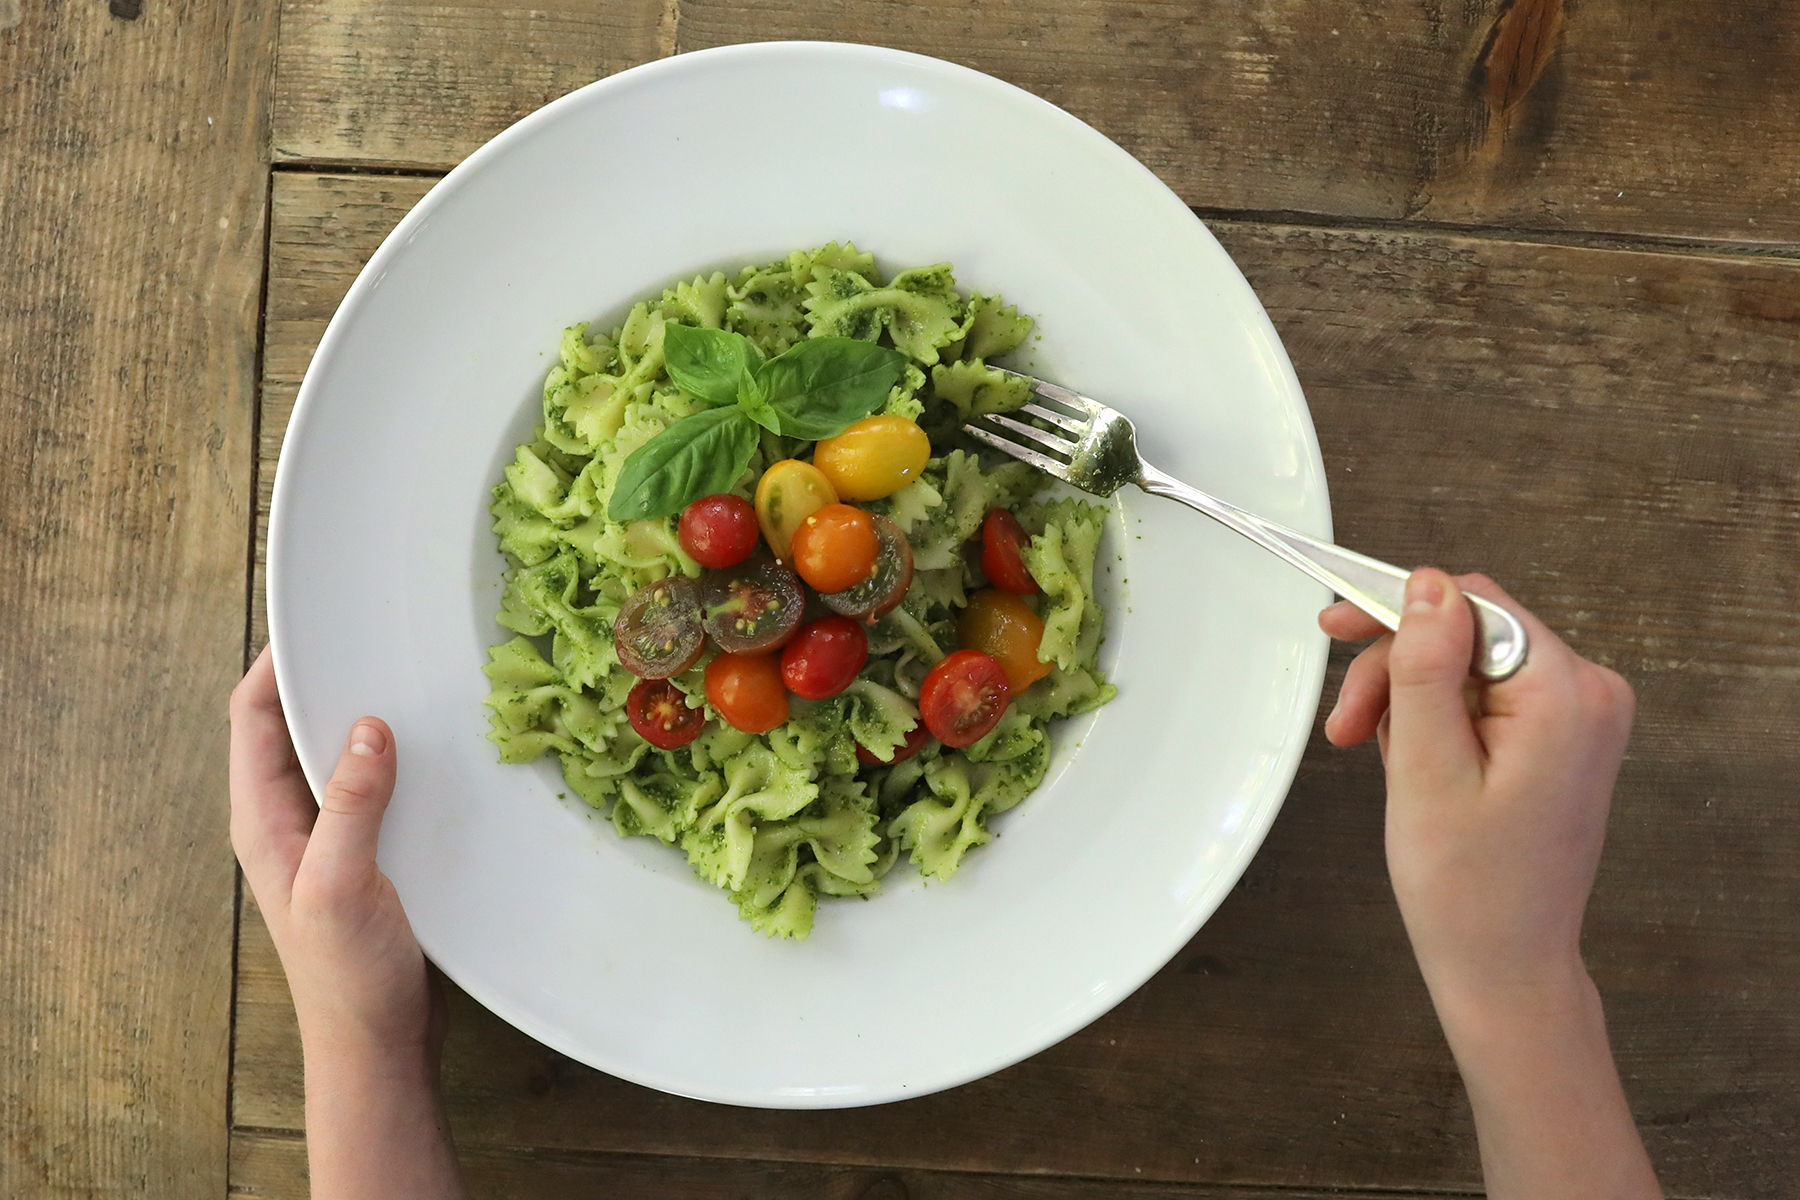
Homemade pesto is a tasty emulsion! (Image from Kitchen Science Lab for Kids: Edible Edition 2019)

Simple freezer sorbet is a mouth-watering way to explore crystal formation in sweet syrups! (Image from Kitchen Science Lab for Kids: Edible Edition 2019)
Knowing something about the physics, biology, and chemistry of food will give you the basic tools to be the best chef you can be. The rest is up to you!
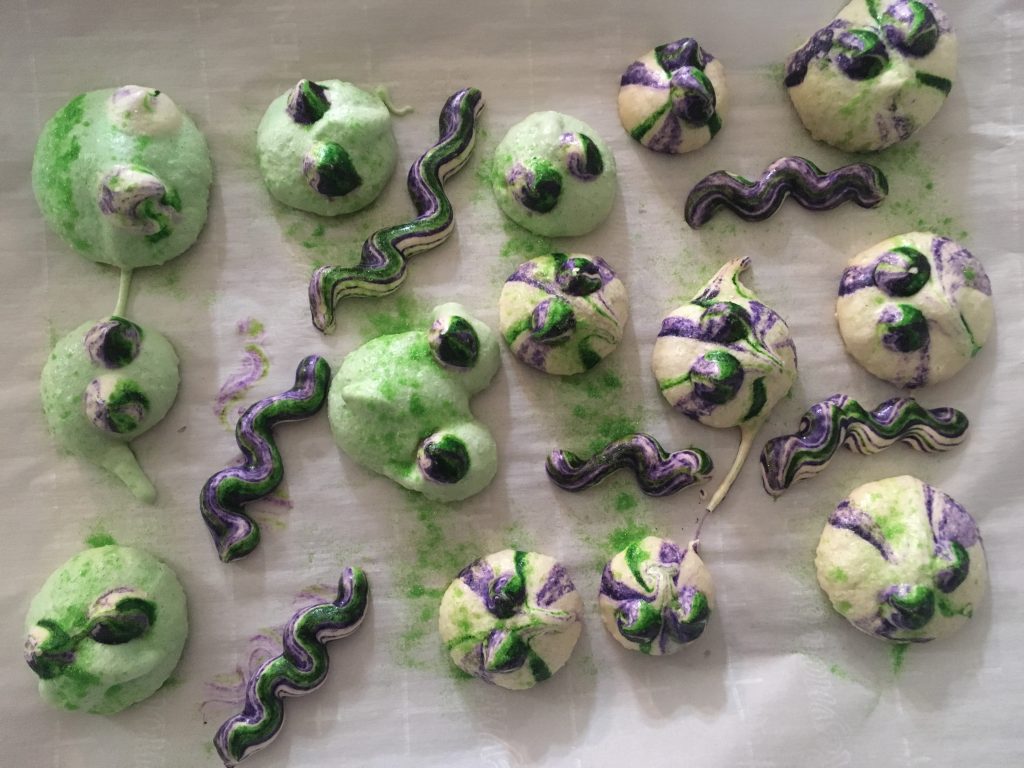
Halloween Meringues
- by KitchenPantryScientist
Eggs and sugar have great chemistry. Mix them together to create these sweet, crunch Halloween treats with a recipe from my upcoming book “Kitchen Science Lab for Kids: Edible Edition.“
They’ll take a few hours to bake, so plan ahead for this fun, edible science project.
KitchenPantryScientist.com Halloween meringues
Meringues are simply egg whites whipped into sugary foams. As you whip air into the mix, glue-like egg white proteins stick to the bubbles, stabilizing them to form a thick foam. The sugar you add combines with water from the eggs to form a sweet syrup.
When you bake meringue at a low temperature for a long period of time, the sugar and protein are transformed from an elastic goo to a glassy state, creating a crunch mouthful of bubbles.
Hard meringues are made using ¼ cup sugar per egg white, with a pinch of cream of tartar. Don’t skip the cream of tartar (an acid.) It helps stabilize the egg whites in the meringue.
To make Halloween Meringues, you’ll need:
3 egg whites from extra large eggs
1/8 tsp cream of tartar
¾ cup granulated sugar
1/4 tsp Vanilla
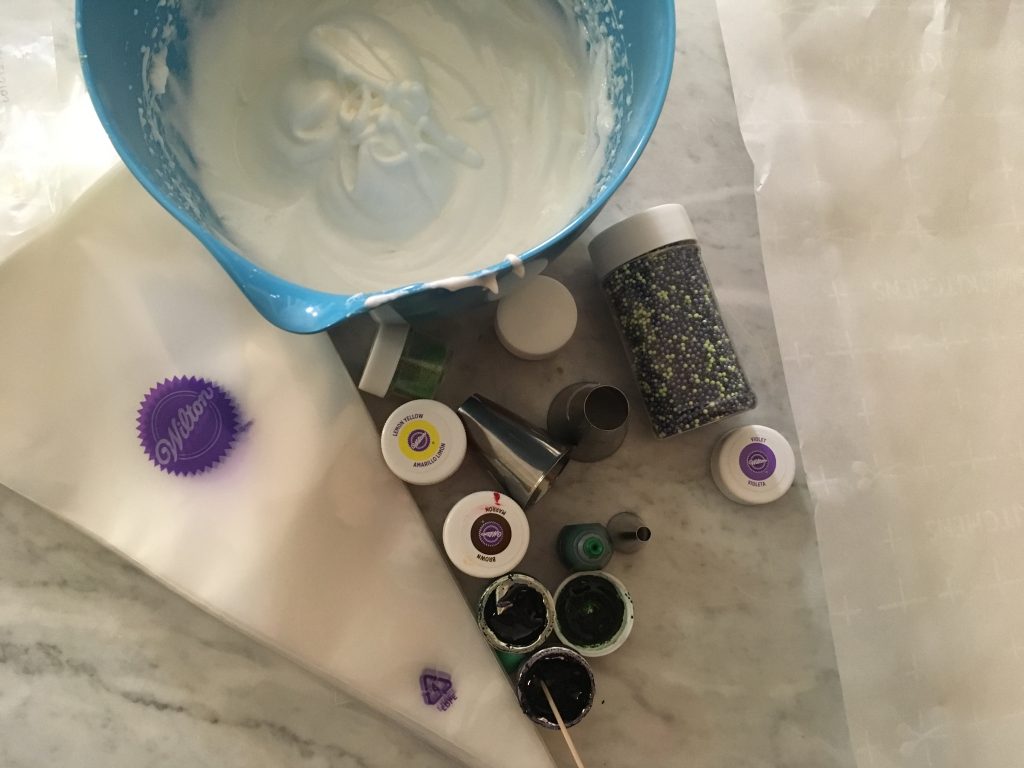
Food coloring (gel works best)
Toothpicks
Sprinkles or dusting sugar (optional)
Parchment paper
Stand mixer or hand mixer
2 baking sheets
Pastry bags or large plastic zipper bags with the corners cut off
Round piping tips for pastry bag, if you have them
Recipe:
1. Pre-heat oven to 200 degrees F.
2. Line two baking sheets with parchment paper.
3. Beat three egg whites on medium until they start to foam.
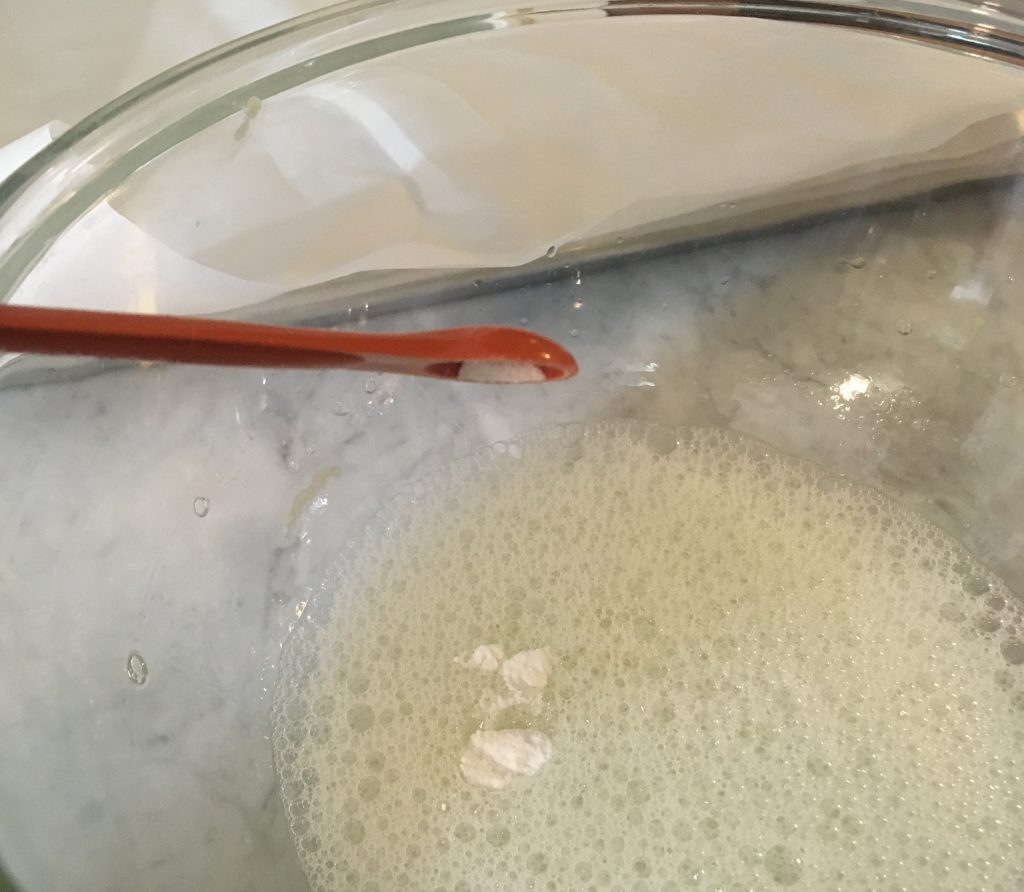
4. Add 1/8 tsp. cream of tartar and continue to beat the egg whites, increasing the speed to high.
5. When the foam gets thicker enough to form soft peaks, add 3/4 cup sugar, a tablespoon or so at a time as you beat the eggs. Add vanilla.
6. Continue beating the mixture until stiff, glossy peaks with rounded tips form. Don’t over-beat the meringue.
7. Add a round tip to the pastry or plastic bag. Fill the bag with the meringue you made.
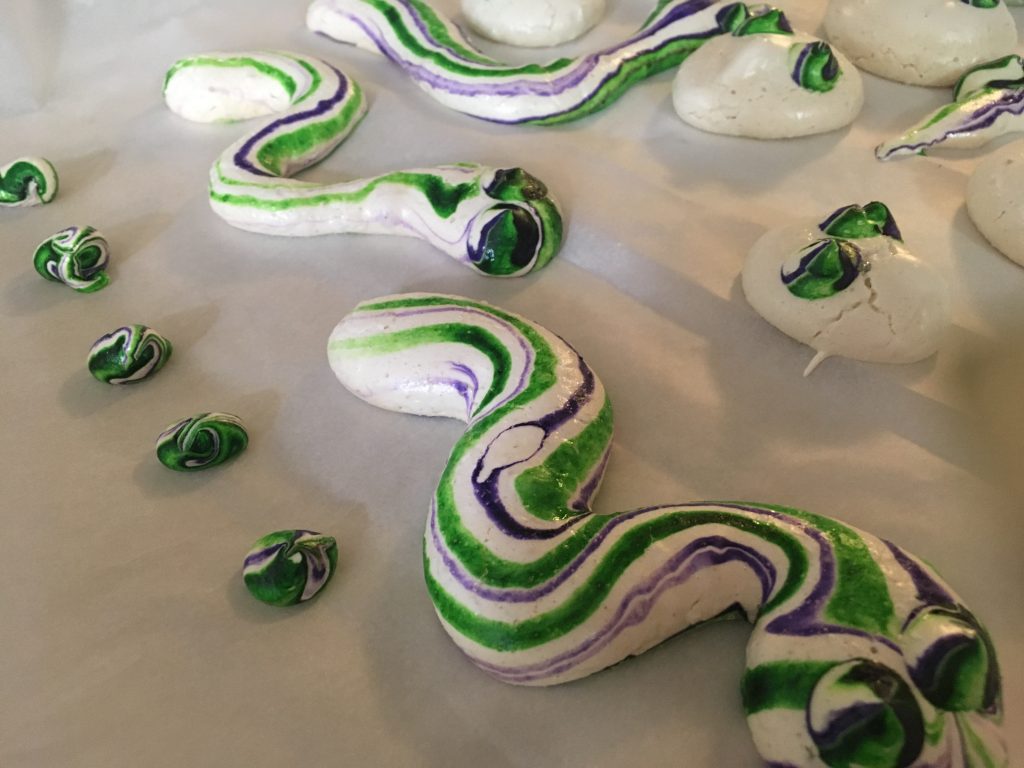
8.Use the bag and tip to pipe half of the meringue into blobs. You can color it with food coloring before piping it, if you wish.
9. Make some colorful streaks on the meringues by using a toothpick to smear food coloring on the inside of the pastry tip before putting it in the bag and piping the meringue. A small tip can be used to create eyes for the blobs, snakes and worms, or you can use sprinkles and dusting sugar to decorate.
10. Bake the meringues for 1-2 hours, until they feel dry and let them cool.
KitchenPantryScientist.com
Edible Water Balloons (and popping boba)
- by KitchenPantryScientist
Sodium alginate (Say it like you say algae!) is a substance found in the cell walls of brown algae, including seaweeds and kelp. Its rubbery, gel-like consistency may be important for the flexibility of seaweed, which gets tossed around on ocean waves.
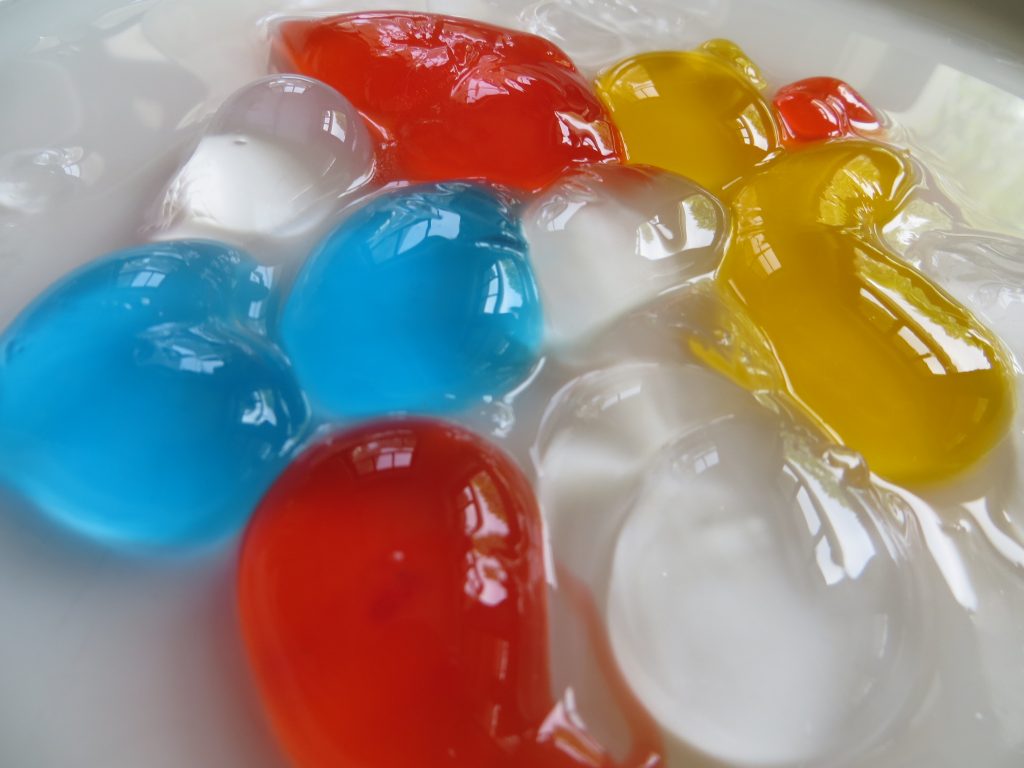
Edible Water Balloons- KitchenPantryScientist.com
Here on dry land, you can use sodium alginate to make edible balloon-like blobs that are liquid in the middle. We can thank scientists for this delicious project, since they discovered that a chemical reaction between sodium alginate and calcium causes the alginate to polymerize, or form a gel. In this experiment, the gel forms on the outside of a sodium alginate blob, where the chemical reaction is taking place. The inside of the blob remains liquid!
No heat is required for this experiment, making it safe and fun for all ages!
Sodium alginate and calcium lactate can be tricky to find at the grocery store, so you’ll probably have to order them online. But they’re not very expensive, and you’ll have lots of fun playing with them!
You’ll need:
-a blender or hand blender (parental supervision required for small children)
-1/2 tsp sodium alginate
-2 tsp calcium lactate
-flavored drink drops, like Kool-Aid or Tang (optional)
-water
-a spoon
-squeeze bottle or syringe for popping boba*
You can make these with juice, but if there is any calcium in the juice, you may end up with foam in your blender, since it may start to polymerize the sodium alginate when you blend it in.
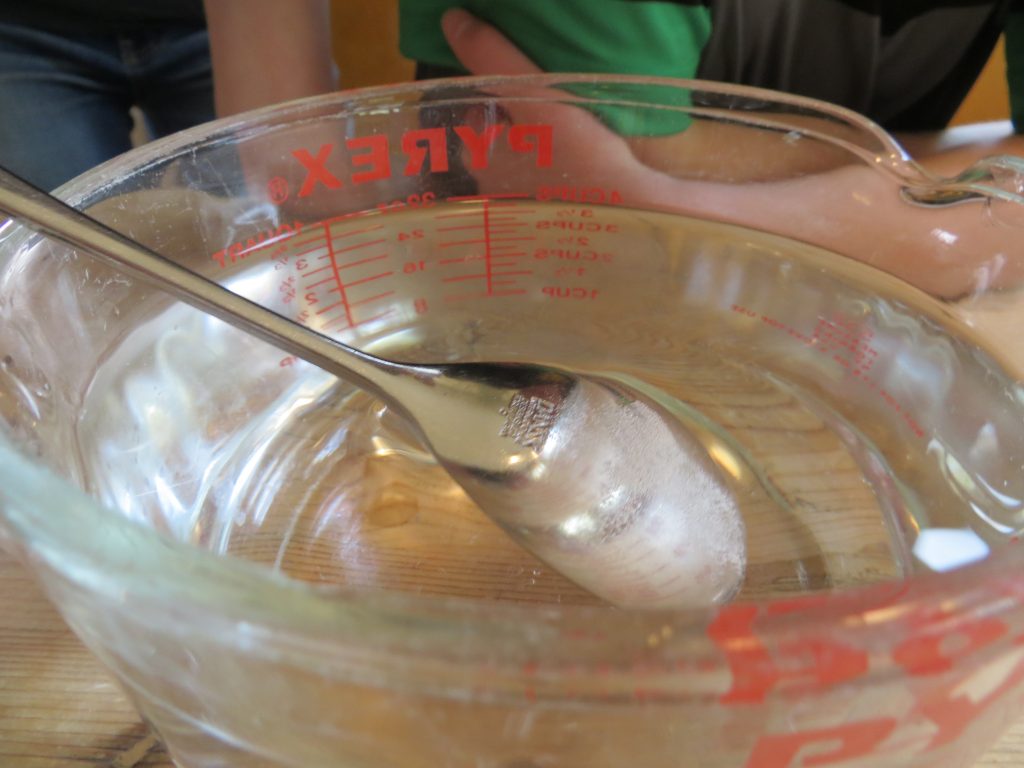
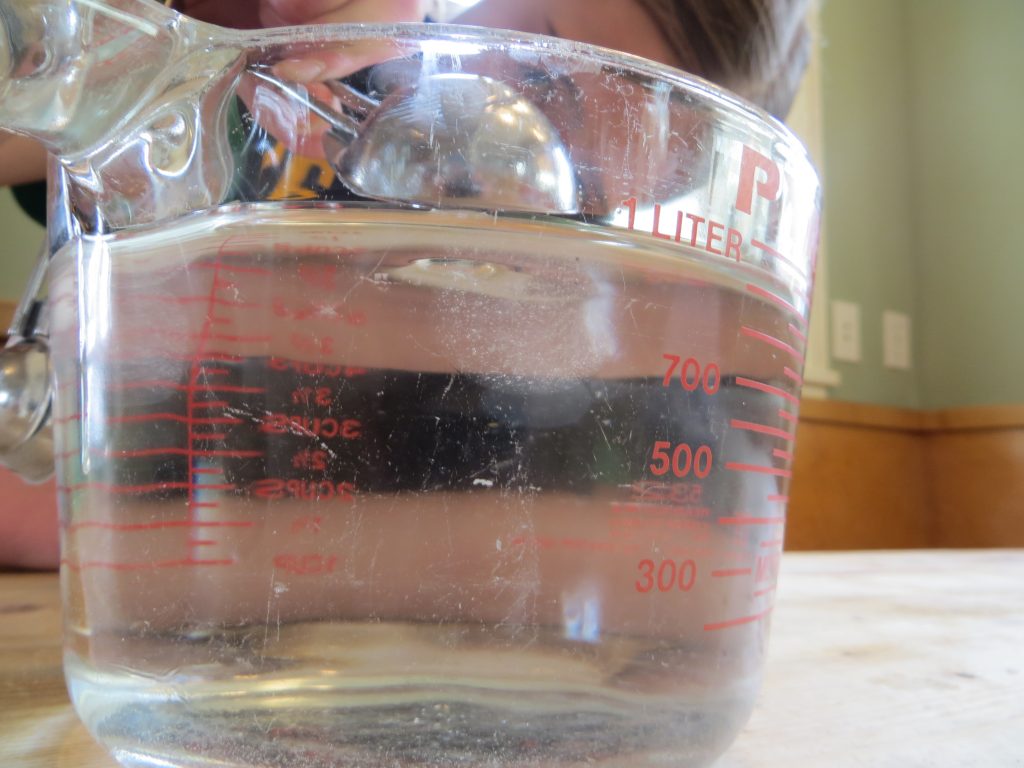
- Add 1 and 1/2 cup water (or calcium-free juice) to the blender.
- To the water, add 1/2 tsp. sodium alginate.
- Blend for about a minute, and let rest for 15 or 20 minutes, or until the bubbles are gone.
- If you want to add flavor, divide the sodium alginate solution into small containers and stir in the flavor, like a squirt of Kool-Aid liquid.
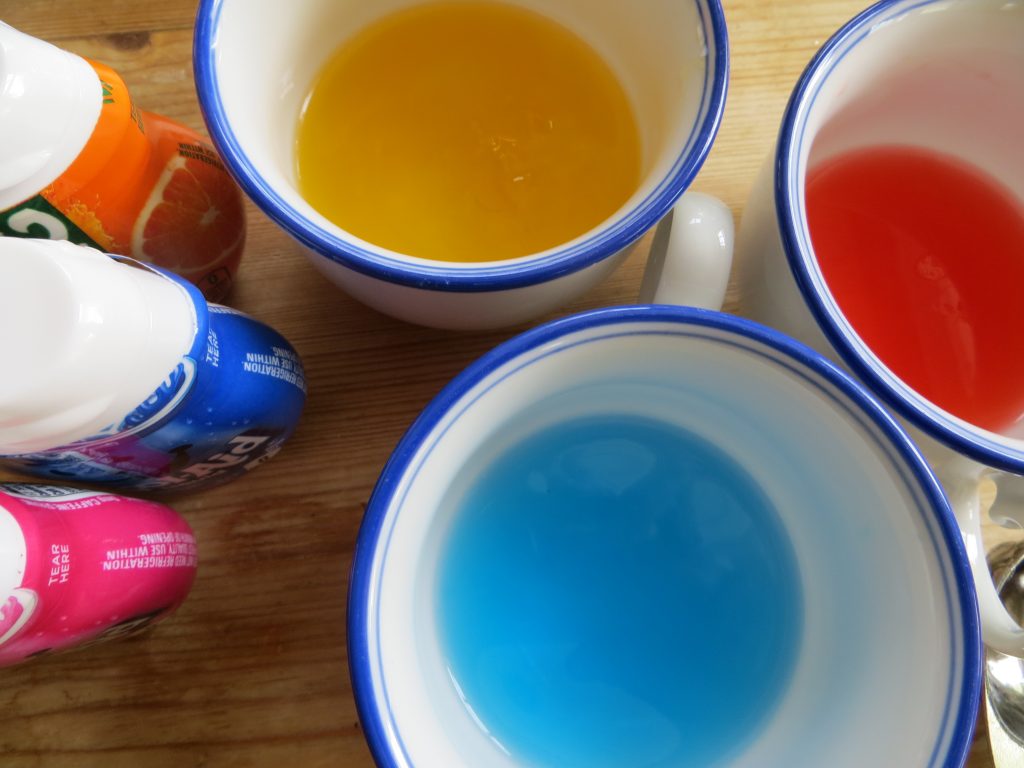
Add liquid drink drops to add flavor and color (KitchenPantryScientist.com)
- Add 4 cups of water to a clean, clear glass bowl or container.
- To the water, add 2 tsp. calcium lactate and mix until completely dissolved. This is your calcium lactate “bath.”
- To make edible water balloons, fill a spoon, like a tablespoon, with the sodium alginate solution, and slowly lower it down into the calcium lactate bath. You’ll see a gel begin to form. Gently turn the spoon so the sodium alginate falls off the spoon and into the calcium lactate.
Gently turn the spoon upside down.
- After about 30 seconds, you’ll be able to see a pale blob in the water. Leave it there for three or four minutes. You can make several edible balloons at once.
After a few minutes, you’ll see a pale blob.
- When the blobs are ready, use a spoon to carefully remove them from the bath and put them in a clean bowl of water for a few seconds to rinse them off.
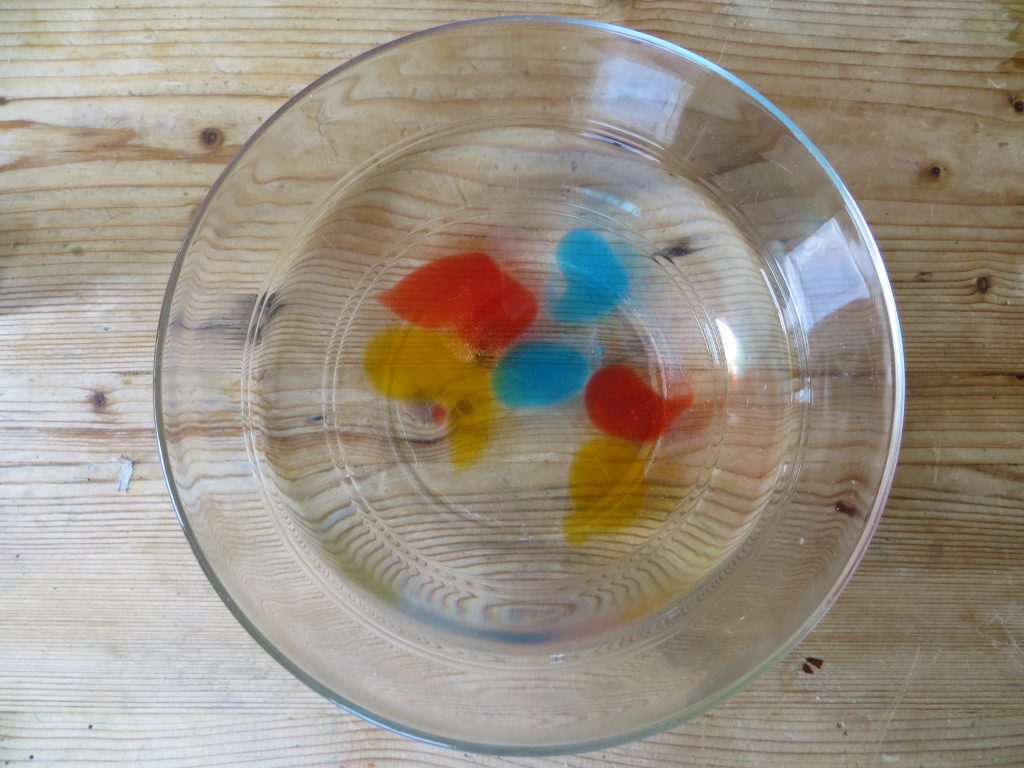
Rinse balloons off in water.
- Put your edible balloons on a plate and taste them. What do you think?
- *To make popping boba, add the fruit-flavored sodium alginate to a squeeze bottle or syringe. Drip the flavored sodium alginate into the calcium lactate as fairly large drops. It may take some practice to get uniform drops of the size you desire. When they’re solid enough to remove from the calcium lactate, rinse them gently and add them to your favorite drink. A small sieve works well for rinsing.
Now that you know how to polymerize sodium alginate with calcium, what else could you try? Can you make a foam in the blender? Can you make gummy worms in the bath using the rest of your sodium alginate solution? Can you invent something entirely new??? Try it!
Thank you to Andrew Schloss’s book Amazing (Mostly) Edible Science for the experiment inspiration! Adding the Kool-Aid and Tang drops to add a little flavor and color was our idea! (This blog post was first published on KitchenPantryScientist.com on May 3rd, 2016 and revised to add popping boba July 24th, 2018.)
Summer Food Science: Sorbet (No ice cream freezer needed!)
- by KitchenPantryScientist
Take your summer food game up a notch using… science! Sorbet recipe below. Vinaigrette recipe is in the post below this one.
&
Simple Freezer Strawberry Sorbet (adapted from Epicurious.com)
30 minutes hands-on prep time, 8 hours start to finish
*Parental supervision required for boiling sugar syrup
You’ll need:
a shallow dish
1 quart strawberries
1/3 cup lemon juice
1/3 cup orange juice
1 cup sugar
2 cups water
What to do:
- Make a sugar syrup by bringing 1 cup sugar and 2 cups water to a boil in a heavy sauce pan. Boil for 5 minutes.
- Puree strawberries in a blender or food processor until smooth.
- Add strawberries, lemon juice and orange juice to the sugar syrup.
- Pour mixture into a shallow dish and cool for 2 hours in the refrigerator.
- Put the chilled sorbet mix in the freezer for 6 hours, stirring every hour.
- Enjoy your sorbet!
The Science Behind the Fun:
In sorbet, sugar acts as an antifreeze agent, physically getting in the way of ice crystal formation to keep crystals small, so that you don’t end up with one big chunk of ice. Pre-chilling the mixture before freezing it allows it to freeze faster, which also encourages smaller crystals to form.
The Science of Emulsions: Vinaigrette and Mayonnaise
- by KitchenPantryScientist
“When I wasn’t at school, I was experimenting at home, and became a bit of a Mad Scientist. I did hours of research on mayonnaise, for instance, and although no one seemed to care about it, I thought it was utterly fascinating. When the weather turned cold, the mayo suddenly became a terrible struggle, because the emulsion kept separating, and it wouldn’t behave when there was a change in the olive oil or the room temperature. I finally got the upper hand by going back to the beginning of the process, studying each step scientifically, and writing it all down. By the end of my research, I believe, I had written more on the subject of mayonnaise than anyone in history. I made so much mayonnaise that Paul and I could hardly bear to eat it anymore, and I took to dumping my test batches down the toilet. What a shame. But in this way I had finally discovered a foolproof recipe, which was a glory.” Julia Child, from My Life in France

Julia’s secret for fool-proof mayo? Beat the mixture over a bowl of hot water to get the oil and eggs to form an emulsion, which is a mixture of two thing which are normally immiscible, like water and oil. In an emulsion, a bunch of one type of molecule will actually surround individuals or small groups of the other type of molecule (think ring-around the rosy with one or two people in the middle who would rather not be there.)
When you’re trying to make an emulsion, it also helps to add a mediator called a surfactant to get between and interact with the immiscible molecules to stabilize the mixture. In a vinaigrette prepared using oil, mustard and vinegar, the proteins in the mustard act as surfactants.
To make delicious vinaigrette:
- Using a fork or wire whisk, mix together: 1 Tbsp. vinegar and 1 Tbsp. mustard.
- Add 3 Tbsp. oil (olive, vegetable or your favorite), drop-by-drop, whisking until you see an emulsion form! You can tell when an emulsion begins to form, because the mixture will start to look lighter-colored and thicker as the molecules are rearranged and reflect light differently!

Try some variations on these kitchen experiments. Does it work better to use a cold egg, room temperature egg, or warm egg? What happens if you try to make mayo by setting your mixing bowl in a bowl of ICE water? Do you get an emulsion?

Can you see the difference between batches of vinaigrette? One was whipped over a bowl of ice water and the other over warm water.
When whipping up mayonnaise, adding a little water to the eggs before adding the oil helps make some of the proteins in the eggs more available to act as surfactants. Of course, adding a little mustard helps too and tastes great!

Here’s the New York Times recipe we used to make mayonnaise:
- 1 large egg yolk, at room temperature
- 2 teaspoons lemon juice
- 1 teaspoon Dijon mustard
- 1/4 teaspoon kosher salt
- 1 teaspoon cold water
- 3/4 cup neutral oil such as safflower or canola

- In a medium bowl, whisk together the egg yolk, lemon juice, mustard, salt and 1 teaspoon cold water until frothy. Whisking constantly, slowly dribble in the oil until mayonnaise is thick and oil is incorporated. When the mayonnaise emulsifies and starts to thicken, you can add the oil in a thin stream, instead of drop by drop.
*Remember that a bacteria called Salmonella enteriditis can lurk in raw eggs and make you sick, so it’s better to use pasteurized eggs for recipes like mayonnaise, where you don’t cook the eggs.
As Julia Child would say, “Bon Appetit!”
Kitchen Science
- by KitchenPantryScientist
“Are you a good cook?” was the first thing Dr. Tsneo Suzuki asked when I sat down in the office next to his cancer research lab at the University of Kansas. I stared at the picture of his wife, who I later learned had passed away from breast cancer, and wondered whether I should be offended.
After all, I was in my twenties and had five years of molecular biology experience under my belt. But I understood why he asked the question. Once you figure out how to test a hypothesis, most science experiments involve following recipes, which scientists call protocols. Generally, if you can read directions and mix things together in the correct order, in the right proportions, you can do things like amplify DNA and clone genes into bacteria.
So I truthfully answered “Yes, I’m a pretty good cook,” and got the job.

Food preparation is like a science experiment. If you can follow a recipe, you should get something close to what you set out to make, because often the ingredients will interact with each other to make something new. This is the very definition of a chemical reaction. Everything you cook with, from water to baking soda, is just a collection of molecules.
Here’s a collection of some food science experiments on my website. Since I love to cook, I hope to add more in the future! Leave a comment if you have other favorite kitchen science experiments, and I’ll try to add them to the list.
Testing Foods for Starch– Add a drop of iodine and watch for color change to detect starch.
Crock Pot Microbiology: Making yogurt from scratch is a delicious experiment
Yeast Experiment: Pyramids, Pasteur and Plastic Baggies– Grow yeast in a plastic bag to see how they make bread rise.
Emulsions: Mayonnaise and Vinaigrette– Mix the un-mixable using surfactants.
Curds and Whey: Make glue and plastic from milk and vinegar.
Gluten Ball– Explore the protein that makes bread chewy.
Red Cabbage Juice CO2 experiment– Use the pH-sensitive pigment in red cabbage to illustrate how CO2 can acidify liquids (and why soda is bad for your teeth.)
Homemade Petri Plates: test surfaces around your kitchen and house for microbes. Use to test fingers before washing, after washing with water alone, after washing with soap, and after using hand sanitizer.
So remember, cooking can make you a better scientist, and doing science can make you a better cook.
FRESH
- by KitchenPantryScientist
 Happy Earth Day! This weekend, we planted a garden. Few things make me happier than watching my kids digging in the dirt, planting things. Maybe it’s because I come from a long line of farmers, or maybe it’s the sun-warmed, homegrown tomato I can almost taste just by thinking about it.
One of the most interesting books I’ve read recently is Michael Pollan’s “Omnivore’s Dilemma,” which follows four meals from field to table (from McDonald’s to foraging for mushrooms and hunting a wild boar.) It reminds the reader of how disconnected we have become from the sources of our food. One of my favorite parts of the book talks about Joel Saletin, who is a seminal figure in the sustainable agriculture movement and probably the most famous farmer in America. His bio on the FRESH movie website says:
“Joel calls himself a grass-farmer, for it is the grass that transforms the sun into energy that his animals can then feed on. By closely observing nature, Joel created a rotational grazing system that not only allows the land to heal but also allows the animals to behave the way the were meant to – as in expressing their “chicken-ness” or “pig-ness”, as Joel would say.”
 Joel Saletin
 Ana Joanes
This week, Joel is in town with Ana Joanes, who has made a documentary called “FRESH” that celebrates the farmers, thinkers and business people across America who are re-inventing our food system. It’s about food, but it’s also about economics, community and social justice. Last weekend, I was lucky enough to meet both Ana and Joel while volunteering at one of Joel’s lectures and was impressed with their optimism and sense of humor. Ana recently told planetgreen.discovery.com “I just had a little girl. Her name is Maayan. And, as clichéd as it may sound, I just want to do right by her. I don’t know what reality she’ll face when she reaches adulthood, but I’m trying my best so she doesn’t have to pick up the pieces of our recklessness and inaction.”
I saw FRESH last night in Minneapolis and loved it! The movie is just 70 minutes long, but you will want to talk about it for two hours afterwards! Tonight’s the last night it’s showing, so if you’re in the Twin Cities, don’t miss it! You can order tickets here.
The movie brings up interesting points about monocultures, antibiotic resistance, high fructose corn syrup, the corn industry (which my grandparents’ farm in Iowa is a part of,) and beneficial bacteria. I’m planning to explore many of these issues on this blog by writing a weekly post about food science between science experiments! Stay tuned!