Tag: STEM’
Summer Food Science: Sorbet (No ice cream freezer needed!)
- by KitchenPantryScientist
Take your summer food game up a notch using… science! Sorbet recipe below. Vinaigrette recipe is in the post below this one.
&
Simple Freezer Strawberry Sorbet (adapted from Epicurious.com)
30 minutes hands-on prep time, 8 hours start to finish
*Parental supervision required for boiling sugar syrup
You’ll need:
a shallow dish
1 quart strawberries
1/3 cup lemon juice
1/3 cup orange juice
1 cup sugar
2 cups water
What to do:
- Make a sugar syrup by bringing 1 cup sugar and 2 cups water to a boil in a heavy sauce pan. Boil for 5 minutes.
- Puree strawberries in a blender or food processor until smooth.
- Add strawberries, lemon juice and orange juice to the sugar syrup.
- Pour mixture into a shallow dish and cool for 2 hours in the refrigerator.
- Put the chilled sorbet mix in the freezer for 6 hours, stirring every hour.
- Enjoy your sorbet!
The Science Behind the Fun:
In sorbet, sugar acts as an antifreeze agent, physically getting in the way of ice crystal formation to keep crystals small, so that you don’t end up with one big chunk of ice. Pre-chilling the mixture before freezing it allows it to freeze faster, which also encourages smaller crystals to form.
STEAM Lab for Kids: hot glue casting, candy molecules and tesselations
- by KitchenPantryScientist
Looking for fun, creative summer projects? I showed off some projects from STEAM Lab for Kids this morning on WCCO MidMorning!
CD Bots from “STEAM Lab for Kids”
- by KitchenPantryScientist
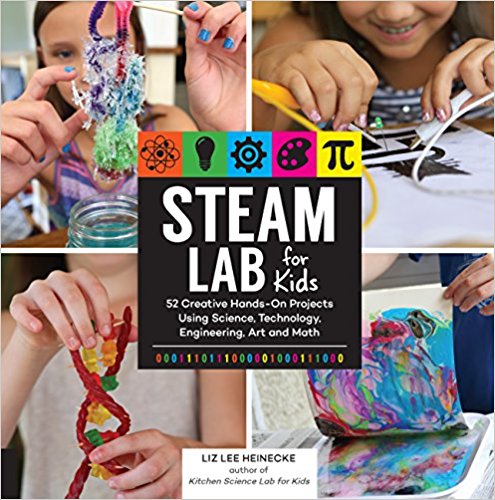
Robots took over the driveway last summer when we were photographing my new book “STEAM Lab for Kids: 52 Creative Hands-On Projects for Exploring Science, Technology, Engineering, Art and Math”
With a few supplies from your junk drawer and a few inexpensive tech supplies available online, kids can easily make their own CD Bots! Grab a copy of “STEAM Lab for Kids” for easy instructions, or figure out how to do it yourself by attaching a toy motor (connected to a battery) to a CD with toothbrushes glued to the bottom!
Have fun!
Balloon Rockets from “STEAM Lab for Kids”
- by KitchenPantryScientist
I took some behind-the-scenes video when we were photographing my new book “STEAM Lab for Kids” last summer. Here’s a fun engineering project from the book! #summer #fun #balloon #rockets #STEAM #STEM
Try it!
Rainbow Icicles -Winter Science for Kids
- by KitchenPantryScientist
Grab your coat and head outside to try this fun winter science project!
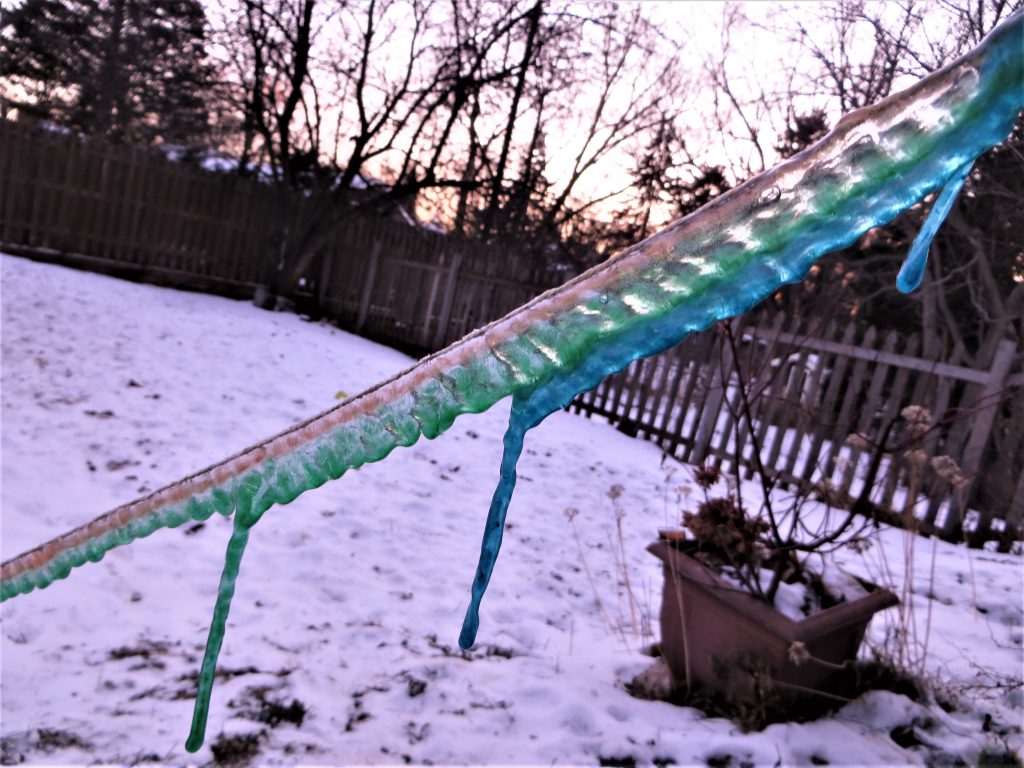
Rainbow Ice (kitchenpantryscientist.com)
You’ll need:
A large plastic zipper bag
Cotton kitchen twine
a toothpick or wooden skewer
ice-cold water
food coloring
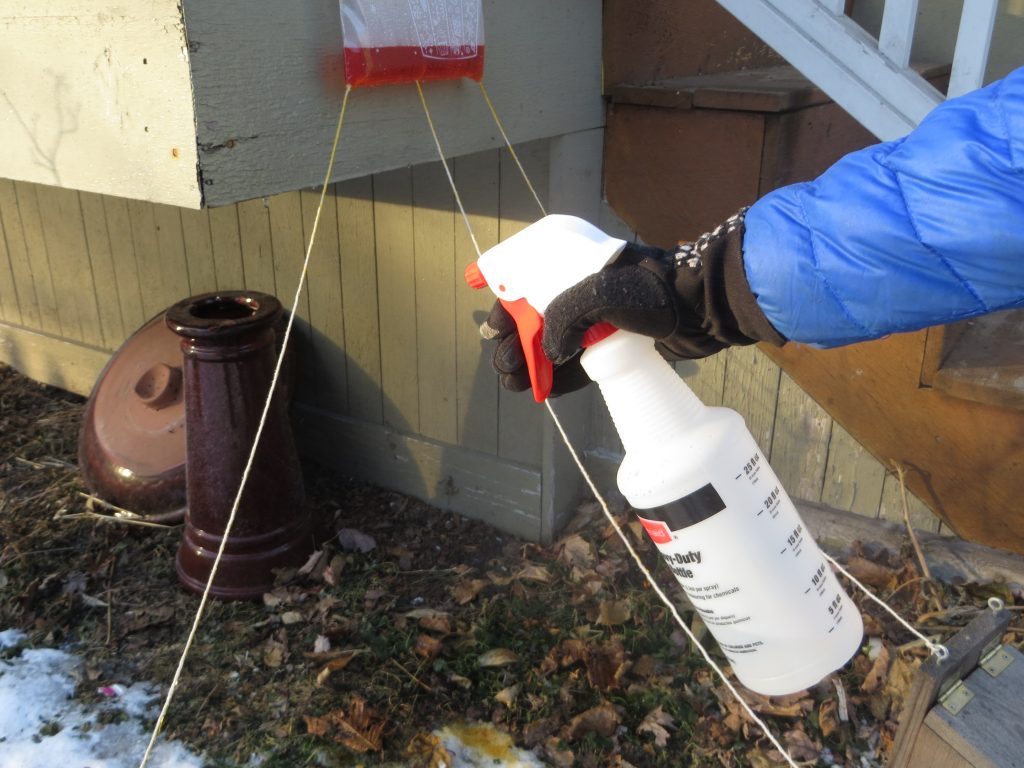
a spray bottle
a squeeze bottle or syringe (optional, but helpful)
a very cold day (below 10 degrees F works best, but you can try it on any day when it’s below freezing)
Note: This experiment takes lots of playing around and results will vary depending on how cold it is outside. Remind your kids (and yourself) to be patient and try it on a colder day if it doesn’t work the first time around! If the bag leaks too quickly, try making one with smaller holes around the string.
Rainbow Ice (kitchenpantryscientist.com)
What to do:
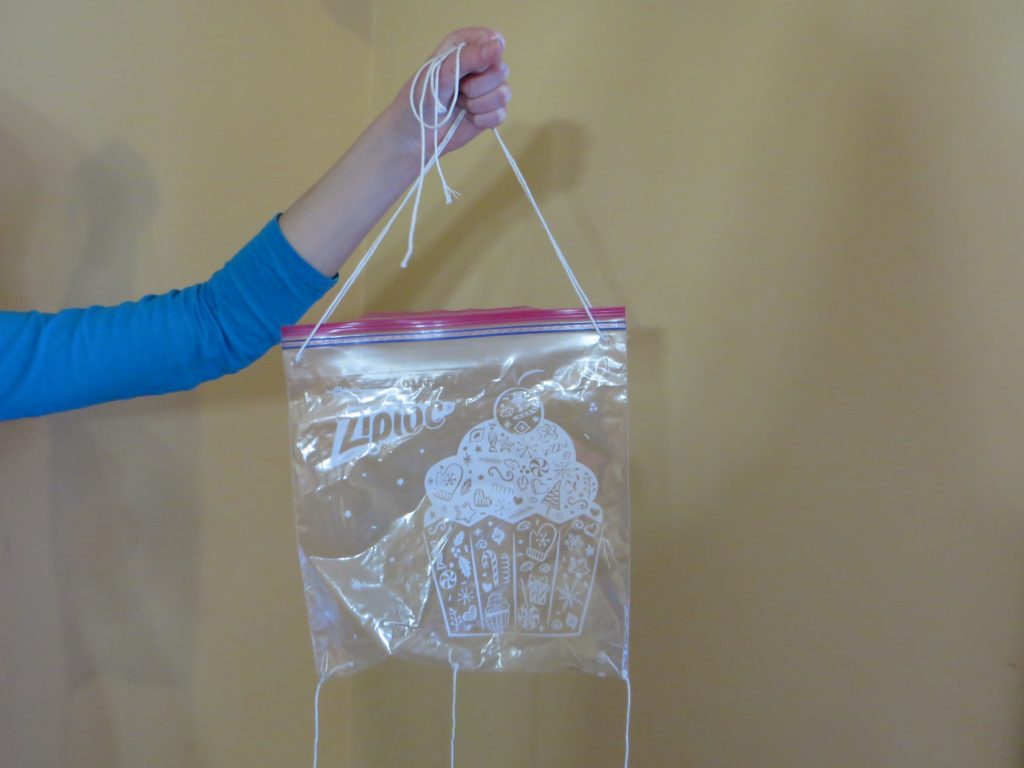
- Use a toothpick or skewer to poke 3 small holes in the bottom of a zipper plastic bag. Make one in the middle and one on each end.
- Cut three long (3 feet or so) pieces of kitchen twine and knot them at one end.
- Carefully thread the twine through the holes in the bag so that the knots are inside the bag to keep the strings from falling through. Try to keep the holes from getting too big, since the bag will be filled with water and you’ll want it to drip out very slowly around the string.
Rainbow Ice (kitchenpantryscientist.com)
4. Attach two more pieces of twine to each top corner of the bag (above the zipper) to use for hanging the bag
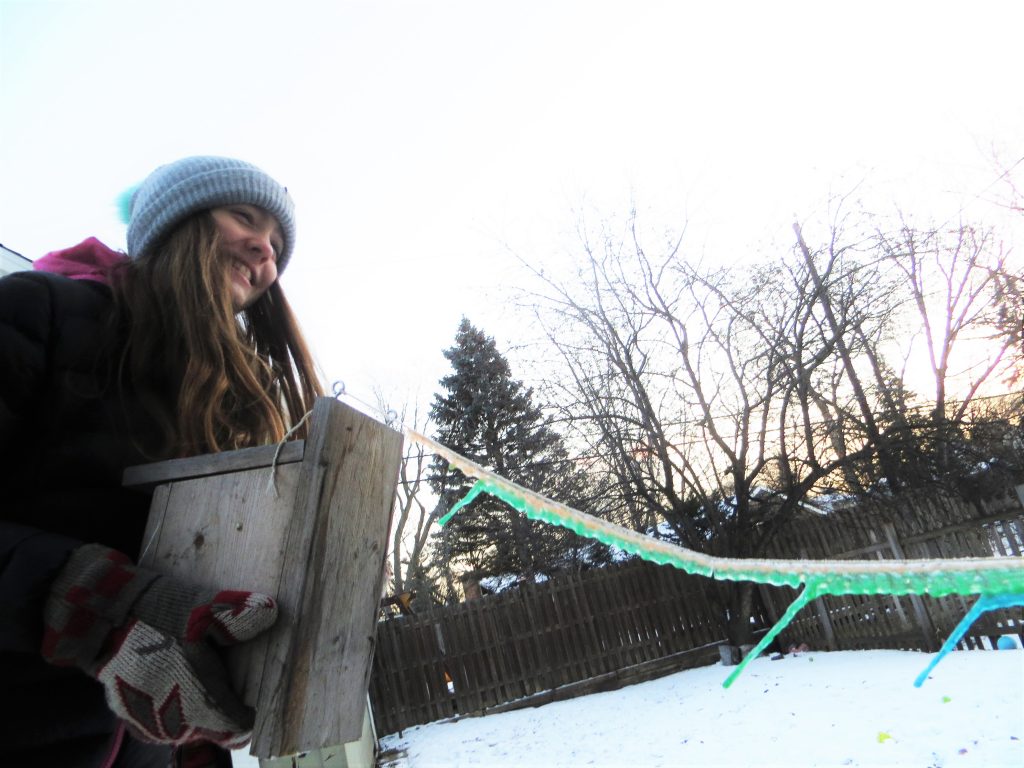
5. Go outside and hang the bag from a low tree branch or railing.
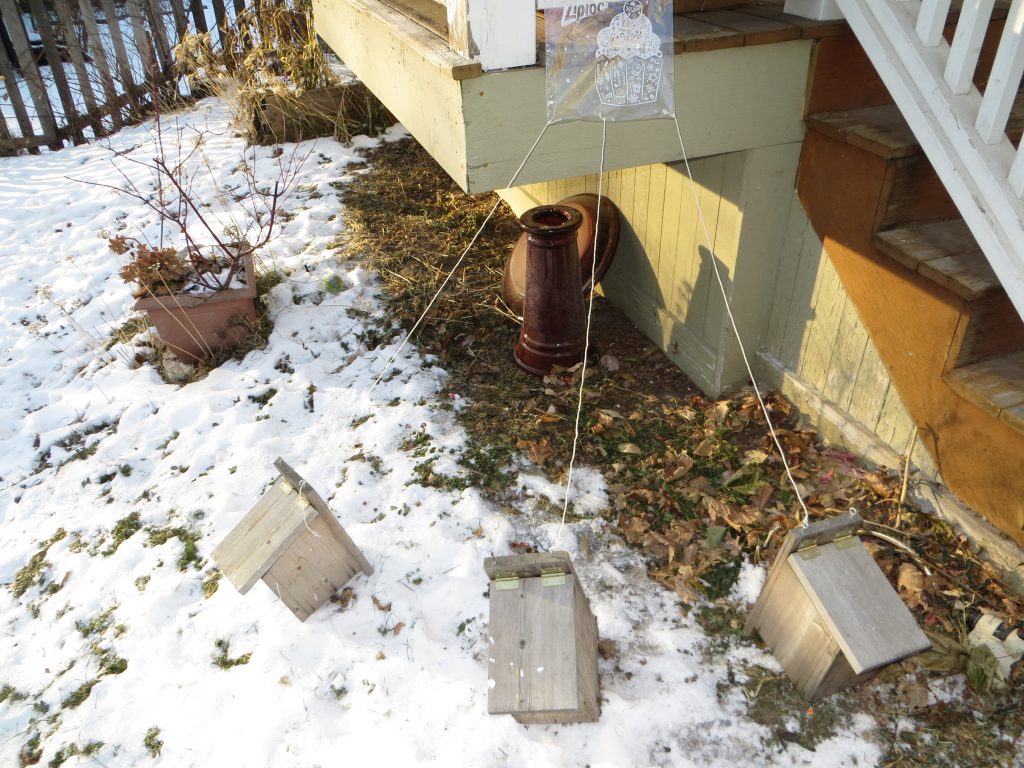
6. Tie each of the three strings to something on the ground, like a rock, piece of wood, or the handle of an empty milk carton filled with water to weight it down. Arrange the objects so that the strings loosely radiate out at around a 45 degree angle. (See photo)
7. Add food coloring to some ice-cold water in a pitcher.
8. Fill the spray bottle with ice-cold water.
9. Add the cold colorful water to the zipper bag hanging outside. Zip the top of the back to slow the rate of leaking.
10. Immediately spray the strings with water to guide the leaking water down the strings.
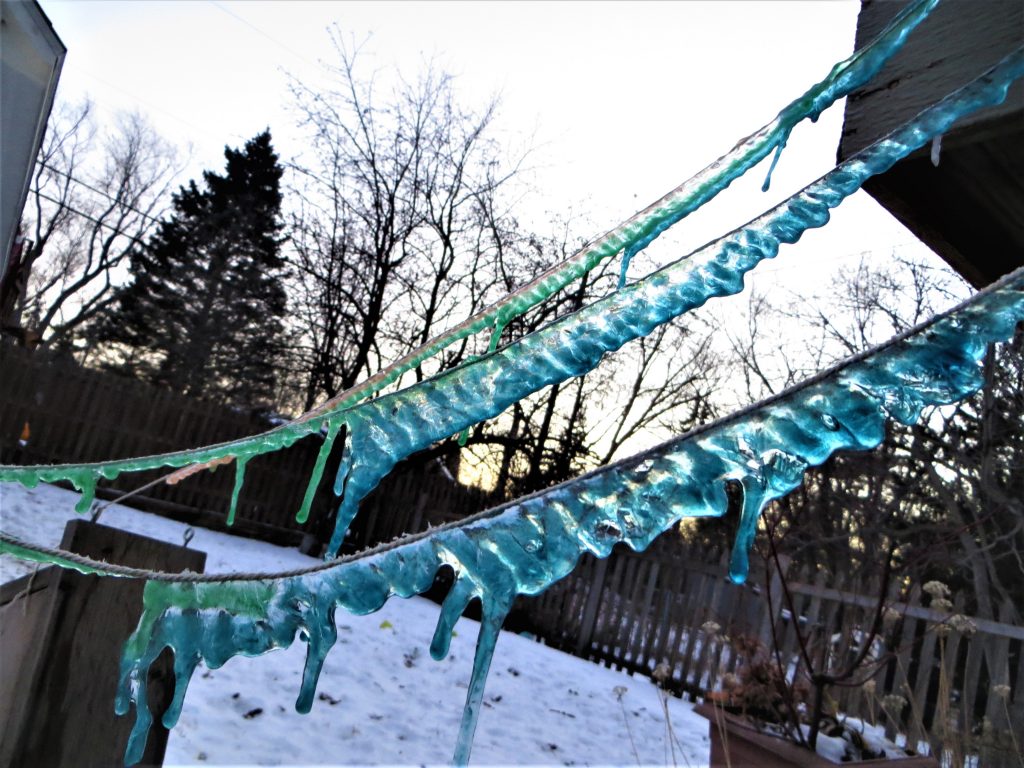
10. Wait for the water on the strings to freeze. Use your syringe to add a little bit more water to the strings (same color) and wait for them to freeze again. Repeat until you have a nice layer of ice/icicles.
11. Refill the bag, using a different color of ice-cold water. Spray the strings lightly again. Repeat step 11.
12. Add layers of color to the icicles until you’re happy with the way they look!
Rainbow Ice (kitchenpantryscientist.com)
The science behind the fun:
Icicles form when dripping water starts to freeze. Scientists have discovered that the tips of icicles are the coldest part, so that water moving down icicles freezes onto the ends, forming the long spikes you’ve seen if you live in a cold climate. When you add different colors of water to icicles in sequence, the color you add last will freeze onto the tip of the ice.
Here’s a cool article on icicle science by an expert, and another great article on “Why Icicles Look the Way They Do.”
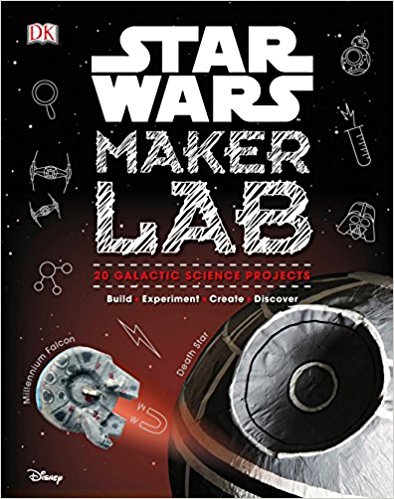
You’ll find more fun ice science experiments in my book “Outdoor Science Lab for Kids” and in my upcoming books “STEAM Lab for Kids” (Quarry Books April 2018) and “Star Wars Maker Lab” (DK- July 2018)
Rubber Band Car
- by KitchenPantryScientist
It’s fun to make a rubber-band powered car from cardboard, straws, and wooden skewers!
You’ll need:
-heavy cardboard
-rubber bands
-glue (a glue gun works best)
-a plastic straw
-wooden skewers
-a CD (or a compass)
-a ruler
-screwdriverCu
-pipe cleaner (optional)
Hints: Parental supervision recommended for hot glue gun use.
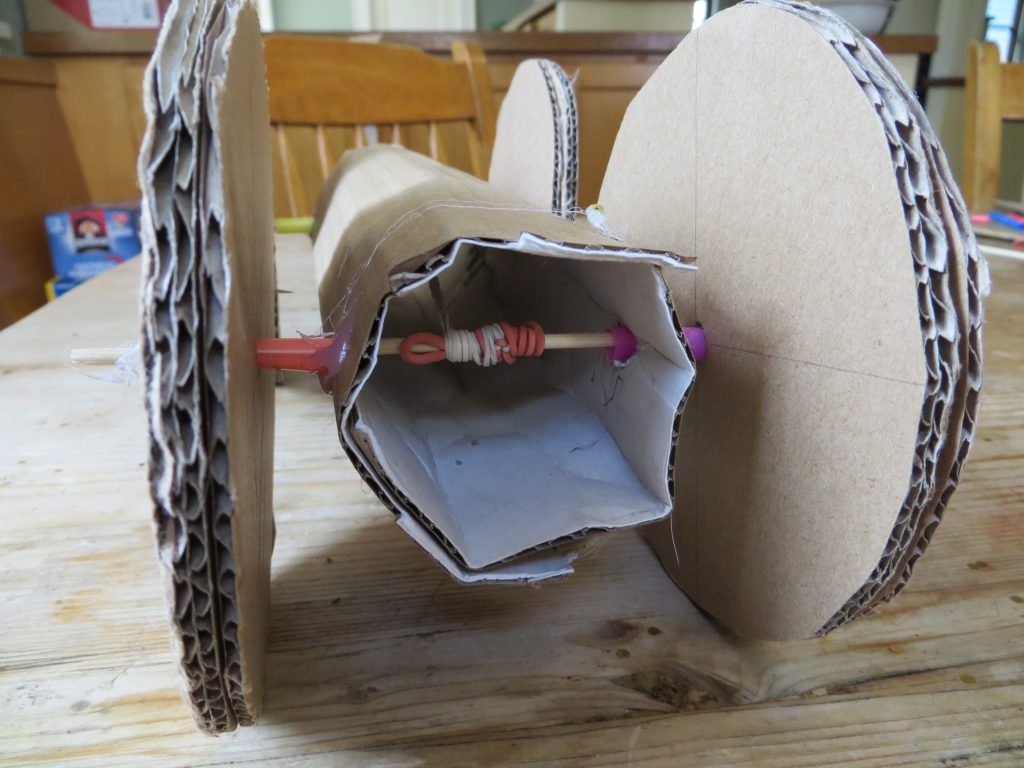
Here’s what you’ll be building:
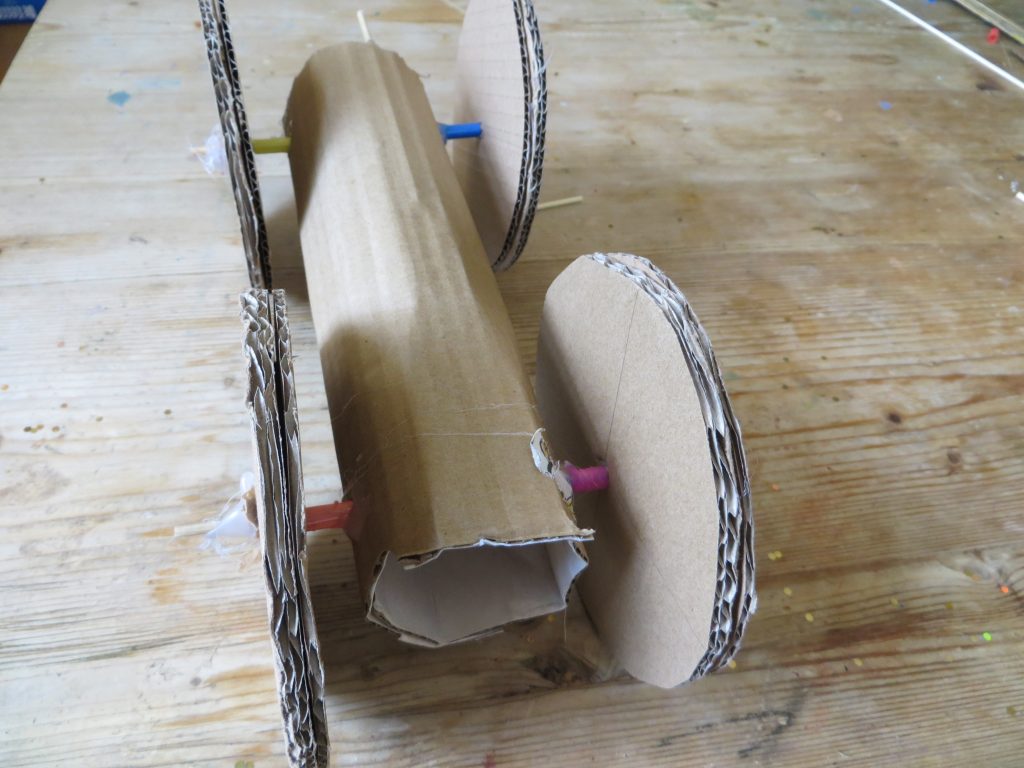
Rubber Band Car kitchenpantryscientist.com
What to do:
- Wrap cardboard around a large spice bottle so you can see how it bends. Cut a piece of cardboard about 9 inches (22cm) long to wrap around the bottle. Trim off the excess cardboard and tape it to create a tube.

kitchenpantryscientist.com
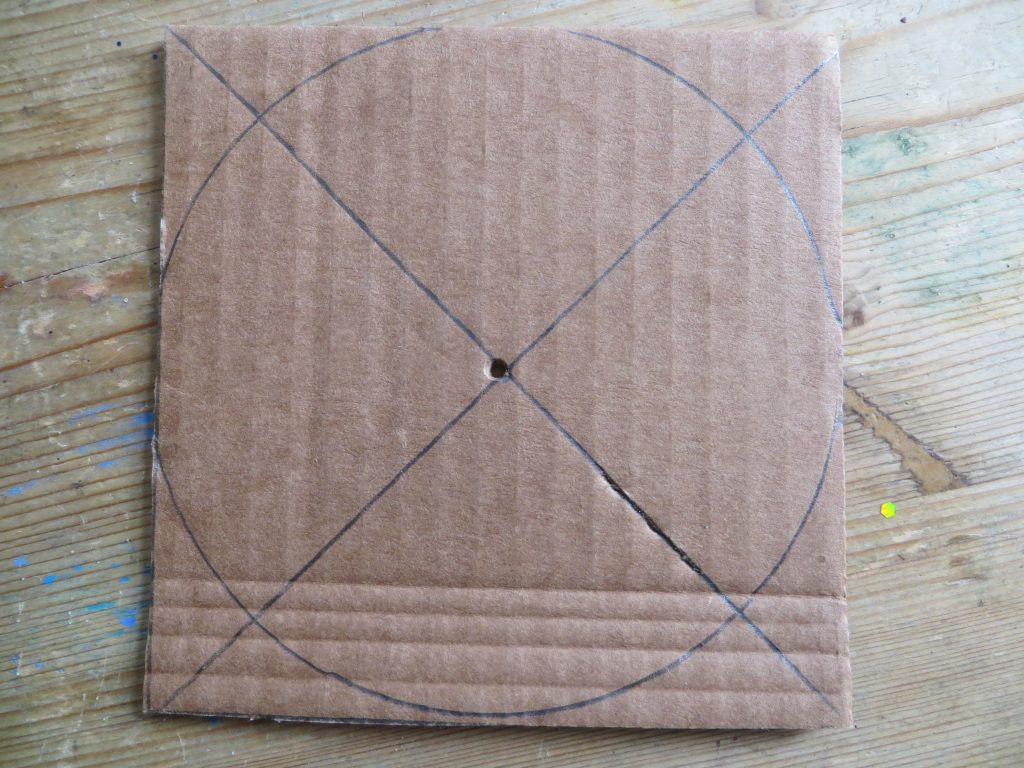
- Trace a CD or use a compass to make 8 circles that are around 4 and 1/2 inches (12 cm) in diameter. Use a ruler to make a square around each circle and then diagonal lines to mark the center of each circle. Cut them out and glue two circles together until you have four wheels. Use skewers to poke holes through the center of each wheel.
kitchenpantryscientist.com
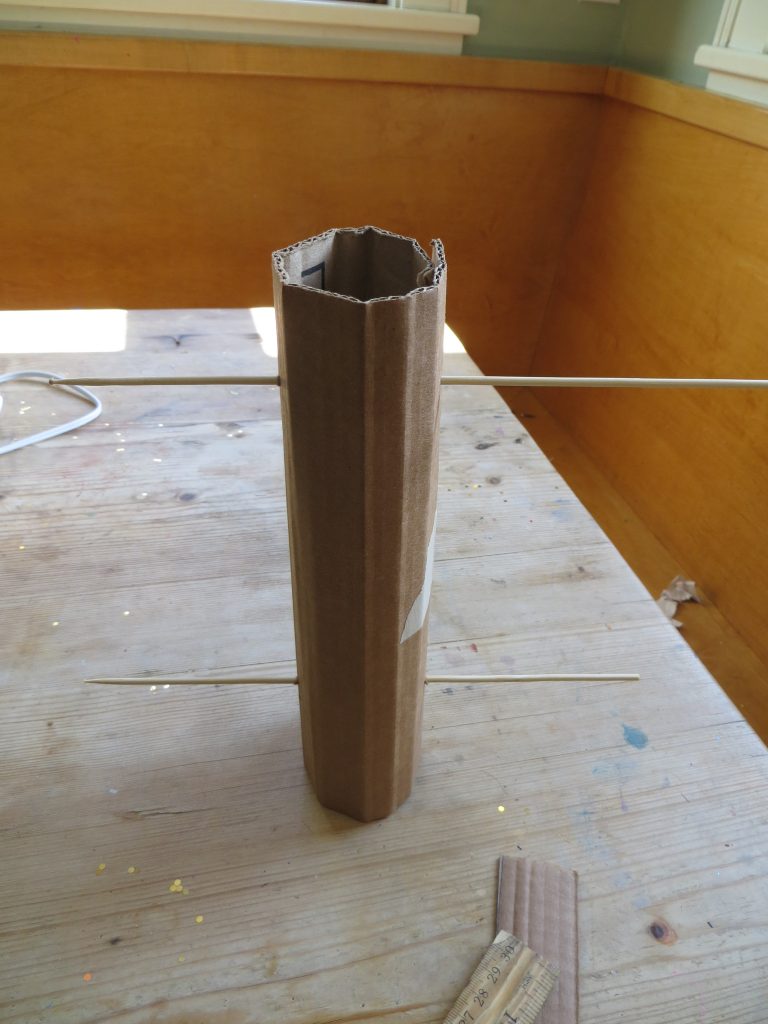
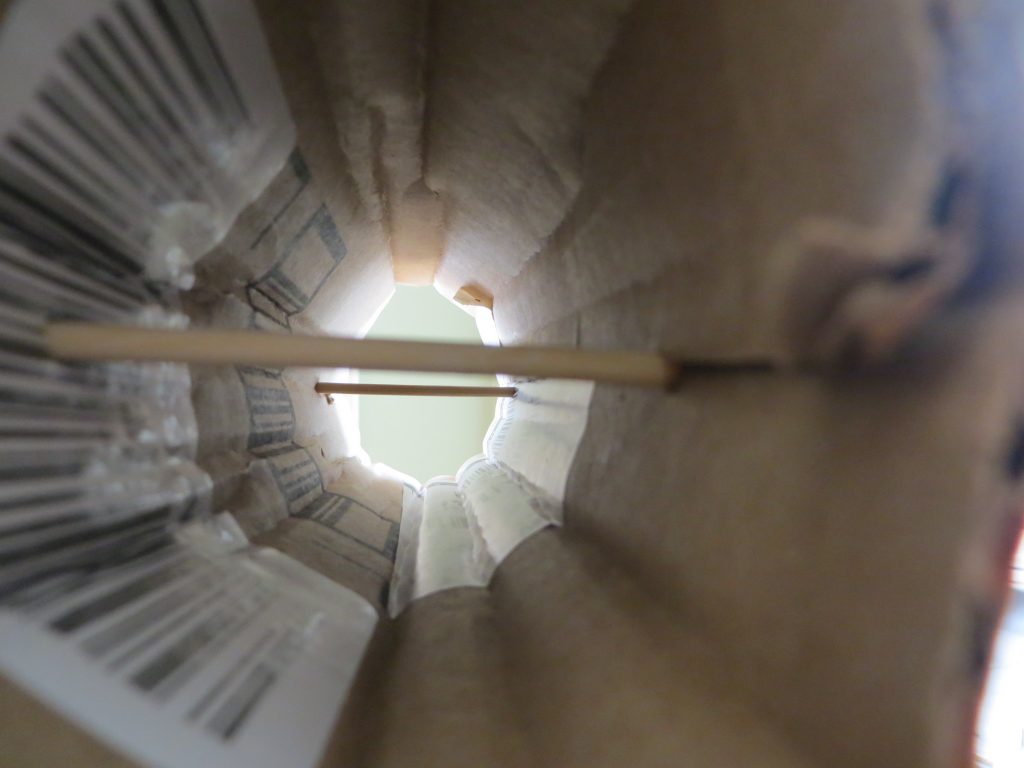
- Poke skewers through each end of the cardboard tube, about 1 and 1/2 inches (4 cm) from the end of each tube. Make sure that the skewers are parallel and that they line up when you look through the end of the tube.
kitchenpantryscientist.com
kitchenpantryscientist.com
- Use a screwdriver to make the holes larger.
kitchenpantryscientist.com
- Cut 4 pieces off of a straw that are about 1/2 inch (1.5cm) long. Glue them to the outside of each hole in the tube. Use a skewer to help align them. The skewer should spin freely.
kitchenpantryscientist.com
- One at a time, put wheels on the skewers and glue the OUTSIDE of the wheel to the skewer. Make sure that the wheels are parallel to the car, and to each other as they dry. Cut off excess skewer.
kitchenpantryscientist.com

kitchenpantryscientist.com
- Poke a skewer down the center of one end of the car, parallel to the wheels so that it’s sticking out about 1 inch (3 cm.) See image above.
- Decorate the car!
- Tie three thin rubber bands together and hook them over the skewer that’s sticking out. If you have a pipe cleaner or wire, hook it onto the other end of the rubber bands. Drop the rubber bands down through the center of the tube.
kitchenpantryscientist.com
- Grab the rubber bands from the end opposite where they are attached to the car. Remove the pipe cleaner hook and wind them around the skewer to create tension in the rubber bands. Wind them until they’re tight.
kitchenpantryscientist.com
- Set the car down and let the wheels start to spin to see what direction the car will go. When you’re ready, let go!
- Measure how far the car traveled.
Enrichment: How can you make the car go faster or farther. Try using different kinds and numbers of rubber bands. How could you redesign the car to make it work better?
The Science Behind the Fun:
In this experiment, you use your body’s energy to twist rubber bands around the wooden skewer axle of a cardboard car. The energy is stored as elastic energy in the tightly-stretched rubber bands. When you let the car go, the rubber bands apply enough force on the axle to turn the wheels on the car and elastic energy is transformed into the energy of motion, which is called kinetic energy.
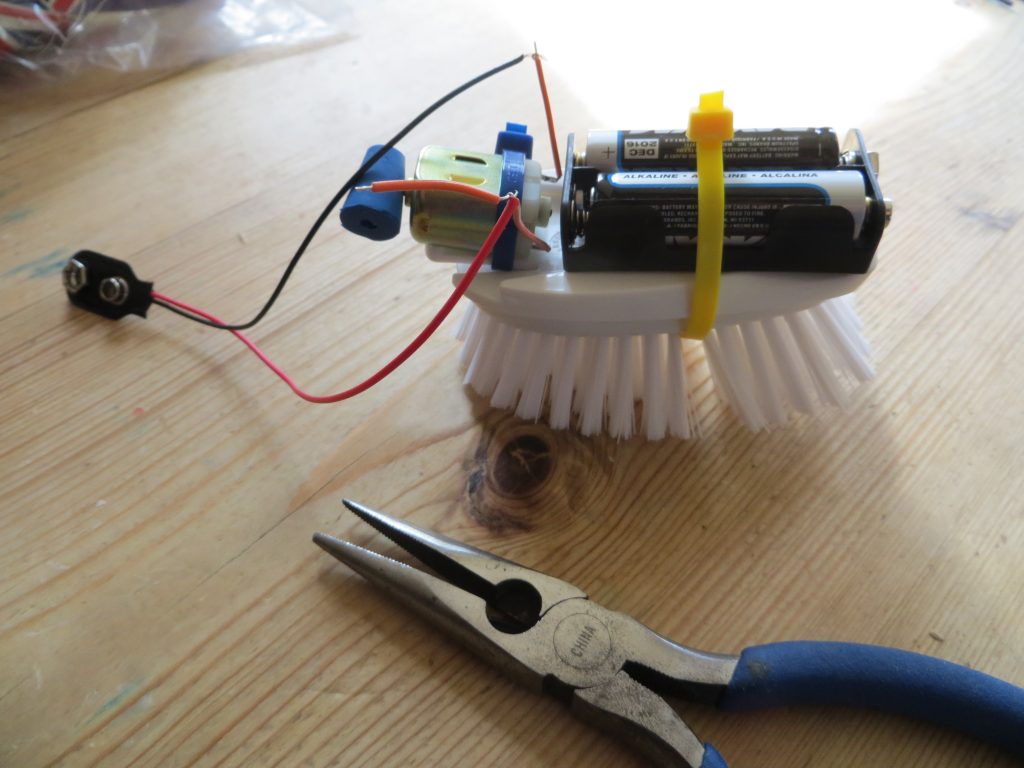
Bristlebots
- by KitchenPantryScientist
With a brush, some batteries, a small motor and a few wires, it’s easy to create a robot that spins, bumps and buzzes around on any smooth surface.
You’ll need:
-a small brush, like a vegetable brush or a cleaning brush
-two AA batteries
–battery holder for 2 AA batteries (optional)
-insulated wire
-a small toy motor with lead wires and pencil eraser or small rubber stopper (or vibrating motor)
–battery clip (optional)
-zip ties (optional)
-electrical tape or duct tape
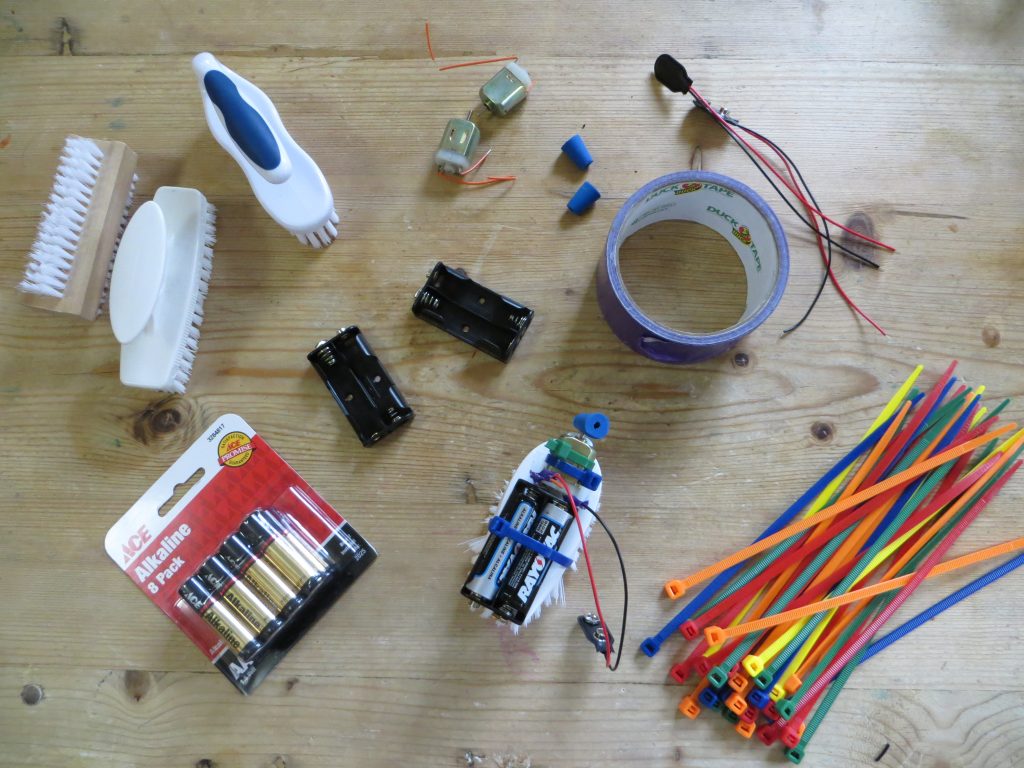
Bristlebot-KitchenPantryScientist.com
Make your bristlebot!
- Attach the motor to one end of the top of the brush. If it’s not a vibrating motor, stick a eraser or rubber stopper onto the spinning post to make it vibrate. Use a zip tie or duct tape to secure it. Make sure the spinning parts can rotate freely.
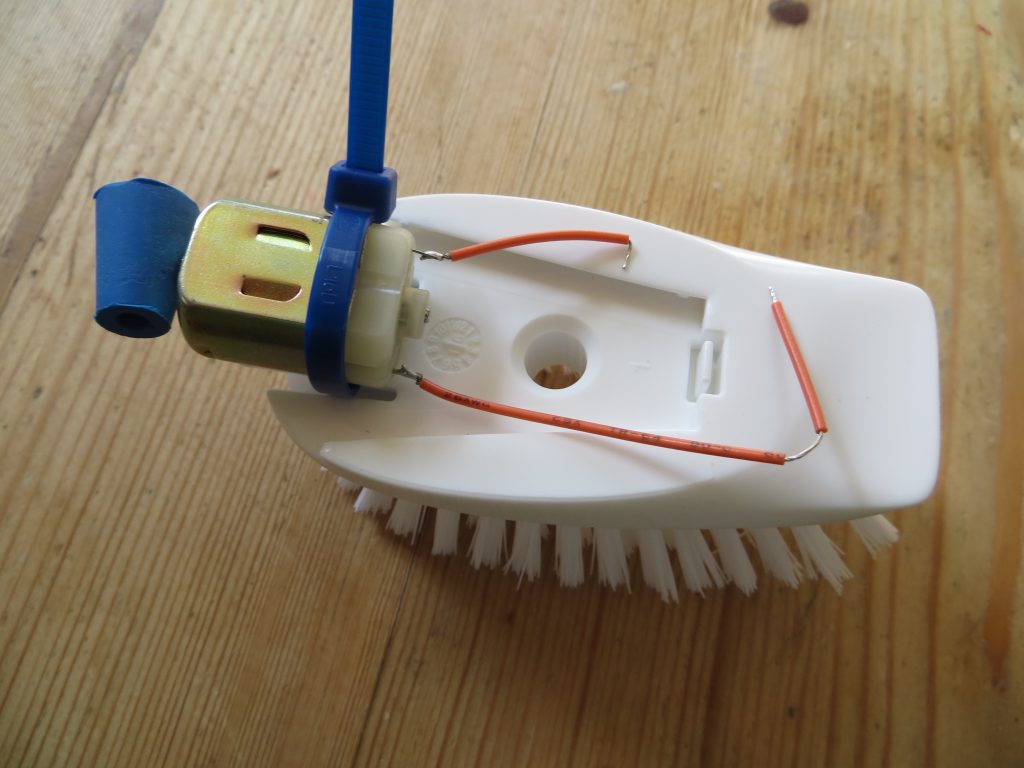
Attach motor- KitchenPantryScientist.com
- Attach the battery holder to the top of the brush near the motor.
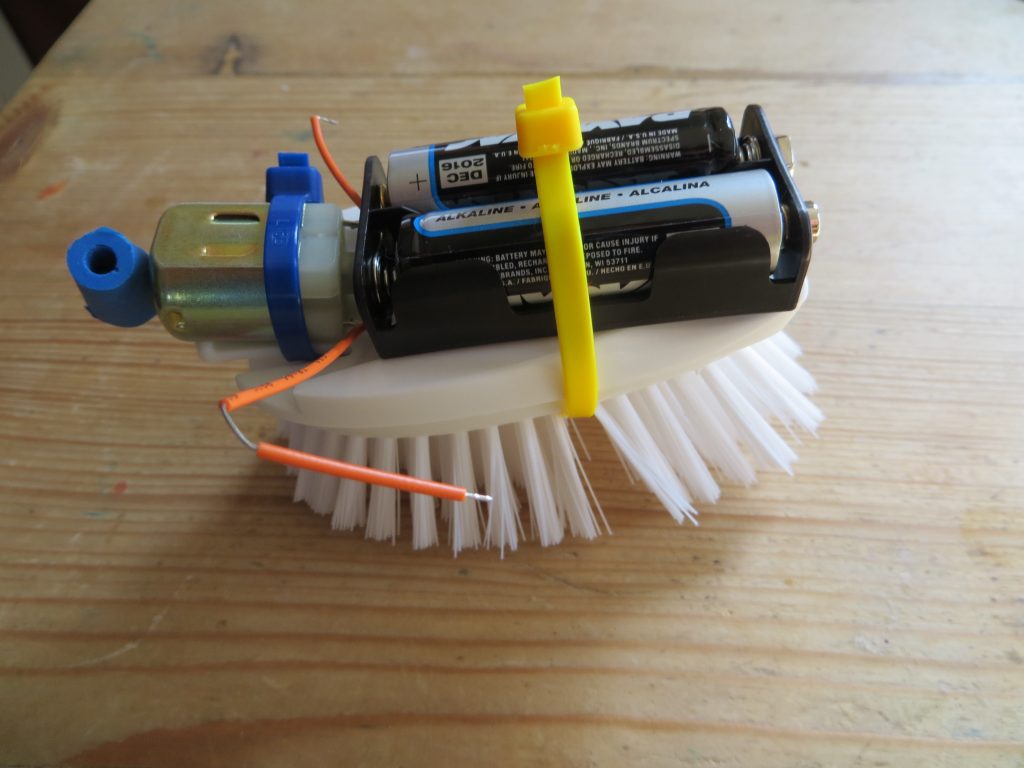
Attach batteries- KitchenPantryScientist.com
- Insert batteries in motor.
- Twist wires around the motor terminals and secure with tape. (These may be the wires on the battery clip, if you have one.)
Connect battery clip- KitchenPantryScientist.com
- To start the motor, attach wires directly to the battery terminals, or to the battery clip and snap it onto the batteries.
Bristlebot- KitchenPantryScientist.com
- Place your robot on a smooth surface to see what happens.
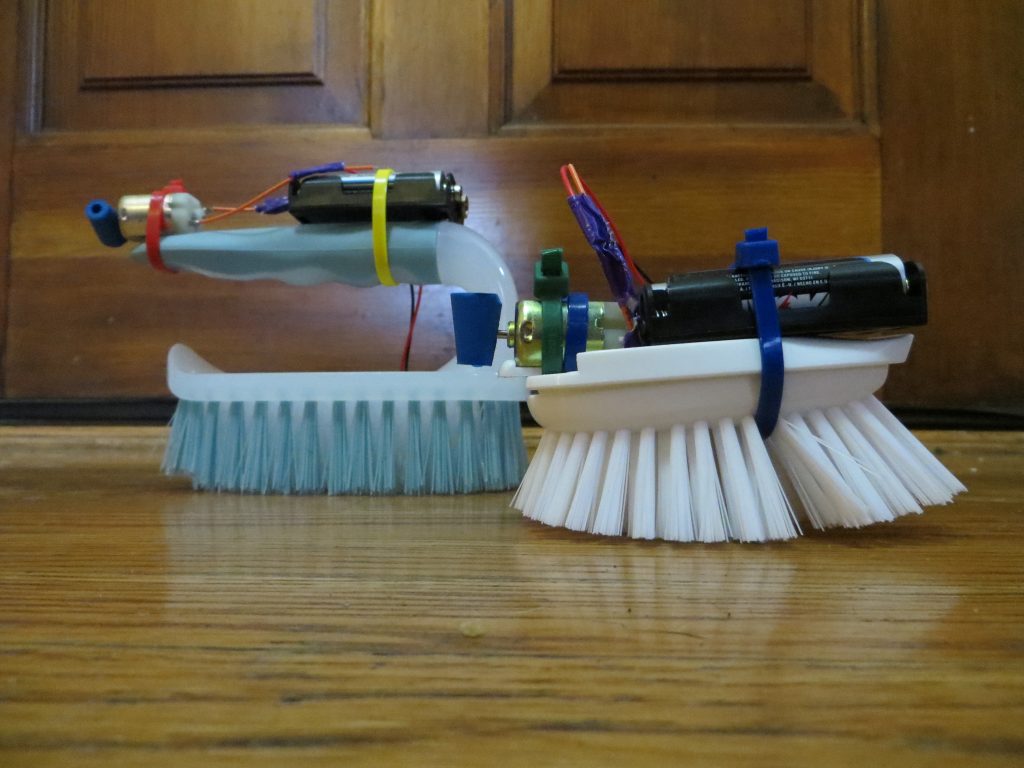
Enrichment: Try different brush shapes, sizes and angles to see how they move. Does your robot spin in the same direction as the motor, or the opposite direction?
The Science Behind the Fun: In this experiment, you complete a battery-powered electrical circuit to spin a vibrating motor. The vibrations traveling through the bristles of the brush move your robot around on the floor.
Graphite Circuits
- by KitchenPantryScientist
Electrons (negatively charged particles) can flow through substances called conductors.
Graphite, used to make pencil lead, among other things, is a conductor and can be used to make a simple circuit on paper. A circuit is just a path for electrical current.
You have to do this experiment with a graphite pencil, rather than the kind you use at school, but you can pick them up at most art supply stores. You’ll also need a few small LED bulbs, 2 wires with alligator clips on either end, and a 9 volt battery.
Adult supervision recommended.
- Make a thick, black rectangle using a graphite pencil. We used a #9 graphite crayon.
- Hook the two wires up to the battery terminals.
- Clip the wire attached to the positive battery terminal to one wire of an LED bulb. (Don’t test it on the battery, or you may blow it out.)
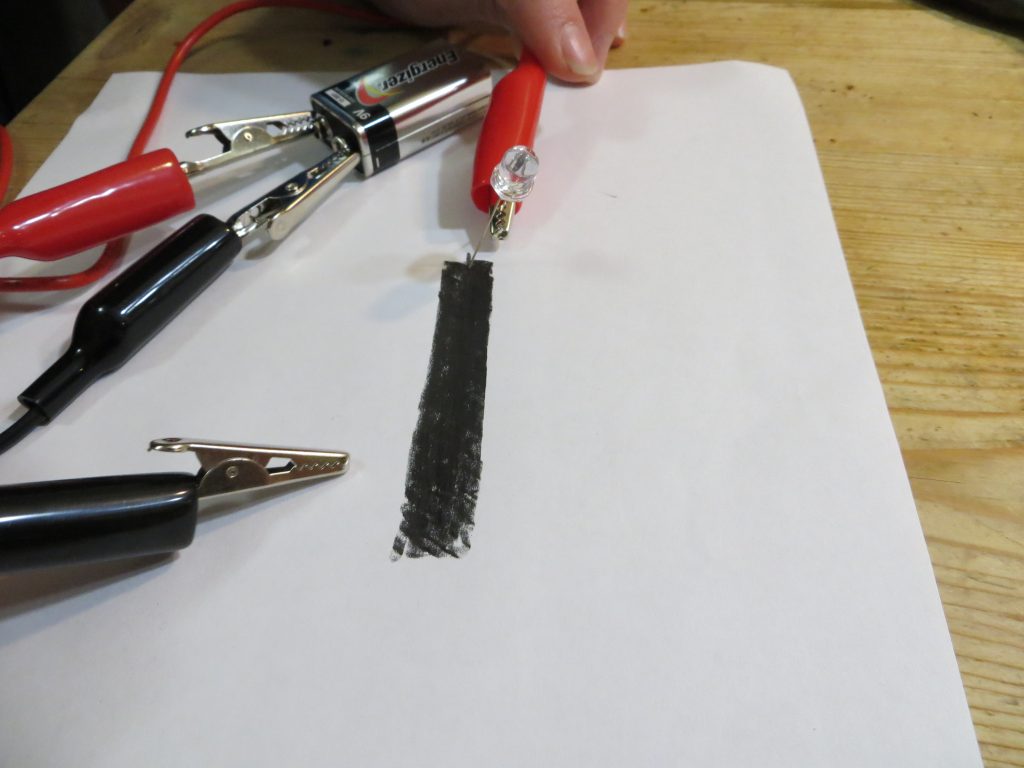 4. Touch the un-attached LED wire to the other (left) side of the graphite bar.
 5.Touch the alligator clip attached to the negative battery terminal to the right side of the graphite bar you drew.
6.If it doesn’t light, switch the positive alligator clip to the other wire of the LED bulb and try it again.
7. Move negative clip closer to the bulb. It should get brighter as you decrease the distance.
8 Spring Science Eggsperiments
- by KitchenPantryScientist
Spring is egg season. You may prefer dyed eggs, hard-boiled eggs, deviled eggs, or even dinosaur eggs. No matter what kind of eggs you like best, you’ll love these eggsperiments that let you play with the amazing architecture of eggs, dissolve their shells and even dye them with the pigments found in your refrigerator. Just click on experiments for directions and the science behind the fun!
Grow alum crystals in eggshells to create beautiful geode-like works of art.
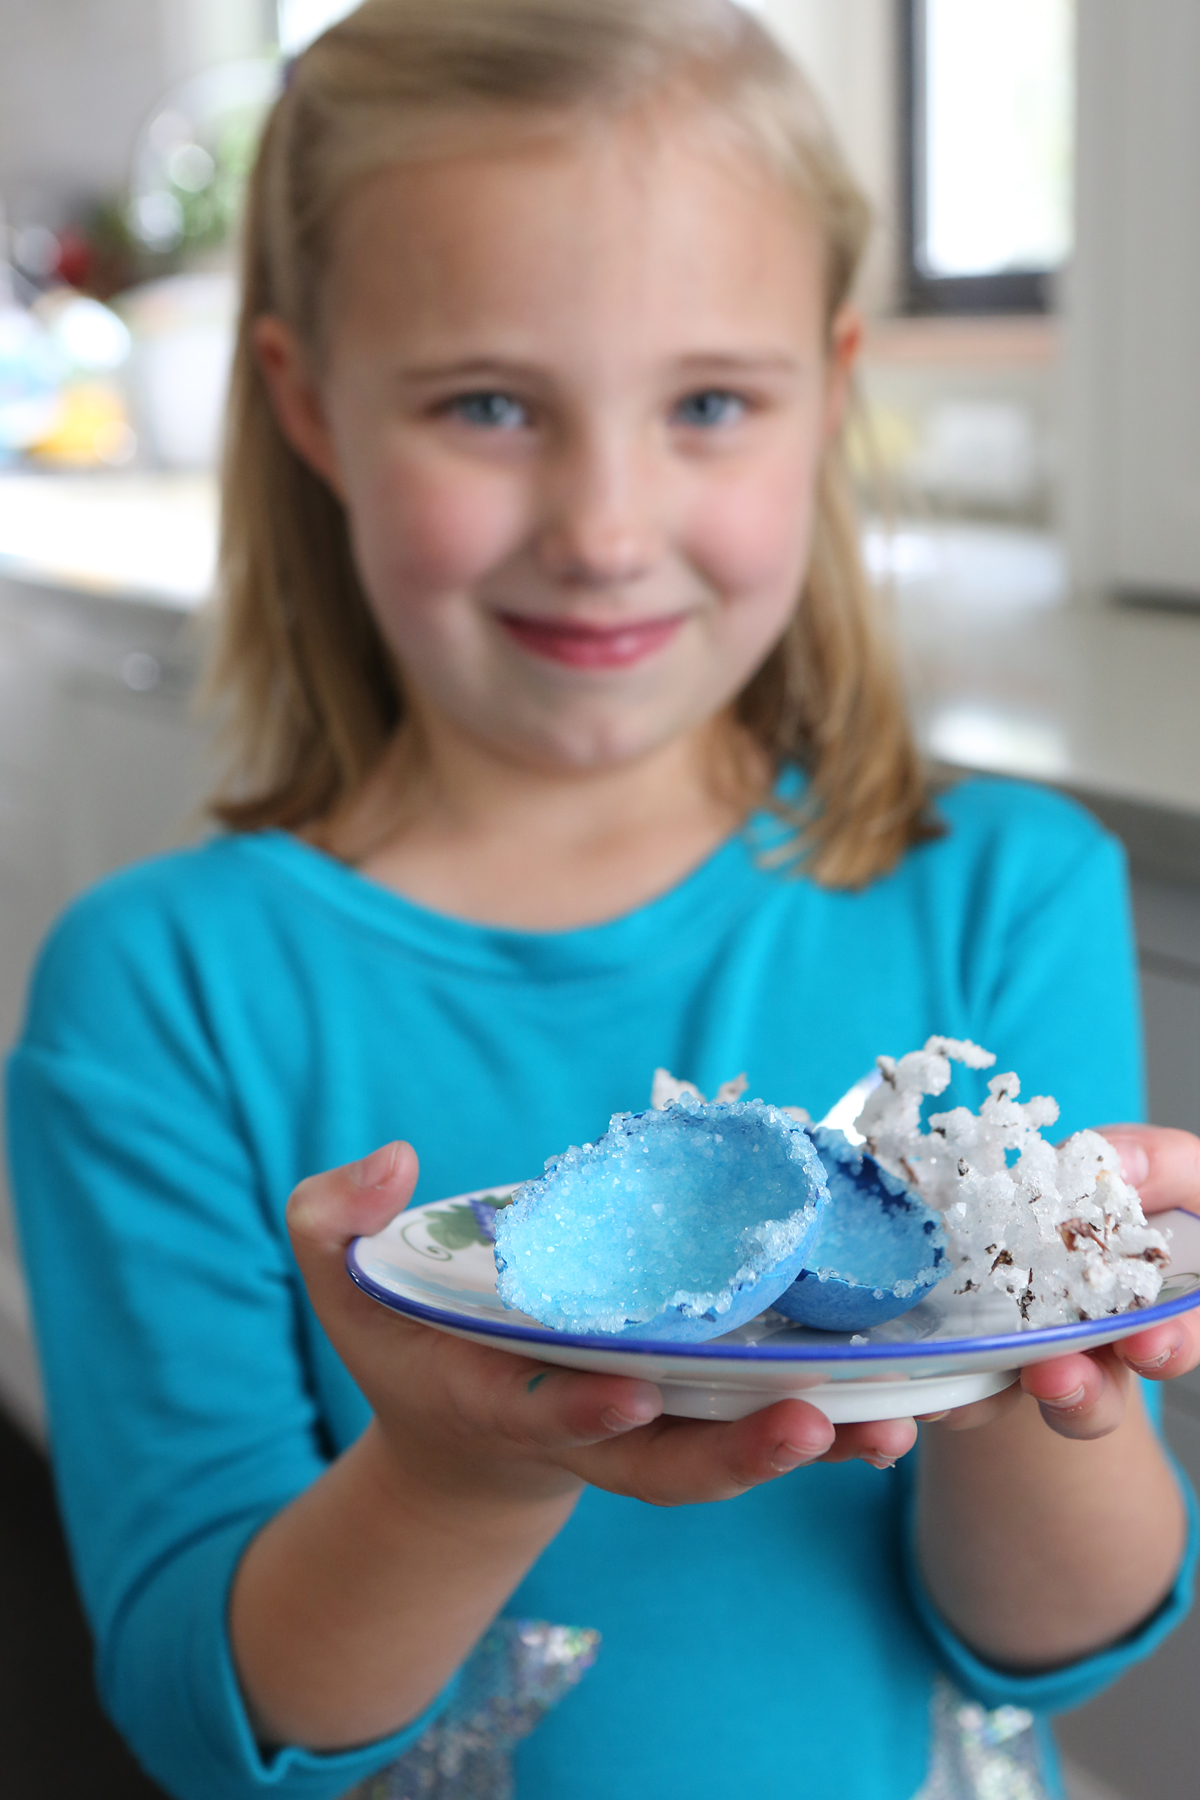
Egg Geode from Kitchen Science Lab for Kids (Quarry Books)
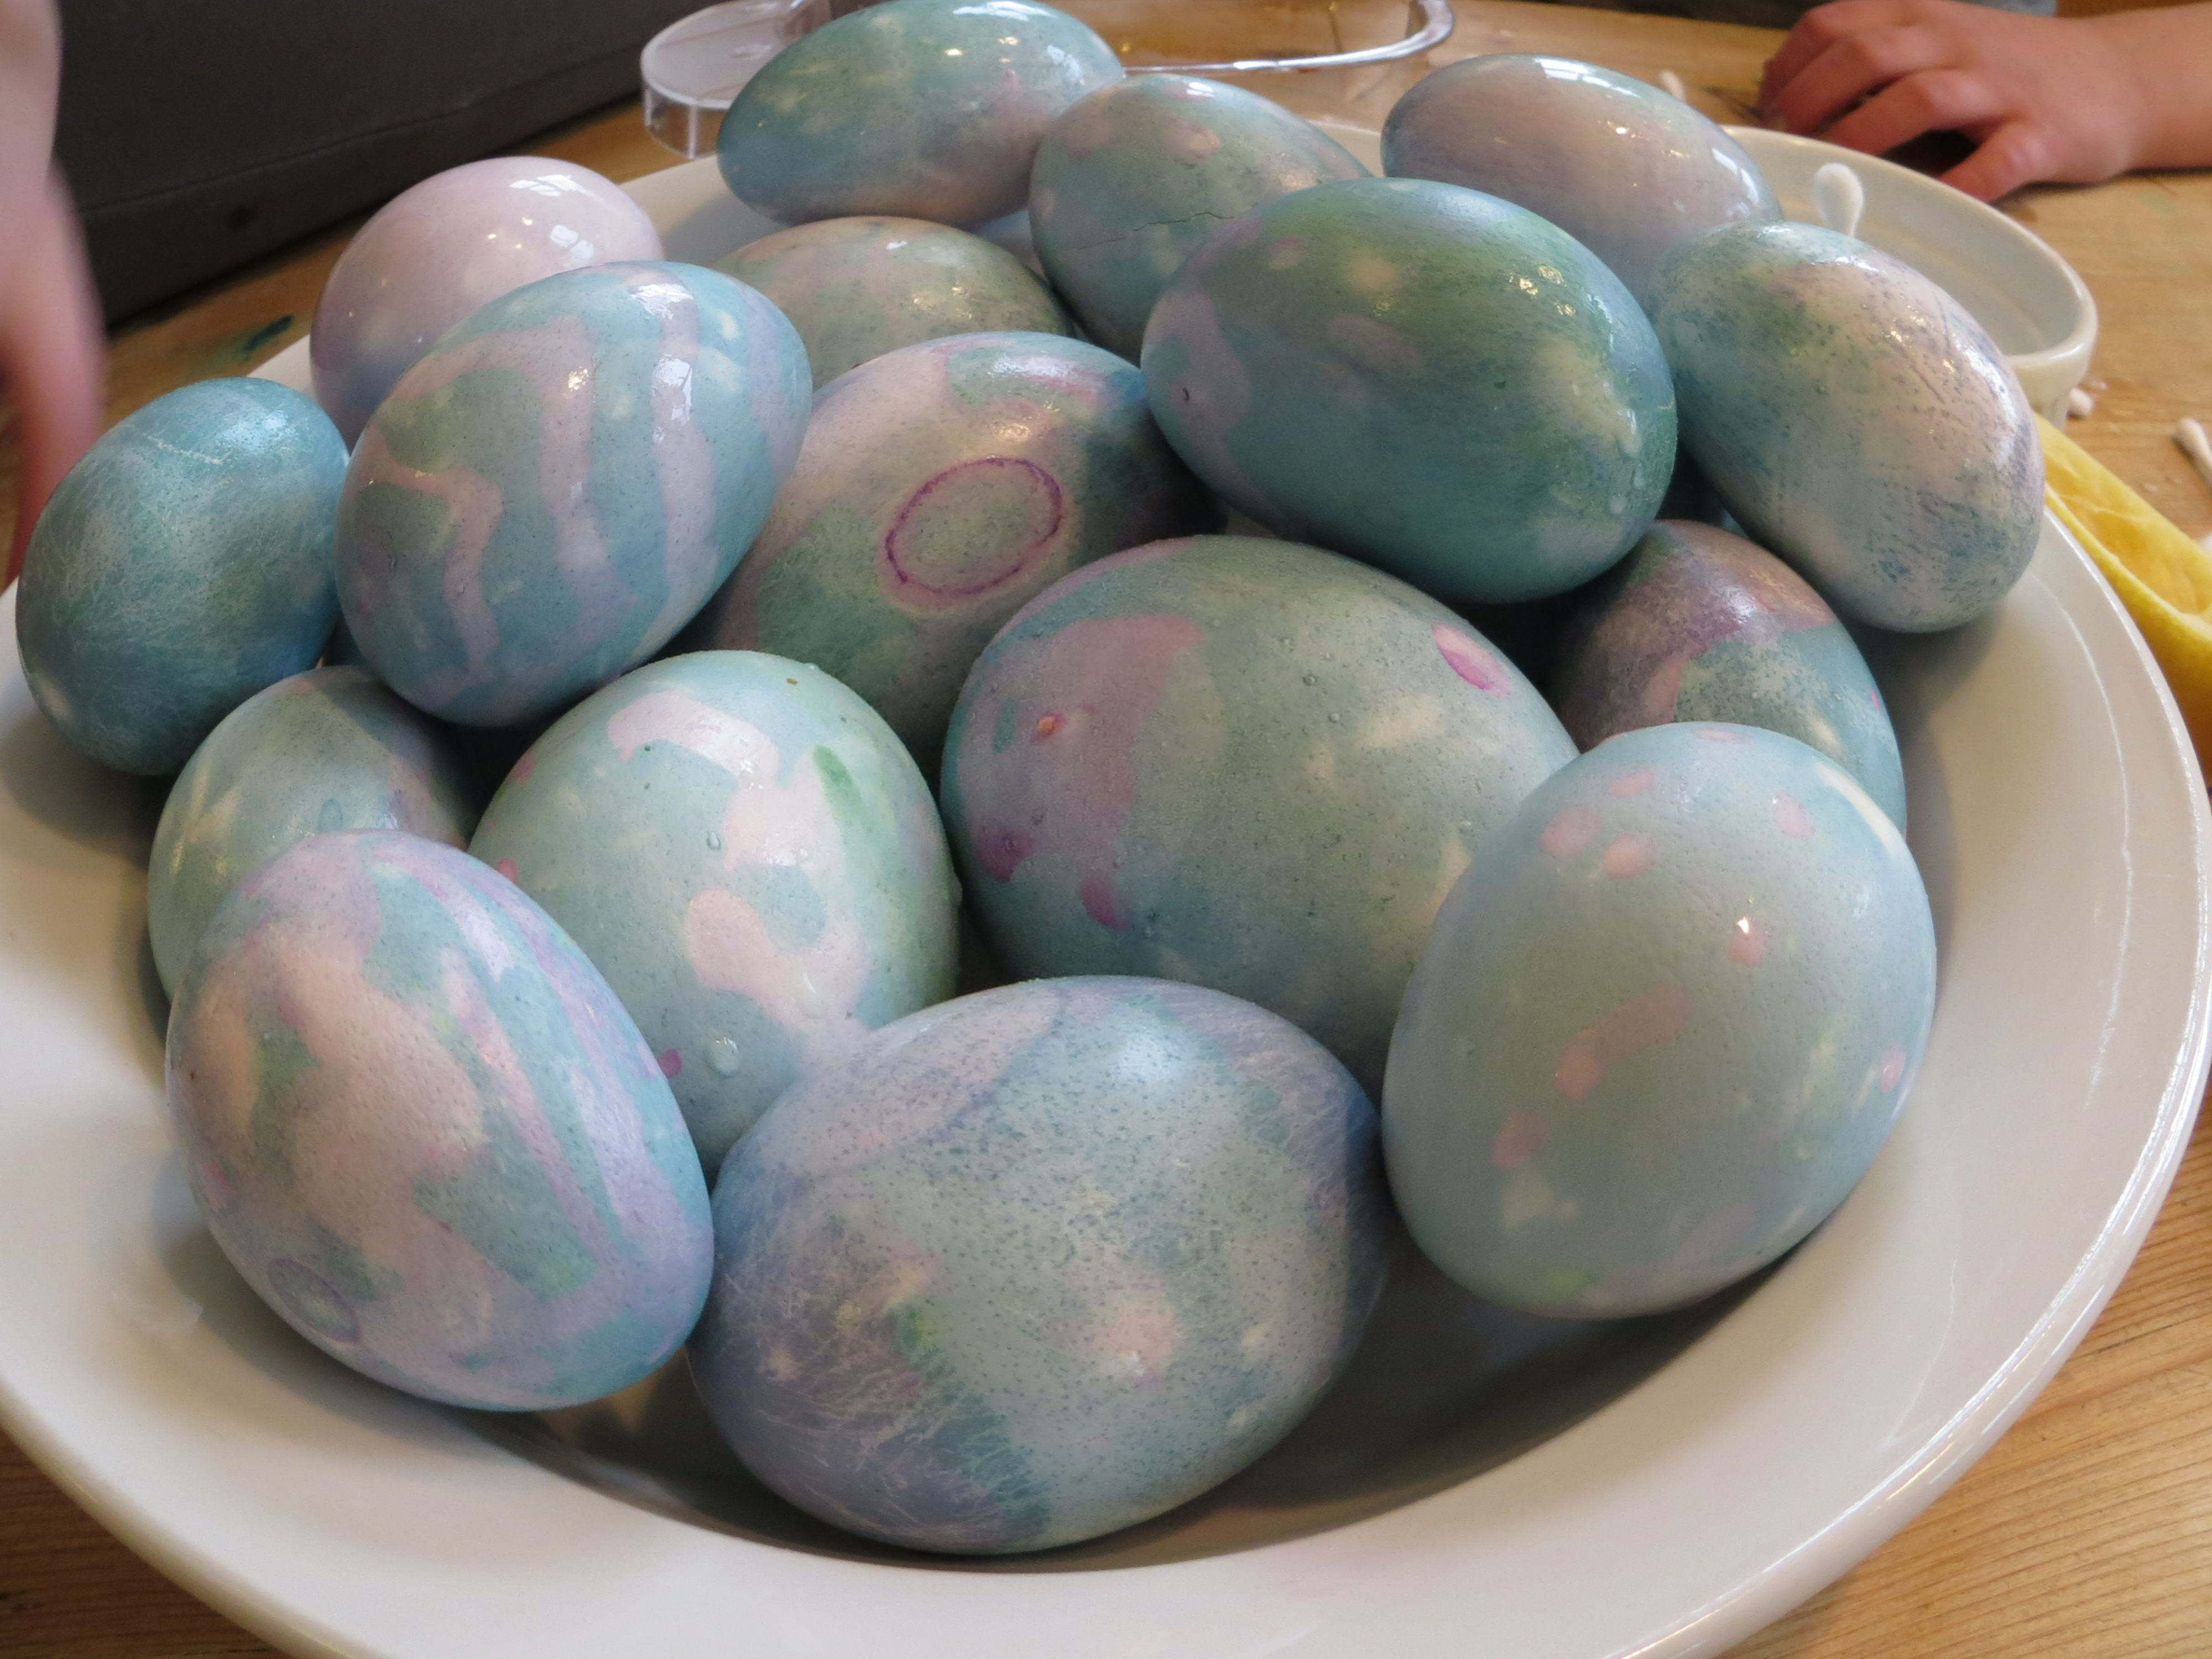
Dye eggs with spices, fruits and vegetables,
or dye them with red cabbage juice and use lemon juice and baking soda to paint them.
Dissolve eggshells with vinegar and play with osmosis when you make “Alien Monster Eggs.”
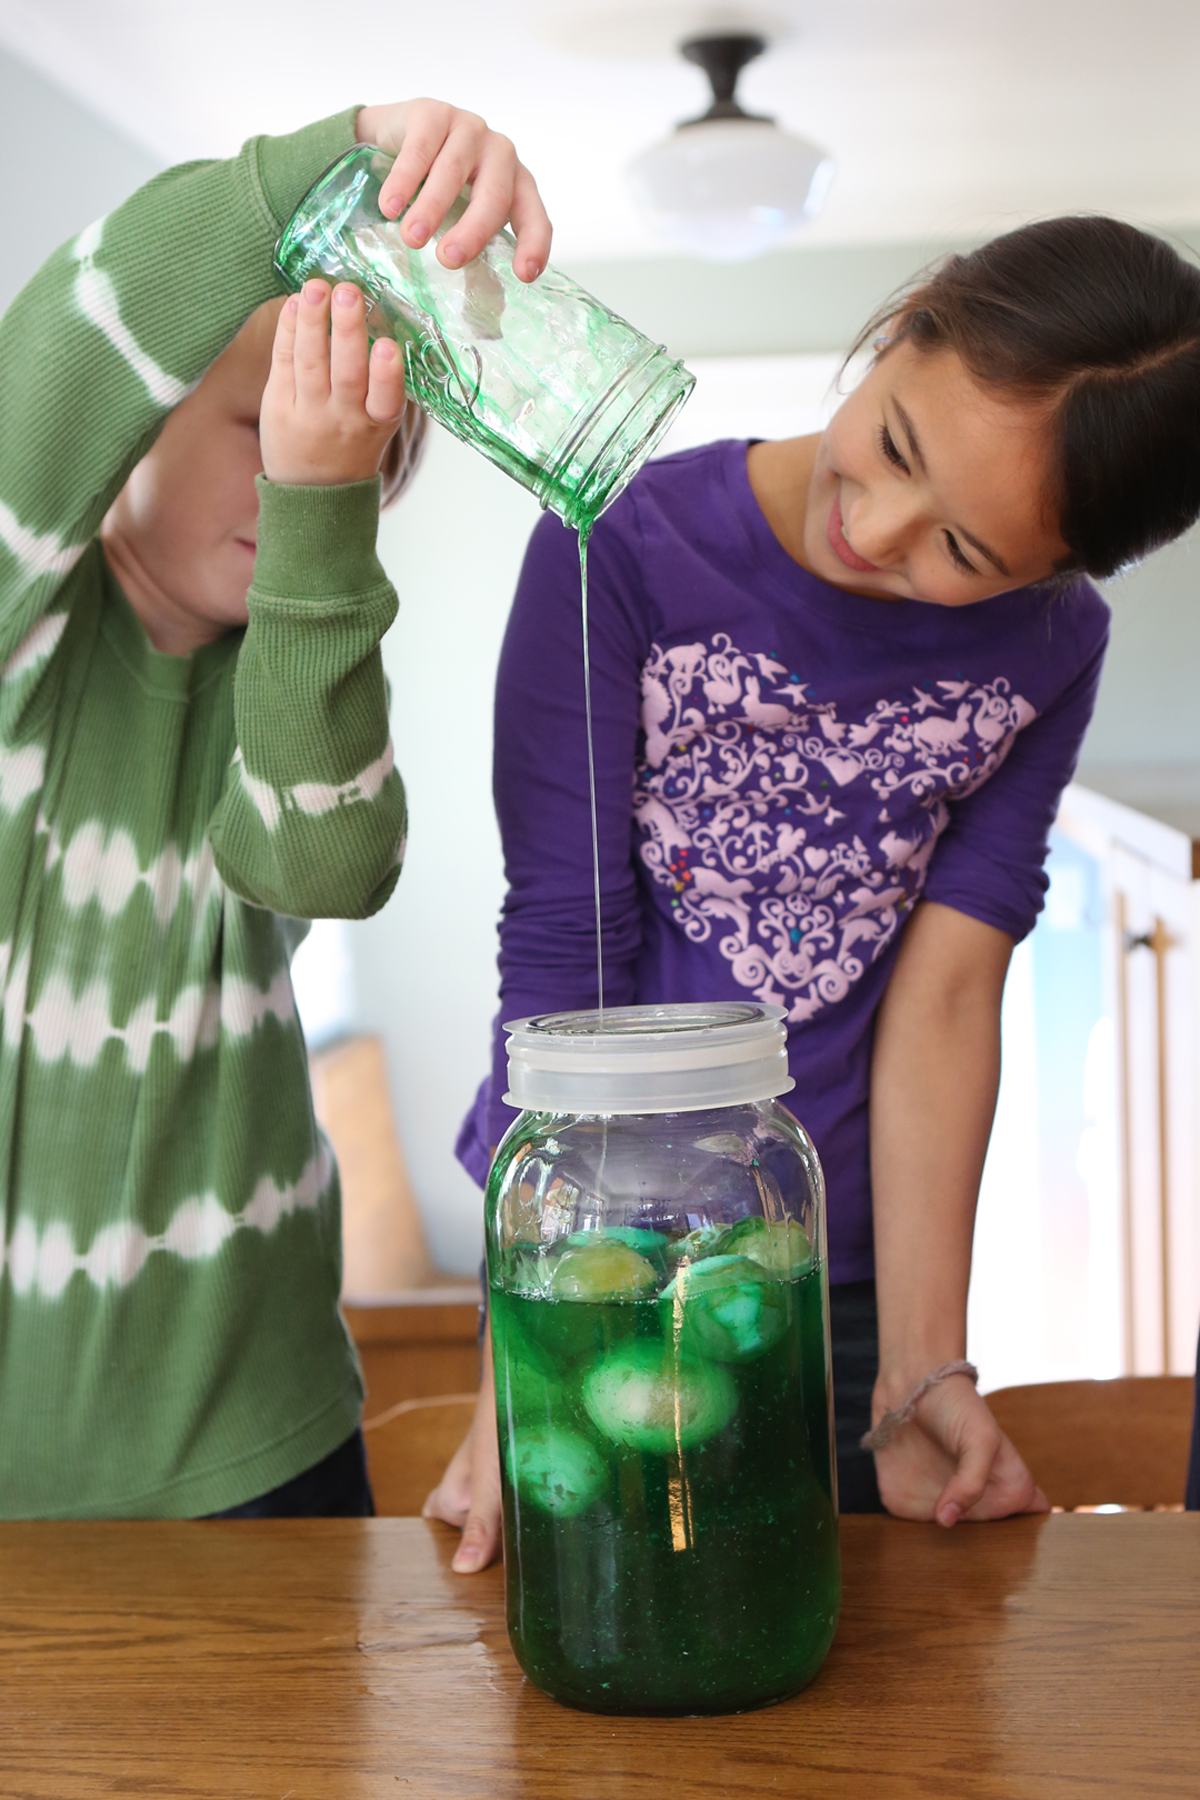
Alien Monster Eggs from Kitchen Science Lab for Kids (Quarry Books)
You can stand on a carton of eggs to test their strength.
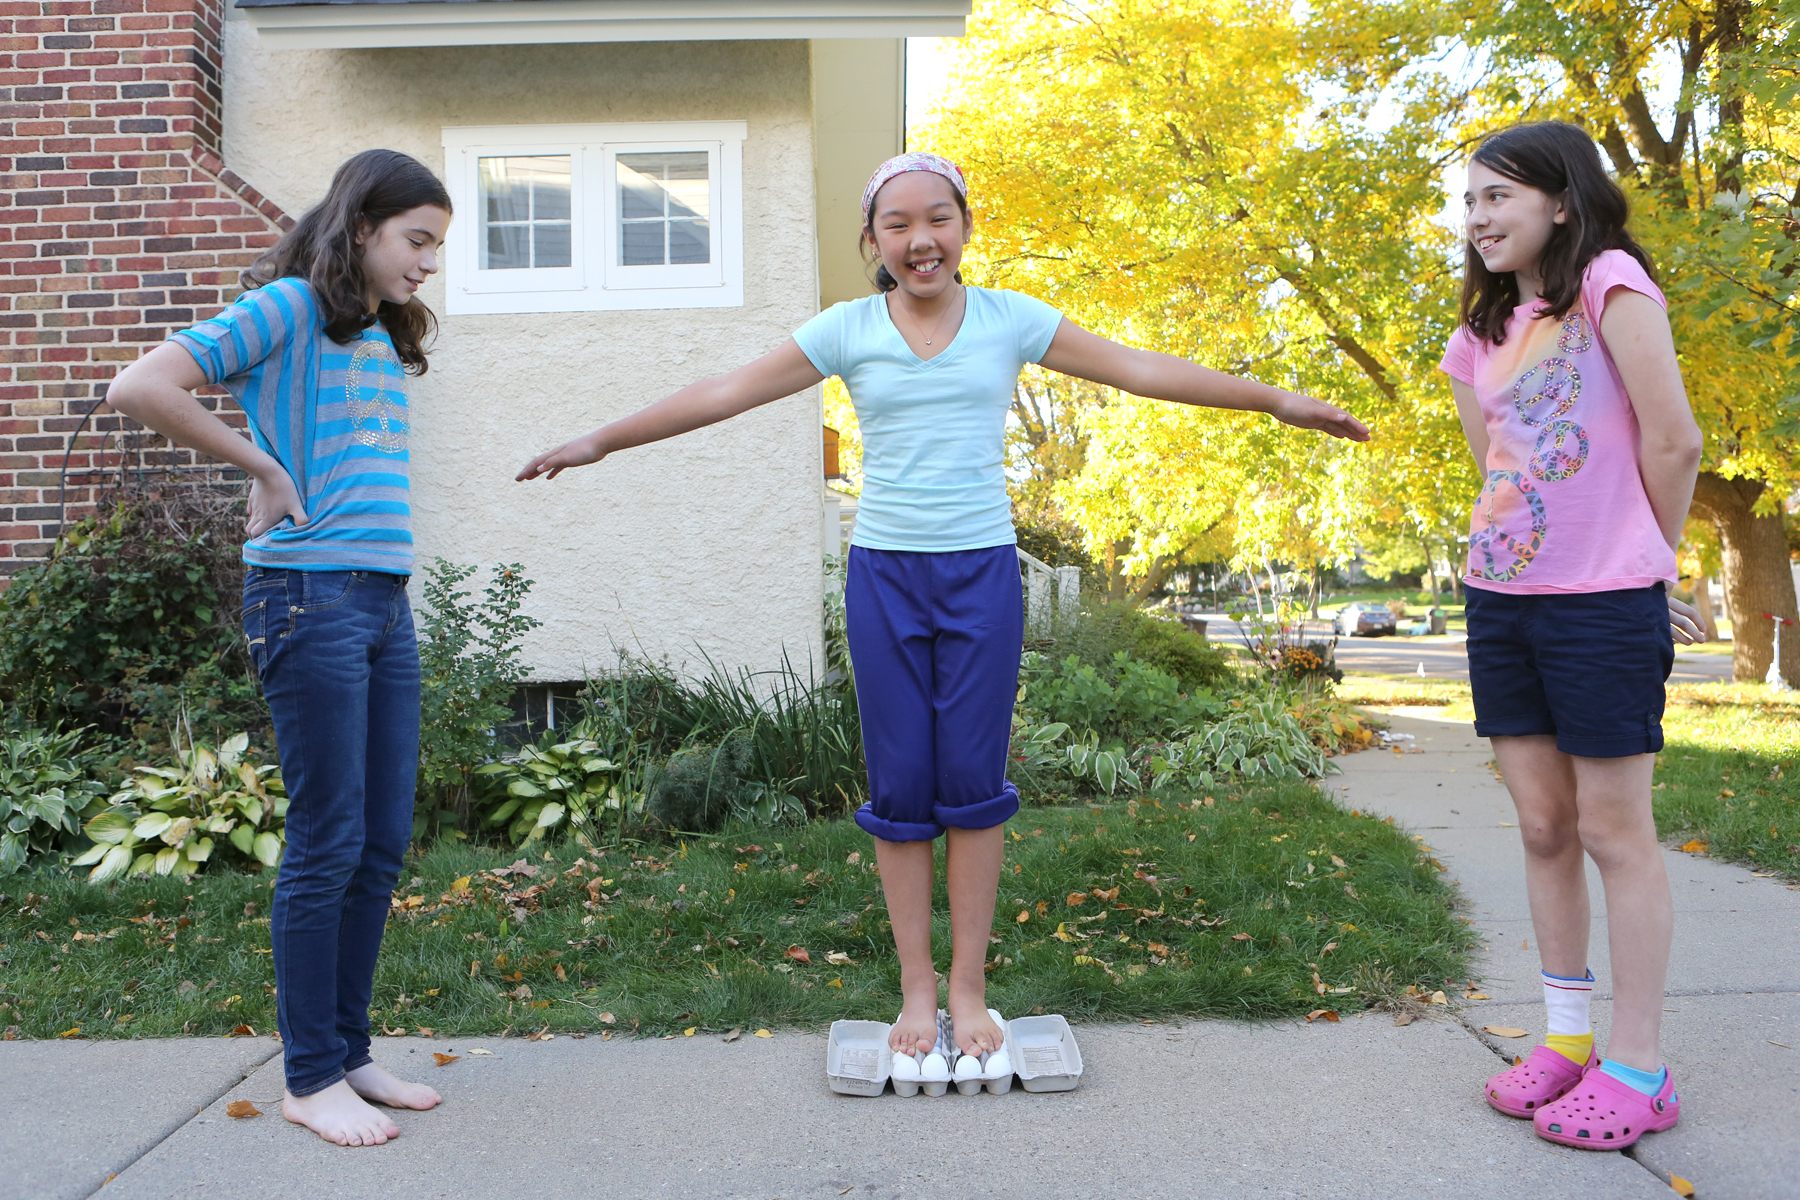
Standing on Eggs from Kitchen Science Lab for Kids (Quarry Books 2015)
For a fun physics experiment, throw eggs at a hanging sheet.
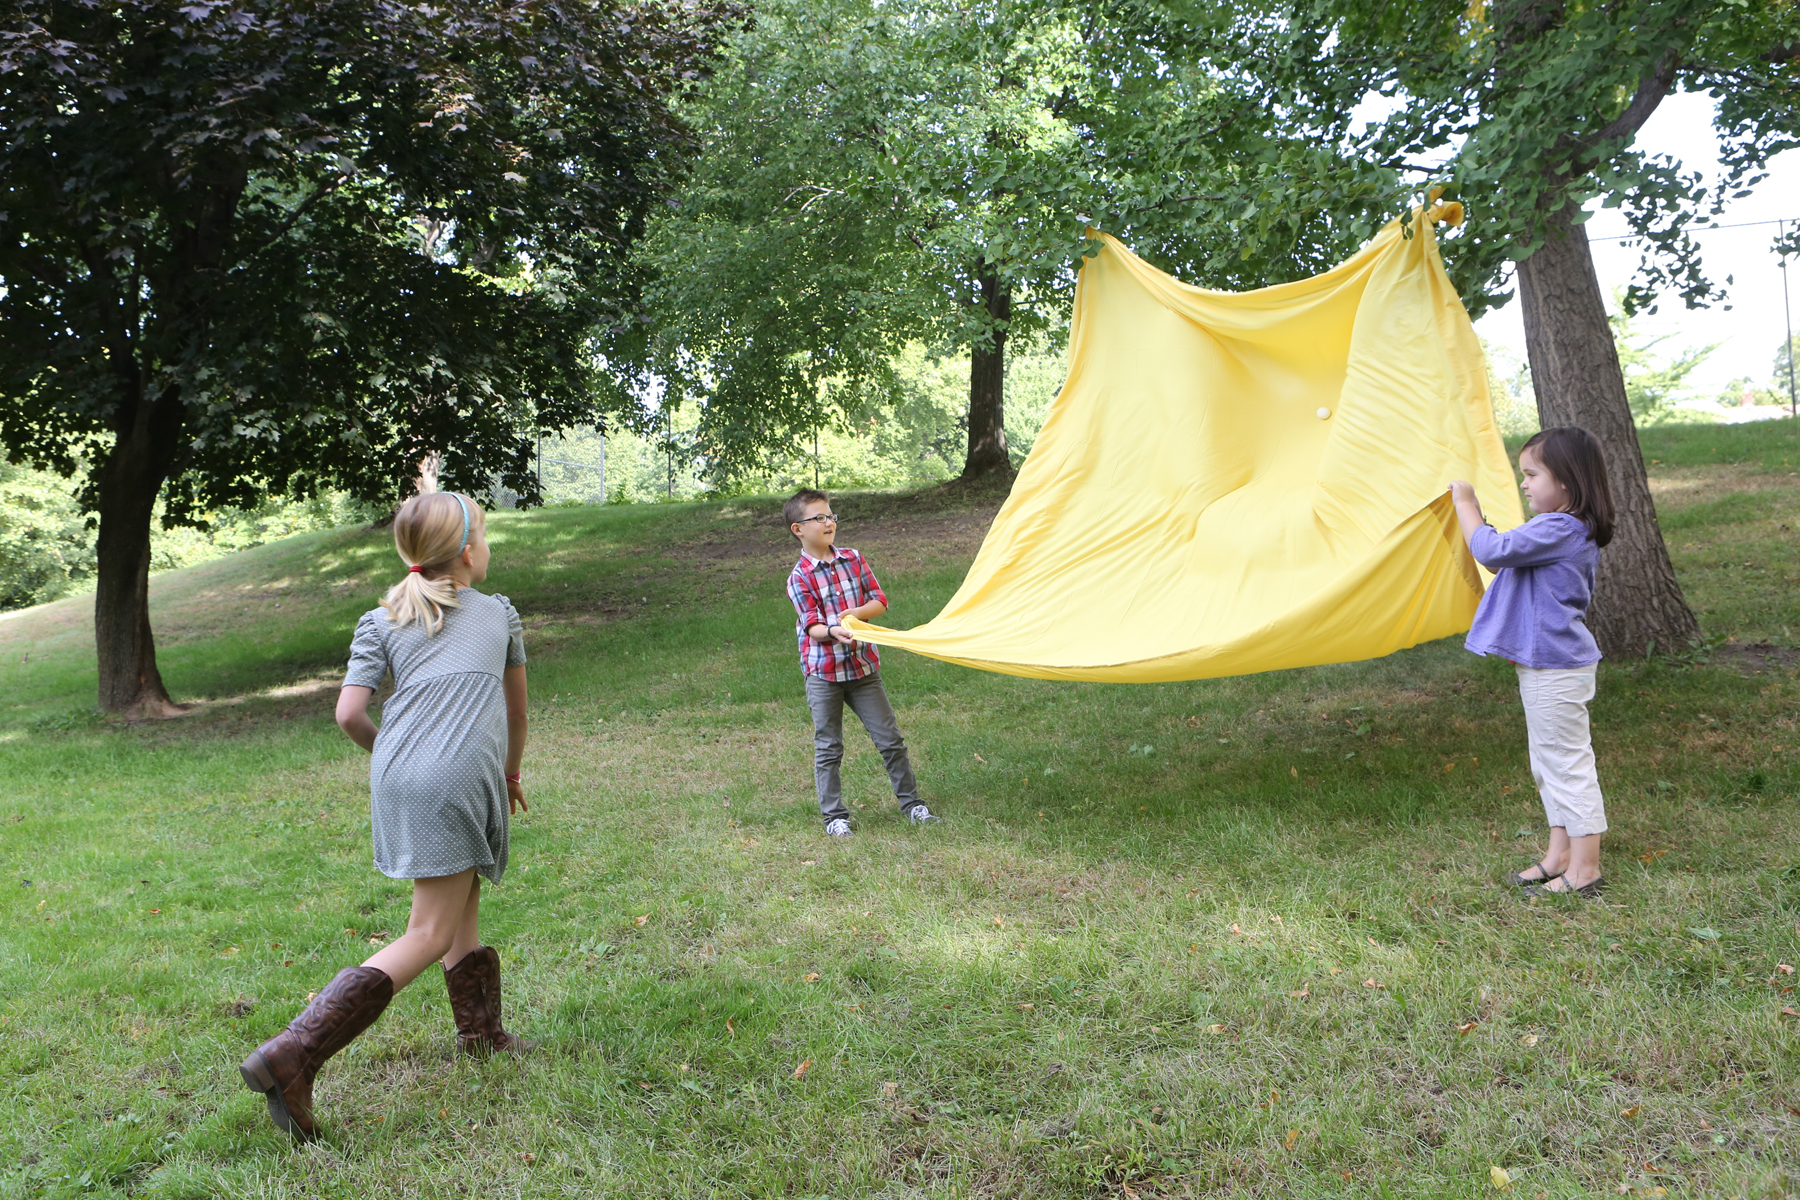
From “Kitchen Science Lab for Kids” Quarry Books
Make egg-eating monsters and watch atmospheric pressure push eggs up into a bottle.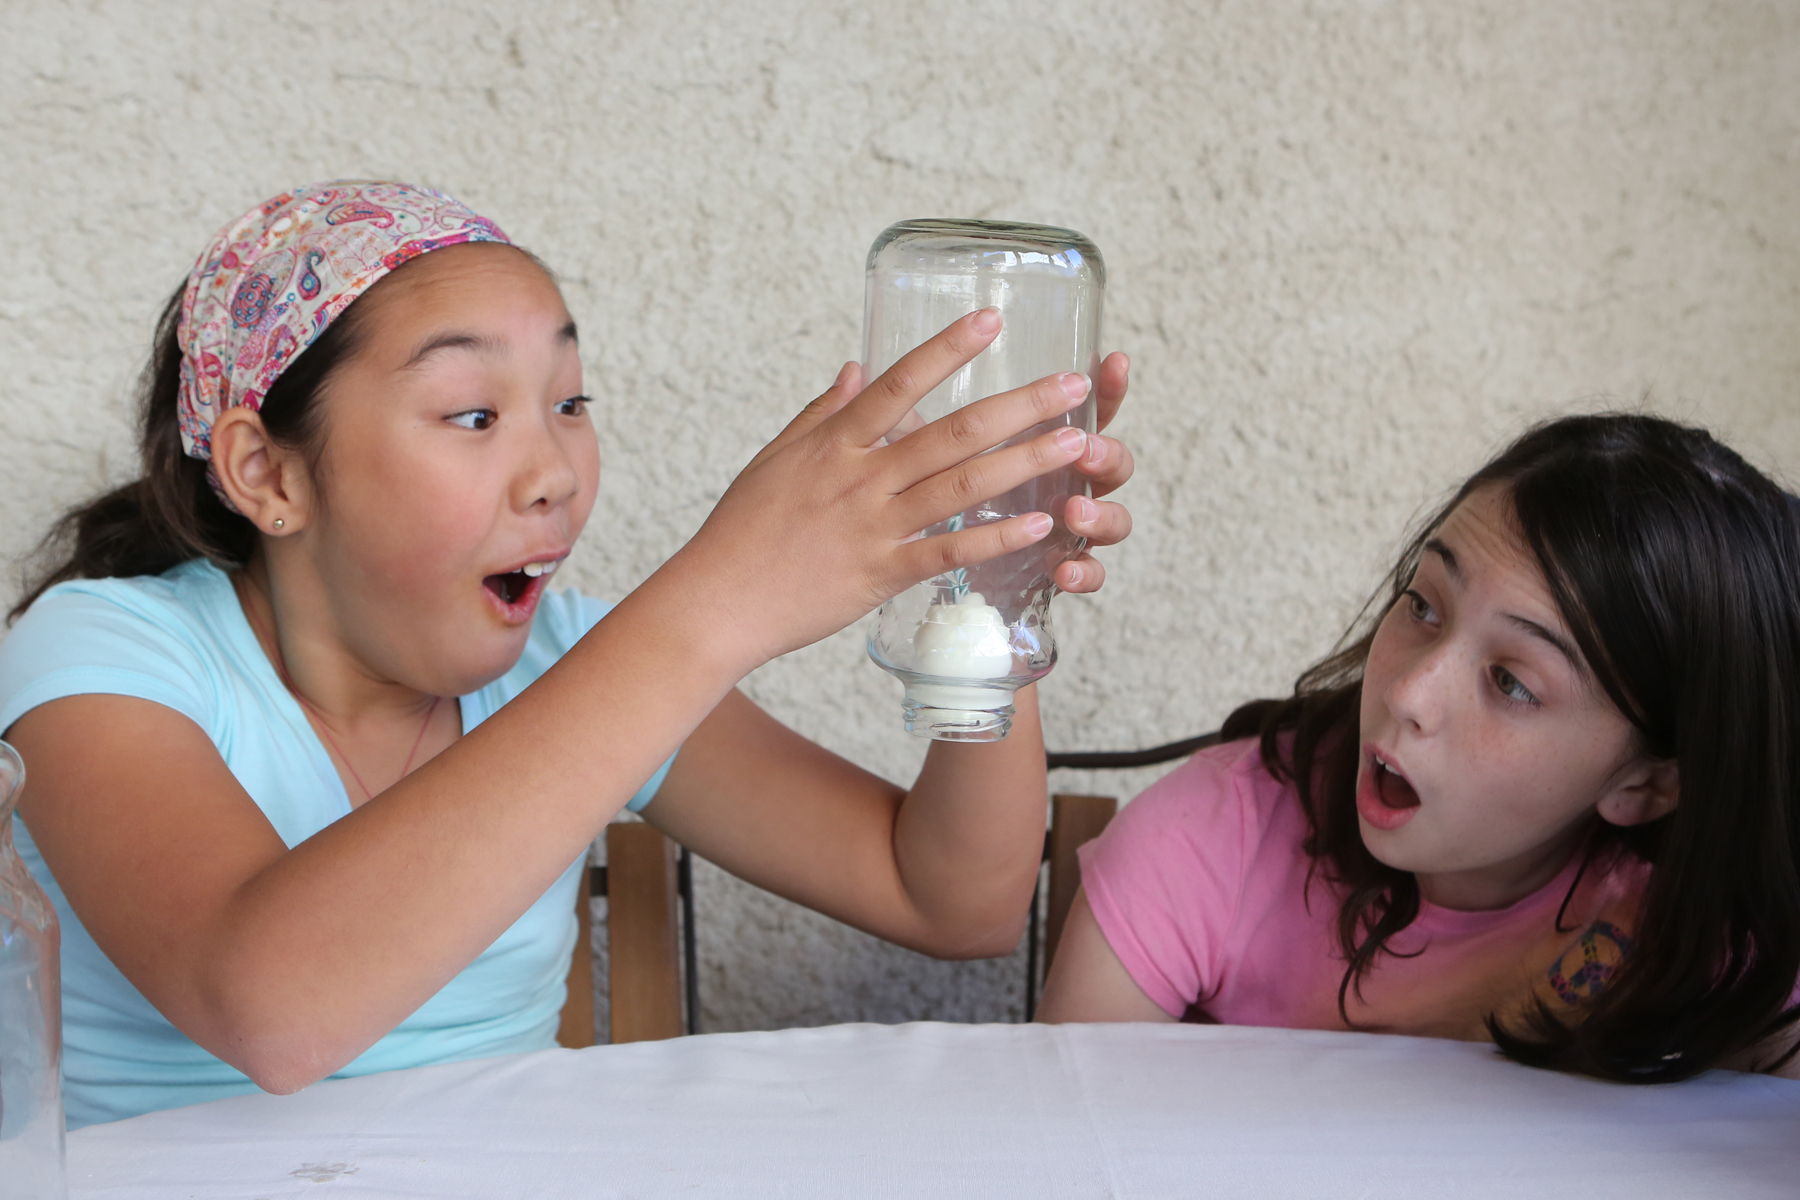
Egg drops are a fun way to test your engineering prowess.
And finally, here’s a little more about the science of hard-boiled eggs.
Fossil Hunting
- by KitchenPantryScientist
Every fossil has a story to tell.
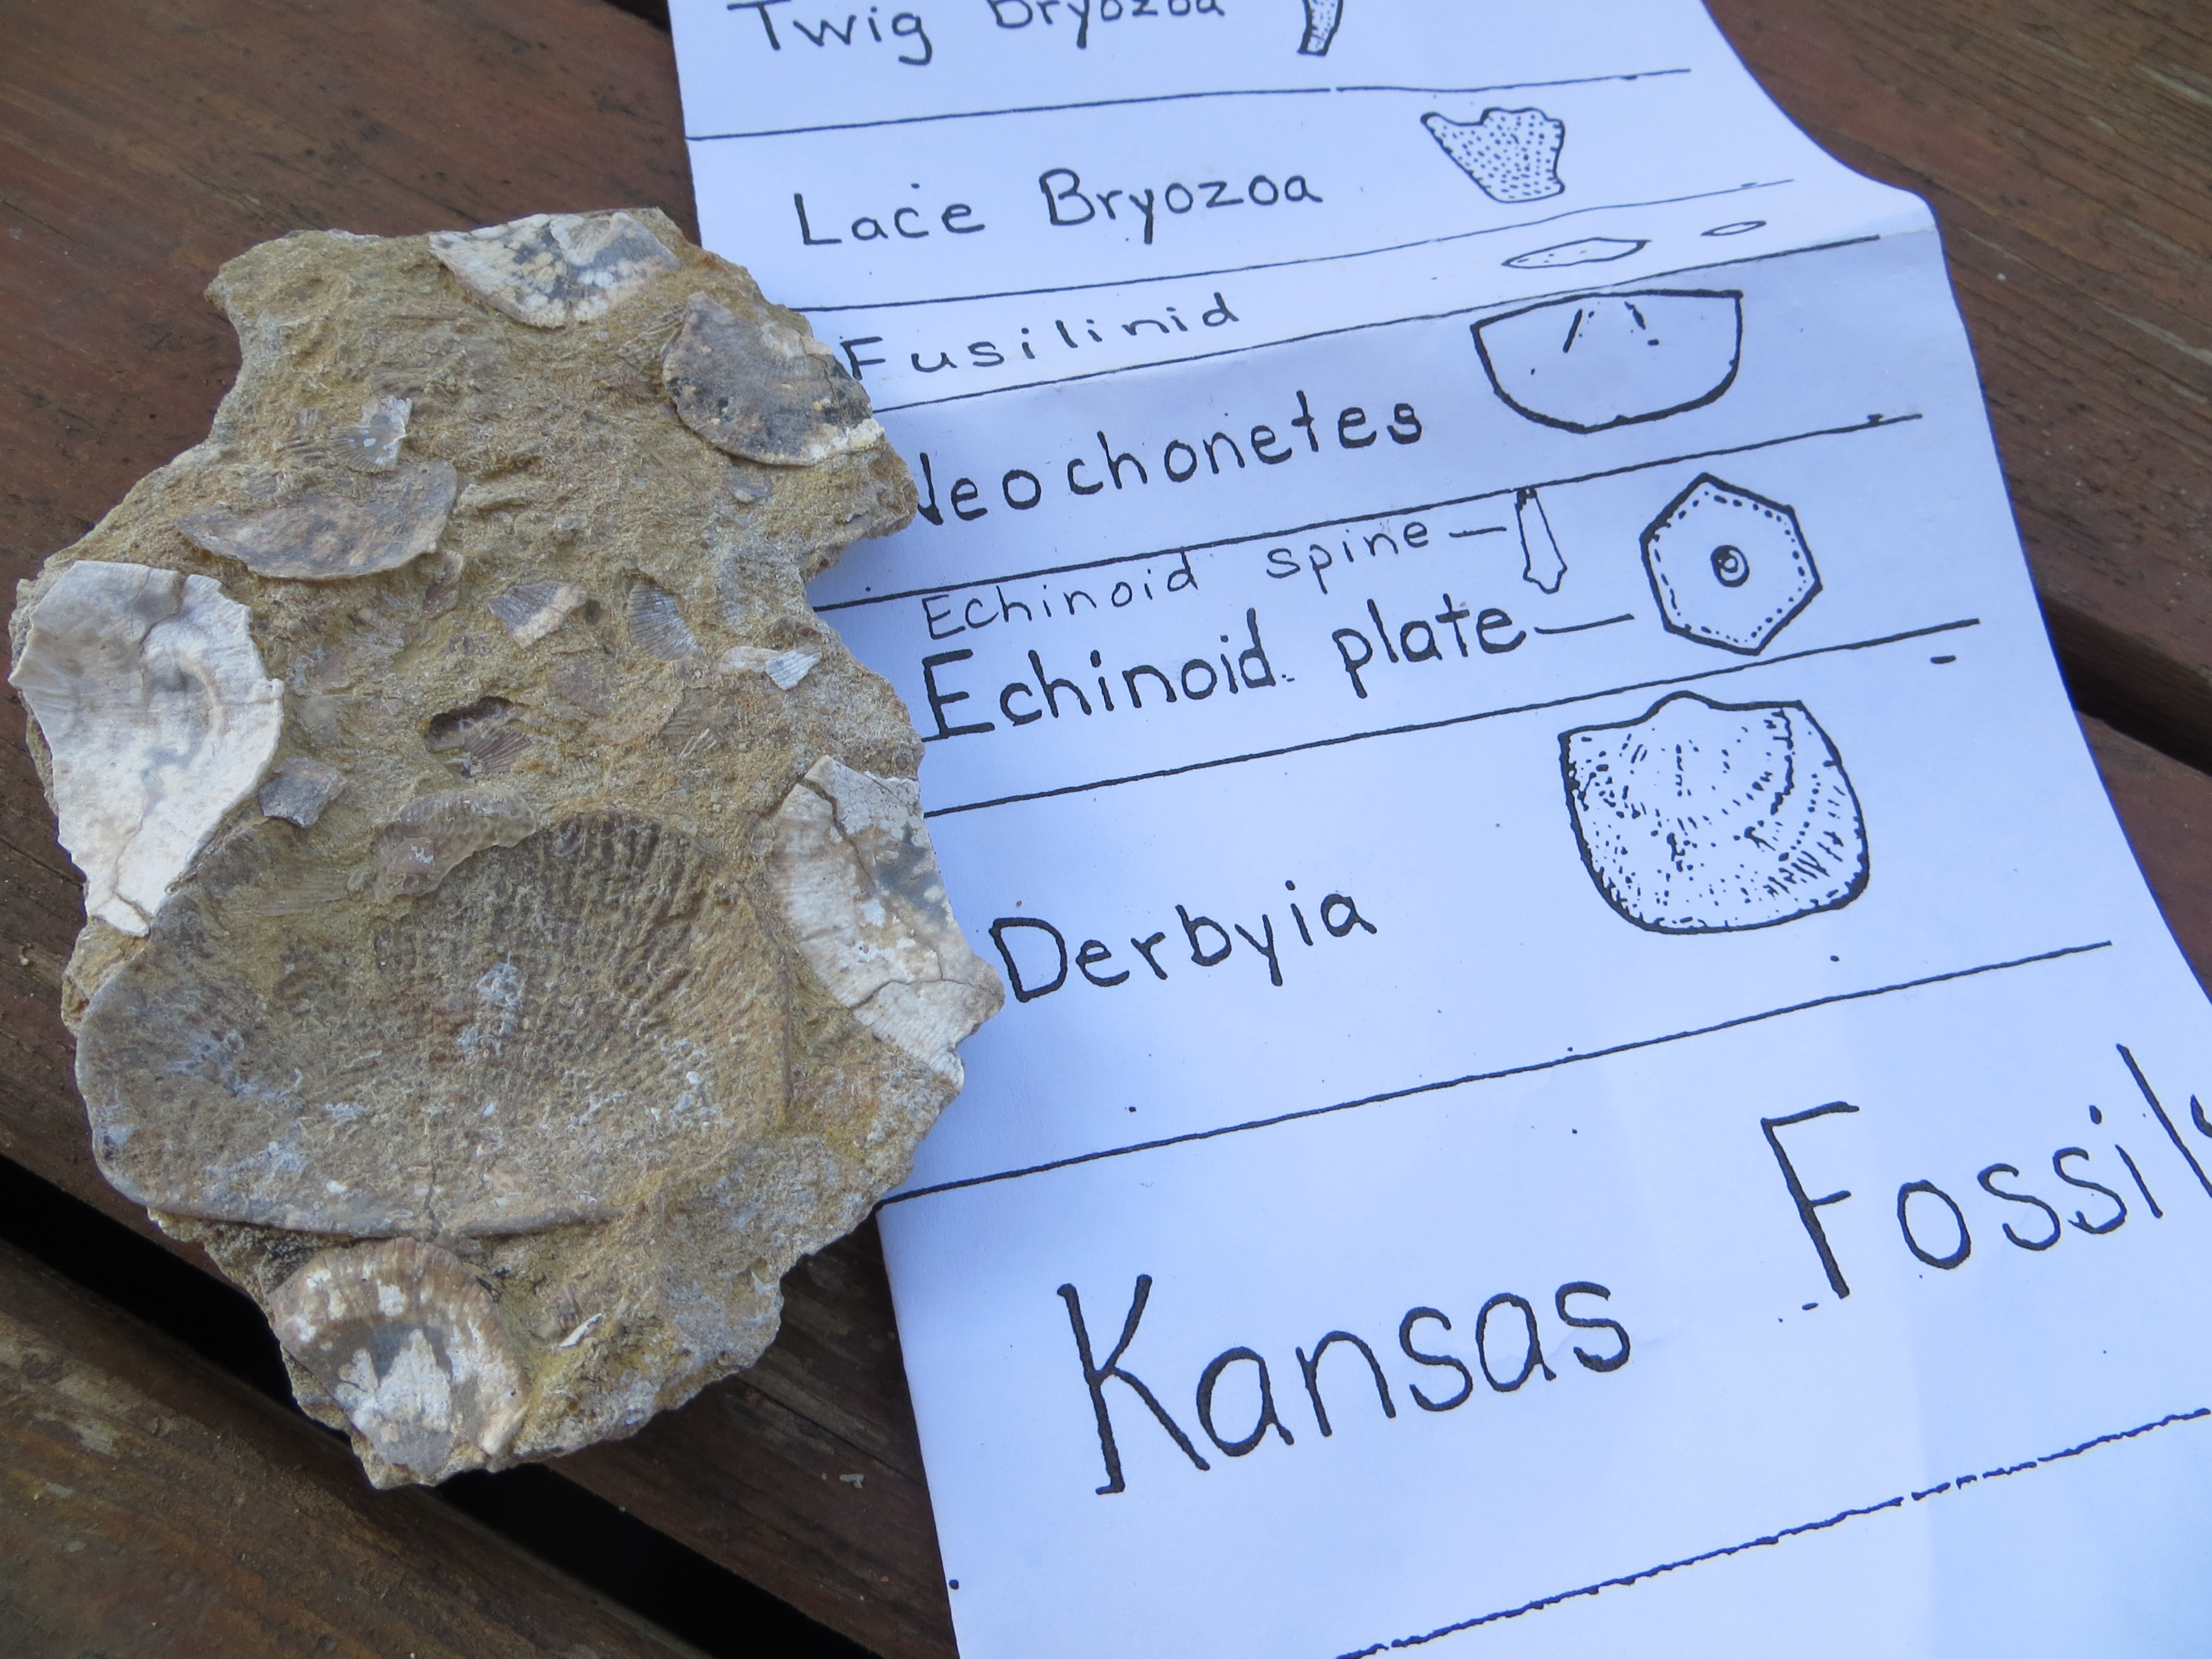
Whether it’s the spectacular specimen of a dinosaur curled up on it’s eggs or a tiny Crinoid ring, mineralized remains offer us a snapshot of the past, telling us not only what creatures lived where, but about how they lived and the world they inhabited.
Growing up surrounded by the flat-topped, windswept Flint Hills of Kansas, it was hard to imagine that I was living in the bottom of an ancient seabed, but there was evidence of the Permian period all around.
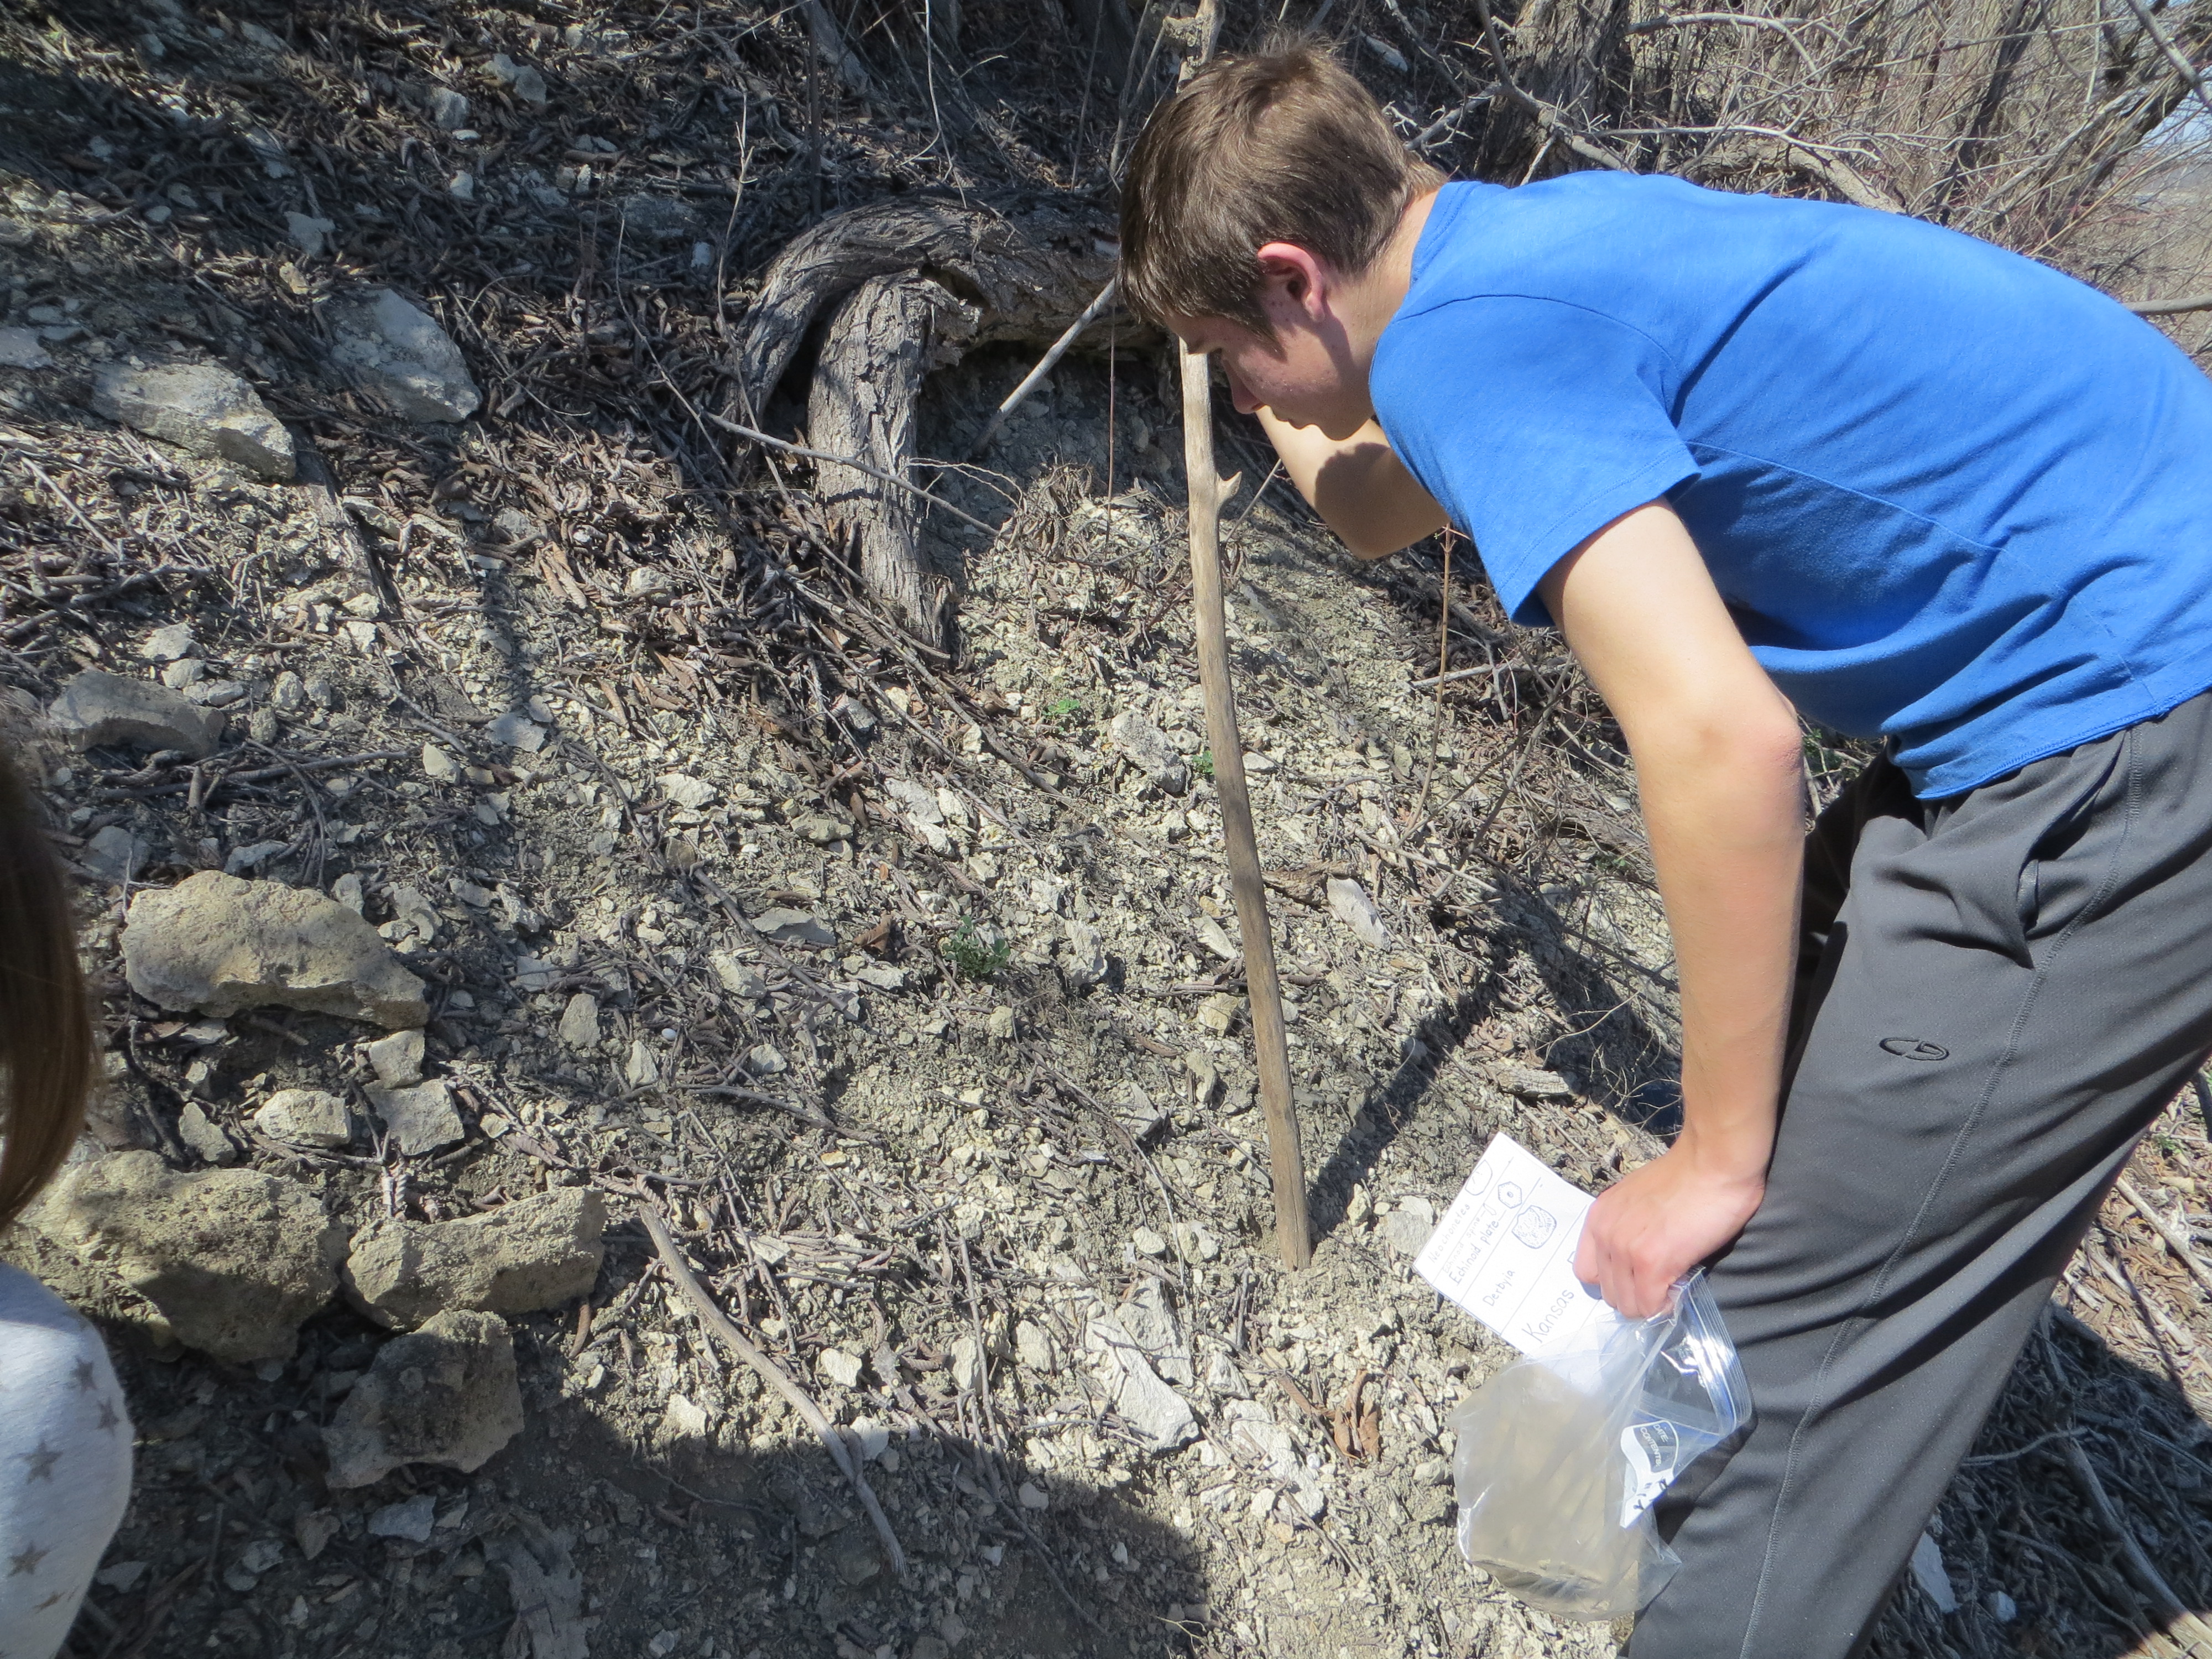
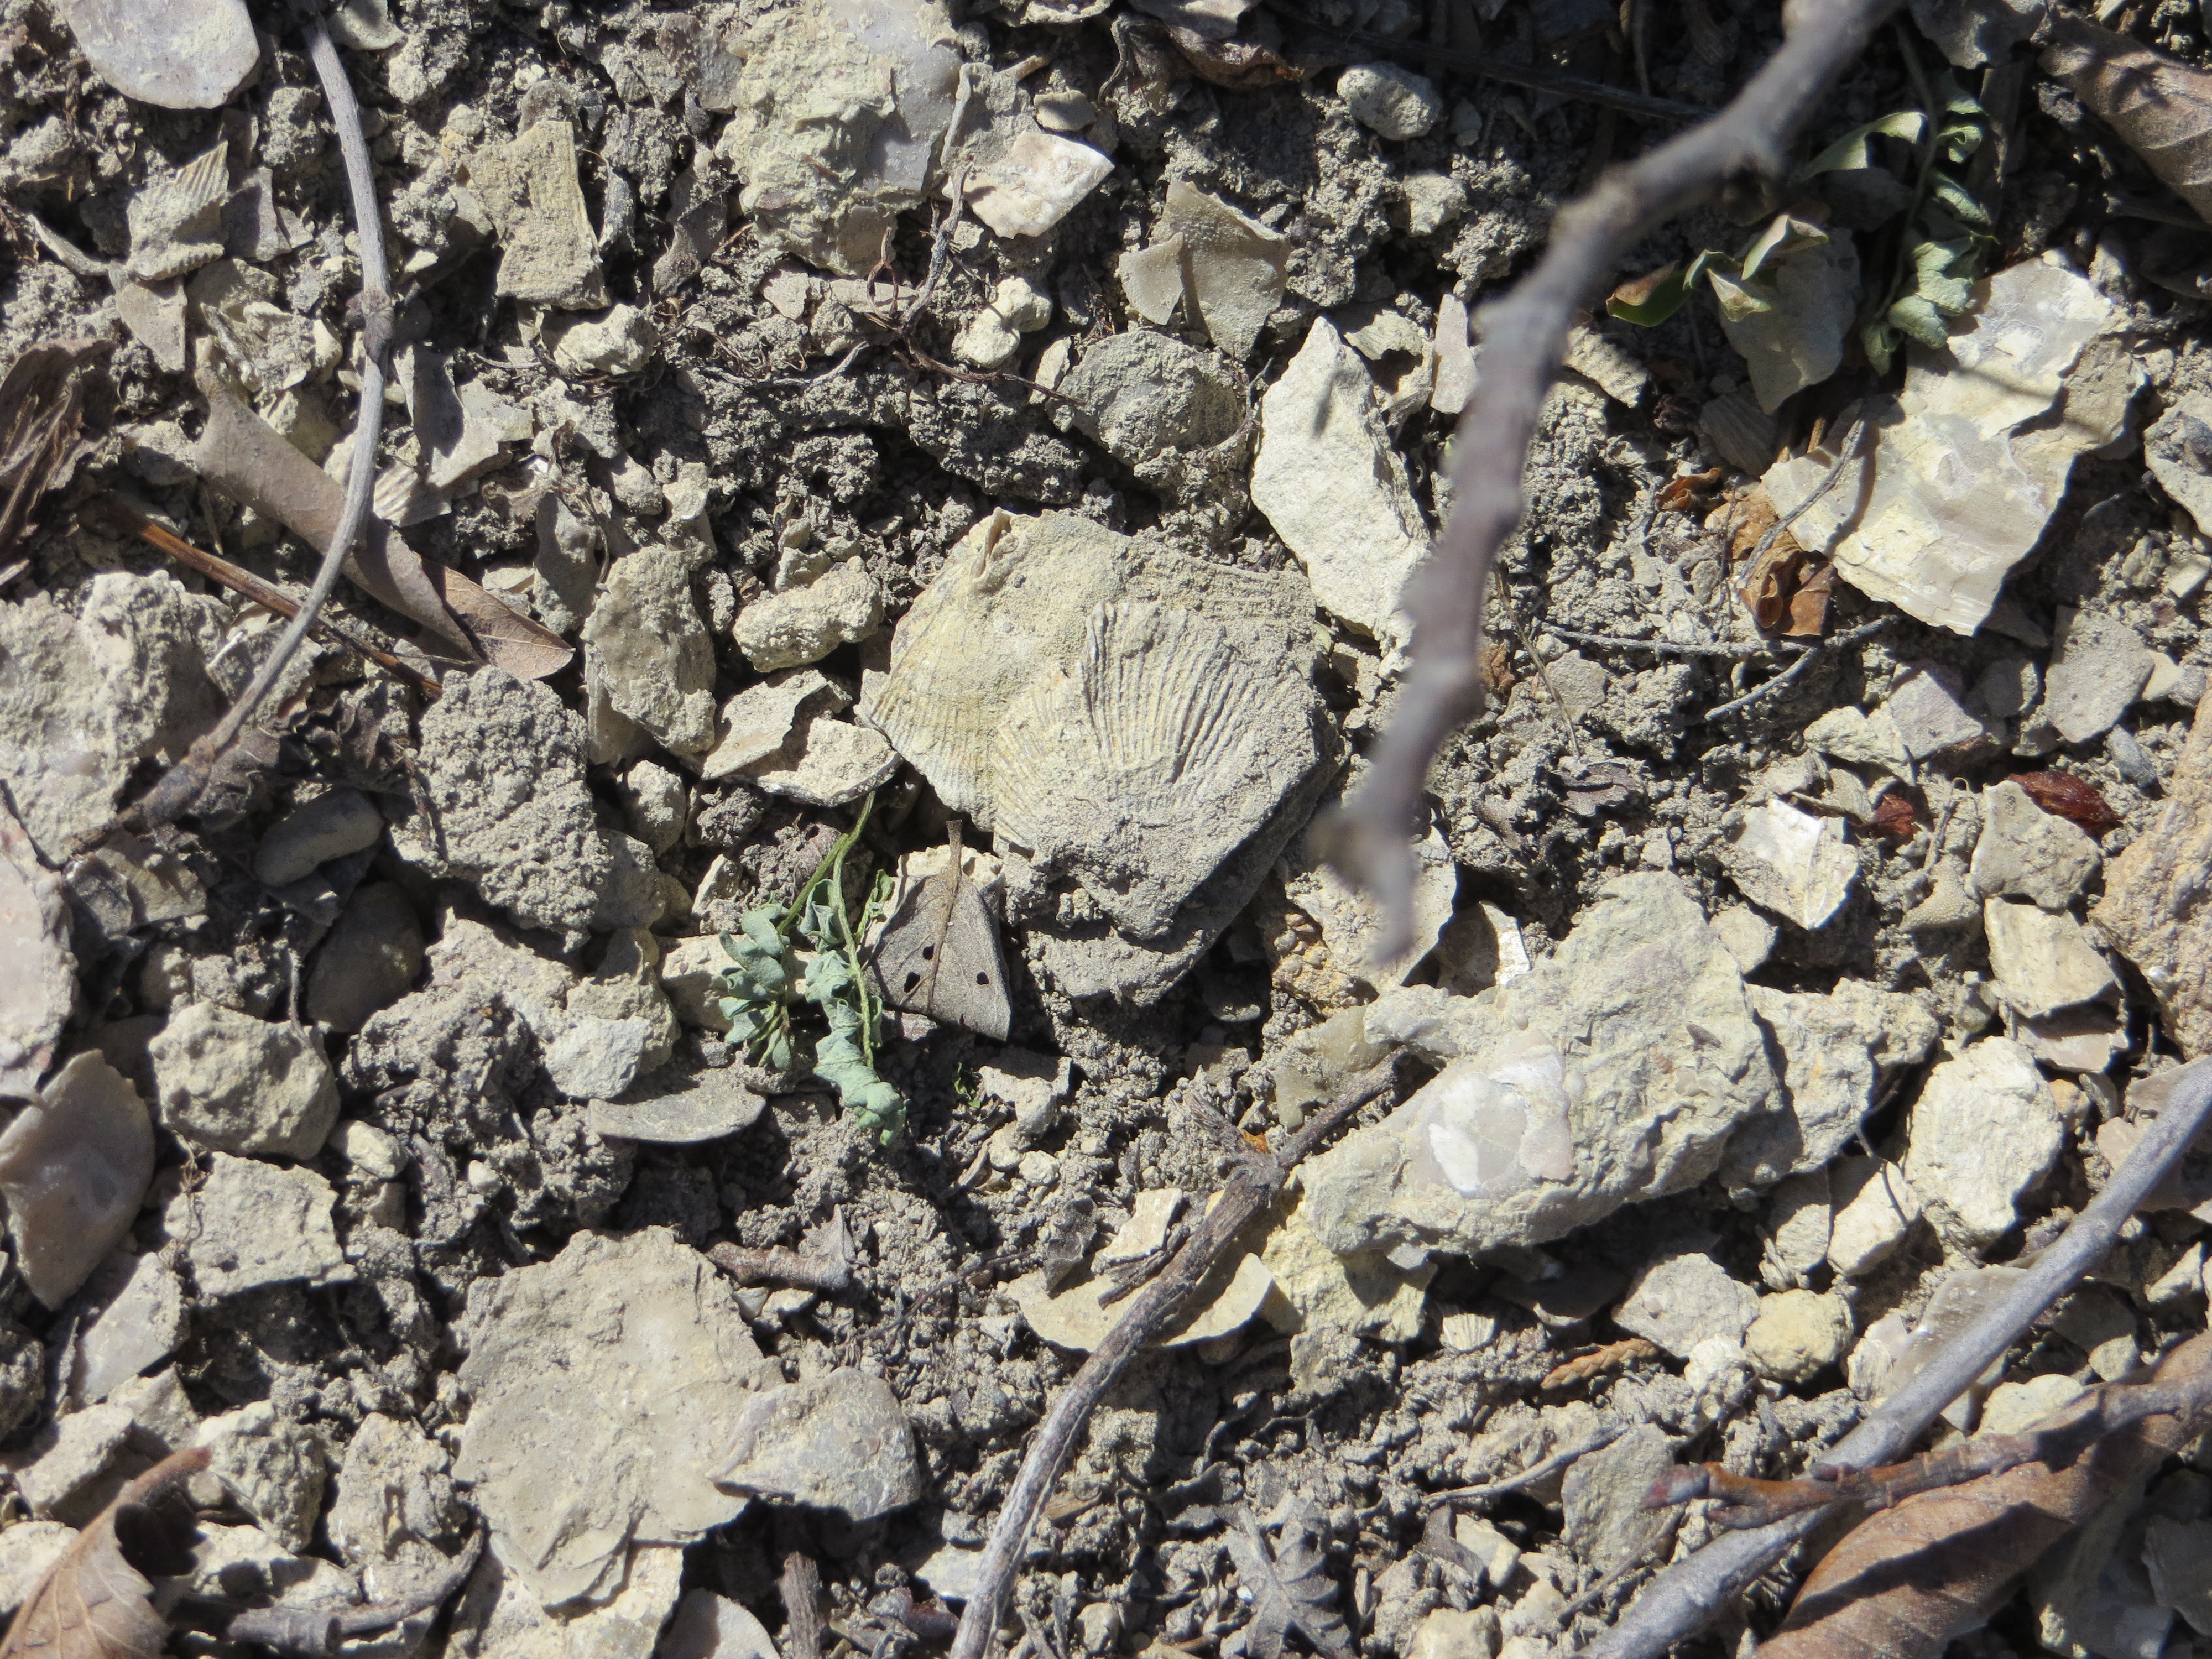
Now, when my kids and I return to my hometown, a fossil-hunting trip is always part of our routine, and we hunt for shells and coral where roads cut through crumbling limestone and and chert (flint.) Looking up at layer after layer of rock and shells, I can almost feel the weight of the water that once covered the land.
An episode of RadioLab we heard on the drive North from Kansas to Minnesota explained that coral keeps time and that by comparing modern coral to ancient coral fossils, scientists discovered that millions of years ago, years were about 40 days shorter than they are now. Can you guess why? Give the podcast a listen here. My mind was blown!
A visit to the Flint Hills Discovery Center in Manhattan, KS gave us more insight into the amazing geology, ecology and anthropology of the Flint Hills and the Konza Prairie that blankets them. Most people don’t know that the great tallgrass prairies of the United States wouldn’t exist if not for humans, who have been burning them for thousands of years.
What do you know about where you live? What’s it like now? What do you think it was like long, long ago? Are there fossils nearby?
Here are some fossil-hunting resources I found online, in case you want to go exploring:
http://geology.about.com/od/fossilbasics/tp/parks-that-allow-fossil-collecting.htm
http://mentalfloss.com/article/50997/10-states-fossil-hunting-sites-public
http://www.fossilguy.com/sites/
http://www.fossils-facts-and-finds.com/fossil_hunting_usa.html