Category:Uncategorized’
Unboxing “STEAM Lab for Kids”
- by KitchenPantryScientist
Today is the official release date of my new book “STEAM Lab for Kids!” You can pick it up online or in your favorite bookstore!
Rainbow Science
- by KitchenPantryScientist
Happy Saint Patrick’s Day! Yesterday, I demonstrated some fun rainbow science on The Jason Show. Click here to watch!
As part of the segment, I featured the “Rainbow Slime” experiment from my new book, “STEAM Lab for Kids,” which you can order from Amazon, Barnes and Noble, or your favorite online retailer. Here’s a sneak-peek at a few photos from the book.
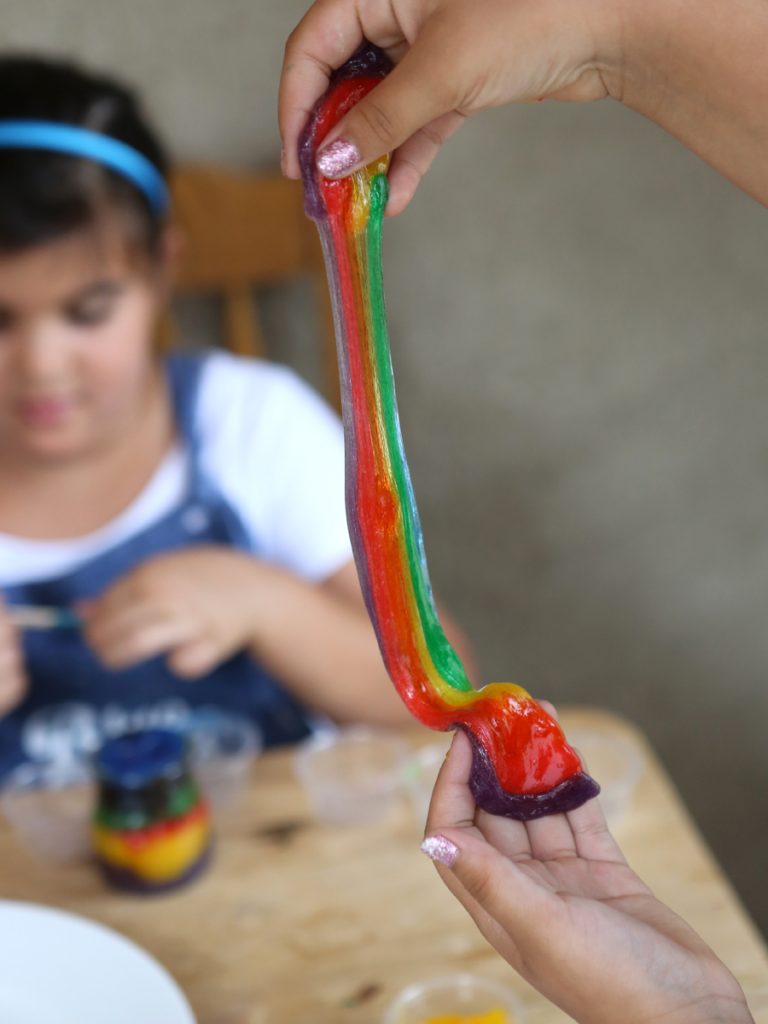
Rainbow Slime from “STEAM Lab for Kids” by Liz Lee Heinecke
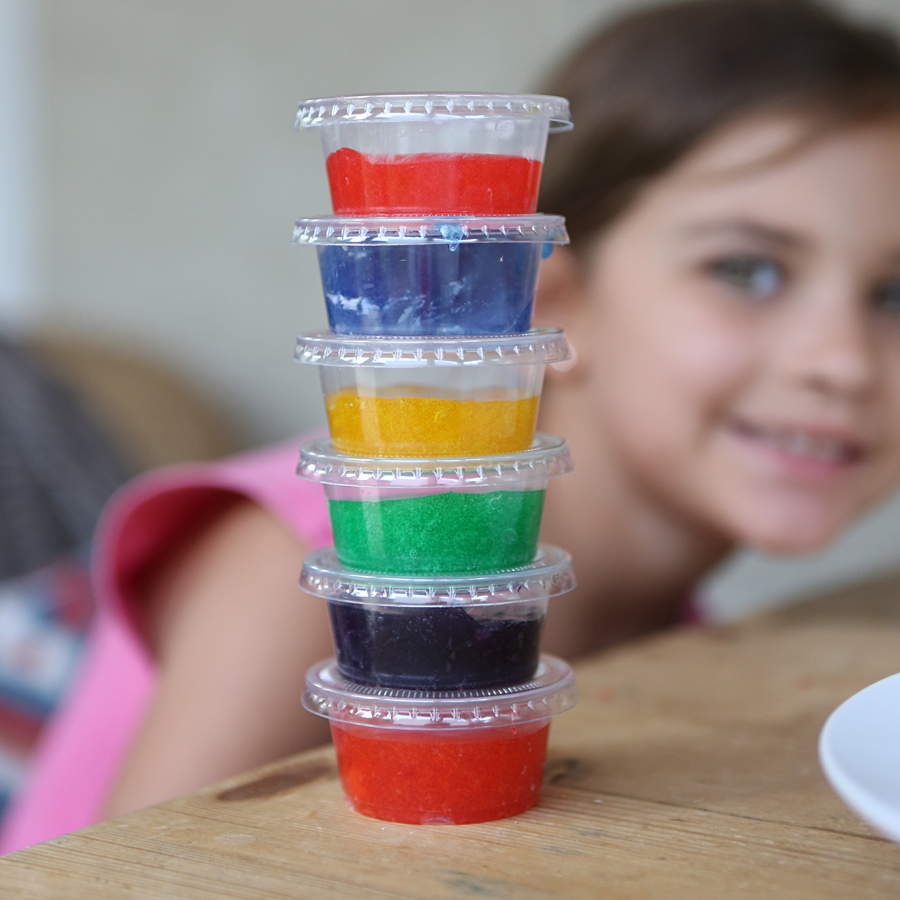
Rainbow Slime from “STEAM Lab for Kids” by Liz Lee Heinecke
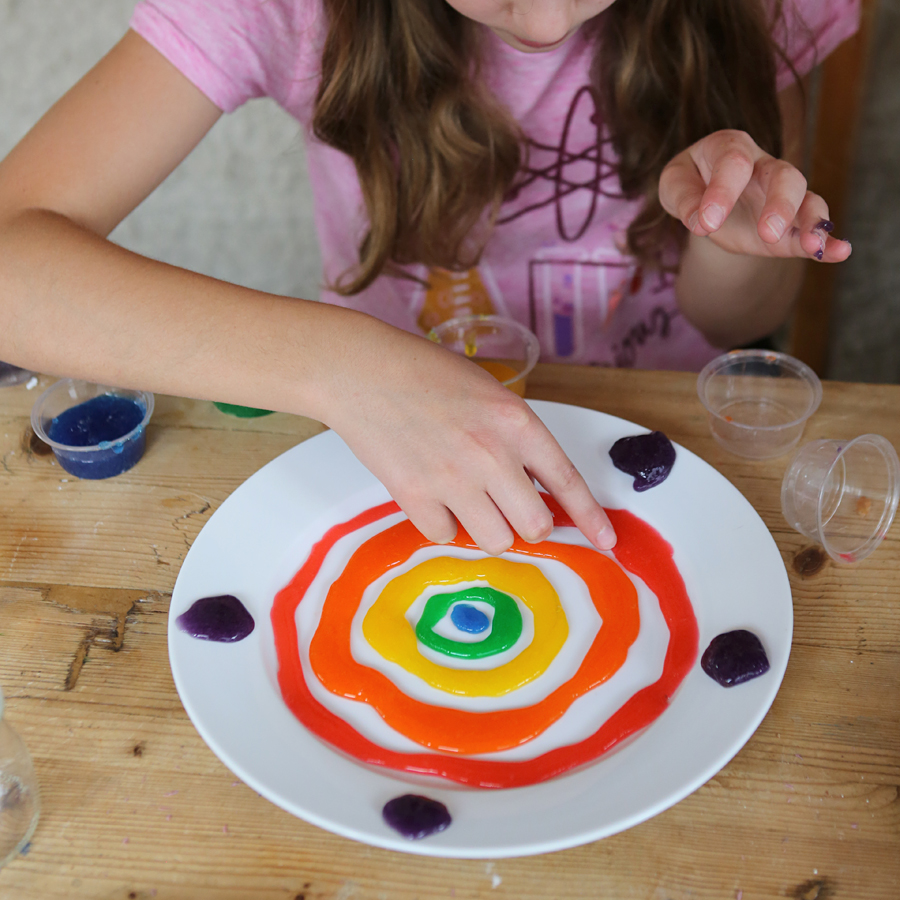
Rainbow Slime from “STEAM Lab for Kids” by Liz Lee Heinecke
Seed Science: Homemade Chi Pets
- by KitchenPantryScientist
I grew up hearing the Chi Chi Chi Chi song on TV, but our family never actually purchased a Chi Pet, so I never realized the dream of sprouting green hair from a clay animal. Until now.
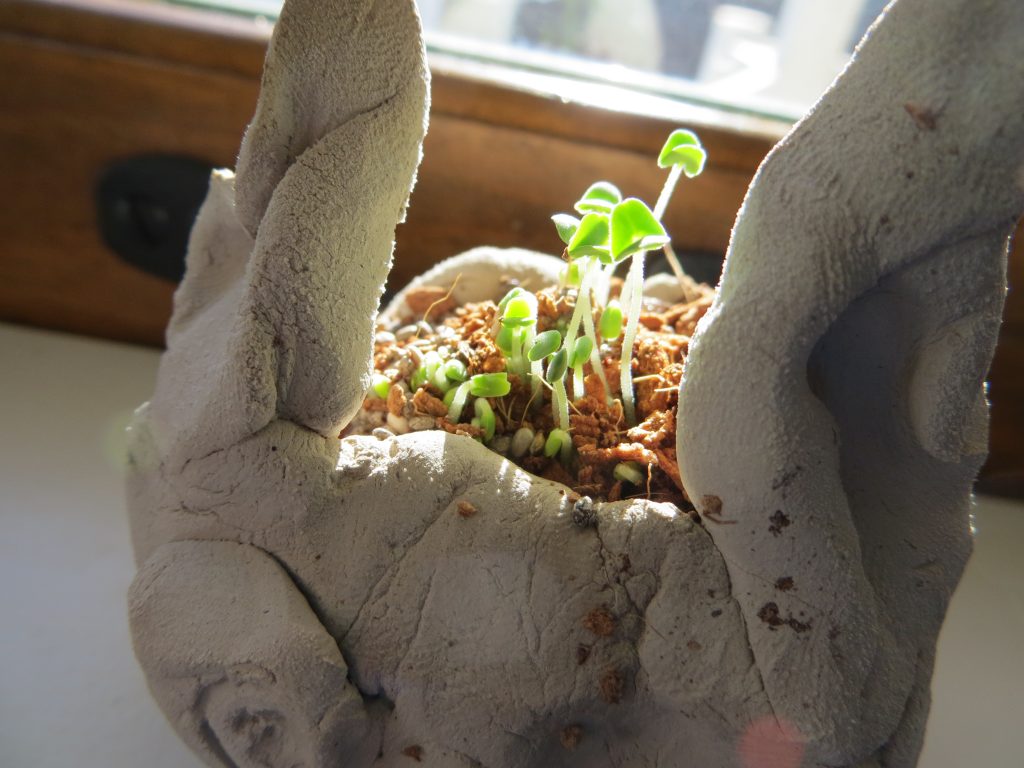
Chia Creature (KitchenPantryScientist.com)
With the emergence of chi seeds as a new health fad, it’s easy to get your hands on some chi seeds (of the sprouting variety) with a click of the mouse, or a trip to the Co-op. Chia seeds are quick-growing members of the mint family called Salivia hispanica, hailing from Central and South America where they have served as a food source for humans for well over a thousand years. And although studies have shown that they probably won’t help you lose weight, they are chock full of protein, fiber, fatty acids and anti-oxidants.
When you give these tiny seeds the signals they need to sprout: water, light, warmth and air, they grow very fast, so you should see tiny white roots poking out in a few days, soon to be followed by a shoot and leaves.
Since most people don’t have any way to fire clay in their homes, I decided to keep it simple. These homemade chia pets are basically clay (or Play-Dough) animals formed around seed starter pellets (also available online.) Add a few pre-soaked chia seeds, wait a few days and Voila! Your homemade animal will be sprouting living green hair.
You’ll need:
-2 Tbs chia (sprouting) seeds
-dirt or seed starter pellets
-clay or playdough
-a fork or toothpick
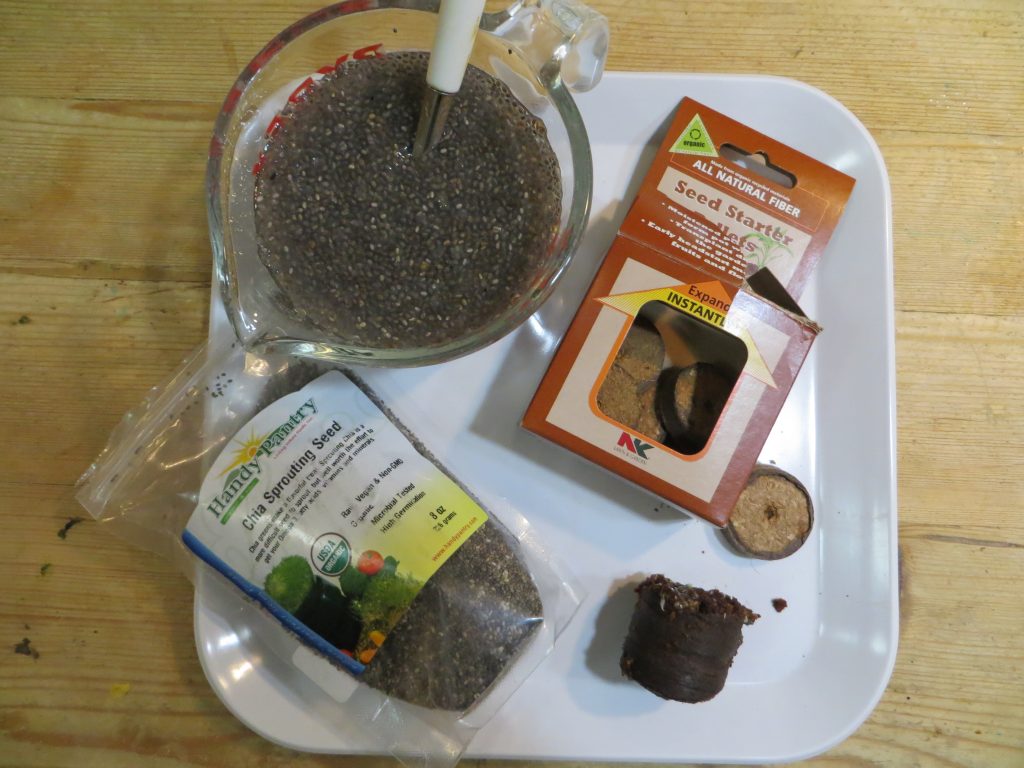
1. Soak 2 Tbs. chia seeds in 1/2 cup water overnight. The mixture will get slimy as it sits and water is trapped by tiny fibers on the seeds to form a gel-like substance.
2. The next day, soak your seed starter pellets per the instructions on the package.
3. Create a clay or Play-Dough animal big enough to hold the expanded pellet or some dirt inside, wherever you want the green sprouts to appear.
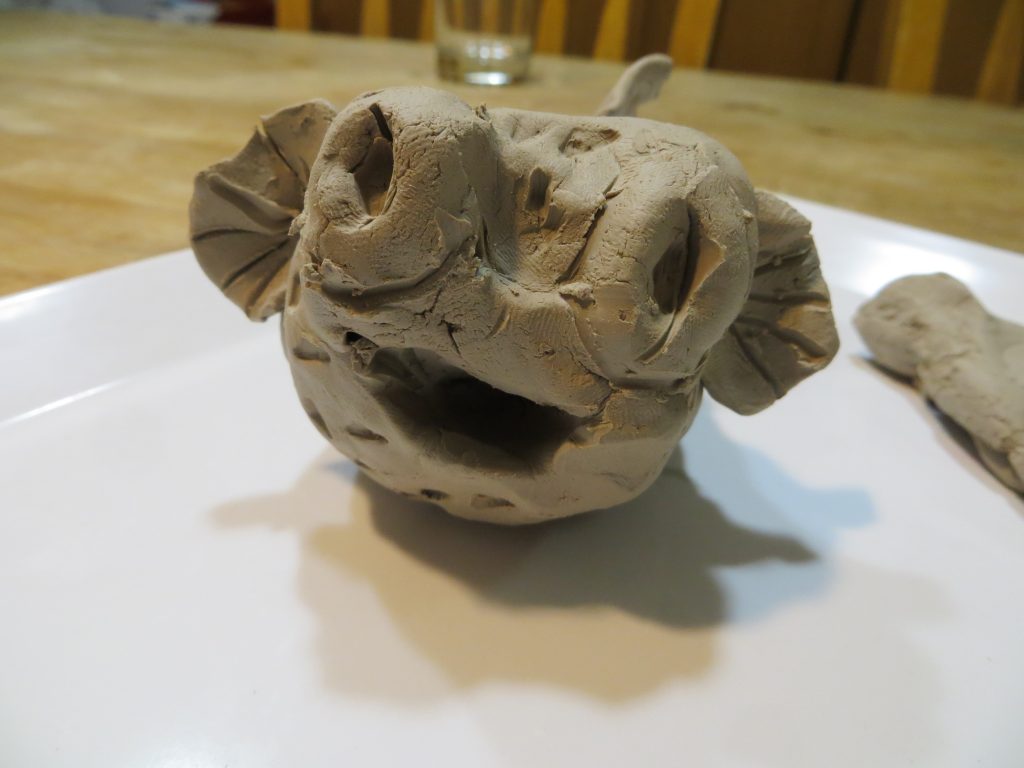
4. Put the dirt/seed starter pellet into to space you created and scratch the surface with a fork or toothpick.
5. Add 1/2 tsp or so of seeds to the dirt and use the fork or toothpick to mix them into the soil.
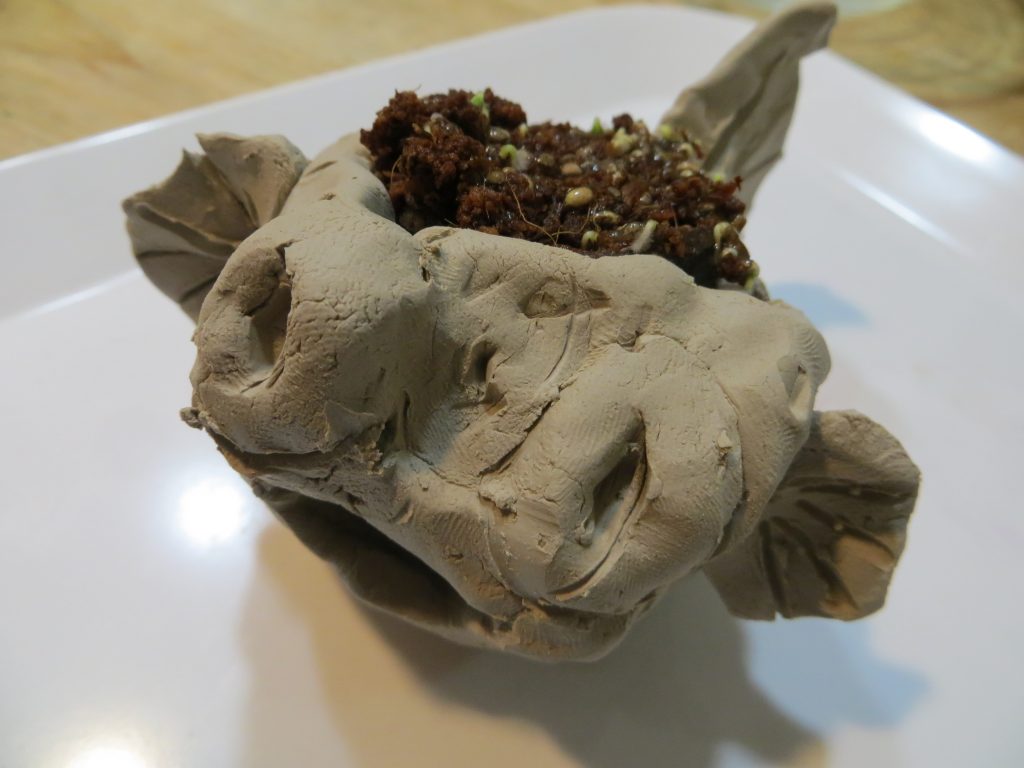
Chia seeds sprouting in our Chia Puffer Fish! (KitchenPantryScientist.com)
6. Wait for the seeds to grow, keeping the soil damp at all times. (You can speed growth by covering your chia pet with a plastic bag to hold in heat and moisture.) Watch for roots and leaves to emerge and draw or photograph them.
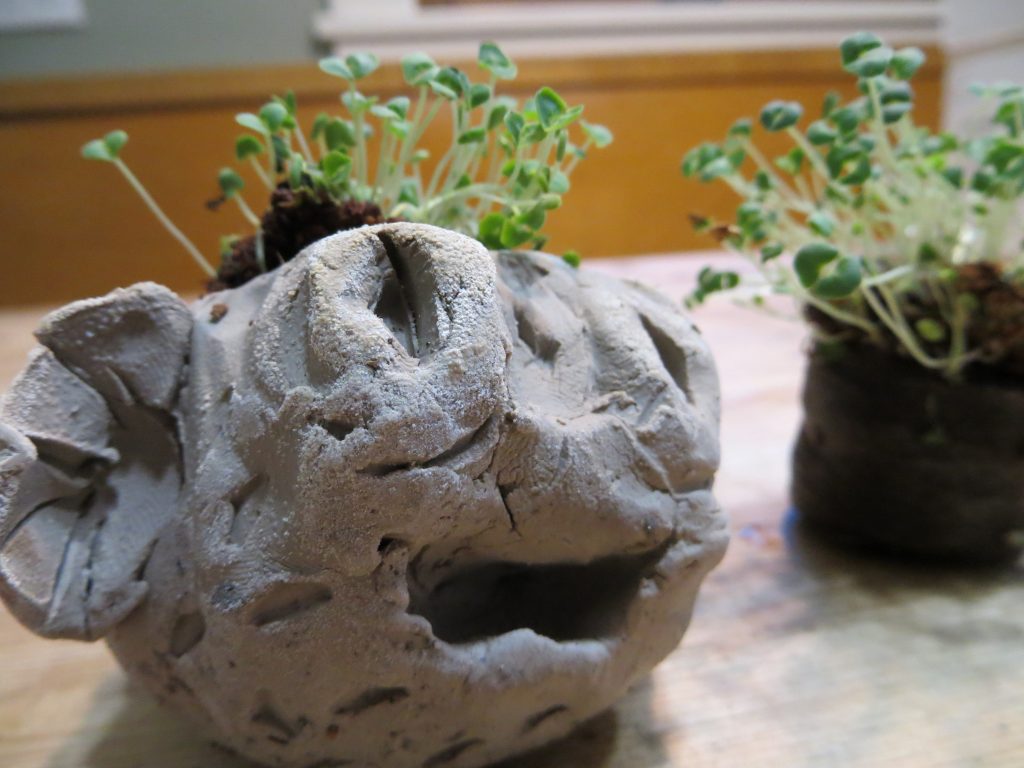
Homemade Chia Pet -KitchenPantryScientist.com
“No risk is more terrifying than that taken by the first root. A lucky root will eventually find water, but its first job is to anchor an embryo and forever end its mobile phase, however passive that motility was….it assesses the light and humidity of the moment, refers to its programming and quite literally takes the plunge.” -Hope Jahren “Lab Girl” (My favorite new book. Read it!)
Slime Kit: Homemade Science-y Holiday Gifts for Kids
- by KitchenPantryScientist
Buying gifts is fine, but it’s more fun to make them. This year, we decided to make botanical gifts for the adults on our list, and slime kits for the kids.
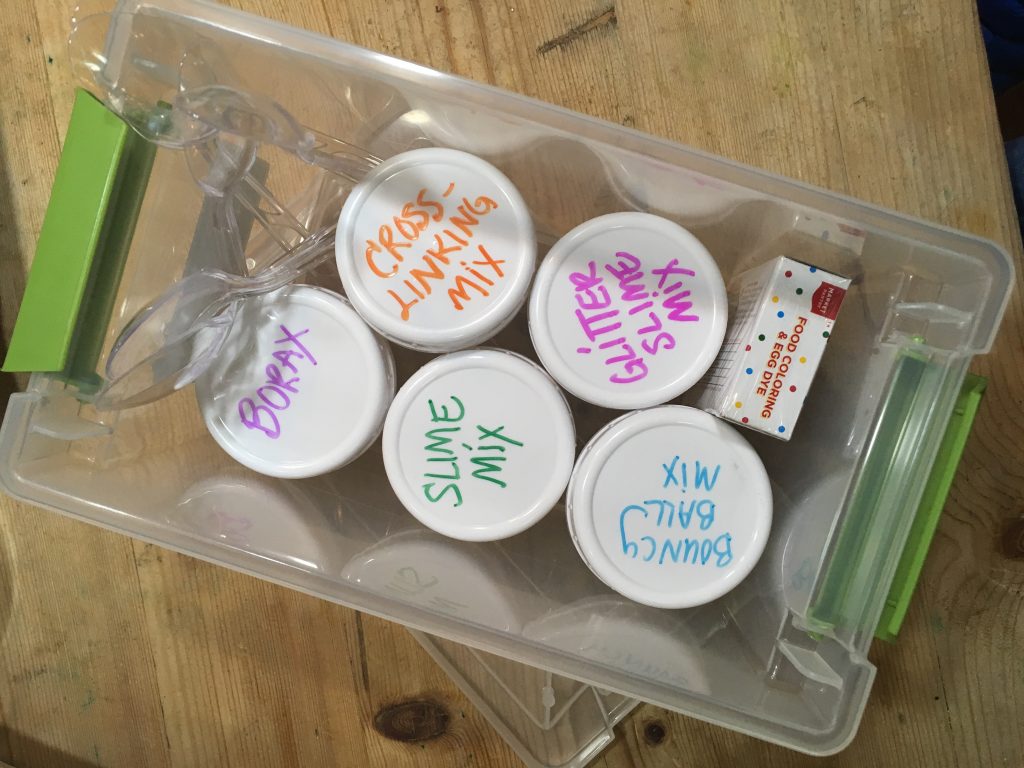
To make a slime kit, you’ll need:
-glue
-glitter glue (optional)
-Borax laundry detergent
-small plastic sample cups or paper cups (optional)
-food coloring
-jars with lids
-a small plastic bin or shoe box
-plastic spoons
-extra glitter (optional)
Label the jars and fill as follows:
- Bouncy Ball Mix (fill with glue)
- Slime Mix (fill with equal parts glue and water, mixed well)
- Borax detergent (fill with powdered detergent)
- Cross-Linking Solution (leave empty)
- optional-Sparkly Bouncy Ball mix (fill with glitter glue)
- optional-Sparkly Slime Mix (fill with equal parts water and glitter glue, mixed well)
Make an instruction sheet for the kit. (Print out the info below, or copy it onto a card.)
To make slime:
- Fill Cross-Linking Solution container with warm water. Add about 2 tsp Borax per 1/2 cup water to the container. Mix well. (Don’t worry if all the Borax doesn’t dissolve!)
- Add a few spoonfuls of Ball Mix or Slime Mix to a small plastic cup or paper cup.
- Add a drop or two of food coloring to the cup. Stir.
- Add 3 spoonfuls of the Cross-Linking Solution to your ball mix or slime mix and stir well.
- If the slime still feels too sticky, add a little more Cross-Linking Solution.
- Remove your completed slime from the cup.
The Science Behind the Fun:
Glue is a polymer, which is a long chain of molecules linked together, like a chemical chain. The polymer formed by water and glue is called polyvinyl acetate.
The Borax solution is called a cross-linking substance, and it makes the glue polymer chains stick to each other. Eventually, all the chains are bound together and no more cross-linking solution can be taken up.
To finish the slime kit, fill the plastic bin with the ingredients you put together, including jars of ingredients, instructions, plastic spoons, and mixing cups (optional.)
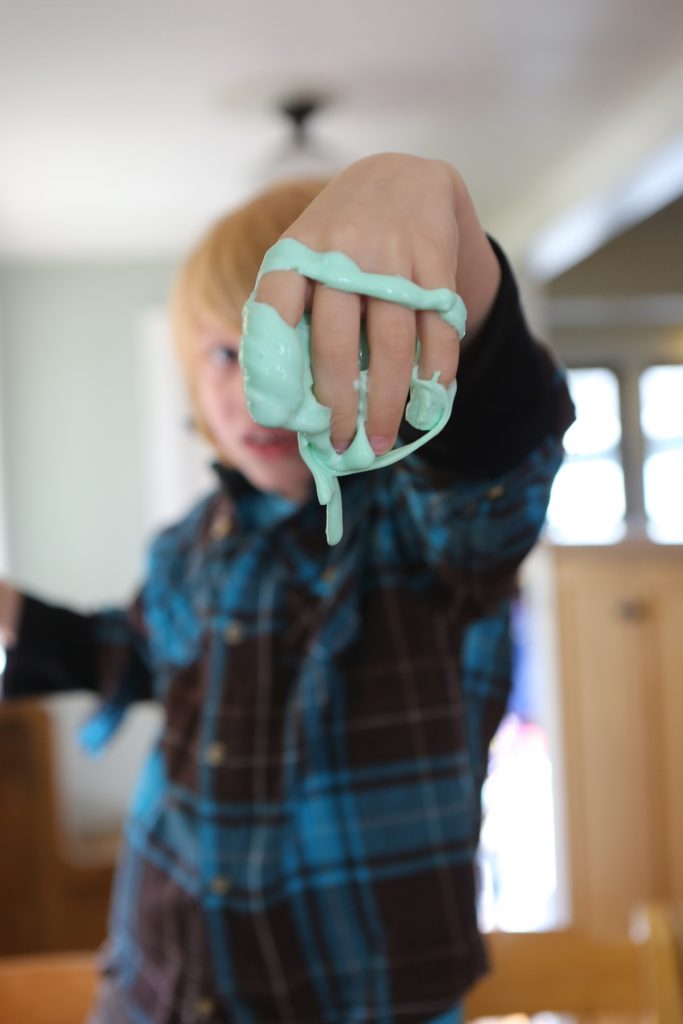
Slime from Kitchen Science Lab for Kids (Quarry Books)
Halloween Science: Oozing Monster Heads
- by KitchenPantryScientist
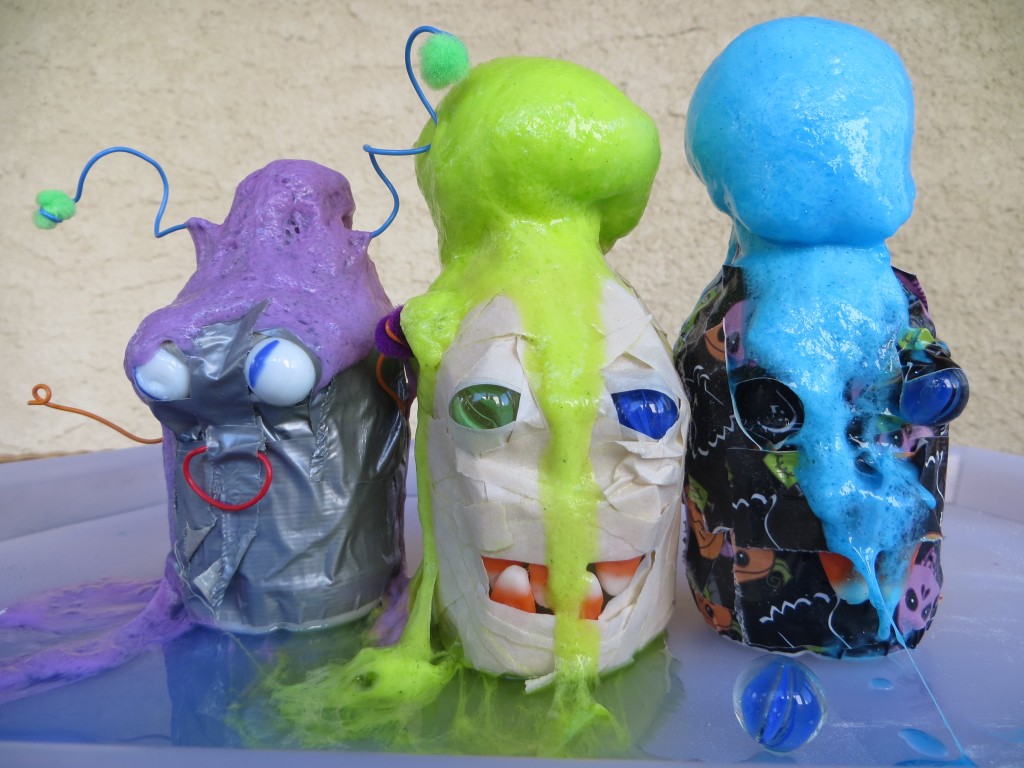 Combine science and art in this awesome experiment!
You’ll need 8 oz water bottles, glue, Borax detergent, baking soda and vinegar.
First, decorate full 8 oz water bottles with tape, marbles and whatever else you can find.
Then, follow these directions to make foaming slime ooze out of their heads, using a simple chemical reaction! You’ll love it!
Marbling Science
- by KitchenPantryScientist
I’ve always wanted to try paper marbling and knew there must be some science involved. So, we gave it a go, and the results were stunning!
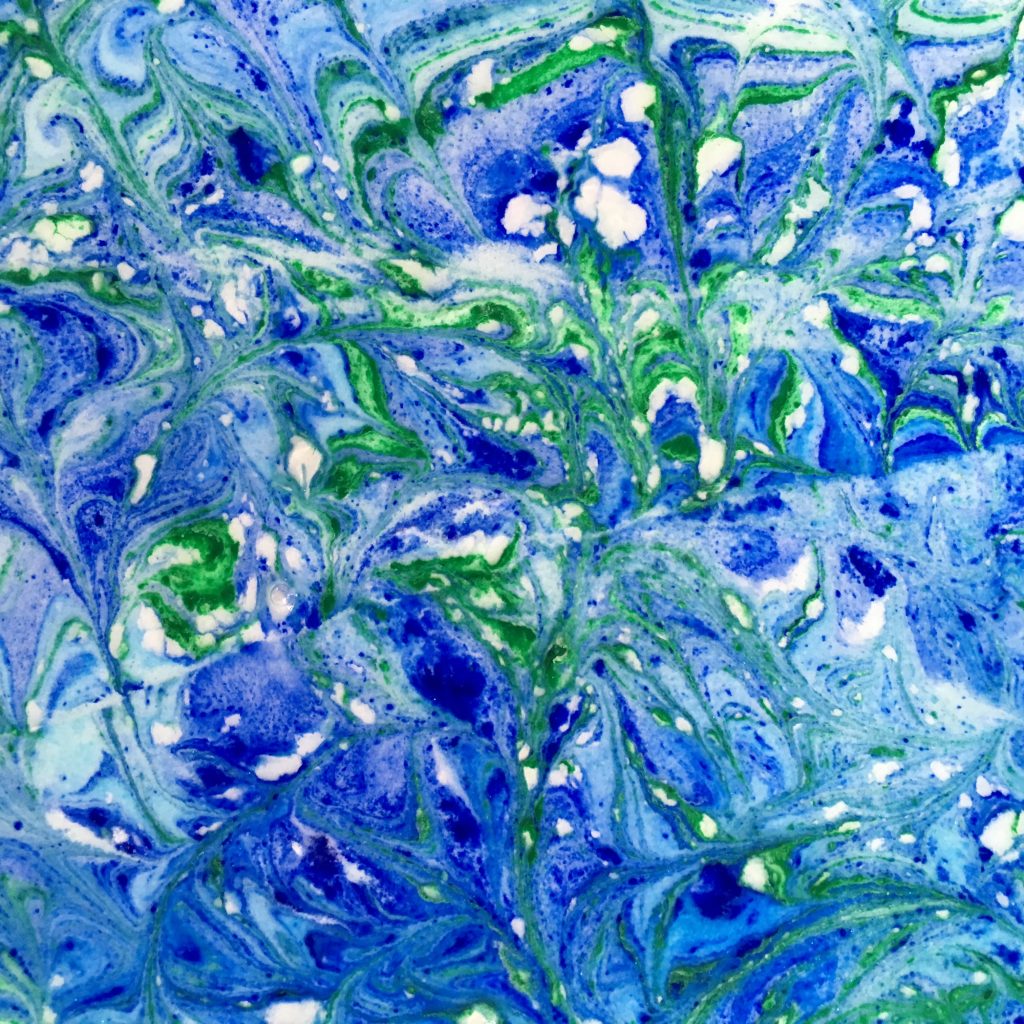
tempera paint marbling- photo by kitchenpantryscientist.com
![IMG_1586[1]](https://kitchenpantryscientist.com/wp-content/uploads/2016/09/IMG_15861-1024x768.jpg)
paper marbled with the Innovation marbling kit (Boku-Undo Suminagashi) from DickBlick.com – photo by kitchenpantryscientist.com
We tried two methods: one with liquid starch (made from cornstarch) and tempera paint, and another with a marbling kit. Both worked well, but look very different.
The Science Behind the Fun: Water molecules like to stick together, a property which scientists call surface tension. This property allows very thin layers of ink to float on water, mixing in beautiful patterns when you break the surface tension with detergent, a tool like a paintbrush, or movement. To marble paper, you have to use dye or paint that floats on the water where it can be easily transferred to paper. Alternately, you can make the liquid underneath more dense than the dye or paint, to help the dye float.
When transferring the ink or paint designs, it helps to use paper that’s been coated with a chemical called a mordant, that combines with substances (usually dyes) to make large molecules that stay in one place. (Iodine is another mordant, which is used to stain bacteria.)
Here’s a video of my 10YO making designs using the pre-made marbling kit…(More info at the bottom of this post.)
Since I like to do experiments using non-toxic, inexpensive ingredients most people have on hand, we first tried a method that uses cornstarch to thicken the bottom liquid layer and tempera paint as the dye. It requires pre-treatment of paper, like inexpensive watercolor paper from Target, with the mordant aluminum sulfate (alum), which you can find at your local coop or grocery store.
You’ll need:
-watercolor paper (cheap stuff from Target works just fine)
-two large, flat trays, like 9×13 pans
-2 tps. Alum (aluminum sulfate crystals)
-a sponge brush
-2 Tbs. corn starch
-eye dropper
-tempura paint (the more colors, the merrier)
-newspaper
- Dissolve 2 tsp alum in 3/4 cup water. Avoid inhaling powder.
- Mark one side of your watercolor paper with an A and use a sponge brush to apply alum solution evenly to that side of the paper.
![IMG_1480[1]](https://kitchenpantryscientist.com/wp-content/uploads/2016/09/IMG_14801-e1473219315556-768x1024.jpg)
- Let the paper dry overnight, or speed drying with a blow dryer.
- Make a double recipe of liquid starch by dissolving 4 Tbs. corn starch in 1/2 cup cold water. Bring 6 cups water to a boil in a sauce pan. Add the cornstarch solution to the water, stir well and boil for 1 minute. Turn the heat to low and simmer for 2 more minutes, stirring occasionally.
- Pour 3 cups of the hot liquid starch into one 9×13 pan and let cool.
- Pour 3 cups of cold water into the other pan.
- Prepare paint by mixing tempura paint with water until it has the consistency of half-and-half or whole milk.
- When starch is cool, drip paint onto the surface of the starch using an eyedropper, or something similar. Rinse dropper between colors.
![IMG_1503[1]](https://kitchenpantryscientist.com/wp-content/uploads/2016/09/IMG_15031-1024x1024.jpg)
- Swirl paint, or use toothpicks to drag out patterns.
![IMG_1521[1]](https://kitchenpantryscientist.com/wp-content/uploads/2016/09/IMG_15211-1024x768.jpg)
- Carefully place your paper on the paint, alum side-down. Let it sit for a minute or two.
![IMG_1527[1]](https://kitchenpantryscientist.com/wp-content/uploads/2016/09/IMG_15271-e1473220884288-768x1024.jpg)
- Carefully peel the paper off of the paint and gently place it, face up, in the water pan.
![IMG_1532[1]](https://kitchenpantryscientist.com/wp-content/uploads/2016/09/IMG_15321-1024x768.jpg) Let it sink and move it back an forth gently to rinse off excess paint.
Let it sink and move it back an forth gently to rinse off excess paint. - Set the paper on a piece of newspaper to dry.
![IMG_1582[1]](https://kitchenpantryscientist.com/wp-content/uploads/2016/09/IMG_15821-e1473221209774-768x1024.jpg)
- Make more marble paper in the same paint pan. When you’re ready, repeat using the rest of the cornstarch.
The Innovation marbling kit (Boku-Undo Suminagashi) from DickBlick.com pictured below includes pre-made low density dyes that you drip onto a tiny floating disc of paper in a tray of water. It’s tons of fun and yields beautiful results. I got the kit at Blick art supplies, and used the paper they recommended, which may have been pre-treated with a mordant.
![IMG_1536[1]](https://kitchenpantryscientist.com/wp-content/uploads/2016/09/IMG_15361-e1473219139648-768x1024.jpg)
Have fun!
Summer Science on Science Friday
- by KitchenPantryScientist
I talked summer science with Ira Flatow and Lynn Brunelle on Science Friday (NPR)! We swapped ideas for water rockets, pitfall traps and leaf paint, among other fun things. You can visit Science Friday’s website and listen by clicking here!
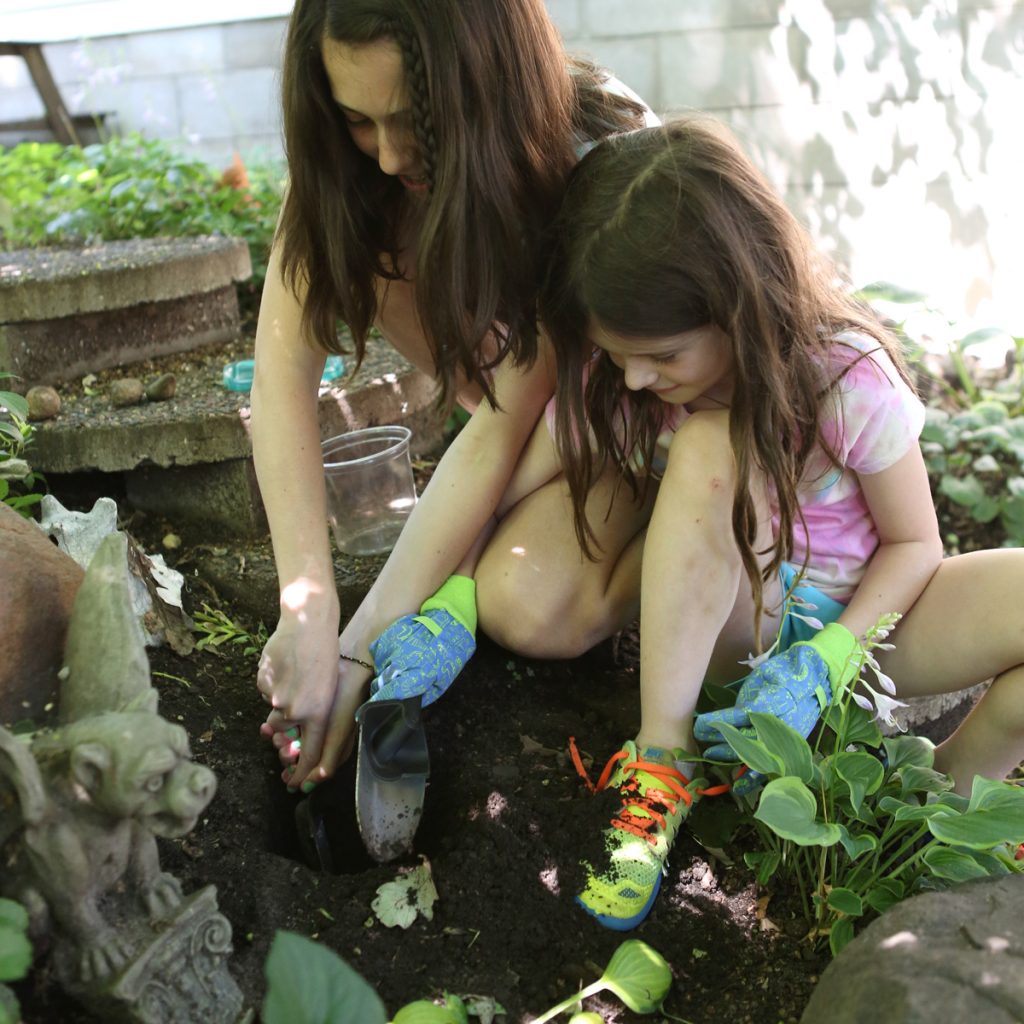
From “Outdoor Science Lab for Kids” (Quarry Books 2016)
Click here for more details!
Spring Fling
- by KitchenPantryScientist
This morning, we made kid-sized catapults on WCCO MidMorning (Minneapolis/St.Paul)!
It’s one of the new experiments in my upcoming book, Outdoor Science Lab for Kids: 52 Family-Friendly Experiments for the Yard, Garden, Playground and Parks.
I also brought along a marshmallow slingshot , and a brand new experiment…a paper airplane launcher!
Egyptian Paint
- by KitchenPantryScientist
sar·coph·a·gus (särˈkäfəɡəs/) noun-
a stone coffin, typically adorned with a sculpture or inscription and associated with the ancient civilizations of Egypt, Rome, and Greece
Two weeks ago, we mummified some apples, a hot dog and a game hen (see previous post). Today, we dug the mummies out (see video above) and found that they’re drying out nicely! I thought it would be fun to add some science art to the project! After all, pigments are molecules that give things color and paint is made from pigments like Zinc Oxide (white), Black Iron Oxide, and Silicate of Sodium and Aluminum with Sulfur (blue.)
The ancient Egyptians were amazing artists, and historians think they made paint using materials and pigments they had on hand, including eggs, casein glue made from milk, wax and gum from local trees. This paint was used to decorate everything from tombs to coffins.
We covered one of our plastic ware “coffins” with masking tape, used plaster of Paris to make it more stone-like and made casein glue from milk and vinegar using this glue recipe (casein science on this link). To the glue, we added pigment until we achieved the desired color, and then stirred in a little bit of water to get the paint-like texture we wanted. We bought the pigment at Blick art store, but didn’t buy red or yellow pigment, since they were pretty toxic. The brownish-yellow is made from Curry spices. I’d like to try the spice turmeric for a more pure yellow!
Can wait to see how our sarcophagus turns out! I’ll post a photo when we finish painting it!
Mummy-making
- by KitchenPantryScientist
When mixing up materials to make a mummy, don’t forget the salt!
Natron, which was used in Ancient Egypt to preserve mummies, is a natural salt mixture containing sodium carbonate decahydrate (soda ash), sodium bicarbonate (baking soda), sodium chloride (table salt), and another salt called sodium sulfate. Salt is a dessicant, which is a chemical that removes water from things. It also has anti-microbial properties, which means it kills bacteria and fungi. When you remove water and microbes from the picture, mummies bodies’ don’t decompose.
Today on WCOO, we mummified some apples, hot dogs and even a game hen, which is like a small chicken. Here’s an old post on how to mummify apples.
First, we’ll weigh everything we’re going to mummify, so we can see how much water weight they lose during the dehydration process.
We’ll rinse and blot the game hen with alcohol to kill some of the microbes on the outside, add aromatic spices like cinnamon and cloves, and put it in a container filled with a 50-50 mix of baking soda and salt (Kosher salt or table salt will work), where we’ll let it sit for about 40 days, changing the salts once or twice over that time period.
Real mummies are coming to the Science Museum of Minnesota! Mummies: New Secrets of the Tombs opens at the Science Museum of Minnesota on February 19. The exhibition, which features mummies from the preeminent collection of the world-renowned Field Museum in Chicago, juxtaposes ancient specimens with the modern science that has given us new glimpses into ancient Egyptian and Peruvian cultures.
![IMG_8120[1]](https://kitchenpantryscientist.com/wp-content/uploads/2016/02/IMG_81201-e1455112081186-768x1024.jpg)
