Irresistible Physics

 - by KitchenPantryScientist

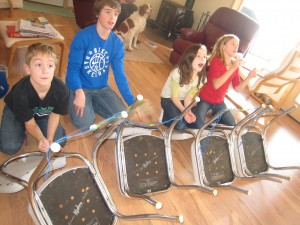
When my 6-YO and her buddy asked whether they could make slingshots this morning, so they could shoot stuffed animals at a tower of blocks, I couldn’t say no. It’s physics after all. A few months ago, my kids had a great time making slingshots with their plush Angry Birds, as you can see in this video.

We got out a chair, some rubber bands, and a plastic ring like the ones they put on prescription bottles. Within minutes, they were laughing hysterically while stuffed bunnies flew through the air. Click here for detailed directions on how to make the slingshots and to learn more about slingshot physics.

Marker Chromatography

 - by KitchenPantryScientist

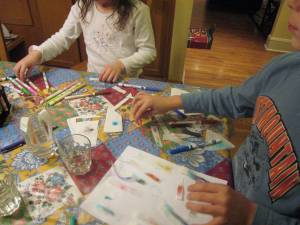
img_16781You can take this project in many different directions, which is what science is all about! Chances are, you already have all the supplies you need for this project in your kitchen: coffee filters or paper towels, magic markers, and water.

Fill the bottom of a bowl or glass with a little water.  Then, cut paper towels or coffee filters into long strips.  Draw a large dot of color (black works best) about an inch from the bottom of the strip of paper. Place the bottom of the paper, below the dot, into the water.  Once the water starts moving, the paper will stick to the side.  You can hook it over the top of the glass, like we did.

img_1681The water will be wicked up the paper and through the dot, dissolving and taking some of the dye up the strip with it.  You’ll be able to see colors separate as the dyes travel up the strip. It’s fun to see what colors make up different black inks.  My kids tried it with colors other than black too.  They even made dots comprised of several different colors and watched them separate in the water.  Another variation is to put ink on a large piece of paper, drip water on it from a dropper or straw and watch the color travel out in a circle!img_1679

We taped some of the strips into our science notebooks.  They’re very colorful. Older kids might enjoy trying a 10:1 mix of window cleaner and vinegar to separate the colors.

When you separate the colors from one another on the paper, you’re doing chromatography!

When paper is dipped in water, water molecules make it wet.  The water molecules travel up the paper towel. When the water reaches the ink, it dissolves some of the dyes in the ink, and the dyes travel up the paper towel with the water. Some of the molecules that make up the dye are smaller and travel up the paper towel faster than the larger ones, so you can see some of the different colors that make up the ink separate from one another.   The number of spots of color you see can tell you how many chemicals make up the color in your marker.

Most importantly, have fun!

Homemade Science Lab

 - by KitchenPantryScientist

Homemade science kits are fantastic, inexpensive holiday or birthday gifts. In addition, they’re great places to store loose science items you might already have around the house, like magnets or magnifying glasses. I’ll list how much some of the ingredients/stuff cost me at Target.  In a single shopping trip, it’s easy to  fill a plastic bin with enough supplies to do a number of science experiments (with a few last-minute additions from around the kitchen, like dish soap and milk.) The other morning, I talked about making your own science kit on Kare11 Sunrise.  Pair your kit up with KidScience app for iPhones and iPods, and watch your kid turn your kitchen table into a science lab! 

I’ll list some “ingredients” for science kits and link directly to the experiments in blue (just click on the experiment name.) You can print out directions from my website for older kids, or let younger kids watch the how-to videos on my website (see sidebar), so they can do them on their own. Better yet,  just put down some newspaper and let them start mixing things together.

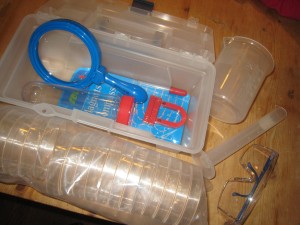
Safety goggles, petri dishes,magnets, plastic test tubes, eyedroppers, magnifying glasses, plastic beakers and graduated cylinders are great additions to any kit! Many of these are reasonably priced at Creative Kidstuff stores, if you live in the Twin Cities.

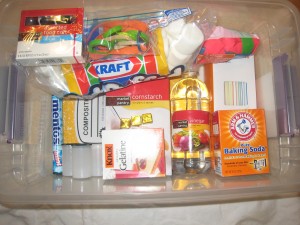
Here’s what we put in our kit:

composition book: really cheap at Target and makes a great science notebook to draw, record, and tape photos of experiments into.
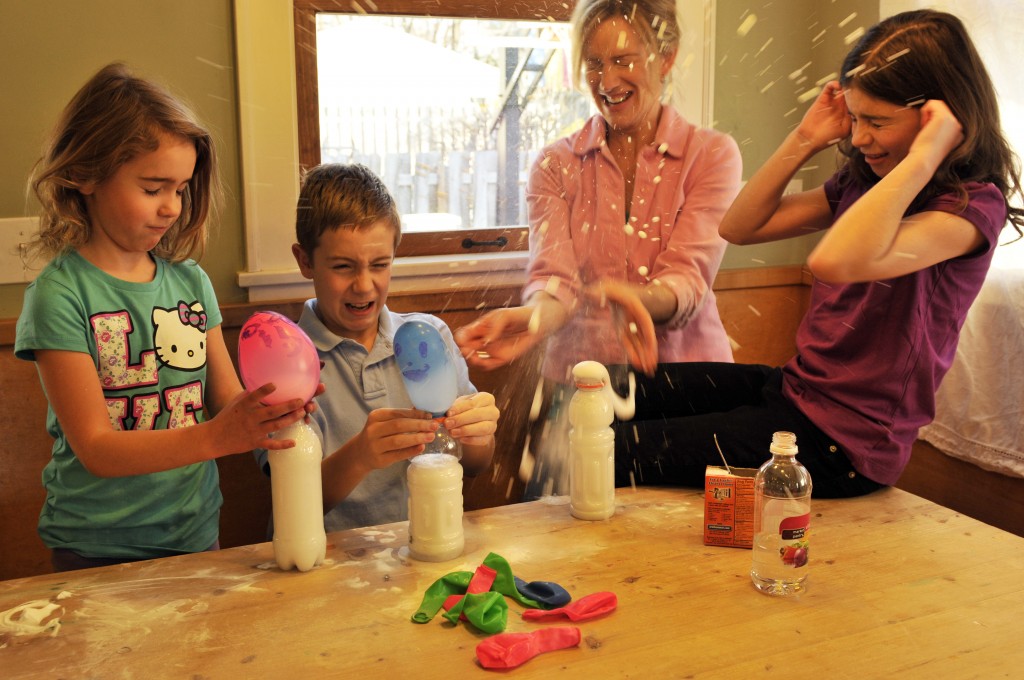
baking soda: $.52 at Target can be used for a number of experiments like fizzy balloons and magic potion. Mix with vinegar to make carbon dioxide bubbles.
vinegar $1.12 at Target can be used for fizzy balloons , alien monster eggs and magic potion.
balloons for fizzy balloons are $1.75 at Target.
dry yeast for yeast experiment is around $1. 32 at Target
white coffee filters: can be used for magic marker chromatography or making red cabbage litmus paper.
cornstarch: $1.27 at Target can keeps kids busy playing with Cornstarch Goo, a non-newtonian fluid. Here’s the video.
marshmallows around $1.50 at Target with rubber bands and prescription bottle rings you have around the house can be used to make marshmallow catapults. My kids used theirs to make their own Angry Birds game.
Knox gelatine and beef bouillon cubes can be used to make petri plates for culturing microbes from around the house. You can also use the gelatine for cool osmosis experiments!
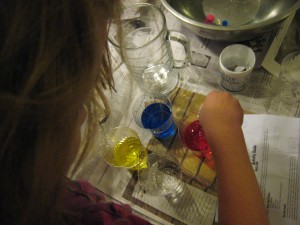
Food coloring $2.39 at Target can be used to learn about surface tension by making Tie Dye Milk. Here’s the video. You can also easily make colorful sugar-water gradients that illustrate liquid density!
Mentos mints will make a Mentos geyser when combined with a 2L bottle of Diet Coke.
drinking straws$1.09 at Target are great for NASA soda straw rockets and a carbon dioxide experiment.
film canisters with pop-in lids make amazing rockets. I wouldn’t include the Alka-Seltzer tablets you need to make them work in kits for younger children, since they’re technically medicine. These rockets would be amazing gifts for kids to make each other.  They’re fun to make and decorate.

Decorating the bin with sharpies(or paint) and stickers is a great way to personalize it and fun for whoever is putting it together.  Have fun!

Rainbow Sugar-Water Density Columns

 - by KitchenPantryScientist

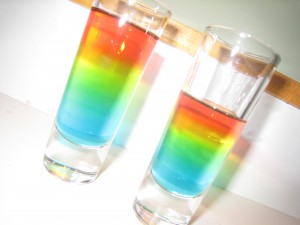
You can make colorful columns that demonstrate the concept of liquid density at your own kitchen table with just water, sugar and food coloring.  An eyedropper, siphoning bulb, syringe (minus a needle,) or anything else that allows you to slowly drip liquid from one cup to another are useful for the layering step.  If you have a tall, thin glass, like a cordial glass, or a test tube, it’s easy to see the layers in your gradient!

Start with two cups of hot tap water and measure half a cup into each of four cups. To the first cup, add 2 Tbs. sugar, to the second add 4 Tbs. sugar, to the third, 6 Tbs. sugar and to the fourth, 8 Tbs. sugar.  Stir until the sugar dissolves. If the sugar won’t dissolve, an adult may microwave the cup for 30 seconds and stir again. Always use caution with hot liquids. If the sugar still won’t dissolve, try adding a Tbs. warm water.

Now, add 2 drops food coloring to each cup. We added red to the cup with 2Tbs, yellow to the one with 4Tbs, green to the to the one with 6Tbs, and blue to the cup with 8Tbs.

Density is mass (how many atoms are in an object) divided by volume (how much space an object takes up.)  Sugar molecules are made up of lots of atoms stuck together.  The more sugar you add to a half cup of water, the more atoms it will contain and the denser it will be. Less dense liquids float to the top of more dense liquids.  Which of your sugar solutions is the most dense? The one with the most sugar in it (8 Tbs.)

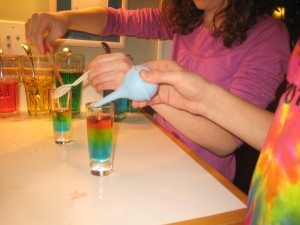
Put the most dense sugar solution(blue in this case)  in the bottom of a tall, thin glass or test tube.  Now, use your dropper to gently drip the next densest liquid (green) on top of the blue layer.  It works best to drip the sugar solution against the side of the cup just above the surface of the liquid.  You can also drip it onto the back of a spoon, like in the photo above.  Add the yellow layer, and finally the red layer, which only contains 2Tbs sugar per half cup and is the least dense.

What happens if you mix the layers up? They won’t separate back out like oil and water would, because the sugar will disperse (spread) equally through the mixture.

Researchers sometimes use density gradients to isolate different parts of cells by breaking the cells up, putting the cell debris on top of a density gradient and spinning it in a centrifuge.  Cellular fragments of different shapes and molecular weights move through the gradient at different rates.

Film Canister Season

 - by KitchenPantryScientist

It’s holiday card season, and that means…film canisters!

When you’re picking up your photos, ask to dig through your camera or photo store’s film canister recycling bin. Pick out clear film canisters with lids that pop IN tightly, and you’ll be ready for some rocketing good times.

Make some film canister rockets to shoot off next spring, or brave the cold to shoot them off now. Do you think the chemical reaction that makes CO2 gas to power your rocket will take longer in the winter? Why?

Here are directions for how to make them. They’d be great holiday gifts for kids to make for siblings!

Globs of Fun

 - by KitchenPantryScientist


Although I don’t usually do product reviews, when Steve Spangler Science asked me to try out  Larry’s Polymer Lab, I couldn’t resist. I’d seen some of Steve’s Halloween Science Demonstrations online and guessed that his kit would probably be both fun and educational.

When the package arrived, we unwrapped a clear paint can filled with 5 different polymer substances in smaller containers (and a big lizard named Larry.) The kids couldn’t wait to get started.

The only polymer we’d played with before was “Mad Scientist’s Green Slime,” made with glue, water and Borax. The kids know that polymers are long chains of molecules, like beads on a string, but Larry’s Polymer Lab’s instruction manual told us that the polymers we were about to play with were super-absorbant and could soak up mind-boggling amounts of water. We put down some newspaper on our kitchen table and opened the can.
As we experimented, the words “awesome” and “feels cool” were uttered repeatedly.

As a note, the polymers we experimented with are considered safe, but I would not use the marble-like ones with small children, since they look like candy and are choking hazards. My 11,9 and 5 year olds were perfect ages for the kit.

First, we tried the Water Gel. “When you add water to this superabsorbent polymer, it instantly turns from a liquid to a slushy solid.”  The kids were impressed as the water seemed to magically solidify, and it was a good way for them to practice measuring!

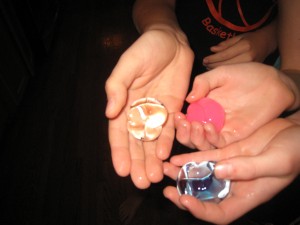
Next, came Jelly Marbles, “tiny 3 mm spheres that, when soaked in water, grow into 20 mm water-filled marbles.” The kids loved these and the color component of the experiment adds some fun variations to play with. We want to try growing plants in them!

The Gravi-Goo, “fascinating goo that finds a way to flows uphill,” was neat, but really hard to clean up. My kids always find a way to spill.
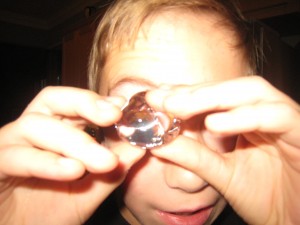
Giant Orbs, “gooey bouncing balls turn into massive, colorful spheres after soaking in water” were our favorite! They grow up to 11 times their own size in water over 6 or so hours and the kids played with them for days, checking them every time they came into the kitchen.

We’ve tried “Insta-Snow” before, but the snow-like polymer in this kit worked spectacularly well. My 5-year old asked for more of it for Christmas, not realizing that we still have a ton left over.

At $44.99, the kit seems a little pricey, but it contains enough of each polymer (at least 50 giant orbs and hundreds of jelly marbles) to do the experiments over and over again, use them for a birthday party, or even a classroom science project or party. I’ve started doing science experiments at my kids’ school holiday parties as a change from the usual arts and crafts. Many of the polymers also have a number of suggested variations on the basic experiments.

As I type, Larry the lizard is soaking in a bucket of water. What I thought was just a plastic lizard is actually made of water-absorbing polymer and will grow into a giant, slimy chameleon. What could be better than that?

The kit was sent to me free of charge, but I wasn’t paid to review it. The kids and I give it two thumbs up.
Starch Test

 - by KitchenPantryScientist

You probably know that lots of foods are full of starch, but did you know you can test foods in your own kitchen to see what has starch and what doesn’t? You can even see how starch is broken down by your own saliva by chewing a cracker for a long time and testing it for starch.

A simple disinfectant called iodine that kills bacteria and viruses can also be used to test for the presence of starch.

Starch is a carbohydrate, or a long chain of glucose (sugar) molecules stuck together by chemical bonds. All plants make starch, but some contain more than others. It is the most common carbohydrate in the human diet!

Iodine usually looks brown, but when long chains of starch interact with iodine, scientists think the iodine molecules get wrapped up in the chains, as if a snake is coiling around them. This changes the way the iodine reflects light, and it starts to look black or blue, instead of reddish-brown. Sugar that is not in long chains doesn’t do the same thing to iodine.

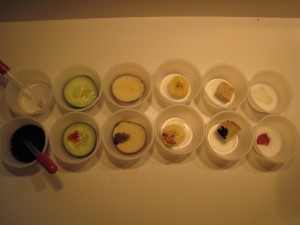
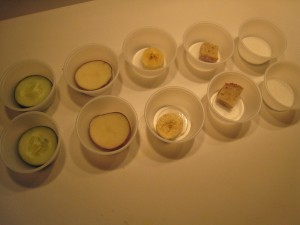
To test for starch in your own kitchen, you’ll need iodine, an eyedropper and the food you want to test. I’d suggest table sugar, potato slices, banana slices, cucumber slices, bread or anything else that is light colored. Dilute some iodine by adding about a teaspoon (5ml) of it to a teaspoon of water (5ml.) For each sample, have a control. For example, have two slices of bread: one to drop water on and another to drop iodine on. This experiment should be done with adult supervision since iodine should not be ingested!

Add a drop of water to each control sample. Then, add a drop of iodine the other samples. Watch and wait for about 5 minutes. Can you tell which samples contain starch? The ones that contain the most starch will turn the iodine blue or black.

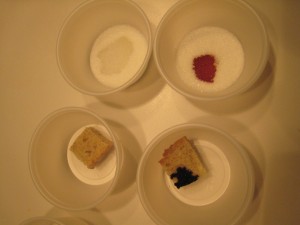
Now, take a cracker, chew it for a minute or so and spit it out into a dish. Mash another cracker up with water and put in another dish. Drip iodine on both of them and wait. What happens?

Gluten Ball

 - by KitchenPantryScientist

Gluten is a hot topic these days, but most people aren’t really sure what it is.

Gluten is a protein found in wheat, rye and barley. It makes bread chewy and helps hold the bubbles that yeast makes in dough so that it can rise. (Here’s a fun yeast experiment!) Although some people have a disorder called celiac disease which impedes them from digesting gluten properly, most people can eat it without any problem.

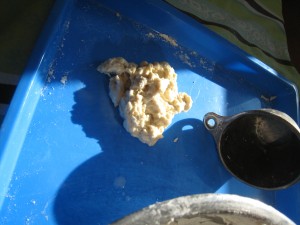
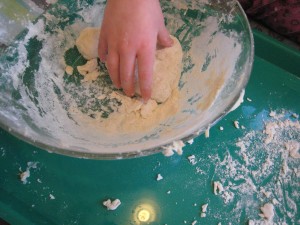
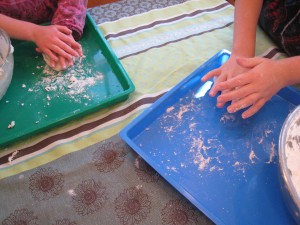
You can easily extract a ball of gluten from flour using nothing but your hands and cold water, to see for yourself what this stretchy grain protein looks like. Just add a cup of water to a cup of flour, mix it together and knead it for about 5 minutes. (Add more flour if it’s too sticky to handle.)

Now, put the dough under COLD water and start “washing” out the carbohydrates so that mostly the gluten remains. Your hands will freeze, so you may need to take a break. If you keep going until the water coming off the dough is mostly clear, you’ll be left with a gluten ball.

Some types of flour have more gluten than others, and sometimes extra gluten is added to pizza dough to make it chewier! Try this with several types of flour to see what has the most gluten (or no gluten.)

Potato Maze

 - by KitchenPantryScientist

I almost always have a sprouting potato or two around my kitchen. I’ll buy a bag of spuds and only use part of it, leaving the rest to turn green and eventually end up in the compost.

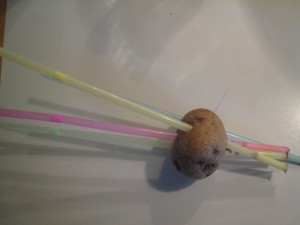
Luckily, those orphan potatoes are perfect for a few science experiments. One teaches you a little bit about physics as you watch an object in motion (a drinking straw) remain in motion as you drive the flimsy plastic deep into a potato. The other, a potato maze, teaches you a little biology as you think about what a potato needs to grow.

We’d stabbed a straw into a potato before, but it worked shockingly well with the boiling potatoes we got from our farm share. The straws went all the way through! Click here to learn how to do the potato experiment yourself!

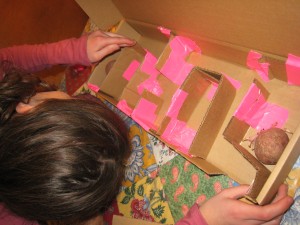
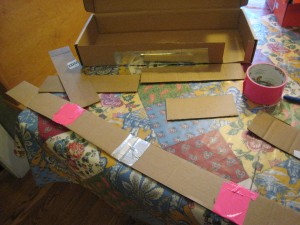
To make a potato maze, all you need is a sprouted potato, duct tape,some cardboard and a shoe box (or any cardboard box with a lid.) Cut out cardboard pieces the same depth as the box, tape them together, bend them and tape them inside of the box to create a maze.
Try to keep the walls of the maze the same height as the box and be sure to cut an opening at the far end of the maze so that light can get in at one end.
Put a sprouted potato or two in the maze. Close the box and seal any light leaks (other than the opening) with tape. (See photo at top for an idea of how your maze should look, but they’ll all be different and there’s no “right” way to make your maze! Just make sure there’s a direct tunnel between your potato and the opening!)

Place the box somewhere where it will get plenty of bright sunlight pouring into the opening. Wait a few weeks and check your potatoes. (You can check them more often if you’re impatient, but they won’t grow any faster.)

What happens to the potatoes?

They should grow towards the light, since plants need light to grow. Using a process called photosynthesis, they can change sunlight, carbon dioxide, water and minerals into electrical and then chemical energy, which allows them to grow into food for other living things. In the process, they also give off oxygen, the gas that we breath.

How do you your potatoes grow without food and water?

There are nutrients and water stored in potatos that allow them to start growing for a while without soil and water.