Category:Biology Experiments’
Mirror Image Plant Prints
- by KitchenPantryScientist
Yesterday on Twin Cities Live, I demonstrated some fun botanical science projects for learners of all ages, including Vegetable Vampires and Leaf Chromatography.
This fun art/science project lets you transfer plant pigments to cloth, creating beautiful prints of your favorite leaves and flowers. It’s especially great for fall, when there are so many colorful leaves around.
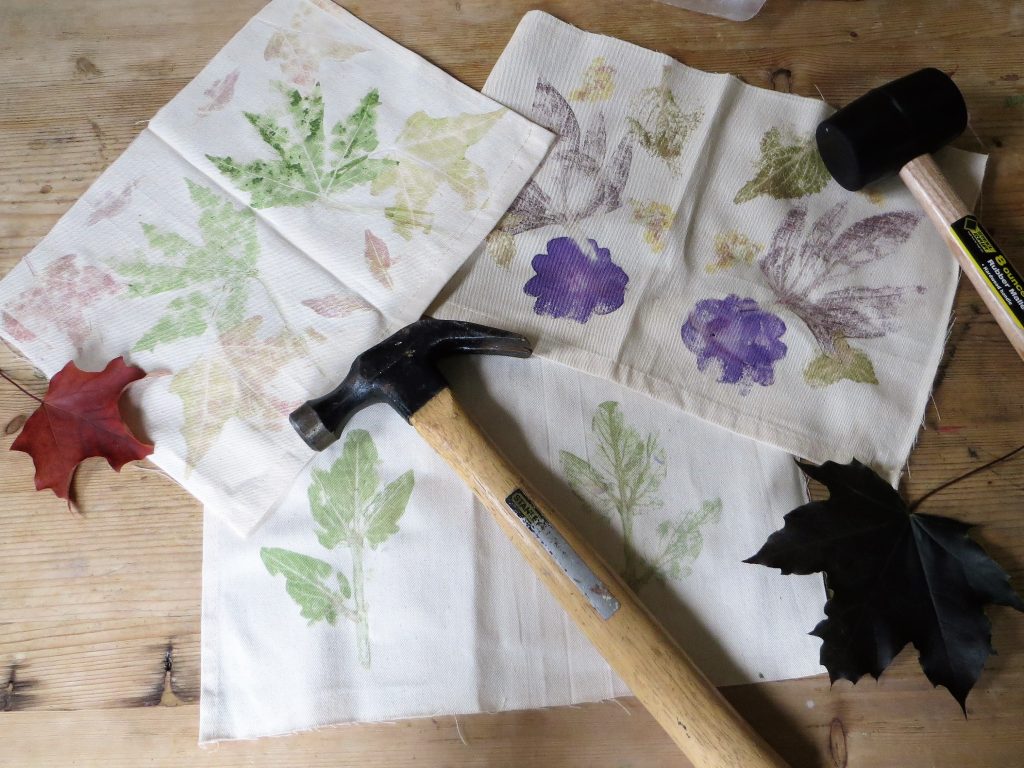
Mirror Image Plant Prints- kitchenpantryscientist.com
You’ll need:
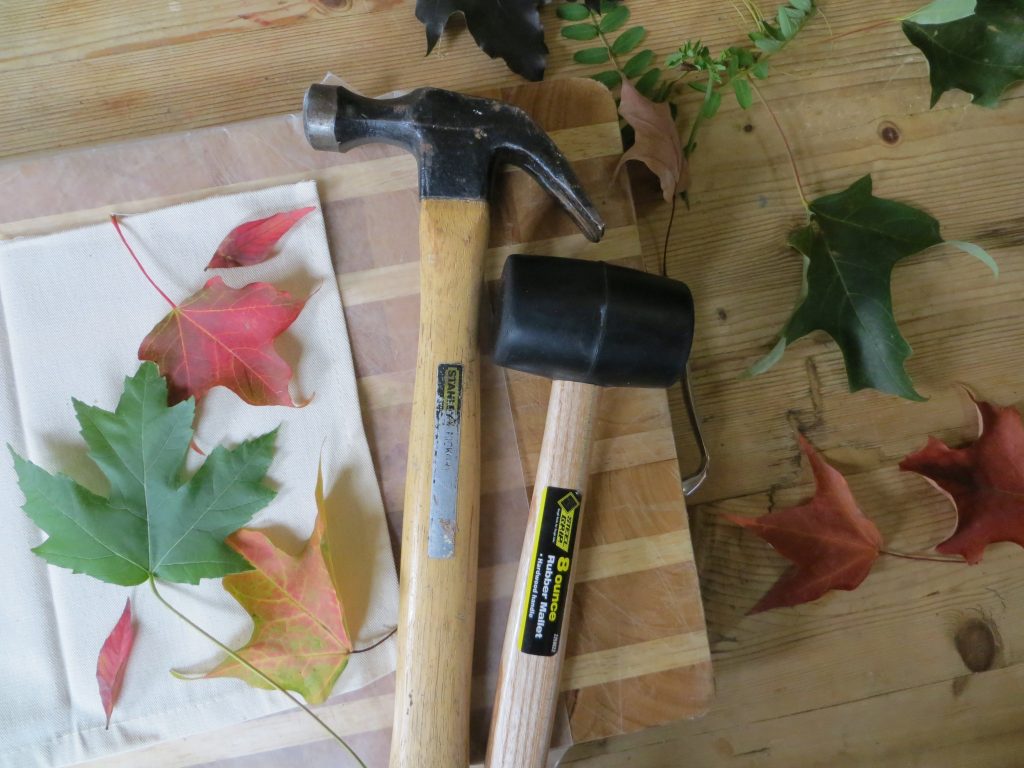
-Fresh leaves and flowers (Dry leaves won’t work.)
-A hard, smooth pounding surface, like a wooden cutting board or carving board
-Wax paper or plastic wrap
-Mallets or hammers
-Untextured cotton cloth, like a dishtowel. Heavy cloth works better than very thin cloth.
-*Alum and baking soda to treat cloth (This is optional. I don’t pre-treat my fabric, but the treatment step will help bond and preserve color, if you want to frame your prints. You can also buy fabric that’s pre-treated for dyeing.)
Mirror Image Plant Prints- kitchenpantryscientist.com
Safety tips: Protective eye wear is recommended. Young children should be supervised when using mallets and hammers.
What to do:
*If treating cloth: The day before you do the project, add 2 quarts water to a large pot. Add 1 Tb alum and 1 tsp baking soda to the water. Add the cotton and bring to a boil. Simmer for 2 hours, turn off heat and soak for at least two hours. Let fabric dry.
The next steps are the same, whether you’re using an untreated piece of cotton or treated cloth.
- Take a walk to collect colorful leaves and flowers. Choose plants that can be flattened. Flowers with huge centers, like coneflowers don’t work as well, but petals may be removed and pounded.
- Cover the pounding surface with waxed paper or plastic wrap.
- Cut a piece of cloth that will fit on the pounding surface when folded in half. Iron the fold.
- Open the cloth and lay it on the pounding surface. (See image above)
- Arrange leaves and flowers on the cloth.
Mirror Image Plant Prints- kitchenpantryscientist.com
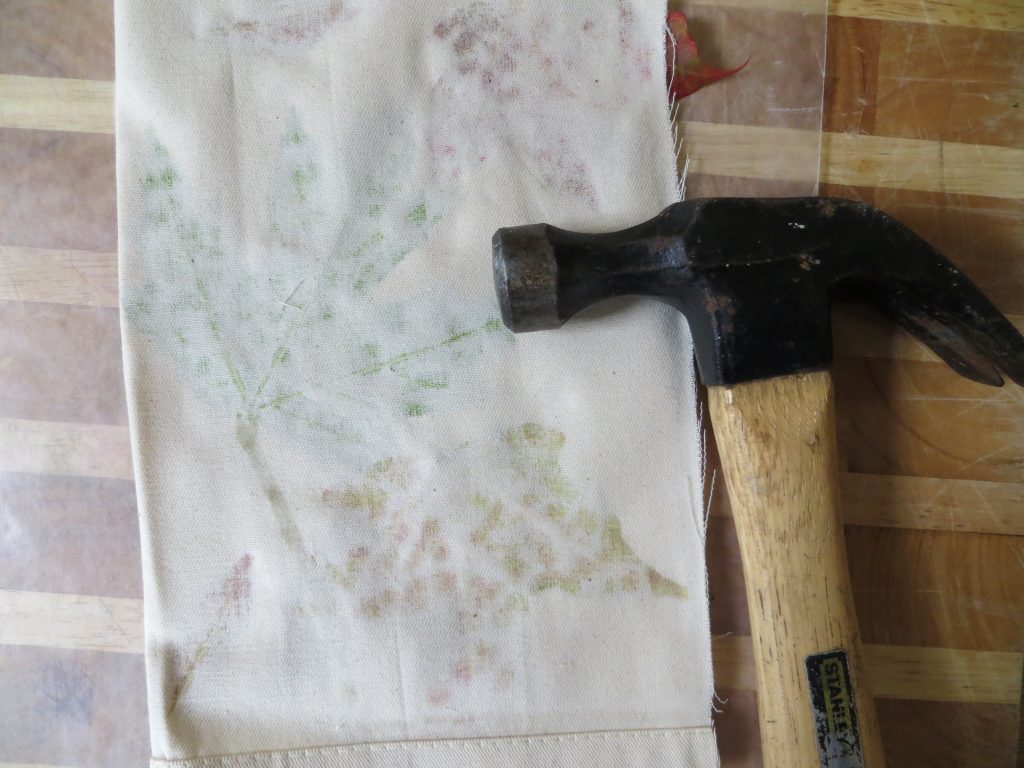
- Fold the cloth over the plants and pound it with the hammer or mallet. If you’re using a hammer, pound more gently.
- Pound until you can see the forms of the leaves through the fabric. As the pigment leaks through, you’ll see the outlines of what you’re smashing. Hint: Hammers work better than mallets for fall leaves. For juicy leaves and flowers, use a mallet or hammer gently.
Mirror Image Plant Prints- kitchenpantryscientist.com
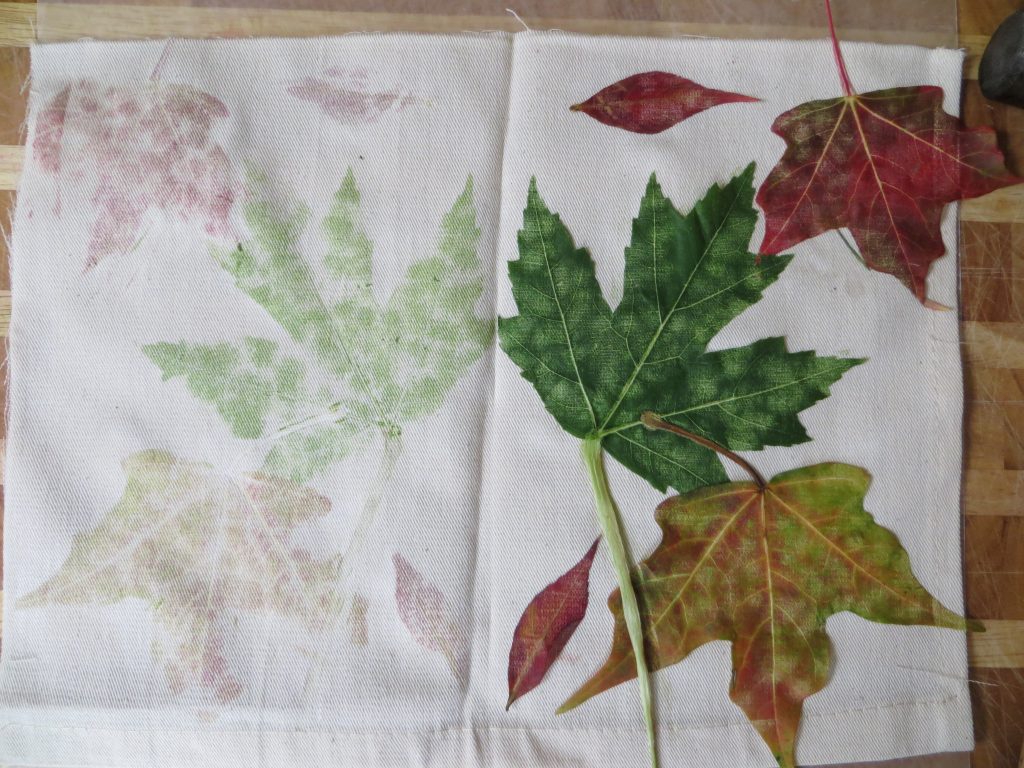
- When you’re finished pounding, unfold the fabric to reveal the print you created. Remove the leaves and petals.
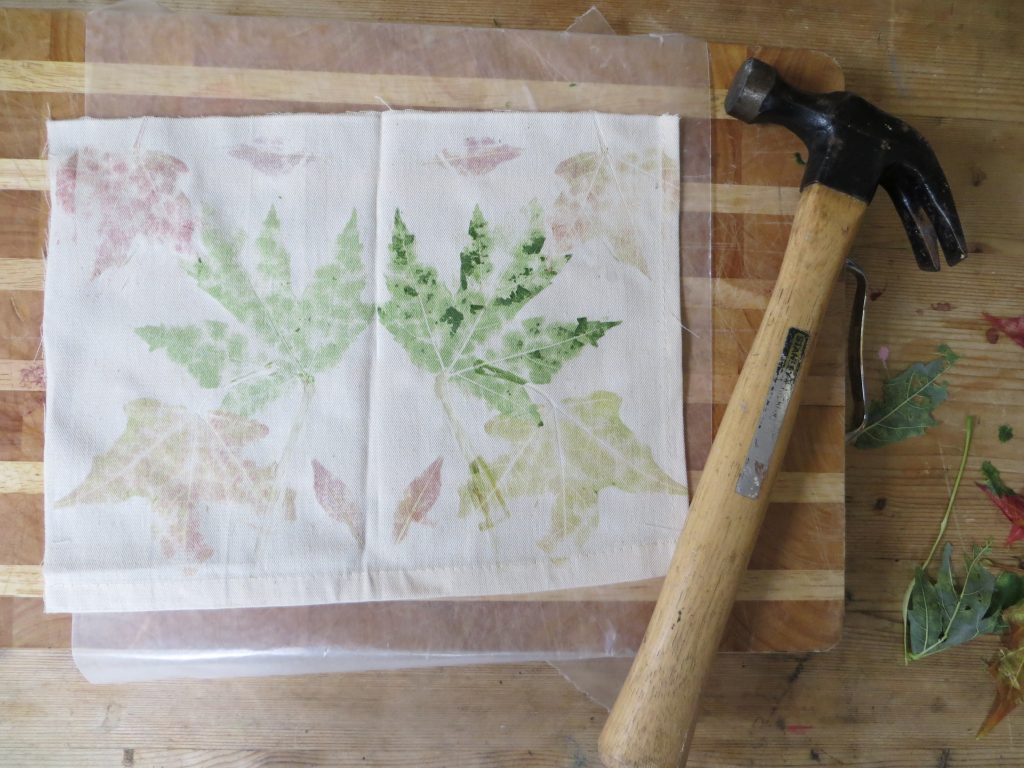
Mirror Image Plant Prints- kitchenpantryscientist.com
- Label the image with plant names, enhance it with paint or markers, or leave nature’s design to speak for itself.
The Science Behind the Fun:
Pigments are compounds that give things color, and many of them are found in nature. Flowers, leave, fruits and vegetables are full of brilliant pigments. In this experiment, we transfer plant pigments to cloth by bursting plant cells using pressure from a hammer or mallet.
The green pigment found in leaves is called chlorophyll. In the fall, many trees stop making chlorophyll, and the red, yellow and orange pigments inside the leaves become visible.
Although you create a mirror image of leaves and flowers, you’ll notice that the color may be more intense on one side of the print. A waxy covering called a cuticle covers leaves, and is sometimes thicker on the top than on the underside of the leaf. It may affect the transfer of pigment to the cloth, making it easy to see structures like veins on the leaf print.
Enrichment:
What parts of the leaf can you identify in the print you created?
Homemade Sweep Nets (from Outdoor Science Lab for Kids)
- by KitchenPantryScientist
This fun project from my book Outdoor Science Lab for Kids shows you how to collect and identify amazing arthropods using a net you make yourself. For more engaging outdoor experiments, you can order the book here, or anywhere else books are sold.
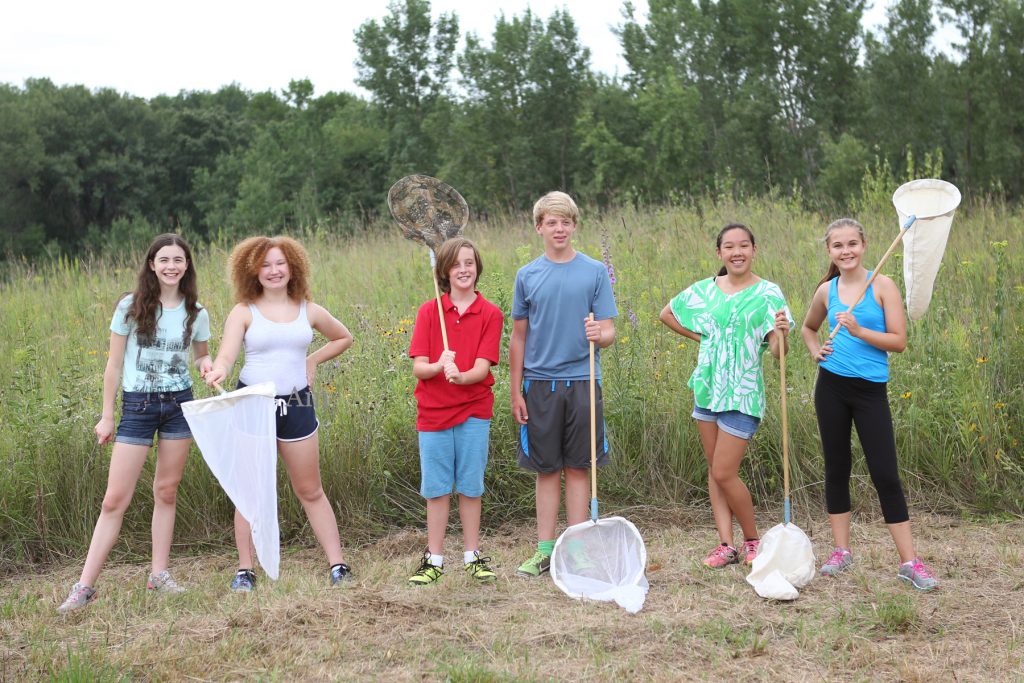
Image from Outdoor Science Lab for Kids (Quarry Books 2016)
Materials
– sweep net or: two wire hangers, an old, light-colored pillowcase, scissors, pliers, long wooden broomstick or sturdy yardstick, and duct tape
– area with long grass
– jars
-large white piece of fabric, like an old sheet
– insect identification books (optional)
Safety Tips and Hints
- Don’t pick insects up with your bare hands, unless you know they don’t bite or sting.
- Ticks love tall grass. If there are ticks in your area, take precautions and do a tick check after your insects hunt.
Protocol
Step 1: If you don’t have a sweep net, make one by straightening and twisting two wire hangers together. Form them into a loop, leaving about 3 inches (8cm) straight on either end. Cut about one third off of the open end of a pillow case and pull the mouth of the pillowcase over the wire loop. Tape it securely around the perimenter.

Image from Outdoor Science Lab for Kids (Quarry Books 2016)
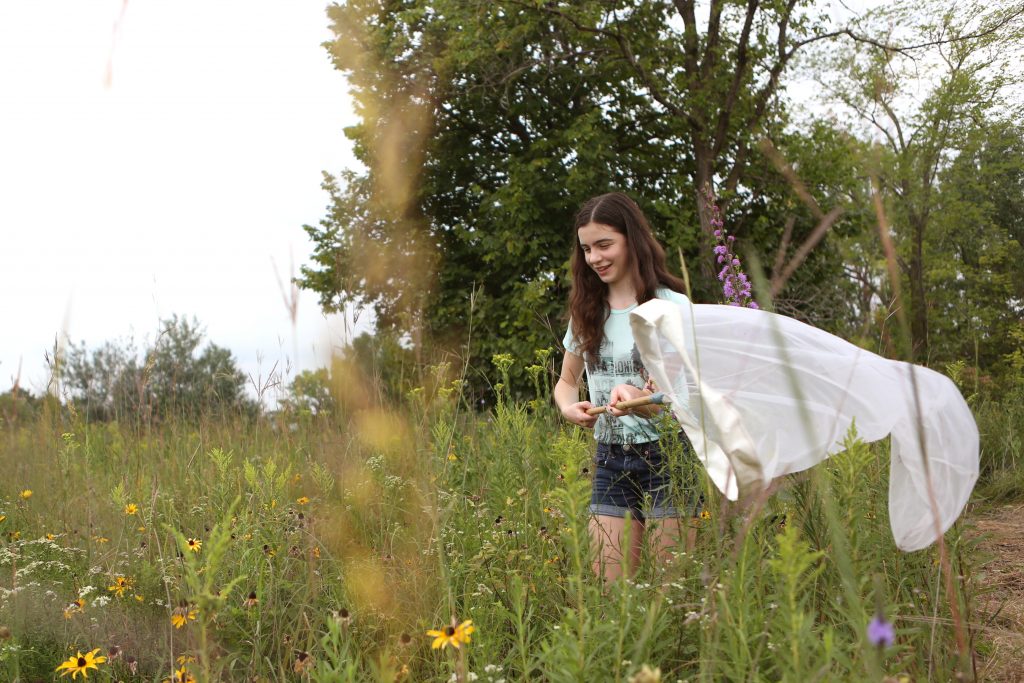
Step 2. Find an area with long grass and plants. Sweep with your net the same way you’d sweep a floor, but flip the open side of the net back and forth to capture insects in the grass.
From Outdoor Science Lab for Kids (Quarry Books 2016)
Step 3. Close your net by flipping the bottom over the top and take it over to your large piece of fabric.
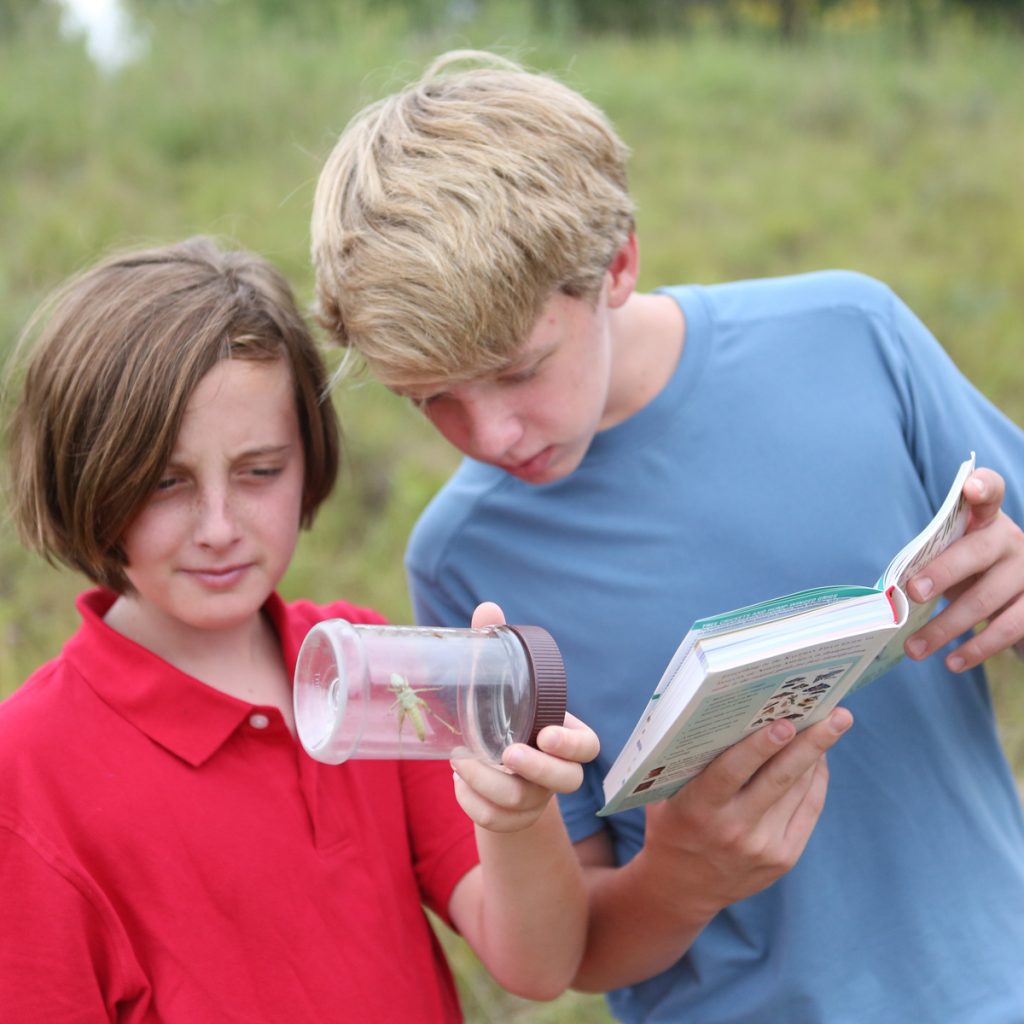
Step 4. Carefully dump the creatures you’ve collected onto the white fabric to inspect them. If you want a closer look, put an insect inside a jar with a loose lid.

Image from Outdoor Science Lab for Kids (Quarry Books 2016)
Step 5. Count how many legs they have, how many body segments, look for antennae, wings and unique color. Record your observations in a notebook.
Step 6. Use insect identification books, or other means to identify what you’ve found.
Step 7. Keep a journal of the insects and arachnids you capture, the time of day, and where you found them.
The Science Behind the Fun:
Arthropods are amazing animals with skeletons outside their body, called exoskeletons, segmented bodies, and jointed legs.
When you sweep, chances are you’ll find lots of insects, which are arthropods with six legs. They often have wings, and their life cycle goes from egg to larva, to adult. Some insects, like butterflies, also go through a pupal stage, in which their bodies are significantly transformed. The antennae on their heads are sensory organs.
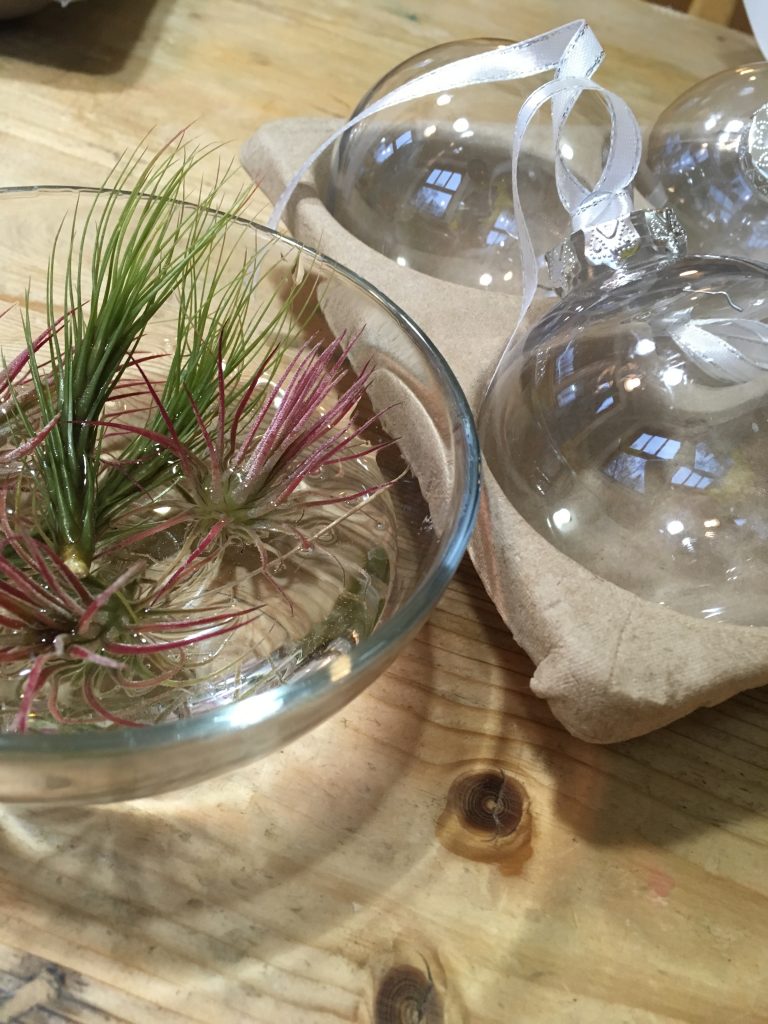
Air Plant (Tillandsia) Holiday Ornaments
- by KitchenPantryScientist
Tillandsia, also known as Air Plants, come in many shapes, sizes and colors. In nature, you’ll find them living in trees in warm places like South America. They collect moisture from the air and rain, rather than pulling it up via roots like most plants, so you can care for them with a weekly misting.
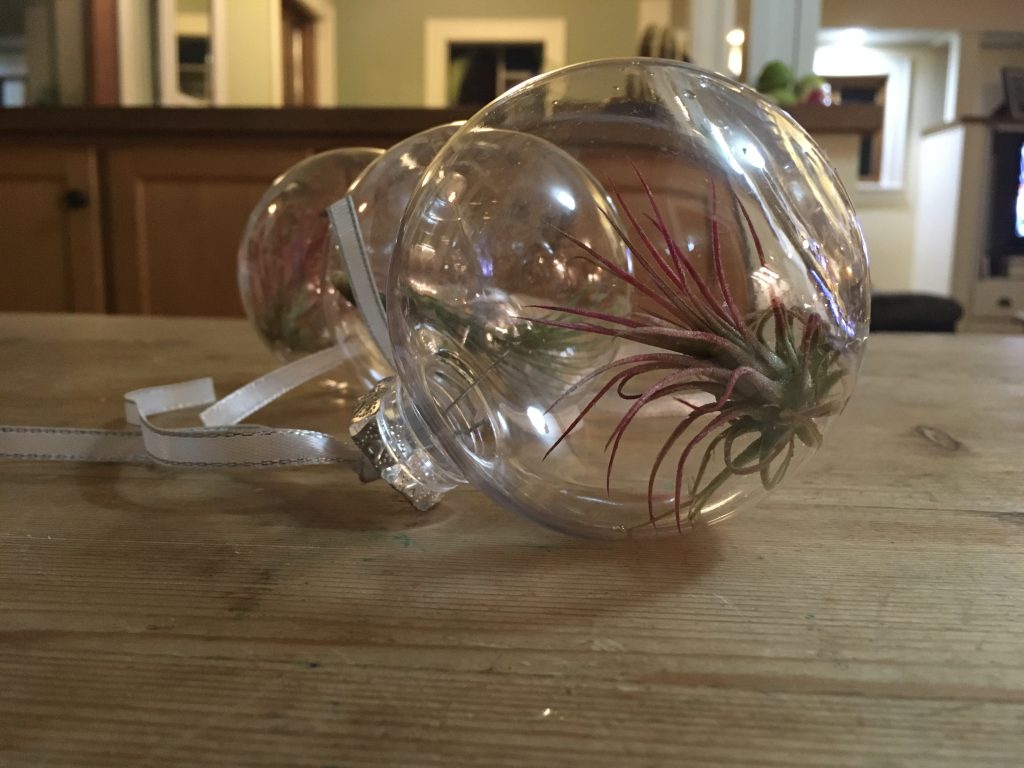
Tillandsia ornament (KitchenPantryScientist.com)
Pick up a few clear, hollow “decorate your own” ornaments, and you can use these living wonders to make unique homemade decorations. We’re giving them as gifts this year.
You’ll need:
-clear ornaments with removable tops
-small Tillandsia that will fit through ornament tops (Air Plants are available at most nurseries. Ask for care instructions, if they have them.)
-needle nose pliars, or tweezers
Note: Choose plants that are small enough to fit through the openings of your ornament!
Tillandsia ornaments (Kitchen Pantry Scientist.com)
Mist your plants, or soak them in a bowl of clean water for 15 minutes or so, gently shake off the excess water, and carefully push them into the ornaments, bottom first so you don’t harm the plant. Put the top back on the ornament, leaving it loose enough for air to circulate.
Once a week or so, remove the top of the ornament and add some water. Coat the entire plant with water, pour out the excess and put the top back on. After the holidays, you can remove the plants with tweezers and move them to a new home in a vase, bowl or other clear container.
10 Fun Kitchen Halloween Science Experiments for Kids
- by KitchenPantryScientist
Here are ten quick and easy experiments to make your Halloween even more fun and memorable!
Click on these links for instructions on how to make:
Oozing Monster Heads (from Outdoor Science Lab for Kids)
Frankenworms (from Kitchen Science Lab for Kids)
Cornstarch Goo (from Kitchen Science Lab for Kids)
Mad Scientist’s Green Slime (from Kitchen Science Lab for Kids)
Alien Monster Eggs (from Kitchen Science Lab for Kids)
Magic Potion (from Kitchen Science Lab for Kids)
Bags of Blood (from Kitchen Science Lab for Kids)
Vegetable Vampires (Scholastic.com/Experiment from Kitchen Science Lab for Kids)
Here are a few of my favorites!
You can find more experiments by scrolling down on my website!
Halloween Science: Non-Toxic Fake Blood
- by KitchenPantryScientist
Unlike the foaming green alien blood in the X-Files, the blood pulsing through our veins is red, thanks to iron-containing hemoglobin molecules loaded with life-giving oxygen.
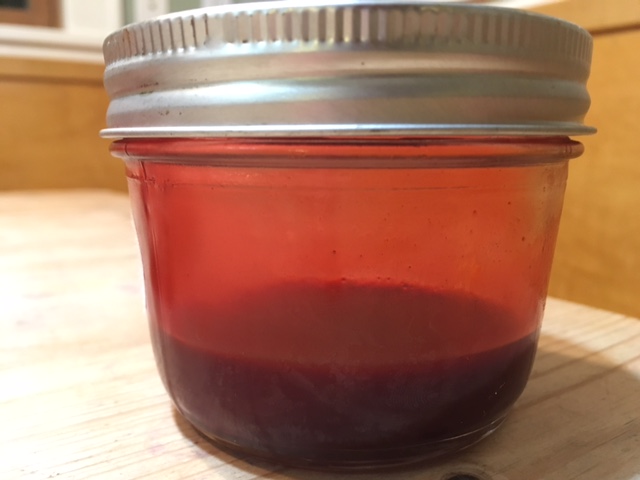
fake blood
To make fake blood that looks like real blood, you’ll need to concoct a mixture of liquid, thickeners and red pigment (tinted with blue and brown.) Kids will have a great time coming up with their own concoctions. Have a creative chemistry contest to see who can come up with the most realistic fake blood, or use it to make scary Halloween props.
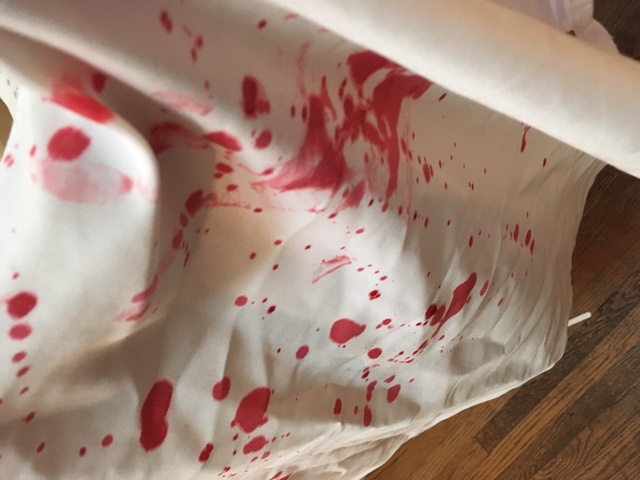
Here’s a recipe to start with, but kids can work with smaller amounts and mix their blood in bowls, rather than a blender. Fake blood stains everything it touches, so be prepared for messy hands and wear old clothes! Naturally red plant pigments, like the ones in pomegranate juice and raspberry jam won’t stain fingers as much as food coloring and taste yummy. However, red food coloring will give you a more realistic color.
Blend together:
1/3 cup pomegranate juice (like POM) or fruit punch
2 Tbs corn starch
1 Tbs chocolate syrup (or 1 Tbs cocoa powder)
1 Tbs red food coloring
1 cup corn syrup
Tint with a tiny bit of blue food coloring. (optional)
Other ingredients to try: seedless raspberry jam, cocoa powder, Kool-Aid, Jell-O, flour, maple syrup
Here’s a fun TV segment where meteorologist Matt Brinkman was game enough to try out one of the blood capsules we made!
We made the edible blood capsules you see in the video by filling empty gelatin and vegetarian capsules with a mix of raspberry jelly, corn syrup and chocolate syrup.
Time Lapse of Monarch Butterfly Emerging from Chrysalis
- by KitchenPantryScientist
Our eight Monarch caterpillars were in chrysalises when we returned from our vacation, and yesterday the first of them emerged! We were lucky enough to catch it on our iPhone time-lapse, which makes everything look faster than it actually happens. You’ll be amazed at how the butterfly pumps fluid from its body to expand its beautiful orange and black wings.
Outdoor Science Apps
- by KitchenPantryScientist
It’s almost summer! Whether you’re heading to the back yard, a park or a nature center, here are a few of our favorite free apps to enhance your next outdoor adventure…
Merlin Bird ID (free) The Cornell Lab of Ornithology makes it easy to identify that mystery bird in your back yard. http://merlin.allaboutbirds.org/
Leaf Snap: (free) Take a photo, identify a plant.http://leafsnap.com/
Bee Friendly: (free) Be a citizen scientist with this cool app that lets you identify and tracking pollinators like bees in your area. http://earthwatch.org/scientific-research/special-initiatives/bee-friend-your-garden
Starmap: iOS (Starmap Lite is free.) Use this app to easily find and identify constellations in the night sky. http://www.star-map.fr/
ISS Spotter: (free) It’s cool to watch the International Space Station fly across the horizon at night. This app will help you spot it, and even has an alarm so you don’t miss it. https://itunes.apple.com/us/app/iss-spotter/id523486350?mt=8
Magnificent : (free version) Magnify leaves, bugs and anything else you want to take a closer look at. http://habitualdigitalsoftware.com/
8 Spring Science Eggsperiments
- by KitchenPantryScientist
Spring is egg season. You may prefer dyed eggs, hard-boiled eggs, deviled eggs, or even dinosaur eggs. No matter what kind of eggs you like best, you’ll love these eggsperiments that let you play with the amazing architecture of eggs, dissolve their shells and even dye them with the pigments found in your refrigerator. Just click on experiments for directions and the science behind the fun!
Grow alum crystals in eggshells to create beautiful geode-like works of art.
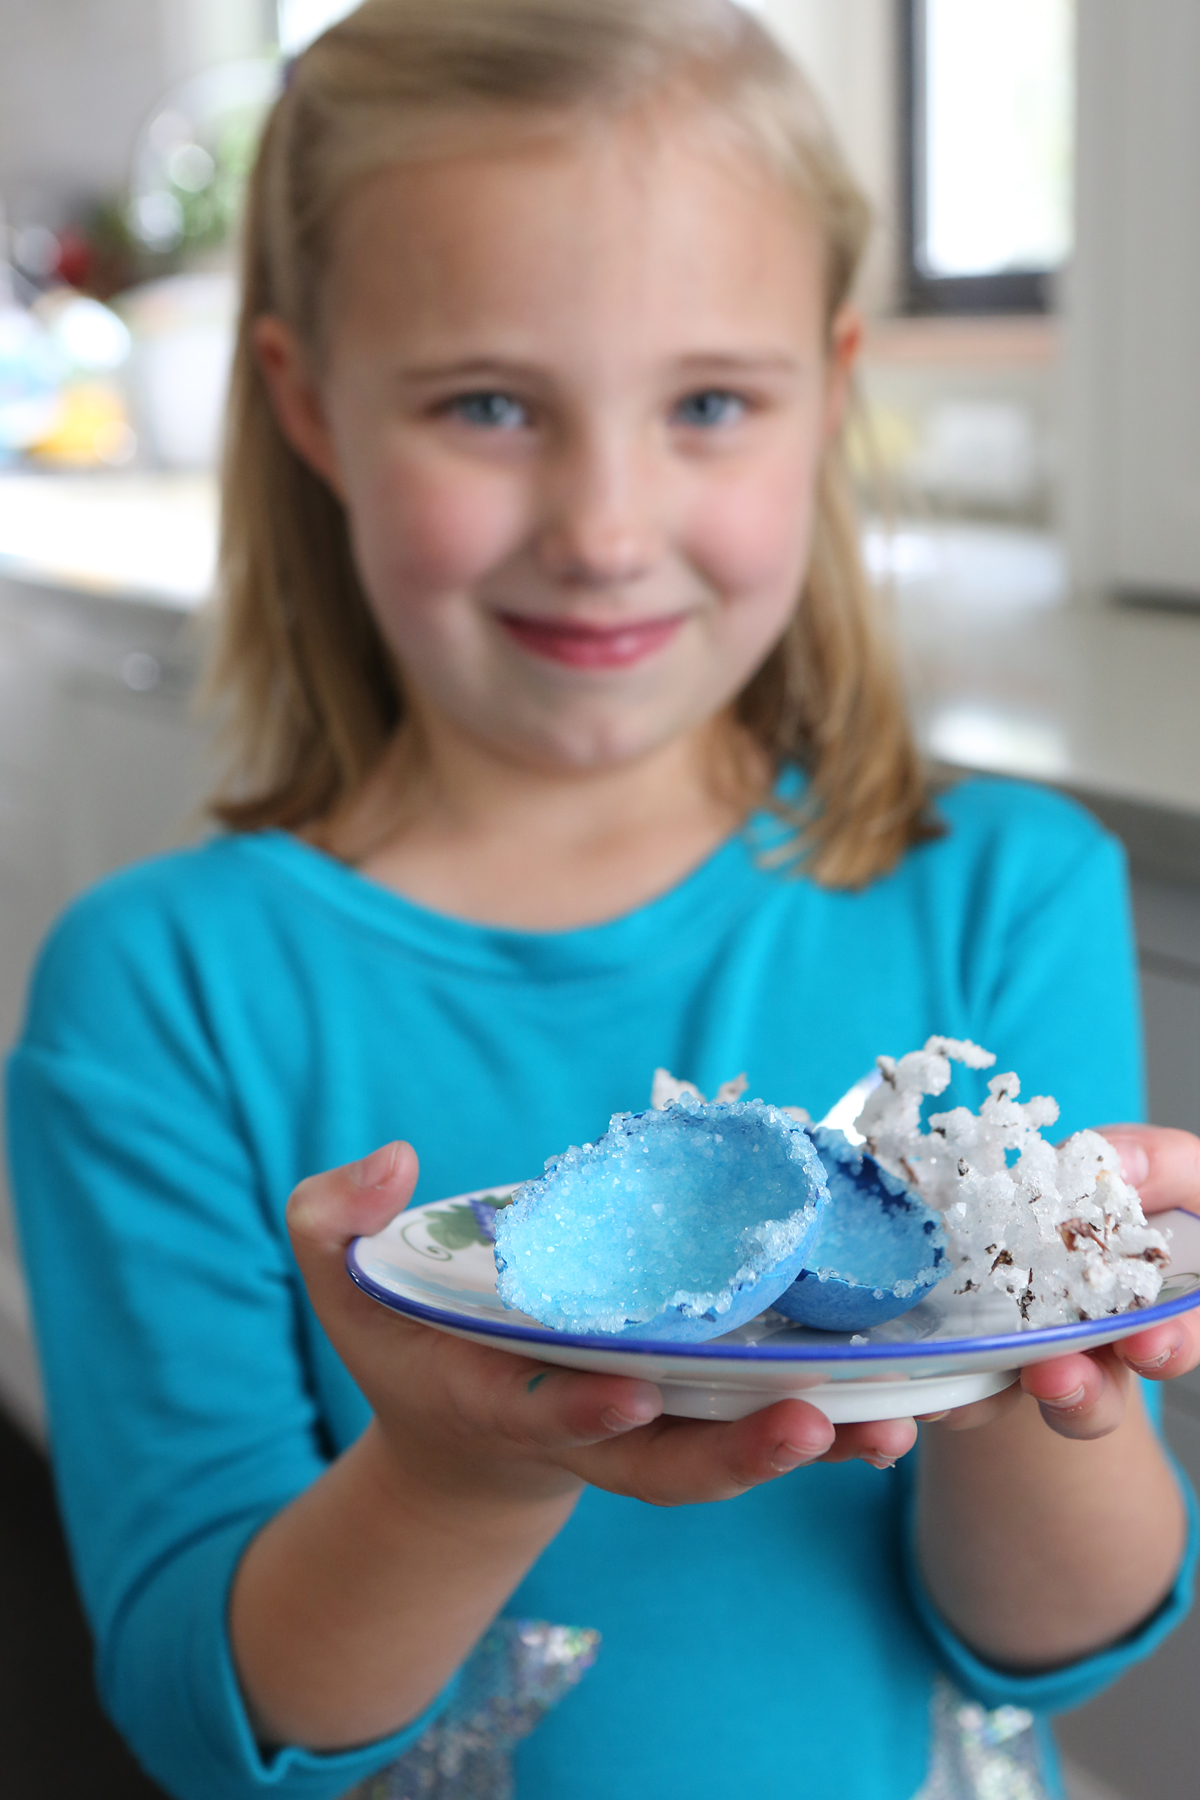
Egg Geode from Kitchen Science Lab for Kids (Quarry Books)
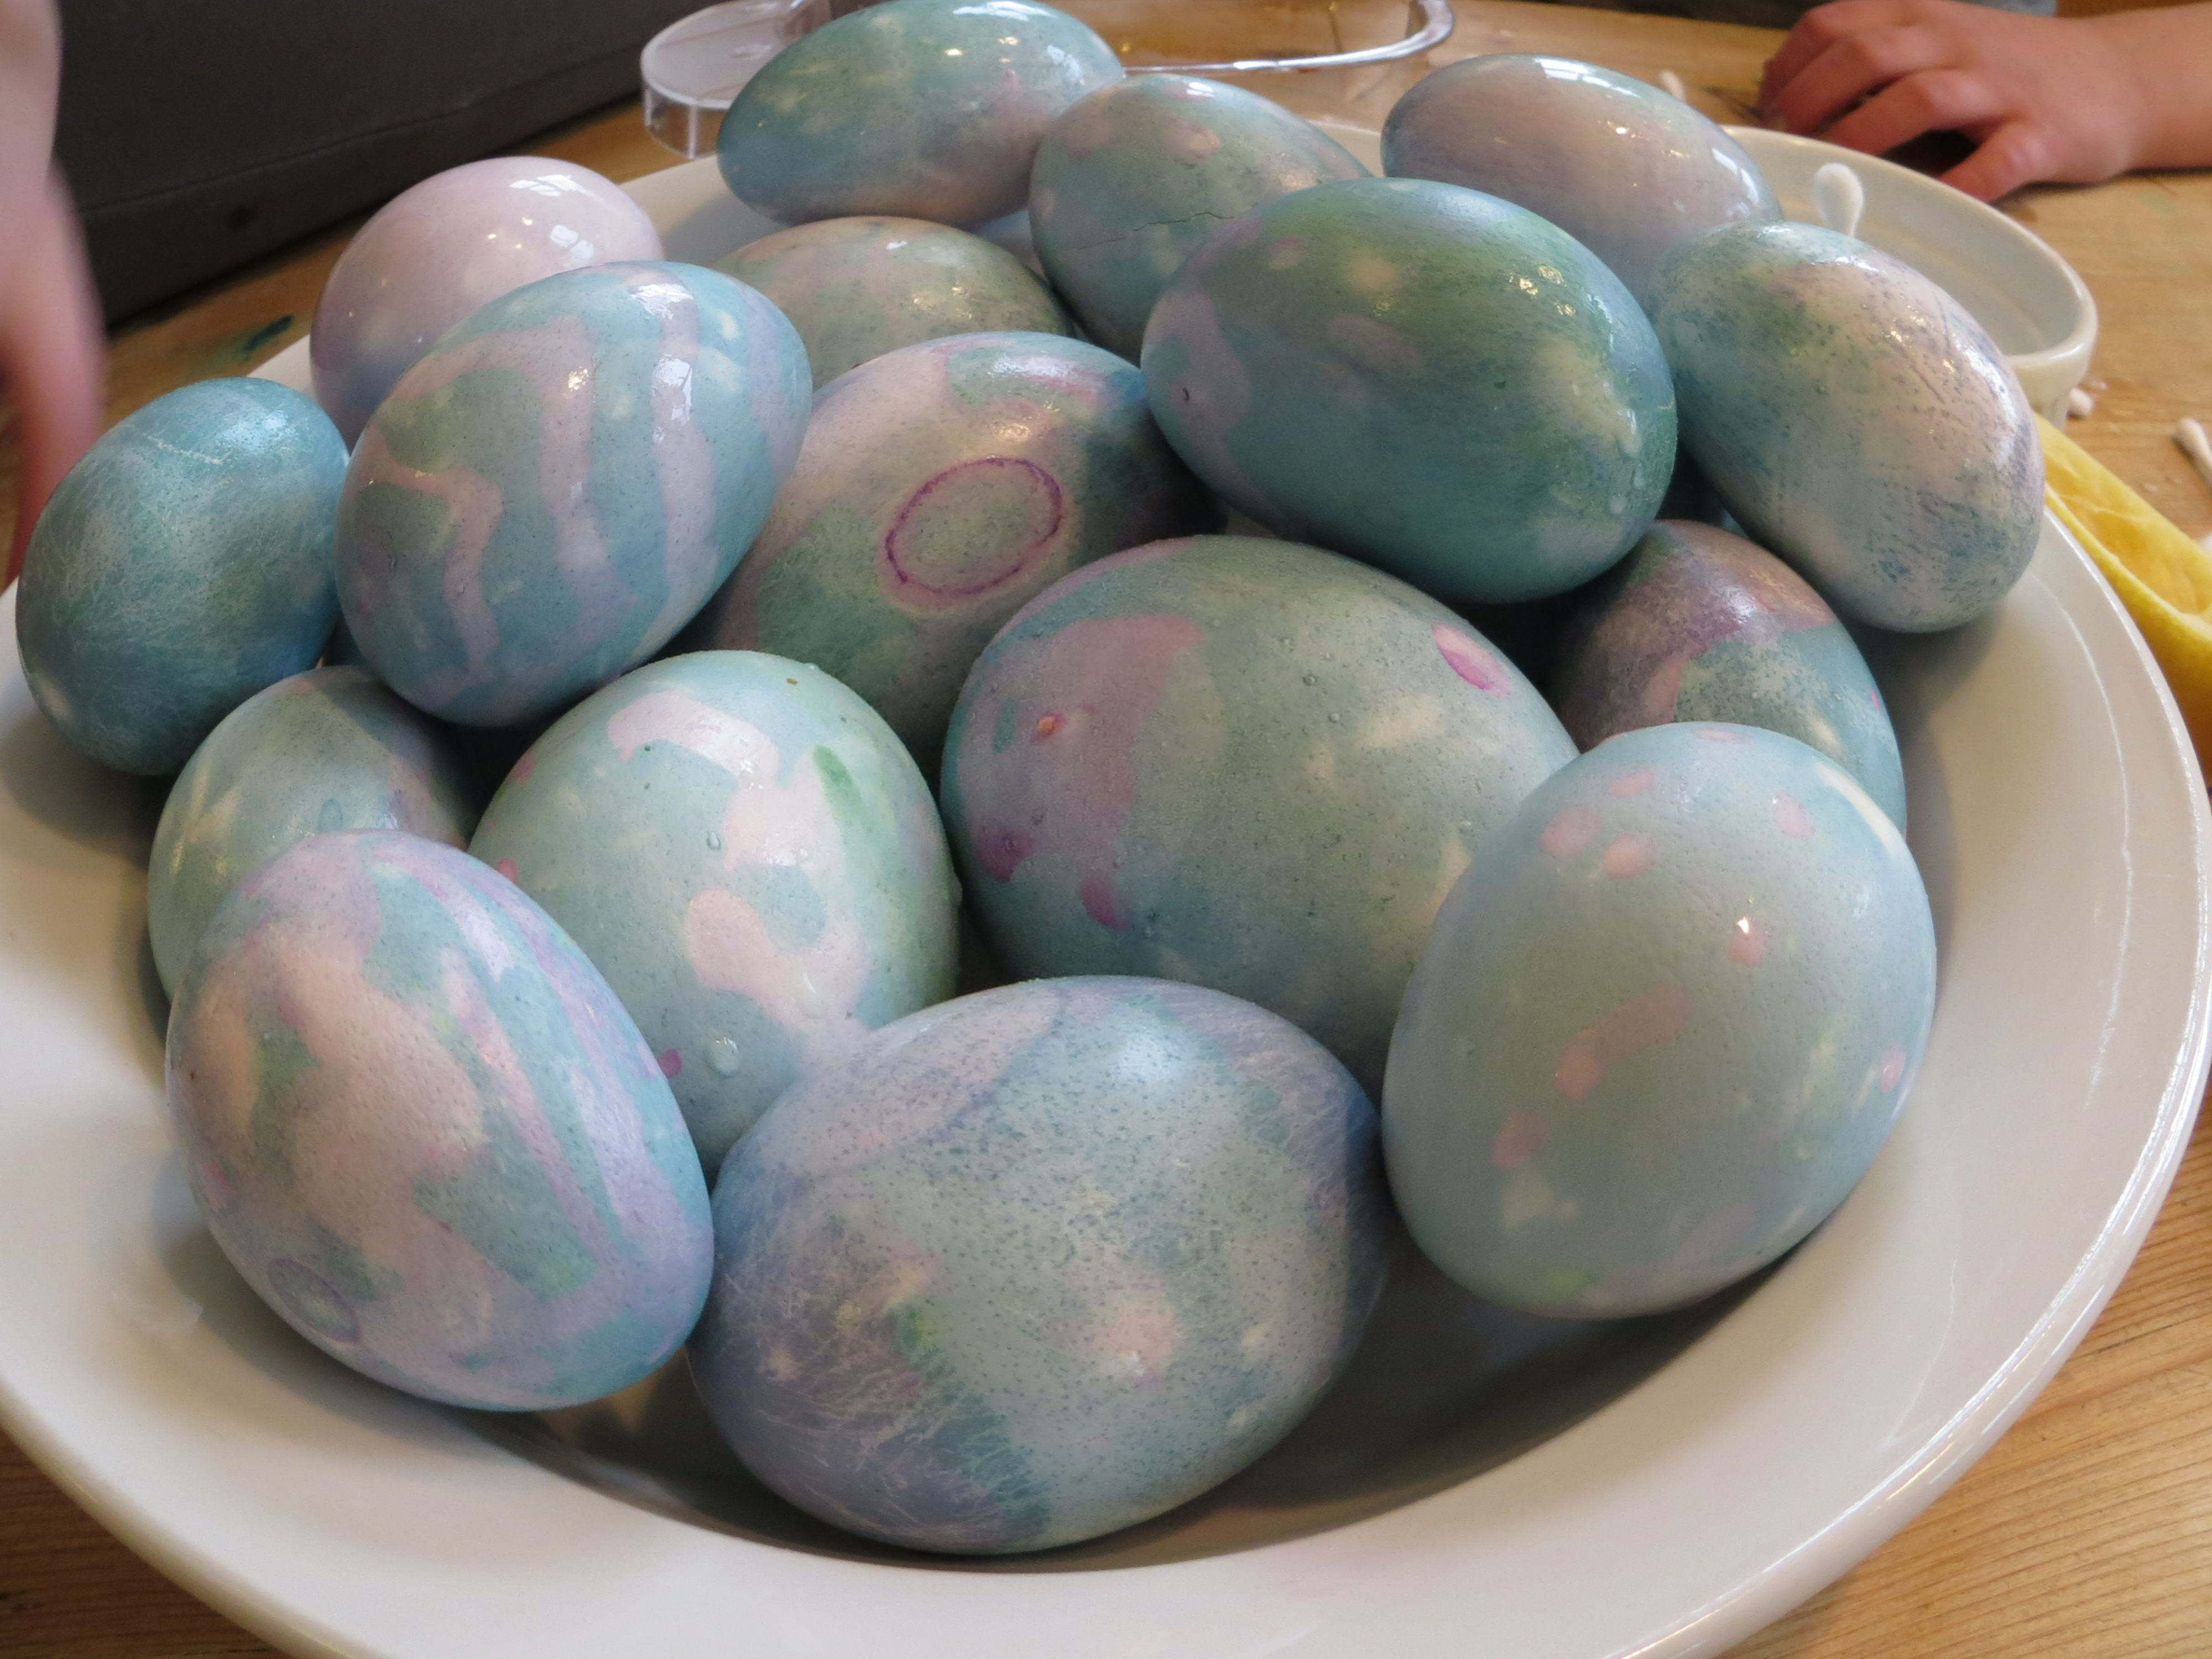
Dye eggs with spices, fruits and vegetables,
or dye them with red cabbage juice and use lemon juice and baking soda to paint them.
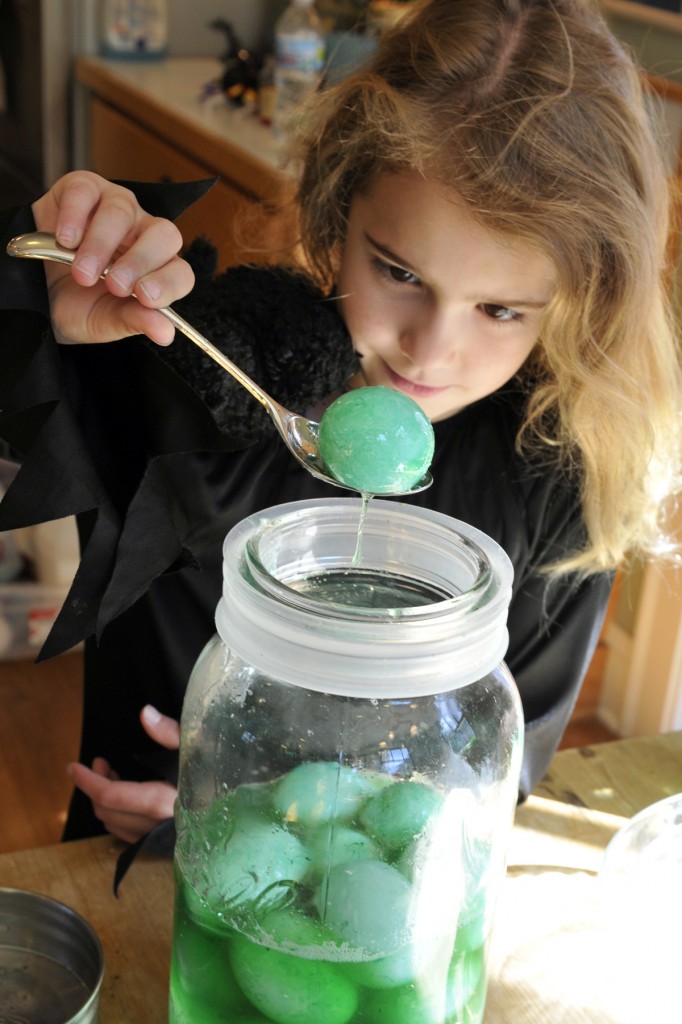
Dissolve eggshells with vinegar and play with osmosis when you make “Alien Monster Eggs.”
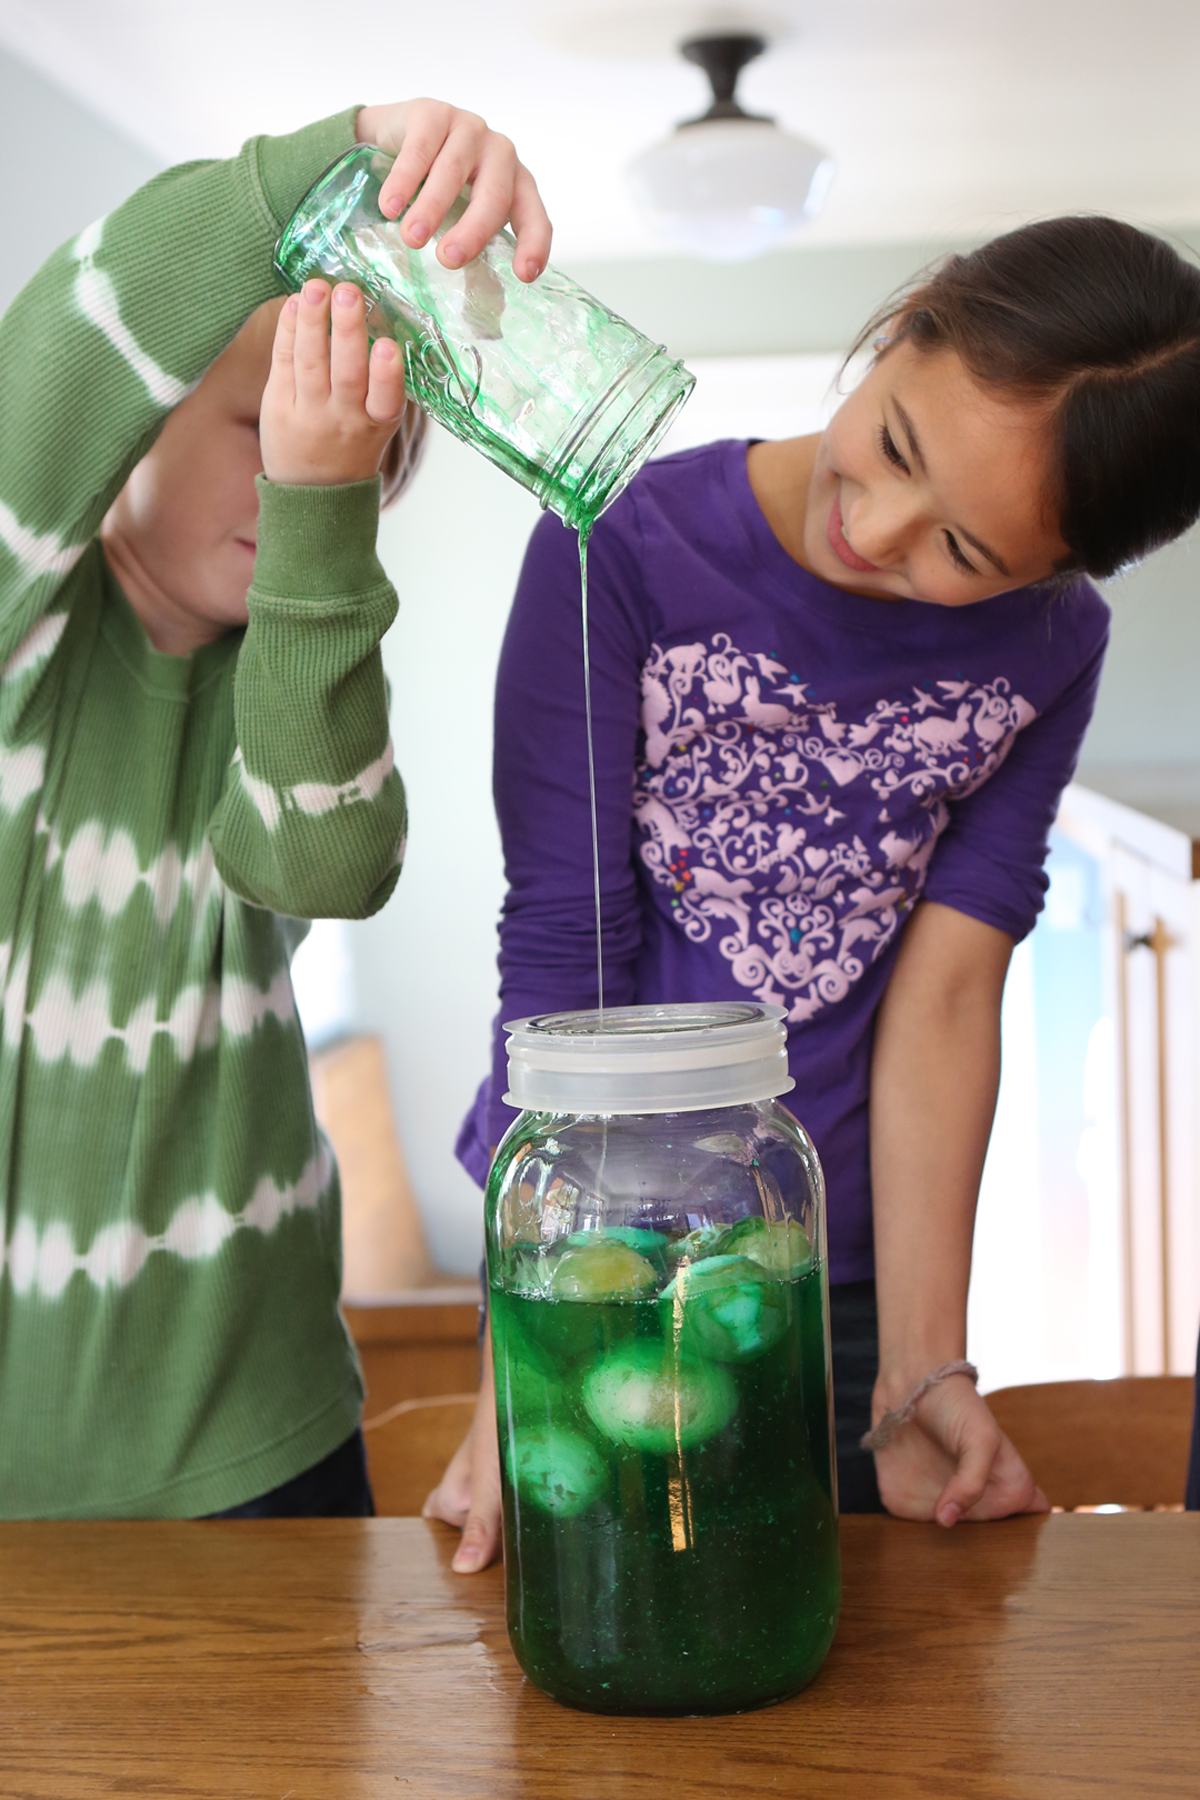
Alien Monster Eggs from Kitchen Science Lab for Kids (Quarry Books)
You can stand on a carton of eggs to test their strength.
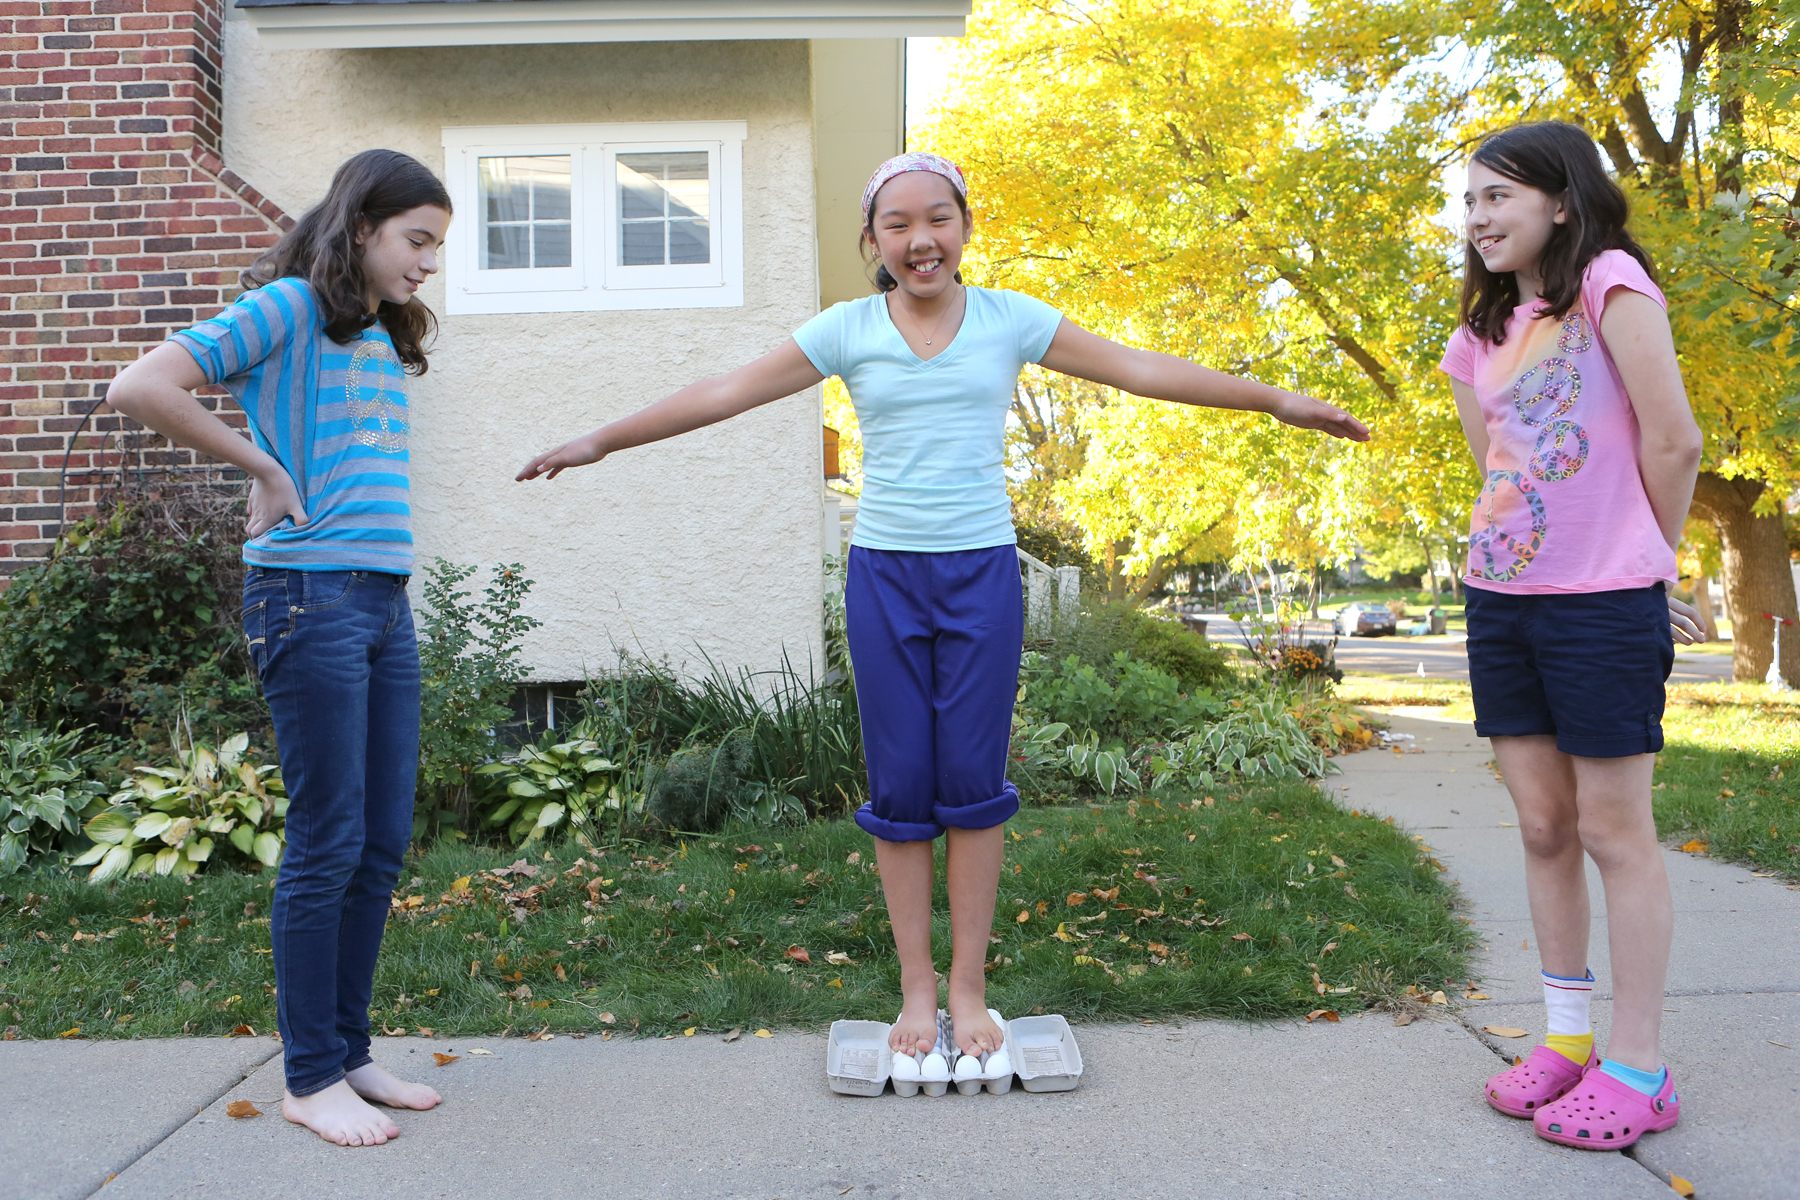
Standing on Eggs from Kitchen Science Lab for Kids (Quarry Books 2015)
For a fun physics experiment, throw eggs at a hanging sheet.
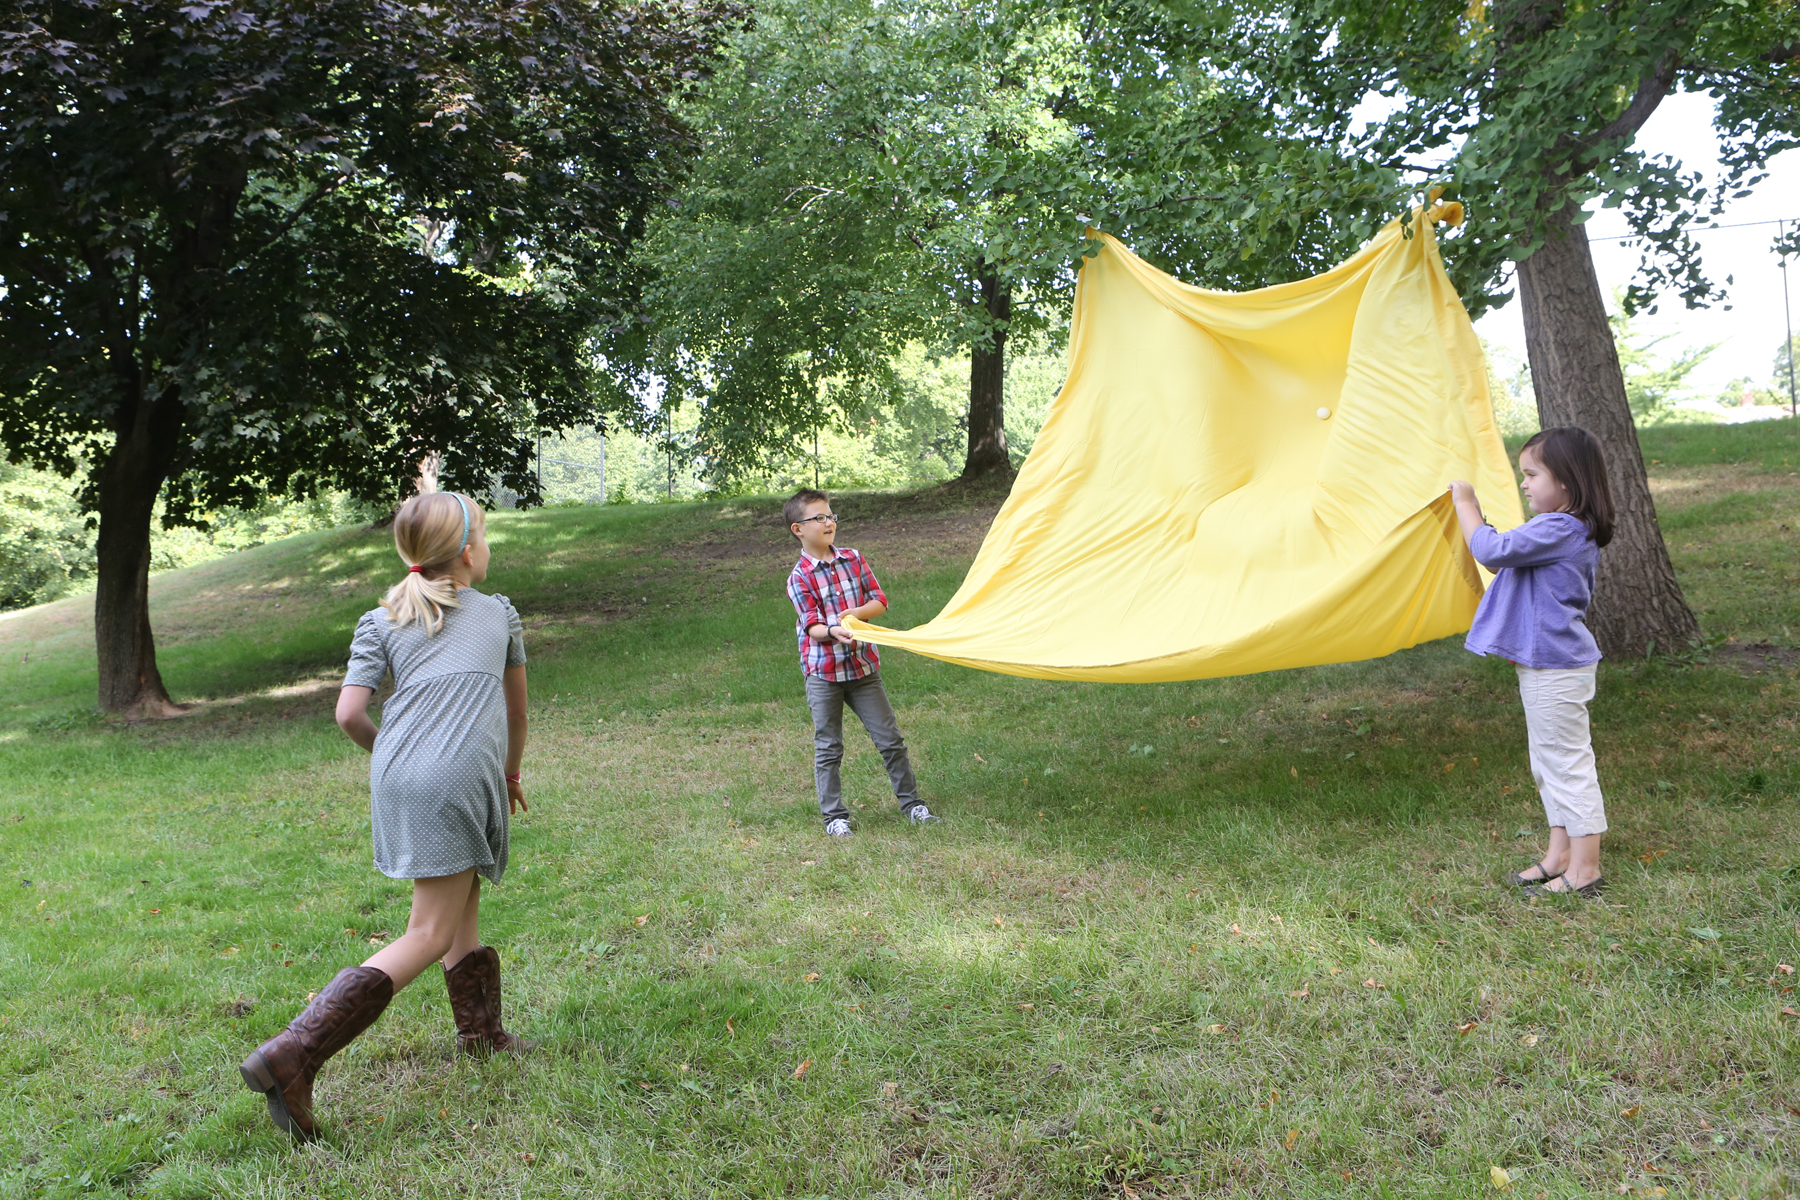
From “Kitchen Science Lab for Kids” Quarry Books
Make egg-eating monsters and watch atmospheric pressure push eggs up into a bottle.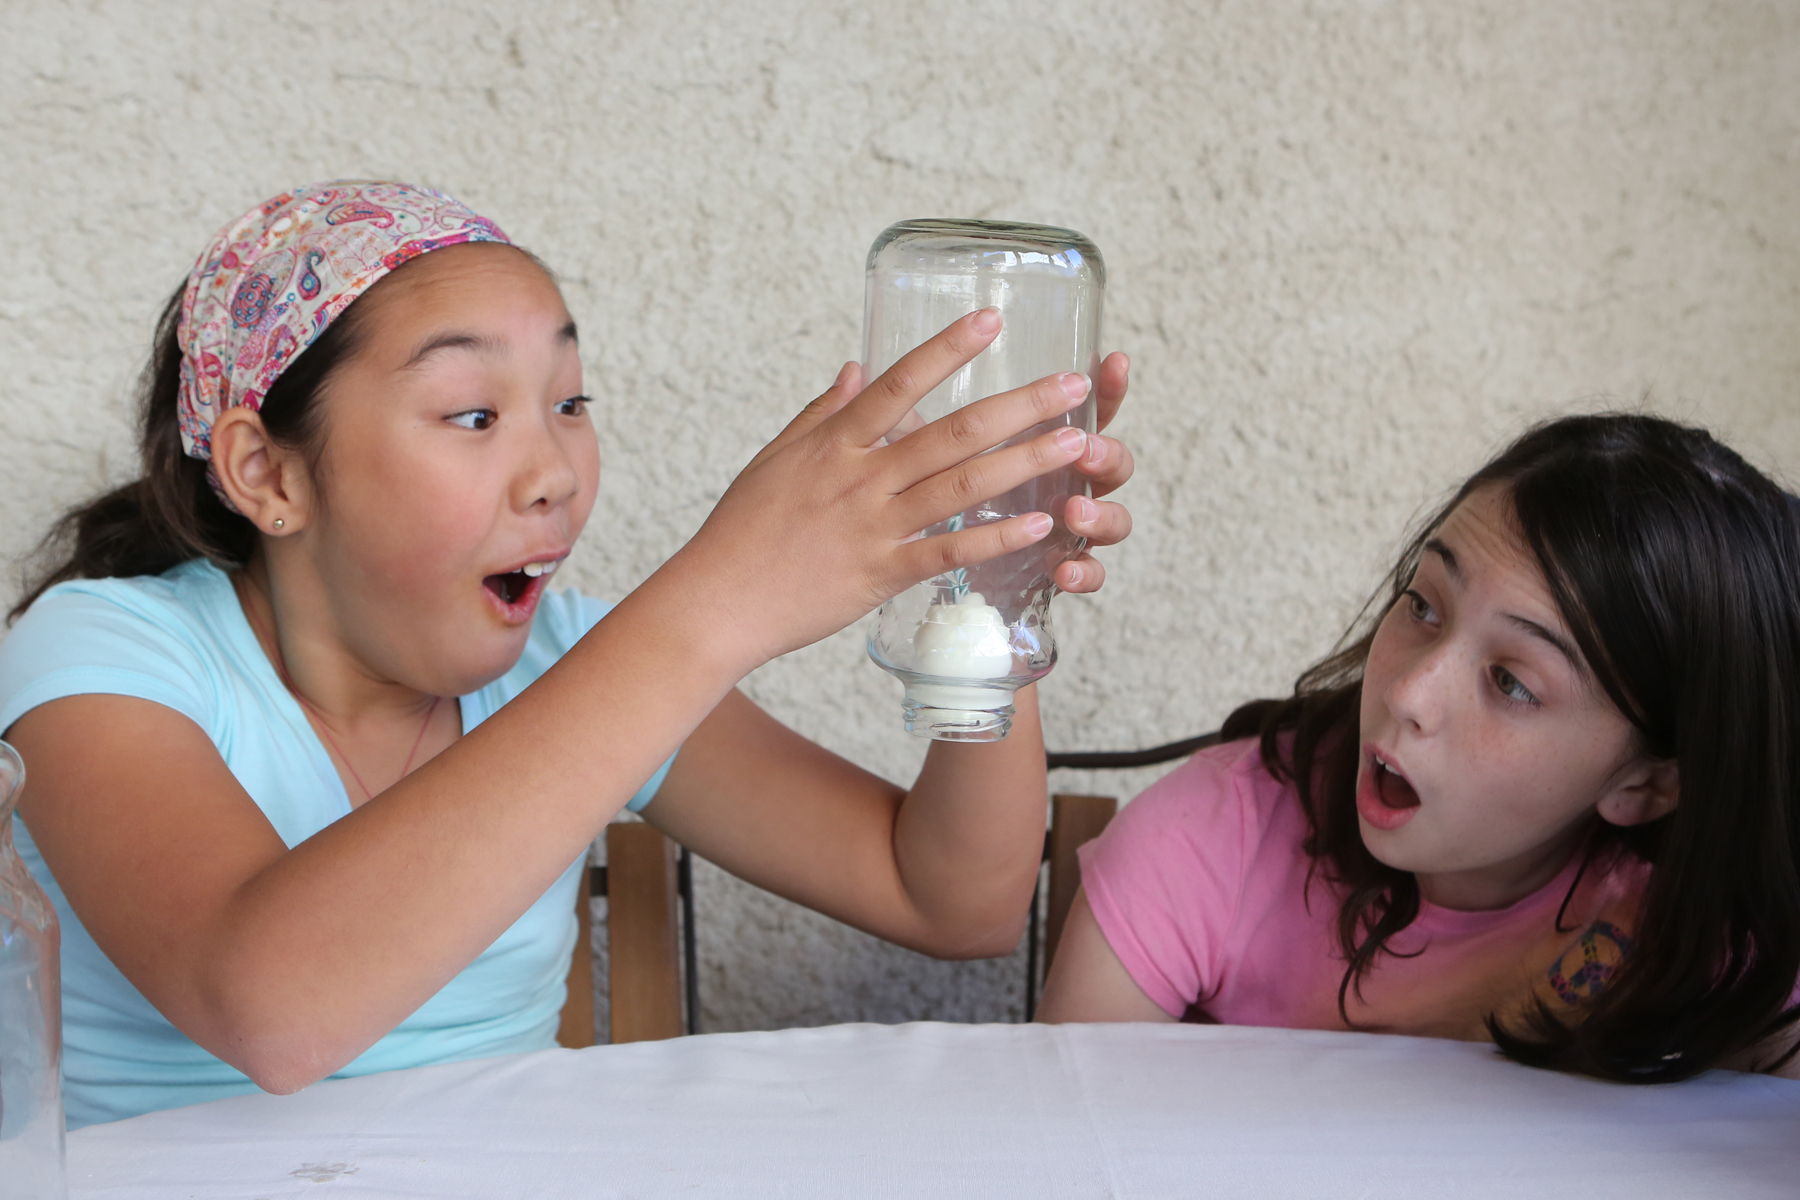
Egg drops are a fun way to test your engineering prowess.
And finally, here’s a little more about the science of hard-boiled eggs.
Epic Star Wars Themed Jell-O
- by KitchenPantryScientist
Did you know you can use science to make amazing works of art in Jell-O? I created this experiment to make Star Wars Jell-O, but you can take it in whatever direction you want. Remember, you’ll need agar, lots of Jell-O and some coconut milk to start experimenting! If your agar figures break, you can fill in the cracks with more melted agar! I ordered the silicone Star Wars molds on Amazon.com.

Star Wars Themed Jell-O : Educational Science Experiment created by KitchenPantryScientist.com
Here’s the science part: Agar is a substance extracted from the cell walls of red algae. It’s often used in cooking and science experiments. Agar has a higher melting temperature than the gelatin used to make Jell-O. So, if you put a piece of agar gel into melted Jell-O, the agar won’t melt unless the Jell-O is really hot (about 150 degrees Fahrenheit or 65 degrees Celsius!) That means you can create works of agar art to embed in your favorite Jell-O. We used silicone molds, cookie cutters and a molecular gastronomy technique called oil spherification to make our agar decorations. To make the orbs using spherification, you simple drip coconut milk agar through cold oil, forming perfect spheres that solidify as they fall. We talked with Astronaut Abby on Kare11 Sunrise about how you could make these orbs in space. Click here to see the segment.
Vegetarians like to eat agar, since it’s made from algae and not animals. In labs, scientists use agar to make petri dishes for growing microorganisms, since it won’t melt at high temperatures in incubators. They also use it to make gels for electrophoresis, to separate DNA and RNA molecules by size!
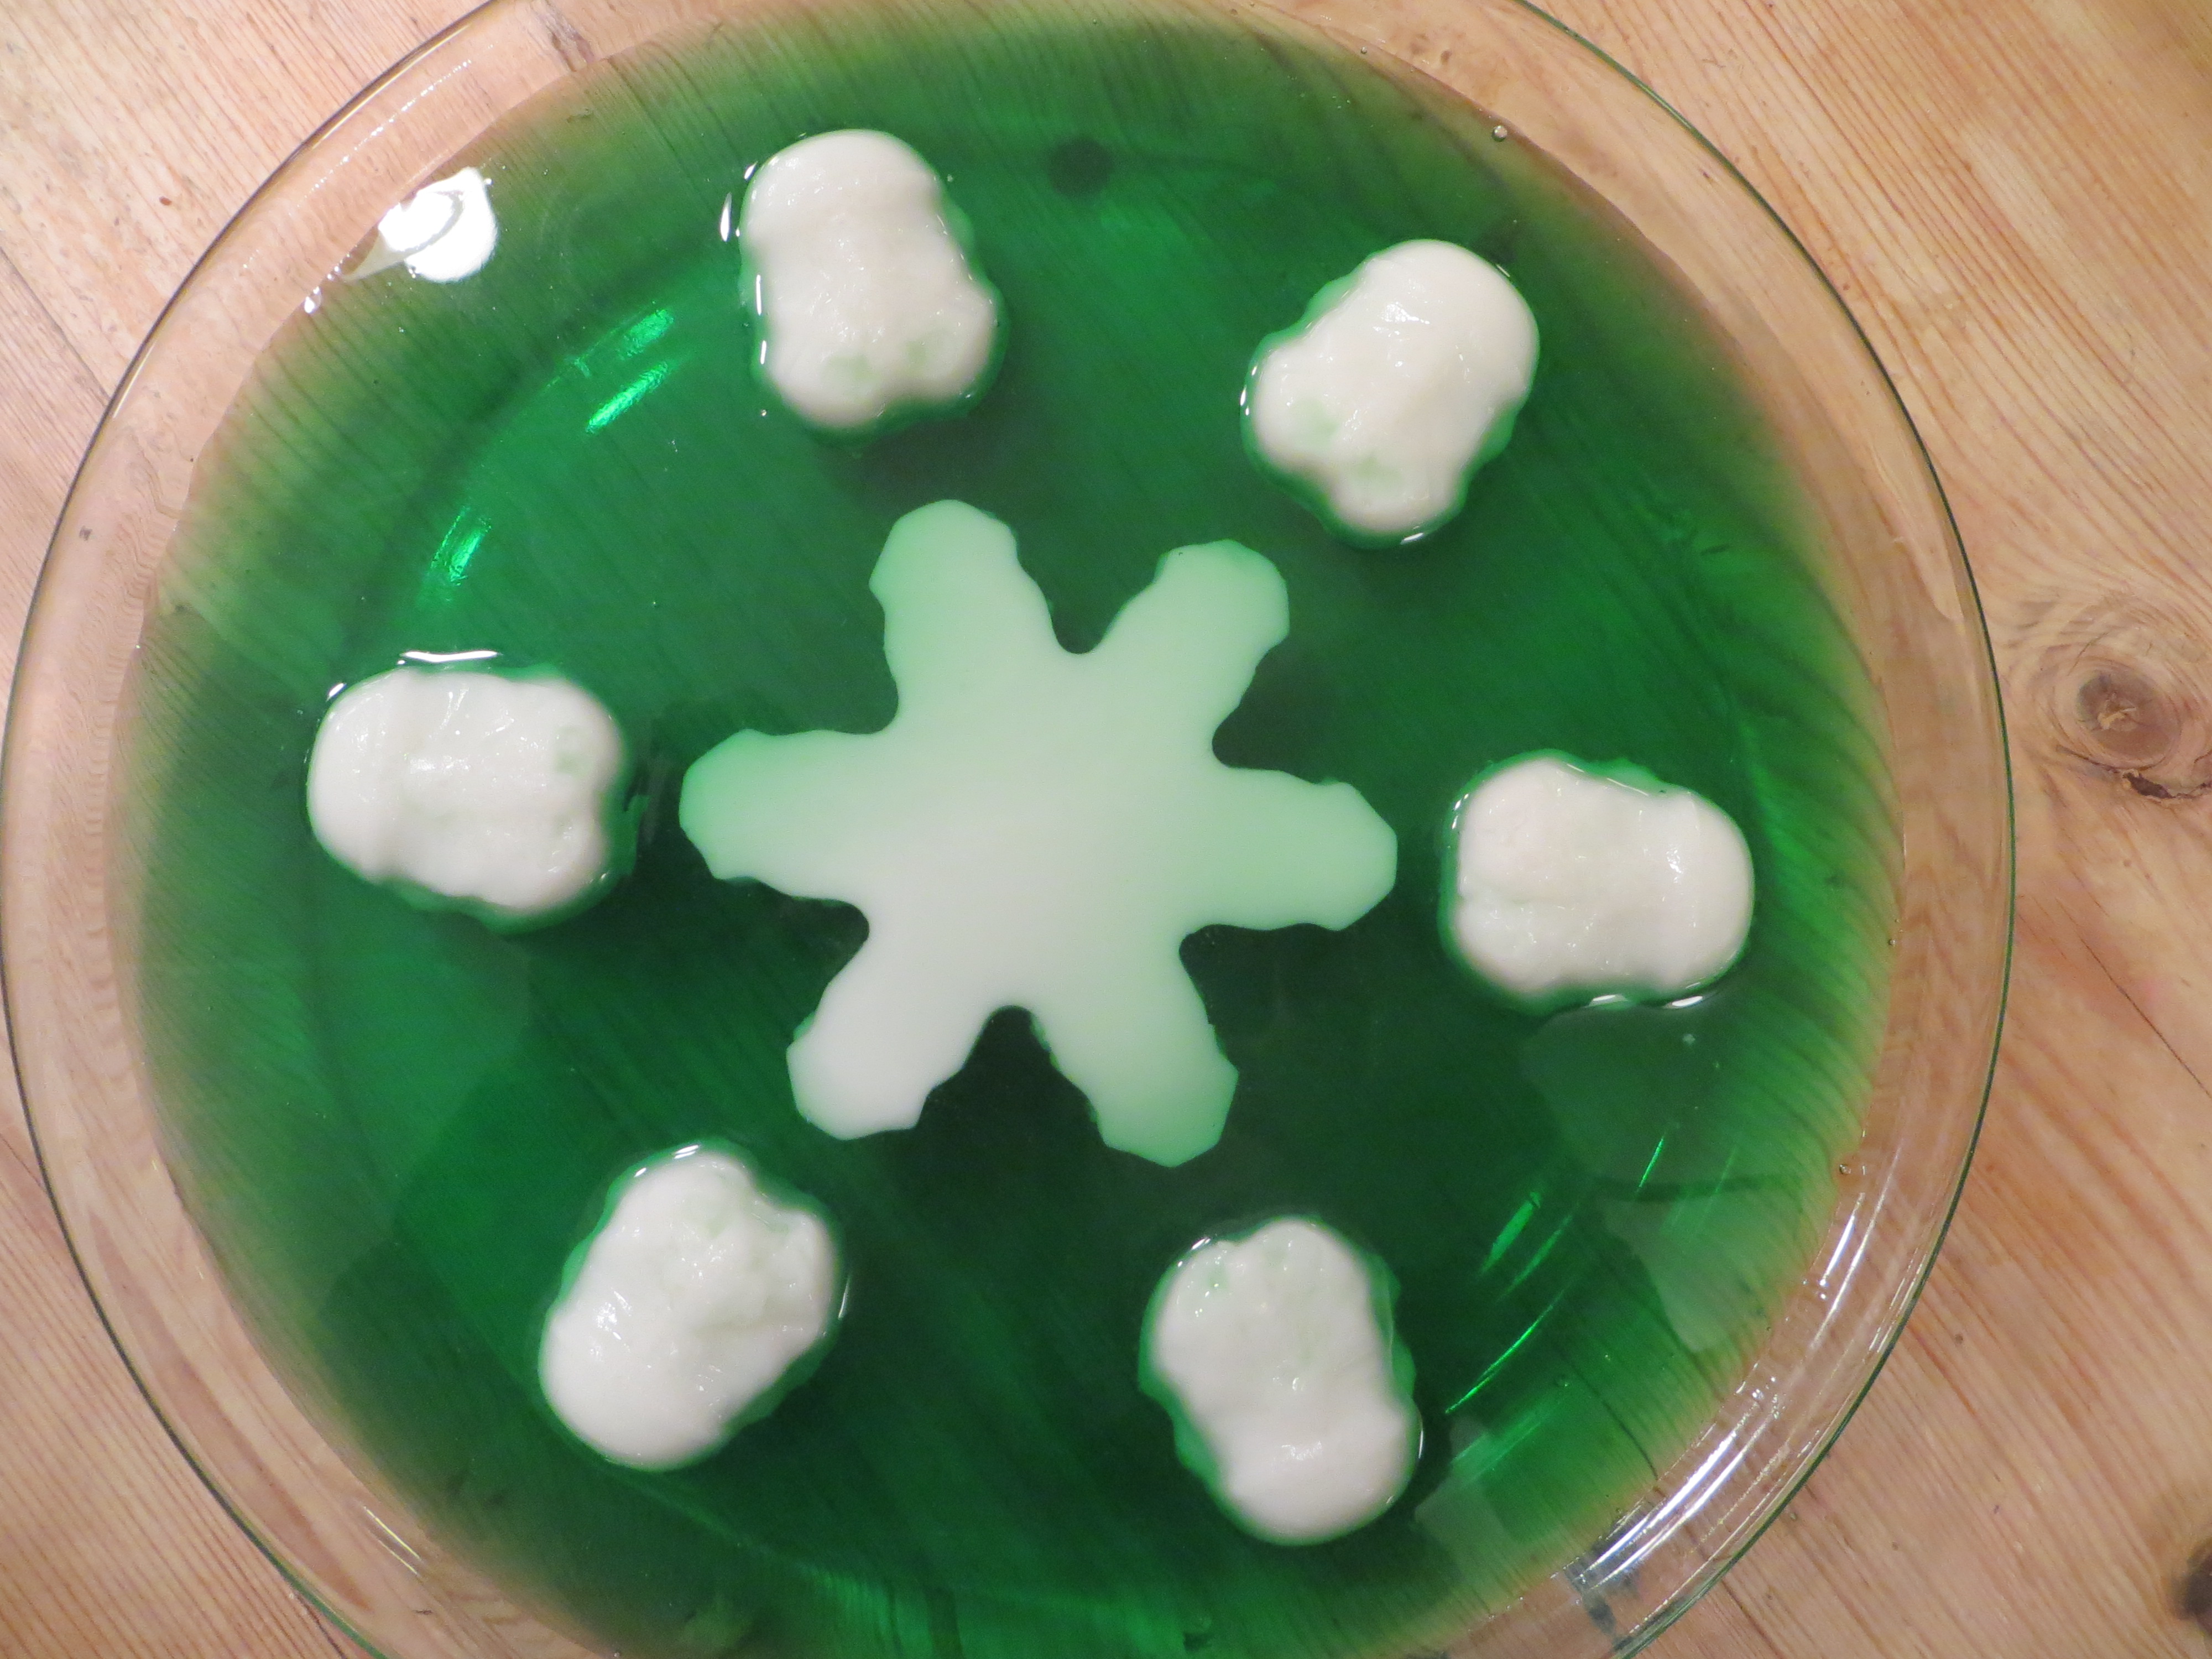
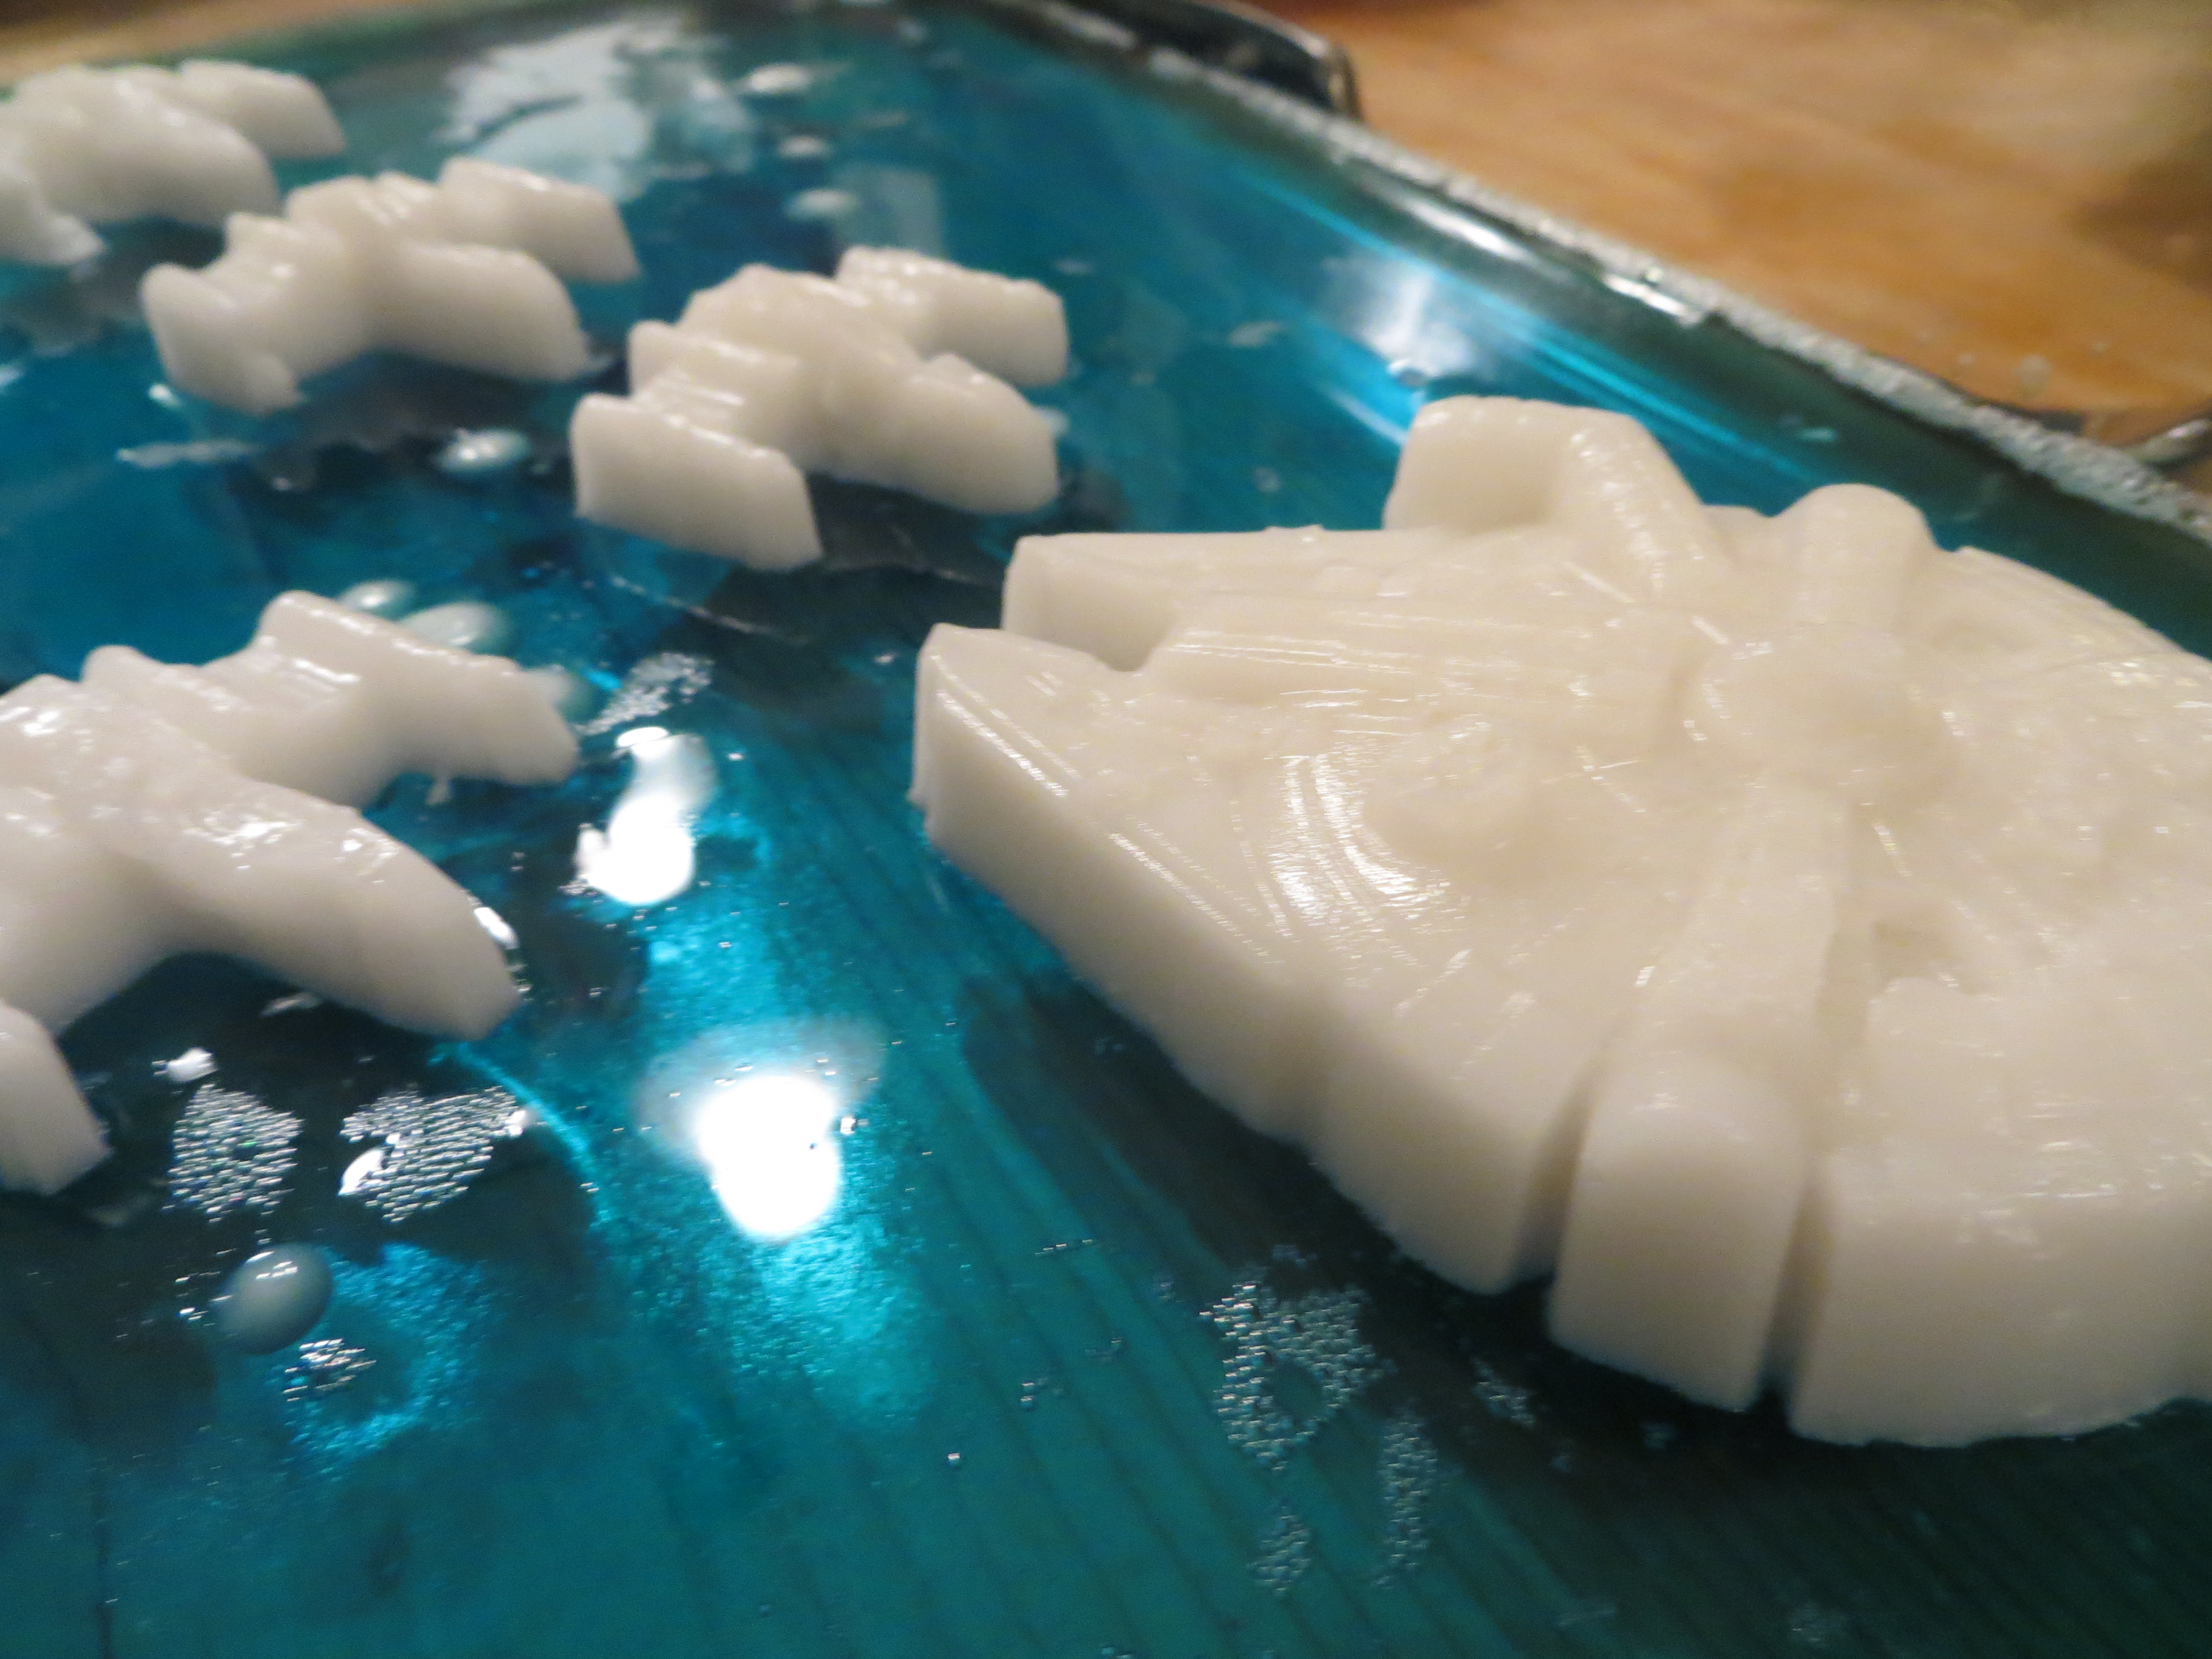
Snowflake and Storm Trooper Jell-O (KitchenPantryScientist.com)
INSTRUCTIONS:
*If you want to make white orbs from the coconut milk agar, you’ll need to plan ahead and chill tall jar or glass of vegetable oil in the freezer until it is thick and almost frozen. You’ll also need some squeeze bottles or clean eyedroppers.
Coconut Milk Agar -To create your white decorations and mini orbs, mix up this coconut milk agar dessert.
2 1/2 cups water
4 Tbs Agar flakes from Asian section of grocery store or COOP
1 cup coconut milk (not lowfat) Mix the coconut milk well before you measure it.
4 Tbs. sugar
In a sauce pan or the microwave, heat 4 Tbs. agar in 2 and 1/2 cups water until the agar is completely dissolved. Adult supervision required.
To the agar mixture, add 1 cup coconut milk and 4 Tbs. sugar. Mix Well. Pour into molds, pour into a pan to cut shapes out with cookie cutters, or pour some into a squeeze bottle to make white orbs.

Coconut Milk Orbs (optional cool science experiment
Slowly drip melted coconut milk agar (above) through ice-cold vegetable oil. As it fall through the oil, it should harden and form orbs. Collect the orbs with a slotted spoon and rinse before adding to your Jell-O.

Jello-O
Follow the directions on the package for the speed set method. If you make a double batch, pour half of it into the bottom of a large, glass casserole dish or bowl. If it’s a single batch, pour the whole thing in. If you made coconut milk orbs, put some in the melted Jell-O to see whether they float or sink. Let the Jell-O solidify and arrange your agar decorations on the Jell-O.
Set the coconut milk agar decorations on the first layer of Jell-O (KitchenPantryScientist.com)
Make or remelt more Jell-O. When it’s cooled down a bit, pour it over your decorations to trap them in the Jell-O. You may want to leave them sticking out a little, or cover them completely with Jell-O over them for effect.
What else could you try? What Jell-O masterpiece can you create?

Han Solo got a little cracked when we took him out of the mold, but we fixed him with some melted coconut milk agar! (KitchenPantryScientist.com)
Six Quick and Easy Halloween Science Experiments
- by KitchenPantryScientist
Here are some great last-minute experiments to make your Halloween more fun and spooky! Watch the TV segment I did to see how much fun they are, and look for links to directions below the video.
Click on these links for instructions on how to make Frankenworms, Cornstarch Goo, Mad Scientist’s Green Slime, Alien Monster Eggs, Magic Potion and Bags of Blood. You can find more experiments by scrolling down on my website!
Happy Halloween!