Tag: kids’
Mirror Image Plant Prints
- by KitchenPantryScientist
Yesterday on Twin Cities Live, I demonstrated some fun botanical science projects for learners of all ages, including Vegetable Vampires and Leaf Chromatography.
This fun art/science project lets you transfer plant pigments to cloth, creating beautiful prints of your favorite leaves and flowers. It’s especially great for fall, when there are so many colorful leaves around.
Mirror Image Plant Prints- kitchenpantryscientist.com
You’ll need:
-Fresh leaves and flowers (Dry leaves won’t work.)
-A hard, smooth pounding surface, like a wooden cutting board or carving board
-Wax paper or plastic wrap
-Mallets or hammers
-Untextured cotton cloth, like a dishtowel. Heavy cloth works better than very thin cloth.
-*Alum and baking soda to treat cloth (This is optional. I don’t pre-treat my fabric, but the treatment step will help bond and preserve color, if you want to frame your prints. You can also buy fabric that’s pre-treated for dyeing.)
Mirror Image Plant Prints- kitchenpantryscientist.com
Safety tips: Protective eye wear is recommended. Young children should be supervised when using mallets and hammers.
What to do:
*If treating cloth: The day before you do the project, add 2 quarts water to a large pot. Add 1 Tb alum and 1 tsp baking soda to the water. Add the cotton and bring to a boil. Simmer for 2 hours, turn off heat and soak for at least two hours. Let fabric dry.
The next steps are the same, whether you’re using an untreated piece of cotton or treated cloth.
- Take a walk to collect colorful leaves and flowers. Choose plants that can be flattened. Flowers with huge centers, like coneflowers don’t work as well, but petals may be removed and pounded.
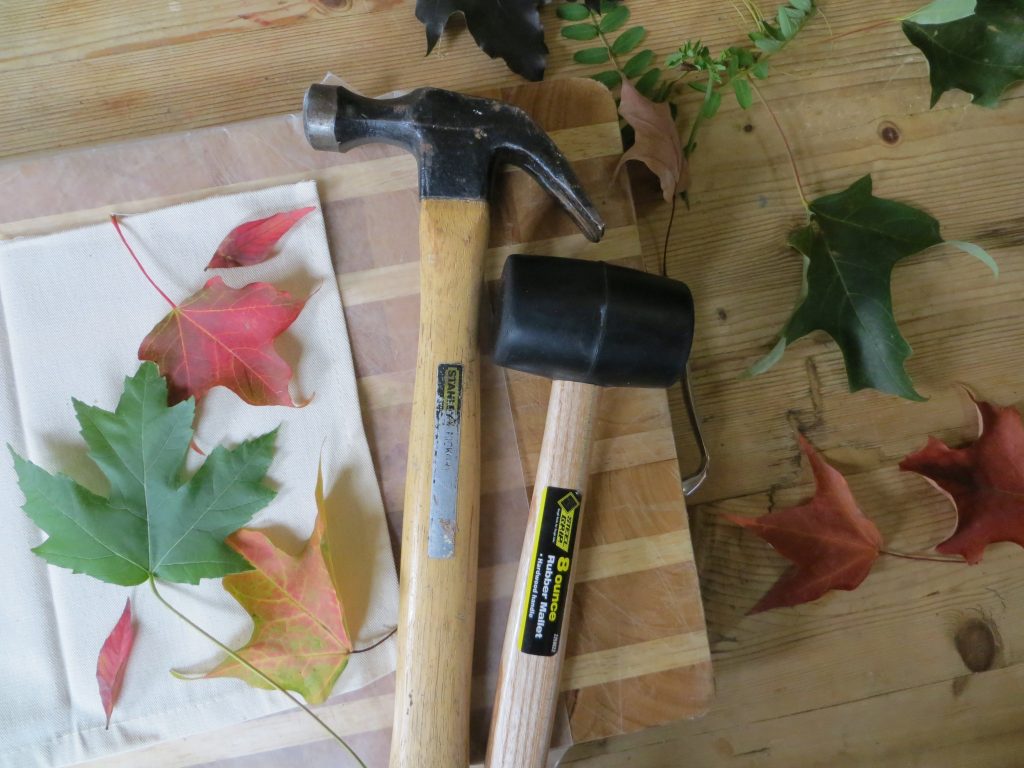
- Cover the pounding surface with waxed paper or plastic wrap.
- Cut a piece of cloth that will fit on the pounding surface when folded in half. Iron the fold.
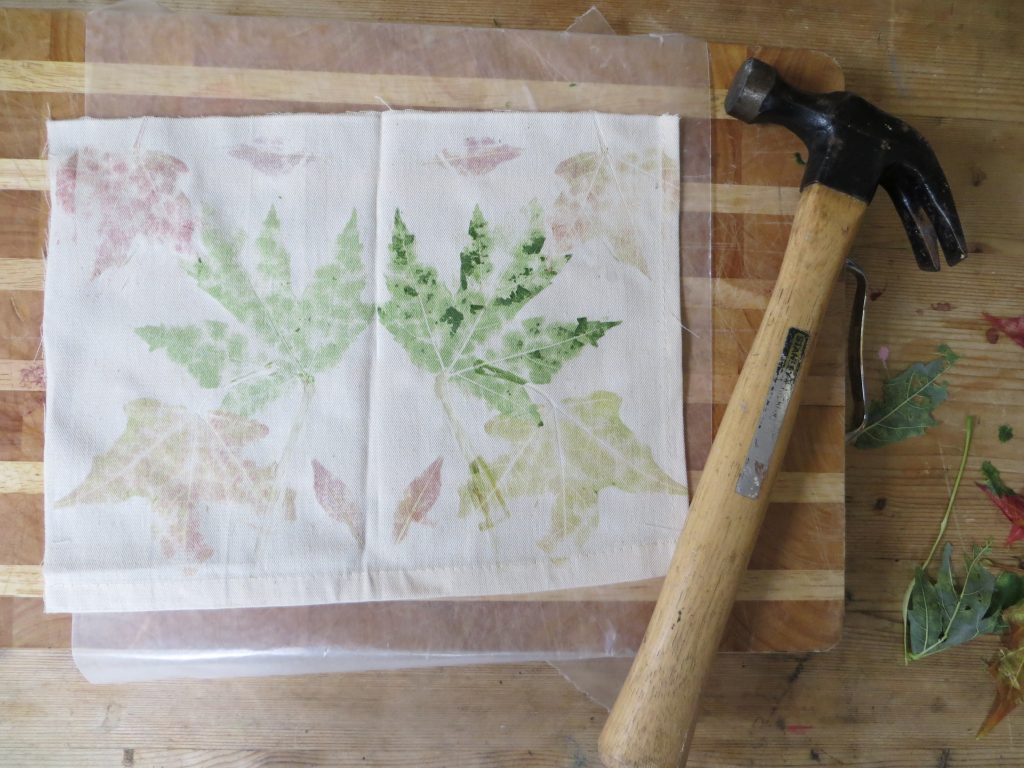
- Open the cloth and lay it on the pounding surface. (See image above)
- Arrange leaves and flowers on the cloth.
Mirror Image Plant Prints- kitchenpantryscientist.com
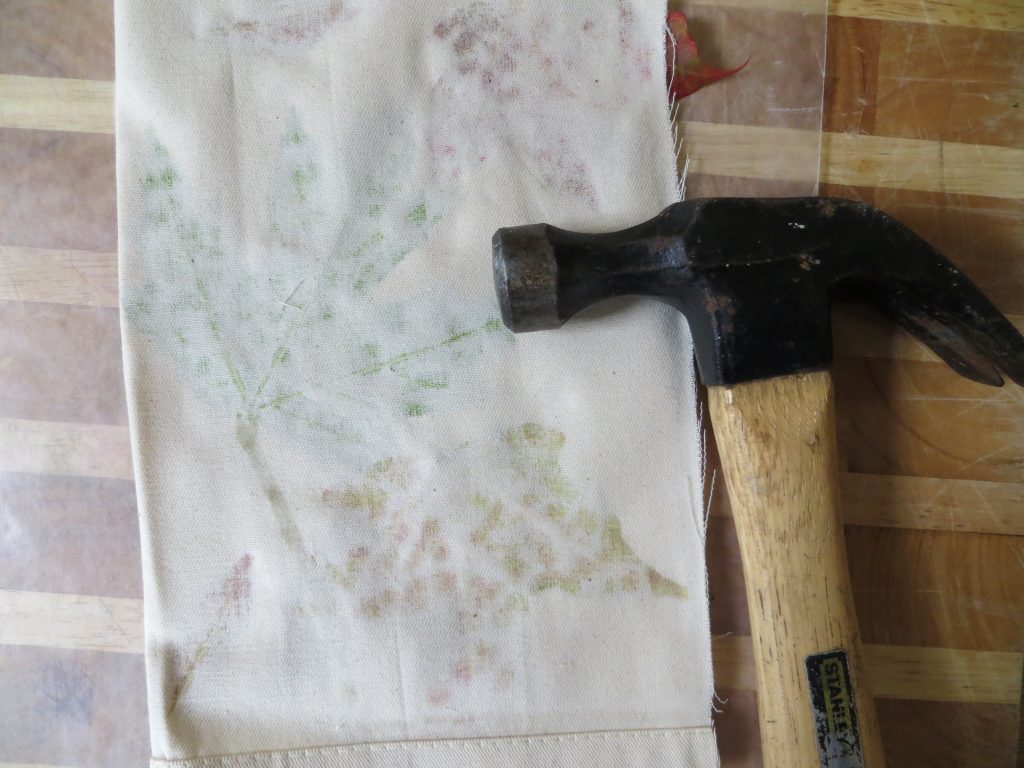
- Fold the cloth over the plants and pound it with the hammer or mallet. If you’re using a hammer, pound more gently.
- Pound until you can see the forms of the leaves through the fabric. As the pigment leaks through, you’ll see the outlines of what you’re smashing. Hint: Hammers work better than mallets for fall leaves. For juicy leaves and flowers, use a mallet or hammer gently.
Mirror Image Plant Prints- kitchenpantryscientist.com
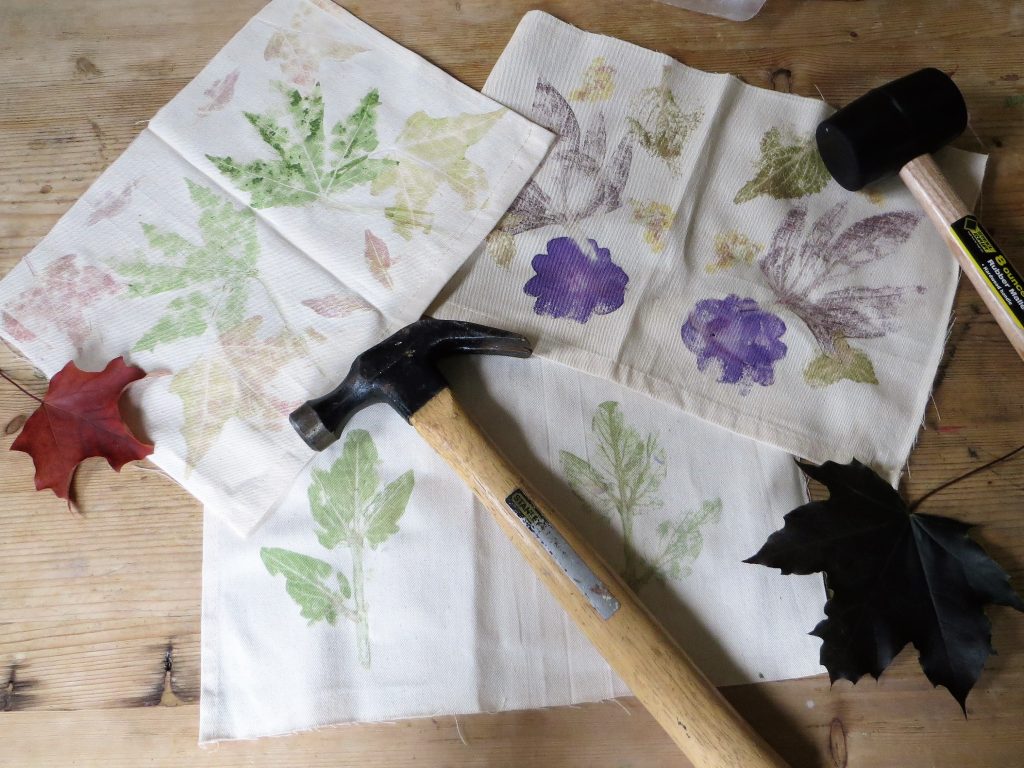
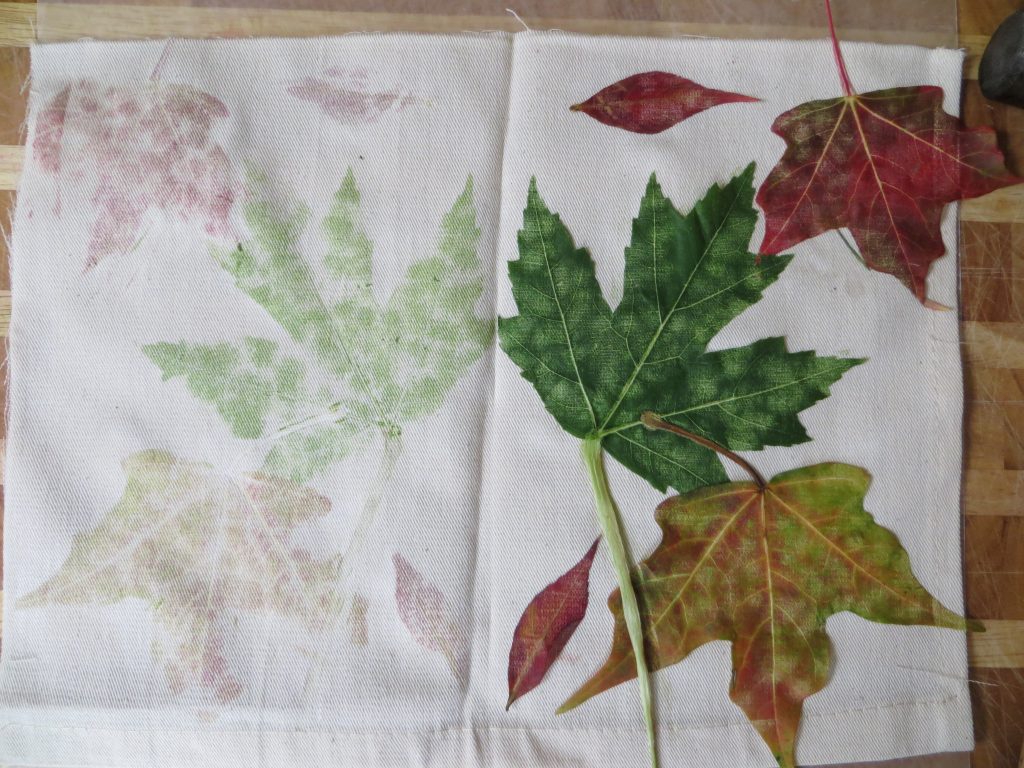
- When you’re finished pounding, unfold the fabric to reveal the print you created. Remove the leaves and petals.
Mirror Image Plant Prints- kitchenpantryscientist.com
- Label the image with plant names, enhance it with paint or markers, or leave nature’s design to speak for itself.
The Science Behind the Fun:
Pigments are compounds that give things color, and many of them are found in nature. Flowers, leave, fruits and vegetables are full of brilliant pigments. In this experiment, we transfer plant pigments to cloth by bursting plant cells using pressure from a hammer or mallet.
The green pigment found in leaves is called chlorophyll. In the fall, many trees stop making chlorophyll, and the red, yellow and orange pigments inside the leaves become visible.
Although you create a mirror image of leaves and flowers, you’ll notice that the color may be more intense on one side of the print. A waxy covering called a cuticle covers leaves, and is sometimes thicker on the top than on the underside of the leaf. It may affect the transfer of pigment to the cloth, making it easy to see structures like veins on the leaf print.
Enrichment:
What parts of the leaf can you identify in the print you created?
Kid-Friendly “Elephant Toothpaste”
- by KitchenPantryScientist
I’ve been hearing about this science demonstration for years, and finally decided to try it! If you do it at home, kids should wear safety goggles or sunglasses to protect their eyes, and adults should pour the 3% hydrogen peroxide into the bottles.
You’ll need:
a tray or cookie sheet
3% hydrogen peroxide (available at most pharmacies and discount stores)
liquid dish soap
dry yeast (2 packets)
food coloring
empty 16 oz bottle
What to do:
1. Pour 1 cup hydrogen peroxide into an empty 16oz bottle. (A funnel helps!)
2. Add 2 Tbs. liquid dish soap to the bottle and mix well with the hydrogen peroxide.
3. Put 8 drops of food coloring into the bottle and swirl to mix.
4. Position the bottle on the tray.
5. Pour 2 packets of yeast into a paper cup and pinch the cup’s lip to make a pouring spout.
6. Quickly pour the yeast into the bottle, while swirling the liquid vigorously to mix well. The better you mix it, the better the experiment will work!
7. Set the bottle down on the tray before the foam emerges from the top.
8. Watch the chemical reaction between catalase in the yeast and the hydrogen peroxide create oxygen bubbles in the soap!
9. When the reactions has stopped, have an adult clean up the mess by pouring everything down the sink and rinsing the tray with water. (Normally kids should clean up, but for this one, I’d recommend an adult do it.)
The Science Behind the Fun:
Hydrogen Peroxide (H2O2) is a common household chemical that is often used to disinfect wounds and bleach hair. Certain chemicals can break it down into water (H2O) and Oxygen (O).
Dry yeast is a living fungus that produces a molecule called catalase. Catalase is very good at breaking down hydrogen peroxide quickly. When you add yeast to hydrogen peroxide that’s been mixed with liquid soap, the soap traps the oxygen and makes bubbles that push their way out of the bottle.
You may notice that the bottle feels warm. That’s because the chemical reaction produces heat and is called an exothermic reaction.
Science Light
- by KitchenPantryScientist
Here’s a fun optics experiment, based on one created in 1842 by Jean-Daniel Colladon, that you can do at home using a laser pointer and a bottle of water.
Parental supervision required. (Eye protection recommended for kids.) Never shine a laser pointer at or near eyes, as it can cause blindness.
Skullsinthestars.com has a well-written, detailed explanation of how light can be reflected in a transparent medium, like water.
Floating Ping Pong Balls
- by KitchenPantryScientist
This experiment is so awesome that our balloon-popping dog Heidi had to get in on the action! Try it, and you’ll see how much fun it is to play with the forces of physics using a blow drier and a ping pong ball or balloon.
Newton’s third law tells us that for every action, there is an equal and opposite reaction. As the air pushes up on the ball, the ball pushes back down on the air. Other forces are at work too, as pressure differences in the air column help the ball stay in the middle of the air flow.
Weather Science
- by KitchenPantryScientist
It’s fun to track the weather, and you can create some cool meteorology instruments using stuff you have around the house. Here’s a great post by NOAA (The National Oceanic and Atmospheric Association) on how to make your own weather station.
It’s also fun and easy to do this cool convection current experiment, using warm and cold water to explore how air moves in Earth’s atmosphere.
Convection Experiment (kitchenpantryscientist.com)
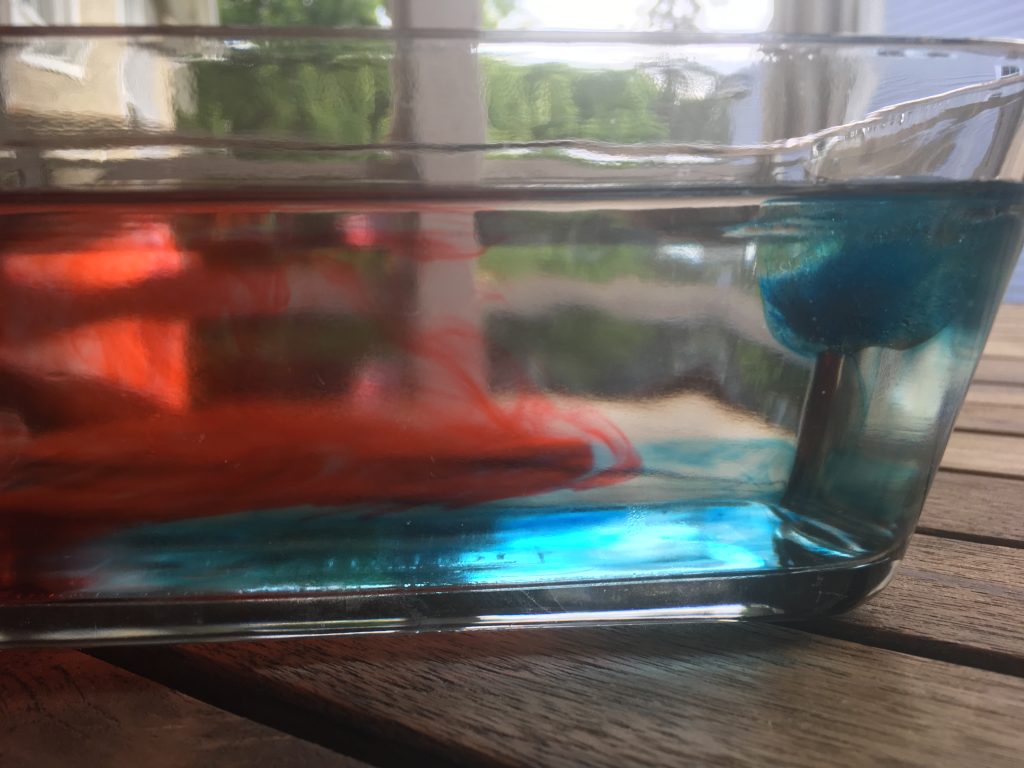
To see how cold fronts move under warm fronts, you’ll need ice cube trays, water, blue and red food coloring and a clear container.
- Add water to an ice cube tray and add a few drops of blue food coloring to the water in each cube space. Freeze.
- Fill a clear container with room temperature water.
- Place one or two blue ice cube or two at one end of the container, and a few drops of red food coloring at the other end.
- Observe what happens.
The Science Behind the Fun:
Cold water(blue) is more dense than warm water and forces warmer water (red) to move up and over it.
This is similar to the way warm air is forced up when it collides with masses of cold air in the atmosphere. Warm air carries energy, and when there’s lots of moisture in the air, these collisions often result in thunderstorms.
Homemade Tie-Dye Fidget Spinner
- by KitchenPantryScientist
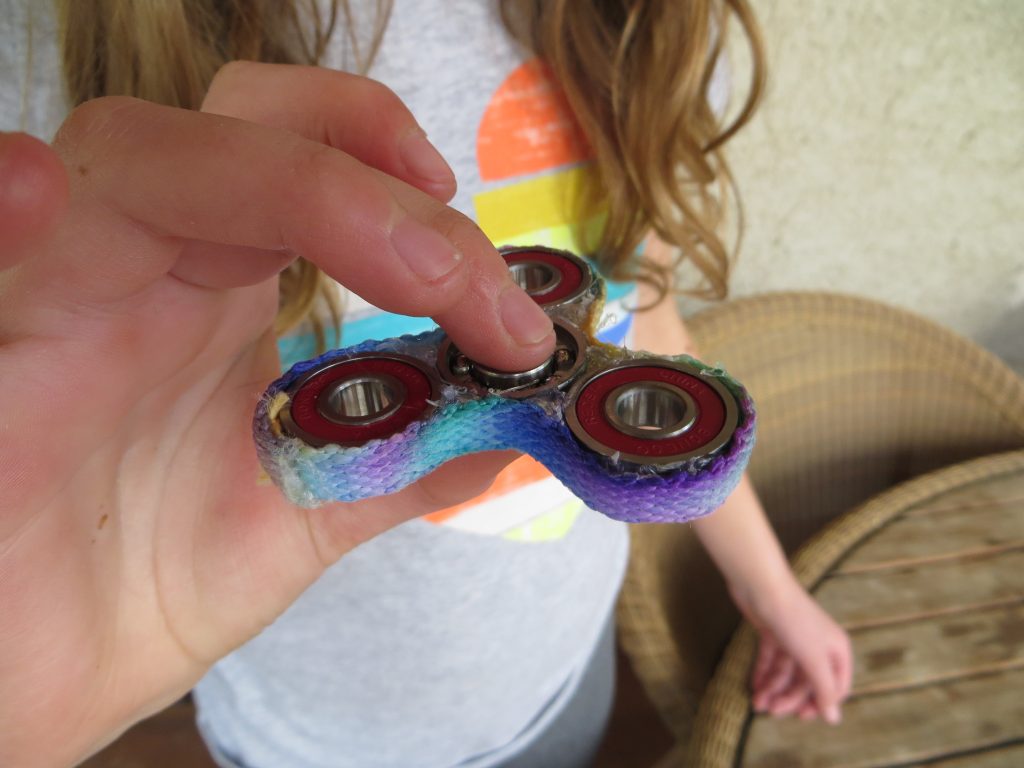
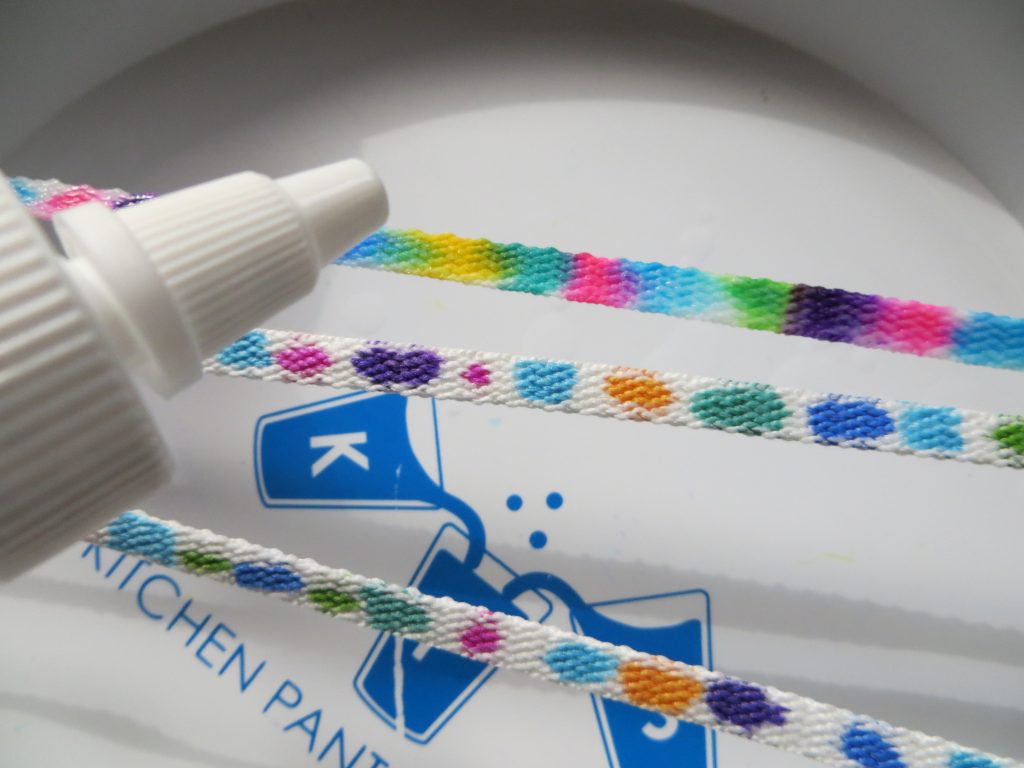
Homemade Spinner with Tie-Dye Edges (KitchenPantryScientist.com)
Make a super-cool spinning toy using skateboard bearings, super glue and a little physics. Customize your design with a marker tie-dyed shoelace.
Warning: Not for recommended for kids under 5. Use adult supervision for super glue, sharp points, rubbing alcohol and glue gun.
You’ll need:
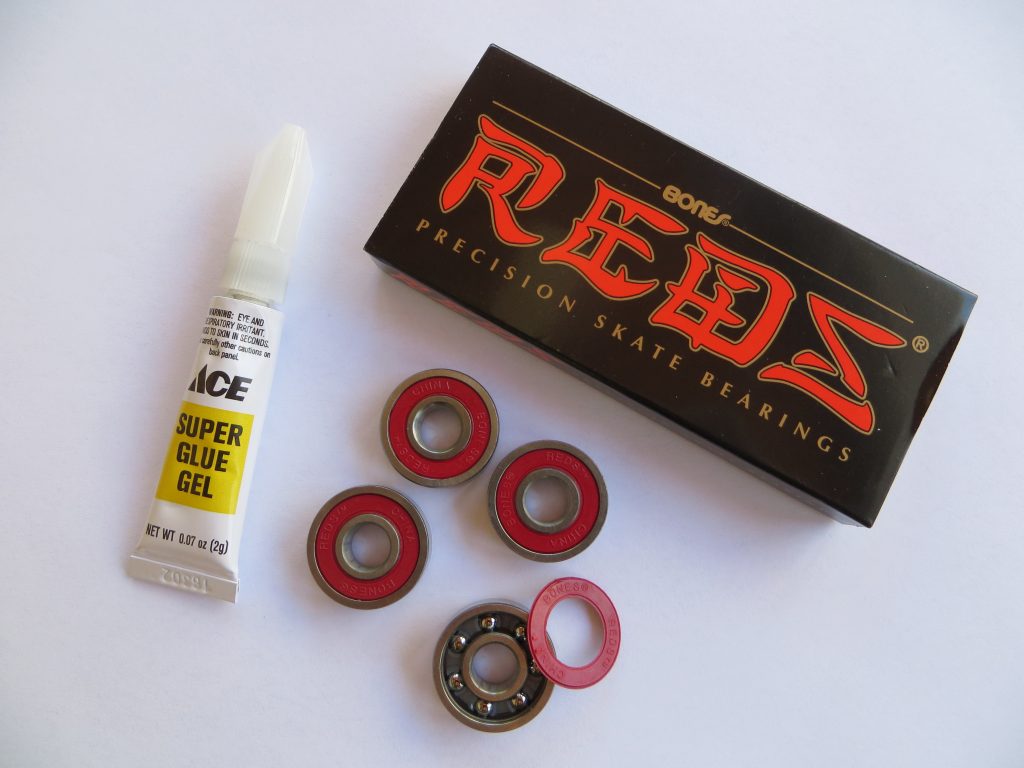
-4 skateboard bearings (available online or at skateboard stores)
-superglue or Krazy Glue
-a white shoelace
-permanent markers, like Sharpies
-rubbing alcohol (isopropanol)
-a glue gun
KitchenPantryScientist.com
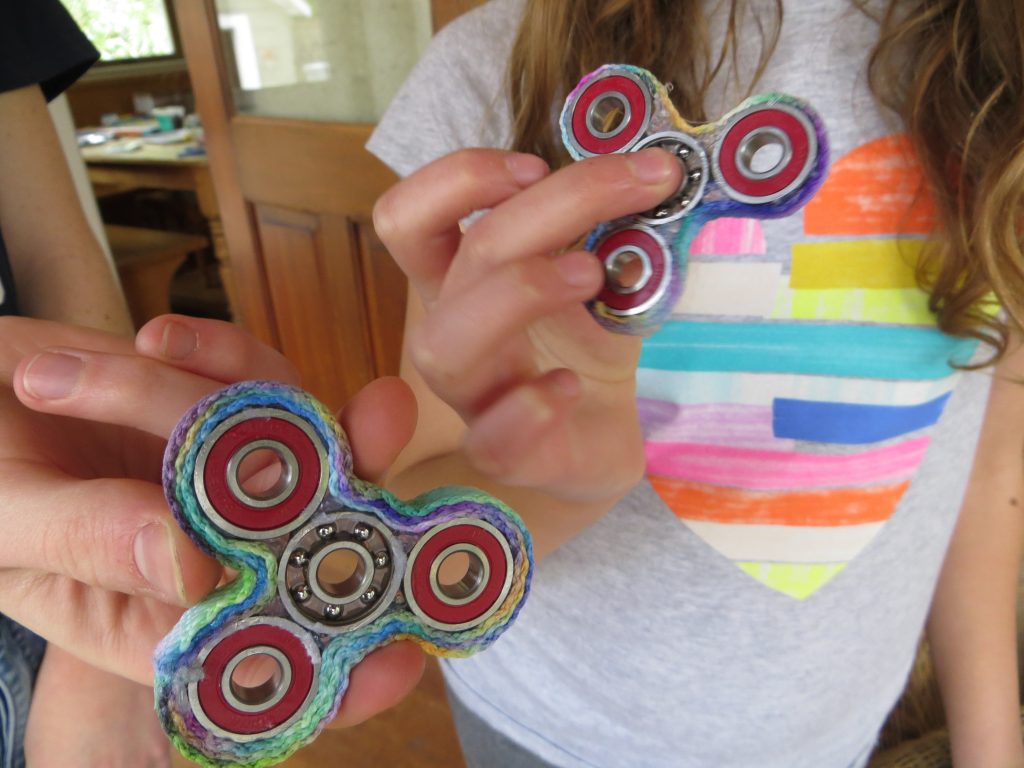
1. Use a sharp point to remove the cover from one of the bearings so that you can see the ball bearings inside. (See image above.)
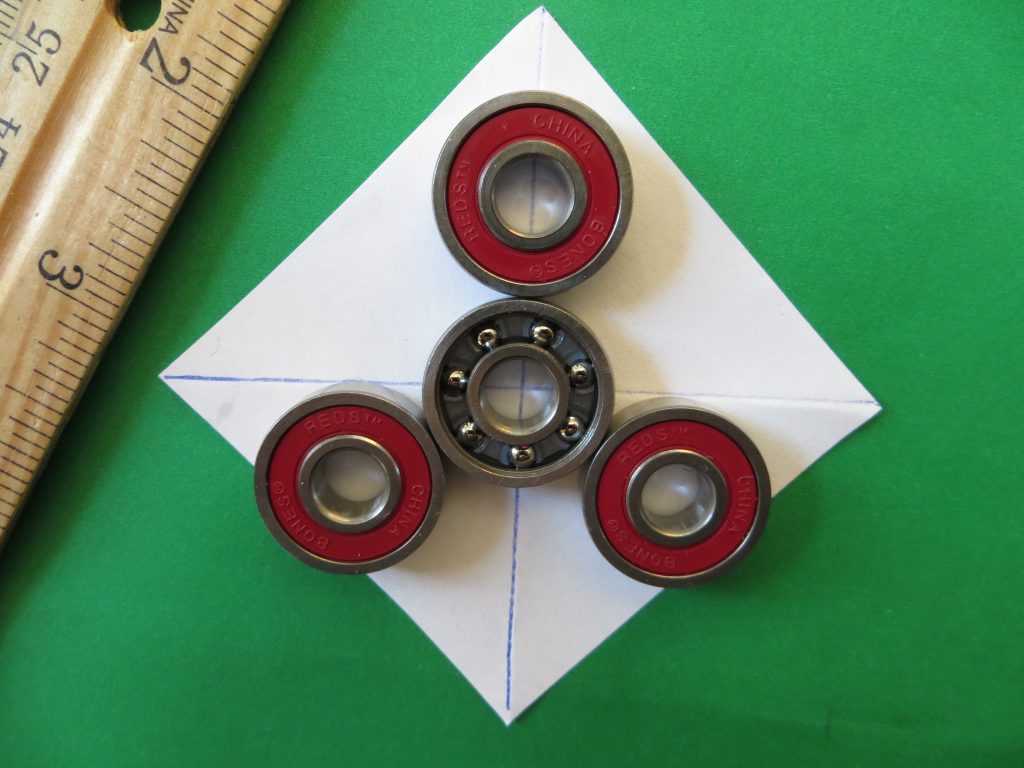
2. Cut a piece of paper 6cm x 6cm and draw an X from corner to corner.
3. Center the bearing with the cover removed in the middle of the X. Then, center the other 3 bearings around the one in the middle so that they’re evenly spaced. You can use a ruler to check spacing. (See image below.)
KitchenPantryScientist.com
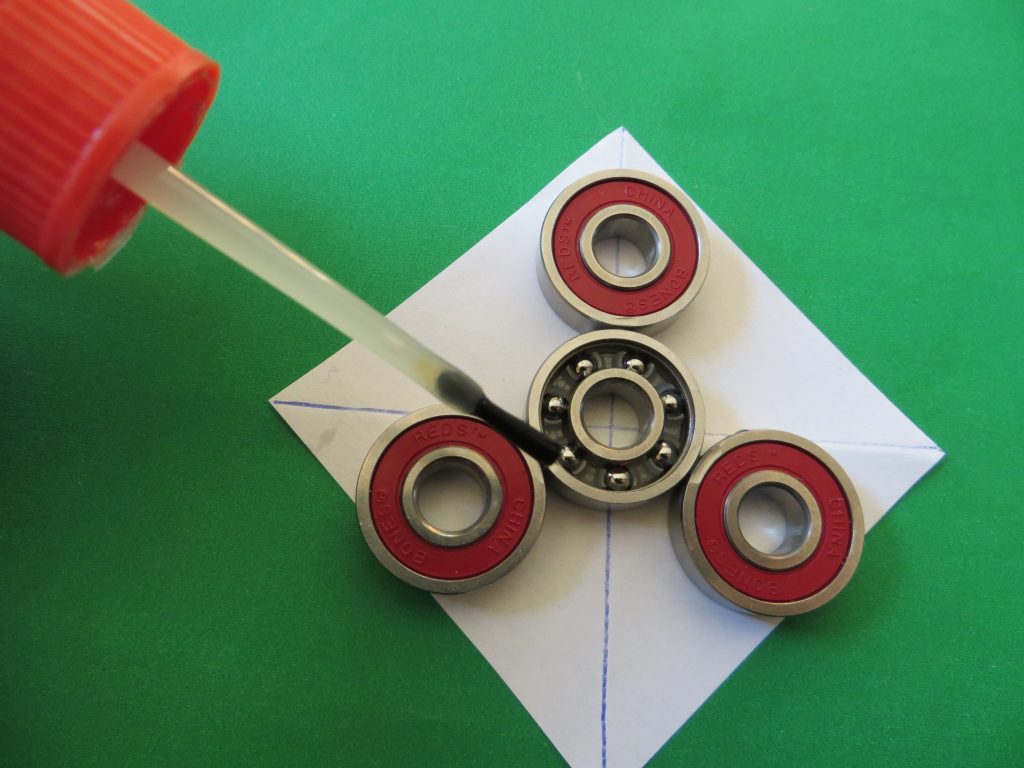
4. Add a single drop of super glue to the junction between each bearing to connect them. If you add too much, the spinner will stick to the paper. *Be careful not to get any glue onto the moving parts of the bearings.
KitchenPantryScientist.com
5. When the glue is dry, carefully turn the spinner over and place another drop of glue at each junction.
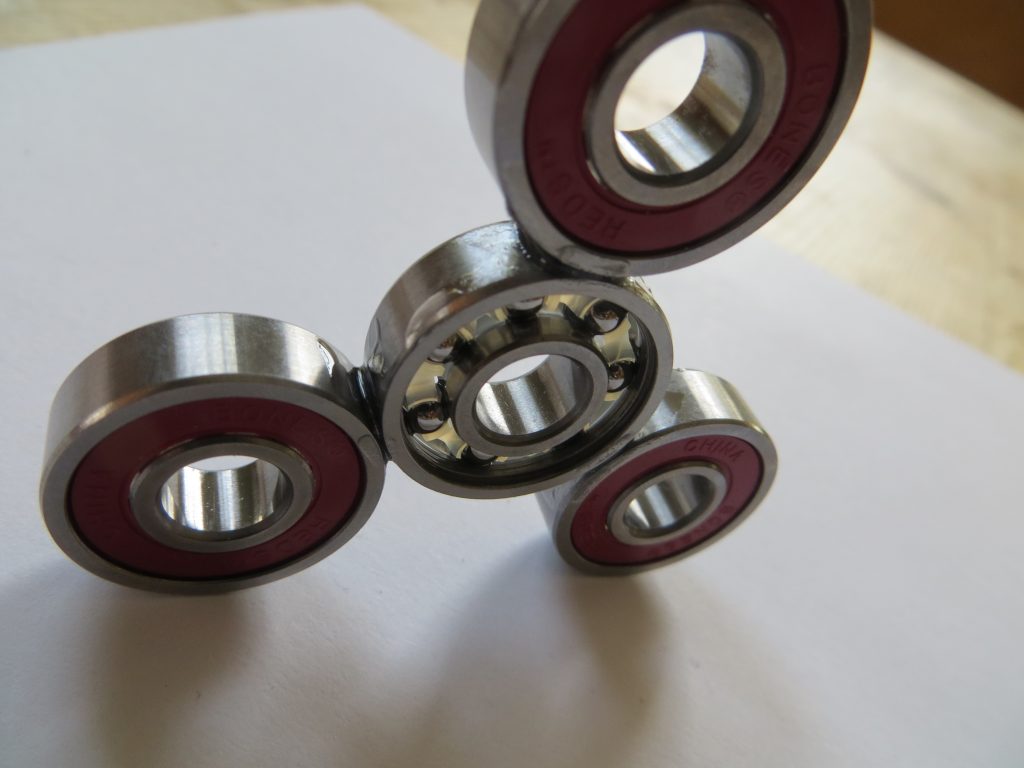
6. When the glue is dry, prop the spinner up on its side and add glue to the junctions on the sides. (See image below.) Repeat on each side.
KitchenPantryScientist.com
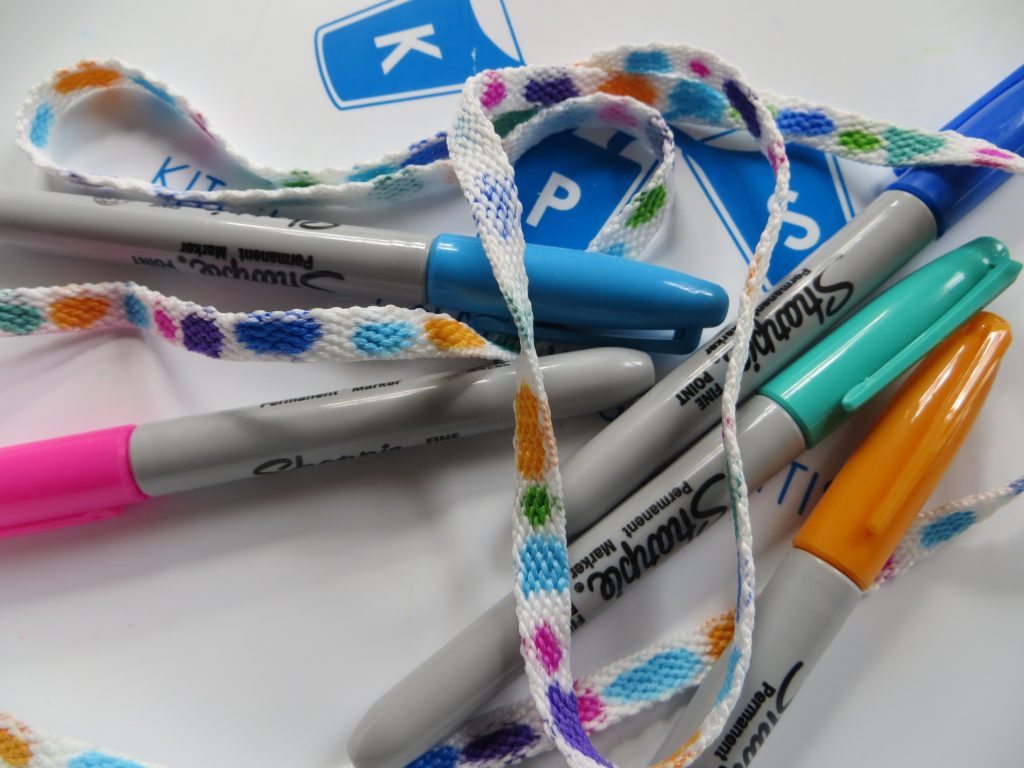
7. While the spinner glue is drying, make dots of permanent marker on the shoelace. In a well-ventilated area, suspend the shoelace over a tray or colander and drip rubbing alcohol onto it to make the colors run together. (See image.) Let it dry completely.
KitchenPantryScientist.com
8. Use the glue gun to attach the shoelace to the outside edges of the spinner. Fill in gaps between the lace and bearings with hot glue.
KitchenPantryScientist.com
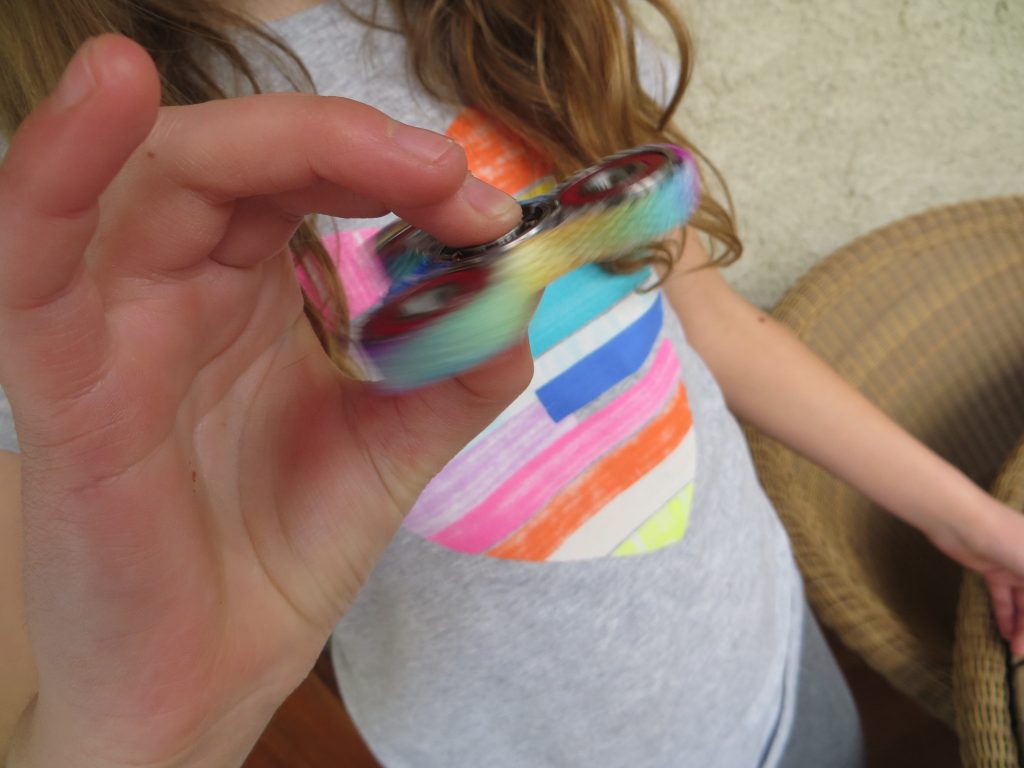
9. Spin away!
The Science Behind the Fun:
If you look closely at a skateboard bearing there are only a few ball bearings connecting the center and the outside part that spins. This means that there’s very little friction, or rubbing, between the parts. If you spin the toy around the center bearing, that bearing is called the axis of rotation.
The three bearings on the outside of the spinner provide the rotating mass that gives the toy a property called angular momentum, which keeps it spinning until the frictional force from the ball bearings in the center slows it down.
Pigments are molecules that give things color. The pigments in permanent markers are trapped in ink compounds that are insoluable in water, which means that they won’t dissolve in water. However, if you add a solvent, like rubbing alcohol, or isopropanol, to permanent markers, it dissolves the ink. As the alcohol moves through the cloth you are decorating, it carries the pigments along with it.
Bristlebots
- by KitchenPantryScientist
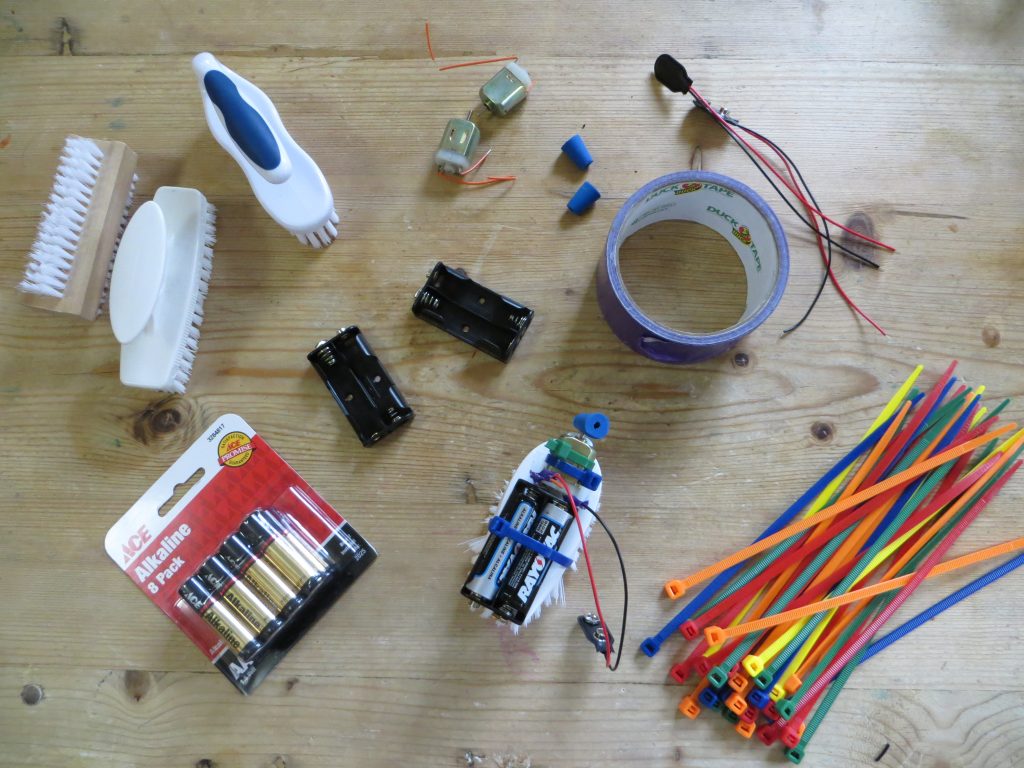
With a brush, some batteries, a small motor and a few wires, it’s easy to create a robot that spins, bumps and buzzes around on any smooth surface.
You’ll need:
-a small brush, like a vegetable brush or a cleaning brush
-two AA batteries
–battery holder for 2 AA batteries (optional)
-insulated wire
-a small toy motor with lead wires and pencil eraser or small rubber stopper (or vibrating motor)
–battery clip (optional)
-zip ties (optional)
-electrical tape or duct tape
Bristlebot-KitchenPantryScientist.com
Make your bristlebot!
- Attach the motor to one end of the top of the brush. If it’s not a vibrating motor, stick a eraser or rubber stopper onto the spinning post to make it vibrate. Use a zip tie or duct tape to secure it. Make sure the spinning parts can rotate freely.
Attach motor- KitchenPantryScientist.com
- Attach the battery holder to the top of the brush near the motor.
Attach batteries- KitchenPantryScientist.com
- Insert batteries in motor.
- Twist wires around the motor terminals and secure with tape. (These may be the wires on the battery clip, if you have one.)
Connect battery clip- KitchenPantryScientist.com
- To start the motor, attach wires directly to the battery terminals, or to the battery clip and snap it onto the batteries.
Bristlebot- KitchenPantryScientist.com
- Place your robot on a smooth surface to see what happens.
Enrichment: Try different brush shapes, sizes and angles to see how they move. Does your robot spin in the same direction as the motor, or the opposite direction?
The Science Behind the Fun: In this experiment, you complete a battery-powered electrical circuit to spin a vibrating motor. The vibrations traveling through the bristles of the brush move your robot around on the floor.
Edible Egg Marbling (with Food Coloring and Whipped Cream)
- by KitchenPantryScientist
Want to take egg-dying up a notch the easy way? Marbling eggs using whipped cream and food coloring is a great project for little ones and the results are downright gorgeous!

KitchenPantryScientist.com
Hint: Wear disposable glove to prevent your fingers from getting stained.
You’ll need:
-hard boiled eggs
-vinegar
-a shallow container
-cool whip or whipped cream
-food coloring (neon, if you can get it)
-a chopstick or toothpick
1. Soak eggs in vinegar for 5 minutes.
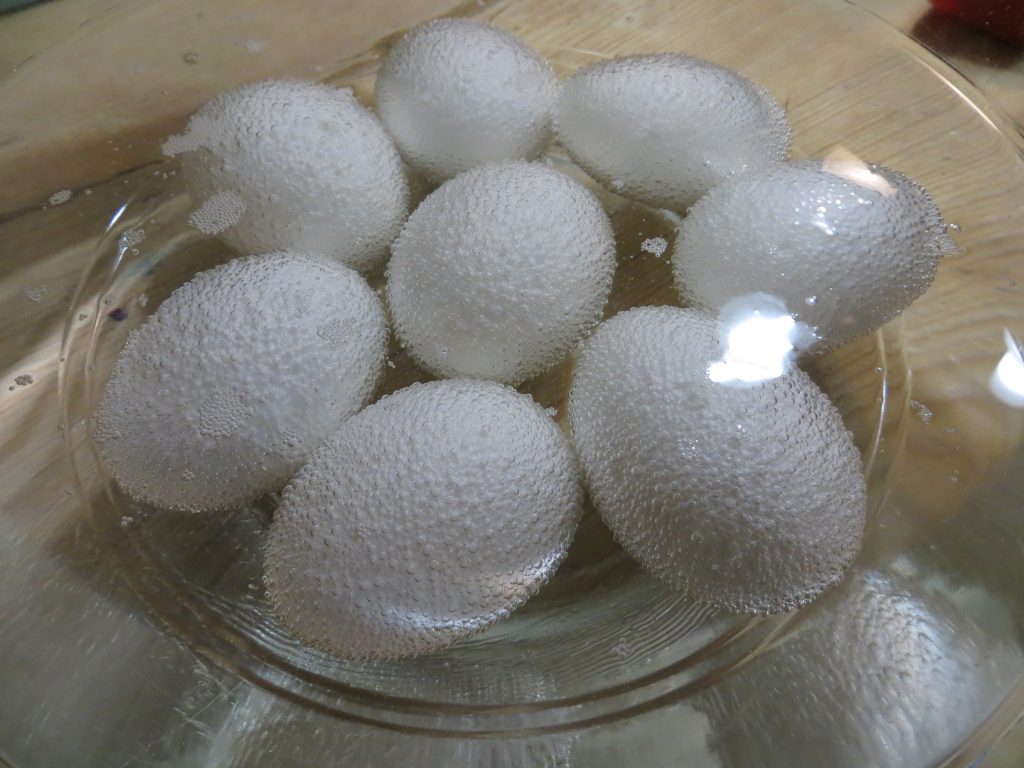
You’ll see carbon dioxide bubbles forming on the eggs as the vinegar reacts with the calcium carbonate in the egg shells.
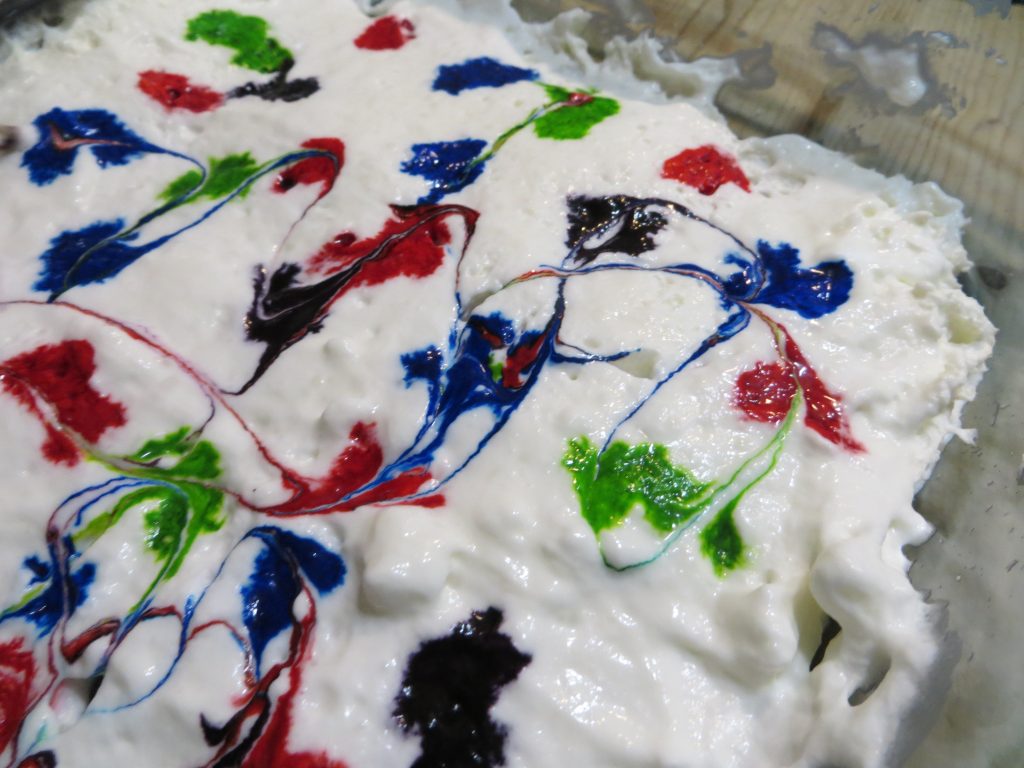
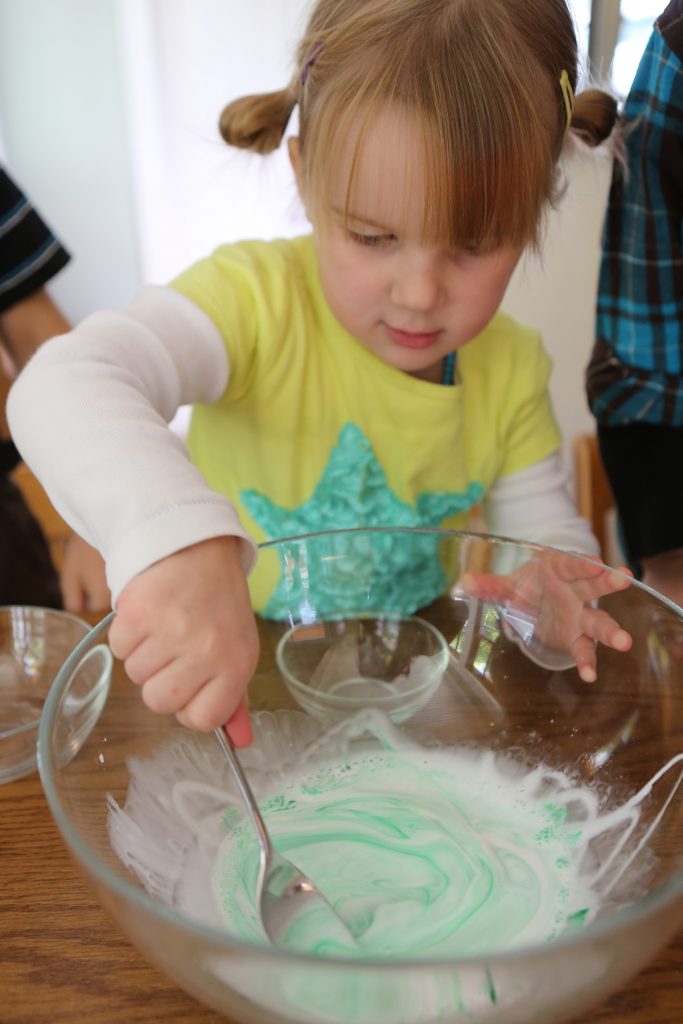
2. Spread and smooth a layer of whipped cream across the bottom of the container and drip food coloring all over the whipped cream.
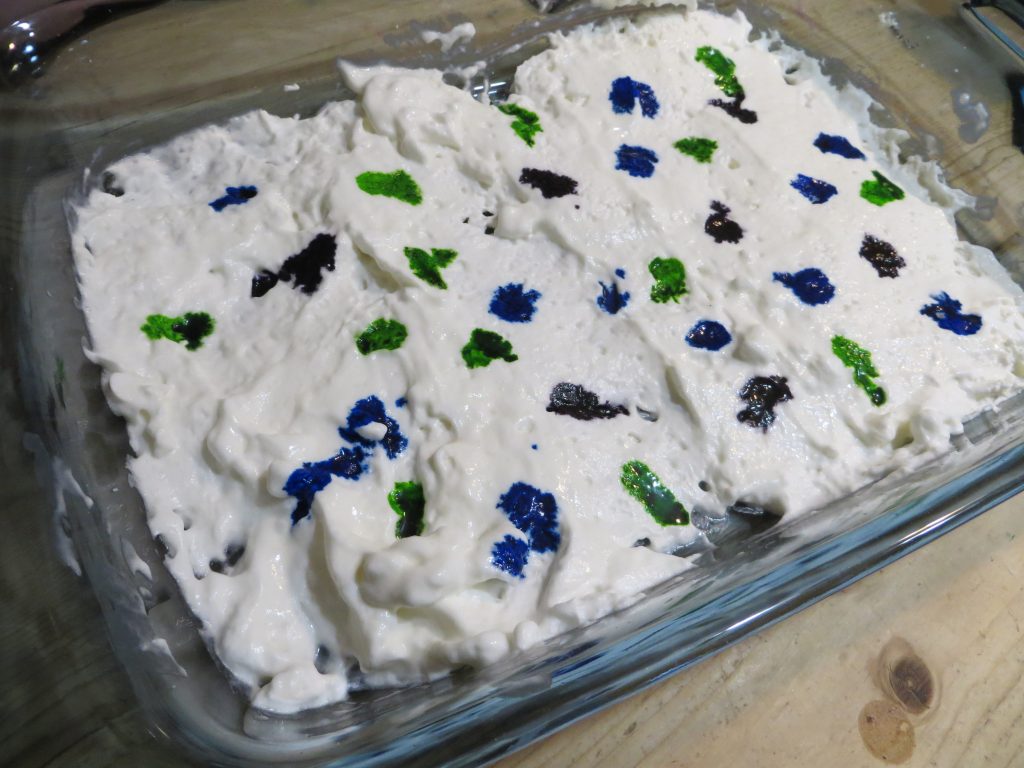
3. Swirl the drips into patterns using a toothpick or chopstick.
KitchenPantryScientist.com
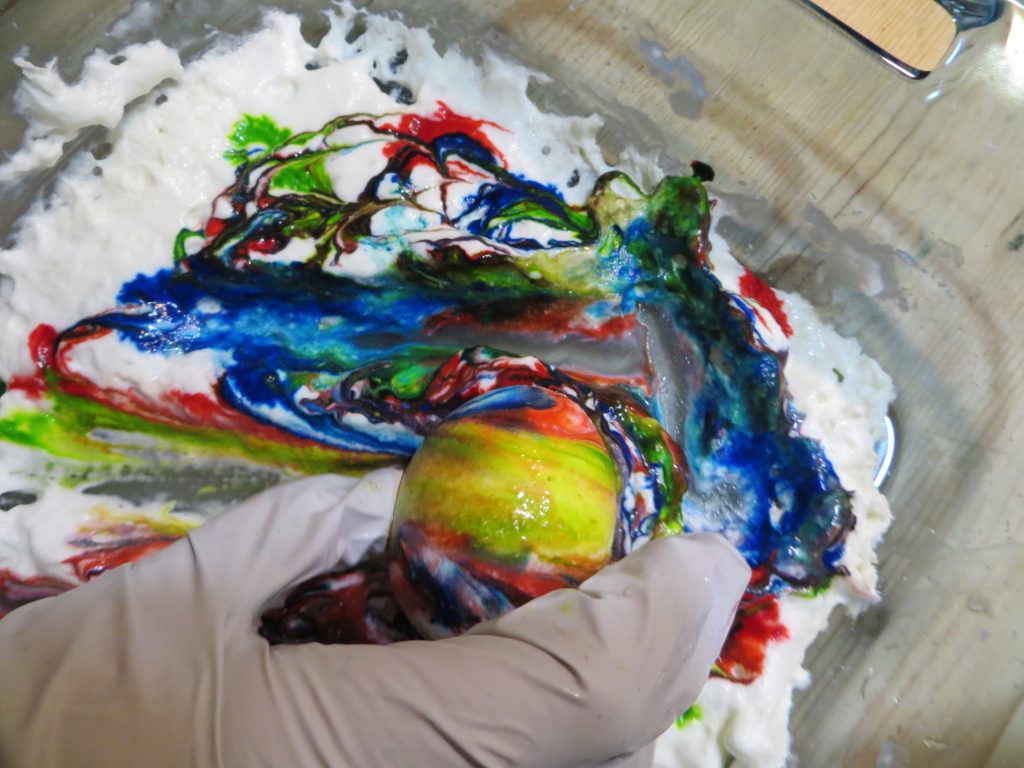
4. Remove eggs from vinegar, blot them with a paper towel and roll them through the food coloring. Put them on a plate to dry.
KitchenPantryScientist.com
5. When the eggs are dry, wipe the excess whipped cream and color from the shells.
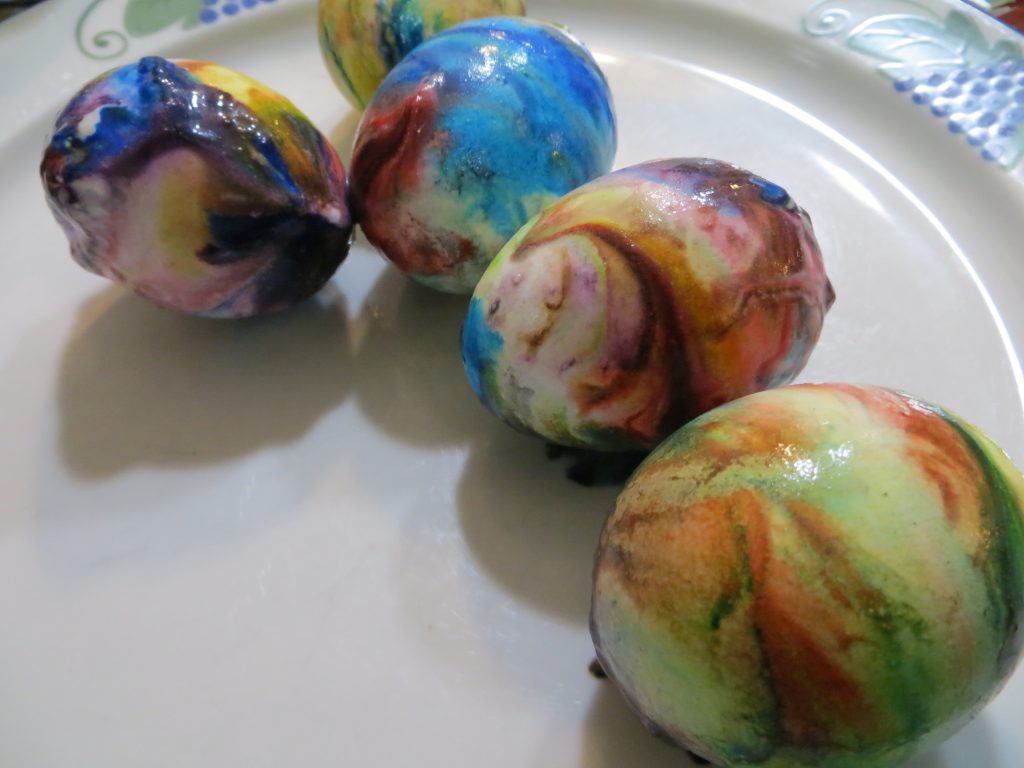
KitchenPantryScientist.com
The science behind the fun: Food coloring is an acid dye, so the vinegar (acetic acid) helps it form chemical bonds with the egg shell, dying the egg.
Slime versus Slime
- by KitchenPantryScientist
A homemade slime craze is sweeping the nation, and glue is becoming a limited resource as stores are swarmed by school kids on a quest to make the perfect goo.
from Kitchen Science Lab for Kids (Quarry Books 2014)
I’ve posted recipes and videos for slime-making on this website and included one in “Kitchen Science Lab for Kids.” For my most recent book, “Outdoor Science Lab for Kids,” I invented a recipe for making slime that oozes from a bottle like a living thing.
From “Outdoor Science Lab for Kids” (Quarry Books 2016)
But the other day, my 11-YO brought home a slime recipe featuring clear glue, baking soda, shaving cream and contact lens solution, and I was baffled. Which ingredient was the cross-linking chemical that would bind all of the glue molecules together into slime? I hadn’t had much luck using any cross-linker besides Borax laundry detergent.
Curiosity got the best of me, and a trip to Walgreens confirmed my suspicion that most contact lens solution contains boric acid, a cross-linking chemical related to Borax. In the glue aisle, I discovered a “Borax-free slime” recipe for slime made with Tide Free and Gentle. (Tide detergent does, in fact, contain the same chemical in Borax, so it’s not really Borax-free.)
A few days later, a friend called saying that the slime her kids were making with Borax and clear glue wasn’t turning out. That’s when I decided it was time for us to do some scientific sleuthing.
From Kitchen Science Lab for Kids (Quarry Books 2014)
We tested two glues (clear glue and white school glue) with three cross-linking solutions (Borax laundry detergent, contact lens solution, and Tide Free and Gentle (which contains some Borax) to see how the end-products would differ.
Helpful hints: A bottle of glue contains 4 or 5 oz, which is a little more than half a cup. Mix glue with other ingredients BEFORE adding the cross-linker. Keep slime away from toddlers, as ingredients may be harmful if consumed. Always wash your hands after playing with slime.
Here’s what we found:
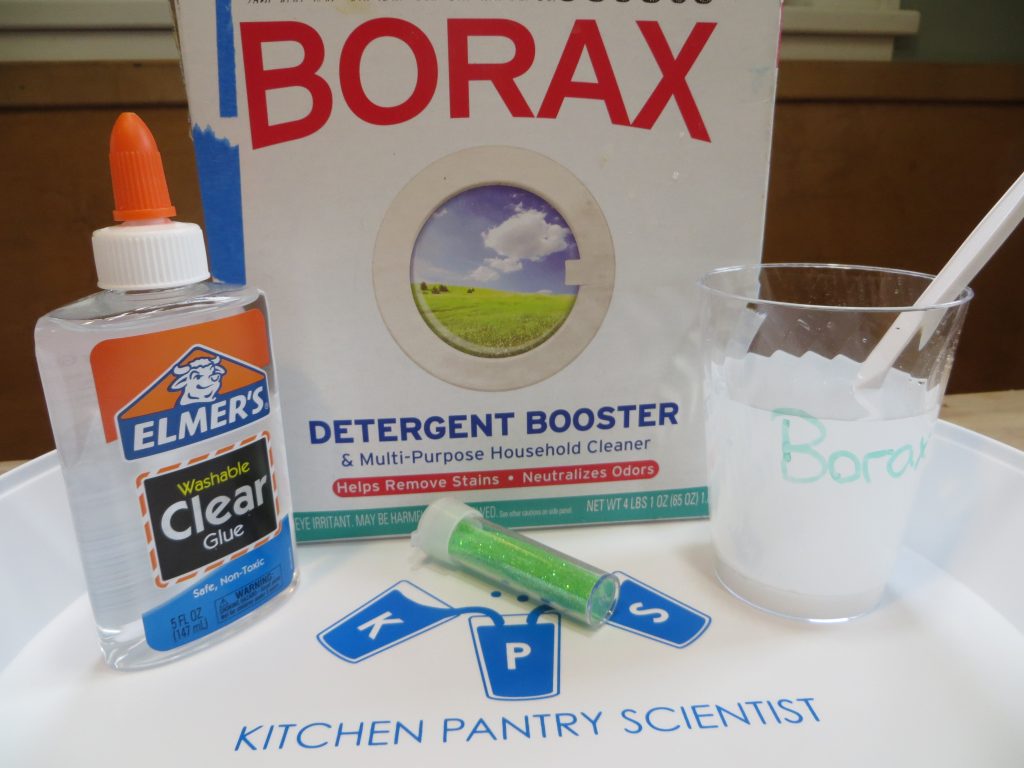
Traditional Borax Slime: Add equal parts glue and water (for example, one 5 oz bottle of glue+5 oz water.) Add glitter or food coloring. Dissolve a few spoonfuls of Borax in a cup of water to make a Borax solution. Add Borax solution to glue, a little at a time, until it no longer feels sticky.
-White school glue works best for this recipe and the result is smooth slime that can be rolled into long snakes.
-Clear glue doesn’t work well with this recipe and produces brittle slime. Save clear glue for the two recipes below.
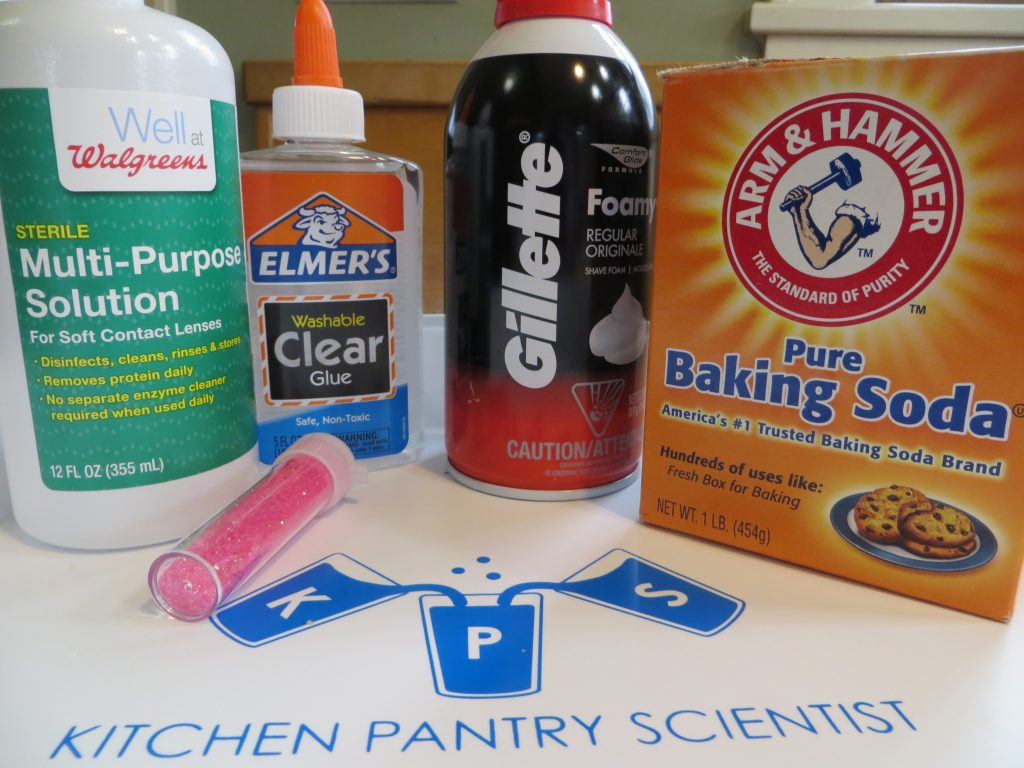
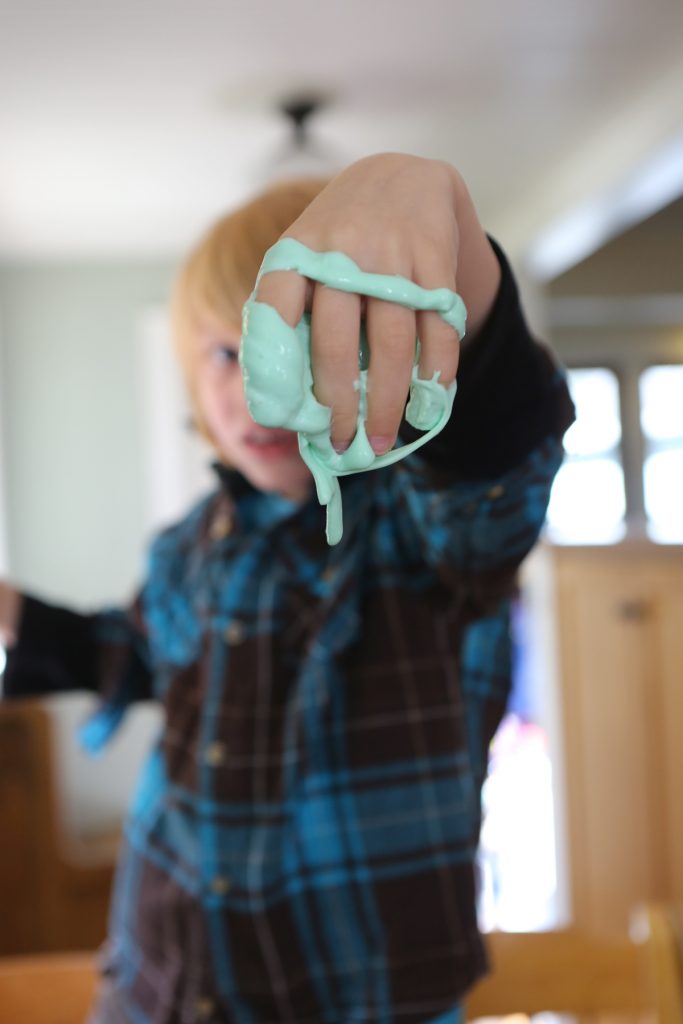
Puffy Slime: Add 5 oz glue to a large bowl. Stir in 1/2 tsp baking soda, 1/4 cup shaving cream and glitter or food coloring. Mix well. Add contact lens solution as a crosslinker and stir. Keep adding contact lens solution until your slime is no longer sticky and knead slime until it has the desired consistency.
-White school glue works well with this recipe and results in a puffier, firmer product than clear glue. The slime has a strong shaving cream smell.
-Clear glue works well for this project and produces nice, smooth puffy slime that smells like shaving cream.
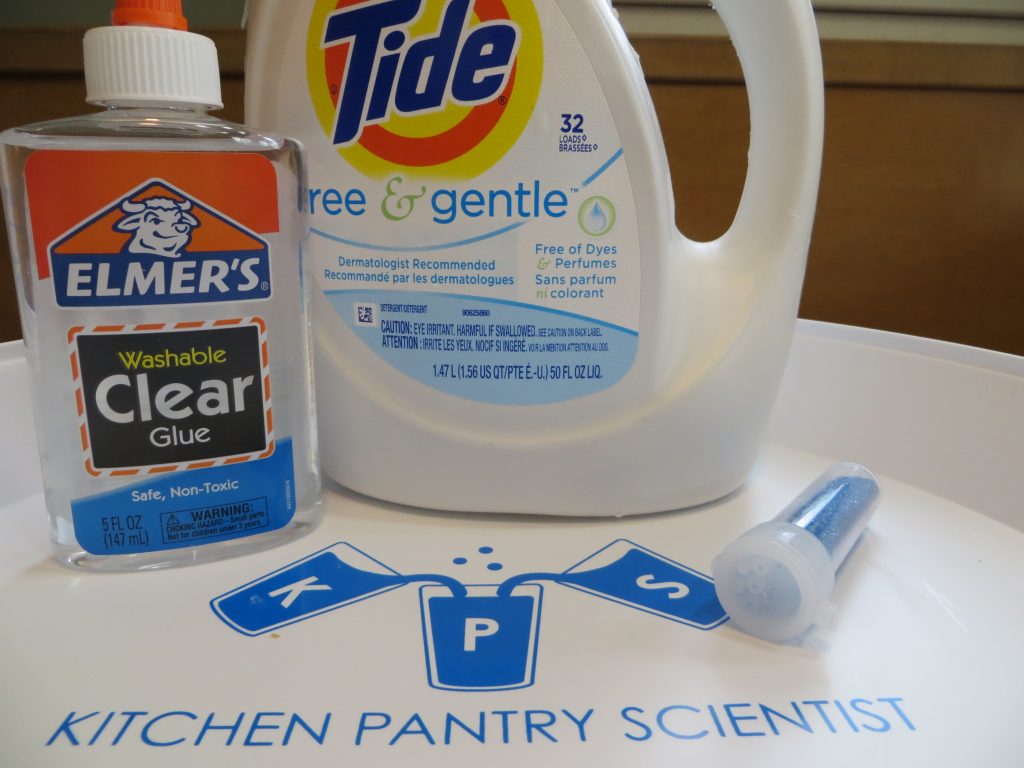
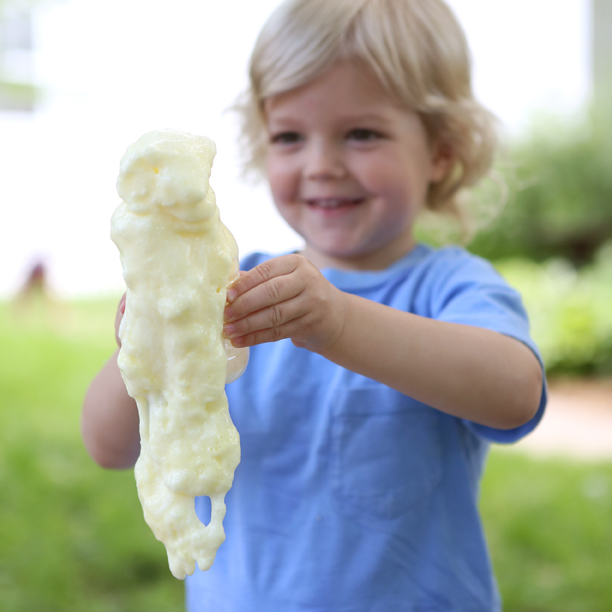
Tide Detergent Slime: Add 5 oz glue to a large bowl. Stir in 5 oz water and some glitter or food coloring. Add 1/4 cup of Tide Free and Clear laundry detergent. Mix well with a spoon and then hands to the desired consistency.
-White school glue works well with this recipe and the soap in the detergent makes tiny bubbles in the slime.
-Clear glue works well for this project and makes great , smooth slime that’s puffy from the soap in the detergent.

Try adding cornstarch, lotion, or anything else you can think of to perfect your recipe.
What are you waiting for? Go make some slime!
The Science Behind the Fun: A polymer is a long chain of repeating molecules, kind of like a string of pearls. The polymer in school glue is called polyvinyl acetate. Borax solution (sodium tetraborate) and boric acid (combined with baking soda to make borate), are cross-linking substances that make the polymer chains in glue stick together. As more and more chains stick together, they can’t move around and the solution gets thicker and thicker. Eventually, all the chains are bound together and no more Borax or boric acid solution can be incorporated into the slime.
Graphite Circuits
- by KitchenPantryScientist
Electrons (negatively charged particles) can flow through substances called conductors.
Graphite, used to make pencil lead, among other things, is a conductor and can be used to make a simple circuit on paper. A circuit is just a path for electrical current.
You have to do this experiment with a graphite pencil, rather than the kind you use at school, but you can pick them up at most art supply stores. You’ll also need a few small LED bulbs, 2 wires with alligator clips on either end, and a 9 volt battery.
Adult supervision recommended.
- Make a thick, black rectangle using a graphite pencil. We used a #9 graphite crayon.
- Hook the two wires up to the battery terminals.
- Clip the wire attached to the positive battery terminal to one wire of an LED bulb. (Don’t test it on the battery, or you may blow it out.)
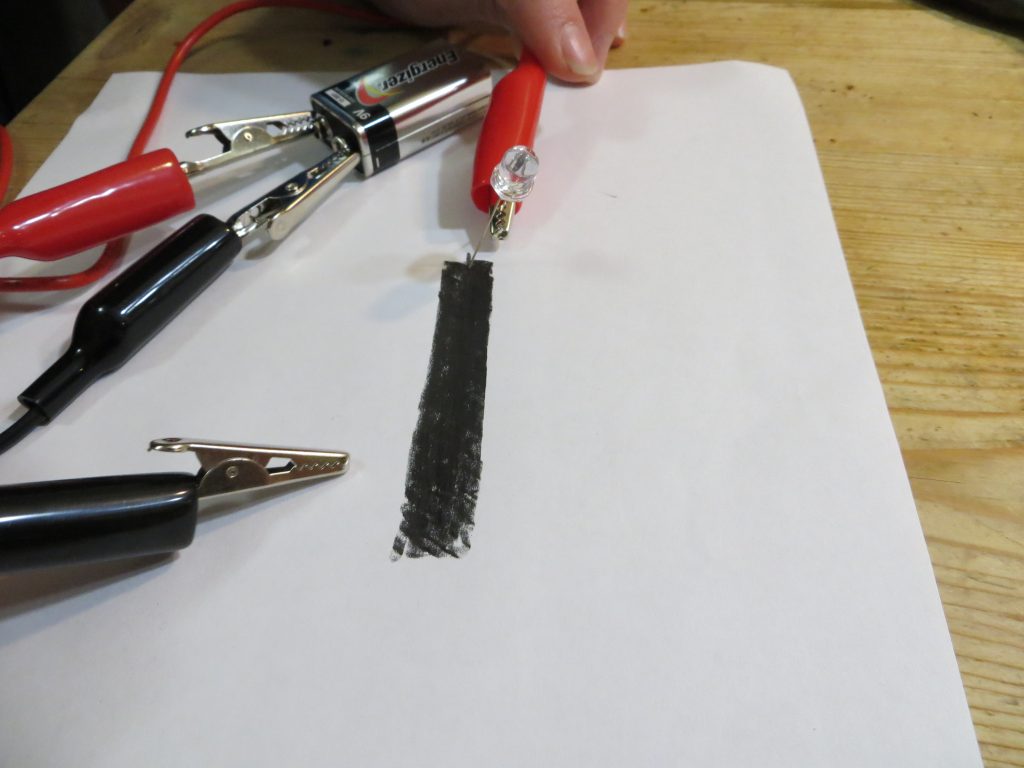 4. Touch the un-attached LED wire to the other (left) side of the graphite bar.
 5.Touch the alligator clip attached to the negative battery terminal to the right side of the graphite bar you drew.
6.If it doesn’t light, switch the positive alligator clip to the other wire of the LED bulb and try it again.
7. Move negative clip closer to the bulb. It should get brighter as you decrease the distance.