Tag: marbling’
Olive Oil Egg Marbling and Epsom Salt Crystal Egg Geodes
- by KitchenPantryScientist
It’s simple to make gorgeous marbled eggs using olive oil marbling. Simply dye your eggs with food coloring and then marble them with a darker color. (Epsom Salt Egg Geode instructions are at the bottom of this post.)

KitchenPantryScientist.com
Hint: Wear gloves to avoid staining your fingers.
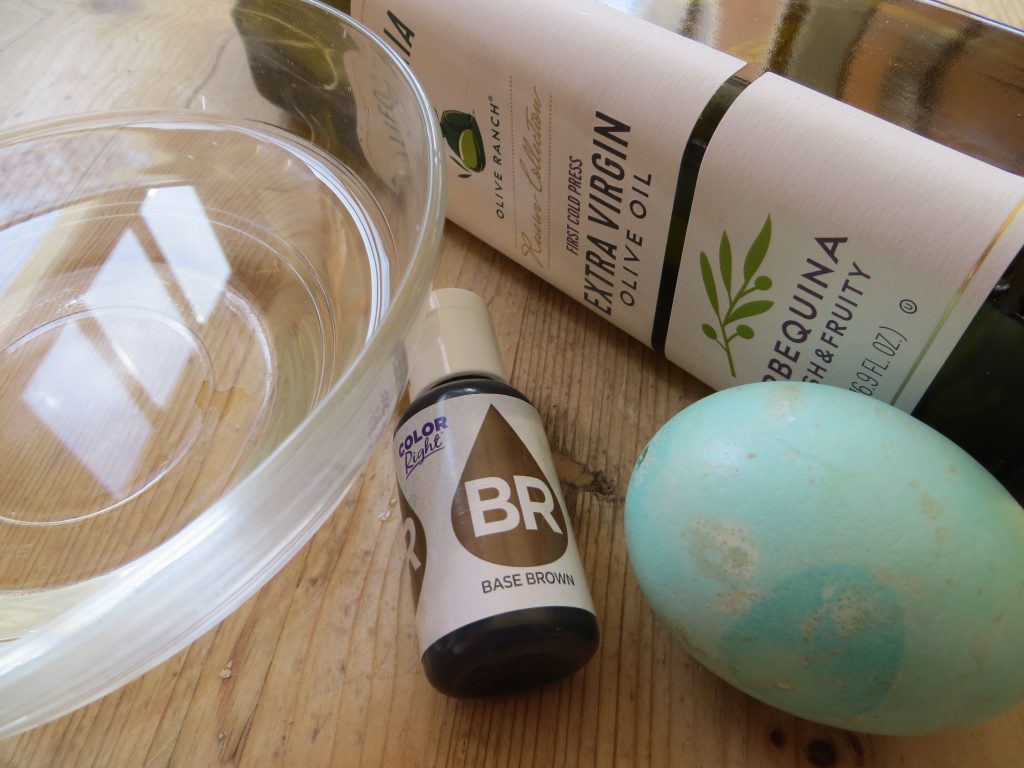
You’ll need:
-2 cups of warm water in a bowl
-hard boiled eggs
-olive oil
-vinegar
-food coloring (We used Wilton Color Right food coloring: 2 drops blue mixed with one drop of yellow in about a cup of water to make robin’s egg colors, and brown for marbling.)
1. Make base dye by adding a few Tbs. vinegar to two cups of water. To this, add a few drops of food coloring. Lighter colors work best for the base.
2. Dye the hard boiled eggs in the base color until they are the desired shade. Let them dry.
3. To a small bowl, add 1/2 cup water, a Tbs. of vinegar, darker food coloring, and 1/2 tsp olive oil. Add more oil if you want less dark color when you marble. Oil shouldn’t cover the entire surface.
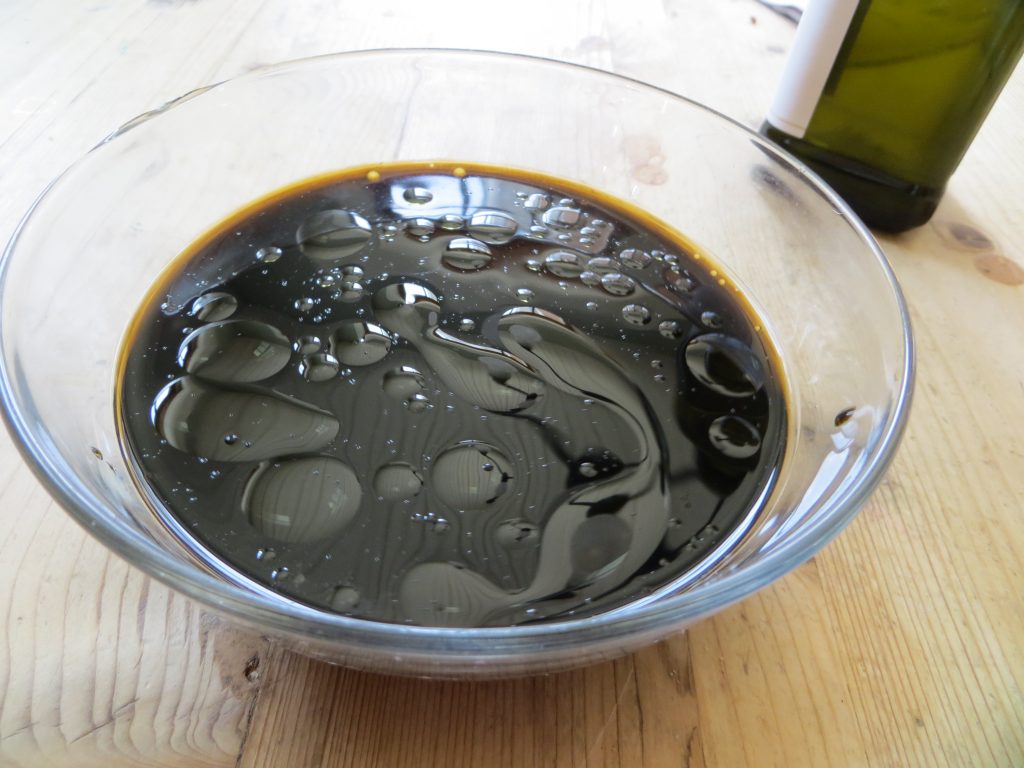
4. Swirl the oil with a toothpick or spoon and lower your egg into the water/oil mixture, swirling and spinning it. When you like the results, take it out and let it dry.
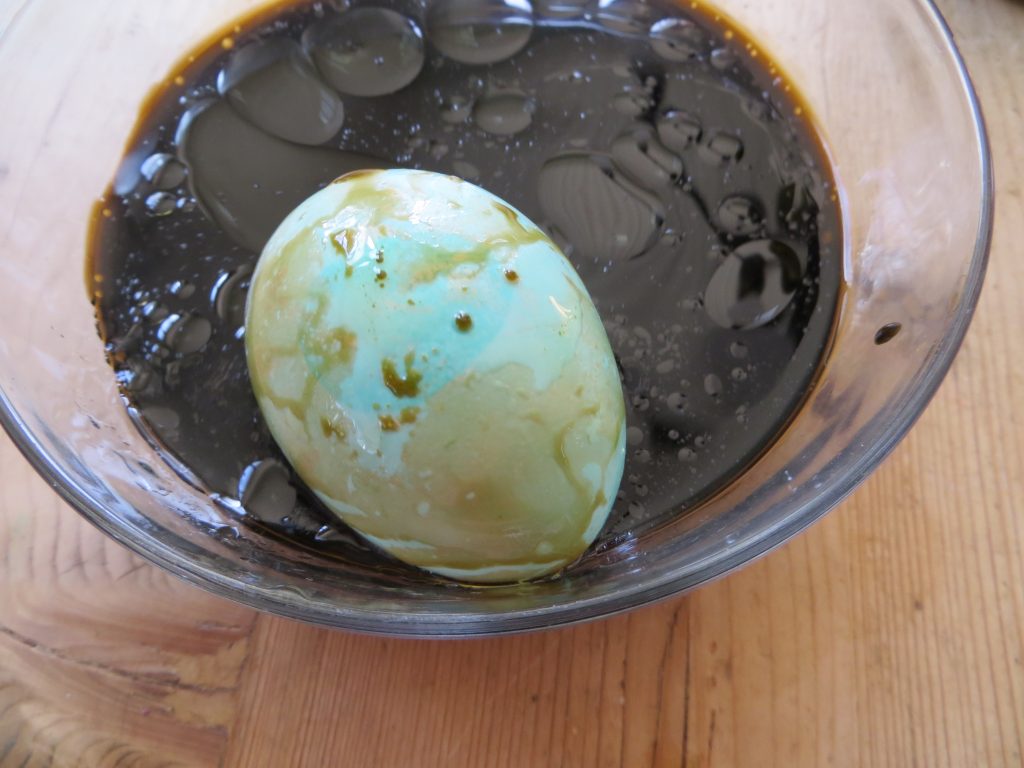
5.When the egg is dry, remove the excess oil with a paper towel.
The science behind the fun: Food coloring is an acid dye, so the vinegar (acetic acid) helps it bond to the egg shell. Oil is less dense than water and floats on top. When you put the egg in the oil-colored water mixture, the oil coats part of the egg, preventing it from being stained.
Epsom Salt Crystal Egg Geodes:
Have an adult cut a raw egg in half lengthwise, using a serrated knife. Wash the shell and dry it. Dye if desired.
Use a glue gun or school glue to coat the inside of the egg. Sprinkle in Epsom salt crystals and allow to harden or dry.
(Warning: Hot liquids require adult supervision.) To make the Epsom Salt crystals, dissolve 3 cups of Epsom salts in 2 cups of water by heating and stirring until no more crystals are visible. This creates a supersaturated solution. Allow the solution to cool slightly. Fill each half eggshell with Epsom salt solution. When long, needle-like crystals have formed, dump out the excess liquid and break the thin layer of crystals on top to reveal the ones in the shell.
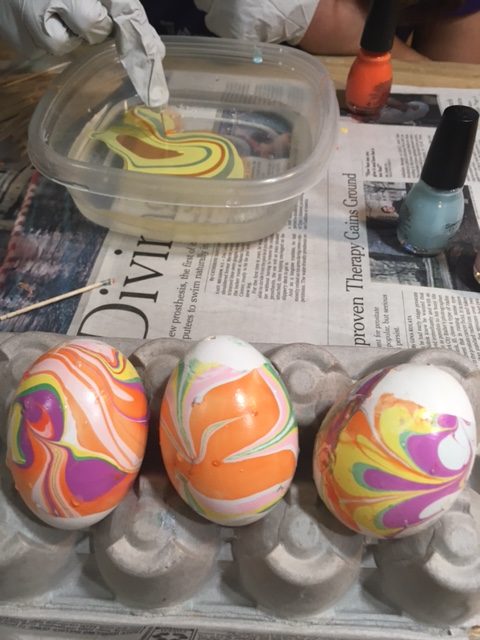
Nail Polish Marbled Eggs
- by KitchenPantryScientist
Nail polish marbling is tons of fun and yields stunning results. However, it takes some eye-hand coordination, practice and patience, so I’d recommend it for ages 10 and up. My 11 YO loved it!

KitchenPantryScientist.com
Hint: You’ll have to work reasonably fast for good results. Gloves are a must, and do this in a well-ventilated area to avoid breathing too many nail polish fumes.
You’ll need:
-eggs with the raw yolks and whites blown out (We poked generous holes in each end of our eggs using a thumb tack, scrambled the inside with a toothpick and used syringes and balloon pumps to blow out the raw whites and yolks. It takes patience, and you’ll lose a few eggs to cracks.)
-a container that can be thrown away
-nail polish in two or more colors
-a toothpick
-water
1. Fill your container 3/4 full of water.
2. Drip nail polish, a drop at a time into the center of the water. Each drop should be in the center of the one before. Don’t worry if they spread out, just keep adding more. You’ll have to work fast, or the polish will dry on top of the water. It may take practice.
Kitchen Pantry Scientist.com
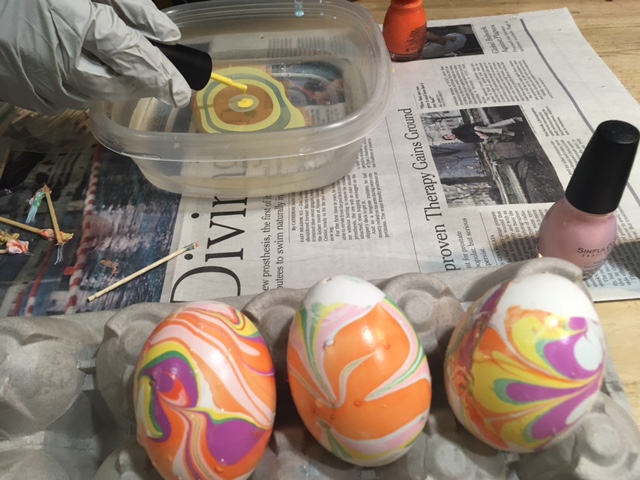
3. Use tip of the toothpick to draw designs in the polish. Start by pulling it out from the center or pushing it into the center.
KitchenPantryScientist.com
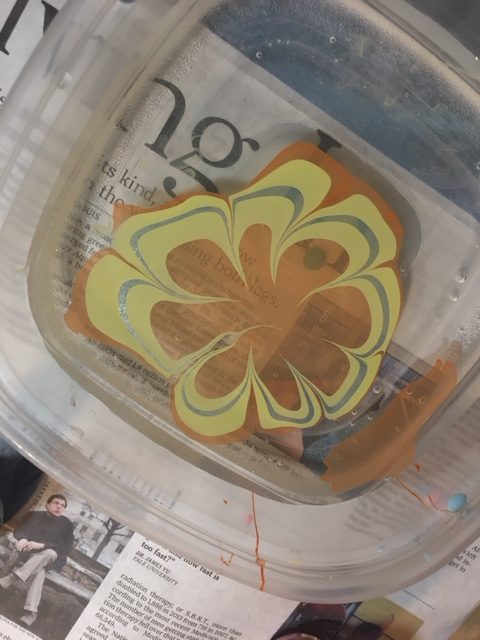
KitchenPantryScientist.com
4. When the design is ready, roll it onto your egg like you’re rolling a bandage around an ankle. Try to keep in smooth and in a single layer. If it looks bad, try another one. You’ll get the hang of it!
KitchenPantryScientist.com
5. Put the marbled egg on an egg carton to dry.
The science behind the fun: Nail polish is less dense than water and floats on top of it. It contains a solvent called acetate that evaporates very quickly into the air, drying out the polish.
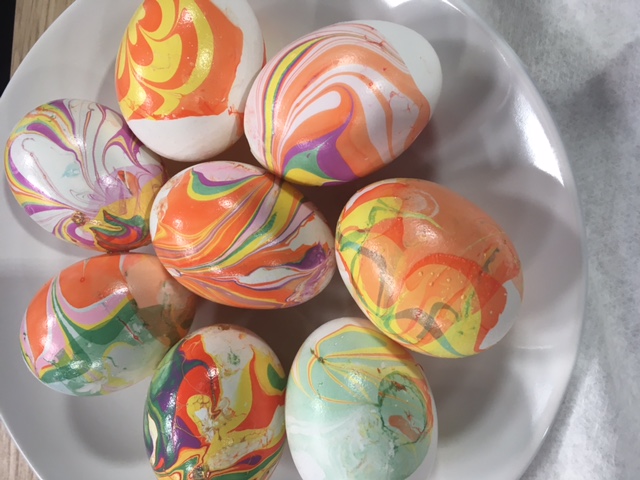
Edible Egg Marbling (with Food Coloring and Whipped Cream)
- by KitchenPantryScientist
Want to take egg-dying up a notch the easy way? Marbling eggs using whipped cream and food coloring is a great project for little ones and the results are downright gorgeous!

KitchenPantryScientist.com
Hint: Wear disposable glove to prevent your fingers from getting stained.
You’ll need:
-hard boiled eggs
-vinegar
-a shallow container
-cool whip or whipped cream
-food coloring (neon, if you can get it)
-a chopstick or toothpick
1. Soak eggs in vinegar for 5 minutes.
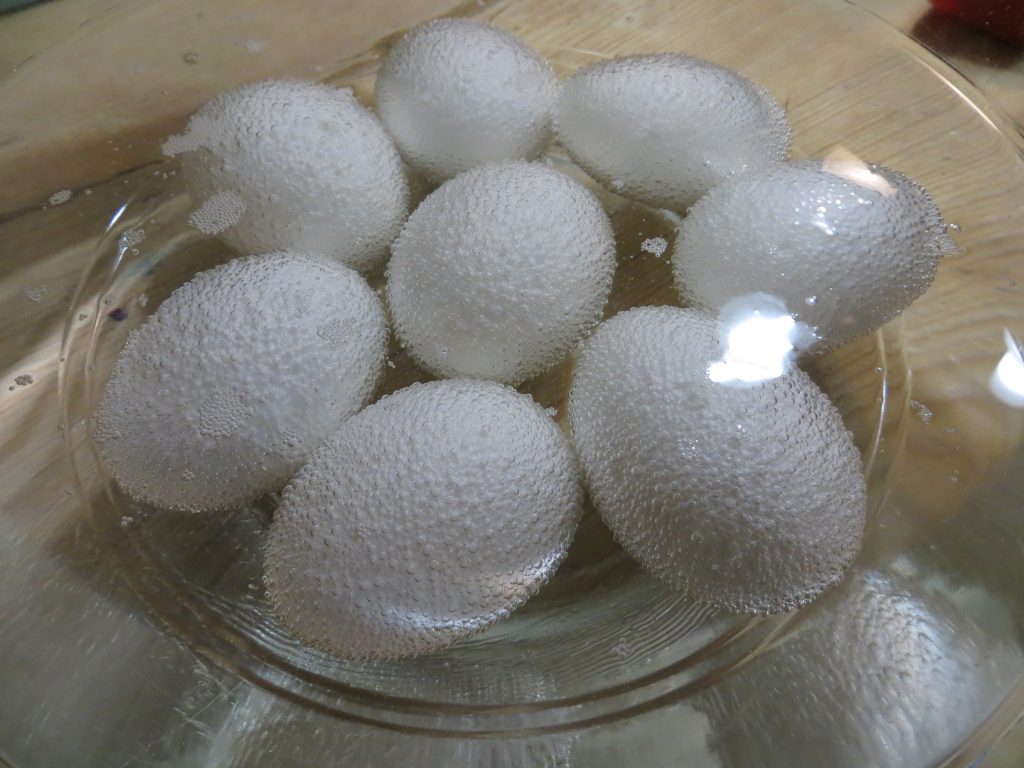
You’ll see carbon dioxide bubbles forming on the eggs as the vinegar reacts with the calcium carbonate in the egg shells.
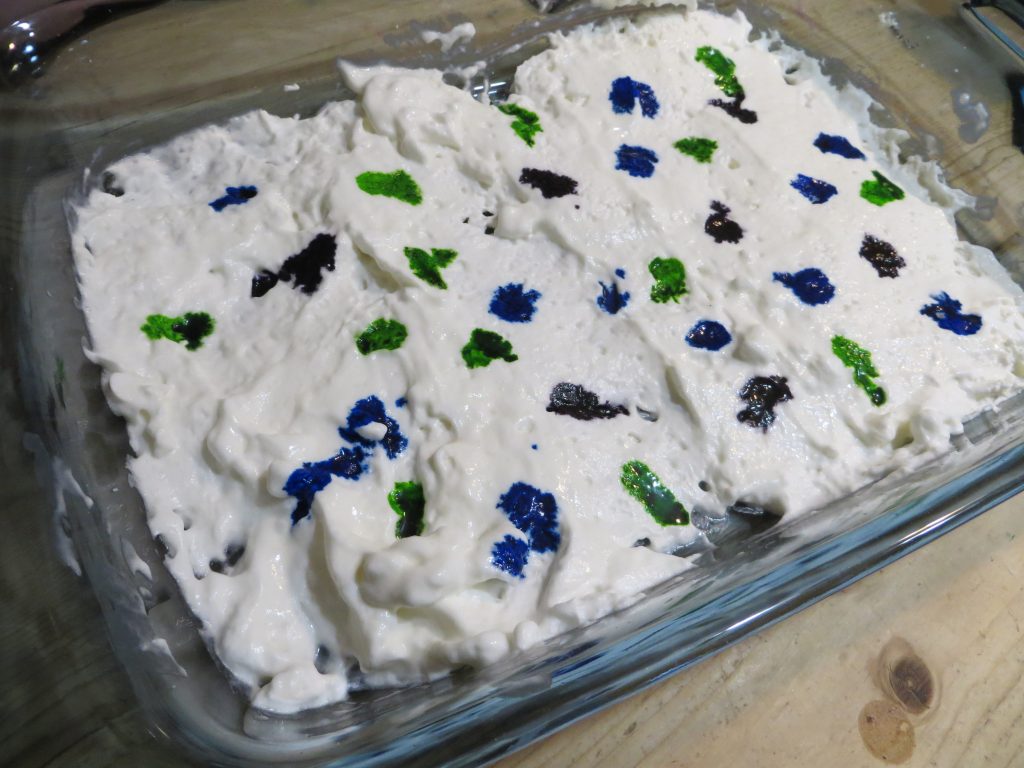
2. Spread and smooth a layer of whipped cream across the bottom of the container and drip food coloring all over the whipped cream.
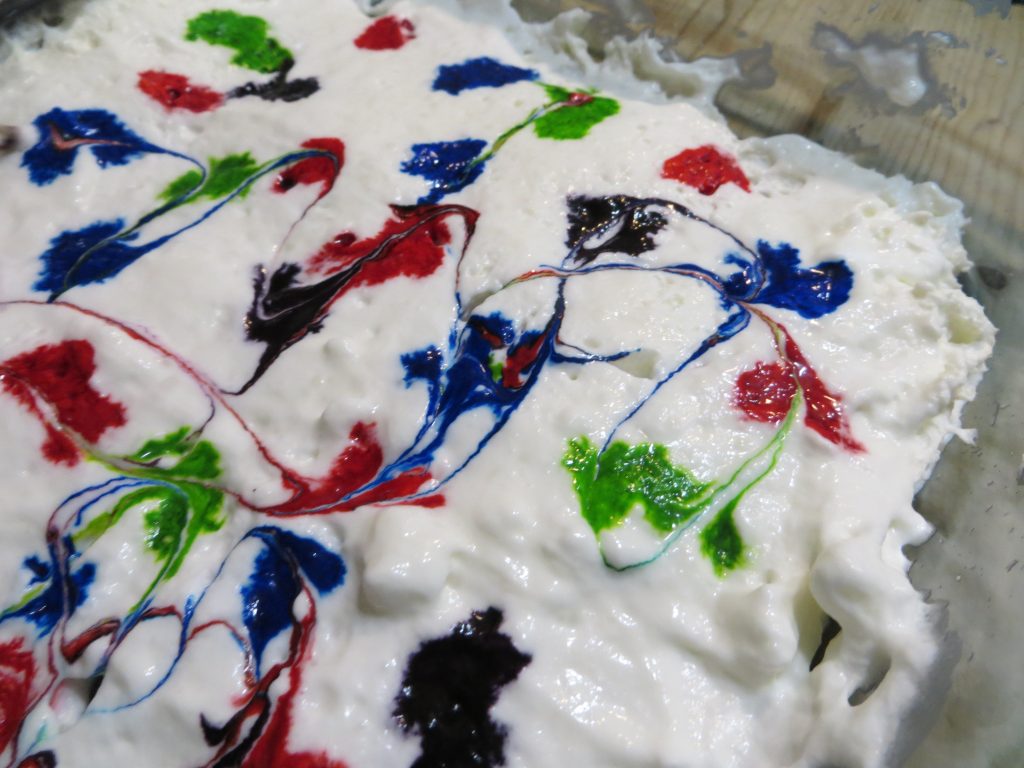
3. Swirl the drips into patterns using a toothpick or chopstick.
KitchenPantryScientist.com
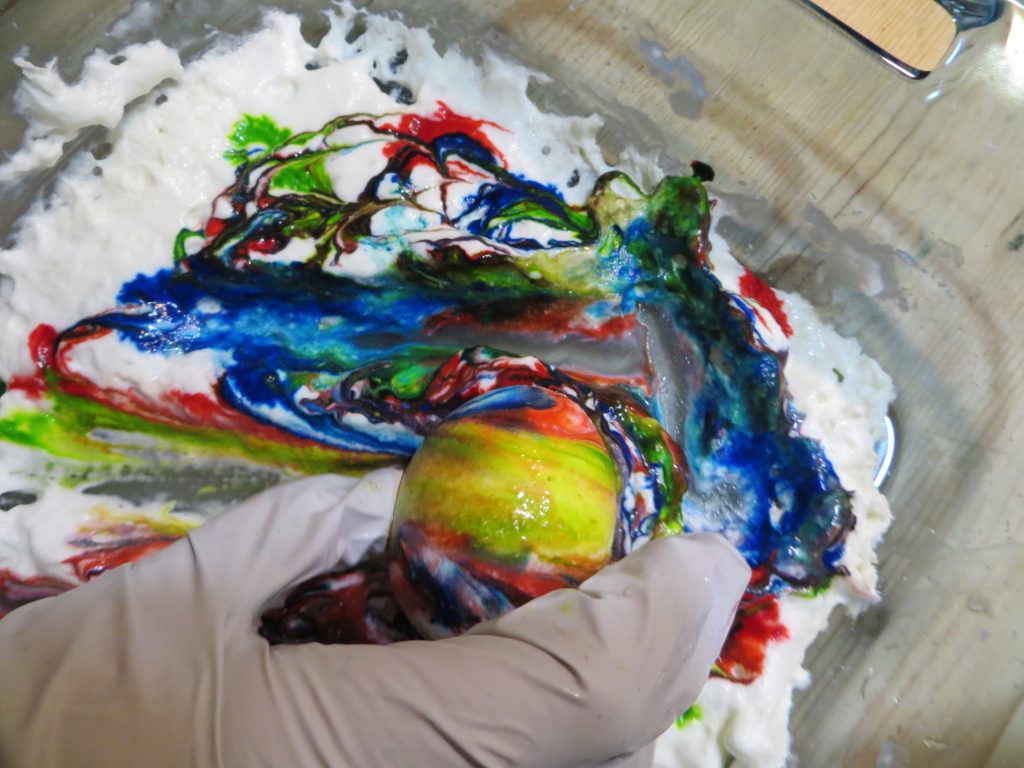
4. Remove eggs from vinegar, blot them with a paper towel and roll them through the food coloring. Put them on a plate to dry.
KitchenPantryScientist.com
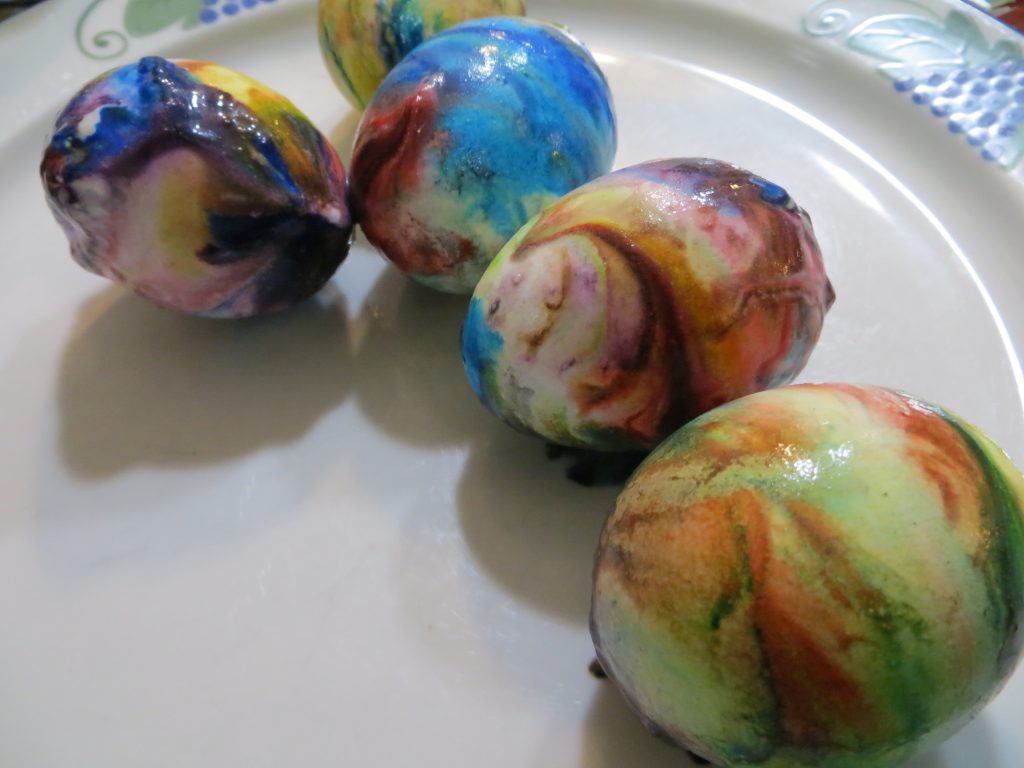
5. When the eggs are dry, wipe the excess whipped cream and color from the shells.
KitchenPantryScientist.com
The science behind the fun: Food coloring is an acid dye, so the vinegar (acetic acid) helps it form chemical bonds with the egg shell, dying the egg.