Tag: science’
Backyard Physics- Throwing Eggs
- by KitchenPantryScientist
It’s getting nice outside. Time to start thinking about backyard science! Here’s one of our favorites, if you haven’t already tried it! W

“Kids aren’t getting dirty these days. They’re not playing in the mud, not playing in rain puddles,” says Dr. Truglio, of Sesame Workshop in a Wall Street Journal article, about getting your kids outside.
Next to the kitchen table, my back yard (or front yard) is my favorite science laboratory. It has the added bonus of being easy to clean up. For this fun, messy experiment, a hose and a few paper towels do the trick. Make your kids clean up whatever mess they make!
My dad, who is a physicist, told me about this great demonstration. It teaches kids a little bit about motion and force while letting them do something that they are rarely, if ever, allowed to do- throw eggs! All you need is a sheet, some clothespins or string, raw eggs, and some paper. (You could use newspaper or easel paper. It is just to make cleaning up easier.) I also used a portable table turned on its side as a wall, but you could just use a wall or the side of a garage and have your child hose it off when you are finished.
Hang the sheet up from a tree, if you have one. If you don’t have a tree, you could hang it from anything else, or have two tall children or adults hold it. Then have two kids hold the bottom of the sheet up, or tie it to chairs so it makes a J shape when you view it from the side. The idea is to keep the eggs from hitting the ground and breaking.
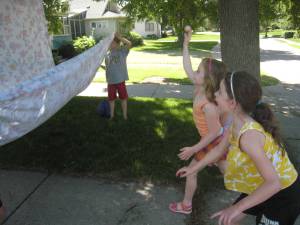
An object in motion wants to remain in motion. To stop an egg moving through the air, you have to apply force to the egg. In this case, the force will be applied by a hanging sheet, or a wall.
Throw a raw egg at the sheet as hard as you can. It won’t break because the sheet slows the movement of the egg as it comes to a stop. The law of motion says that the faster you change the speed of an object, the greater the force applied to the object will be. When you change the speed of the egg slowly, like the sheet does, it lessens the force applied to the egg and the egg remains intact.
Now, put some paper on a wall (or table like we did.) Throw an egg at the wall. You’ll see what happens when something stops fast. Once again, the law of motion rules. When you change the speed of the egg quickly, it stops with a lot of force. SPLAT. This is my kids’ favorite part.

This is why they put airbags in cars. If a car is moving and hits something, causing it to stop very quickly, the airbag act like the sheet, slowing the person in the car down SLOWLY and greatly reducing the amount of force they might hit the dashboard with.
Record your results in your science notebook, if you want to. Finally, be sure to wash your hands when you’re finished experimenting and cleaning up. Raw eggs can have bacteria called Salmonella living in them and on them. Have fun!
Earth Day Science
- by KitchenPantryScientist
On April 21st (the day before Earth Day), the Science Museum of Minnesota will celebrate Earth Day and open their new Future Earthexhibit to the public. Exploring the amazing planet that nurtures and sustains us, the thought-provoking exhibit examines climate science, looks at the impact of humans, and considers Earth’s future. Today’s young people will play an essential role in determining that future, and it’s essential that we raise our kids to be critical thinkers, as well as creators and innovators! Abby Harrison, a.k.a. Astronaut Abby, wants to be the first person on Mars and she visited Kare11 Sunrise news with me to talk about NASA and Earth Day.
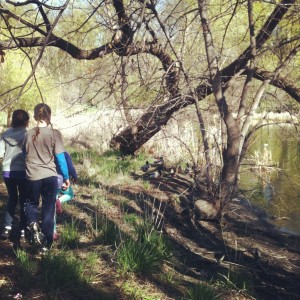 Every time you encourage a kid to ask “why?” or get them out into nature, you’re engaging their scientific brains! When they see you recycle, turn out the lights, walk instead of drive, or pick up a piece of trash, you’re teaching them lessons about stewardship and responsibility.
Here are some easy experiments that would be fun to do with your kids to help celebrate Earth Day. If you click on the experiment name, it will take you to directions and photos!
Window Sprouts: Plant a bean in a plastic baggie with a damp paper towel and see how plants need only water and air to sprout roots and leaves. Here’s a short video demonstrating how to put a window garden together.
Homemade Solar Oven: Using a pizza box, aluminum foil, plastic wrap, and newspaper, you can harness the sun’s energy to cook your own S’mores! Try it!
Nature Walk Bracelets: Wrap some duct tape around your wrist (inside out) and take a walk, sticking interesting natural objects like leaves and flowers to your bracelet. It’s a great way to get outdoors and engage with nature!
Carbon Dioxide and Ocean Acidity: See for yourself how the carbon dioxide in your own breath can make a water-based solution more acidic. It’s the same reason too much carbon dioxide in Earth’s atmosphere can be bad for our oceans.
Composting: Be a composting detective. Bury some things in your back yard (away from power cables) and dig them up in a few months to see how they look. Composting reduces methane gas emissions (a greenhouse gas) from dumps.
Diffusion and Osmosis: See for yourself how chemicals we add to water, put on our streets to melt ice, and spray on our lawns and crops can move into our soil, ground water, rivers, lakes and oceans.
Solar Water Purification: Another great illustration of the greenhouse effect and a fun experiment in general. Requires hot sun and some patience!
To continue to thrive, we’ll need countless innovations in energy, agriculture, health and environmental stewardship. Our children are our greatest natural resource, and we will depend on them to make a better future for us all. It’s up to us to nurture them, educate them, foster their innate sense of curiosity and fan their creative spark. Happy Earth Day!
A Day at the Museum
- by KitchenPantryScientist
 There was no school yesterday, so we went on a field trip of our own to the Science Museum of Minnesota.
We started the day by being transported “Under the Sea” at the Omnitheater, watching sea lions frolic and giant sea turtles gobble jellyfish. (Did you know they close their eyes each time they take a bite, so they don’t get stung?) The kids loved “Real Pirates” and filled out activity sheets to win eyepatches. They especially liked playing dice and looking at the different coins in the Treasure Room!
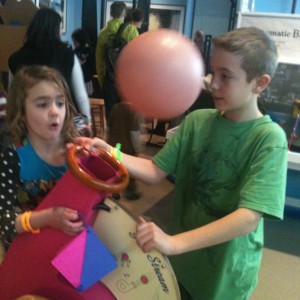
After lunch, they brought some fossils and flint they’d found in Kansas to the Collector’s Corner and then we spent the rest of the day playing at the museum!
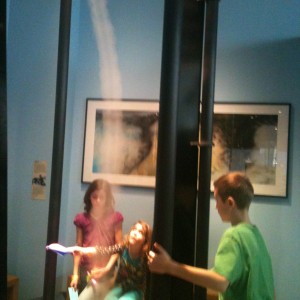
The new wind tunnels, where kids could fashion flying machines from paper, cups and pipe cleaners were a huge hit! I wonder if we could figure out how to make one in our kitchen. Hmmm.
Real Pirates and How to Make a Compass
- by KitchenPantryScientist
Last week at the Real Pirates exhibit at the Science Museum of Minnesota, I walked below deck on a mock pirate ship, hoisted a pirate flag (Jolly Roger), touched real pirate treasure and played dice with pirates. The bell of the Whydah, a 300-ton pirate ship greeted us, illuminated by lighting and suspended in a huge tank of water. I could almost imagine it spinning and tumbling to the bottom of the sea off the Massachusetts coast. 146 people aboard the ship drowned when The Wyhdah went down.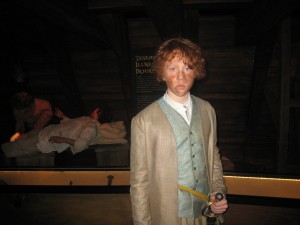
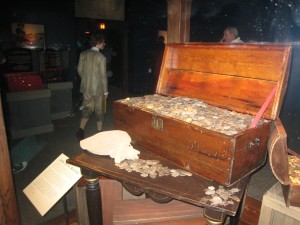
I was lucky enought to meet the treasure hunter-turned-historian Barry Cifford who discovered the wreck of the Whydah. He explained to us that pirate ships were true democracies, where crew mates were equal, no matter their background, age, race or religion. As a result ,many rushed to be pirates- whether they had escaped slavery, unjust society, or were just trying to make their fortune. The captain of the Whydah, Sam Bellamy, needed money to marry the woman he loved. There was even a 10-year old boy named John King aboard the Whydah when she went down…he left his mother to join the pirates. (My 11-year old claims he’d never do that.)
How did pirates navigate their way around the deep blue ocean well enough to ever utter the words “Land Ahoy?” In addition to maps and the stars, they used tools like the ones I saw from the Whydah: sounding weights to determine sea depth and ring dials to tell time. They also used compasses, simple tools for determining which direction North was, even in thick fog. A compass is an instrument containing a magnetized pointer that shows the direction of magnetic north, and you can easily make one with a needle, a magnet and a piece of cork or Styrofoam and a glass bowl (or pie plate) containing a few inches of water.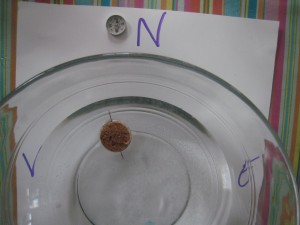 Cut a slice of cork, maybe 1/2 inch thick) with a bread knife (see photo.) Then, magnify the metal in your needle by stroking it from one end to another with a magnet about ten times. (Go the same direction each time.) Push your needle through the cork or Styrofoam and gently set it in the bowl of water. The needle, which you have turned into a magnet, will line up with Earth’s magnetic field, which runs from the South Pole to the North Pole. It should point North and South if you magnetized it correctly!
Target Shares Kitchen Pantry Science
- by KitchenPantryScientist
Since my goal is to get kids doing science, I was thrilled when Target asked me to do a guest post for abullseyeview.com about three easy experiments you can do with a homemade science kit!
Check it out here.
Marker Chromatography
- by KitchenPantryScientist
 You can take this project in many different directions, which is what science is all about! Chances are, you already have all the supplies you need for this project in your kitchen: coffee filters or paper towels, magic markers, and water.
Fill the bottom of a bowl or glass with a little water. Then, cut paper towels or coffee filters into long strips. Draw a large dot of color (black works best) about an inch from the bottom of the strip of paper. Place the bottom of the paper, below the dot, into the water. Once the water starts moving, the paper will stick to the side. You can hook it over the top of the glass, like we did.
 The water will be wicked up the paper and through the dot, dissolving and taking some of the dye up the strip with it. You’ll be able to see colors separate as the dyes travel up the strip. It’s fun to see what colors make up different black inks. My kids tried it with colors other than black too. They even made dots comprised of several different colors and watched them separate in the water. Another variation is to put ink on a large piece of paper, drip water on it from a dropper or straw and watch the color travel out in a circle!
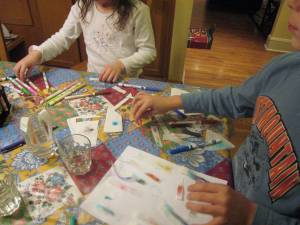
We taped some of the strips into our science notebooks. They’re very colorful. Older kids might enjoy trying a 10:1 mix of window cleaner and vinegar to separate the colors.
When you separate the colors from one another on the paper, you’re doing chromatography!
When paper is dipped in water, water molecules make it wet. The water molecules travel up the paper towel. When the water reaches the ink, it dissolves some of the dyes in the ink, and the dyes travel up the paper towel with the water. Some of the molecules that make up the dye are smaller and travel up the paper towel faster than the larger ones, so you can see some of the different colors that make up the ink separate from one another. The number of spots of color you see can tell you how many chemicals make up the color in your marker.
Most importantly, have fun!
Fizzy Balloon Outtake
- by KitchenPantryScientist
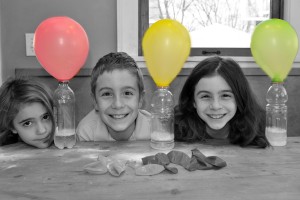
The kids and I got carried away and added a little too much baking soda and vinegar to our Fizzy Balloon experiment yesterday. Here’s what happened. 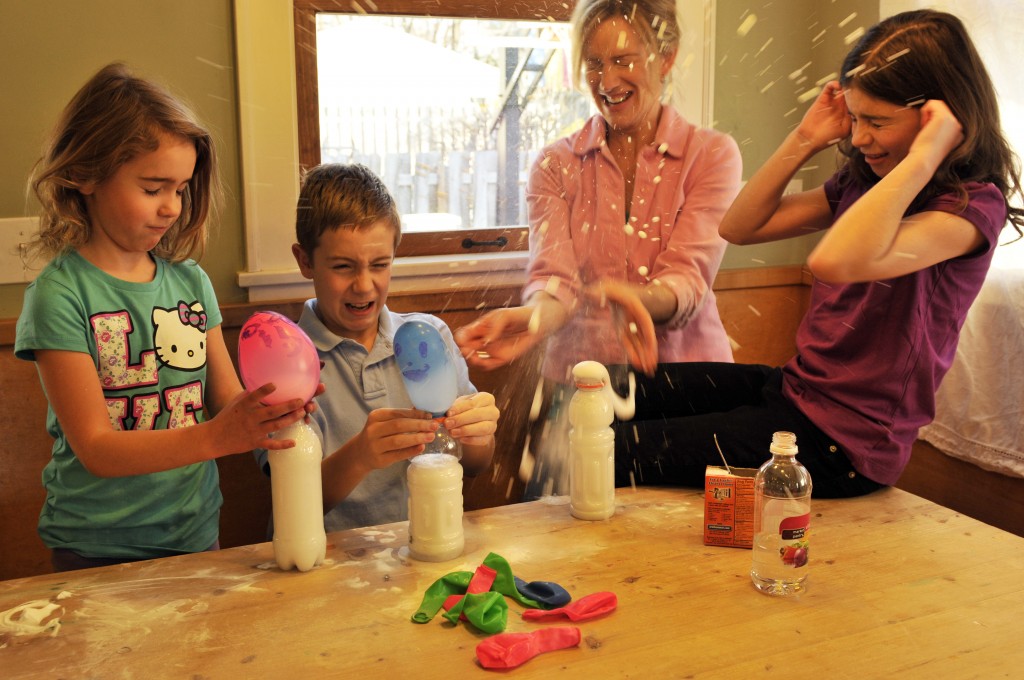 Pamela Diedrich of PD Photography was taking some pictures and captured the blast on film! Maybe next time we’ll measure a little more carefully.
Homemade Science Lab
- by KitchenPantryScientist
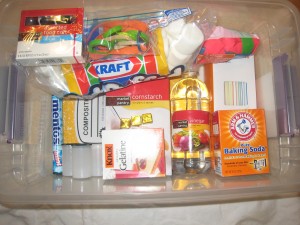
Homemade science kits are fantastic, inexpensive holiday or birthday gifts. In addition, they’re great places to store loose science items you might already have around the house, like magnets or magnifying glasses. I’ll list how much some of the ingredients/stuff cost me at Target. In a single shopping trip, it’s easy to fill a plastic bin with enough supplies to do a number of science experiments (with a few last-minute additions from around the kitchen, like dish soap and milk.) The other morning, I talked about making your own science kit on Kare11 Sunrise. Pair your kit up with KidScience app for iPhones and iPods, and watch your kid turn your kitchen table into a science lab!
I’ll list some “ingredients” for science kits and link directly to the experiments in blue (just click on the experiment name.) You can print out directions from my website for older kids, or let younger kids watch the how-to videos on my website (see sidebar), so they can do them on their own. Better yet, just put down some newspaper and let them start mixing things together.
Safety goggles, petri dishes,magnets, plastic test tubes, eyedroppers, magnifying glasses, plastic beakers and graduated cylinders are great additions to any kit! Many of these are reasonably priced at Creative Kidstuff stores, if you live in the Twin Cities.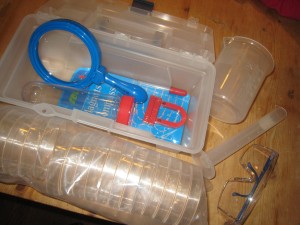
Here’s what we put in our kit:
composition book: really cheap at Target and makes a great science notebook to draw, record, and tape photos of experiments into.
baking soda: $.52 at Target can be used for a number of experiments like fizzy balloons and magic potion. Mix with vinegar to make carbon dioxide bubbles.
vinegar $1.12 at Target can be used for fizzy balloons , alien monster eggs and magic potion.
balloons for fizzy balloons are $1.75 at Target.
dry yeast for yeast experiment is around $1. 32 at Target
white coffee filters: can be used for magic marker chromatography or making red cabbage litmus paper.
cornstarch: $1.27 at Target can keeps kids busy playing with Cornstarch Goo, a non-newtonian fluid. Here’s the video.
marshmallows around $1.50 at Target with rubber bands and prescription bottle rings you have around the house can be used to make marshmallow catapults. My kids used theirs to make their own Angry Birds game.
Knox gelatine and beef bouillon cubes can be used to make petri plates for culturing microbes from around the house. You can also use the gelatine for cool osmosis experiments!
Food coloring $2.39 at Target can be used to learn about surface tension by making Tie Dye Milk. Here’s the video. You can also easily make colorful sugar-water gradients that illustrate liquid density!
Mentos mints will make a Mentos geyser when combined with a 2L bottle of Diet Coke.
drinking straws$1.09 at Target are great for NASA soda straw rockets and a carbon dioxide experiment.
film canisters with pop-in lids make amazing rockets. I wouldn’t include the Alka-Seltzer tablets you need to make them work in kits for younger children, since they’re technically medicine. These rockets would be amazing gifts for kids to make each other. They’re fun to make and decorate.
Decorating the bin with sharpies(or paint) and stickers is a great way to personalize it and fun for whoever is putting it together. Have fun!
Rainbow Sugar-Water Density Columns
- by KitchenPantryScientist
You can make colorful columns that demonstrate the concept of liquid density at your own kitchen table with just water, sugar and food coloring. An eyedropper, siphoning bulb, syringe (minus a needle,) or anything else that allows you to slowly drip liquid from one cup to another are useful for the layering step. If you have a tall, thin glass, like a cordial glass, or a test tube, it’s easy to see the layers in your gradient!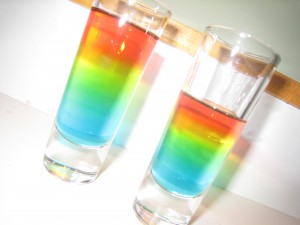
Start with two cups of hot tap water and measure half a cup into each of four cups. To the first cup, add 2 Tbs. sugar, to the second add 4 Tbs. sugar, to the third, 6 Tbs. sugar and to the fourth, 8 Tbs. sugar. Stir until the sugar dissolves. If the sugar won’t dissolve, an adult may microwave the cup for 30 seconds and stir again. Always use caution with hot liquids. If the sugar still won’t dissolve, try adding a Tbs. warm water.
Now, add 2 drops food coloring to each cup. We added red to the cup with 2Tbs, yellow to the one with 4Tbs, green to the to the one with 6Tbs, and blue to the cup with 8Tbs.
Density is mass (how many atoms are in an object) divided by volume (how much space an object takes up.) Sugar molecules are made up of lots of atoms stuck together. The more sugar you add to a half cup of water, the more atoms it will contain and the denser it will be. Less dense liquids float to the top of more dense liquids. Which of your sugar solutions is the most dense? The one with the most sugar in it (8 Tbs.)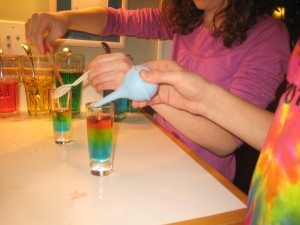
Put the most dense sugar solution(blue in this case) in the bottom of a tall, thin glass or test tube. Now, use your dropper to gently drip the next densest liquid (green) on top of the blue layer. It works best to drip the sugar solution against the side of the cup just above the surface of the liquid. You can also drip it onto the back of a spoon, like in the photo above. Add the yellow layer, and finally the red layer, which only contains 2Tbs sugar per half cup and is the least dense.
What happens if you mix the layers up? They won’t separate back out like oil and water would, because the sugar will disperse (spread) equally through the mixture.
Researchers sometimes use density gradients to isolate different parts of cells by breaking the cells up, putting the cell debris on top of a density gradient and spinning it in a centrifuge. Cellular fragments of different shapes and molecular weights move through the gradient at different rates.
Globs of Fun
- by KitchenPantryScientist
Although I don’t usually do product reviews, when Steve Spangler Science asked me to try out Larry’s Polymer Lab, I couldn’t resist. I’d seen some of Steve’s Halloween Science Demonstrations online and guessed that his kit would probably be both fun and educational.
When the package arrived, we unwrapped a clear paint can filled with 5 different polymer substances in smaller containers (and a big lizard named Larry.) The kids couldn’t wait to get started.
The only polymer we’d played with before was “Mad Scientist’s Green Slime,” made with glue, water and Borax. The kids know that polymers are long chains of molecules, like beads on a string, but Larry’s Polymer Lab’s instruction manual told us that the polymers we were about to play with were super-absorbant and could soak up mind-boggling amounts of water. We put down some newspaper on our kitchen table and opened the can.
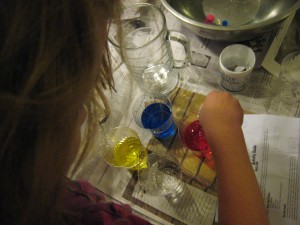 As we experimented, the words “awesome” and “feels cool” were uttered repeatedly.
As a note, the polymers we experimented with are considered safe, but I would not use the marble-like ones with small children, since they look like candy and are choking hazards. My 11,9 and 5 year olds were perfect ages for the kit.
First, we tried the Water Gel. “When you add water to this superabsorbent polymer, it instantly turns from a liquid to a slushy solid.” The kids were impressed as the water seemed to magically solidify, and it was a good way for them to practice measuring!
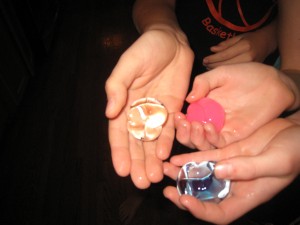
Next, came Jelly Marbles, “tiny 3 mm spheres that, when soaked in water, grow into 20 mm water-filled marbles.” The kids loved these and the color component of the experiment adds some fun variations to play with. We want to try growing plants in them!
The Gravi-Goo, “fascinating goo that finds a way to flows uphill,” was neat, but really hard to clean up. My kids always find a way to spill.
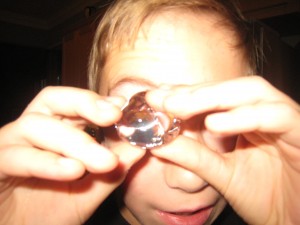 Giant Orbs, “gooey bouncing balls turn into massive, colorful spheres after soaking in water” were our favorite! They grow up to 11 times their own size in water over 6 or so hours and the kids played with them for days, checking them every time they came into the kitchen.
We’ve tried “Insta-Snow” before, but the snow-like polymer in this kit worked spectacularly well. My 5-year old asked for more of it for Christmas, not realizing that we still have a ton left over.
At $44.99, the kit seems a little pricey, but it contains enough of each polymer (at least 50 giant orbs and hundreds of jelly marbles) to do the experiments over and over again, use them for a birthday party, or even a classroom science project or party. I’ve started doing science experiments at my kids’ school holiday parties as a change from the usual arts and crafts. Many of the polymers also have a number of suggested variations on the basic experiments.
As I type, Larry the lizard is soaking in a bucket of water. What I thought was just a plastic lizard is actually made of water-absorbing polymer and will grow into a giant, slimy chameleon. What could be better than that?
The kit was sent to me free of charge, but I wasn’t paid to review it. The kids and I give it two thumbs up.
