Paper Bag Volcano
- by KitchenPantryScientist
Last spring, I went into my daughter’s first grade classroom to do the famous volcano experiment that involves mixing baking soda (sodium bicarbonate) and vinegar (acetic acid). Unfortunately, with our hectic schedule there was no time to create a “work of art” volcano from paper mache or clay. So, we made one out of a paper bag. It was a smashing success.
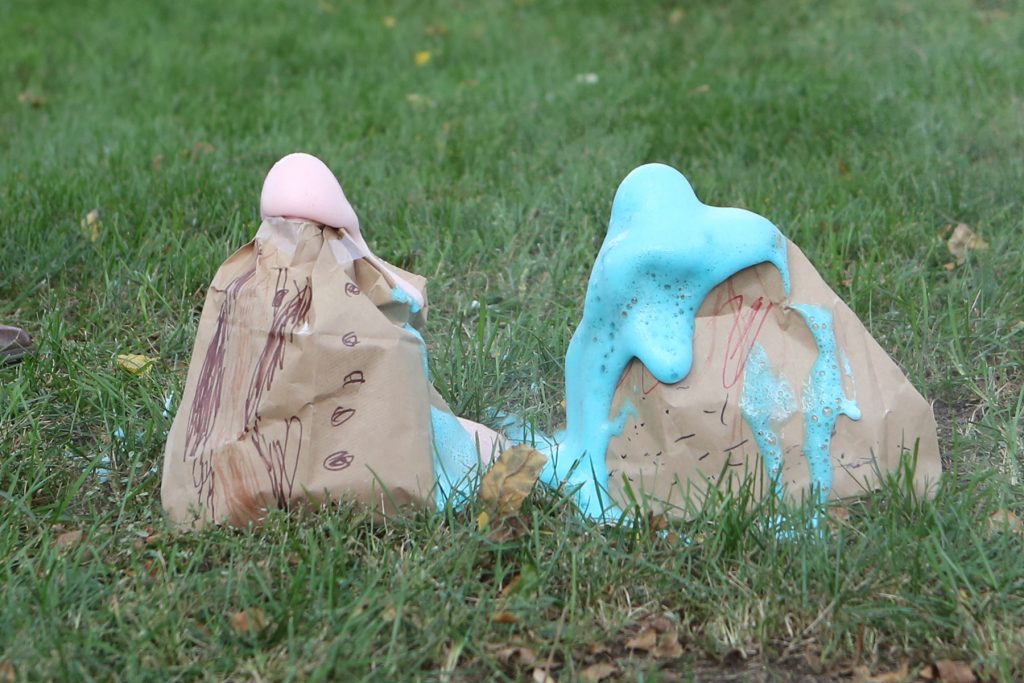
Paper bag volcanoes (image from Kitchen Science Lab for Kids- Quarry Books 2014
To make your own paper bag volcano, you’ll need a brown paper lunch sack (or a slightly bigger one like we used), an empty plastic water or soda bottle, a cup of vinegar, red food coloring and about a fourth of a cup of baking soda. *Cone coffee filters make great volcano cones too and work well on small plastic bottles!
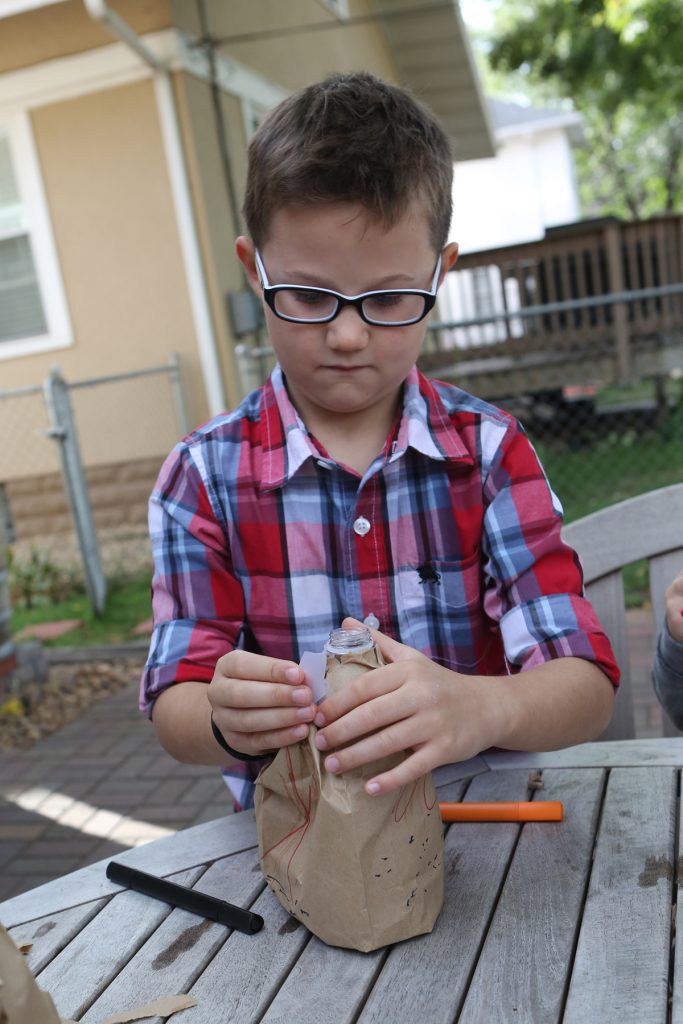
Remove the lid from the bottle, invert the brown bag over it, and tear open the bottom of the bag, along the flaps. Then, loosely tape the paper sack so that it fits around the mouth of the bottle. Don’t tape it to the bottle. If you like to draw, you can decorate the bag with markers.. We squashed and tore the bottom of the bag a little, to make it look more mountain-like.
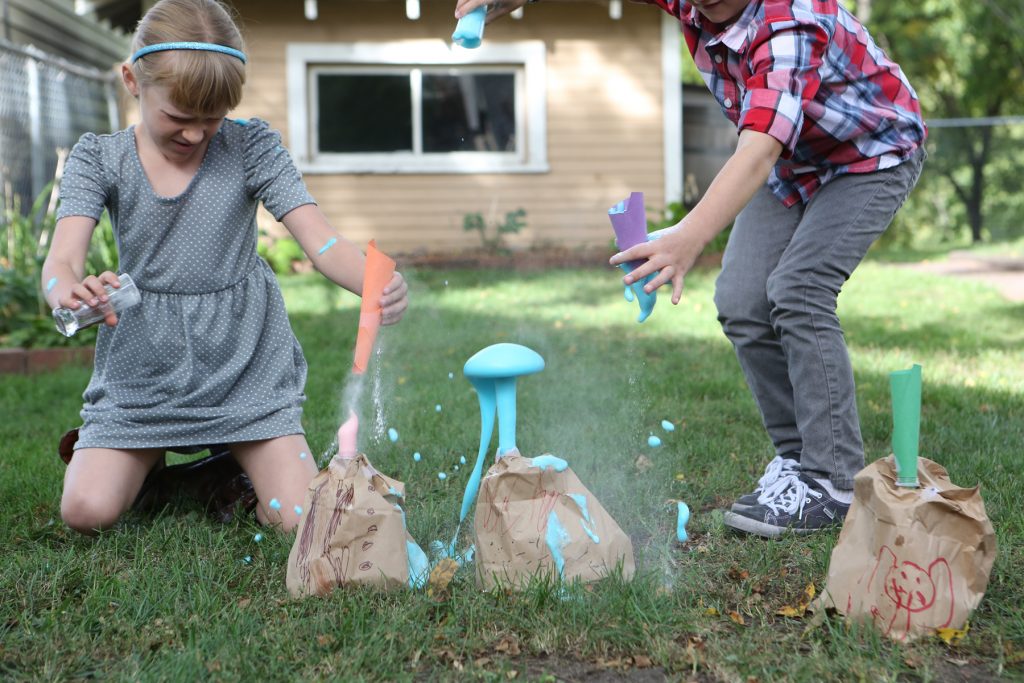
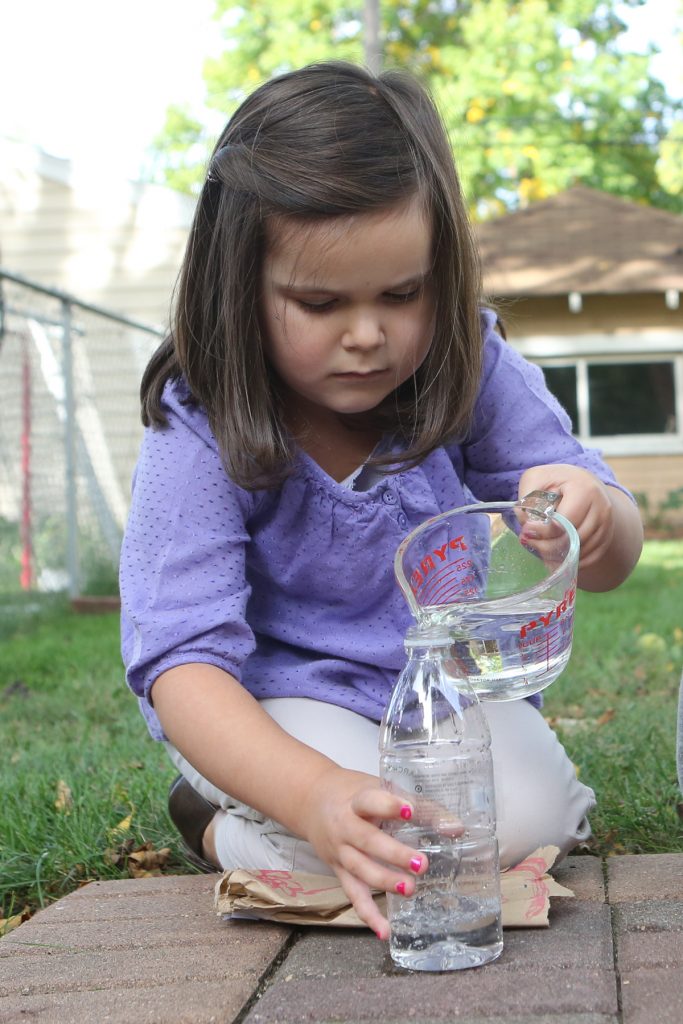
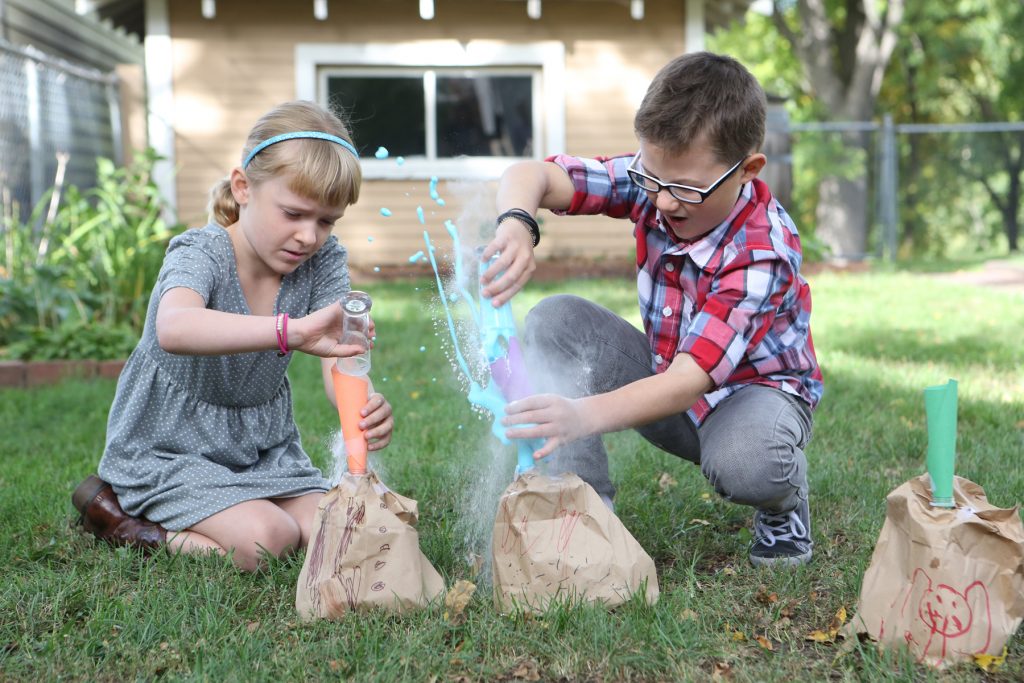
Now, remove the bottle, fill it with the vinegar and add several drops of red food coloring for your “lava.” Place the bag bag over the bottle to hide the lava container.
Place the volcano on a tray or something that will contain overflow and you’re ready for eruption!
Using a folded piece of paper, quickly dump all of the baking soda into your bottle to start the chemical reaction. You’ll see the volcano erupt as the baking soda combines with the vinegar to produce carbon dioxide gas, which is one of the gases spewed by real volcanoes.
From Kitchen Science Lab for Kids (Quarry Books 2014)
From Kitchen Science Lab for Kids (Quarry Books 2014)
If you liked this experiment, try making “fizzy balloons“ with the same ingredients (plus a balloon, of course!) If you want to learn more about carbon dioxide gas and the carbon cycle, here’s a link to a cool video from NASA that explains it using a banana and a chunk of coal.


