Tag: science’
Halloween Science Roundup
- by KitchenPantryScientist
Halloween Halloween brings out the kid in all of us, and there’s no better way to celebrate than with some ghoulish science experiments. Next week, I’ll be adding Vegetable Vampires and Zombie Candy to the lineup!

Here’s a list of our favorites. Just click on the name of the experiment to go to the instructions, see photos of what to do, and learn a little science. Most have links to videos or TV segments where I demonstrate how to do the experiments.
Shocking Machine Make an electrophorus and Leyden jar to shock your friends! Here’s how to do it. We demonstrated it on Kare11 last week!
Frankenworms Gummy worms soaked in baking soda and water come to “life” when you drop them into vinegar! Click here for directions and a video.
Goblin Goo (All you need is cornstarch and water. Here’s a video on how to make the goo. You can add a little food coloring to the water if you want, but it may stain your hands!)
Bag of Blood (If you have ziplock baggies, water, red food coloring and skewers, you can do this experiment!) Here’s the video.
Fizzy Balloon Monster Heads (After we made Goblin Goo, I demonstrated how to make Fizzy Balloon Monster heads. Click here to watch.)
Magic Potion (Bubbly, stinky Halloween fun: I made a short video on how to make magic potion. Click here to watch it.
Mad Scientist’s Green Slime (To see a TV segment where we made Mad Scientist’s Green Slime, click here!) Here’s another video.
Apple Mummies (Here’s a link to a TV segment where the kids and I demonstrated how to make Apple Mummies. Click here.)
Alien Monster Eggs (These make a great centerpiece for a Halloween party, when you’re done playing with them.) I demonstrated how to make them on Kare 11! Click here to watch the video.
Creepy Critter Slingshots Lob Marshmallow eyeballs and spiders at a pumpkin or another target in this fun physics experiment.
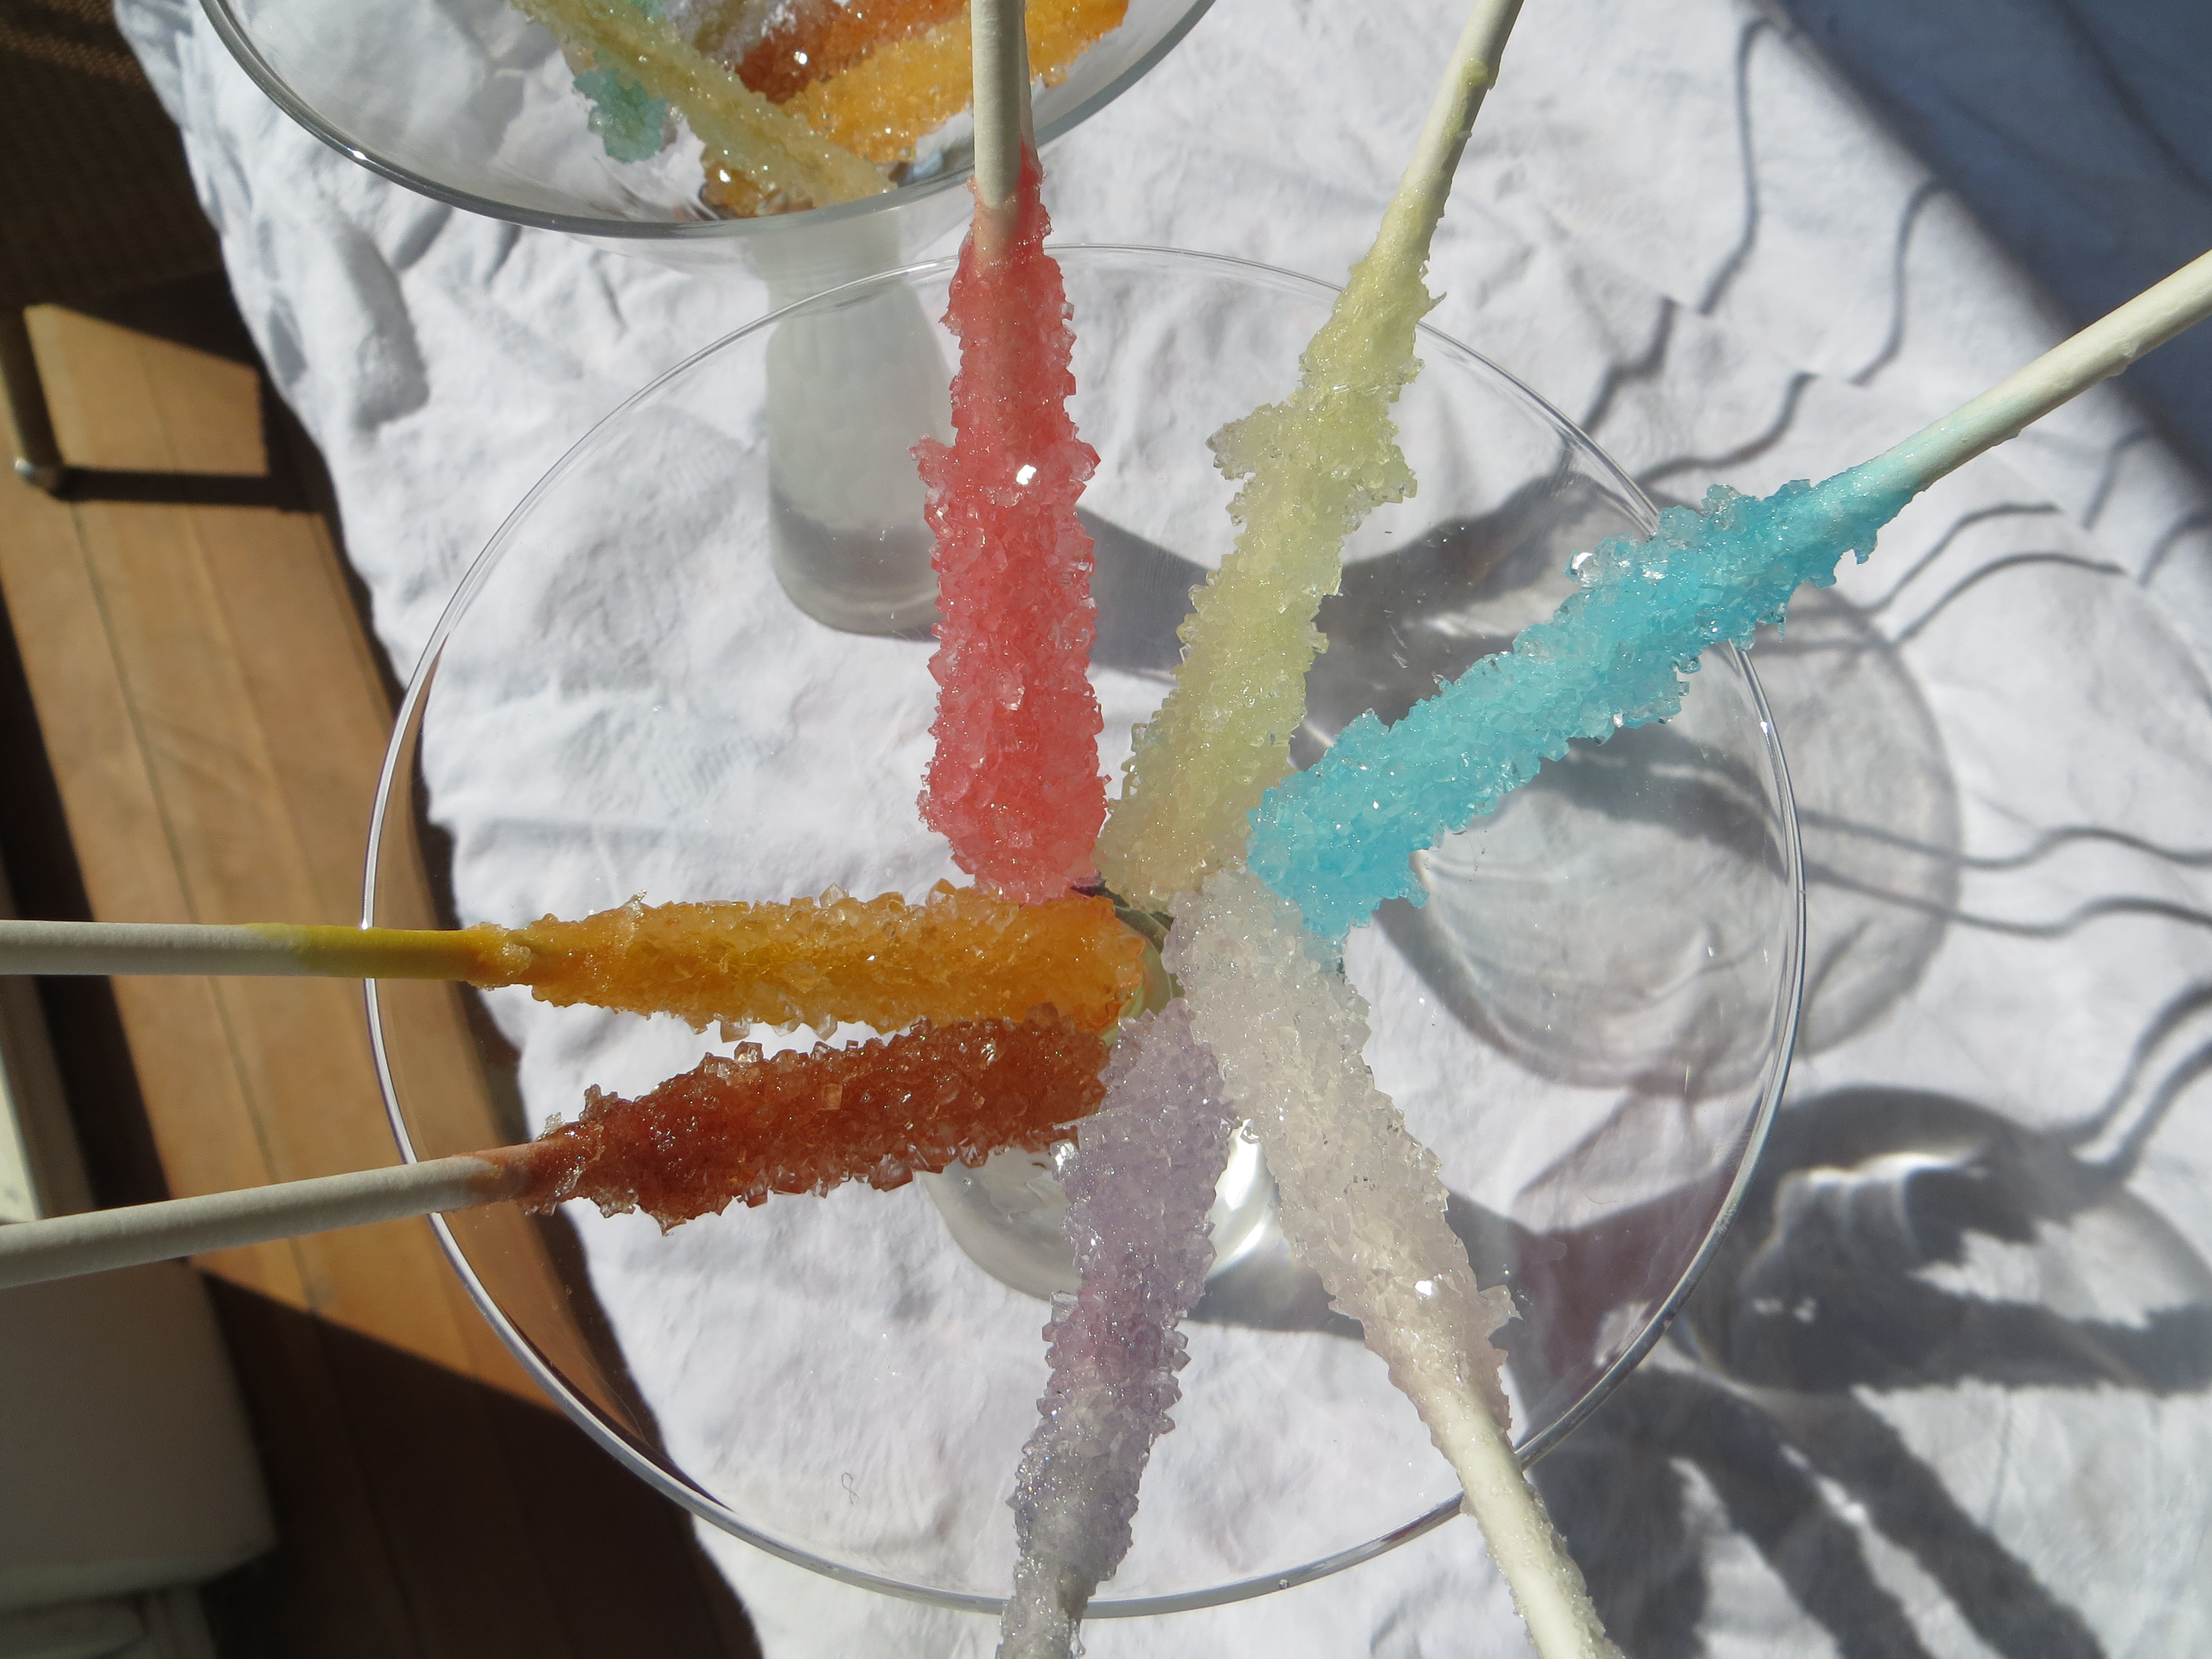
Science on a Stick: Rock Candy
- by KitchenPantryScientist
Got sugar? You can grow big, edible sugar crystals, commonly called “rock candy,” in your own kitchen. We thought they’d make a great science experiment to demonstrate at the Minnesota State Fair, where foods on a stick hold sway.
Like bricks in a wall, crystals are solids formed by repeating patterns of molecules. Instead of mortar, the atoms and molecules are connected by atomic bonds.
They can be big or small, but crystals made from the same atoms or molecules always form the same shape. Table sugar, or sucrose, is made up of a molecule composed of two sugars, glucose and fructose. The crystals formed by sucrose are hexagonal (six-sided) prisms, slanted at the ends.
To make rock candy on a stick, you’ll need: 5 cups white granulated sugar, 2 cups water, cake pop sticks or wooden skewers, and food coloring
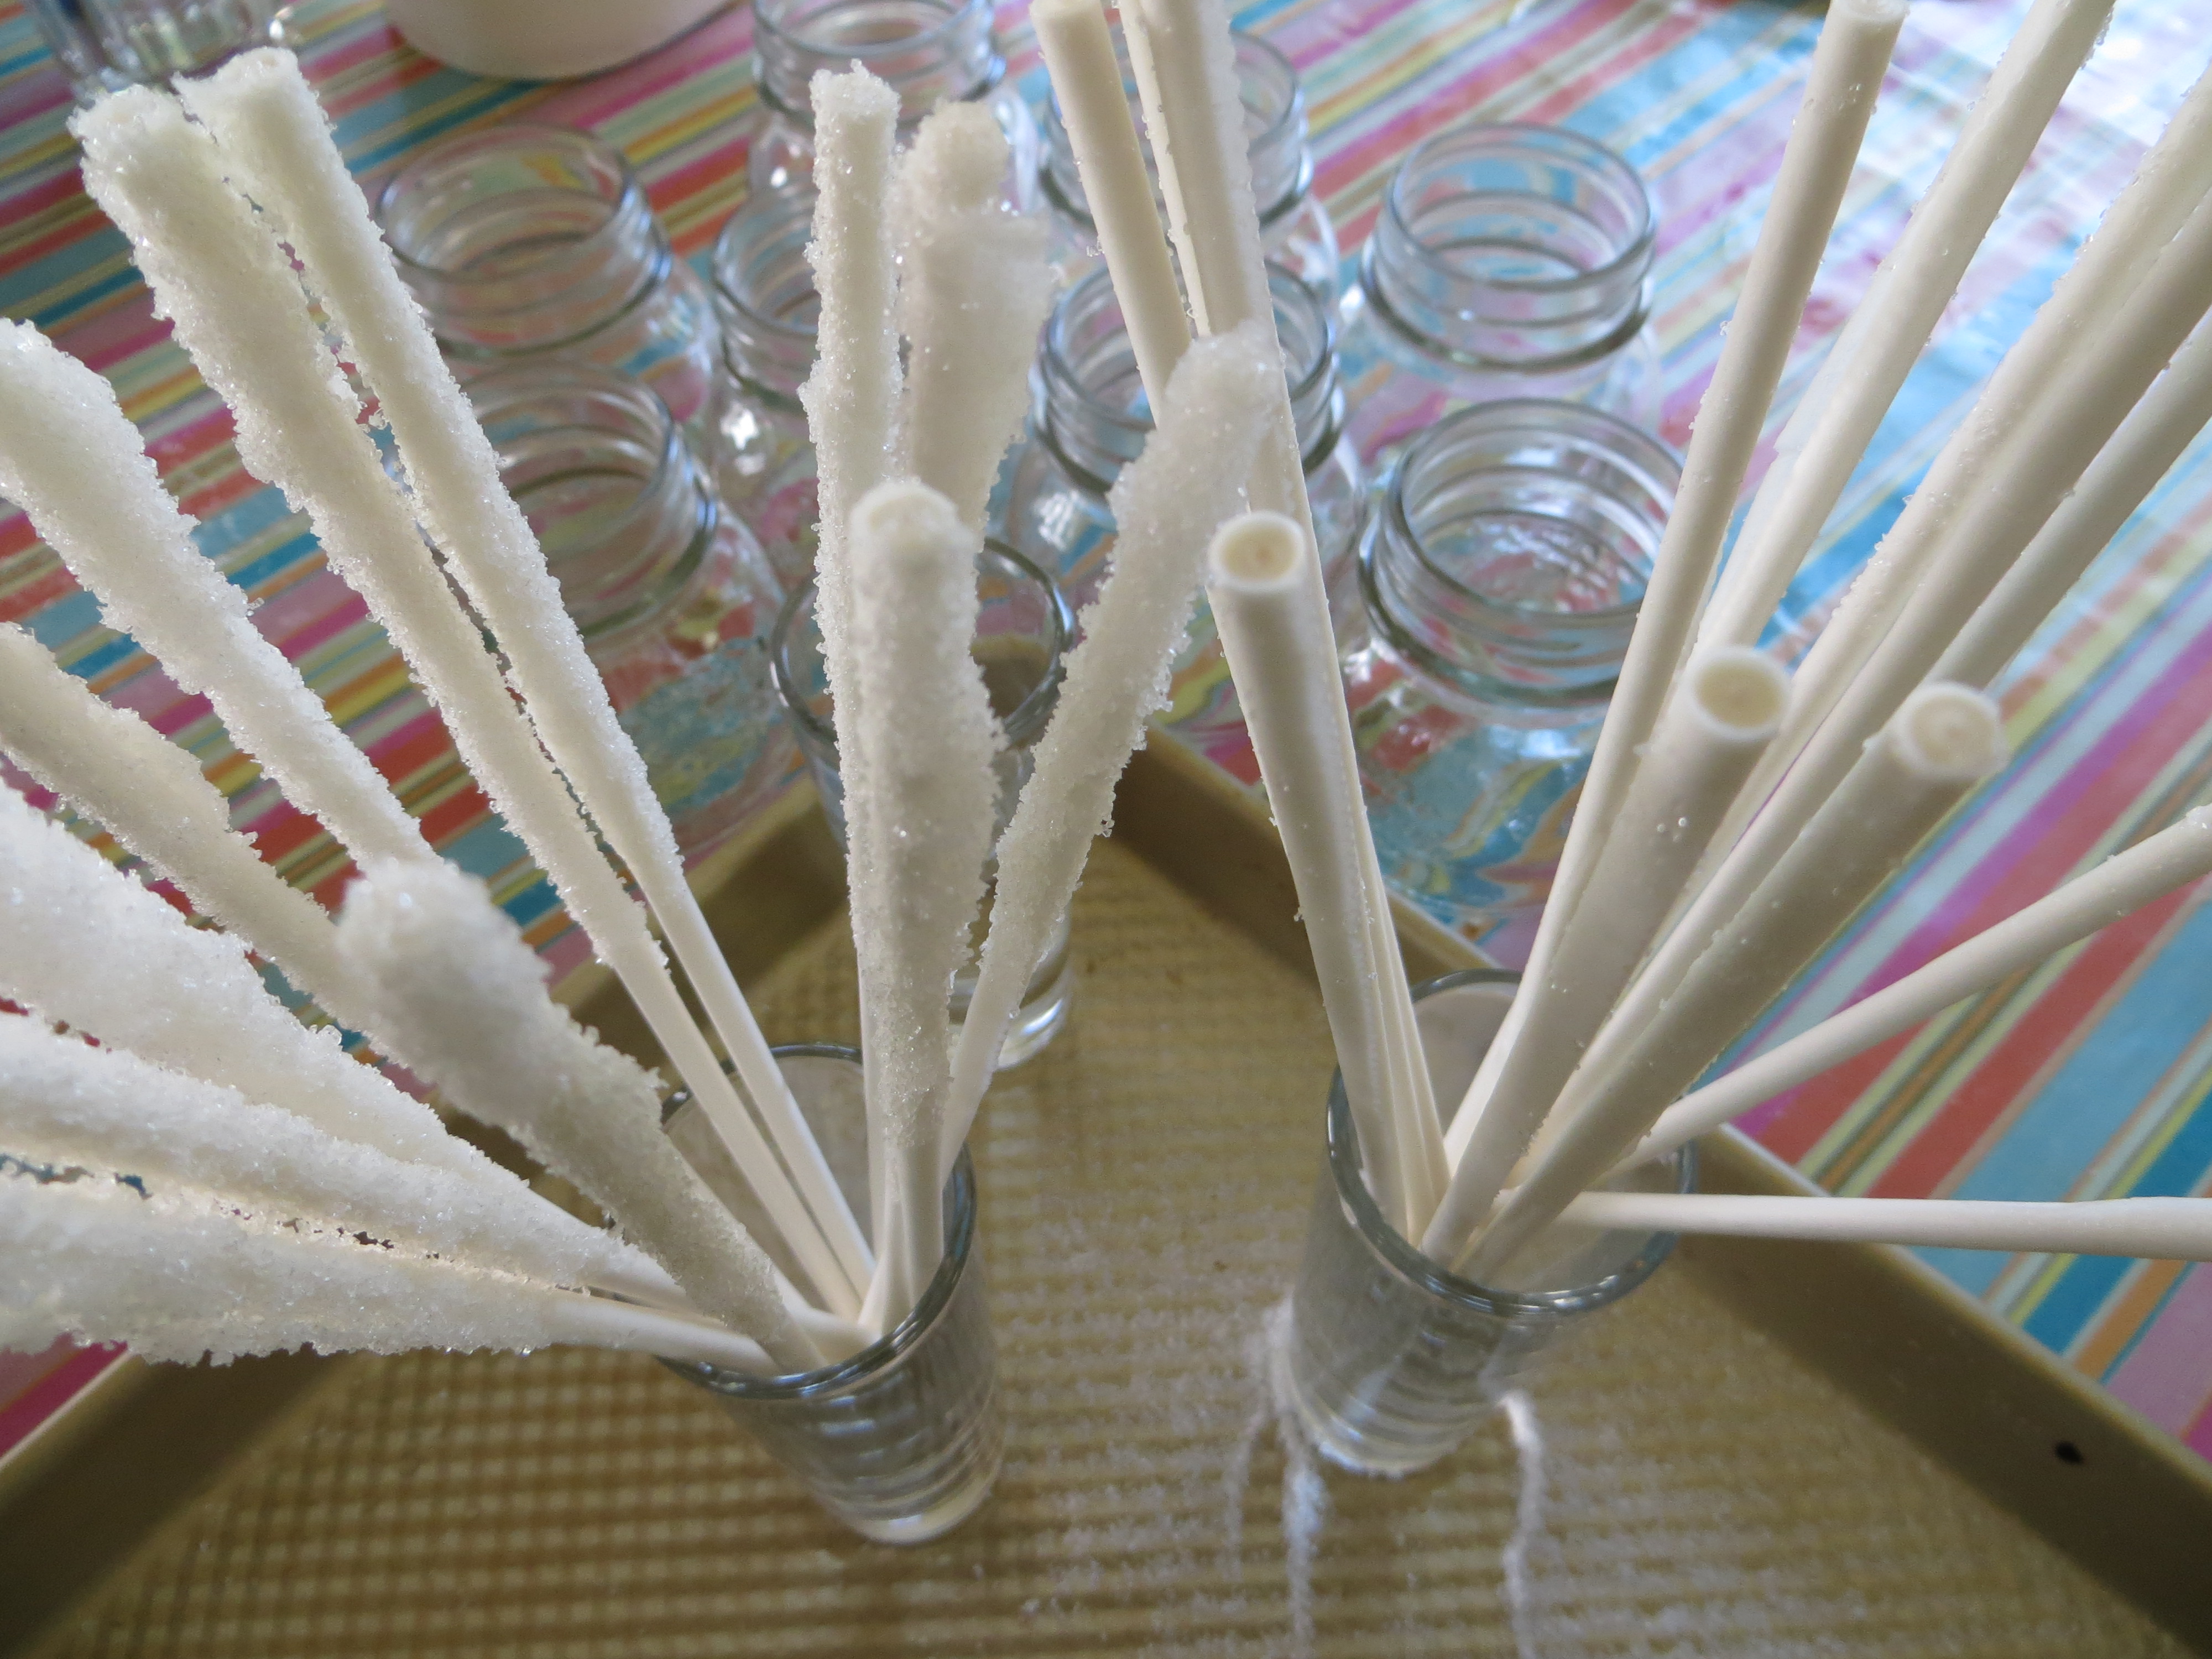
- Dip one end of cake-pop sticks or wooden skewers in water and then roll them in granulated white sugar. The sugar should cover 2-3 inches of the stick. Let them dry completely. These are the seeds for the sugar crystal growth.
- Boil 2 cups water and 5 cups sugar until sugar is dissolved as much as possible. It should look like syrup. This is your supersaturated sugar solution.
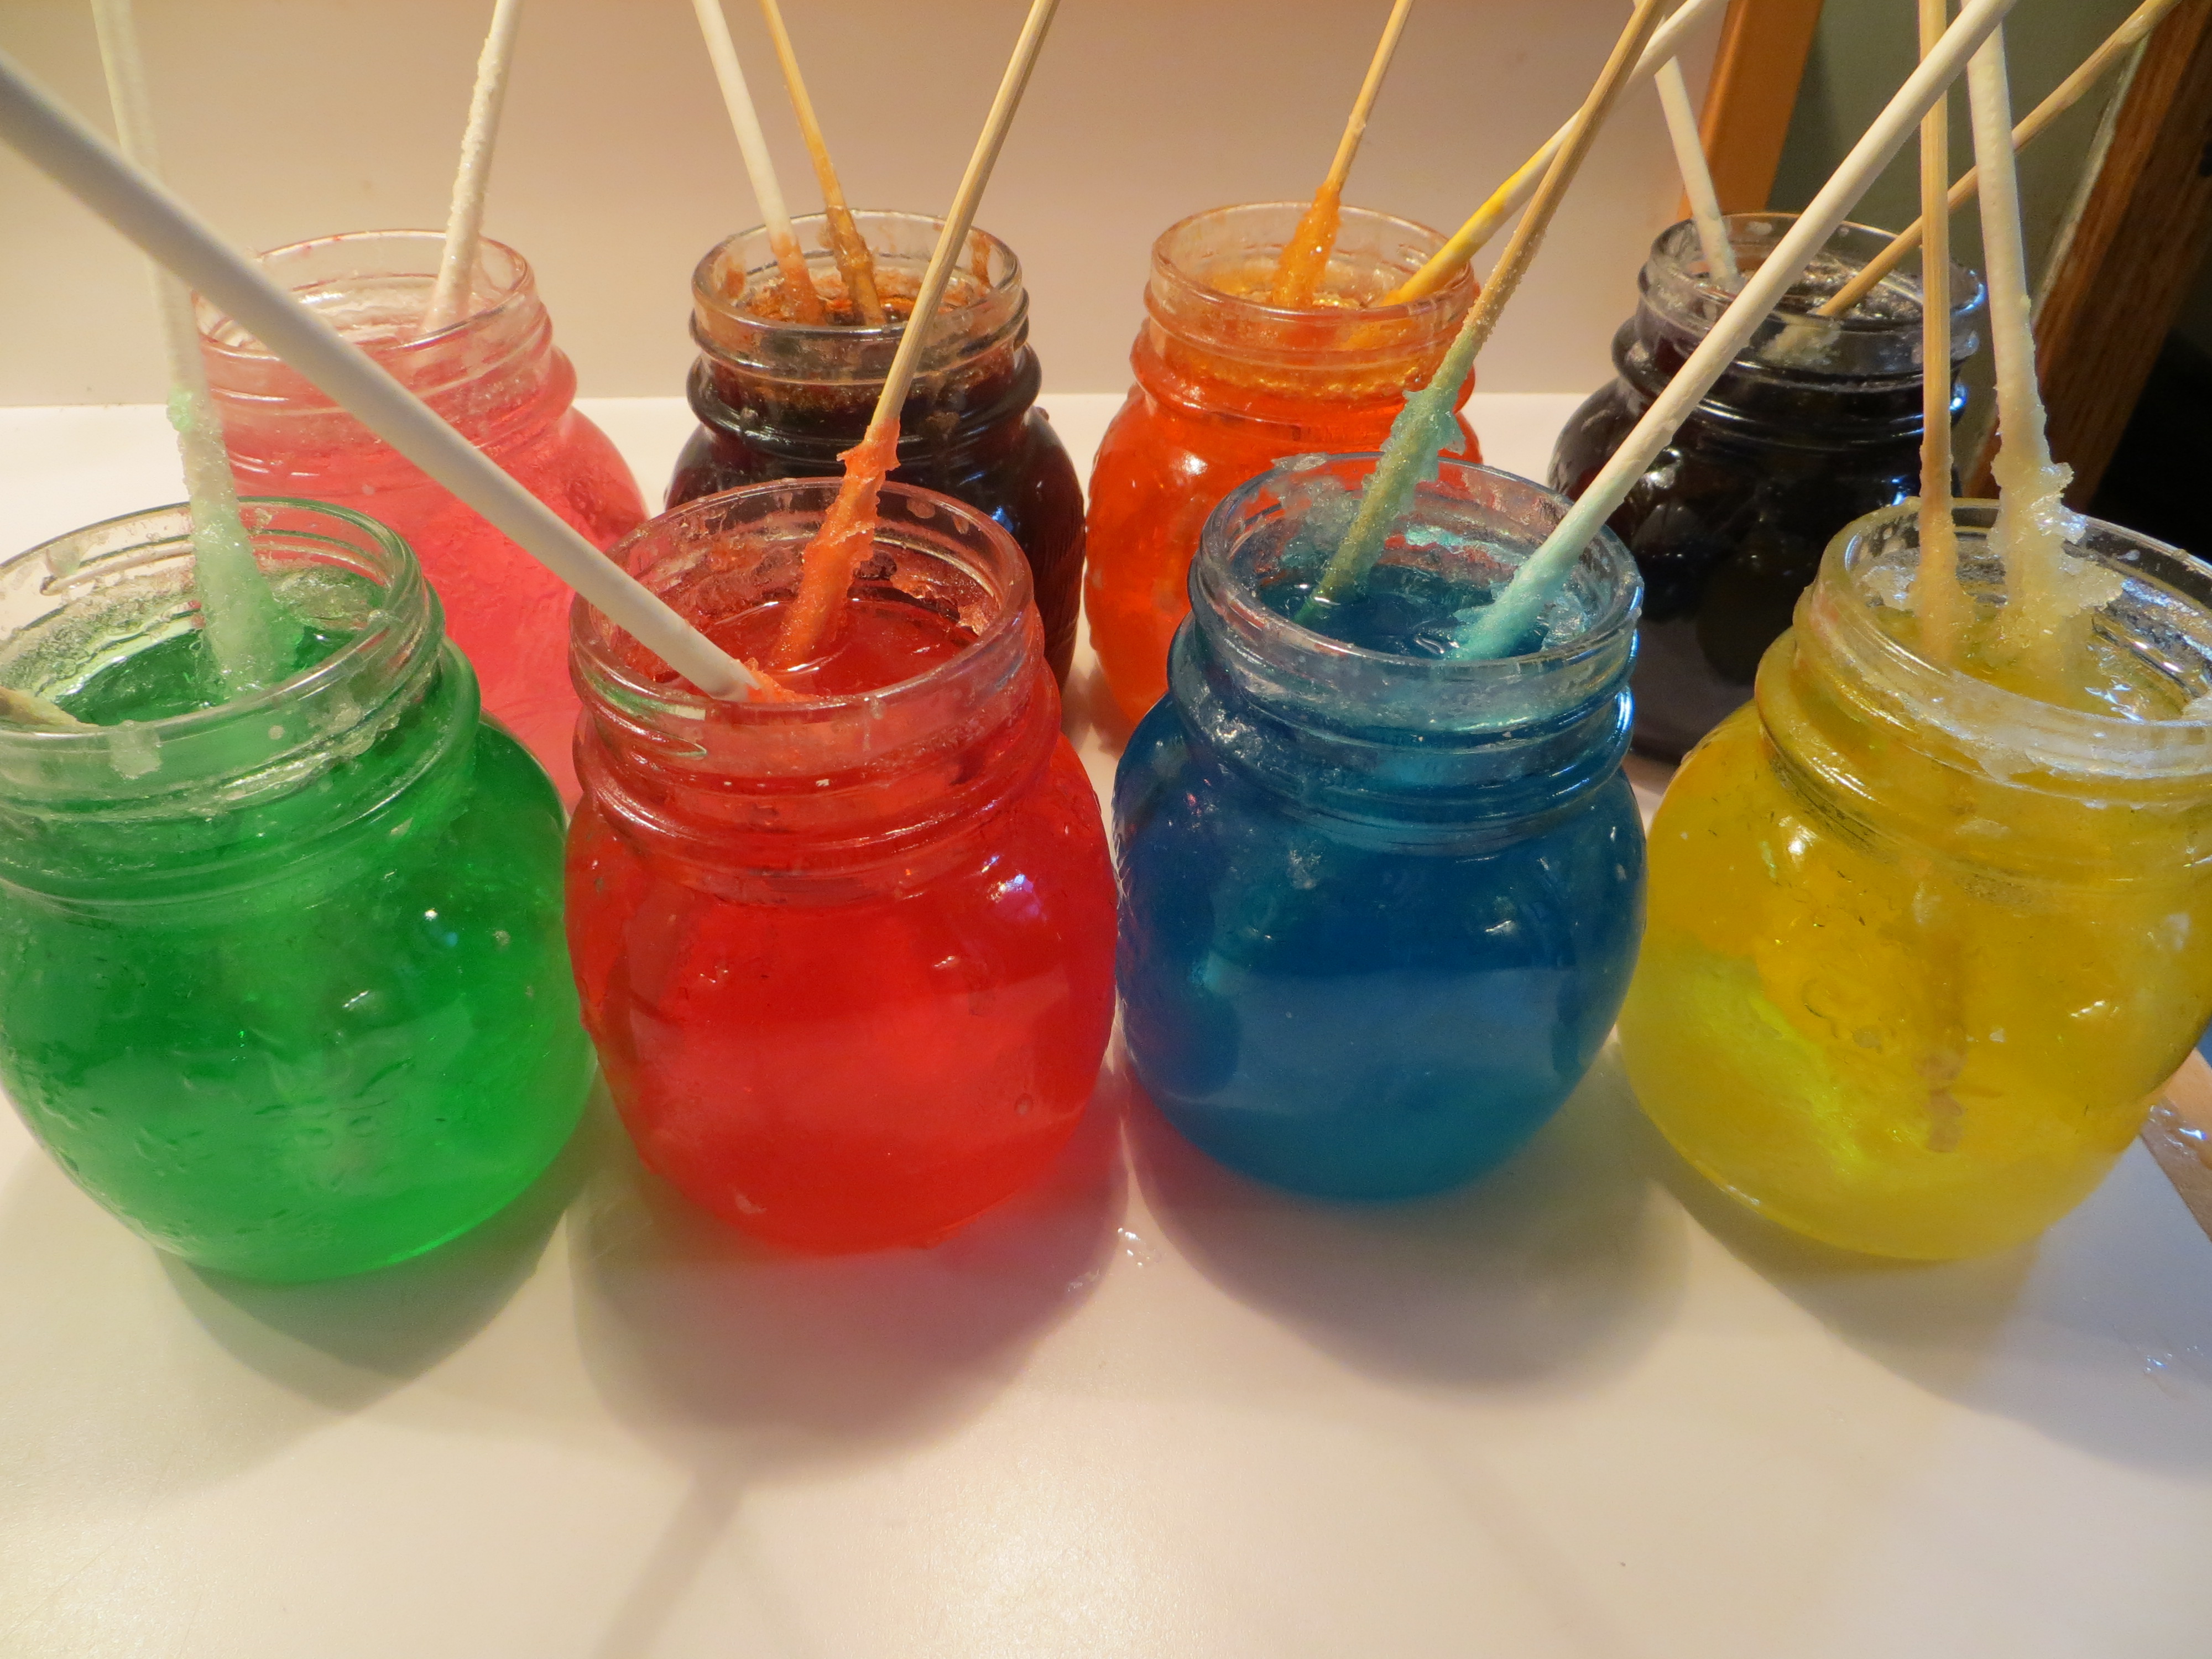
- Let syrup sit until it is no longer hot and pour into glass containers. Add food coloring and stir.
- When colored syrup is completely cool, set the sugary end of the sugar-seeded cake pops or skewers into the syrup and let them sit for about a week.
5. Gently move the sticks around occasionally, so they don’t stick to the crystals in the bottom of the glass. If the glass container gets too full of crystals, pour the syrup into a new container and move your stick into the cleaner syrup to grow more crystals. When the rock candy is done, drain the excess syrup and let them dry. Enjoy!

The science behind the candy? A supersaturated solution is one that is forced to hold more atoms in water or another solute than it normally would. Supersaturated solutions can be made using heat or pressure. Crystals start to form when a supersaturated solutions encounters a “seed” atom or molecule, causing the other atoms to come out of the solution and attach to the seed. In this case, the seed molecules were the sucrose molecules we dried onto the sticks.
Butter Candles and Biofuel
- by KitchenPantryScientist
Biofuels are burnable energy sources produced by living organisms, like corn, algae, and even cows. Microorganisms and plants gather carbon from the atmosphere and incorporate it into the organic compounds that make up things like leaves, fruit, stems and wood. When animals eat plants and microbes, they store some of the carbon energy they’ve gobbled up as fat, like the milk fat used to make butter. Scientists call carbon stored in plants, microbes and animals “new” carbon. Old carbon is carbon tied up in fossil fuels like coal and oil, that’s been underground for millions of years.
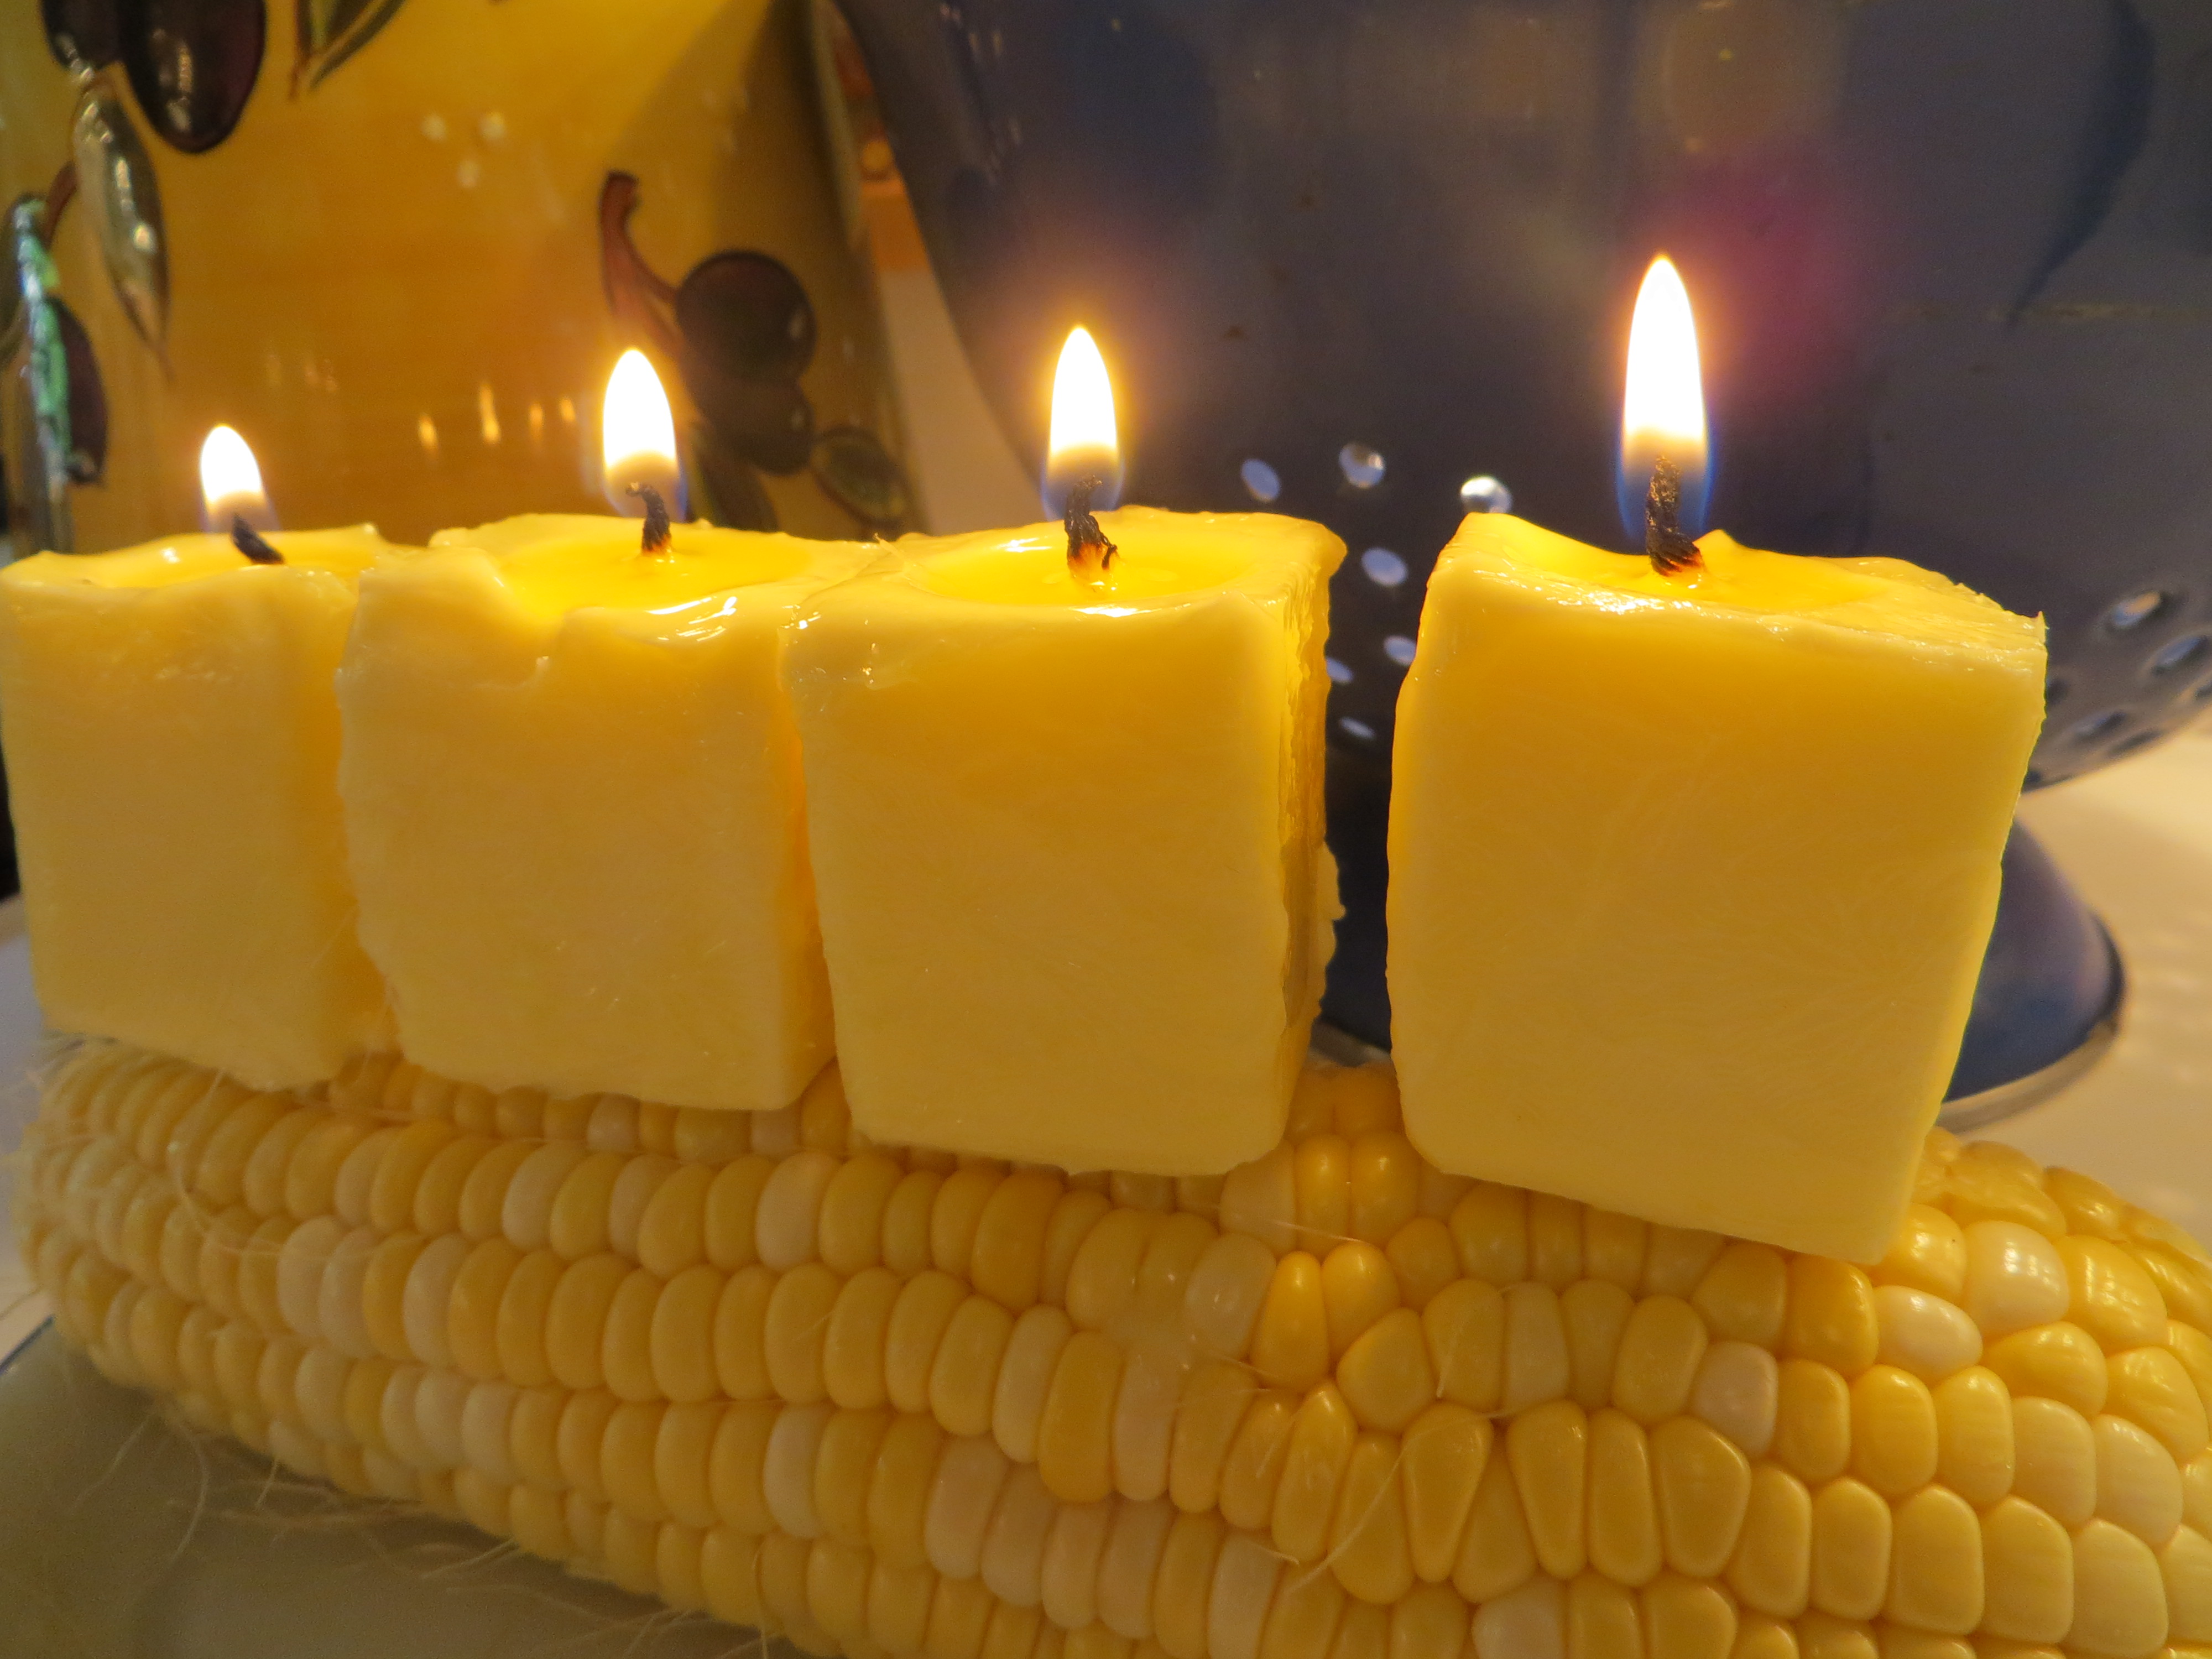
We used broken-off skewers to attach our butter candles to an ear of corn.
Although butter isn’t usually burned as a fuel, a Pennsylvania farm show recently converted their thousand pound butter sculpture into 3 days-worth of power for a local farm, using a methane digester. The New York State Fair turned its butter sculptures into biodiesel fuel. At home, you can make a stick of butter into a candle to see for yourself how an animal product can be used as a fuel.
To make butter candles you’ll need a stick of butter, a toothpick or skewer, some cotton kitchen twine and scissors.
1. Cut the butter into the size candles you want. Place your candles on a fire-proof surface, like a metal plate.
2. Cut pieces of string slightly longer than the height of your candles.
3. Use a skewer or toothpick to poke a hole from the top of your candle to near the bottom.
4. Push your string into the hold using your skewer or toothpick. Leave 1/4 inch or so sticking out. This is your candle wick.
5. Rub a little butter onto the wick. Light your candle. It may take a few tries, but soon it should burn like a wax candle.
*As with all candles, butter candles should never be left unattended. Be sure to place your candles on a surface like a candle holder that cannot catch fire.
What happens? The lit cotton wick starts to burn and liquefies some of the butter fat. The wick then absorbs the melted butter and pulls it up,via capillary action, to the flame. The flame starts to burn the fat vapors rather than the wick, in a combustion reaction. This reaction produces heat, water vapor and carbon dioxide gas, putting the carbon is back in the atmosphere.
Since burning food isn’t an efficient use of energy or money (it takes lots of oil to raise and care for a cow,) scientists are coming up with ways to turn animal fats and byproducts that can’t be used as food into biofuels. Some inedible plant foods can be reused as well. For example, some cars can run on used cooking oil. Can you imagine how much oil a fast food restaurant throws away each week?
Although butter will never replace candle wax, butter candles are a good way to introduce the carbon cycle and get kids thinking about how new fuels and cleaner-burning fuel will impact the future of our planet.
To make the corn candle at the top of this post, we attached the butter candles to an ear of corn with broken off wooden skewers.
Outdoor Science Lab
- by KitchenPantryScientist
It’s hard to believe it’s already August. Other than reading, we don’t do much to fight summer brain drain at our house, but the end of summer is a great time to head to the back yard or driveway for some science experiments. They’re so much fun that kids won’t even realize they’re using their noggins! Just click on the experiment for how-to directions, photos and videos.

Learn physics by throwing eggs!
Got water? Make siphons, a water-purifier, water rockets, or fire-proof water balloons.
Hungry? Build a solar oven from a pizza box and bake s’mores.
Stand on eggs or throw them as hard as you can without breaking them. You can always clean up mistakes with your hose!
Play magician with the tablecloth trick, or make paper bag volcanoes erupt in your back yard.
Of course, there’s always the famous Mentos geyser, and film canister rockets are always a hit.
Nature walk bracelets add fun to any excursion, and you can collect water from trees or make water filters with grass and sand.
August is a great time to find Monarch caterpillars or study the earthworms in your back yard.
And no summer would be complete at our house without an epic marshmallow shooting competition. You’ll even learn some physics!
Simple Water Rockets
- by KitchenPantryScientist
You’ll have a blast learning physics by making water rockets!
While NASA’s rockets use rocket fuel as their working mass, these rockets use water. As pressurized air forces the water out of your rocket, the rocket moves in the opposite direction, just like Newton’s Third Law says it will. “For every action, there is an equal and opposite reaction.”
Although these rockets lack fins, a payload and a nose cone, you can see from this NASA illustration that they’re very similar to real rockets. You can make a complicated launch pad like this, but we decided to make things easy.
For this experiment, you’ll need:
-an empty one or two liter bottle from a carbonated beverage
-a cork that has been cut in half and will fit in the mouth of your bottle (An adult should do this. I used a serrated knife.)
-a needle for inflating balls
-a bike or ball pump
-a cardboard box cut to hold the bottle at an angle pointing away from you. This is your launch pad.
Push the needle through the cork so that it pokes out of the other side. Use the hole from the corkscrew to make it easier.

Needle should poke all the way through the cork.
Fill the bottle about 1/3 of the way full of water and insert the cork in the bottle.
Set the bottle in the cardboard box so that it’s pointing up, but away from you. See the photograph.

water rocket in launch pad
Attach the needle to the bike pump, stand behind the launch pad and start pumping air into the bottle. The air pressure will build in the bubble at the top of the rocket. When the pressure gets high enough, it will force the cork and water out of the bottle with lots of force, and as the water shoots down, the rocket will shoot up!
What happens if you add more water, or less water to your rocket?
Can you imagine riding a real rocket? Check out Astronaut Abby’s website to meet a girl who wants to ride a rocket some day and ask an astronaut on the International Space Station questions!
Zooming Fish Video
- by KitchenPantryScientist

Here’s a great project for pre-K kids. They can cut the fish out of paper or foam, pour the water and put a drop of soap behind the fish to make it “zoom.”
My original post and written directions for zooming fish can be found by clicking here.
Photosynthesis Experiment
- by KitchenPantryScientist
Plants are wonderful chemical reorganizers. Using the sun’s energy and a process called photosynthesis, they can turn water and carbon dioxide into sugar (glucose) and oxygen.
Thanks to plants and other autotrophs like algae, Earth has an oxygen-containing atmosphere that can sustain animal and human life.
To watch plants make oxygen, all you need is a water plant like Elodea (available at pet stores), a large container, water and a few small clear glasses or test tubes.

Fill the large container with water and turn your small, clear containers on their sides underwater to remove all the air bubbles.
Cut a branch off of your plant, place it under water in the large container, shake off any air and put it under your small, clear container- stem side up. Invert the small container, allowing no air to enter it. Repeat the experiment with your other small clear container, but don’t add a plant. This is your control. If you’re using test tubes, you can put them in small cups or beakers so they don’t tip over. (See photo above.)

Place your experiment in bright sunlight or near a strong lamp and observe what happens. You should see oxygen bubbles form on the plant as it performs photosynthesis. In a test tube, you will eventually see some water displaced by oxygen.
What happens if you duplicate the experiment in a room with no light?
Tap water contains some carbon dioxide. How do you think the experiment would work with lake or pond water?
The Science of Hard-Boiled Eggs
- by KitchenPantryScientist
You can’t judge an egg by its shell, but you can use science to figure out whether or not it’s fresh.

Imagine an egg. It can be white or brown, since they’re identical except for shell color. There are two membranes inside an eggshell, separating it from the inside of the egg and helping to keep it safe from microbial invaders.
Under the membranes is the egg white, made up of proteins and water, and the yolk, which also contains fat and is enclosed in a sac. Tiny rope-like structures anchor the yolk between either end of the egg. The egg white contains a substance called lysosyme, which is a potent antibacterial. Eleven percent of an egg’s weight is made up by shell, 58% by white and 31% by yolk.
When a hen first lays an egg, the raw egg white contains carbon dioxide, making it look cloudy, and the proteins in the egg white are freshly folded into their correct protein shapes, so it will hold a nice shape in a pan. However, egg shells contain thousands of tiny pores, some big enough to see with the naked eye, and as an egg sits, it changes.
The contents begin to slowly shrink, and a small air pocket forms between the two membranes, usually at the large end. The egg’s pH, about 7.6 when first laid, rises as the egg ages and loses carbon dioxide. In just a few days, the pH may reach 9.7, causing the egg white to look clear and spread out more in a pan when the egg is broken.

The nicer shape and centered yolk of fresh eggs is why they’re recommended for frying. But why are older eggs better for boiling, and why does the yolk turn green sometimes?
Fresh eggs are harder to peel. When you boil an egg, it cooks from the outside to the inside, and its proteins become unfolded, or denatured. The denatured proteins are more likely to stick to the membranes on the eggshell of a fresh egg because the pH is lower. According to “FOODS, A Scientific Approach” by Charley and Weaver, eggs are easier to peel if their pH is greater than 8.7. In other words, old eggs that have lost carbon dioxide have a higher pH (are less acidic) and are easier to peel.
Sometimes, when you boil eggs, you see a greenish/gray/blue layer on the outside of the yolk. It’s the harmless product of a chemical reaction between the iron in the egg yolk and sulfer-containing proteins in the white. You can try to avoid it by using fresh eggs, using hot (not boiling water) to cook the eggs, by plunging eggs into ice water immediately after cooking, and by promptly removing the shells.

If you’ve heard of candling eggs, it involves shining a strong light through a raw egg to look at yolk position, air sac size and white clarity. You can also tell that an egg is older if it floats in water, due to the enlarged air sac.
Ideally, to cook perfect hard boiled (large) eggs, you put them in cold water, bring the water to a boil, remove the heat and let the pan stand with the lid on for 17 minutes before removing the eggs and plunging them into cold water. Alternately, boil large eggs for eleven minutes and put them in ice water to stop the cooking. For perfect eggs, prick the large end of your eggs with a pin to release the air in the air sac.
Spring Break Boredom-Busters on KidScience App
- by KitchenPantryScientist
Whether you’re home or away, science can make any vacation more fun. You can collect data for real citizen science research projects by searching SciStarter.com or do your own experiments. KidScience app, based on the science projects on this website, puts fun science experiments at your fingertips on your iPhone, iPod Touch or iPad, no matter where you are.
I showed Kare11 viewers three of our favorite KidScience experiments: Red Cabbage Litmus Paper, Fizzy Balloons and Marshmallow Slingshots (using stuffed animals like Angry Birds to learn a little about the conservation of energy. Click here to watch the TV segment.
How will you mix a little science into your spring break?
Kitchen Science
- by KitchenPantryScientist
“Are you a good cook?” was the first thing Dr. Tsneo Suzuki asked when I sat down in the office next to his cancer research lab at the University of Kansas. I stared at the picture of his wife, who I later learned had passed away from breast cancer, and wondered whether I should be offended.
After all, I was in my twenties and had five years of molecular biology experience under my belt. But I understood why he asked the question. Once you figure out how to test a hypothesis, most science experiments involve following recipes, which scientists call protocols. Generally, if you can read directions and mix things together in the correct order, in the right proportions, you can do things like amplify DNA and clone genes into bacteria.
So I truthfully answered “Yes, I’m a pretty good cook,” and got the job.

Food preparation is like a science experiment. If you can follow a recipe, you should get something close to what you set out to make, because often the ingredients will interact with each other to make something new. This is the very definition of a chemical reaction. Everything you cook with, from water to baking soda, is just a collection of molecules.
Here’s a collection of some food science experiments on my website. Since I love to cook, I hope to add more in the future! Leave a comment if you have other favorite kitchen science experiments, and I’ll try to add them to the list.
Testing Foods for Starch– Add a drop of iodine and watch for color change to detect starch.
Crock Pot Microbiology: Making yogurt from scratch is a delicious experiment
Yeast Experiment: Pyramids, Pasteur and Plastic Baggies– Grow yeast in a plastic bag to see how they make bread rise.
Emulsions: Mayonnaise and Vinaigrette– Mix the un-mixable using surfactants.
Curds and Whey: Make glue and plastic from milk and vinegar.
Gluten Ball– Explore the protein that makes bread chewy.
Red Cabbage Juice CO2 experiment– Use the pH-sensitive pigment in red cabbage to illustrate how CO2 can acidify liquids (and why soda is bad for your teeth.)
Homemade Petri Plates: test surfaces around your kitchen and house for microbes. Use to test fingers before washing, after washing with water alone, after washing with soap, and after using hand sanitizer.
So remember, cooking can make you a better scientist, and doing science can make you a better cook.