Rainbow Science

 - by KitchenPantryScientist

Happy Saint Patrick’s Day! Yesterday, I demonstrated some fun rainbow science on The Jason Show. Click here to watch!

As part of the segment, I featured the “Rainbow Slime” experiment from my new book, “STEAM Lab for Kids,” which you can order from Amazon, Barnes and Noble, or your favorite online retailer. Here’s a sneak-peek at a few photos from the book.

Rainbow Slime from “STEAM Lab for Kids” by Liz Lee Heinecke

Rainbow Slime from “STEAM Lab for Kids” by Liz Lee Heinecke

Rainbow Slime from “STEAM Lab for Kids” by Liz Lee Heinecke

Football Science Experiments for Super Bowl 52

 - by KitchenPantryScientist

Footballs take crazy bounces, partly due to the occasional transformation of rotational (spinning) energy to linear kinetic (forward motion) energy when  a football hits the ground. We used an experiment created by Kelly O’Shea to replicate this cool phenomenon! Try it to see for yourself how the second or third bounce can be higher than the first one! No wonder it’s so hard to catch a football!

For more Super Bowl physics fun, make paper footballs and have your own match during the big game. Here’s my ScholasticParents.com article on how to make them, how to play and the physics behind the fun! To see paper footballs in action and learn why players stay close to the ground when they tackle, check out this Super Bowl Science segment (above) I did this week on our Twin Cities CBS station.

And if you’re a Vikings fan like me…

Three Fun Science Experiments Using Bubbles

 - by KitchenPantryScientist

Blowing bubbles is a fun way to experiment with surface tension.

kitchenpantryscientist.com

Dish detergent lowers the surface tension of water which allows you to blow bubbles, and additives like glycerine, corn starch and baking soda make bubbles more elastic and resistant to popping. (More science below.)

  1. You can use a statically-charged balloon to make a bubble glide across glass as if by magic: (Instructions in video.)

2. Create a square bubble by making a cube from straws: (Submerge the cube in bubble soap made using the recipe below, pull it out, blow a bubble above it and let the bubble drop into the cube)

3. Or blow a bubble inside a bubble inside a bubble by coating a smooth surface like glass and using a straw dipped in bubble mix (recipe below) to blow bubbles inside bubbles:

kitchenpantryscientist.com

Here’s our recipe (from Outdoor Science Lab for Kids- Quarry Books 2016) that can also be used to make giant bubbles:

Mix together:

-6 cups distilled or purified water

-1/2 cup cornstarch

-1 Tbs. baking powder

-1 Tbs. glycerin (Corn syrup may be substituted for glycerine.)

-1/2 cup blue Dawn or Joy dish detergent. (Fairy, Dreft or Yes work well in Europe.)

image from “Outdoor Science Lab for Kids” Quarry Books 2016

The Science Behind the Fun (from Outdoor Science Lab for Kids-Quarry Books 2016)

Water molecules like to stick together, and scientists call this attractive, elastic tendency “surface tension.” Surfactants like detergent molecules, on the other hand, have a hydrophobic (water-hating) end and a hydrophilic (water-loving) end. This makes them very good at reducing the surface tension of water.

When you add dish detergent to water, the lower surface tension allows you to blow a bubble by creating a thin film of water molecules sandwiched between two layers of soap molecules, all surrounding a large pocket of air.

Bubbles strive to be round. The air pressure in a closed bubble is slightly higher than the air pressure outside of it and the forces of surface tension rearrange their molecular structure to have the least amount of surface area possible. Of all three dimensional shapes, a sphere has the lowest surface area. 

Of course, other forces, like your moving breath or a breeze can affect the shape of bubbles as well.

The thickness of the water/soap molecule is always changing slightly as the water layer evaporates and light waves hit the soap layers from many angles, causing them to bounce around and interfere with each other, giving the bubble a multitude of colors. Solutions like glycerine and corn syrup slow water layer evaporation, allowing bubbles to stick around longer.

Rainbow Icicles -Winter Science for Kids

 - by KitchenPantryScientist

Grab your coat and head outside to try this fun winter science project!

Rainbow Ice (kitchenpantryscientist.com)


You’ll need:

A large plastic zipper bag

Cotton kitchen twine

a toothpick or wooden skewer

ice-cold water

food coloring

a spray bottle

a squeeze bottle or syringe (optional, but helpful)

a very cold day (below 10 degrees F works best, but you can try it on any day when it’s below freezing)


Note: This experiment takes lots of playing around and results will vary depending on how cold it is outside. Remind your kids (and yourself) to be patient and try it on a colder day if it doesn’t work the first time around! If the bag leaks too quickly, try making one with smaller holes around the string.

Rainbow Ice (kitchenpantryscientist.com)

What to do:

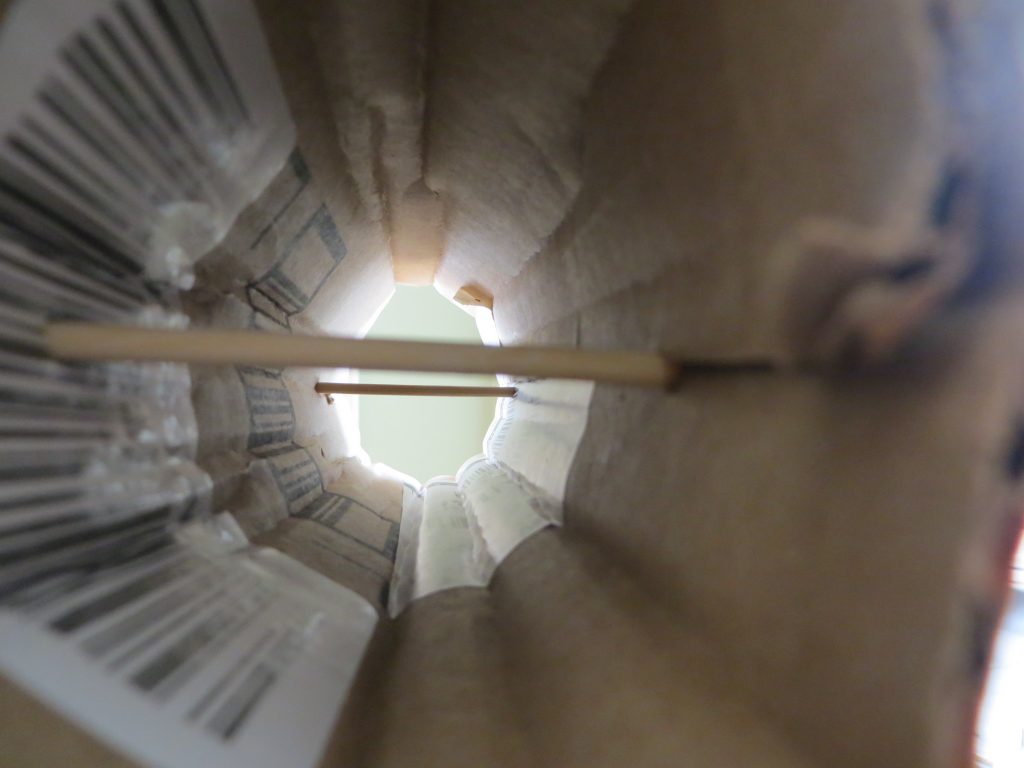
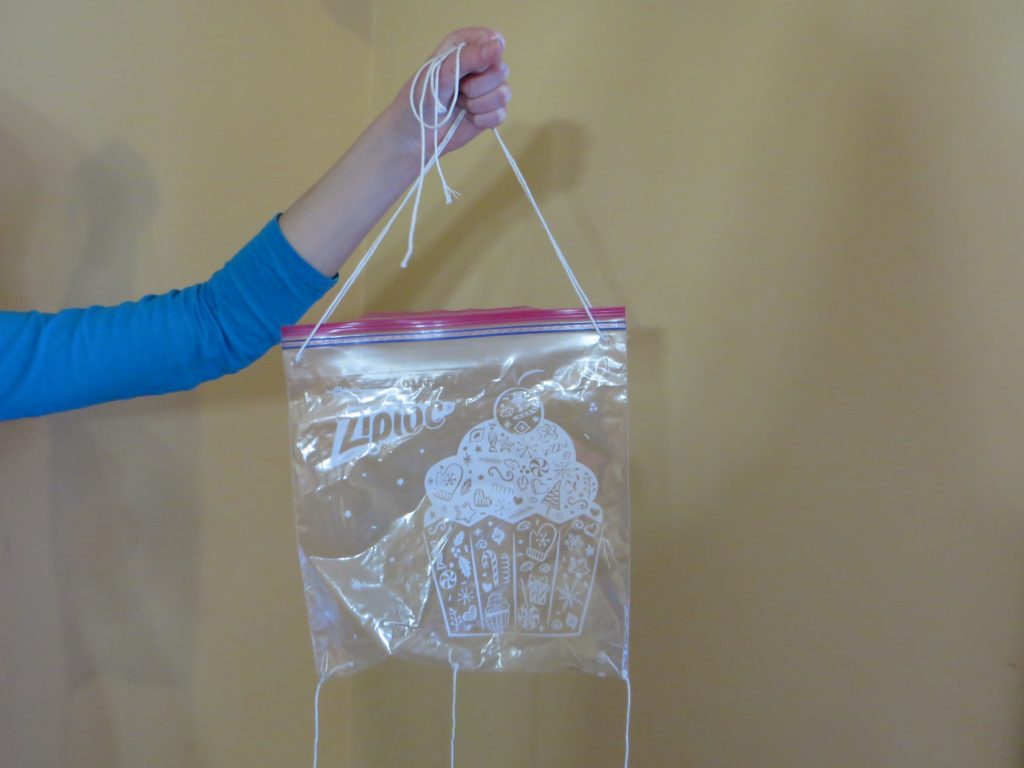
  1. Use a toothpick or skewer to poke 3 small holes in the bottom of a zipper plastic bag. Make one in the middle and one on each end.
  2. Cut three long (3 feet or so) pieces of kitchen twine and knot them at one end.
  3. Carefully thread the twine through the holes in the bag so that the knots are inside the bag to keep the strings from falling through. Try to keep the holes from getting too big, since the bag will be filled with water and you’ll want it to drip out very slowly around the string.

Rainbow Ice (kitchenpantryscientist.com)

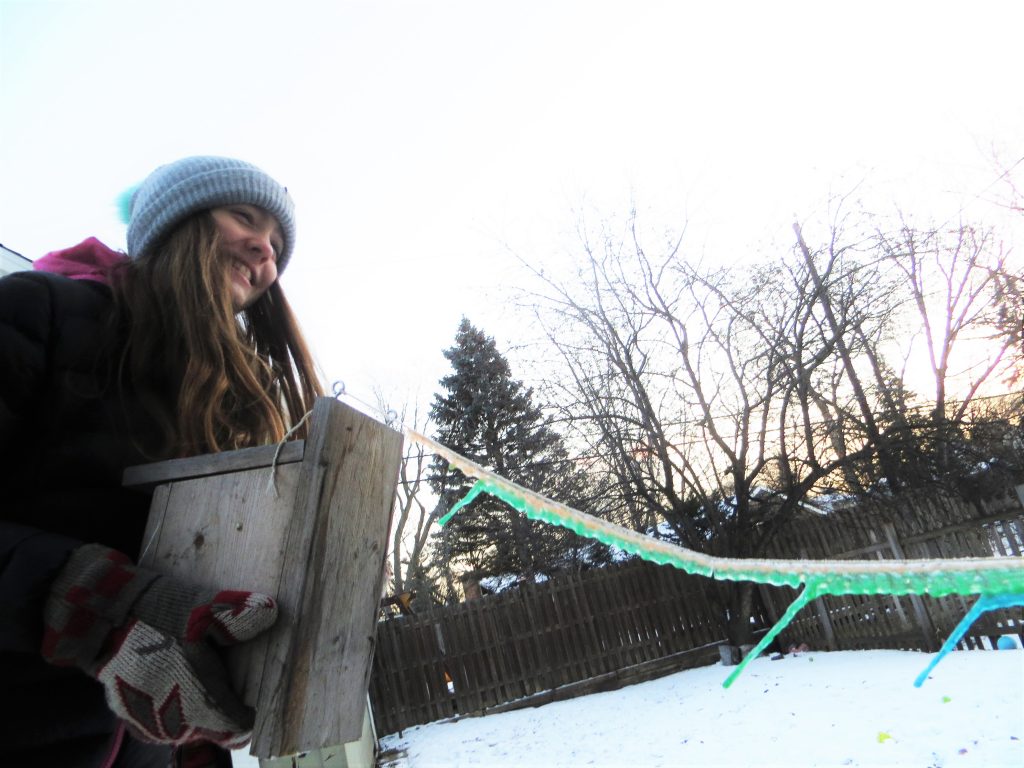
4. Attach two more pieces of twine to each top corner of the bag (above the zipper) to use for hanging the bag

5. Go outside and hang the bag from a low tree branch or railing.

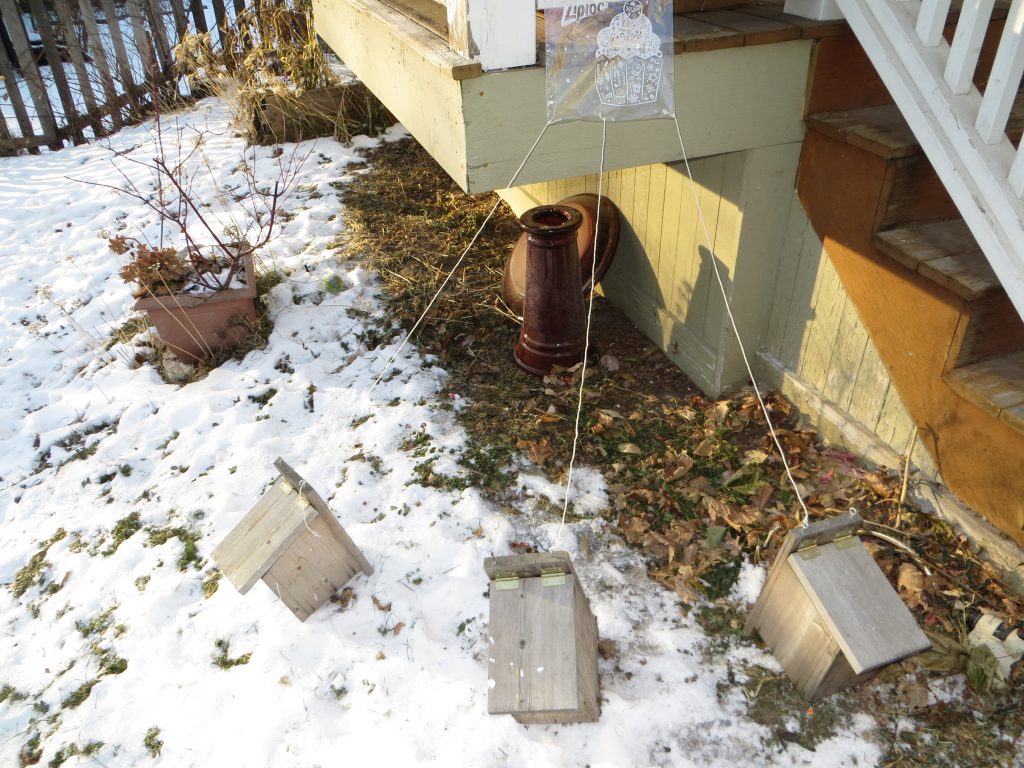
6. Tie each of the three strings to something on the ground, like a rock, piece of wood, or the handle of an empty milk carton filled with water to weight it down. Arrange the objects so that the strings loosely radiate out at around a 45 degree angle. (See photo)

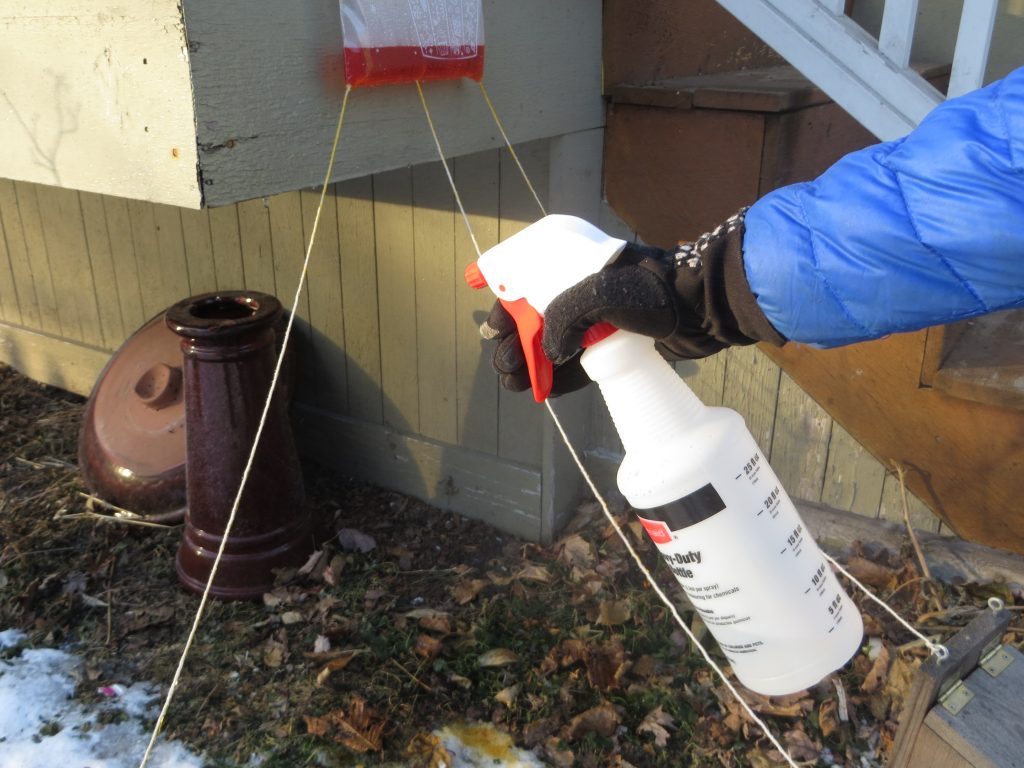
7. Add food coloring to some ice-cold water in a pitcher.

8. Fill the spray bottle with ice-cold water.

9. Add the cold colorful water to the zipper bag hanging outside. Zip the top of the back to slow the rate of leaking.

10. Immediately spray the strings with water to guide the leaking water down the strings.

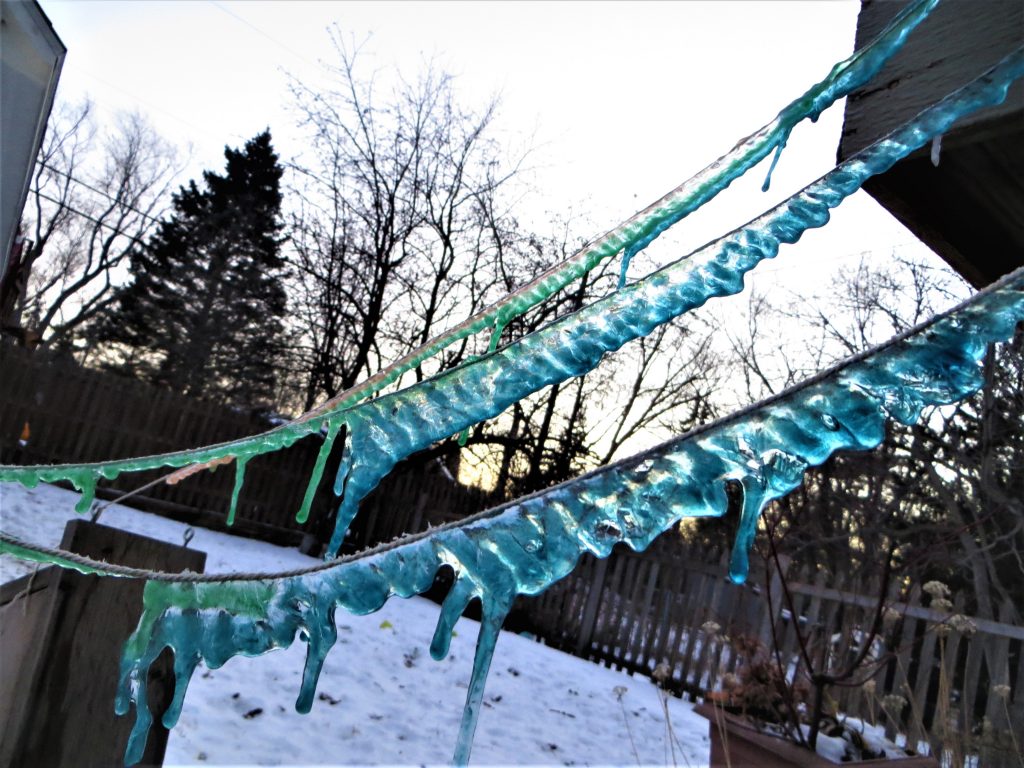
10. Wait for the water on the strings to freeze. Use your syringe to add a little bit more water to the strings (same color) and wait for them to freeze again. Repeat until you have a nice layer of ice/icicles.

11. Refill the bag, using a different color of ice-cold water. Spray the strings lightly again. Repeat step 11.

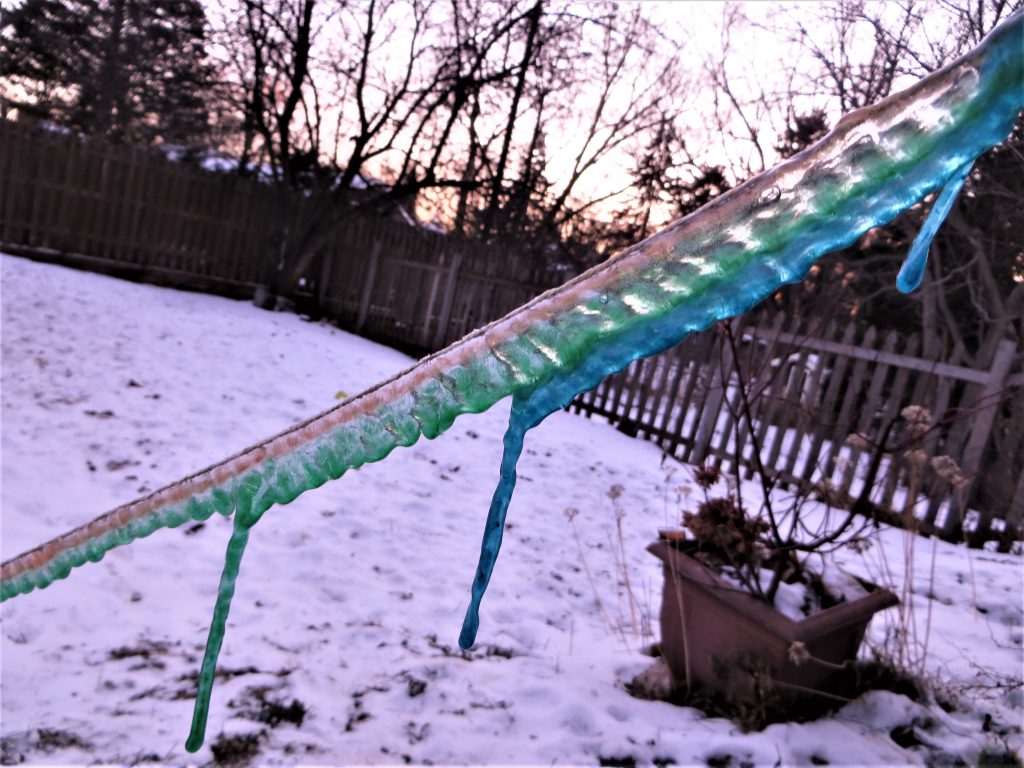
12. Add layers of color to the icicles until you’re happy with the way they look!

Rainbow Ice (kitchenpantryscientist.com)

The science behind the fun:

Icicles form when dripping water starts to freeze. Scientists have discovered that the tips of icicles are the coldest part, so that water moving down icicles freezes onto the ends, forming the long spikes you’ve seen if you live in a cold climate. When you add different colors of water to icicles in sequence, the color you add last will freeze onto the tip of the ice.

Here’s a cool article on icicle science by an expert, and another great article on “Why Icicles Look the Way They Do.”

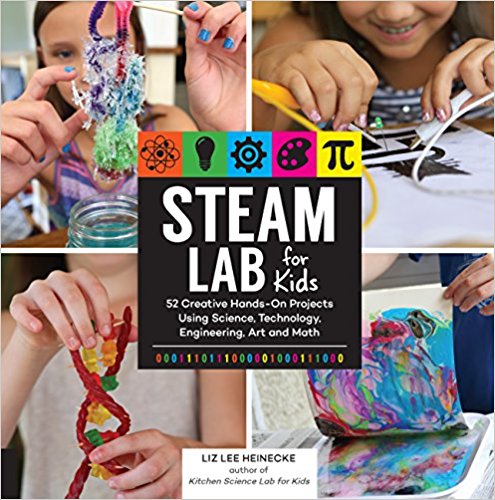
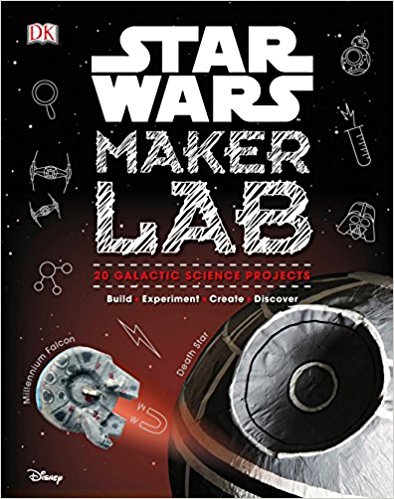
You’ll find more fun ice science experiments in my book “Outdoor Science Lab for Kids” and in my upcoming books “STEAM Lab for Kids” (Quarry Books April 2018) and “Star Wars Maker Lab” (DK- July 2018)


Rubber Band Car

 - by KitchenPantryScientist

It’s fun to make a rubber-band powered car from cardboard, straws, and wooden skewers!

You’ll need:

-heavy cardboard

-rubber bands

-glue (a glue gun works best)

-a plastic straw

-wooden skewers

-a CD (or a compass)

-a ruler

-screwdriverCu

-pipe cleaner (optional)

Hints: Parental supervision recommended for hot glue gun use.

Here’s what you’ll be building:

Rubber Band Car kitchenpantryscientist.com

What to do:

  1. Wrap cardboard around a large spice bottle so you can see how it bends. Cut a piece of cardboard about 9 inches (22cm) long to wrap around the bottle. Trim off the excess cardboard and tape it to create a tube.

    kitchenpantryscientist.com

  2. Trace a CD or use a compass to make 8 circles that are around 4 and 1/2 inches (12 cm) in diameter. Use a ruler to make a square around each circle and then diagonal lines to mark the center of each circle. Cut them out and glue two circles together until you have four wheels. Use skewers to poke holes through the center of each wheel.

    kitchenpantryscientist.com

  3. Poke skewers through each end of the cardboard tube, about 1 and 1/2 inches (4 cm) from the end of each tube. Make sure that the skewers are parallel and that they line up when you look through the end of the tube.

    kitchenpantryscientist.com

    kitchenpantryscientist.com

  4. Use a screwdriver to make the holes larger.

    kitchenpantryscientist.com

  5. Cut 4 pieces off of a straw that are about 1/2 inch (1.5cm) long. Glue them to the outside of each hole in the tube. Use a skewer to help align them. The skewer should spin freely.

    kitchenpantryscientist.com

  6. One at a time, put wheels on the skewers and glue the OUTSIDE of the wheel to the skewer. Make sure that the wheels are parallel to the car, and to each other as they dry. Cut off excess skewer.

    kitchenpantryscientist.com

    kitchenpantryscientist.com

  7. Poke a skewer down the center of one end of the car, parallel to the wheels so that it’s sticking out about 1 inch (3 cm.) See image above.
  8. Decorate the car!
  9. Tie three thin rubber bands together and hook them over the skewer that’s sticking out. If you have a pipe cleaner or wire, hook it onto the other end of the rubber bands. Drop the rubber bands down through the center of the tube.

    kitchenpantryscientist.com

  10. Grab the rubber bands from the end opposite where they are attached to the car. Remove the pipe cleaner hook and wind them around the skewer to create tension in the rubber bands. Wind them until they’re tight.

    kitchenpantryscientist.com

  11. Set the car down and let the wheels start to spin to see what direction the car will go. When you’re ready, let go!
  12. Measure how far the car traveled.

Enrichment: How can you make the car go faster or farther. Try using different kinds and numbers of rubber bands. How could you redesign the car to make it work better?

The Science Behind the Fun:

In this experiment, you use your body’s energy to twist rubber bands around the wooden skewer axle of a cardboard car. The energy is stored as elastic energy in the tightly-stretched rubber bands. When you let the car go, the rubber bands apply enough force on the axle to turn the wheels on the car and elastic energy is transformed into the energy of motion, which is called kinetic energy.


Mirror Image Plant Prints

 - by KitchenPantryScientist

Yesterday on Twin Cities Live, I demonstrated some fun botanical science projects for learners of all ages, including Vegetable Vampires and Leaf Chromatography.

This fun art/science project lets you transfer plant pigments to cloth, creating beautiful prints of your favorite leaves and flowers. It’s especially great for fall, when there are so many colorful leaves around.

Mirror Image Plant Prints- kitchenpantryscientist.com

You’ll need:

-Fresh leaves and flowers (Dry leaves won’t work.)

-A hard, smooth pounding surface, like a wooden cutting board or carving board

-Wax paper or plastic wrap

-Mallets or hammers

-Untextured cotton cloth, like a dishtowel. Heavy cloth works better than very thin cloth.

-*Alum and baking soda to treat cloth (This is optional. I don’t pre-treat my fabric, but the treatment step will help bond and preserve color, if you want to frame your prints. You can also buy fabric that’s pre-treated for dyeing.)

Mirror Image Plant Prints- kitchenpantryscientist.com

Safety tips: Protective eye wear is recommended. Young children should be supervised when using mallets and hammers.

What to do:

*If treating cloth: The day before you do the project, add 2 quarts water to a large pot. Add 1 Tb alum and 1 tsp baking soda to the water. Add the cotton and bring to a boil. Simmer for 2 hours, turn off heat and soak for at least two hours. Let fabric dry.

The next steps are the same, whether you’re using an untreated piece of cotton or treated cloth.

  1. Take a walk to collect colorful leaves and flowers. Choose plants that can be flattened. Flowers with huge centers, like coneflowers don’t work as well, but petals may be removed and pounded.
  2. Cover the pounding surface with waxed paper or plastic wrap.
  3. Cut a piece of cloth that will fit on the pounding surface when folded in half. Iron the fold.
  4. Open the cloth and lay it on the pounding surface. (See image above)
  5. Arrange leaves and flowers on the cloth.

    Mirror Image Plant Prints- kitchenpantryscientist.com

  6. Fold the cloth over the plants and pound it with the hammer or mallet. If you’re using a hammer, pound more gently.
  7. Pound until you can see the forms of the leaves through the fabric. As the pigment leaks through, you’ll see the outlines of what you’re smashing. Hint: Hammers work better than mallets for fall leaves. For juicy leaves and flowers, use a mallet or hammer gently.

    Mirror Image Plant Prints- kitchenpantryscientist.com

  8. When you’re finished pounding, unfold the fabric to reveal the print you created. Remove the leaves and petals.

    Mirror Image Plant Prints- kitchenpantryscientist.com

  9. Label the image with plant names, enhance it with paint or markers, or leave nature’s design to speak for itself.

The Science Behind the Fun:

Pigments are compounds that give things color, and many of them are found in nature. Flowers, leave, fruits and vegetables are full of brilliant pigments. In this experiment, we transfer plant pigments to cloth by bursting plant cells using pressure from a hammer or mallet.

The green pigment found in leaves is called chlorophyll. In the fall, many trees stop making chlorophyll, and the red, yellow and orange pigments inside the leaves become visible.

Although you create a mirror image of leaves and flowers, you’ll notice that the color may be more intense on one side of the print. A waxy covering called a cuticle covers leaves, and is sometimes thicker on the top than on the underside of the leaf. It may affect the transfer of pigment to the cloth, making it easy to see structures like veins on the leaf print.

Enrichment:

What parts of the leaf can you identify in the print you created?

Six Cool Facts about the 2017 Total Solar Eclipse

 - by KitchenPantryScientist

In less than two weeks, the kids and I will hit the road to venture into the path of totality of the August 21st total solar eclipse. We’re hoping for clear skies in St. Joseph, MO, so that we can stand under the moon-darkened sky and catch a glimpse of the Sun’s corona.

Pinhole Solar Viewer- Kitchen Science Lab for Kids (Quarry Books)

NASA’s website is one of my favorite science resources, and they have tons of great information on the upcoming total solar eclipse. Check it out to learn when and where you can watch the eclipse, and how much of the Sun will be covered up in your back yard.

To safely watch the eclipse without damaging your eyes, you’ll need National Science Foundation-approved solar viewing glasses. If you don’t have glasses, you can easily view it indirectly by making a pinhole viewer. Here’s a link to an article I wrote for Scholastic Parents on how to build a solar viewer using a shoe box and some aluminum foil.

The Exploratorium in San Francisco has a fantastic Total Solar Eclipse 2017 app that you can download for more resources and to watch the eclipse live.

Here are some of the coolest things I learned about total solar eclipses from NASA’s website:

1: During a total eclipse, it’s possible to see bright stars and planets, even in the middle of the day. (I knew it would get dark, but that’s amazing!)

2. The Sun is 400 times wider than the Moon, but it’s 400 times farther away, so they appear to be the same size if you’re looking at them from Earth. That’s why the Moon can completely cover the sun. Scientists describe this by saying that they have the same angular size.

3. If you’re in the path of the total eclipse and place a large sheet of white paper on the ground, you may see dancing “shadow bands” moments before and after the eclipse, which are created by tiny slivers of sunlight passing through the currents of Earth’s atmosphere.

4. The temperature in areas of the Moon’s shadow will briefly drop as the Sun’s light is blocked.

5. The only popular song that refers directly to an actual solar eclipse is Carly Simon’s song “You’re so Vain.” (1970 total solar eclipse in Nova Scotia) (Around 3:05 in the song.)

6. Just before a total solar eclipse, you can see flashes of light called “Bailey’s Beads”around the edges of the dark circle of the Moon. They’re caused by sunlight flashing through canyons on the Moon’s surface.

Will you be watching? The next total solar eclipse won’t traverse the continental United States until April, 2024.


Elemental Science: Gallium

 - by KitchenPantryScientist

Gallium is a soft metal related to other metals in Group 13 of the periodic table, including aluminum. It doesn’t exist as a free element in nature, but can be purified from other metallic ores, like zinc. Each gallium atom has 31 protons in its nucleus, so its atomic number is 31.

You’ll find it around you in thermometers, semiconductors, and even some LED lights, and one property that makes it so cool is that it melts from solid to liquid at low temperatures (around 85.6 degrees F or 29.8 degrees C.) This makes it easy to play with the liquid metal simply by melting it in a glass of hot water, or in the palm of your hand.

You can see the crystal structure in the side of the gallium “Lego” we created in play dough! KitchenPantryScientist.com

*Not for small children! Wearing gloves and safety goggles is recommended when observing gallium. Although is is fairly safe, gallium will coat hands with a lead-like substance. (Wash with soap and water to remove.) Gallium can also damage other metals, so keep it away from jewelry, like rings. I always recommend doing your research, as well as checking out the MSDS (Material Data Safety Sheet) of a new substance before using it to know what precautions to take.

We ordered 99.99% pure gallium on Amazon. It arrived in plastic tubes,in crystal form, but by placing the tubes in hot tap water, it melted easily. Eye droppers work well for moving the melted metal around. I’d recommend using a rimmed paper plate to contain the mess.

Try imprinting a Lego or toy car in play dough and pouring the molten gallium into the imprint. When it solidifies, you’ll have a cast of the item you imprinted! (It takes a while.) Gallium coats glass to create mirrored surfaces, so you can pour some into a small jar and use it to coat the sides. If you leave some in a puddle on the bottom of an upside-down jar, you can watch crystals form.

In other words, it’s pretty awesome!

Kid-Friendly “Elephant Toothpaste”

 - by KitchenPantryScientist

I’ve been hearing about this science demonstration for years, and finally decided to try it! If you do it at home, kids should wear safety goggles or sunglasses to protect their eyes, and adults should pour the 3% hydrogen peroxide into the bottles.

You’ll need:
a tray or cookie sheet
3% hydrogen peroxide (available at most pharmacies and discount stores)
liquid dish soap
dry yeast (2 packets)
food coloring
empty 16 oz bottle

What to do:
1. Pour 1 cup hydrogen peroxide into an empty 16oz bottle. (A funnel helps!)
2. Add 2 Tbs. liquid dish soap to the bottle and mix well with the hydrogen peroxide.
3. Put 8 drops of food coloring into the bottle and swirl to mix.
4. Position the bottle on the tray.
5. Pour 2 packets of yeast into a paper cup and pinch the cup’s lip to make a pouring spout.
6. Quickly pour the yeast into the bottle, while swirling the liquid vigorously to mix well. The better you mix it, the better the experiment will work!
7. Set the bottle down on the tray before the foam emerges from the top.
8. Watch the chemical reaction between catalase in the yeast and the hydrogen peroxide create oxygen bubbles in the soap!
9. When the reactions has stopped, have an adult clean up the mess by pouring everything down the sink and rinsing the tray with water. (Normally kids should clean up, but for this one, I’d recommend an adult do it.)

The Science Behind the Fun:

Hydrogen Peroxide (H2O2) is a common household chemical that is often used to disinfect wounds and bleach hair. Certain chemicals can break it down into water (H2O) and Oxygen (O).

Dry yeast is a living fungus that produces a molecule called catalase. Catalase is very good at breaking down hydrogen peroxide quickly. When you add yeast to hydrogen peroxide that’s been mixed with liquid soap, the soap traps the oxygen and makes bubbles that push their way out of the bottle.

You may notice that the bottle feels warm. That’s because the chemical reaction produces heat and is called an exothermic reaction.