Category:Chemistry Experiments’
Halloween Science: Frankenworms
- by KitchenPantryScientist
A chemical reaction happens when you mix two or more things together to make something new.
Mixing sodium bicarbonate (baking soda) and acetic acid (vinegar) together produces carbon dioxide gas bubbles, which can make gummy worms which have been cut into very thin strips squirm and float! My kids created this experiment a few years ago! Can you think of an experiment you could do with candy?
To make Frankenworms:
1. Cut gummy worms into skinny, skinny long strips (May require adult assistance. The skinnier they are, the better they’ll work.) *Not all gummy worms are created equal. If your worms aren’t wriggling, dip them in baking soda before putting them in the vinegar!
2. Soak the worms in a bowl of water with a few tablespoons of baking soda mixed in for around 20-30 minutes.
3. Drop the baking-soda infused worms into a large, clear glass or jar full of white vinegar and watch them come to “life.”
Halloween Science: Mad Scientist’s Green Slime
- by KitchenPantryScientist
What could be more fun than creating your own green slime ? It’s easy to synthesize your own green goo using only Elmer’s glue (the non-washable kind), Borax (found in the laundry detergent section of Target and some grocery stores), green food coloring and water.
Mix together about 1/3 cup glue and 1/3 cup water with a spoon or Popsicle stick. These measurements don’t have to be exact. Add a few drops of green food coloring and stir.
To make the Borax solution, add around a cup of water to a jar. To the water, add about a Tablespoon of Borax. Shake or stir to dissolve as much of the Borax as possible. You’re making a saturated solution, so it may not all dissolve!
Here’s the fun part: Add a teaspoon at a time of the Borax solution to the glue/water mix. After each addition, stir the mixture. You’ll see long strings begin to form and stick together. Keep adding Borax until the mixture doesn’t feel sticky. It will form a shiny playdough-like substance. If you add too much Borax solution, it will feel wet, but you should be able to squish it around in your hands to absorb the extra water! The slime isn’t toxic, but Borax is soap, so don’t eat it!
What happens? Mixing Elmer’s glue with water forms a substance called a polymer, which is a long chain of molecules, sort of like a string of pearls. (A molecule is the smallest amount of a specific chemical substance that can exist alone, like H2O, a single water molecule). The polymer in school glue is called polyvinyl acetate.
The Borax solution (sodium tetraborate) is a cross-linking substance that makes the polymer chains stick together. As more and more chains stick together, they can’t move around and the goo gets thicker and thicker. Eventually, all the chains are bound together and no more Borax solution can be incorporated.
You can store the slime in plastic bags. If you want to make a larger batch, just remember to mix equal amounts of glue and water and then add as much Borax solution as needed.
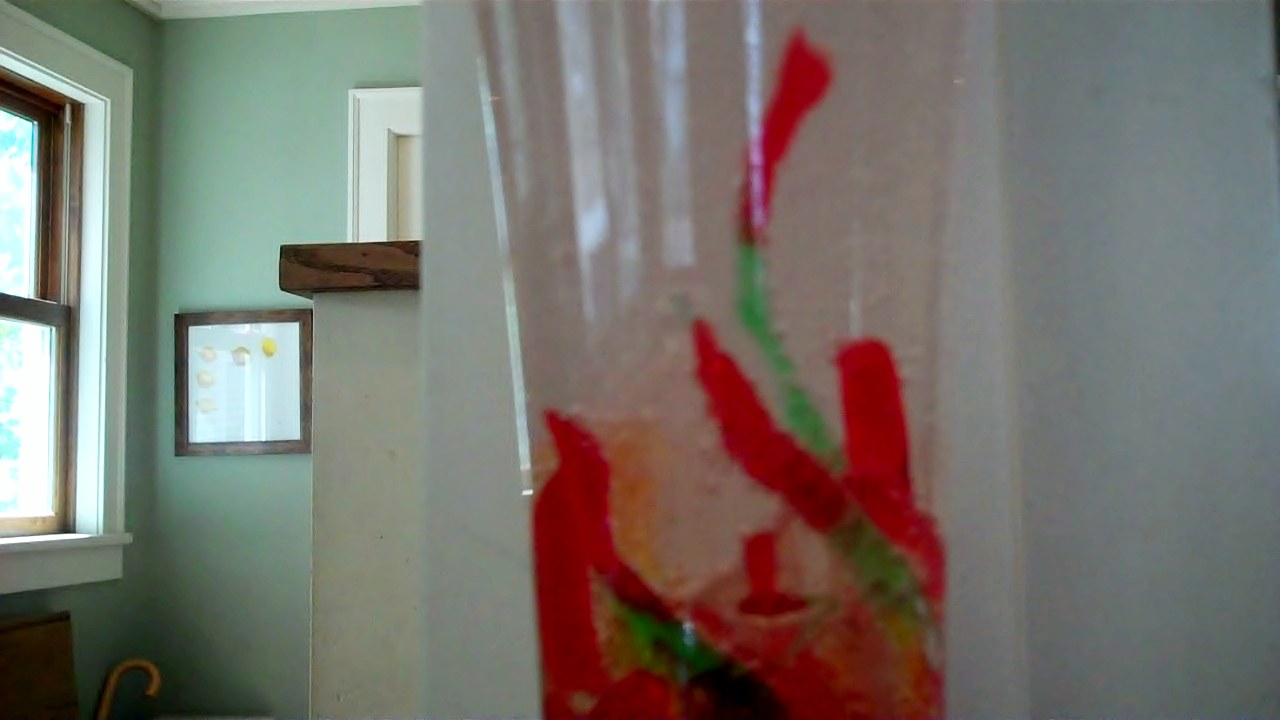
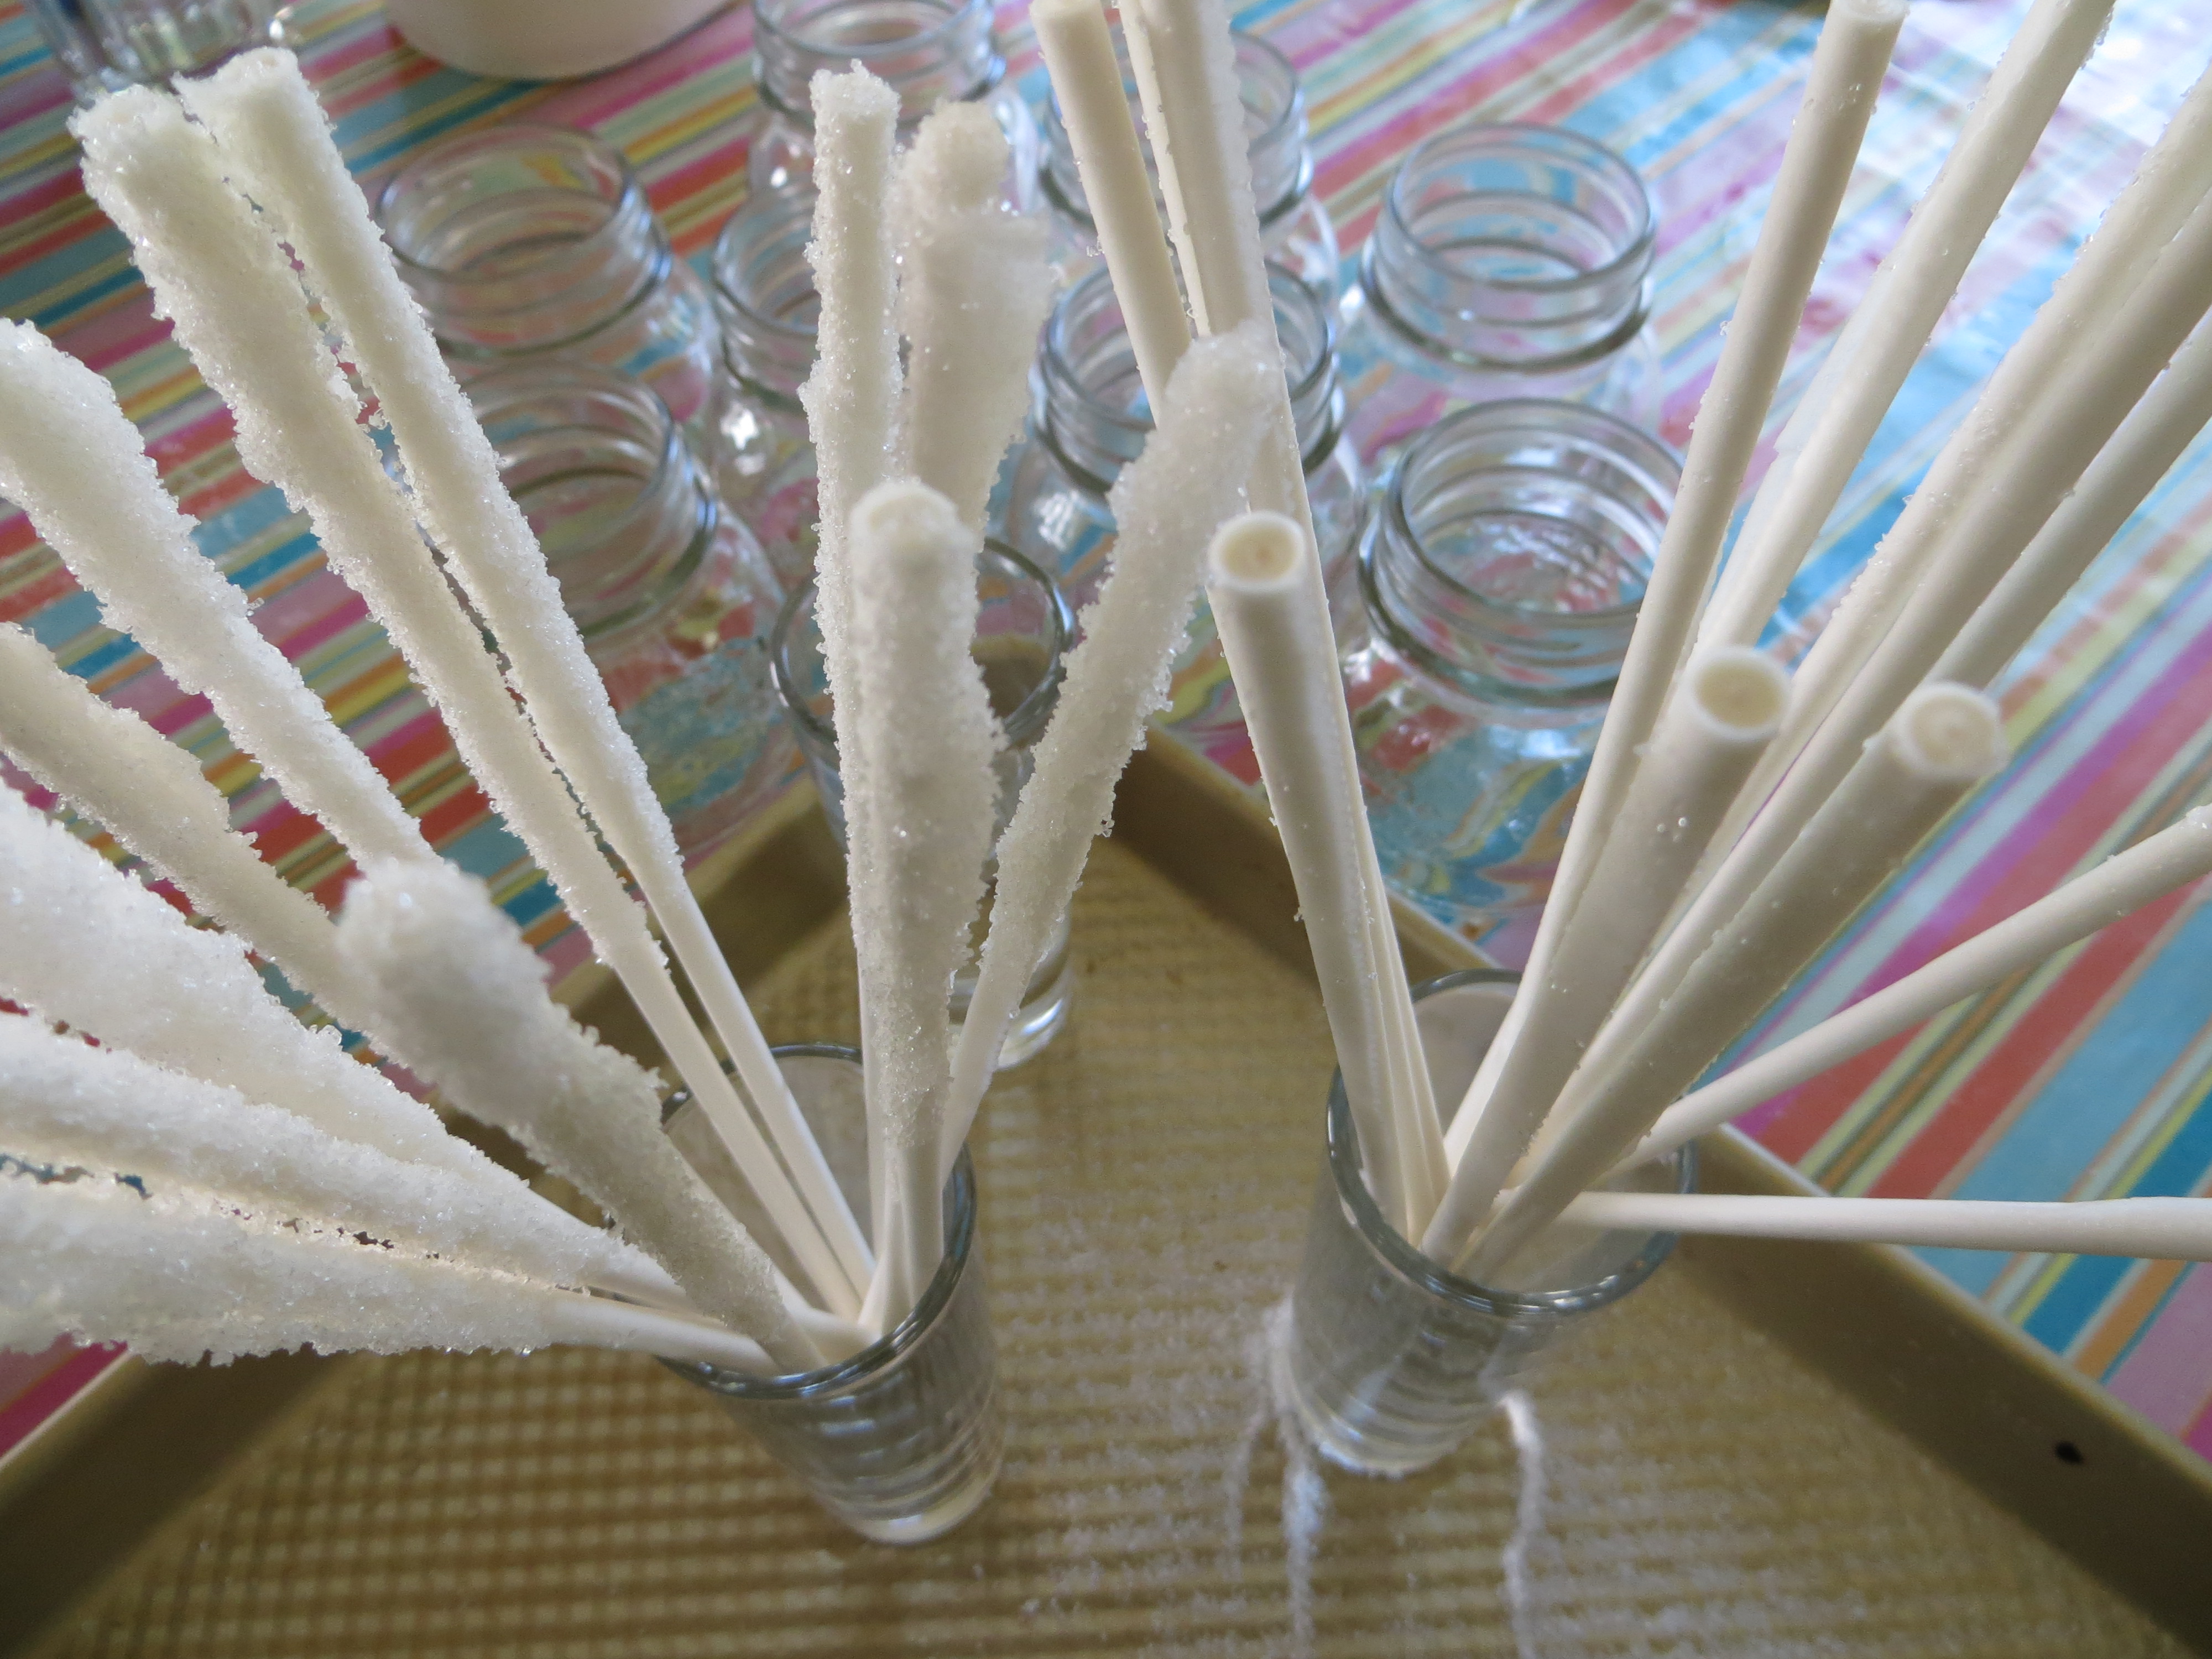
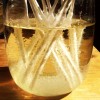
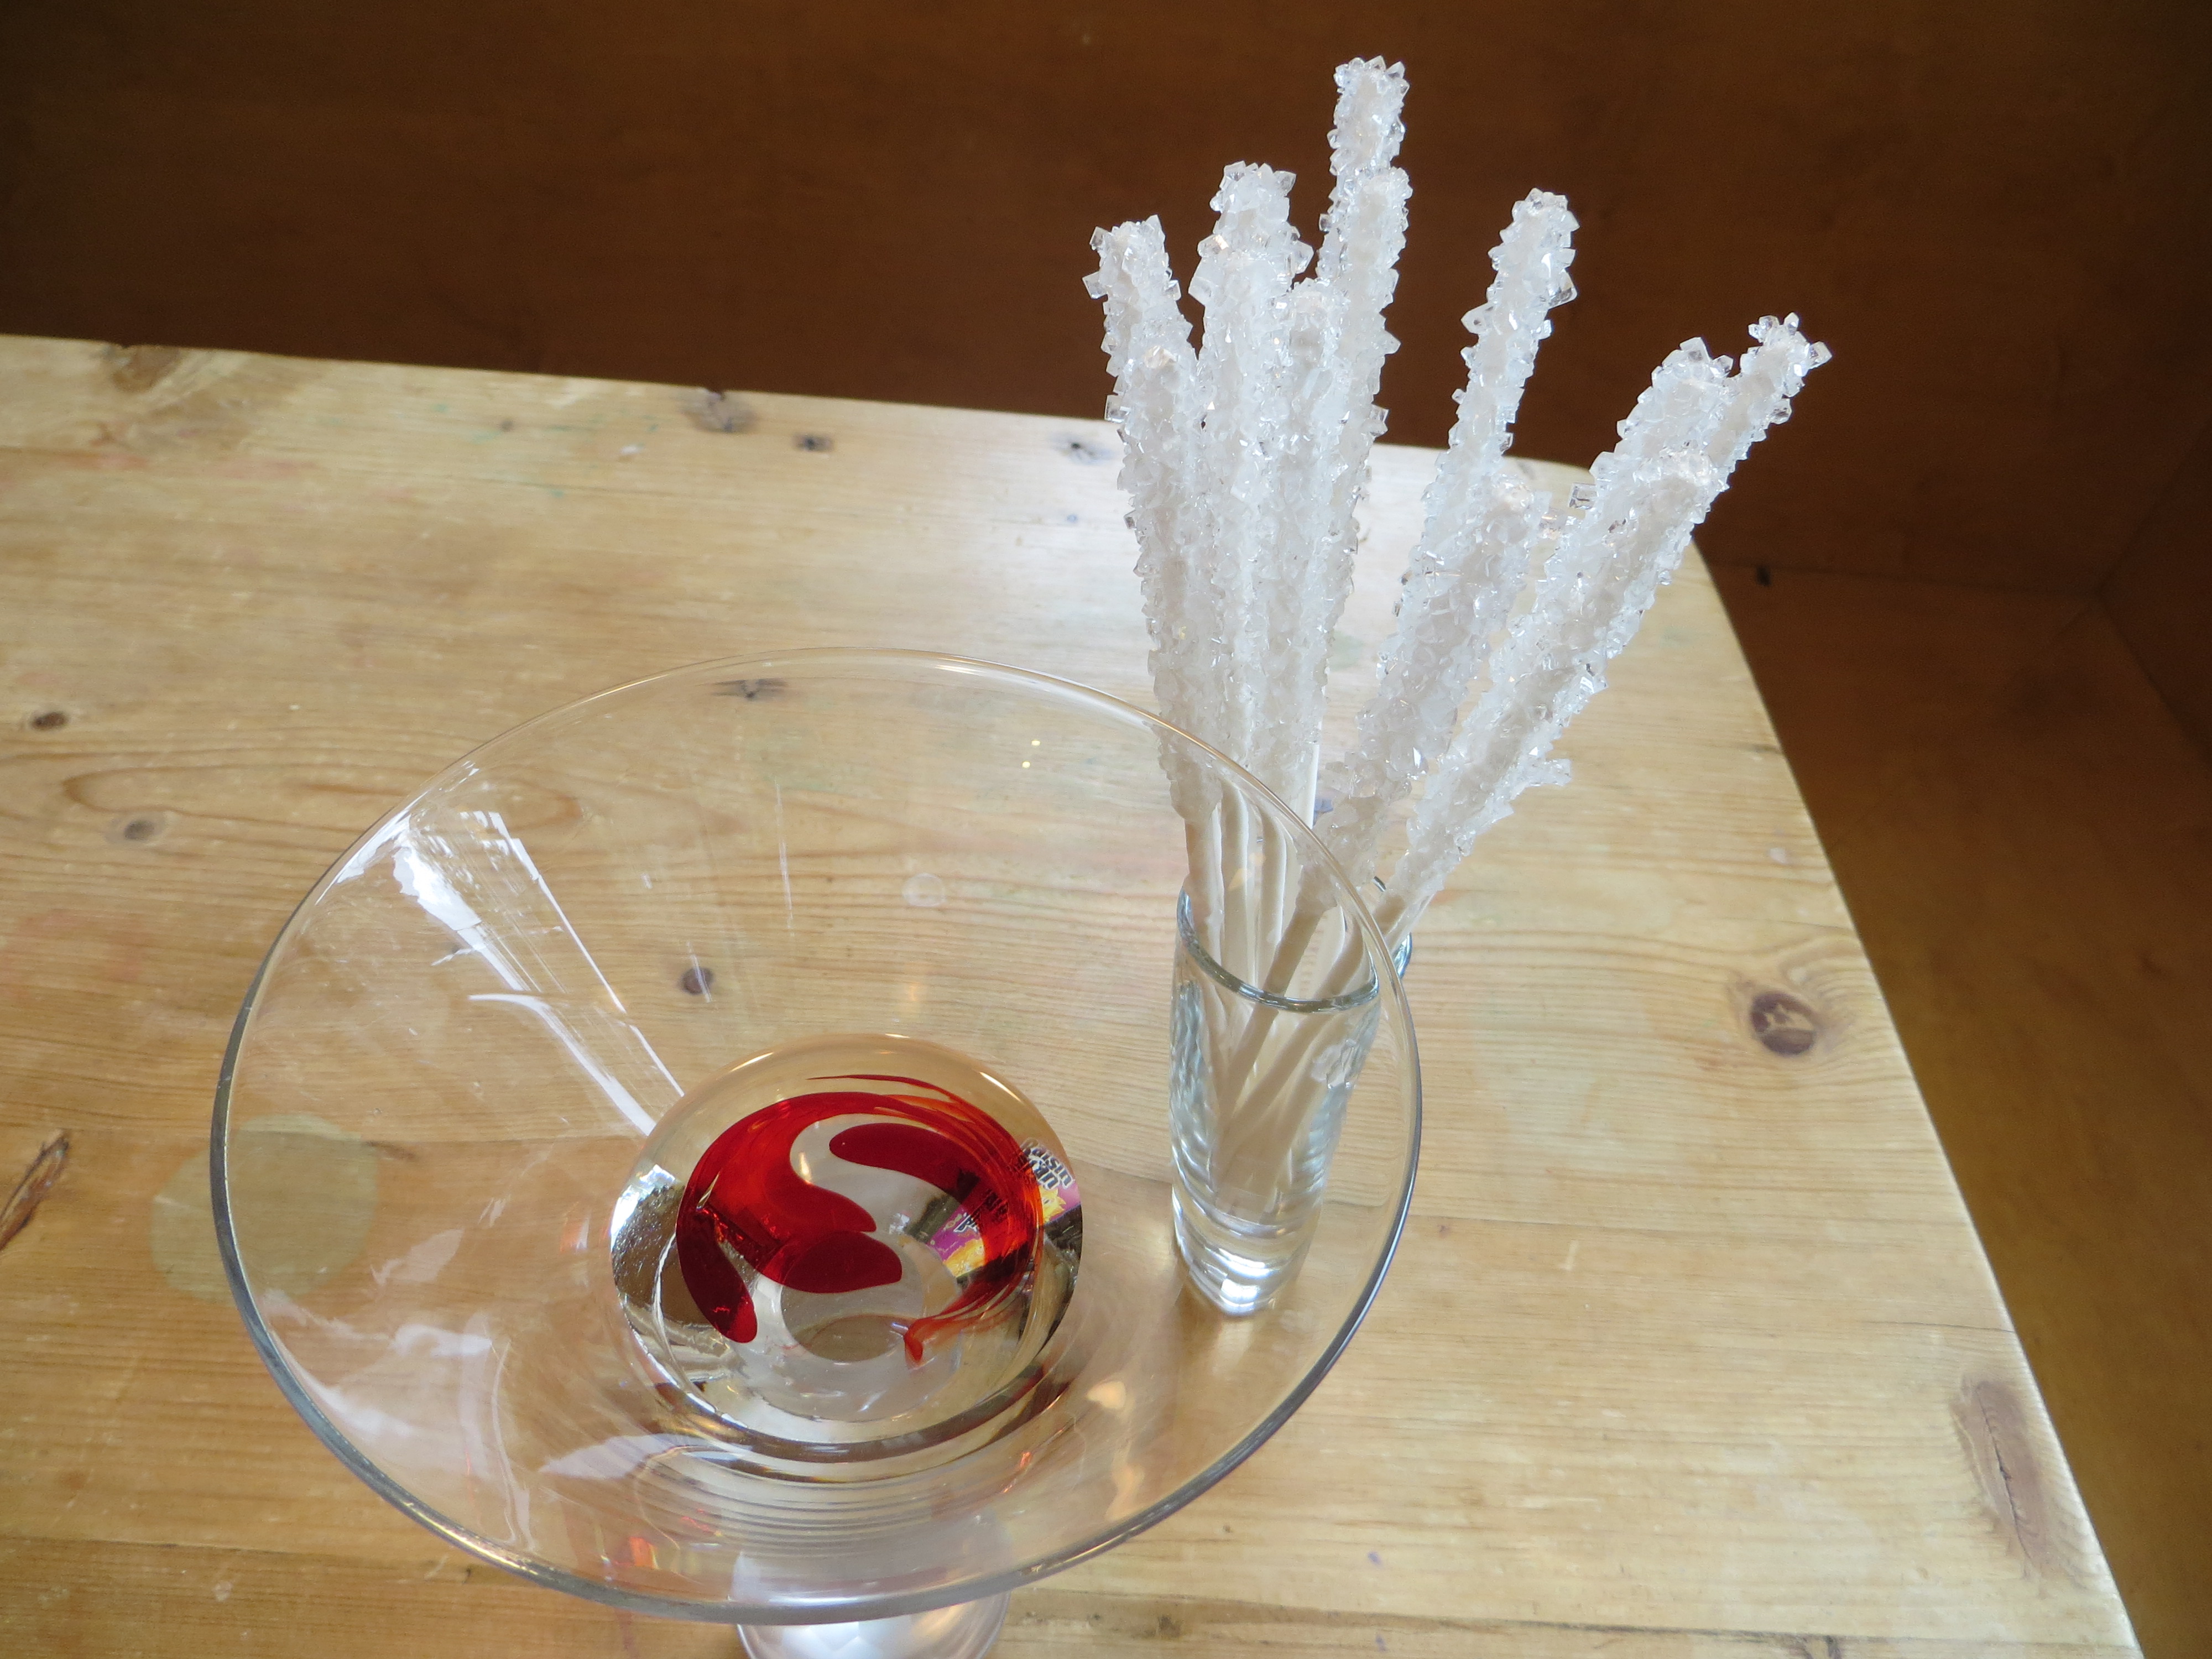
Halloween Science: Vampire Rock Candy
- by KitchenPantryScientist
Think Halloween science!
I’m going to post a spooky experiment every few days from now until Oct.31st. They’re great for school or home Halloween parties, and some even make groovy Halloween Decorations!
This bloody candy experiment takes a few weeks , but is worth the wait! If you start soon, you’ll have gorgeously gruesome rock candy, dripping with sugary fake blood, in time for Halloween.

This experiment requires adult supervision for boiling and handling the hot sugar syrup. Once it’s cooled down, kids can take over.
To make 12-15 sticks, you’ll need the following:
-2 and 1/2 cups white granulated sugar
– 1 cup water
-cake pop sticks or wooden skewers
-red food coloring
- Dip one end of cake-pop sticks or wooden skewers in water and then roll them in granulated white sugar.
 The sugar should cover 2-3 inches of the stick. Let them dry completely. These are the seeds for the sugar crystal growth.
- Boil 2 cups water and 5 cups sugar until sugar is dissolved as much as possible. It should look like syrup. Once it cools, this syrup is your supersaturated sugar solution.
- Let syrup sit until it is no longer hot and pour into a large glass jar or deep bowl.
- When syrup is completely cool, set the sugary end of the sugar-seeded cake pops or skewers into the syrup, evenly spaced in the jar. Cover loosely with plastic wrap and let them sit for about a week. Gently move the sticks around occasionally, so they don’t stick to each other and the crystals in the bottom of the glass. If the glass container gets too full of crystals, pour the syrup into a new container and move your stick into the cleaner syrup to grow more crystals.
- When the rock candy is done, pull them from the syrup and let them dry. Save the syrup.
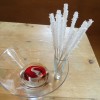
- To serve, pour a few cm of your sugar syrup into the bottom of a pretty glass and add a few drops of red food coloring. You can even add a little flavoring to the syrup (like cherry extract.) Stir.
- Put your rock candy, handle side up, into the glass. Be sure to give your guests napkins, so they don’t drip “blood” all over the house!

How do Crystal Grow?
Like bricks in a wall, crystals are solids formed by a network of repeating patterns of molecules. Instead of the mortar that holds brick together, the atoms and molecules are connected by atomic bonds.
Crystals that share the same chemical composition can be big or small, but the molecules always come together to form the same shape. Table sugar, or sucrose, is made up of a molecule composed of two sugars, glucose and fructose. Crystals formed by sucrose are hexagonal (six-sided) prisms, slanted at the ends.
The crystals on your rock candy sticks grow from the “seeds” of the sugar you rolled on the stick before you put them in the syrup.
Frankenworms, Magic Bags and Fall Leaf Chromatography
- by KitchenPantryScientist
This morning, on Kare11 Sunrise, I showed off my new book, Kitchen Science Lab for Kids, and demonstrated three experiments from the book. Just click on the experiment name for directions, photos and more about the science!
Frankenworms– Bring gummy worms to “life” using a chemical reaction.
Magic Bags– Explore the elastic properties of polymers.
Leaf Chromatography– Separate plant pigments on coffee filters.
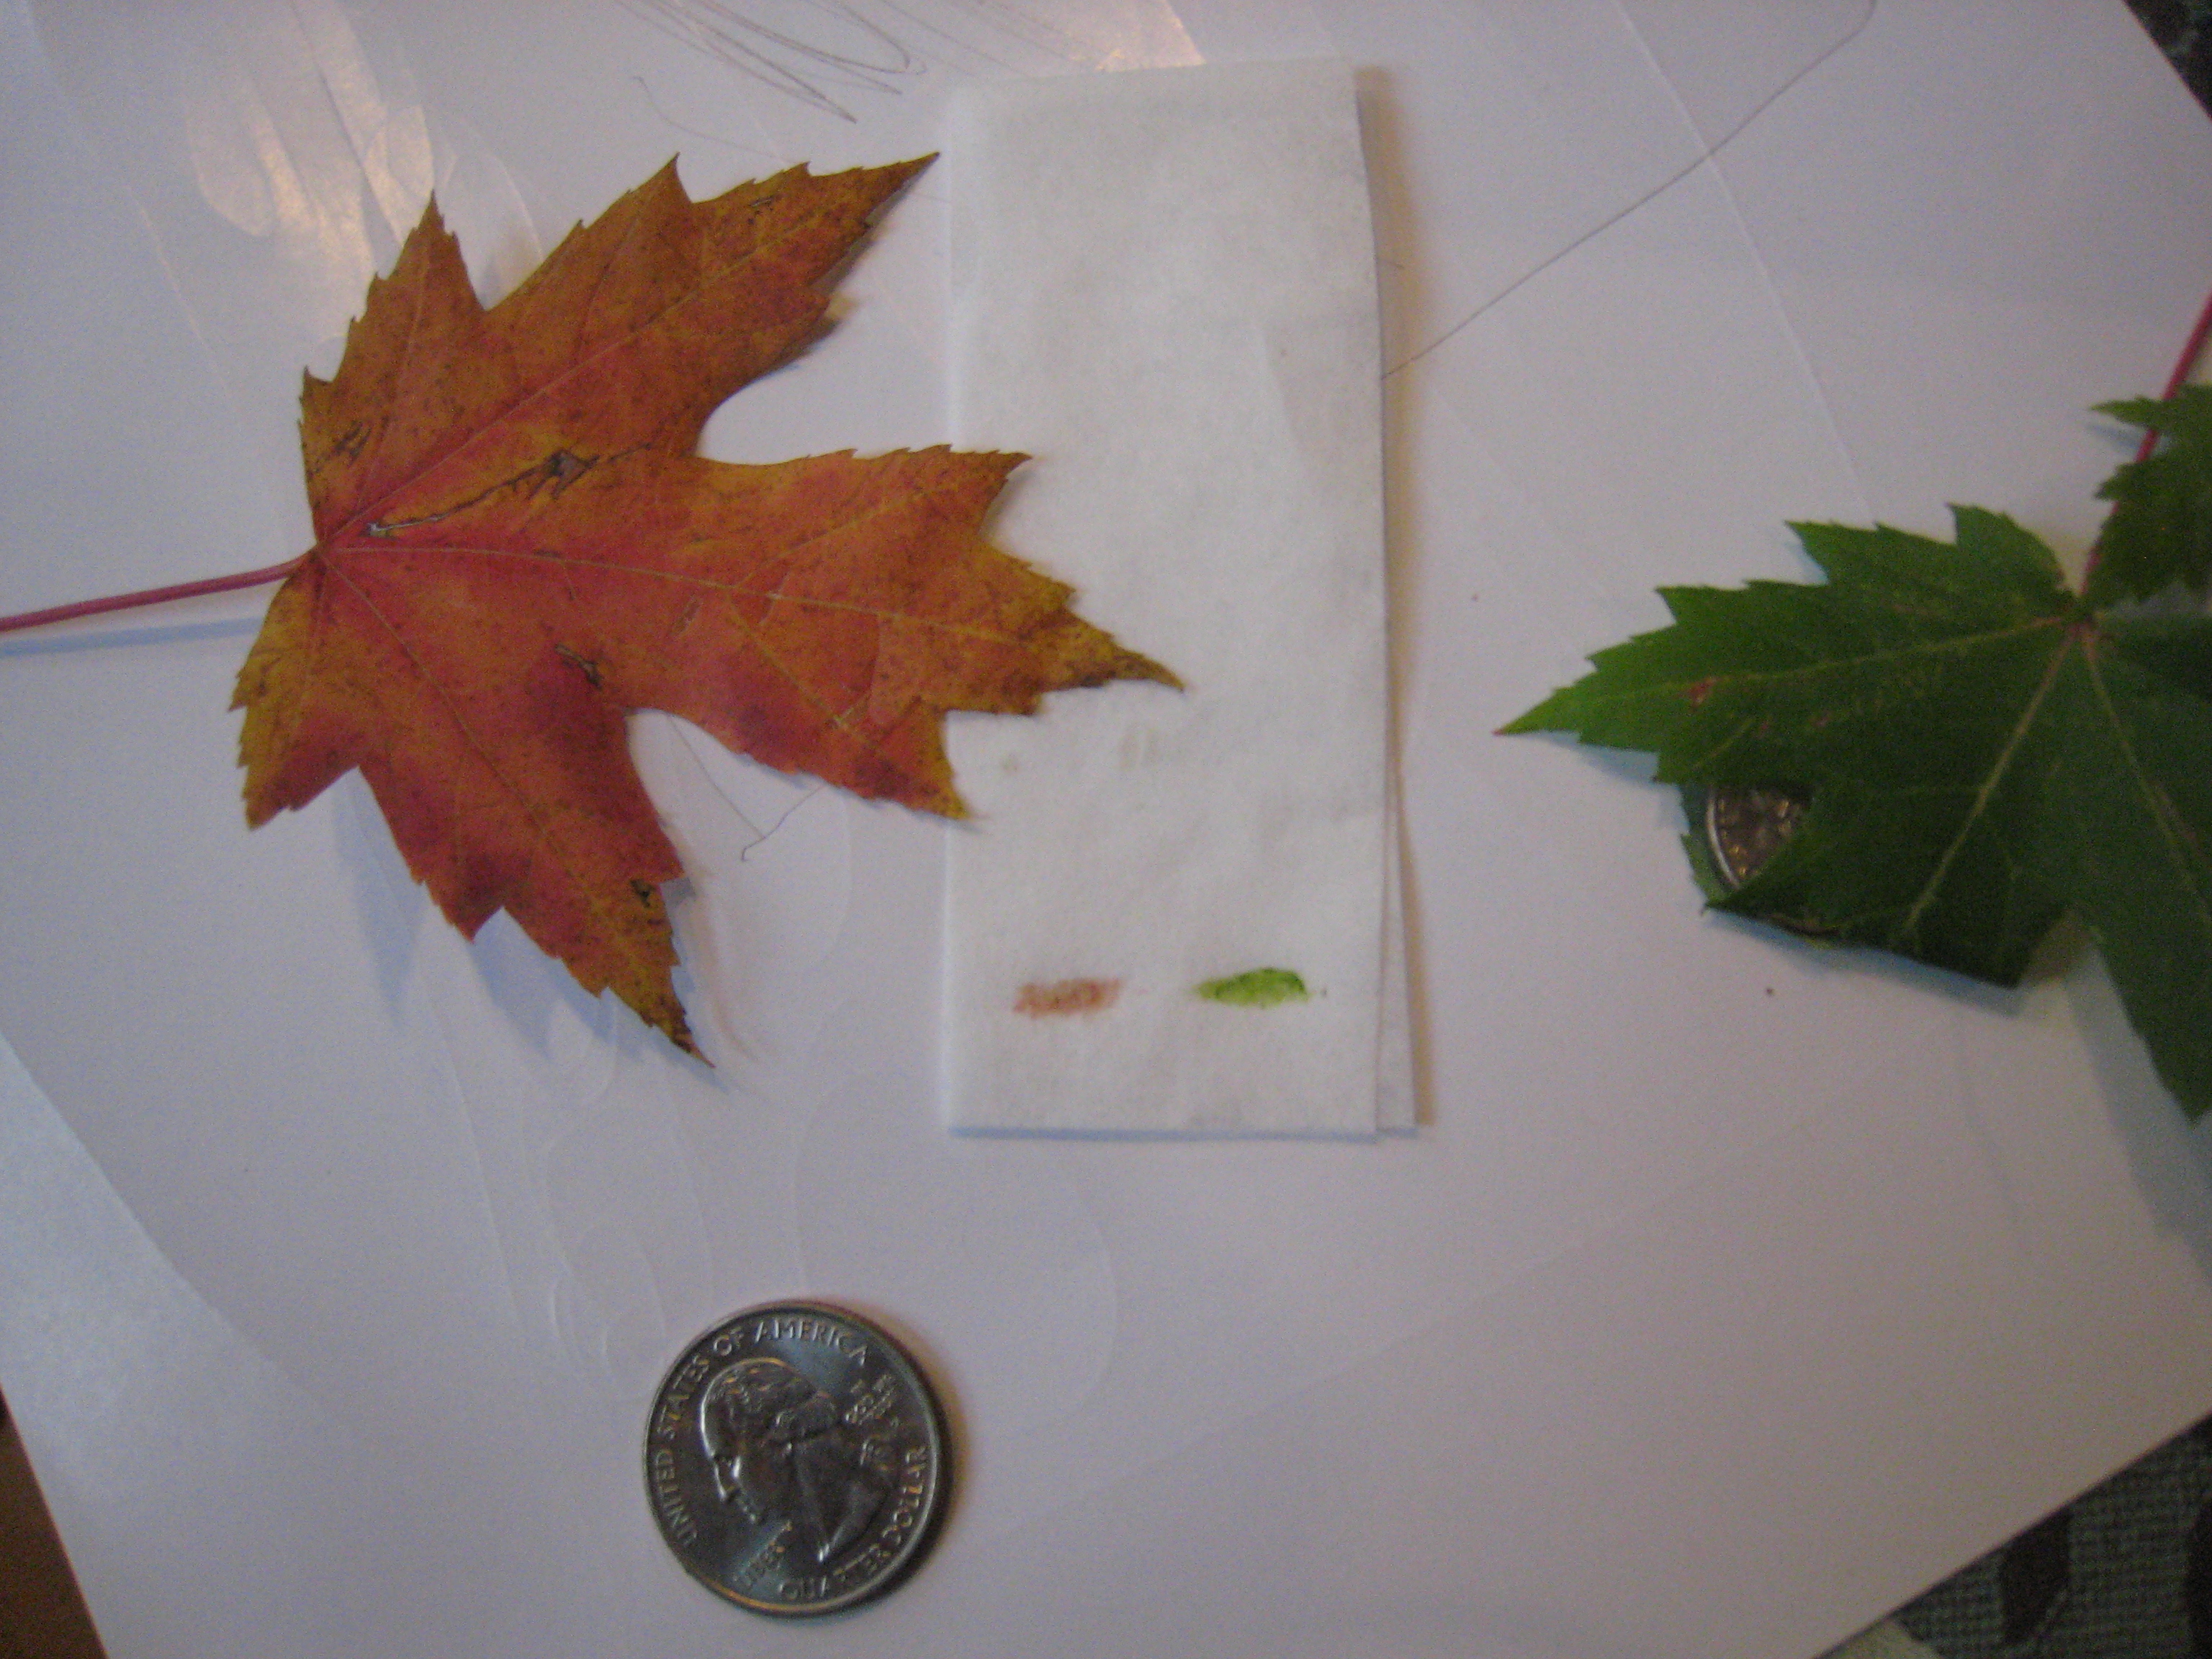
This is especially fun in the fall, when you can compare green leaves to red and yellow ones! Here’s a nice article on the chemistry of the colors of fall leaves (from the Compound Interest website) that my friend Joanne Manaster highlighted on her Joanne Loves Science Facebook page.
Summer Science
- by KitchenPantryScientist
This week, abulleyeview.com featured three of my favorite summer science experiments and I showed Twin Cities Live viewers how to make nature walk bracelets and green slime! (Oh yeah, we also broke a few eggs.)
Learn physics by throwing eggs!
What summer science experiments have you tried?
Don’t forget to download KidScience app for more great ideas! We just added a new experiment and have another one on the way!
Rainy Day Science for Kids
- by KitchenPantryScientist
While you wait for the sun to come out, put away the screens and pull out some simple science! Just click on the blue experiment name for instructions and more about the science behind the fun, or click here to watch me demonstrate them on Twin Cities Live.
Fizzy Balloons are a fun way to explore chemical reactions!
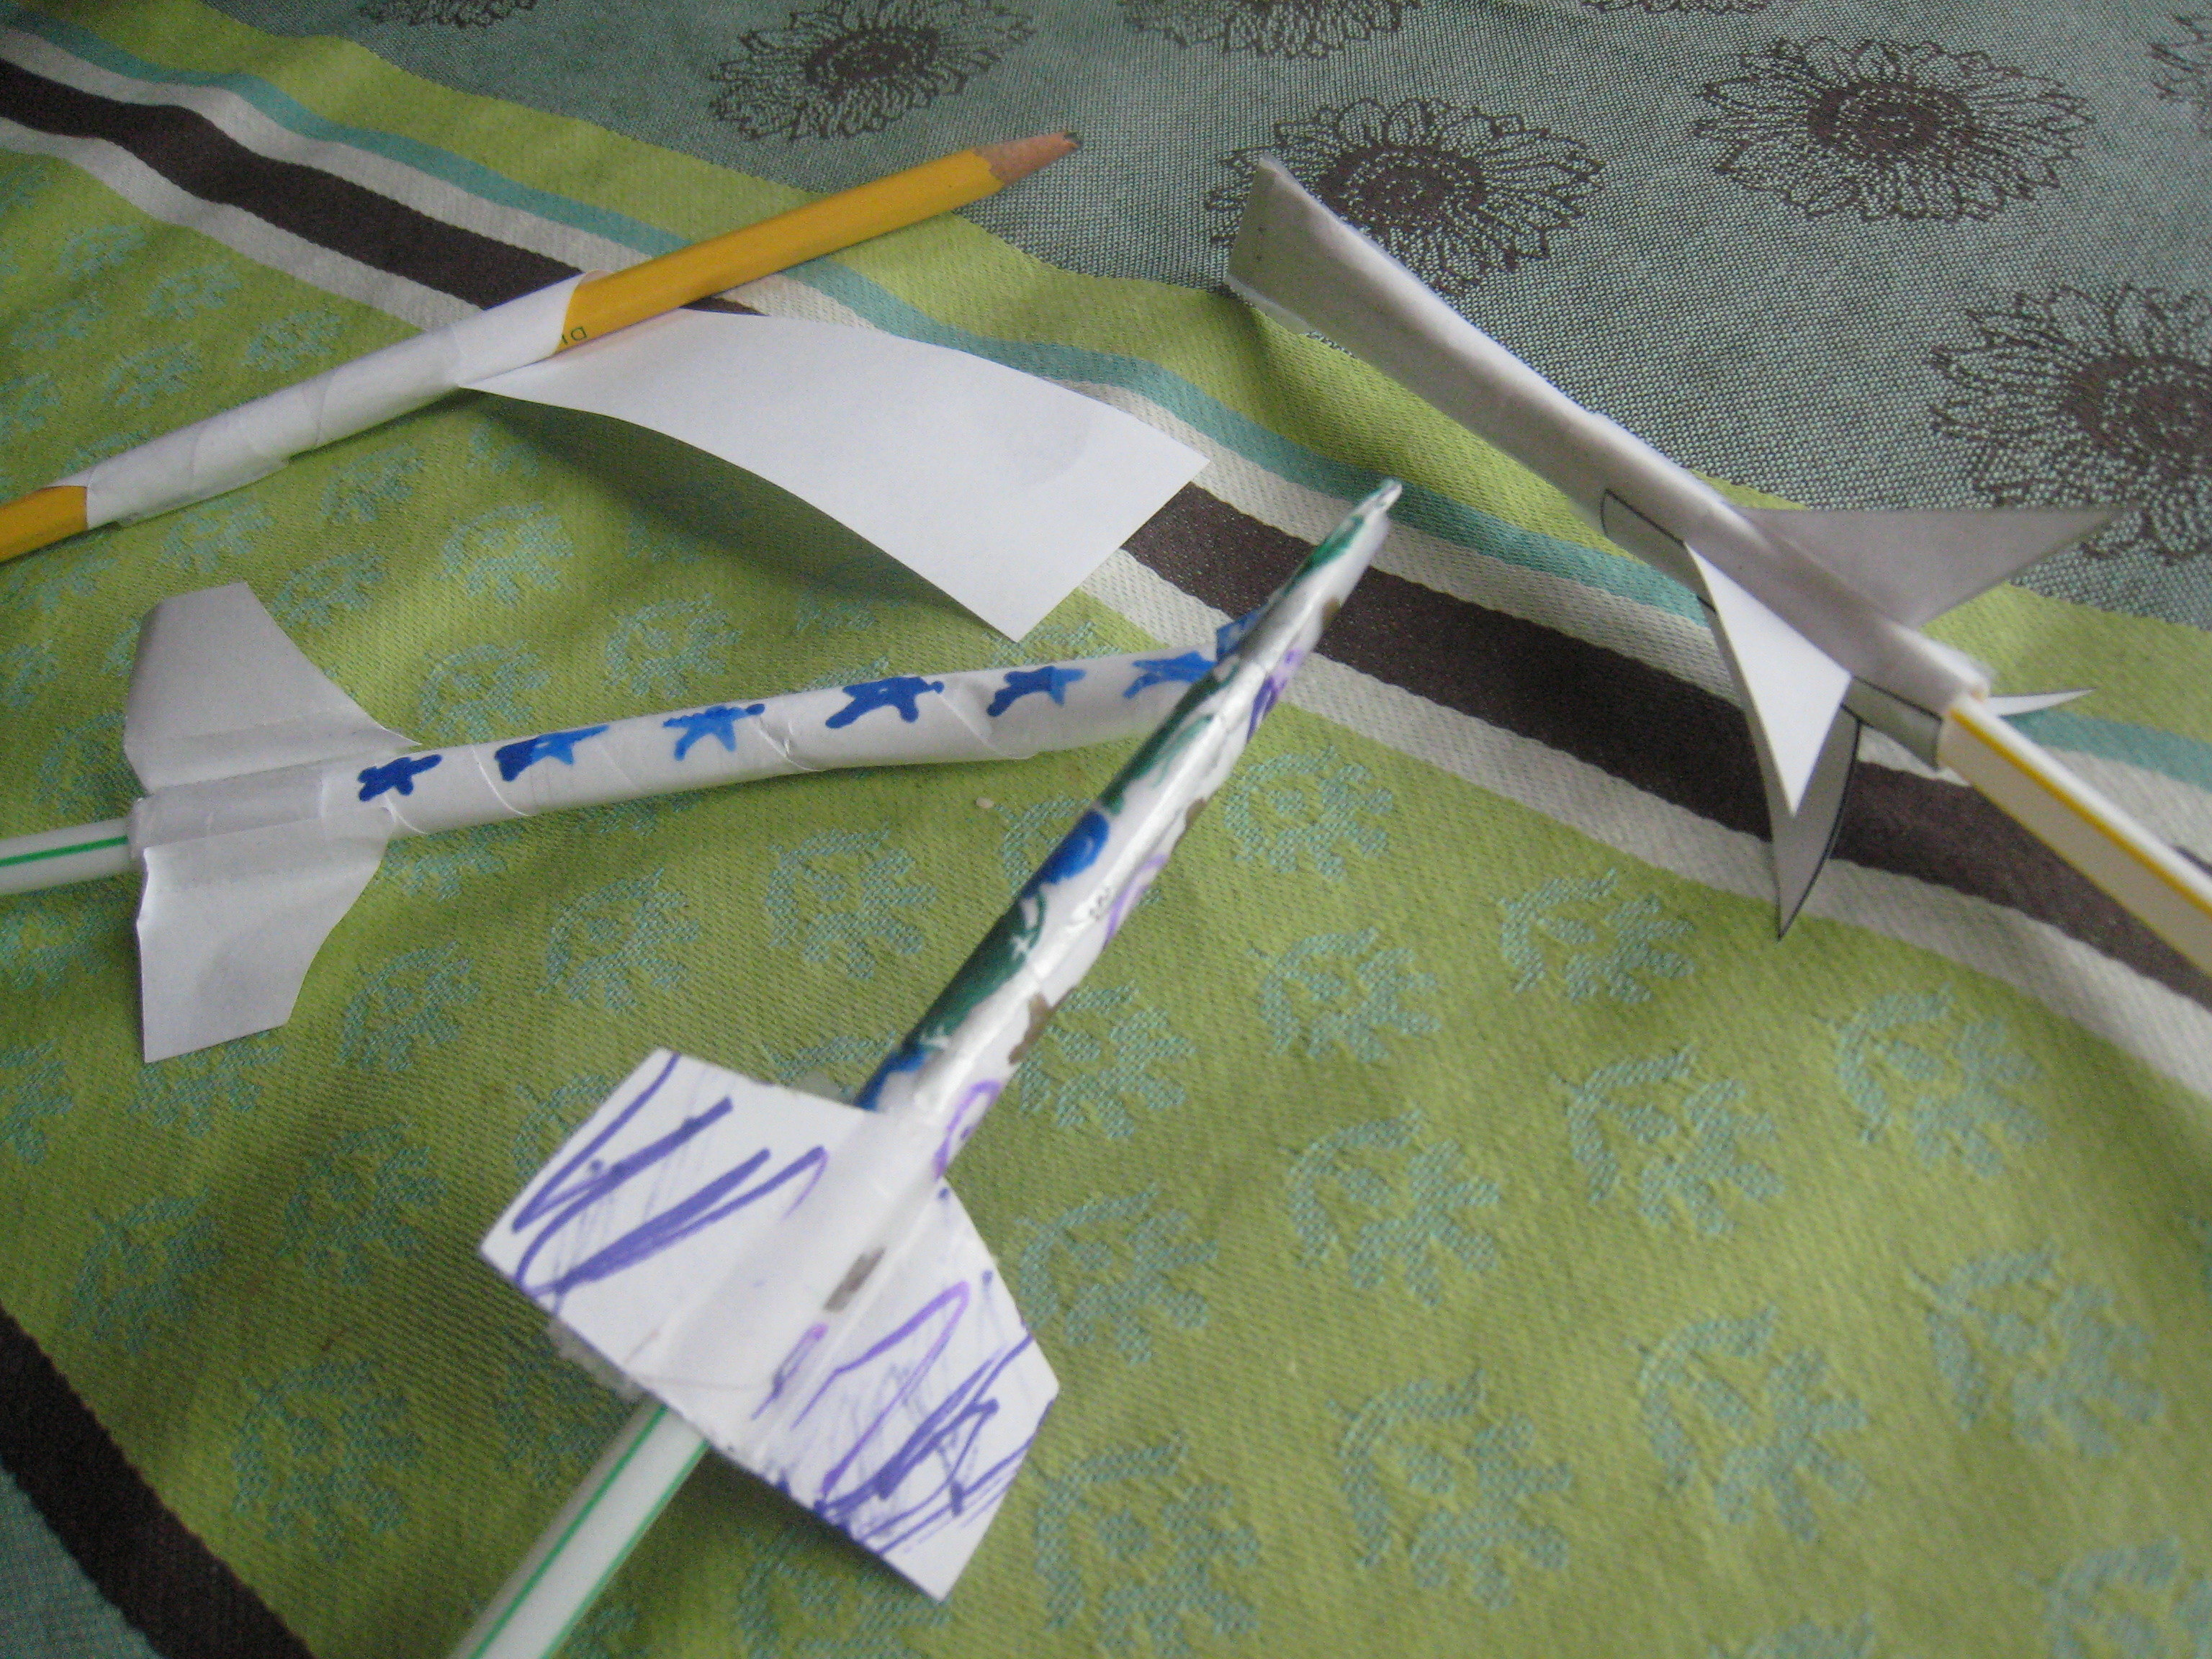
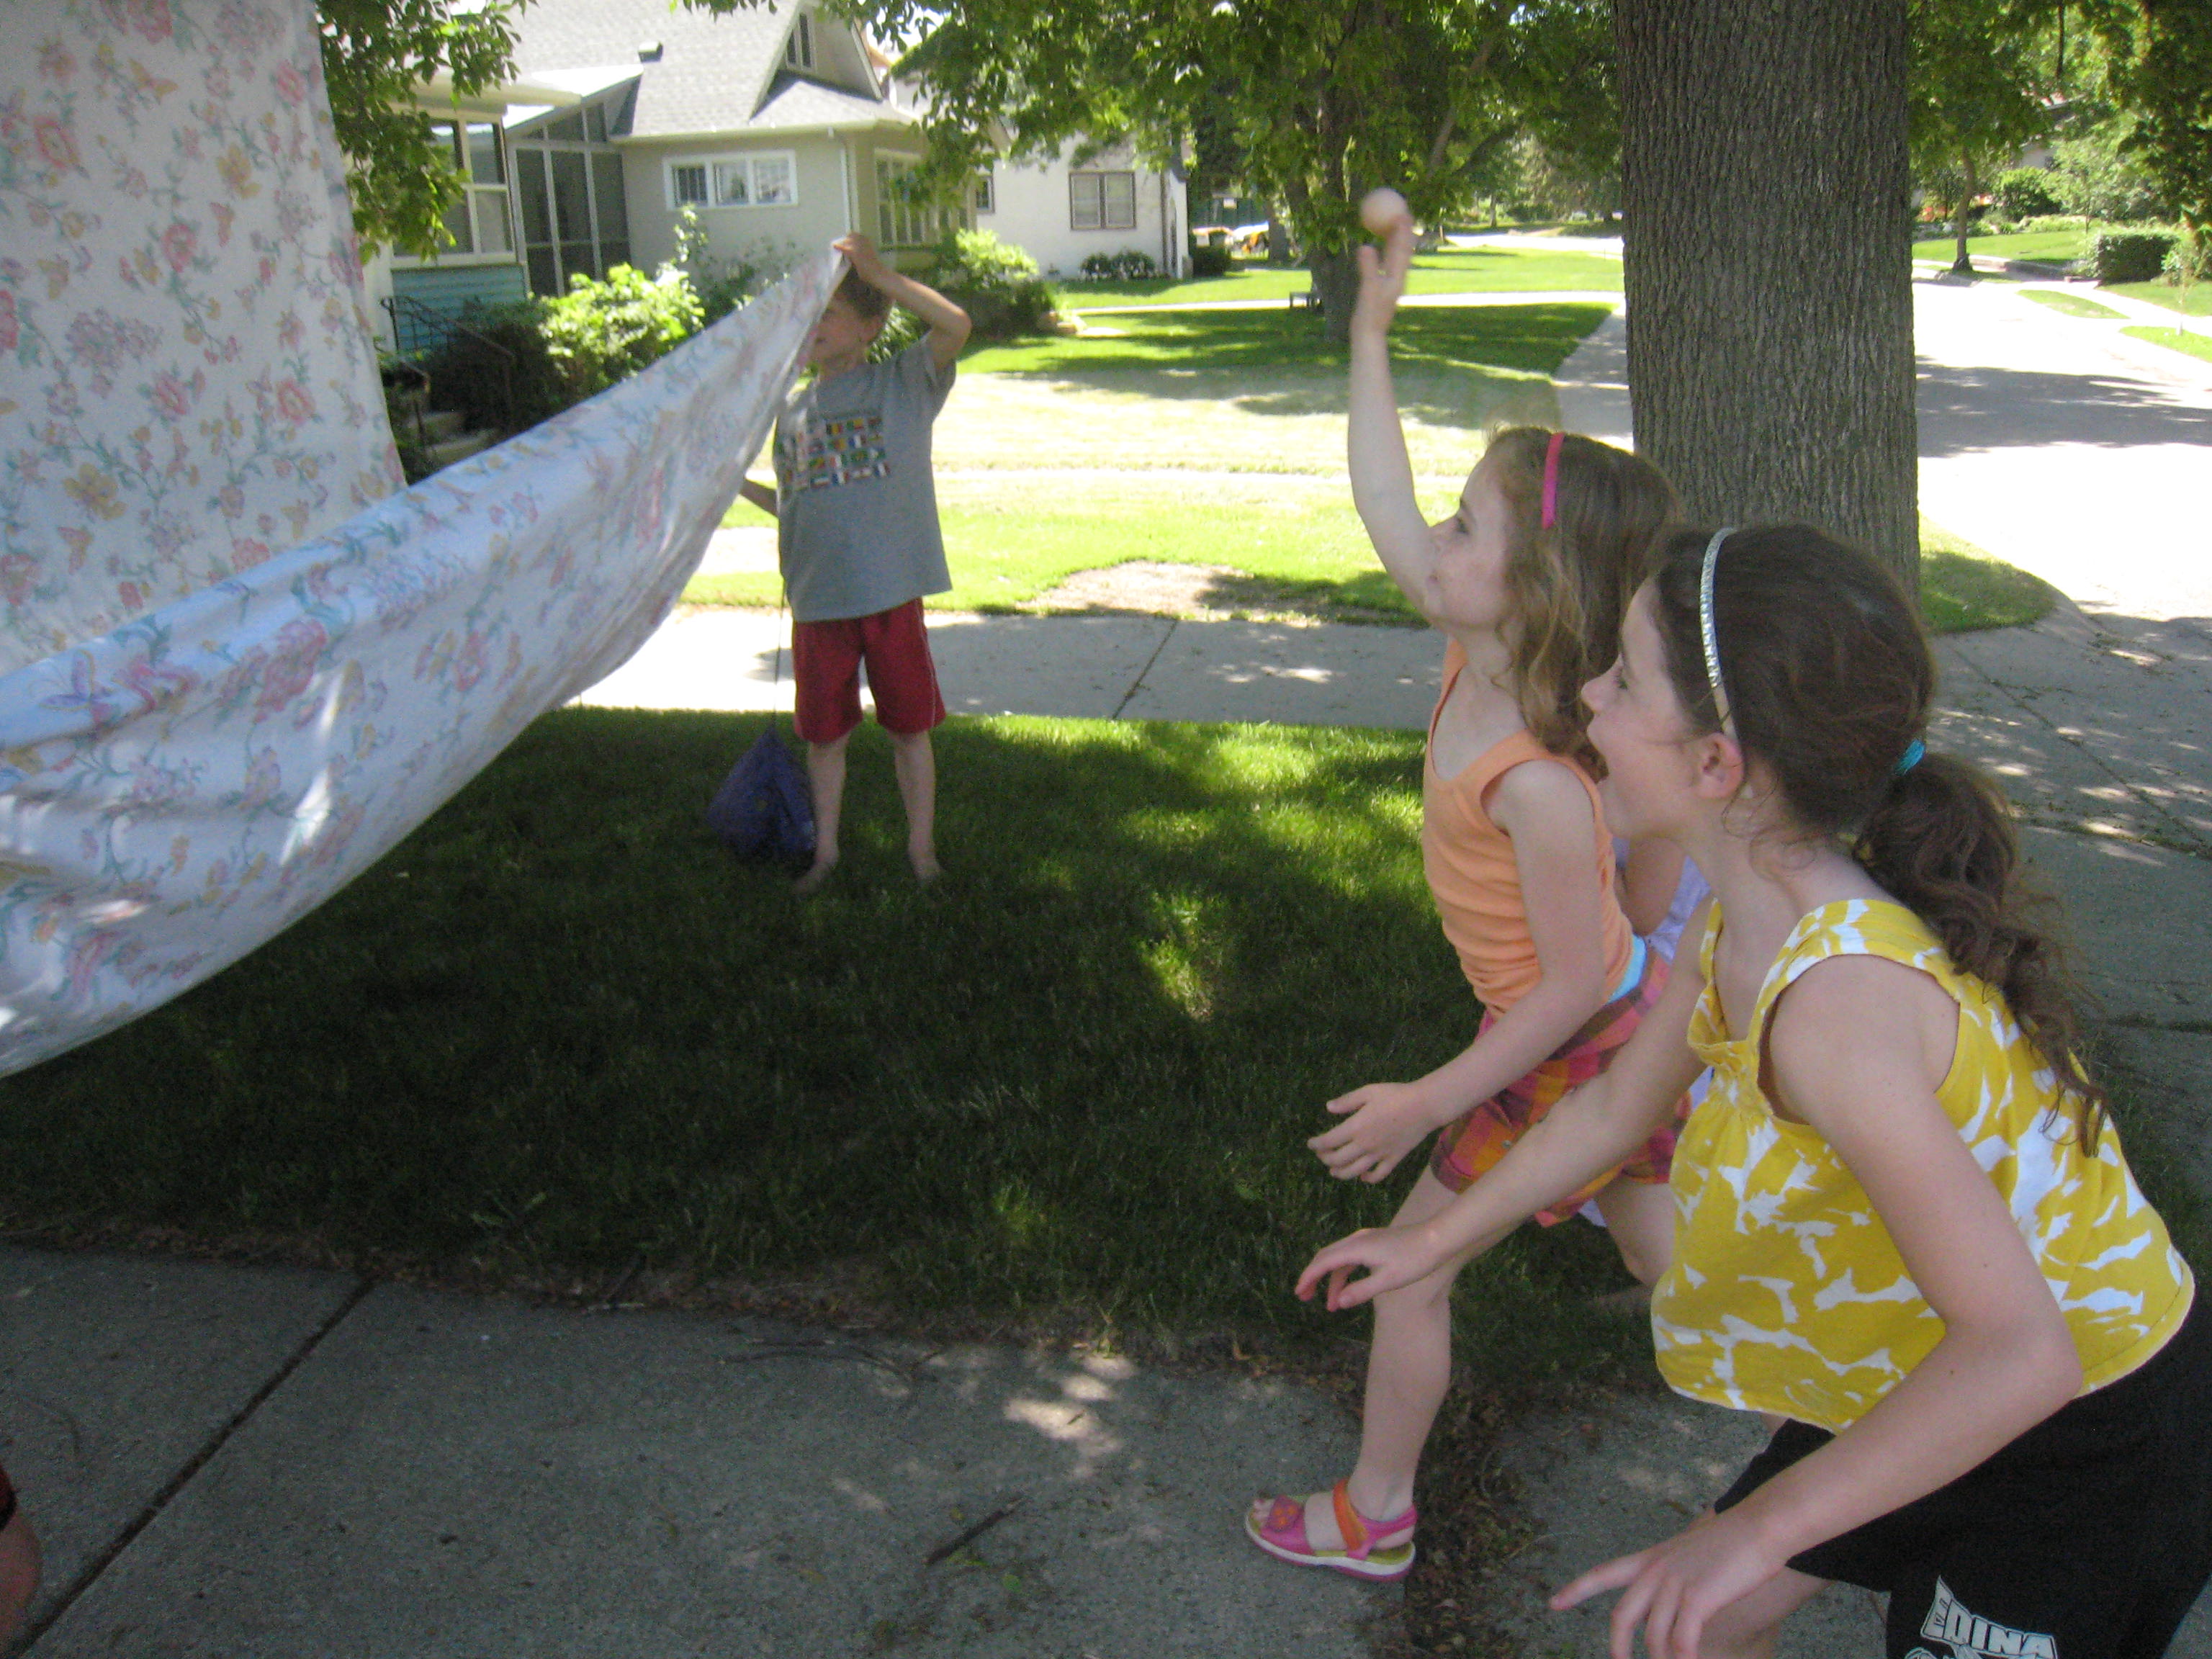
Have an engineering competition by making breath-propelled Straw Rockets and seeing whose will travel the farthest.
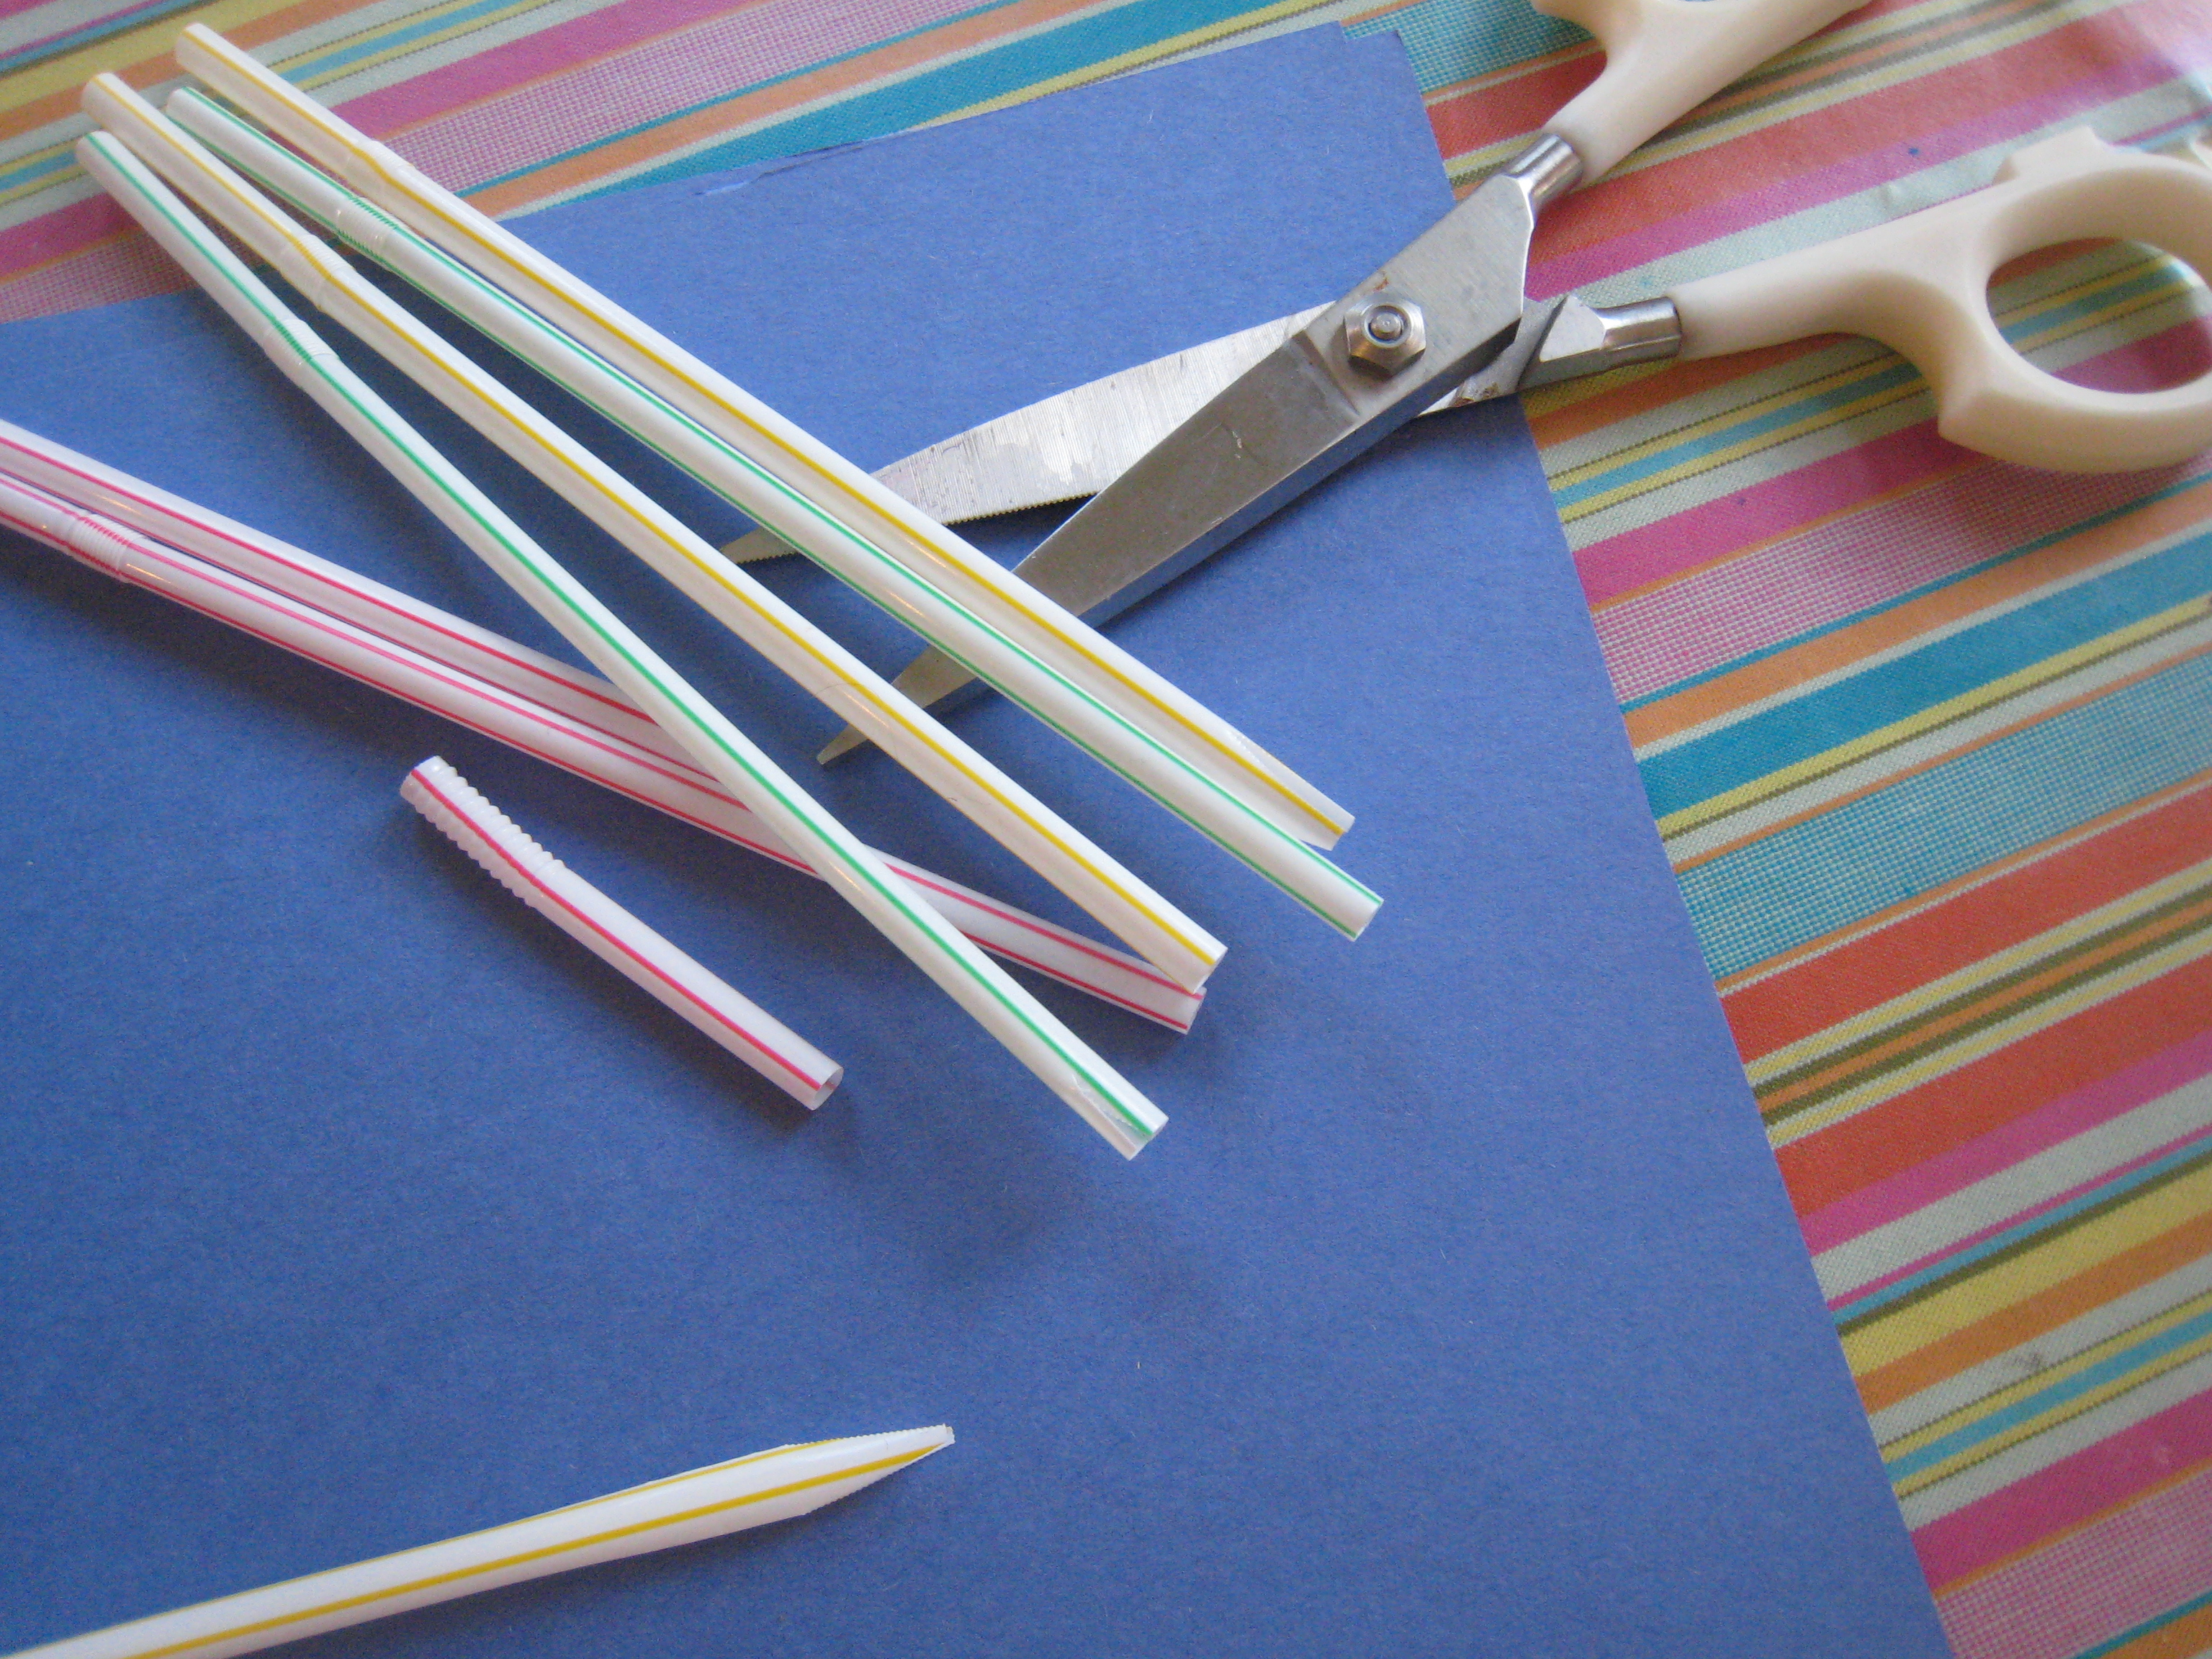
Make your own Orchestraws from plastic drinking straws. (Get out the earplugs.)
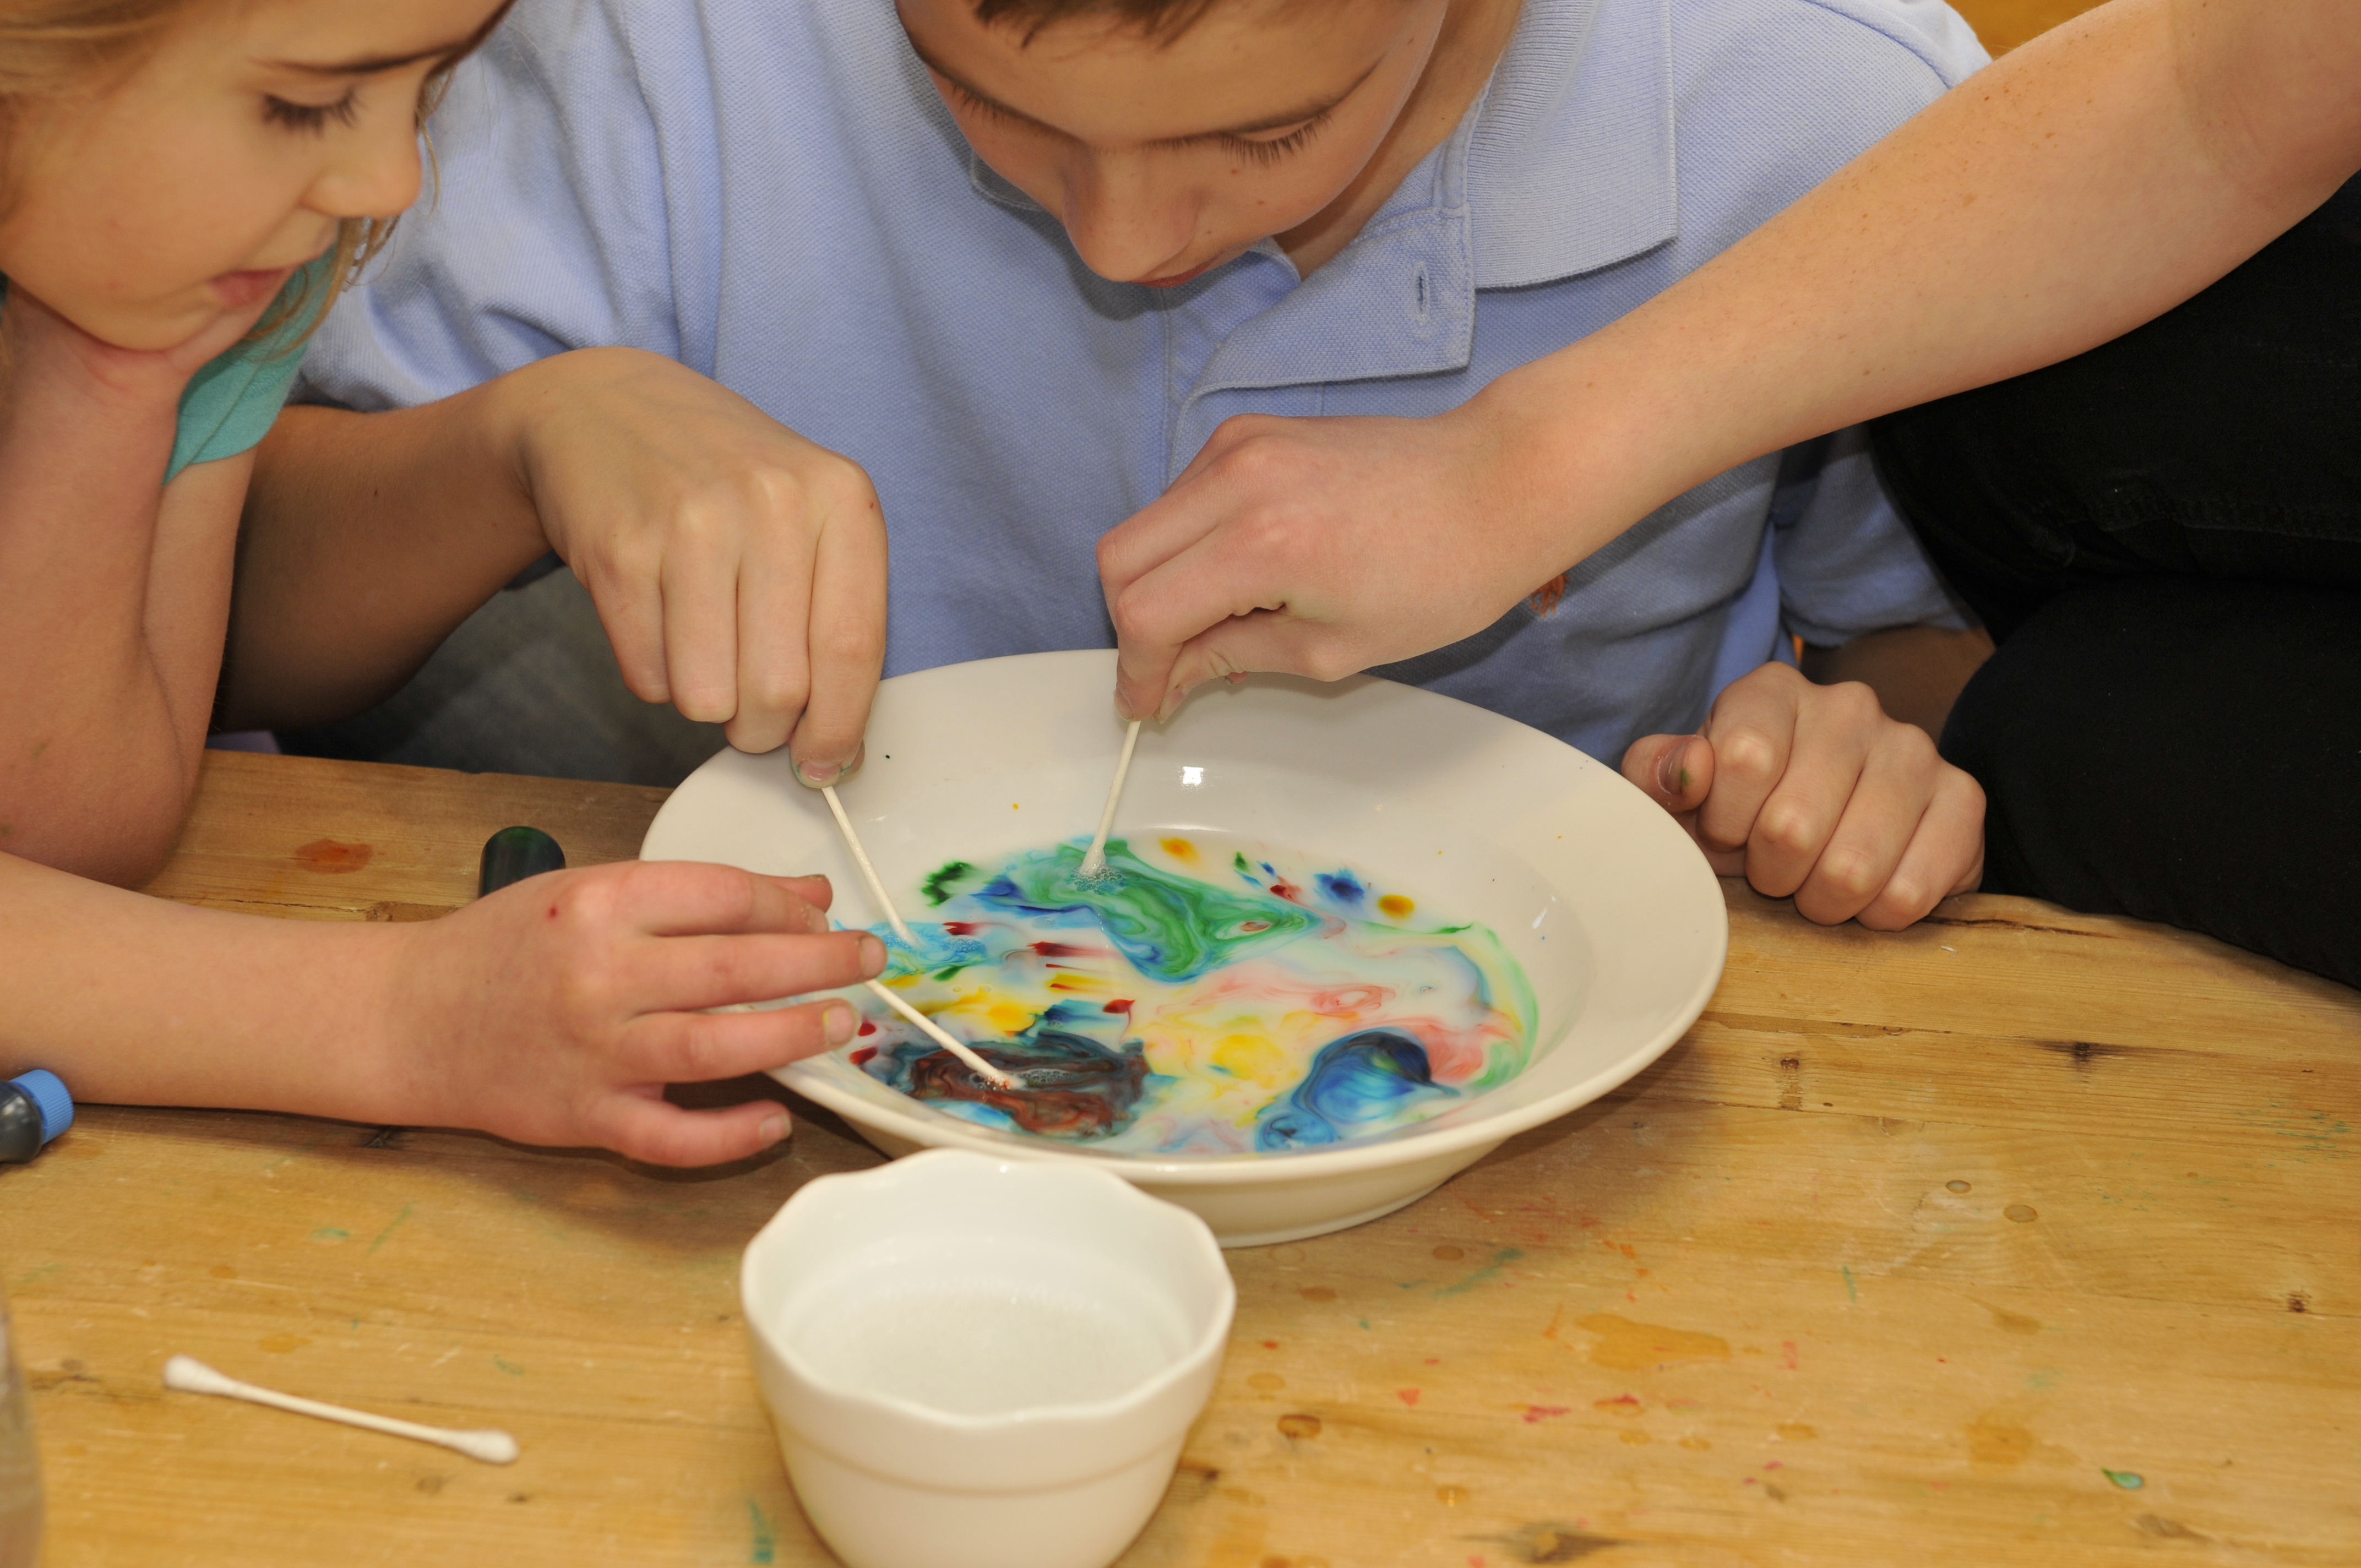
Or watch science turn psychedelic when you add food coloring and dish soap to dairy and make Tie Dye Milk.
Earth Day Science, #SpaceMicrobes and a Laser Pointer Experiment
- by KitchenPantryScientist
Earth Day is Tuesday, April 22nd. How will you celebrate the amazing planet that sustains us? Here’s a link to ten fun Earth Day science experiments. Or, step outside, take a picture of yourself and post it on social media with the hashtag #GlobalSelfie for a new mosaic image of Earth being created by NASA: a new “Blue Marble” built bit by bit with your photos.
If you live in Minnesota, join me at the Science Museum of Minnesota Tuesday morning from 10-12 to celebrate Earth Day and NASA Climate Day with some games and a hands-on experiment for kids!
#SpaceMicrobes, including our own Minnesota microbe swabbed from the Kare11 television studio, have arrived safely on the International Space Station. Over the next few days, 48 microbes swabbed from sports stadiums and other cool locations will be thawed out and start to grow! Astronauts will measure their growth using a machine called a microplate reader, over a period of three days. The experiment will be repeated three times, and scientists will average the data and compare it to the data they’ve collected doing an identical experiment with the same microbes here on Earth! I talked about it on Kare11 the other day.
Finally, here’s a fun experiment we did with a water bottle and a laser pointer this weekend. Try it!
skullsinthestars.com has a detailed explanation of this amazing phenomenon!
Growing Alum Crystals in Eggshells
- by KitchenPantryScientist
It only takes a spark to start a fire, and it only takes one atom to act as a seed for crystal formation. Under the right conditions, the atoms in alum will join together like puzzle pieces to form large crystals. I posted a few years ago about how to grow a large alum crystal, but this experiment is even more fun. It’s also easier for young kids, since it takes less small-motor coordination.

Alum is also called potassium aluminum sulfate. It’s used in pickling and in found in baking powder. You can grow beautiful alum crystals at home with a few jars of alum, water and any object you don’t mind covering with glue. We made fake geodes by breaking eggs in half and washing them out, but we also encrusted a grape stem and a plastic shark.
To do this experiment, you’ll need glue, 3/4 cup alum from the spice section of the grocery store (4 or 5 small jars should do it,) water and whatever you want to coat with crystals. It takes three days to complete.

On day one, paint glue on the objects you want to grow crystals on. If you’re making “geodes”, apply a thin layer of glue to the inside of an eggshell that’s been cut in half, washed out and dried. Then, sprinkle a little alum powder on the glue and let it dry overnight. We heavily coated our object with alum, but might have grown larger crystals if we’d used less. Each alum particle acts as a seed for crystal growth. The closer together they are, the less room your crystals will have to grow.
On day two, dissolve 3/4 cup alum in 2 cups of water by boiling. This step requires adult supervision. Make sure all the alum dissolves (it may still look a little cloudy) and let the solution cool. This is your supersaturated alum solution.
After about 30 minutes, when the solution is cool enough to be safely handled, gently immerse your object in the alum solution. For color, you can add a large squirt of food coloring. Let your project sit overnight to grow crystals.
On day three, gently remove your object from the alum solution and let it dry. How does it look? Draw it or take a picture to put in your science notebook!

Crystals are geometric networks of atoms. Imagine a three dimensional chain-link fence, and you’ll get the picture. Certain crystals will only grow in certain shapes. For example, diamonds are always cube-shaped when they form. Whether the atoms have joined to form a small diamond, or a large one, it will always be in the shape of a cube!
Some crystals, like alum, will form from supersaturated solutions, like the one you used in this experiment. A supersaturated solution is one that is forced to hold more atoms in water (or another solute) than it normally would. You can make these solutions using heat or pressure. Crystals can form when a supersaturated solutions encounters a “seed” atom or molecule, causing the other atoms to come out of the solution and attach to the seed.
What else could you try? Could you do the same experiment with salt, or sugar crystals? How do you think the color gets incorporated into the crystal? Do you think the food coloring disrupts the shape? Will larger crystals grow if you let your object sit in the solution longer?
You can read more about crystals and gems here.
Dinosaur Science
- by KitchenPantryScientist
Today on Twin Cities Live, we did some dinosaur-related science experiments in honor of the Science Museum of Minnesota’s new Ultimate Dinosaurs exhibit.
Here are directions for doing the experiments in the video. Just click on the name to go to the post.
Window Stickies diffusion experiment
Have fun!
Science Fairs Made Simple (For Parents)
- by KitchenPantryScientist
Parents are under a ridiculous amount pressure to make sure kids finish homework, practice for music lessons and make it to sporting events, among other things. I saw the photo below on Facebook yesterday, and then again in a post on an awesome science blog called “It’s OK to Be Smart . The poster is funny, but kind of sad if you love science. It inspired me to share a few tips on making science fairs less painful for parents and to list of some of my favorite simple experiments. Most of them use ingredients you have on hand and you can also find these experiments and more, like DNA extraction from strawberries, on KidScience app and in my book Kitchen Science Lab for Kids.

Poster/photo by Susan Messina
Parents: Insist that kids take the reins on their science fair projects. Let them look through this list of experiments, and then sit down with them for five minutes and tell them to think about how you can take simple experiments like these to the next level by applying them to real life. (For example, how could you test whether soap or hand sanitizer removes more of the microbes you can grow on a homemade petri dish?) What might happen if you change the variables, like how much water you use, the temperature or even the materials used in the original experiment?
Kids: Here are a few ideas to get you started. Just click on the experiment name or the blue typeface to follow the link to instructions, photos and videos of the experiments. Choose one that you have the ingredients for and try it! You shouldn’t need help for most of these unless you have to boil something. Lots of them even have a video you can watch, if you’re not sure about one of the steps. My kids and I have tested them all and you can leave a comment here if you have any questions. Do more research into the science behind what you’re doing and think about how you could apply this experiment to something in real life.
Diffusion Experiment See how food coloring or other liquids diffuse through gelatin. You could even do this with yellow or orange jello if you don’t have plain. How can you change the rate of diffusion? Think about how the chemicals we add to water, put on our streets to melt ice, and spray on our lawns and crops can move into our soil, ground water, rivers, lakes and oceans.
Microbial Zoos Sample different surfaces with a cotton swab, or do a hand washing experiment, and grow the microbes on a homemade petri plate. (You’ll need some agar for this, so it may require a trip to the store.) Here’s a video on how to make the plates.
Vegetable Vampires See how plants take up water using the forces of physics. Does this experiment work better with some plants than others?
Shocking Machine Make an electrophorus and Leyden jar to shock your friends! Here’s how to do it. We demonstrated it on Kare11!
Frankenworms This is a fun candied chemical reaction. Gummy worms soaked in baking soda and water come to “life” when you drop them into vinegar! Click here for directions and a video.
Oil Spill Experiment: See why oil is so hard to clean up. What works best to remove it from water and feathers?
Goblin Goo (All you need is cornstarch and water. Here’s a video on how to make the goo. You can add a little food coloring to the water if you want, but it may stain your hands!)
Magic Bag (If you have ziplock baggies, water, red food coloring and skewers, you can do this experiment!) Here’s the video.
Fizzy Balloons (After we made Goblin Goo, I demonstrated how to make Fizzy Balloon Monster heads. Click here to watch.)
Magic Potion (Bubbly, stinky Halloween fun: I made a short video on how to make magic potion. Click here to watch it
Mad Scientist’s Green Slime (To see a TV segment where we made Mad Scientist’s Green Slime, click here!) Here’s another video.
Apple Mummies (Here’s a link to a TV segment where the kids and I demonstrated how to make Apple Mummies. Click here.)
Alien Monster Eggs (These make a great centerpiece for a Halloween party, when you’re done playing with them.) I demonstrated how to make them on Kare 11! Click here to watch the video.
Marshmallow Slingshots Lob Marshmallow eyeballs and spiders at a pumpkin or another target in this fun physics experiment. Do different size rubber bands make a difference?
Window Sprouts: Plant a bean in a plastic baggie with a damp paper towel to see how plants need only water and air to sprout roots and leaves. Here’s a short video demonstrating how to make a window garden.
Homemade Solar Oven: Using a pizza box, aluminum foil, plastic wrap, and newspaper, you can harness the sun’s energy to cook your own S’mores!
Carbon Dioxide and Ocean Acidity: See for yourself how the carbon dioxide in your own breath can make a water-based solution more acidic. It’s the same reason too much carbon dioxide in Earth’s atmosphere can be bad for our oceans.
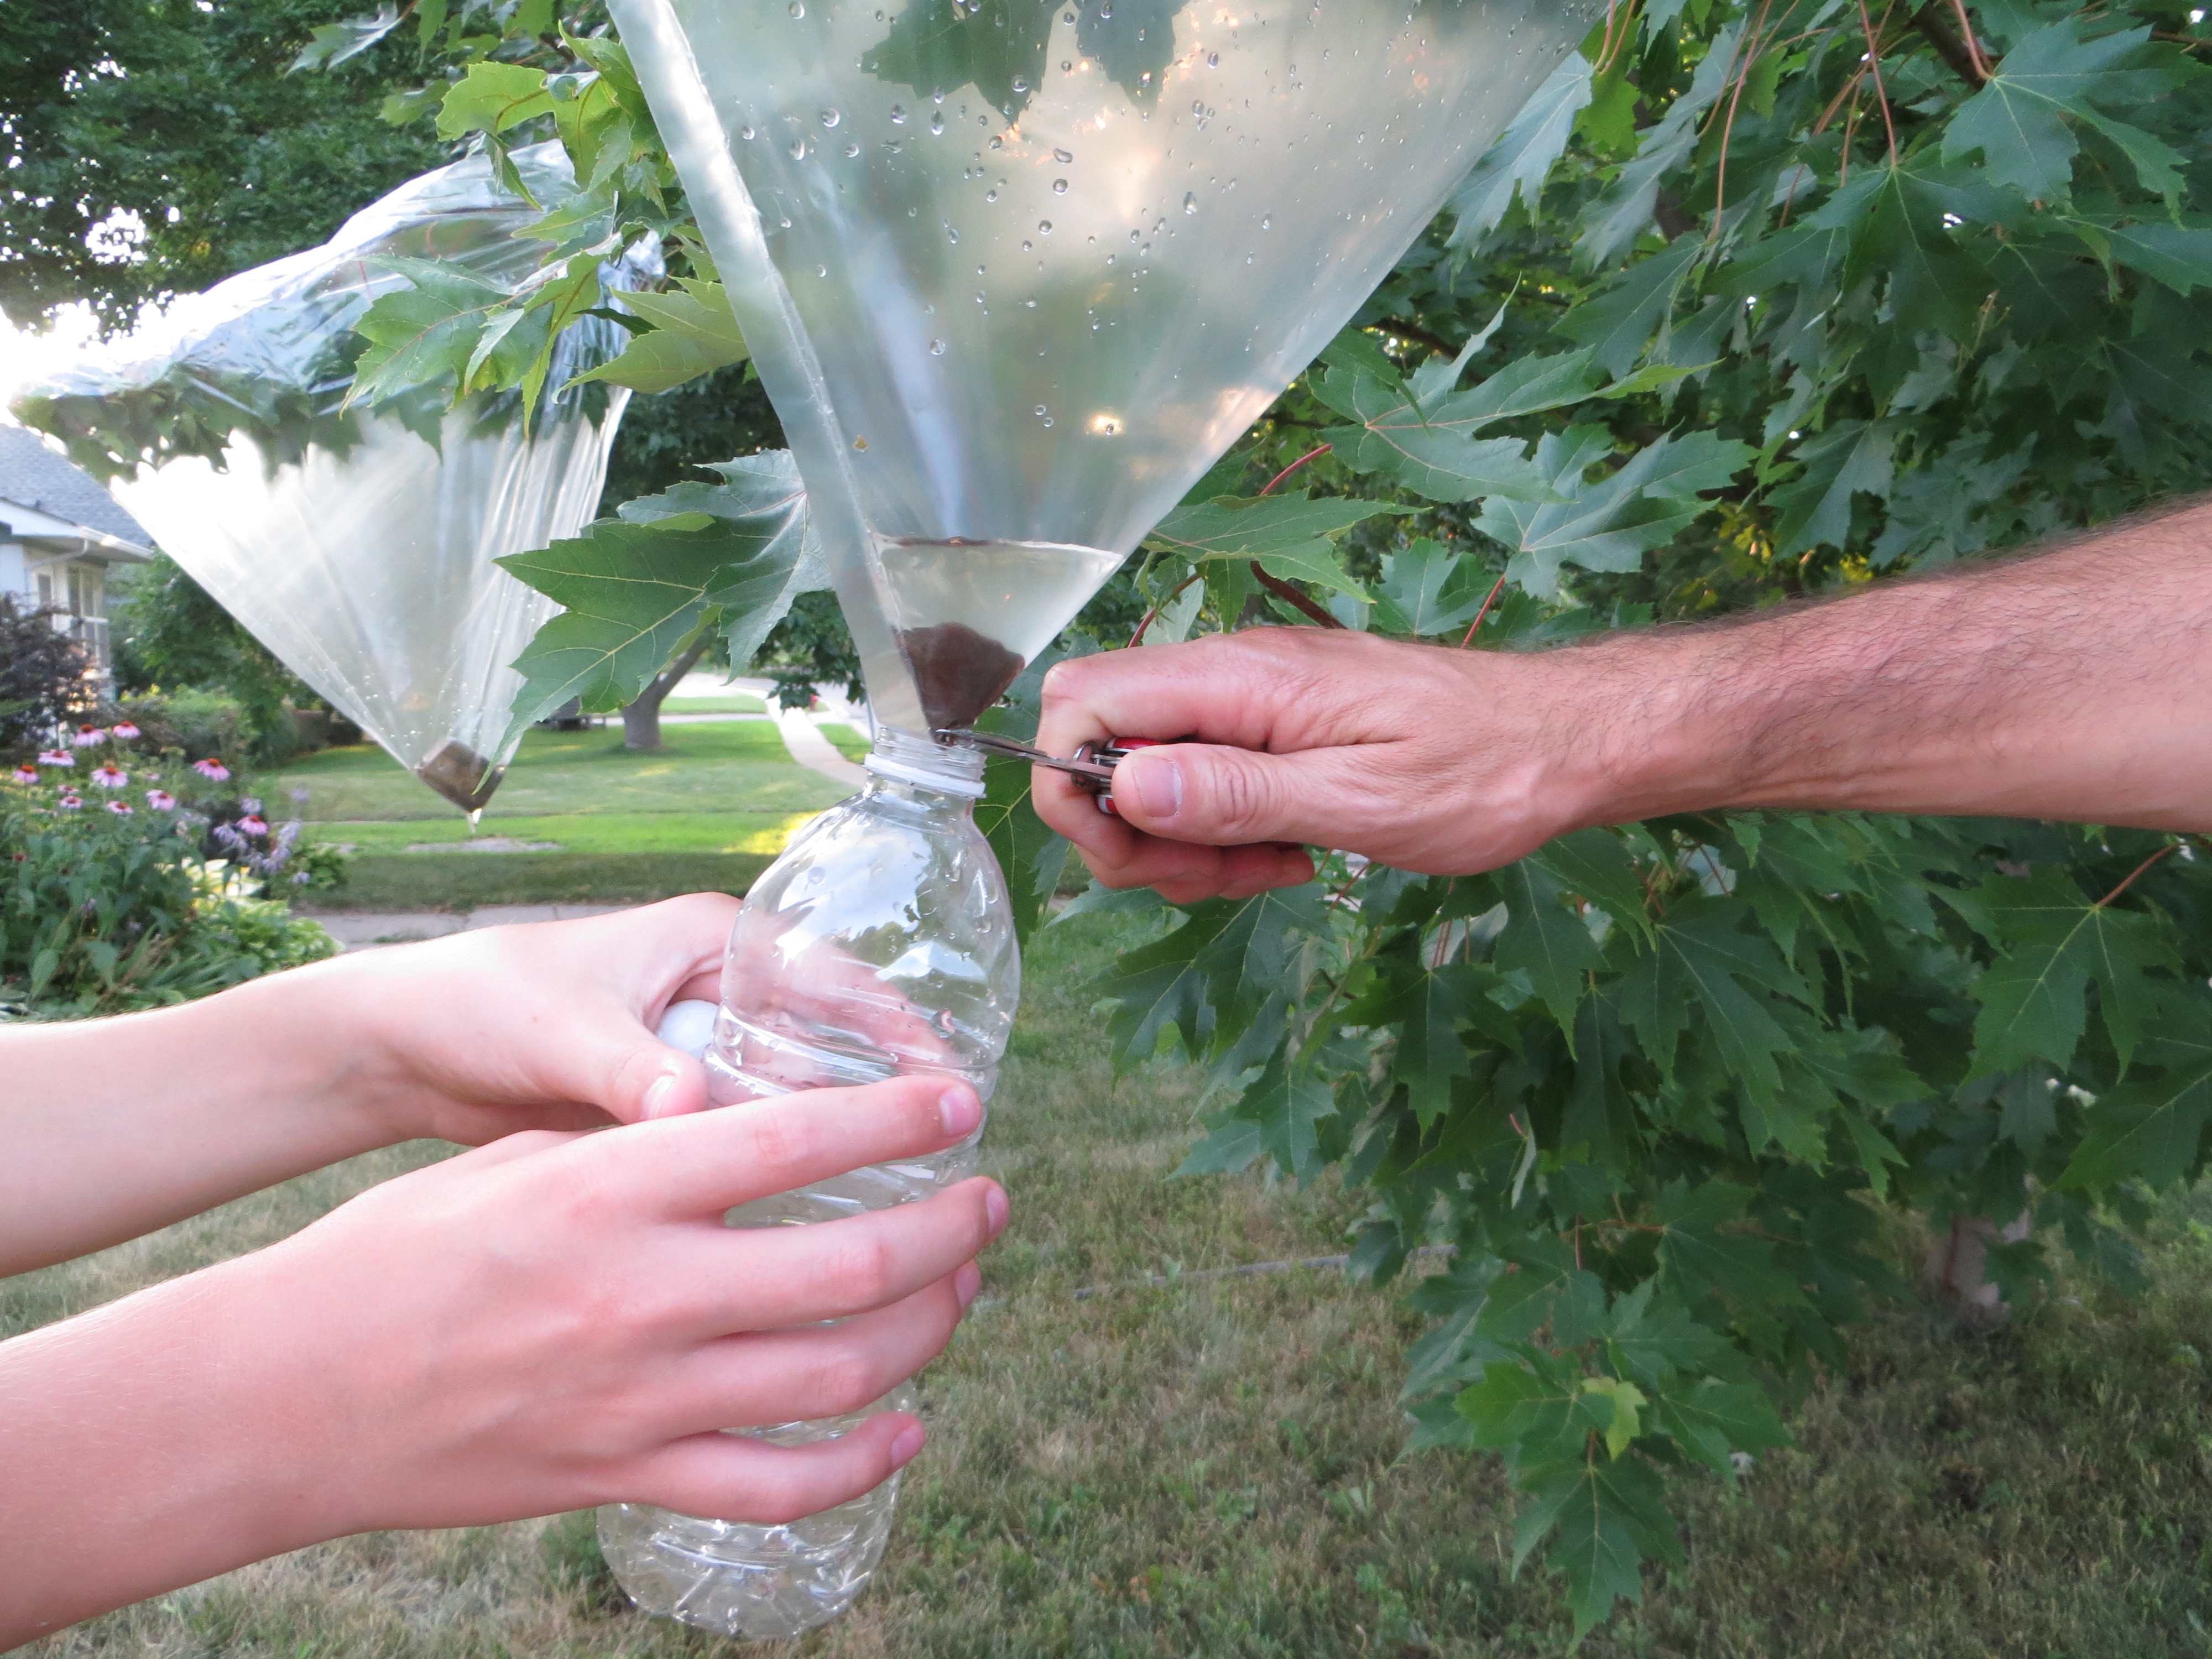
Plant Transpiration: See how trees “sweat” in this survival science experiment.
Earthworm Experiment: Do you know what kind of earthworms are living in your back yard?
Composting: Be a composting detective. Bury some things in your back yard (away from power cables) and dig them up in a few months to see how they look. Composting reduces methane gas emissions (a greenhouse gas) from dumps.
Solar Water Purification: This project illustrates the greenhouse effect and is a fun “survival science” experiment. Requires hot sun and some patience!
Citizen Science: Don’t forget about all the real environmental research projects you can participate in through Citizen Science programs all around the world!
For mores activities and games, check out NASA’s Climate Kids website, to see a kid-friendly diagram of the water cycle, click here.