Category:Biology Experiments’
Yeast Experiment: Pyramids, Pasteur and Plastic Baggies
- by KitchenPantryScientist
This month has found me ridiculously busy teaching microbiology and writing, while trying to keep up with my kids’ activities. To keep you busy doing science, I thought I’d repost this yeasty microbiology experiment from last year, since bacteria, viruses and fungi have been on my mind (and in my house a few times in the form of colds and stomach bugs.) If you’re starved for more projects, on January 31st, you’ll find me on Kare11 morning news (Minneapolis/St. Paul) demonstrating how to extract DNA from strawberries at your kitchen table!

I demonstrated this experiment on Kare11- you can watch it here.
Picture yourself living in ancient Egypt and imagine that it is your job to rise before the sun each day to bake crackers for your family. Mixing up ground wheat and honey one afternoon, you are distracted. (Maybe you are watching a pyramid being built just across the Nile.) You forget to cover up the cracker dough. It sits all night in an open window, caressed by a warm breeze carrying tiny life forms that are too small to see. When you wake the next morning, you find the dough puffed up and overflowing its bowl. Everyone will be awake and hungry soon and you don’t want to get in trouble, so you go ahead and bake it. The crackers are not hard and flat like usual, but emerge from the hearth light, puffy and delicious. You have just baked the first bread in human history.
No one really knows how the ancient Egyptians discovered yeast, but we have learned from their writings and artwork that they have been making bread for over 4,000 years. How bread rose was a mystery though, until a famous scientist named Louis Pasteur proved that tiny living organisms called yeast were responsible for making bread dough puff up.
Bread yeast is a type of fungus and is related to mushrooms. If you look at yeast cells under a microscope, you will see that they are shaped like balloons and footballs. The single-celled organisms reproduce themselves by making tiny buds that will become new yeast cells. The kind of yeast used to make bread is called Saccharomyces cerevisiae (sack-a-roe-MY-seas sair-a-VIS-e-ey). Saccharomyces means “sugar fungus” and the word cerevisiae comes from the name of Ceres, who was a goddess of farming in Roman mythology. Here’s what they look like under the microscope.
Growing yeast cells love to eat sugar and starches, like the ones in bread flour. When they eat these starches, some of the proteins in the flour, called glutens, swell up. Yeast cells eating starch make a gas called carbon dioxide that forms lots of tiny bubbles in the bread dough. The tiny bubbles pop during baking, but leave tiny holes where they were. You can see these holes in the bread you eat. The yeast you buy at the store is alive, but it is dried and can’t grow until you add water to it.
Here’s a fun experiment you can try to see what makes yeast grow best. All you will need are some zip-lock baggies, yeast, salt, sugar and water.

1. Label four baggies as follows:
Sugar + warm water
Sugar + cold water
Sugar + salt + warm water
No sugar + warm water

2. Add a package of yeast (or 2 tsp.) to each plastic bag. Add 2 tsp. of sugar to each of the bags that say sugar and 1 tsp. of salt to the bag that says salt.
3. Carefully, add ½ cup water to each baggie. The warm water should be warm, but not too hot, or it will kill the yeast. The cold water can be room temperature.
4. Seal the bags, squeezing out as much of the extra air as possible and let them sit. (The yeast will grow faster in a warm room than a cold one.)
5. Watch the bags to see what happens. You will know your yeast cells are growing if the baggie containing them puffs up. Keep an eye on your experiment. If a bag gets so puffy that it looks like it might explode, be sure to open it to let the pressure out!
Which ingredients help yeast grow best? Did you find an ingredient that kept them from growing well? Do yeast cells grow better in warm or cold water? What is making the bags puff up and how does this tell you that the yeast is growing? (Hint: the answer is in the paragraph above about how yeast makes bubbles in bread!)
Try coating the yeast with oil before adding the sugar and water. What happens if you add fruit juice to the bags? Honey? Lemon juice? What happens if you put the bags in the refrigerator just after adding the yeast?
It’s fun to try the same experiment in bowls, but you won’t be able to see the carbon dioxide gas puffing the bag up!
I wrote this post as an article for INGREDIENT magazine, a magazine for kids curious about food. The January/Feb. issue contains lots of great articles and teaches kids to bake bread!
Starch Test
- by KitchenPantryScientist
You probably know that lots of foods are full of starch, but did you know you can test foods in your own kitchen to see what has starch and what doesn’t? You can even see how starch is broken down by your own saliva by chewing a cracker for a long time and testing it for starch.
 A simple disinfectant called iodine that kills bacteria and viruses can also be used to test for the presence of starch.
Starch is a carbohydrate, or a long chain of glucose (sugar) molecules stuck together by chemical bonds. All plants make starch, but some contain more than others. It is the most common carbohydrate in the human diet!
Iodine usually looks brown, but when long chains of starch interact with iodine, scientists think the iodine molecules get wrapped up in the chains, as if a snake is coiling around them. This changes the way the iodine reflects light, and it starts to look black or blue, instead of reddish-brown. Sugar that is not in long chains doesn’t do the same thing to iodine.
To test for starch in your own kitchen, you’ll need iodine, an eyedropper and the food you want to test. I’d suggest table sugar, potato slices, banana slices, cucumber slices, bread or anything else that is light colored. Dilute some iodine by adding about a teaspoon (5ml) of it to a teaspoon of water (5ml.) For each sample, have a control. For example, have two slices of bread: one to drop water on and another to drop iodine on. This experiment should be done with adult supervision since iodine should not be ingested!

Add a drop of water to each control sample. Then, add a drop of iodine the other samples. Watch and wait for about 5 minutes. Can you tell which samples contain starch? The ones that contain the most starch will turn the iodine blue or black.

Now, take a cracker, chew it for a minute or so and spit it out into a dish. Mash another cracker up with water and put in another dish. Drip iodine on both of them and wait. What happens?
Potato Maze
- by KitchenPantryScientist
I almost always have a sprouting potato or two around my kitchen. I’ll buy a bag of spuds and only use part of it, leaving the rest to turn green and eventually end up in the compost.

Luckily, those orphan potatoes are perfect for a few science experiments. One teaches you a little bit about physics as you watch an object in motion (a drinking straw) remain in motion as you drive the flimsy plastic deep into a potato. The other, a potato maze, teaches you a little biology as you think about what a potato needs to grow.
We’d stabbed a straw into a potato before, but it worked shockingly well with the boiling potatoes we got from our farm share. The straws went all the way through! Click here to learn how to do the potato experiment yourself!
To make a potato maze, all you need is a sprouted potato, duct tape,some cardboard and a shoe box (or any cardboard box with a lid.)  Cut out cardboard pieces the same depth as the box, tape them together, bend them and tape them inside of the box to create a maze.
Try to keep the walls of the maze the same height as the box and be sure to cut an opening at the far end of the maze so that light can get in at one end.
Put a sprouted potato or two in the maze. Close the box and seal any light leaks (other than the opening) with tape. (See photo at top for an idea of how your maze should look, but they’ll all be different and there’s no “right” way to make your maze! Just make sure there’s a direct tunnel between your potato and the opening!)
Place the box somewhere where it will get plenty of bright sunlight pouring into the opening. Wait a few weeks and check your potatoes. (You can check them more often if you’re impatient, but they won’t grow any faster.)
What happens to the potatoes?
They should grow towards the light, since plants need light to grow. Using a process called photosynthesis, they can change sunlight, carbon dioxide, water and minerals into electrical and then chemical energy, which allows them to grow into food for other living things. In the process, they also give off oxygen, the gas that we breath.
How do you your potatoes grow without food and water?
There are nutrients and water stored in potatos that allow them to start growing for a while without soil and water.
Plant Chromatography for Kids
- by KitchenPantryScientist
What started out as a food science experiment turned into a seasonal one this morning, and we ended up outside pulling leaves off our Maple tree to see how the pigments from a red leaf would compare to those from a green one. Liquid chromatography allows you to separate the pigments (molecules that give plants color) using paper as a solid medium for the molecules to travel up, and alcohol as the solvent that separates and carries the pigments up the paper at different speeds, depending on how large they are.

To do this experiment, you’ll need a green leaf, and one or more that has turned color (we found a red and green one from the same tree!) In addition, you’ll need a coin, a jar, a pencil, paper towels or coffee filters and rubbing alcohol. Young children MUST be supervised during this experiment since rubbing alcohol is a toxic substance if ingested!
Balance the pencil on the lip of the jar and cut a strip of paper towel or coffee filter long enough to hang (folded in half) over your pencil and dangle with both ends just above the bottom.
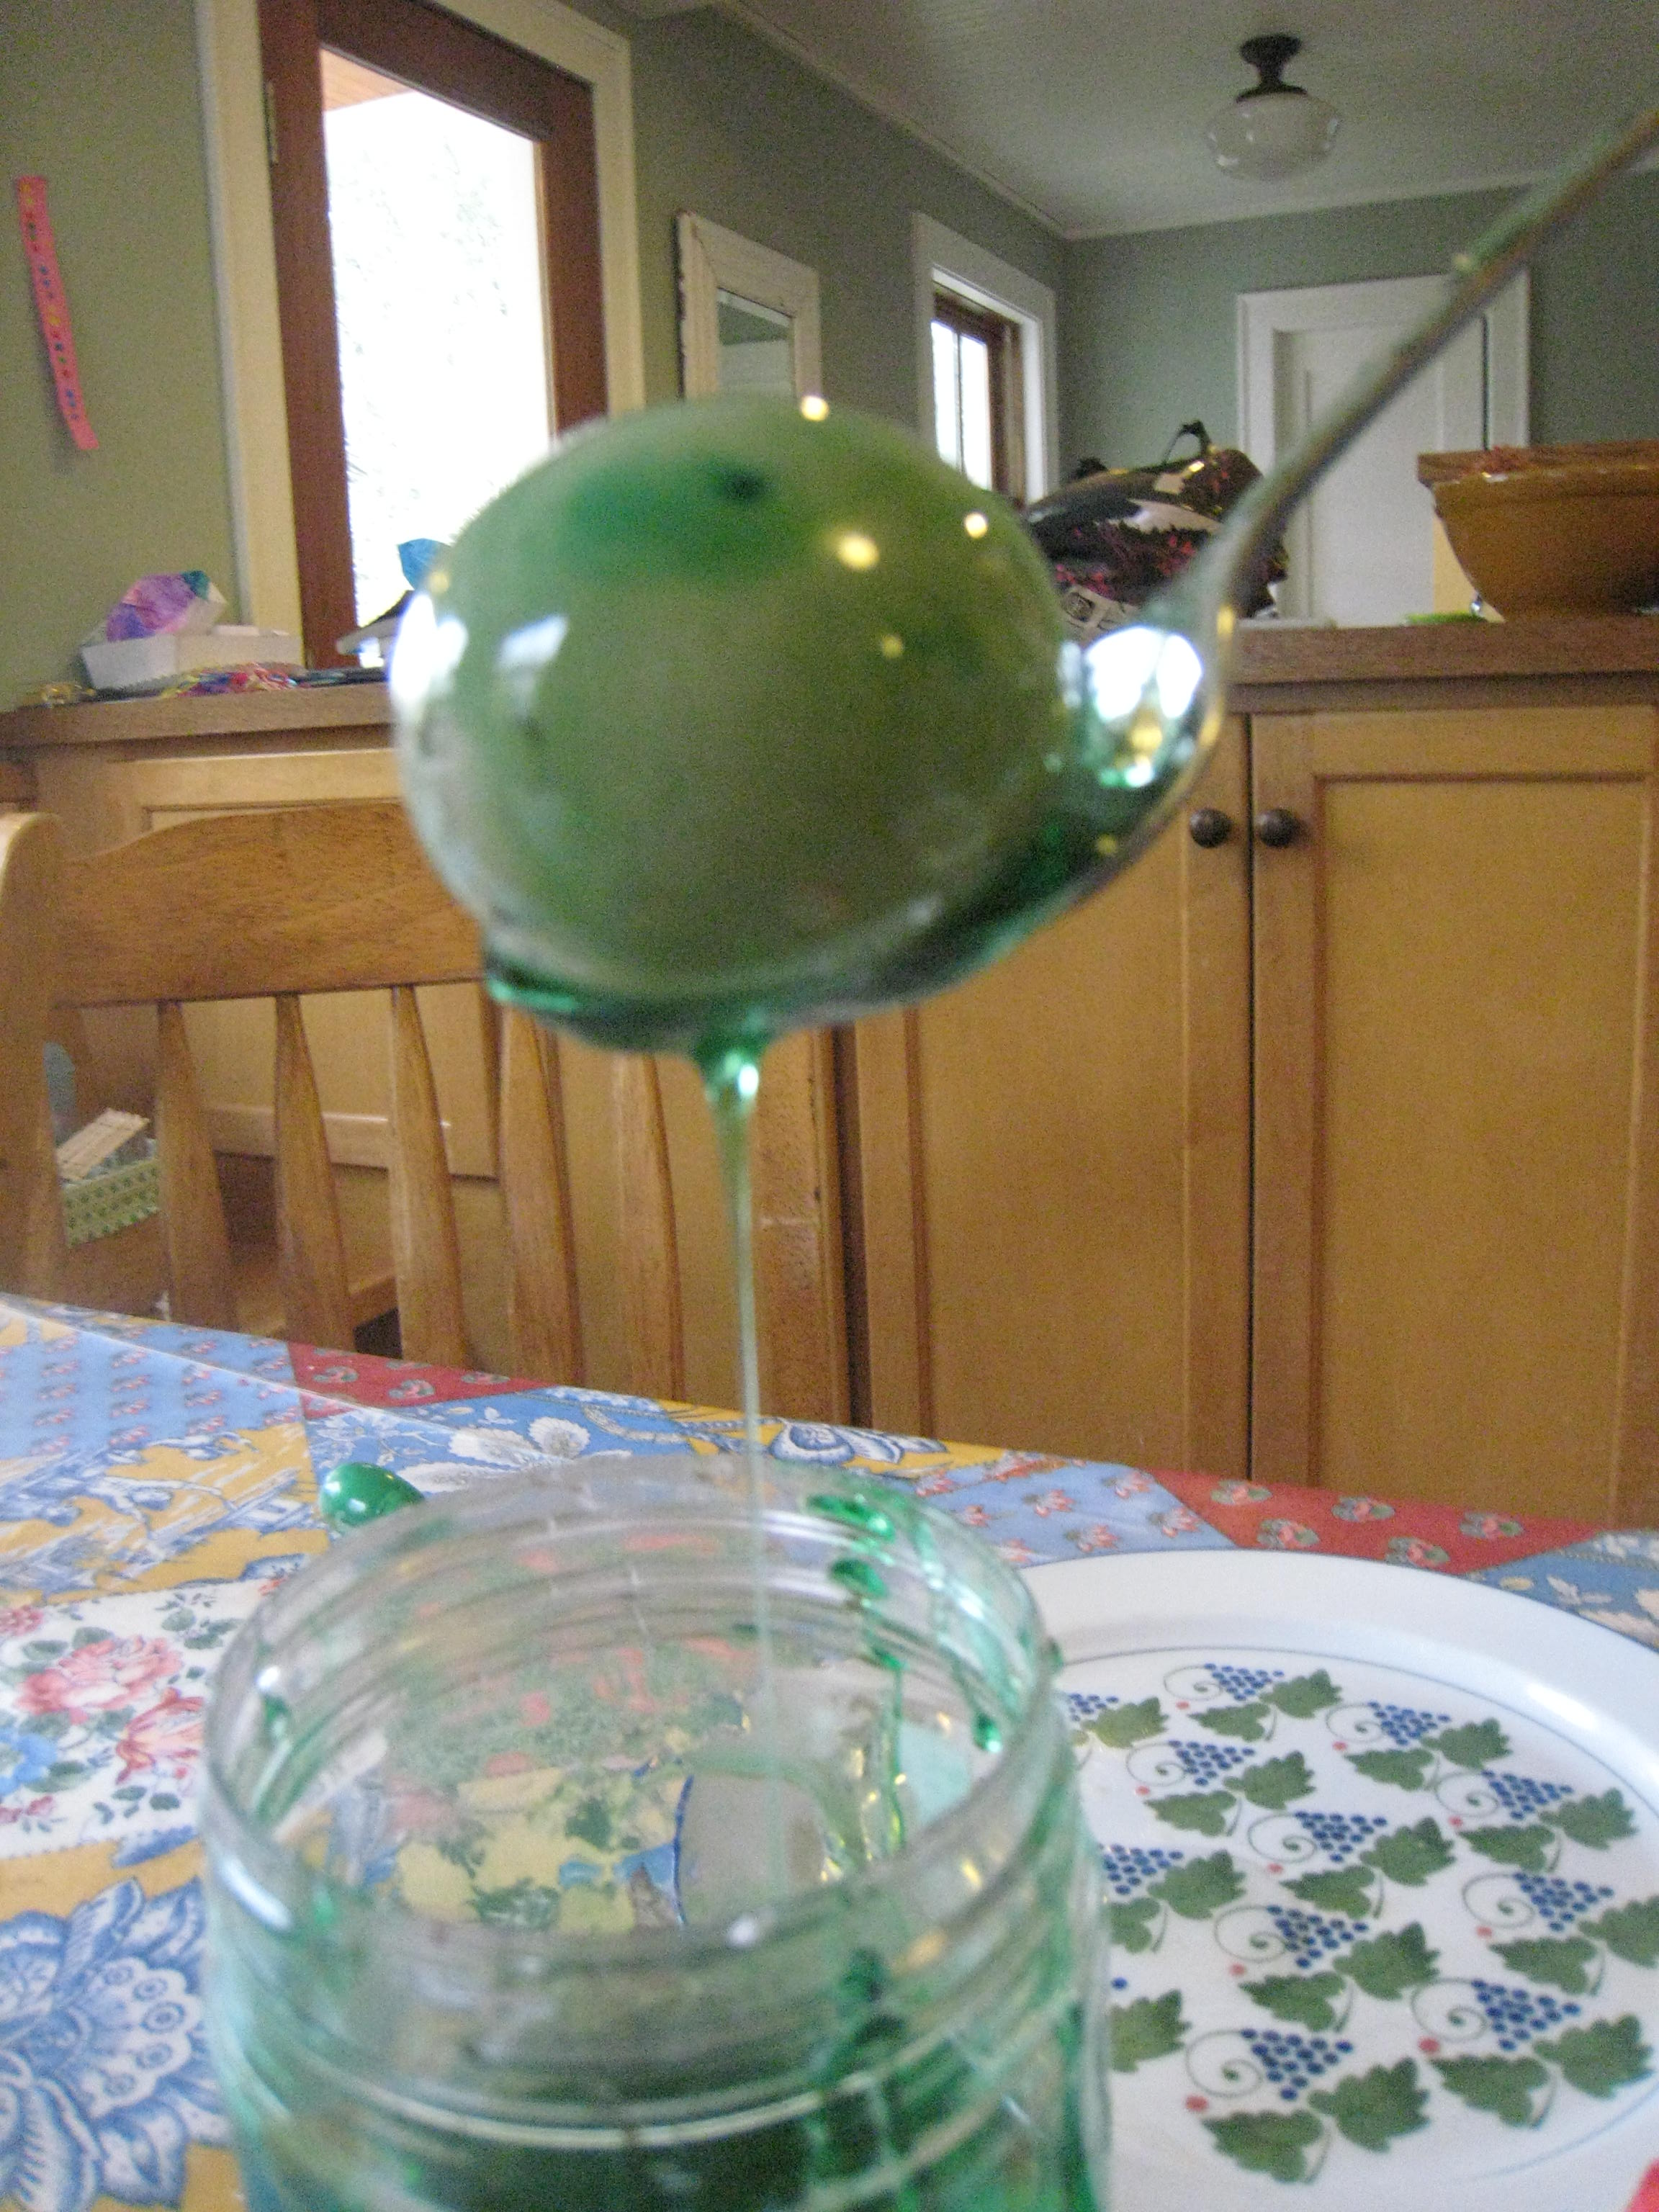
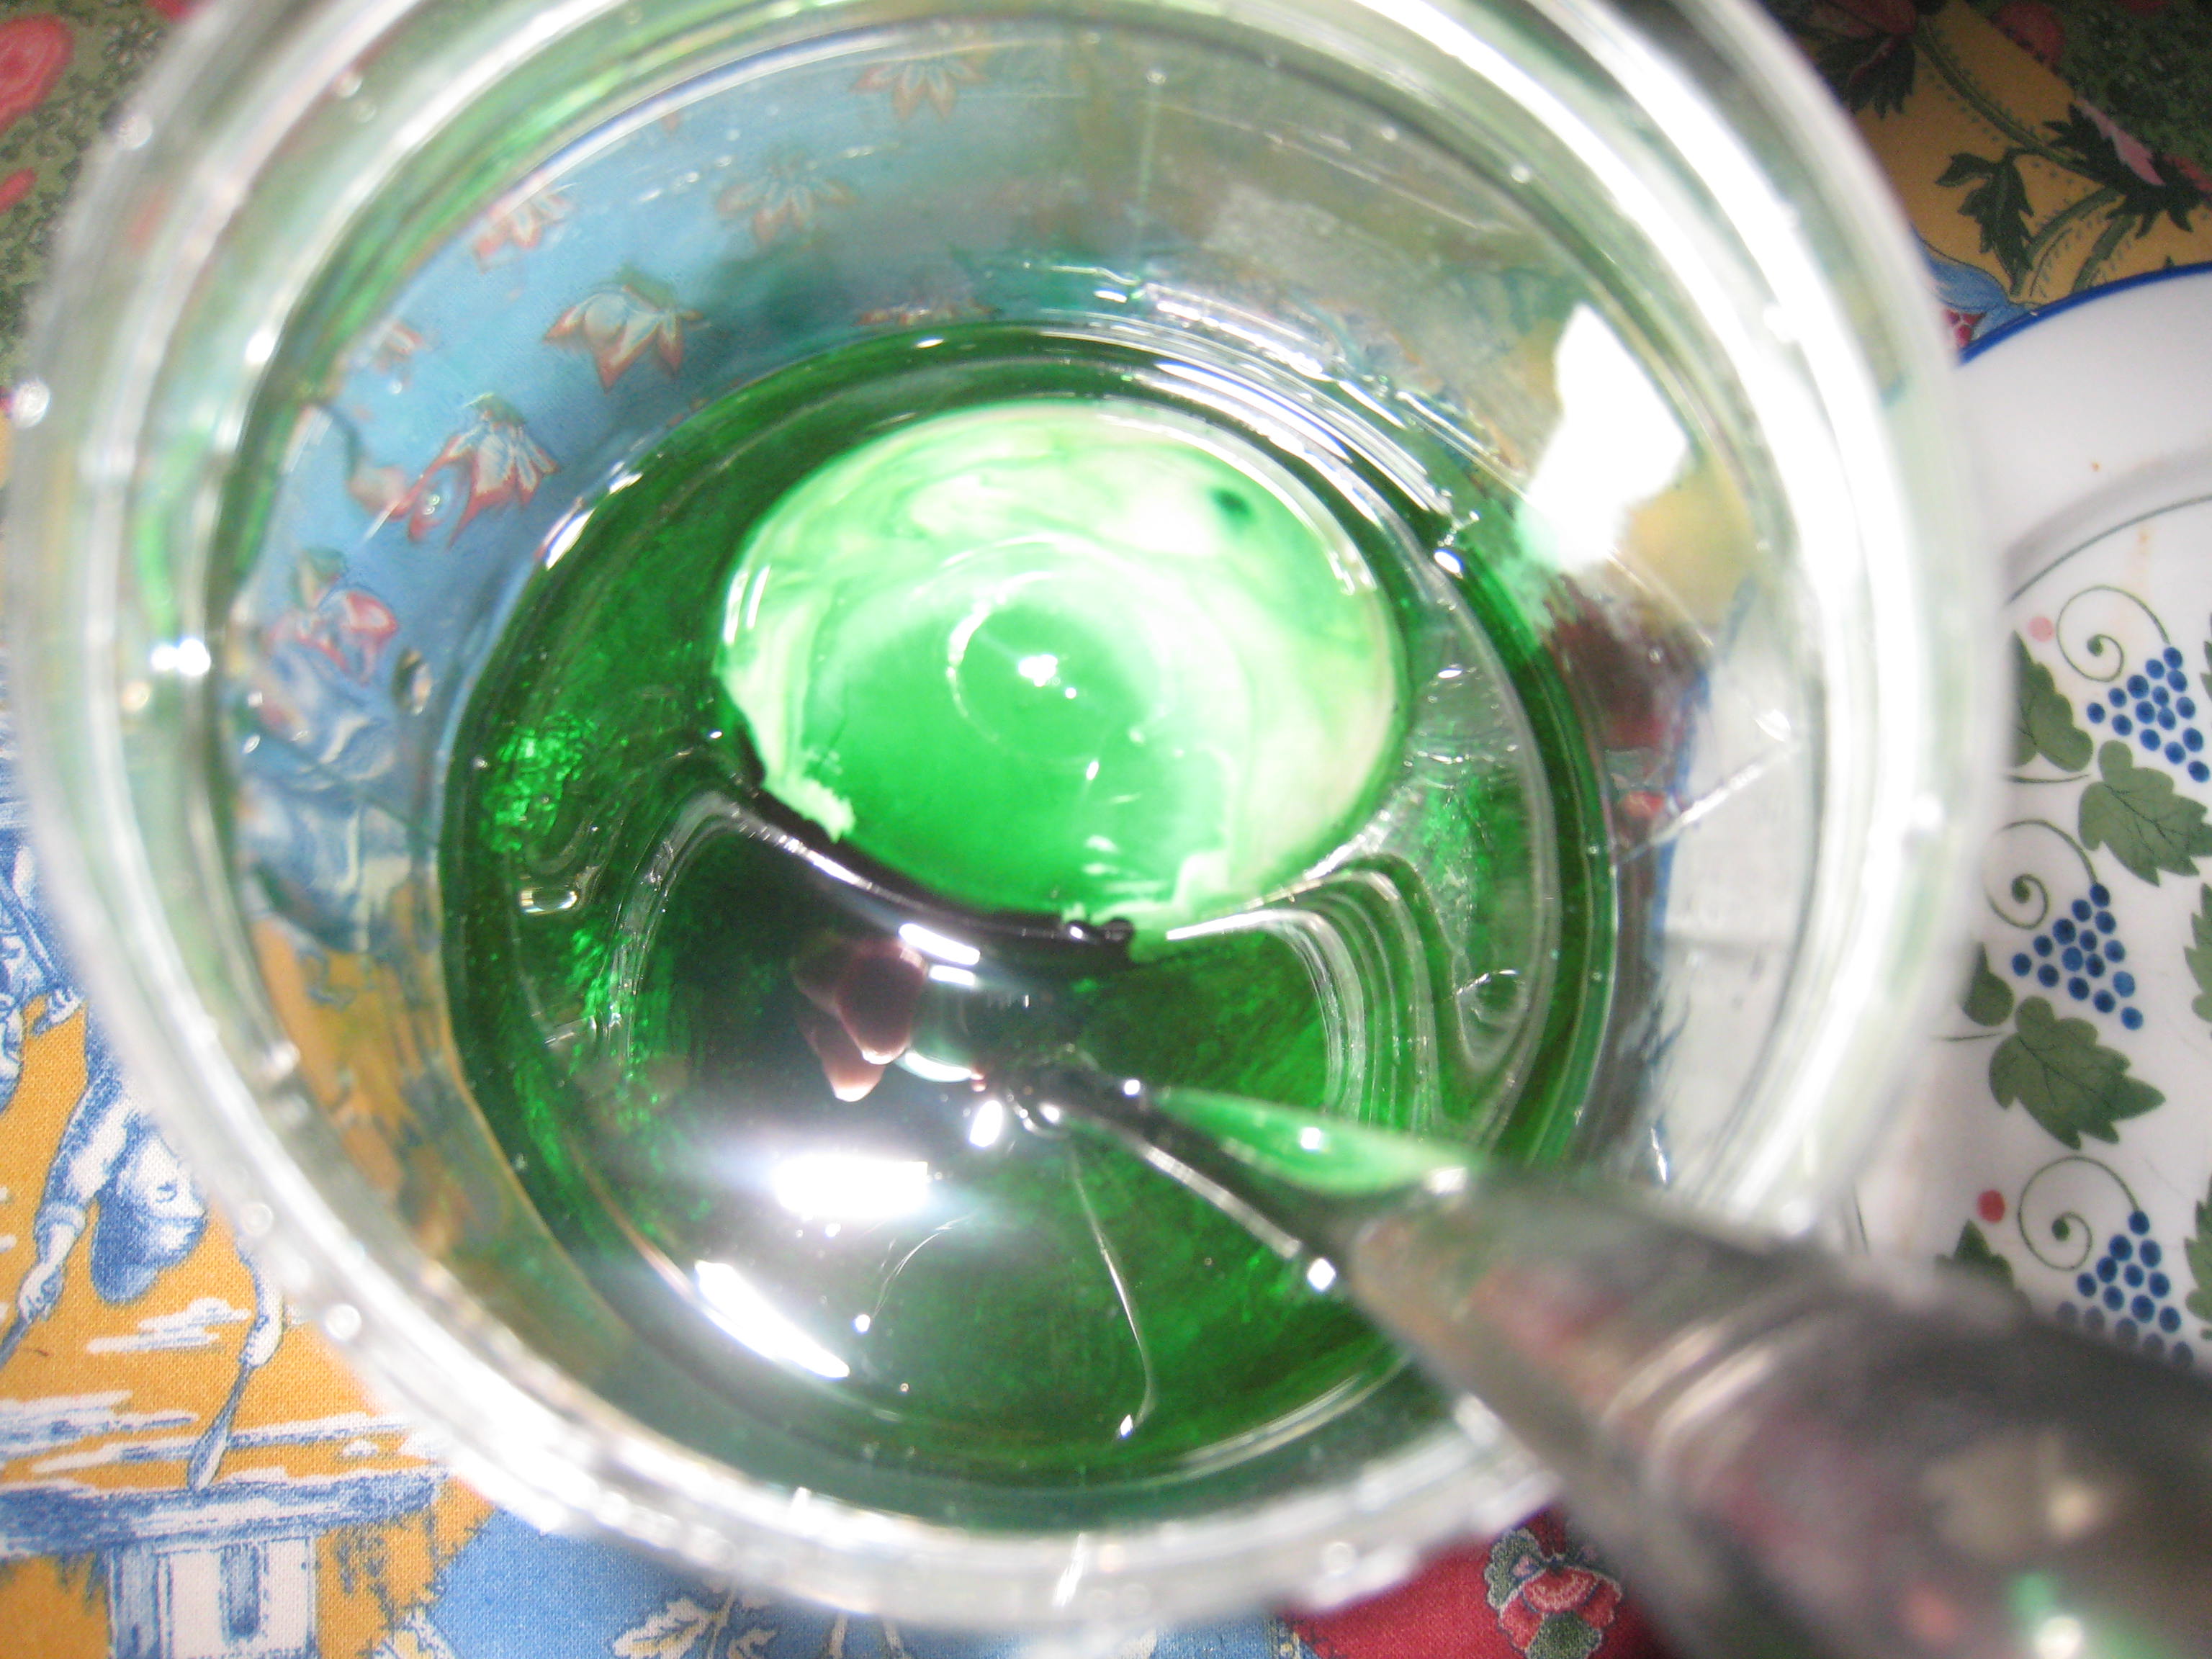
Draw a pencil line about half an inch above the bottom of the strip on one side. Wrap a leaf around the coin (dimes work well) and press it down against the line on the left side, hard enough to rub color onto the line. (See photo above!) Do the same thing with the other leaf. Get as much color as possible onto each spot and let dry for a few minutes, or dry with a blow dryer.

Fill the jar with just enough rubbing alcohol so that the bottom of the strip will touch it, but the spots of color will not. Hang your paper strip over the pencil with the bottom touching the alcohol. (You can have it doubled or have one half hanging outside the jar. Both worked for us.) Try to make sure that the strip is hanging evenly so the color will travel straight up.
Watch as the colors travel up the strip and take the strip out of the alcohol before they reach the top. Let it dry and observe. The colors may be faint, but you should be able to make them out.

What do you see? Green leaves contain a pigment called chlorophyll, which helps plants do photosynthesis (get energy from sunlight, water and carbon dioxide.) In the fall, many trees stop making this pigment, which is why the other colors in the leaves become visible. Are your results consistent with this?
We tried the same experiment to compare spinach leaves that were fresh or had been microwaved in a ziplock (blanched). Although I read that the pigments change when vegetables are cooked or stored, we didn’t see much difference, except a brown smear near the very bottom. What other veggies could you try this experiment with?

A Very Hungry Caterpillar
- by KitchenPantryScientist

We’ve enjoyed watching the Monarch caterpillar we found a few weeks ago transform from ravenous larva to jewel-like chrysalis. Soon, a beautiful butterfly will emerge and my kids and I will cheer as it soars to the treetops.

It’s a great time of year to find Monarch caterpillars! Look for some milkweed that’s been chewed up and you may find a caterpillar of your own to observe! Be sure to take some milkweed with you and keep it fresh so your caterpillar has plenty of food. The last bunch of caterpillars that hatch out each summer are the ones that make the long trip to Mexico, where they’ll spend the winter before returning to your backyard.
There was a really neat article about Monarchs in the New York Times recently! Click here to read it.
Grow Living Magnets from Pond Water
- by KitchenPantryScientist
If you have a pond nearby, gallons of science projects await! Not only can you collect tadpoles and watch them change into frogs before your very eyes, but there is a microscopic world in every drop of pond water.

Grab a bucket, or whatever container you can find, and fill it with pond water. Be sure to scoop up a few inches of muck from the bottom when you fill your bucket, since lots of cool things live in muck.
Let the murk settle and peek into your bucket. Can you see any tiny creatures swimming around? Grab a magnifying glass, or if you’re lucky enough to have a microscope, see what else lives in the water.

There are special bacteria, called magnetotactic bacteria, that live in the mud of many ponds. Bacteria are tiny organisms made of just one cell, and these magnetotactic bacteria make tiny magnets called magnetosomes, which they store in microscopic “sacs” inside their single-cell bodies. The magnets in their bodies are arranged in long chains, and tell the bacteria what direction to swim. Not only do magnetotactic bacteria swim toward the nearest pole, but they swim down toward magnetic forces deflected through the earth’s center, which is made of molten metal. This helps them survive, since the oxygen in air can kill them and the nutrients they need are in the mud.
To grow your own magnetotactic bacteria, cover your bucket of muddy water and put it in a dark place (so algae won’t grow) for about a month. Take out a jarfull of the water and set a magnet outside the glass. After a few days, if magnetotactic bacteria have grown, you should be able to see white substance in the water near one pole of the magnet. This whitish stuff is actually millions of bacteria, attracted to the magnet by the opposite magnetic charges in their own bodies. If you have a microscope, collect the bacteria with an eyedropper and observe them. What happens if you set a magnet next to them?
Try growing these bacteria from water and mud from different ponds in your area. There are over 12 different strains of magnetotactic bacteria, and scientists are very interested in them. Not only do they have great possibilities in biotechnology and nanotechnology, but they may be clues to life on other planets. Magnetosomes in long chains, like those in bacteria, have been found in meteorites from Mars!
Algae Experiment
- by KitchenPantryScientist
Did you know that you can add a bale of barley hay to a 1 acre pond to help keep it from getting green and scummy in the summer? The hay, or possibly microorganisms in the hay, keep algae from overgrowing in the pond.
Algae are tiny, single-celled organisms called plant-like protists. They use the sun’s energy to make carbohydrates in a process called “photosynthesis” and they grow mostly in moist, sunny environments.
However, there are some places we don’t want algae to grow- like aquariums, or water purifiers. Some metals, organic chemicals, and other things (like barley hay) can keep algae from growing, or slow its growth. You can create your own experiment and discover some good anti-algae materials!

Take some lake or pond water and use it to fill several clear jars or glasses. Now, add a different non-toxic substance or item to each glass. Find things that you think might keep algae from growing. You might try pennies, tea bags, salt, vinegar, etc. Be sure to include a control sample, where you don’t add anything, so you can see normal algae growth. What happens if you cover glass one loosely with foil, so it gets air, but no light?
Place your samples in a warm, sunny spot for several weeks. You can lightly cover them with plastic wrap to reduce evaporation. Once you see green in your control sample, check the others. Did anything you add keep algae from growing? Did anything make it grow even better?
“Rubber” Eggs
- by KitchenPantryScientist
 This experiment never gets old! Put some raw eggs into jars and cover the eggs with (white or cider) vinegar. Remember to always wash your hands after handling raw eggs, since they can carry a bacteria called Salmonella enteriditis!
Do you notice anything happening to the eggs when you add the vinegar?
Let them sit overnight in the refrigerator and see what they feel like the next day. Before handling the eggs, gently rinse them with water, and be careful not to get vinegar in your eyes, since vinegar is an acid and stings!
Only the membrane of the egg will remain, which is like a rubbery balloon. What does it feel like?
If you want, draw or record what you observed in your science notebook.
What happened? Egg shells are made up of two chemical elements called calcium and carbon, which stick together in calcium carbonate crystals. Vinegar is an acid that breaks the crystals apart in a chemical reaction. The carbon and vinegar react to form carbon dioxide bubbles, which you probably noticed when you added the vinegar to the eggs.
To make alien monster eggs, return the eggs to the jars. Cover them with corn syrup and add some green food coloring. Leave them for 24 hours in the refrigerator and see how they feel the next day!
What happens? The balloon-like membrane of the soft eggs let water molecules pass through. Corn syrup doesn’t have much water in it, and water molecules move out of the egg into the corn syrup, making the egg shrivel.
If you want to, now try rinsing the eggs and submerging them in water again overnight (in the fridge.)
Happy eggsperimenting!
How to Mummify Apples
- by KitchenPantryScientist

We had an amazing time at the King Tut exhibit at the Science Museum of Minnesota and the omnitheater film Mummies, Secrets of the Pharaohs, gave us a fascinating look into the rituals of mummification.
We learned that Natron, which was used in Ancient Egypt to preserve mummies, is a natural salt mixture containing sodium carbonate decahydrate (soda ash), sodium bicarbonate (baking soda), sodium chloride (table salt), and another salt called sodium sulfate. Salt is a dessicant, which is a chemical that removes water from things. It also has anti-microbial properties, which means it kills bacteria and fungi. When you remove water and microbes from the picture, mummies bodies’ don’t decompose.
I read that you could use different combinations of table salt, Epsom salts and baking soda to try to replicate Natron and mummify apples, so we tried it out…Here’s a demonstration we did on Kare 11.
First, we decorated some of our plastic cups with Markers, since every mummy should have a fancy sarcophagus (even an apple). Then, we labeled them as follows:
control/table salt alone/Epsom salt alone/baking soda alone/half table salt, half Epsom salt/half table salt,half baking soda/half Epsom salt,half baking soda/ and equal parts table salt, baking soda and Epsom salt.

We cut an apple into 8 equal pieces and added one to each cup, covering them with the appropriate salt mixture and adding a loose top to the cups (we used foil cupcake holders.) We let them sit for a week and exhumed them to see what happened. It was amazing how different each apple looked, and how much liquid was in some of the cups! After we checked them out, we returned them to the cups with some dry salt mixture to let them go for another week!

The Egyptians would dry their mummies with Natron in windy tents in the dry desert air for40 days before wrapping them for their final burial.
You can weigh your apples before drying them to see how much water they lose! We tried the experiment with whole apples too, peeling and coring one, coring another and leaving one intact before covering them with salt mixture. We even wrapped on in cloth strips, just for fun!

What keeps mold from growing? What preserves the apple’s color best? Which salt mixture keeps the apples from smelling bad?
Fingerprint Fun and Homemade Valentines
- by KitchenPantryScientist

Who says science and art can’t go hand-in-hand? It’s easy to lift and study fingerprints using scotch tape, and colorful fingerprint designs make great Valentine’s cards, so what are you waiting for? All you need for the science part is paper, scotch tape and a pencil. For the valentines, you will need an ink pad, paper and markers.
On www.wikieducator.org/Fabulous_Forensic_Fingerprints, I found a fingerprint-lifting technique that works well, even for very young children. Simply take a pencil and scribble on a piece of paper until a small area is covered with the graphite from the pencil lead. Rub your finger around in the graphite until it is covered with gray. Place your finger on the sticky side of a piece of scotch tape and then carefully lift your finger up. A clear fingerprint should be visible. Place the tape face-down on another piece of paper to preserve the fingerprint.


You can then inspect the fingerprint under a magnifying glass, or with your naked eye. If you go to the wiki website I mentioned, you can decipher whether your fingerprint is a whorl, a loop, or an arch. It’s fun to trace your hand, fingerprint each finger and thumb, and tape your fingerprints to the appropriate fingers on the outline of your hand. Fingerprints would be a great addition to your science notebook! Kids have a lot of fun with this project and can do it unassisted once you show them what to do.
Older kids can try lifting a fingerprint from a hard surface! Put an oily fingerprint on a drinking glass, dust it with cocoa powder (you can use a feather), blow on it to remove extra powder, and lift the print using scotch tape. Tape it on some white paper to see it.
To make Valentines, put two fingerprints or thumbprints together in the shape of a heart. It’s also fun to make fish, bugs, and anything else you can think up! I gave my kids some ideas to get them started and they went from there! (You can add details with markers.) Have fun!
