Lemon Batteries

 - by KitchenPantryScientist

To make a battery, you need two oppositely charged electrodes (materials that pass electrical current from one thing to another) and an electrolyte (a liquid that allows charged atoms to travel through it.)

If you stick a zinc (galvanized) nail and a copper wire side by side into a lemon, but not touching each other, they act as electrodes. The lemon juice acts as the electrolyte.

A chemical reactions occurs between the zinc electrode and the acidic lemon juice, resulting in a second chemical reaction at the copper electrode. If you attach the two electrodes to a metal wire, electrons from the chemical reaction will flow through the wire from the zinc to the copper, creating an electric current.  We used a tool called a mutimeter to connect the two electrodes and measure the current flowing through the wire.

To make a lemon battery, push a zinc nail and a piece of copper into a lemon, side by side, but not touching. You can use a copper wire or a penny.

Touch the two ends of a multimeter to each of the electrodes to see how much current you’re generating. (See image below.)

Lemons with zinc and copper electrodes

Lemons with zinc and copper electrodes.

Testing current produced by a single lemon using a multimeter.

Testing current produced by a single lemon using a multimeter.


Test how changing the distance between the two electrodes changes the current. What else could you try?

Permanent Marker Tie Dye (Color and Chemistry)

 - by KitchenPantryScientist

(Re-post from April 14, 2016)

I love traditional tie-dye, but it’s fun to do this experiment that uses permanent markers and rubbing alcohol to make bright, gorgeous designs that mimic tie-dye, more easily, and with less mess.

IMG_5357
This experiment was created by Bob Becker, a chemistry and AP chemistry teacher at Kirkwood High School in Kirkwood, MO.  (To find a few of the original experiments I invented, check out Frankenworms, Sugar Cube Fizz Bombs, Homemade Window StickiesFoaming Slimeand Cornstarch Frescos.)

Here’s a video from my YouTube channel on how to do this experiment, so kids can “watch and do.”

To play with permanent marker tie dye, you’ll need:

-permanent markers (like Sharpies) 

-cotton items to decorate, like tee-shirts, socks, or dish towels

-rubbing alcohol (isopropanol)*Read warning labels. Parental supervision is required, since rubbing alcohol is poisonous if swallowed. Do this experiment in a well-ventilated area, and do not expose your artwork to heat until is is COMPLETELY dry, since rubbing alcohol and its fumes are flammable.

-rubber bands

-eye droppers

-containers like plastic cups or jars

To make your designs, stretch the cotton over the mouth of a jar or cup and secure it with rubber bands. (See video above.)

Use permanent markers to make several dime-sized dots of different colors on the stretched cotton.

Slowly drip rubbing alcohol onto the spots of color until the alcohol starts to soak outward, carrying the ink with it.

Allow your design to dry overnight. When completely dry, hang your shirt in the sun, or put it in the dryer for 15 minutes to set the color. Wash separately from other clothes, just in case!

IMG_5354

The Science Behind the Fun: Pigments are molecules that give things color. The pigments in permanent markers are trapped in ink compounds that are insoluable in water, which means that they won’t dissolve in water. However, if you add a solvent, like rubbing alcohol, or isopropanol, to permanent markers, it dissolves the ink. As the alcohol moves through the cloth you are decorating, it carries the pigments along with it. Small pigment molecules move faster than big ones, so the colors sometimes separate into their different color components as they move through the cloth. The alcohol evaporates into the air, leaving the ink in the fabric, and since it is still insoluable in water, it won’t come out when you wash it. 

Enrichment: What happens if you draw lines, concentric circles or different shapes on your designs? Can you layer colors and watch them separate? What if you add rubbing alcohol next to the color, instead of directly on it? How many drops of alcohol do you have to add to a dime-sized color spot before it starts to expand?


Seed Science: Homemade Chi Pets

 - by KitchenPantryScientist

I grew up hearing the Chi Chi Chi Chi song on TV, but our family never actually purchased a Chi Pet, so I never realized the dream of sprouting green hair from a clay animal. Until now.

Chia Creature (KitchenPantryScientist.com)

Chia Creature (KitchenPantryScientist.com)

With the emergence of chi seeds as a new health fad, it’s easy to get your hands on some chi seeds (of the sprouting variety) with a click of the mouse, or a trip to the Co-op. Chia seeds are quick-growing members of the mint family called Salivia hispanica, hailing from Central and South America where they have served as a food source for humans for well over a thousand years. And although studies have shown that they probably won’t help you lose weight, they are chock full of protein, fiber, fatty acids and anti-oxidants.

When you give these tiny seeds the signals they need to sprout: water, light, warmth and air, they grow very fast, so you should see tiny white roots poking out in a few days, soon to be followed by a shoot and leaves.

Since most people don’t have any way to fire clay in their homes, I decided to keep it simple. These homemade chia pets are basically clay (or Play-Dough) animals formed around seed starter pellets (also available online.) Add a few pre-soaked chia seeds, wait a few days and Voila! Your homemade animal will be sprouting living green hair.

You’ll need:

-2 Tbs chia (sprouting) seeds

-dirt or seed starter pellets

-clay or playdough

-a fork or toothpick

img_5806

1. Soak 2 Tbs. chia seeds in 1/2 cup water overnight. The mixture will get slimy as it sits and water is trapped by tiny fibers on the seeds to form a gel-like substance.

2. The next day, soak your seed starter pellets per the instructions on the package.

3. Create a clay or Play-Dough animal big enough to hold the expanded pellet or some dirt inside, wherever you want the green sprouts to appear.

img_5795

4. Put the dirt/seed starter pellet into to space you created and scratch the surface with a fork or toothpick.

5. Add 1/2 tsp or so of seeds to the dirt and use the fork or toothpick to mix them into the soil.

Chia Puffer Fish (KitchenPantryScientist.com)

Chia seeds sprouting in our Chia Puffer Fish! (KitchenPantryScientist.com)

6. Wait for the seeds to grow, keeping the soil damp at all times. (You can speed growth by covering your chia pet with a plastic bag to hold in heat and moisture.) Watch for roots and leaves to emerge and draw or photograph them.

Homemade Chia Pet -KitchenPantryScientist.com

Homemade Chia Pet -KitchenPantryScientist.com

“No risk is more terrifying than that taken by the first root. A lucky root will eventually find water, but its first job is to anchor an embryo and forever end its mobile phase, however passive that motility was….it assesses the light and humidity of the moment, refers to its programming and quite literally takes the plunge.” -Hope Jahren “Lab Girl”  (My favorite new book. Read it!)


Winter Science: Mouthwatering Maple Syrup Snow Candy

 - by KitchenPantryScientist
Maple Snow Candy from Outdoor Science Lab for Kids (Quarry Books 2016)

Maple Snow Candy from Outdoor Science Lab for Kids (Quarry Books 2016)

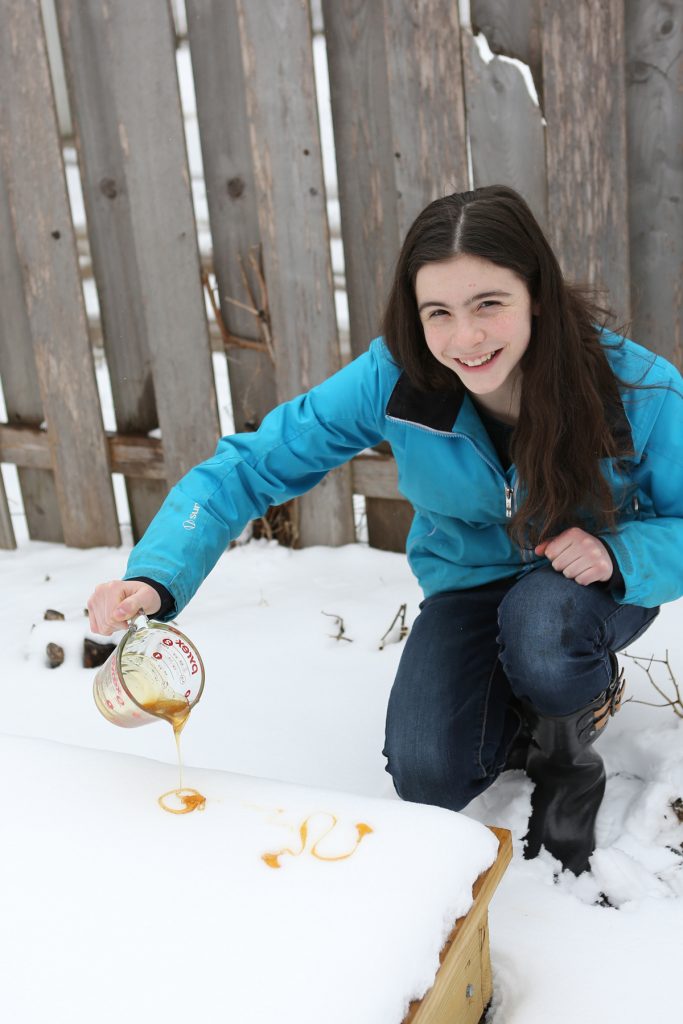
Remember this homemade snow candy from Laura Ingalls Wilder’s classic “Little House in the Big Woods?” You can make the same amazing maple treats using heat evaporation and quick cooling in the snow, or on crushed ice cubes.

Here’s how to make the candy, along with some candy-making science, straight from the pages of my new book, “Outdoor Science Lab for Kids,” which you can order from your favorite book retailer by clicking here.

You’ll need:

-1 cup pure maple syrup

-sauce pan

-candy thermometer

-fresh, clean snow

Safety Tips and Hints:

-Hot sugar syrup can cause burns. This experiment must be done with adult supervision.

-Allow candy to cool completely before tasting.

-Only use pure maple syrup for the best results.

Directions:

Step 1: Go outside and scout out a spot with some clean snow several inches deep for making your candy. Alternately, collect and pack down a few inches of fresh snow in a large, flat container, like a casserole dish. (You can use crushed ice cubes if you don’t have snow.)

Step 2.  Boil the maple syrup in saucepan, stirring constantly until it reaches around 235-240 degrees F (soft ball stage.)

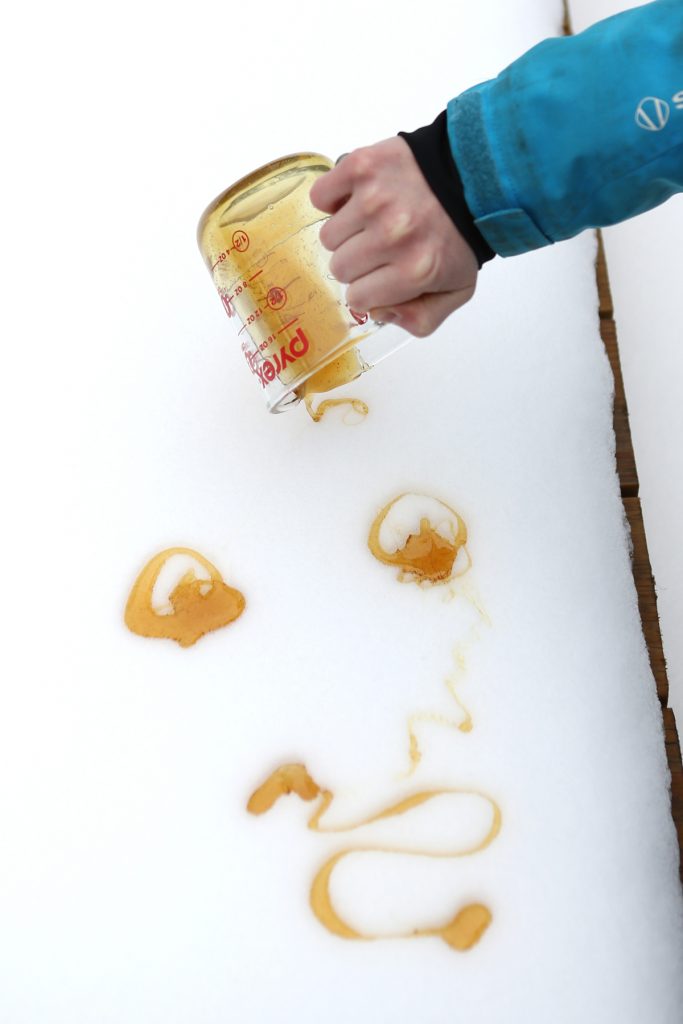
Step 3.  Remove the maple syrup from the heat and carefully pour it into a heat-resistant container with a spout, like a Pyrex measuring cup.

Step 4. Pour wiggly candy lines into the snow to freeze them into shape.

Maple Snow Candy from Outdoor Science Lab for Kids (Quarry Books 2016)

Maple Snow Candy from Outdoor Science Lab for Kids (Quarry Books 2016)


cz1a0054p

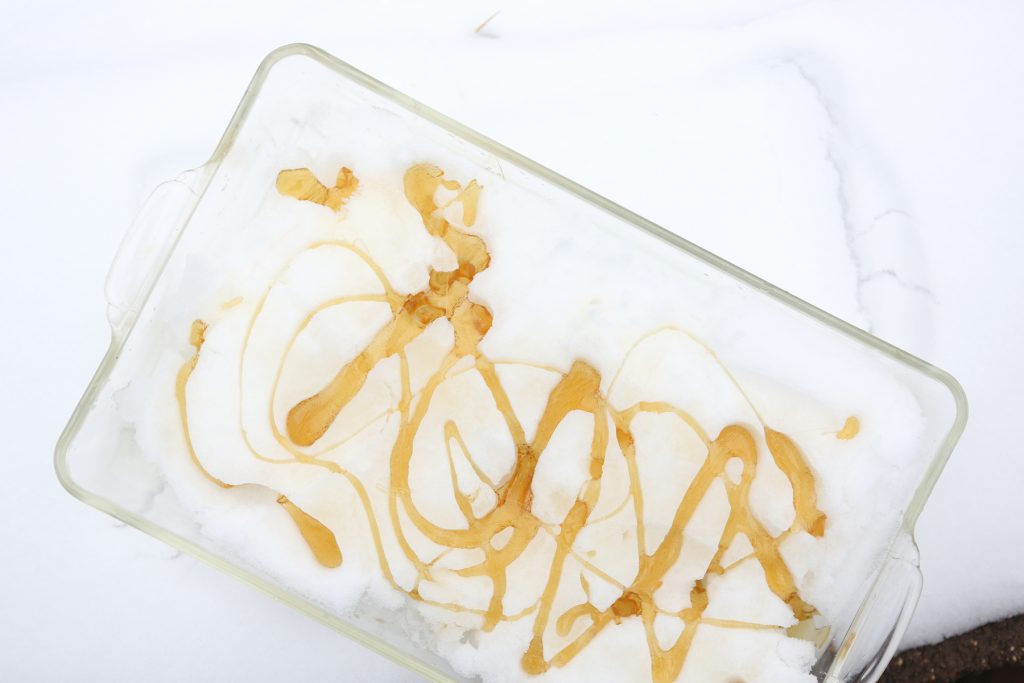
Alternately, make snow candy in a casserole dish filled with fresh snow or crushed ice.

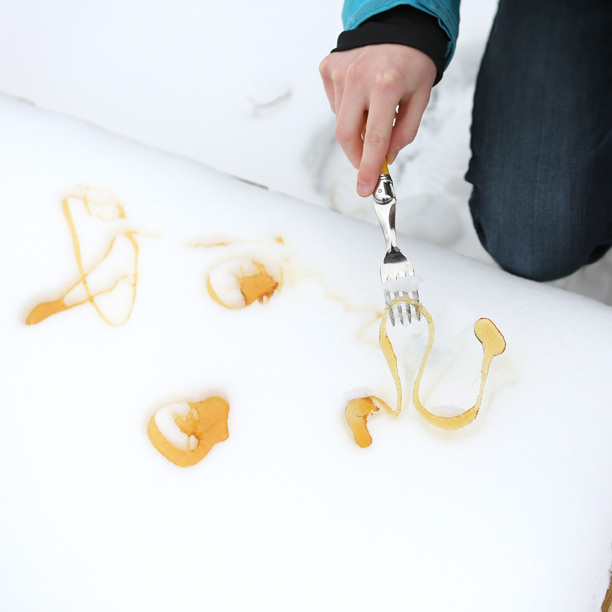
Step 5.  When you’re done, remove the candy from the snow with a fork.

Maple Syrup Snow Candy from "Outdoor Science Lab for Kids" (Quarry Books 2016)

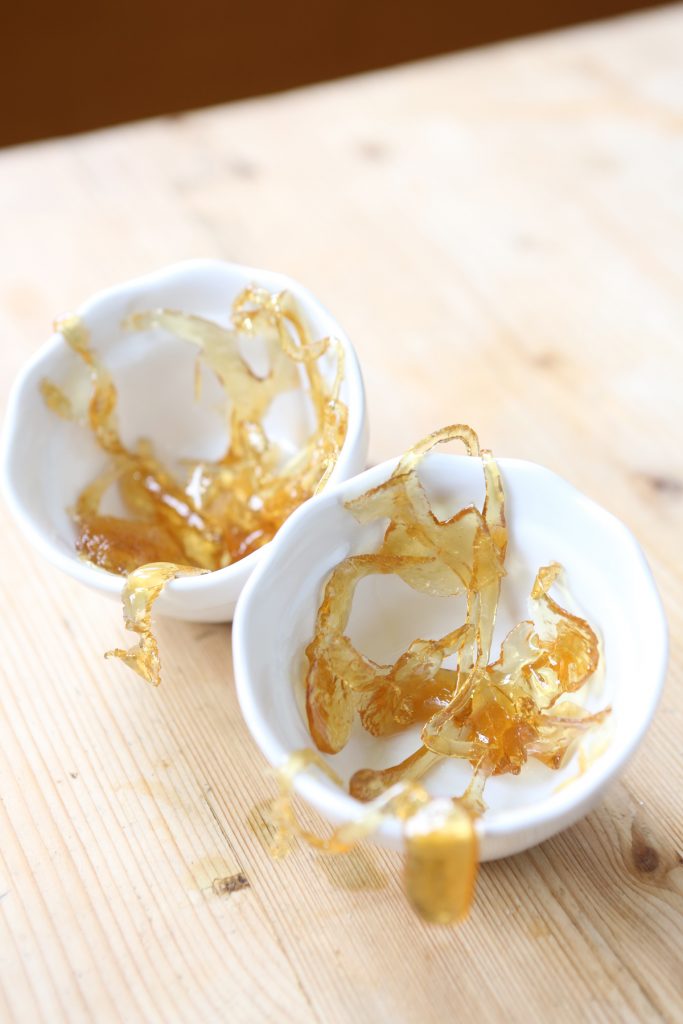
Maple Syrup Snow Candy from “Outdoor Science Lab for Kids” (Quarry Books 2016)

Step 6. Eat your candy right away, or let it warm up and wind it around sticks or skewers to make maple lollipops. Enjoy!

Maple Snow Candy from Outdoor Science Lab for Kids (Quarry Books 2016)

Maple Snow Candy from Outdoor Science Lab for Kids (Quarry Books 2016)

The Science Behind the Fun:

Maple syrup is made from watery tree sap boiled to evaporate most of the moisture it contains when it’s first tapped from a tree. Following evaporation, the syrup that remains is mostly made up of a sugar called sucrose, but it also contains smaller amounts of glucose and fructose.

Naturally, other organic compounds are also present in tree sap, giving syrup from different areas unique flavors. Syrup collected earlier in spring when it is cold tend to be light in color and have a mild flavor. As the days get warmer, microbes ferment some of the sugar in the syrup, making it darker and giving it a more robust taste.

In this experiment, you heat maple syrup, evaporating even more water. A super saturated solution forms, which holds more sugar molecules in the liquid than would be possible if you evaporated the water at room temperature.

When you pour the supersaturated sugar into the snow, it cools quickly, forming some sugar crystals to give the maple candy a soft, semi-solid consistency. Heating the syrup to a higher temperature will evaporate more water, resulting in even more crystal formation in the cooled syrup, making it harder to bite. If you carefully evaporate all of the water from maple syrup, you’ll be left with pure maple sugar crystals.

Creative Enrichment:

-Try collecting some syrup from your pan at several different temperatures and compare the resulting snow candy for texture, color and consistency.

-Can you do the same experiment with other sugar syrups, like molasses or corn syrup?

-Try to make maple sugar.


Air Plant (Tillandsia) Holiday Ornaments

 - by KitchenPantryScientist

Tillandsia, also known as Air Plants, come in many shapes, sizes and colors. In nature, you’ll find them living in trees in warm places like South America. They collect moisture from the air and rain, rather than pulling it up via roots like most plants, so you can care for them with a weekly misting.

Tillandsia ornament (KitchenPantryScientist.com)

Tillandsia ornament (KitchenPantryScientist.com)

Pick up a few clear, hollow “decorate your own” ornaments, and you can use these living wonders to make unique homemade decorations. We’re giving them as gifts this year.

You’ll need:

-clear ornaments with removable tops
-small Tillandsia that will fit through ornament tops (Air Plants are available at most nurseries. Ask for care instructions, if they have them.)
-needle nose pliars, or tweezers

Note: Choose plants that are small enough to fit through the openings of your ornament!

Tillandsia ornaments (Kitchen Pantry Scientist.com)

Tillandsia ornaments (Kitchen Pantry Scientist.com)

Mist your plants, or soak them in a bowl of clean water for 15 minutes or so, gently shake off the excess water, and carefully push them into the ornaments, bottom first so you don’t harm the plant. Put the top back on the ornament, leaving it loose enough for air to circulate.

Once a week or so, remove the top of the ornament and add some water. Coat the entire plant with water, pour out the excess and put the top back on. After the holidays, you can remove the plants with tweezers and move them to a new home in a vase, bowl or other clear container.

Slime Kit: Homemade Science-y Holiday Gifts for Kids

 - by KitchenPantryScientist

Buying gifts is fine, but it’s more fun to make them. This year, we decided to make botanical gifts for the adults on our list, and slime kits for the kids.

img_2335

To make a slime kit, you’ll need:
-glue
-glitter glue (optional)
-Borax laundry detergent
-small plastic sample cups or paper cups (optional)
-food coloring
-jars with lids
-a small plastic bin or shoe box
-plastic spoons
-extra glitter (optional)

Label the jars and fill as follows:

  1. Bouncy Ball Mix (fill with glue)
  2. Slime Mix (fill with equal parts glue and water, mixed well)
  3. Borax detergent (fill with powdered detergent)
  4. Cross-Linking Solution (leave empty)
  5. optional-Sparkly Bouncy Ball mix (fill with glitter glue)
  6. optional-Sparkly Slime Mix (fill with equal parts water and glitter glue, mixed well)

Make an instruction sheet for the kit. (Print out the info below, or copy it onto a card.)

To make slime:

  1. Fill Cross-Linking Solution container with warm water. Add about 2 tsp Borax per 1/2 cup water to the container. Mix well. (Don’t worry if all the Borax doesn’t dissolve!)
  2. Add a few spoonfuls of Ball Mix or Slime Mix to a small plastic cup or paper cup.
  3. Add a drop or two of food coloring to the cup. Stir.
  4. Add 3 spoonfuls of the Cross-Linking Solution to your ball mix or slime mix and stir well.
  5. If the slime still feels too sticky, add a little more Cross-Linking Solution.
  6. Remove your completed slime from the cup.

The Science Behind the Fun:

Glue is a polymer, which is a long chain of molecules linked together, like a chemical chain.  The polymer formed by water and glue is called polyvinyl acetate.

The Borax solution is called a cross-linking substance, and it makes the glue polymer chains stick to each other. Eventually, all the chains are bound together and no more cross-linking solution can be taken up.

To finish the slime kit, fill the plastic bin with the ingredients you put together, including jars of ingredients, instructions, plastic spoons, and mixing cups (optional.)

Slime (from Kitchen Science Lab for Kids -Quarry Books)

Slime from Kitchen Science Lab for Kids (Quarry Books)


Candy Experiments

 - by KitchenPantryScientist

We have bags full of candy at our house, and I’d like to see them disappear as quickly as possible. Here are a few science experiments we tried, substituting candy for other ingredients:

Candy Chromatography: We put candy in water and used coffee filters to separate out the colors, via capillary action.

Skittles in water with coffee filter strips between cups...

Skittles in water with coffee filter strips between cups…

Coffee filters on cups, with water dripped onto a piece of candy.

Coffee filters on cups, with water dripped onto a piece of candy.

Candy-drinking plants? We dissolved candy in warm water and added white carnations with cut/split stems to see whether they’d  change color as the flowers drew the water up into their petals.

img_21141

img_21431

img_21501

Candy Vegetable Vampires: We tried the same experiment with Napa Cabbage, via the Vampire Vegetables experiment in Kitchen Science Lab for Kids.

img_21541

img_21591

We’re also going to freeze candy in ice and make Tie Dye milk with Skittles!

What could you try with your candy?

10 Fun Kitchen Halloween Science Experiments for Kids

 - by KitchenPantryScientist

Here are ten quick and easy experiments to make your Halloween even more fun and memorable!

_DSC5642-b

Click on these links for instructions on how to make:

Oozing Monster Heads (from Outdoor Science Lab for Kids)

Frankenworms (from Kitchen Science Lab for Kids)

Cornstarch Goo (from Kitchen Science Lab for Kids)

Mad Scientist’s Green Slime (from Kitchen Science Lab for Kids)

Alien Monster Eggs (from Kitchen Science Lab for Kids)

Magic Potion (from Kitchen Science Lab for Kids)

Bags of Blood (from Kitchen Science Lab for Kids)

Fake Blood 

Scary Jell-O Eyeballs

Vegetable Vampires (Scholastic.com/Experiment from Kitchen Science Lab for Kids)

Here are a few of my favorites!

You can find more experiments by scrolling down on my website!

Dry Ice Science

 - by KitchenPantryScientist

We had a great time playing with dry ice on WCCO TV this morning. I showed viewers how to make spooky Halloween decorations (hot water, food coloring and dry ice), carbonate beverages, inflate a balloon, and even make a spoon “sing.”

Dry ice is literally really cool, which is why you have to wear gloves to handle it. It’s made from frozen carbon dioxide gas, and as it warms up, it goes from the solid to liquid state instantly, skipping being a liquid altogether in a process called sublimation. As it becomes a gas, it cools water molecules in the air around it, making fog. And if you add it to a liquid, it carbonates the liquid with bubbles.

img_19071

To make dry ice, you have to get carbon dioxide gas really cold and put it under pressure so that it goes instantly from the gas phase to the solid phase in a process called deposition.  Here’s a video of a machine that makes dry ice pellets:

Foaming Alien Blood

 - by KitchenPantryScientist

If you’ve ever seen the X-Files, you know that foaming green alien blood is pretty scary.

It’s simple to use kitchen table chemistry to mix up your own batch of green alien blood with corn syrup, green food coloring, water and baking soda.

Just add vinegar (tell your friends it’s water) to make it foam.

Mix together:

2 Tbs corn syrup

1 tsp baking soda

green food coloring

1/2 tsp water

When you want to make your slime foam, add a few tsp of vinegar.

You could make the same thing with red food coloring and call it vampire blood!

The Science Behind the Fun: When you add baking soda (sodium bicarbonate) to vinegar (acetic acid), there’s a chemical reaction that creates carbon dioxide gas bubbles! 

Experiment created by Liz Heinecke at KitchenPantryScientist.com