Category:Uncategorized’
Real Pirates and How to Make a Compass
- by KitchenPantryScientist
Last week at the Real Pirates exhibit at the Science Museum of Minnesota, I walked below deck on a mock pirate ship, hoisted a pirate flag (Jolly Roger), touched real pirate treasure and played dice with pirates. The bell of the Whydah, a 300-ton pirate ship greeted us, illuminated by lighting and suspended in a huge tank of water. I could almost imagine it spinning and tumbling to the bottom of the sea off the Massachusetts coast. 146 people aboard the ship drowned when The Wyhdah went down.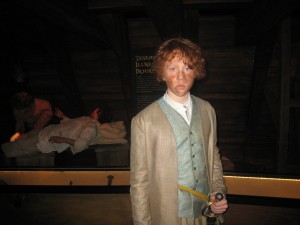
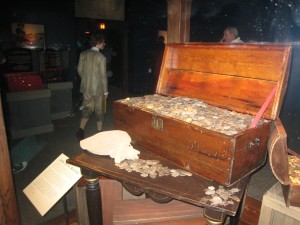
I was lucky enought to meet the treasure hunter-turned-historian Barry Cifford who discovered the wreck of the Whydah. He explained to us that pirate ships were true democracies, where crew mates were equal, no matter their background, age, race or religion. As a result ,many rushed to be pirates- whether they had escaped slavery, unjust society, or were just trying to make their fortune. The captain of the Whydah, Sam Bellamy, needed money to marry the woman he loved. There was even a 10-year old boy named John King aboard the Whydah when she went down…he left his mother to join the pirates. (My 11-year old claims he’d never do that.)
How did pirates navigate their way around the deep blue ocean well enough to ever utter the words “Land Ahoy?” In addition to maps and the stars, they used tools like the ones I saw from the Whydah: sounding weights to determine sea depth and ring dials to tell time. They also used compasses, simple tools for determining which direction North was, even in thick fog. A compass is an instrument containing a magnetized pointer that shows the direction of magnetic north, and you can easily make one with a needle, a magnet and a piece of cork or Styrofoam and a glass bowl (or pie plate) containing a few inches of water.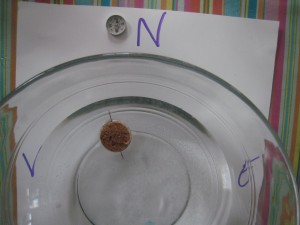 Cut a slice of cork, maybe 1/2 inch thick) with a bread knife (see photo.) Then, magnify the metal in your needle by stroking it from one end to another with a magnet about ten times. (Go the same direction each time.) Push your needle through the cork or Styrofoam and gently set it in the bowl of water. The needle, which you have turned into a magnet, will line up with Earth’s magnetic field, which runs from the South Pole to the North Pole. It should point North and South if you magnetized it correctly!
Target Shares Kitchen Pantry Science
- by KitchenPantryScientist
Since my goal is to get kids doing science, I was thrilled when Target asked me to do a guest post for abullseyeview.com about three easy experiments you can do with a homemade science kit!
Check it out here.
Homemade Science Lab
- by KitchenPantryScientist
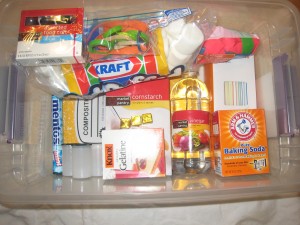
Homemade science kits are fantastic, inexpensive holiday or birthday gifts. In addition, they’re great places to store loose science items you might already have around the house, like magnets or magnifying glasses. I’ll list how much some of the ingredients/stuff cost me at Target. In a single shopping trip, it’s easy to fill a plastic bin with enough supplies to do a number of science experiments (with a few last-minute additions from around the kitchen, like dish soap and milk.) The other morning, I talked about making your own science kit on Kare11 Sunrise. Pair your kit up with KidScience app for iPhones and iPods, and watch your kid turn your kitchen table into a science lab!
I’ll list some “ingredients” for science kits and link directly to the experiments in blue (just click on the experiment name.) You can print out directions from my website for older kids, or let younger kids watch the how-to videos on my website (see sidebar), so they can do them on their own. Better yet, just put down some newspaper and let them start mixing things together.
Safety goggles, petri dishes,magnets, plastic test tubes, eyedroppers, magnifying glasses, plastic beakers and graduated cylinders are great additions to any kit! Many of these are reasonably priced at Creative Kidstuff stores, if you live in the Twin Cities.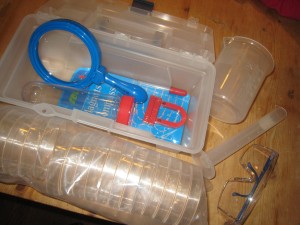
Here’s what we put in our kit:
composition book: really cheap at Target and makes a great science notebook to draw, record, and tape photos of experiments into.
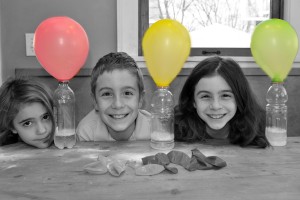
baking soda: $.52 at Target can be used for a number of experiments like fizzy balloons and magic potion. Mix with vinegar to make carbon dioxide bubbles.
vinegar $1.12 at Target can be used for fizzy balloons , alien monster eggs and magic potion.
balloons for fizzy balloons are $1.75 at Target.
dry yeast for yeast experiment is around $1. 32 at Target
white coffee filters: can be used for magic marker chromatography or making red cabbage litmus paper.
cornstarch: $1.27 at Target can keeps kids busy playing with Cornstarch Goo, a non-newtonian fluid. Here’s the video.
marshmallows around $1.50 at Target with rubber bands and prescription bottle rings you have around the house can be used to make marshmallow catapults. My kids used theirs to make their own Angry Birds game.
Knox gelatine and beef bouillon cubes can be used to make petri plates for culturing microbes from around the house. You can also use the gelatine for cool osmosis experiments!
Food coloring $2.39 at Target can be used to learn about surface tension by making Tie Dye Milk. Here’s the video. You can also easily make colorful sugar-water gradients that illustrate liquid density!
Mentos mints will make a Mentos geyser when combined with a 2L bottle of Diet Coke.
drinking straws$1.09 at Target are great for NASA soda straw rockets and a carbon dioxide experiment.
film canisters with pop-in lids make amazing rockets. I wouldn’t include the Alka-Seltzer tablets you need to make them work in kits for younger children, since they’re technically medicine. These rockets would be amazing gifts for kids to make each other. They’re fun to make and decorate.
Decorating the bin with sharpies(or paint) and stickers is a great way to personalize it and fun for whoever is putting it together. Have fun!
Halloween Science Experiments
- by KitchenPantryScientist
Update! I’ve added a few more experiments for your Mad Scientist’s laboratory. Here’s an new post of 10 spooky Halloween Science experiments (including those below) posted this Oct. (2012) : Click here to check them out.
Since lots of people are looking for fun science experiments to do for Halloween, I compiled some of mine so that they’re easy to find. Just click on the name of the experiment to go to the instructions, see photos of what to do, and learn a little science. Some of them also have links to my videos or TV segments where I demonstrate how to do the experiments. They’re all really easy and lots of fun!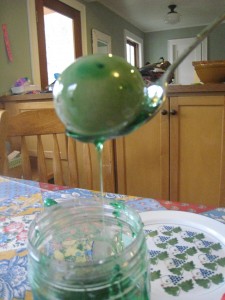
Goblin Goo (All you need is cornstarch and water. Here’s a video on how to make the goo. You can add a little food coloring to the water if you want, but it may stain your hands!)
Bag of Blood (If you have ziplock baggies, water, red food coloring and skewers, you can do this experiment!)
Fizzy Balloon Monster Heads (After we made Goblin Goo, I demonstrated how to make Fizzy Balloon Monster heads. Click here to watch.)
Magic Potion (Bubbly, stinky Halloween fun: I made a short video on how to make magic potion. Click here to watch it.
Mad Scientist’s Green Slime (To see a TV segment where we made Mad Scientist’s Green Slime, click here!)
Apple Mummies (Here’s a link to a TV segment where the kids and I demonstrated how to make Apple Mummies. Click here.)
Alien Monster Eggs (These make a great centerpiece for a Halloween party, when you’re done playing with them.) I demonstrated how to make them on Kare 11 this week! Click here to watch the video.
Frankenworms Gummyworms soaked in baking soda and water come to “life” when you drop them into vinegar! Click here for directions and a video.
Here’s a video of Halloween science experiments you can find on KidScience app for iPhones and iPod Touch. Kids will love watching how-to videos of all the experiments on KidScience Premium!
Next week, I’m headed to Goddard Space Flight Center in Maryland to learn more about climate change for my role as an Earth Ambassador for NASA! When I return, I’ll talk about my trip and demonstrate an all-new Halloween science experiment on Kare11’s Sunrise News on Oct. 19th.
Fly away!
- by KitchenPantryScientist
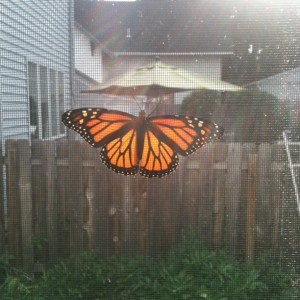 This morning, we set our freshly-hatched Monarch butterfly free. Amazing.
Film Canister Rockets
- by KitchenPantryScientist
I’m reposting this experiment at the top of my blog, since I’ve been telling everyone about it. Most of my projects use things you already have around the house, but this is worth a trip to a camera store to get some film canisters!
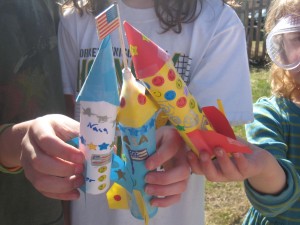
Three important forces act on rockets: THRUST (the force lifting the rocket), DRAG (force acting against the rocket caused by air resistance) and WEIGHT (the force produced by gravity dragging down the weight of the rocket.)
You can make your own rocket using a film canister. The clear kind with a lid that pops into the end works best and most stores that develop film will give you discarded canisters if you ask nicely! You’ll also need water and an effervescent tablet, like Alka-Seltzer, or Airborne to create the THRUST to launch your rocket into the air. Paper, tape and markers will help you make a longer rocket with fins (for stability) and of course, cool decorations. Here’s a quick video on how to make these rockets, followed by more detailed instructions and a little more physics! Astronauts are very safety conscious, and you should be too! WEAR SAFETY GOGGLES WHILE DOING THIS EXPERIMENT!
To make a rocket, cut paper into a rectangle (maybe 6″x4″), tape it to the film canister with the edge tight against the open side of the canister,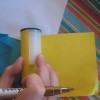 wrap it around to make a tube, and tape it tightly. Next, trace a drinking glass,
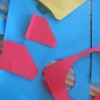
 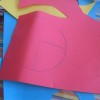 cut a pie-shaped piece out of it out, and roll it into a cone. Tape the cone to the end of your rocket (opposite the film canister.) Finally, tape fins on the rocket
  and decorate it!
To launch your rocket, put your safety goggles on and chew a piece of gum. Stick the gum into the inside of the film canister lid and firmly stick half an Alka-Seltzer or Airborne tablet in the gum so it won’t fall out.
Fill your film canister 1/3 to halfway with water and find a flat surface to set your rocket on. When you’re ready, firmly grasp the film canister end and, holding it upside down, pop the lid on TIGHTLY.
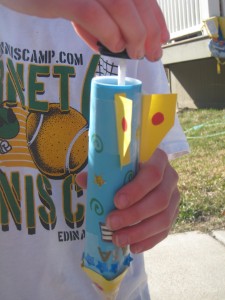
Flip your rocket over to begin the reaction and quickly set it on the flat surface you chose. Stand back and wait for the pressure (formed by the chemical reaction between the tablet and water) to build up and blow the lid off the canister, launching your rocket in to the air. Be patient, since it may take 30 seconds to a minute!
What happens? Pressure builds up inside the canister as carbon dioxide gas is produced by the chemical reaction. The gas is then rapidly expelled from the film canister when the lid blows off. This pushes the rocket in the opposite direction, demonstrating Newton’s third law: for every action, there is an equal and opposite reaction (THRUST.) DRAG and WEIGHT quickly bring these rockets back down. We shot a few film canister rockets off in Kare11’s studio and they almost hit the rafters!
Real rockets have enough fuel to produce enough thrust to carry them outside the earth’s atmosphere.
Aerogel (Space Jello!)
- by KitchenPantryScientist
When NASA scientists wanted to study star dust (particles from comets and interstellar dust), they had to find a way to slow down the tiny pieces of matter as they flew through space. By the way, interstellar means “between stars.” NASA’s Stardust spacecraft would encounter star dust traveling 6 times the speed of a rifle bullet! At these speeds, a collision with most materials would shatter, or burn up the space dust they were trying to collect.
In order to solve this problem, the scientists at NASA’s Jet Propulsion Laboratory (JPL) in California crafted a special “space jello” called Aerogel which could slow space particle down and trap them, undamaged, for study. Aerogel is similar to glass, but is 1000 times less dense. In fact Aerogel is 99.8 percent empty space. Imagine a box of air filled with tiny, tiny glass threads. When space dust hits this jello-like substance, it makes a tiny tunnel in the aerogel that helps scientists find and collect the dust under a powerful microscope. Then they can study the dust to see what it is made of!
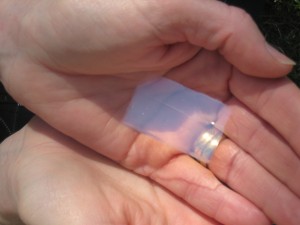
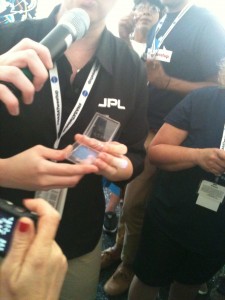
I was luckily enough to get a sample of Aerogel from Stephanie Smith, who works at the Jet Propulsion Laboratory. Aerogel looks like light-blue smoke when you hold it in your hand. It is as light as a feather, but it feels solid, dry, and harder than jello when you touch it! You can read more about Aerogel and the Stardust missions by clicking here, on the JPL website! It’s amazing science. They’ve found many interesting elements and chemical compounds in the star dust already. I can’t wait to see what they find next!
Here’s a video of us playing with the Aerogel Stephanie brought to the NASATweetup! (courtesy of MindspaceLTD)
Astronauts Rock(et)
- by KitchenPantryScientist
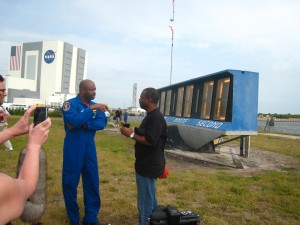
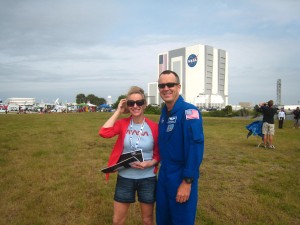
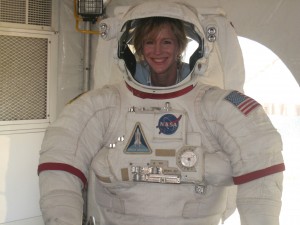
We waved and screamed as the Astrovan (carrying the astronaut crew to the shuttle Endeavour) drove past our NASA Tweetup group yesterday. Moments later, our hearts fell when we witnessed the first-ever Astrovan turn-around as the launch was “scrubbed”, or delayed, and the astronauts headed back to quarantine to wait for the next launch attempt. Putting on brave smiles, we trudged back to our tent. Everyone was sad, but one thing we learned at the tweetup is that NASA always puts safety first, and for good reason.
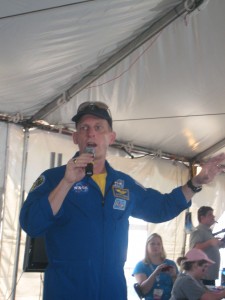
Astronauts. Absolutely nothing comes before astronaut safety. Not a presidential visit, not millions of viewers, not politics…nothing. So, when an Auxiliary Power Unit heater didn’t seem to be working correctly, they delayed the launch. I was astonished at the overwhelming pride and sense of responsiblity that the NASA employees who spoke to us expressed for each mission and every human life that we send into space.
The astronauts who spoke to our group were amazing, accomplished individuals with a unified message: be curious, work hard in school, and follow your dreams. Any kid who wants to be an astronaut has that potential. And parents…it’s our job to fan that creative, imaginative, curious spark in our kids, whether it’s by letting them bang on some pans (Astronaut Leland Melvin) to learn about sound, or simply to encourage them to do something that might seem out of reach. (NASA Astronaut Ricky Arnold is a teacher, not a military man.)
NASA Tweetup -Day 1
- by KitchenPantryScientist
How Golden Orb spiders travel to space
New Year’s Resolution
- by KitchenPantryScientist
My New Years Resolution is to get my kidscience iphone app up and running, so please forgive my infrequent posts during the month of January.
On Friday, Jan. 14th, I’ll be on the Twin Cities’ Kare11 Sunrise News demonstrating how to make Petri dishes at home, so you can see some of the cool microorganisms are growing around your house. You can also catch me at the Linden Hills Creative Kidstuff on January 23rd at 2p.m., showing kids how to make cornstarch goo, mad scientist’s green slime and red cabbage litmus paper!
January is a great month to do some kitchen pantry science, so what are you waiting for? Search through my experiments, choose one that looks fun, and get busy!
