Category:Physics Experiments’
Vegetable Vampires
- by KitchenPantryScientist
Plants love water as much as vampires love blood. Although they don’t have long thin fangs, they’ve developed a great system for pulling water up through their trunks and stems to their highest leaves using capillary action.
The kids and I demonstrated how to make them on WCCO MidMorning. Click here to watch.
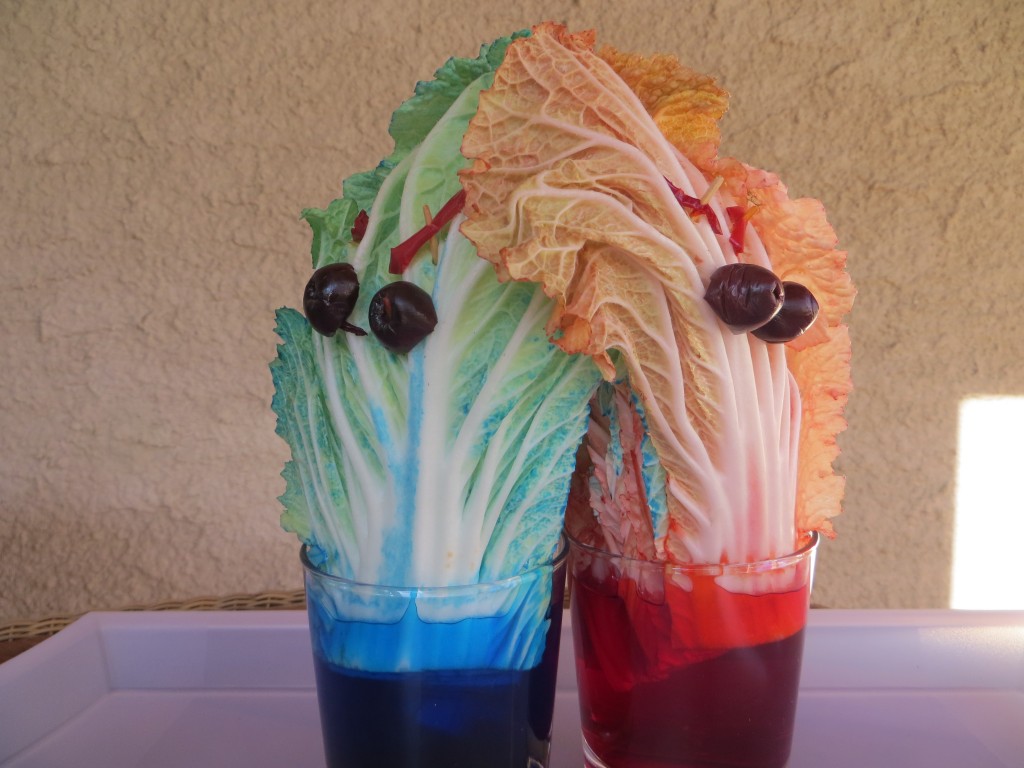
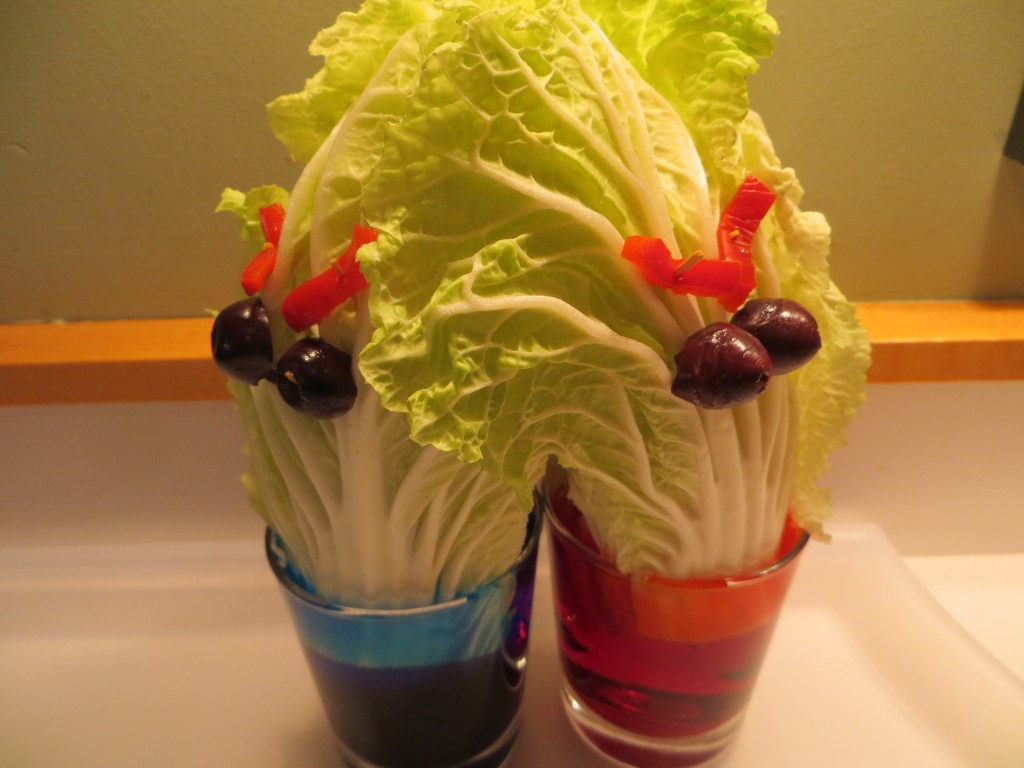
Make a vegetable vampire and watch capillary action move colored water through the cabbage creature you created.
To make a leafy vampire, you’ll need:
-head of fresh napa cabbage
-2 large cups, jars or plasticware containers large enough to hold the base of ½ of your cabbage
-food coloring
-fruits and veggies to use as eyes and eyebrows on your monster
-toothpicks
-rubber bands or string
First, fill your two containers ¾ of the way to the top with warm (not hot) water.
Add 10 or more drops of blue food coloring to one container and 10 or more drops of red food coloring to the other .
With a sharp knife, cut the cabbage in half vertically, from the bottom up, leaving the top 10cm or so intact, so the two pieces are still attached at the crown. If possible, try to cut down the middle of one of the big leaves.
Use rubber bands to secure the bottoms of each side of the cabbage and make a fresh cut at the bottom, a few cm up from the old cut.
Put one half of the base of your cabbage in the red water, and the other half in the blue water.
Decorate your two “vampires” with eyes and spooky eyebrows made from olives and peppers (or whatever you have in the refrigerator.) Secure the decorations with toothpick.
Keep an eye on your cabbage to see how much colored water it’s drinking. Your vegetable vampire will have to drink for 24-48 hours for the best results.
Plants survive by drawing nutrients dissolved in water up into their stems, stalks, trunks, branches and leaves.
Capillary action is the main force that allows the movement of water up into plants. In a narrow tube, on a surface that attracts water, the attraction between the surface and water, coupled with the attraction of the water molecules to each other, pulls water up. Plants are composed of huge numbers of tube-shaped cells that take advantage of these physical forces.
In this experiment, you can see colored water being taken up, via capillary action, into your cabbage.
Imagine how high the water in giant redwoods has to travel to reach the leaves at the top. In very tall trees, a process called transpiration helps the water overcome the forces of gravity. Here’s a transpiration experiment you can try at home.
Halloween Science Roundup
- by KitchenPantryScientist
Halloween Halloween brings out the kid in all of us, and there’s no better way to celebrate than with some ghoulish science experiments. Next week, I’ll be adding Vegetable Vampires and Zombie Candy to the lineup!
Here’s a list of our favorites. Just click on the name of the experiment to go to the instructions, see photos of what to do, and learn a little science. Most have links to videos or TV segments where I demonstrate how to do the experiments.
Shocking Machine Make an electrophorus and Leyden jar to shock your friends! Here’s how to do it. We demonstrated it on Kare11 last week!
Frankenworms Gummy worms soaked in baking soda and water come to “life” when you drop them into vinegar! Click here for directions and a video.
Goblin Goo (All you need is cornstarch and water. Here’s a video on how to make the goo. You can add a little food coloring to the water if you want, but it may stain your hands!)
Bag of Blood (If you have ziplock baggies, water, red food coloring and skewers, you can do this experiment!) Here’s the video.
Fizzy Balloon Monster Heads (After we made Goblin Goo, I demonstrated how to make Fizzy Balloon Monster heads. Click here to watch.)
Magic Potion (Bubbly, stinky Halloween fun: I made a short video on how to make magic potion. Click here to watch it.
Mad Scientist’s Green Slime (To see a TV segment where we made Mad Scientist’s Green Slime, click here!) Here’s another video.
Apple Mummies (Here’s a link to a TV segment where the kids and I demonstrated how to make Apple Mummies. Click here.)
Alien Monster Eggs (These make a great centerpiece for a Halloween party, when you’re done playing with them.) I demonstrated how to make them on Kare 11! Click here to watch the video.
Creepy Critter Slingshots Lob Marshmallow eyeballs and spiders at a pumpkin or another target in this fun physics experiment.
Outdoor Science Lab
- by KitchenPantryScientist
It’s hard to believe it’s already August. Other than reading, we don’t do much to fight summer brain drain at our house, but the end of summer is a great time to head to the back yard or driveway for some science experiments. They’re so much fun that kids won’t even realize they’re using their noggins! Just click on the experiment for how-to directions, photos and videos.
Got water? Make siphons, a water-purifier, water rockets, or fire-proof water balloons.
Hungry? Build a solar oven from a pizza box and bake s’mores.
Stand on eggs or throw them as hard as you can without breaking them. You can always clean up mistakes with your hose!
Play magician with the tablecloth trick, or make paper bag volcanoes erupt in your back yard.
Of course, there’s always the famous Mentos geyser, and film canister rockets are always a hit.
Nature walk bracelets add fun to any excursion, and you can collect water from trees or make water filters with grass and sand.
August is a great time to find Monarch caterpillars or study the earthworms in your back yard.
And no summer would be complete at our house without an epic marshmallow shooting competition. You’ll even learn some physics!
Simple Water Rockets
- by KitchenPantryScientist
You’ll have a blast learning physics by making water rockets!
While NASA’s rockets use rocket fuel as their working mass, these rockets use water. As pressurized air forces the water out of your rocket, the rocket moves in the opposite direction, just like Newton’s Third Law says it will. “For every action, there is an equal and opposite reaction.”
Although these rockets lack fins, a payload and a nose cone, you can see from this NASA illustration that they’re very similar to real rockets. You can make a complicated launch pad like this, but we decided to make things easy.
For this experiment, you’ll need:
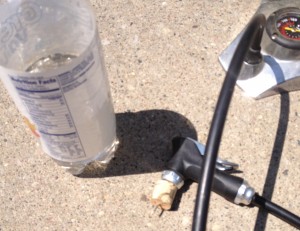
-an empty one or two liter bottle from a carbonated beverage
-a cork that has been cut in half and will fit in the mouth of your bottle (An adult should do this. I used a serrated knife.)
-a needle for inflating balls
-a bike or ball pump
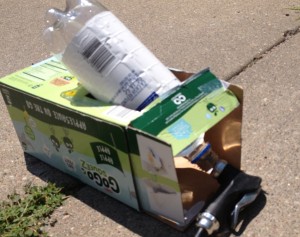
-a cardboard box cut to hold the bottle at an angle pointing away from you. This is your launch pad.
Push the needle through the cork so that it pokes out of the other side. Use the hole from the corkscrew to make it easier.
Fill the bottle about 1/3 of the way full of water and insert the cork in the bottle.
Set the bottle in the cardboard box so that it’s pointing up, but away from you. See the photograph.
Attach the needle to the bike pump, stand behind the launch pad and start pumping air into the bottle. The air pressure will build in the bubble at the top of the rocket. When the pressure gets high enough, it will force the cork and water out of the bottle with lots of force, and as the water shoots down, the rocket will shoot up!
What happens if you add more water, or less water to your rocket?
Can you imagine riding a real rocket? Check out Astronaut Abby’s website to meet a girl who wants to ride a rocket some day and ask an astronaut on the International Space Station questions!
Zooming Fish Video
- by KitchenPantryScientist
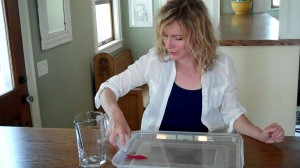
Here’s a great project for pre-K kids. They can cut the fish out of paper or foam, pour the water and put a drop of soap behind the fish to make it “zoom.”
My original post and written directions for zooming fish can be found by clicking here.
The Kaye Effect
- by KitchenPantryScientist
Have you ever wondered why it’s so hard to get ketchup flowing out of a bottle, or why no-drip paint doesn’t drip?
Ketchup, no drip paint, liquid soaps and shampoos are all part of a really amazing category of fluids known as “shearing liquids.” These fluids are pretty thick when they’re sitting still, but they get thinner or more “liquidy” as they flow, because movement decreases their viscosity, or thickness, making them more slippery.
Back in 1963, an engineer named Arthur Kaye noticed streams of liquid shooting from the surface below a stream of shearing liquid he was working with. This strange, short-lived phenomena became known as the Kaye effect.
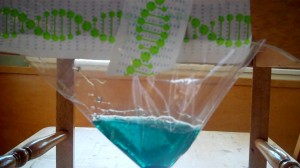
With a chair, tape, some dish soap and a plastic ziplock bag, you can do your own Kaye effect experiment at home and watch soap jets shoot like ski jumpers from the very slippery shearing liquid soap pile below
-Tape a plastic ziplock bag to a chair with one corner or the bag pointed toward a plate underneath. The bag corner nearest the floor should be around 20 cm (about a foot) from the floor.
-Fill the bag with liquid soap or dish detergent. We added a few drops of food coloring to ours.
-Cut off the corner of the bag closest to the floor with scissors to make a tiny hole for the soap to flow through (1mm.) You may have to make it a little bigger, but you want a very thin, steady stream of soap flowing to the plate.
-Watch for jumping streams of soap. If it’s not working, try changing soap and adjusting bag hole size and bag height! What happens if you put the plate below at an angle?
To learn more about the Kaye effect and other cool physics stuff, visit Dr. Skyskulls’ website. He’s the physicist who told me about this experiment and helped me work out the protocol.
Surface Tension in Space
- by KitchenPantryScientist
If you’ve done an experiment where you drip water onto a penny, or made Tie Dye Milk, you know what surface tension looks like here on Earth. How does it look in space?
Here’s an amazing video demonstrating how the surface tension of water looks in zero gravity on the international space station. Fascinating!
Earth Day Science Experiments
- by KitchenPantryScientist
Here are some of our favorite environmental science experiments. Click on the experiment name for directions and photos. I’ll post a new photosynthesis experiment on Monday!
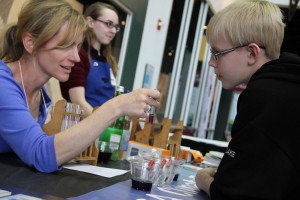
Window Sprouts: Plant a bean in a plastic baggie with a damp paper towel to see how plants need only water and air to sprout roots and leaves. Here’s a short video demonstrating how to make a window garden.
Homemade Solar Oven: Using a pizza box, aluminum foil, plastic wrap, and newspaper, you can harness the sun’s energy to cook your own S’mores!
Nature Walk Bracelets: Wrap some duct tape around your wrist (inside out) and take a walk, sticking interesting natural objects like leaves and flowers to your bracelet. It’s a great way to get outdoors and engage with nature!
Carbon Dioxide and Ocean Acidity: See for yourself how the carbon dioxide in your own breath can make a water-based solution more acidic. It’s the same reason too much carbon dioxide in Earth’s atmosphere can be bad for our oceans.
Plant Transpiration: See how trees “sweat” in this survival science experiment.
Earthworm Experiment: Do you know what kind of earthworms are living in your back yard?
Composting: Be a composting detective. Bury some things in your back yard (away from power cables) and dig them up in a few months to see how they look. Composting reduces methane gas emissions (a greenhouse gas) from dumps.
Diffusion and Osmosis: See for yourself how the chemicals we add to water, put on our streets to melt ice, and spray on our lawns and crops can move into our soil, ground water, rivers, lakes and oceans.
Solar Water Purification: This project illustrates the greenhouse effect and is a fun “survival science” experiment. Requires hot sun and some patience!
Citizen Science: Don’t forget about all the real environmental research projects you can participate in through Citizen Science programs all around the world!
For mores activities and games, check out NASA’s Climate Kids website, to see a kid-friendly diagram of the water cycle, click here, or just get outside and enjoy the beautiful planet that sustains and nurtures us.
March Eggs
- by KitchenPantryScientist
Between basketball games and homework this weekend, we stood barefoot on cartons of raw eggs and painted hard boiled ones with lemon juice and baking soda.
Why the eggfest? We’re making videos for some April KidScience app experiments!
Here are a few still shots of our lovely creations:
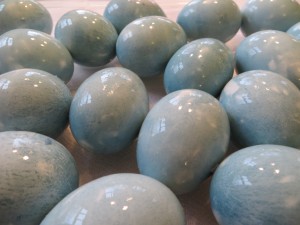
We soaked hard-boiled eggs in cabbage juice overnight. Then, we painted them with citric acid (lemon juice) and sodium bicarbonate (baking soda.)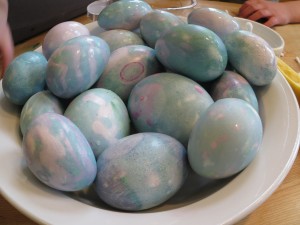 Click here for detailed directions and more about the science.
Spring Break Boredom-Busters on KidScience App
- by KitchenPantryScientist
Whether you’re home or away, science can make any vacation more fun. You can collect data for real citizen science research projects by searching SciStarter.com or do your own experiments. KidScience app, based on the science projects on this website, puts fun science experiments at your fingertips on your iPhone, iPod Touch or iPad, no matter where you are.
I showed Kare11 viewers three of our favorite KidScience experiments: Red Cabbage Litmus Paper, Fizzy Balloons and Marshmallow Slingshots (using stuffed animals like Angry Birds to learn a little about the conservation of energy. Click here to watch the TV segment.
How will you mix a little science into your spring break?
