Category:Physics Experiments’
Star Wars Science: Pop a Balloon Using the Sun’s Power
- by KitchenPantryScientist
Here’s a fun video from Kaleigh demonstrating a project from my book “Star Wars Maker Lab!” Grab a magnifying glass and a balloon, head outdoors and try it! (Click here for a link to order the book.)
Thank you, Tom Gross (from coffeewithkenobi.com) and Kaleigh!
Outdoor Science for Kids: Water Rockets!
- by KitchenPantryScientist
This summer, get off screens and get outside with this fun project from my book Kitchen Science Lab for Kids!
Floating Ping Pong Balls and Balloons
- by KitchenPantryScientist
Your pet may like this project too. Why should humans have all the fun?
45 How-To Science Experiment Videos for Kids
- by KitchenPantryScientist
Physics! Biology! Chemistry! Yeah!
Great job staying isolated to help keep everyone safe! Keep up the good work! Scientists and medical workers are busy testing anti-viral drugs and creating vaccines that will help us to help get life back to normal as soon as humanly possible. They are the superheroes we need right now!
Click HERE for 45 Watch-and-Do Videos for Kids. Some, like cornstarch goo and tie-dye milk are perfect for the younger crowd, while older kids can tackle the tougher projects.
For more detailed instructions, go to kitchenpantryscientist.com and search for the experiment in the search box! You can also order my books online wherever books are sold.
15 Fun, Easy, Educational Science Projects to Keep Kids Entertained When Schools are Closed
- by KitchenPantryScientist
Image from “Kitchen Science Lab for Kids” (Quarry Books 2014)
With a few simple pantry items, you can throw together some serious science fun. Here’s a list of project you can do using things from the pantry and craft drawer. Just click on the blue links for instructions!
Or, head outside to do some fun outdoor science!
You can find most of these projects on my Kitchen Pantry Scientist YouTube channel!
-composition book: Makes a great science notebook to draw, record, and tape photos of experiments into.
-clear plastic cups to use as test tubes and beakers
-measuring spoons and cups
-school glue (white or clear) for making Mad Scientist’s Slime
-contact lens solution for making Borax-free Slime
-gummy worms to transform into Frankenworms
-baking soda: Can be used for a number of experiments like fizzy balloons, magic potion . Or just mix with vinegar to make carbon dioxide bubbles.
-vinegar Great for fizzy balloons , alien monster eggs and magic potion.
-balloons for fizzy balloons.
-dry yeast for yeast balloons.
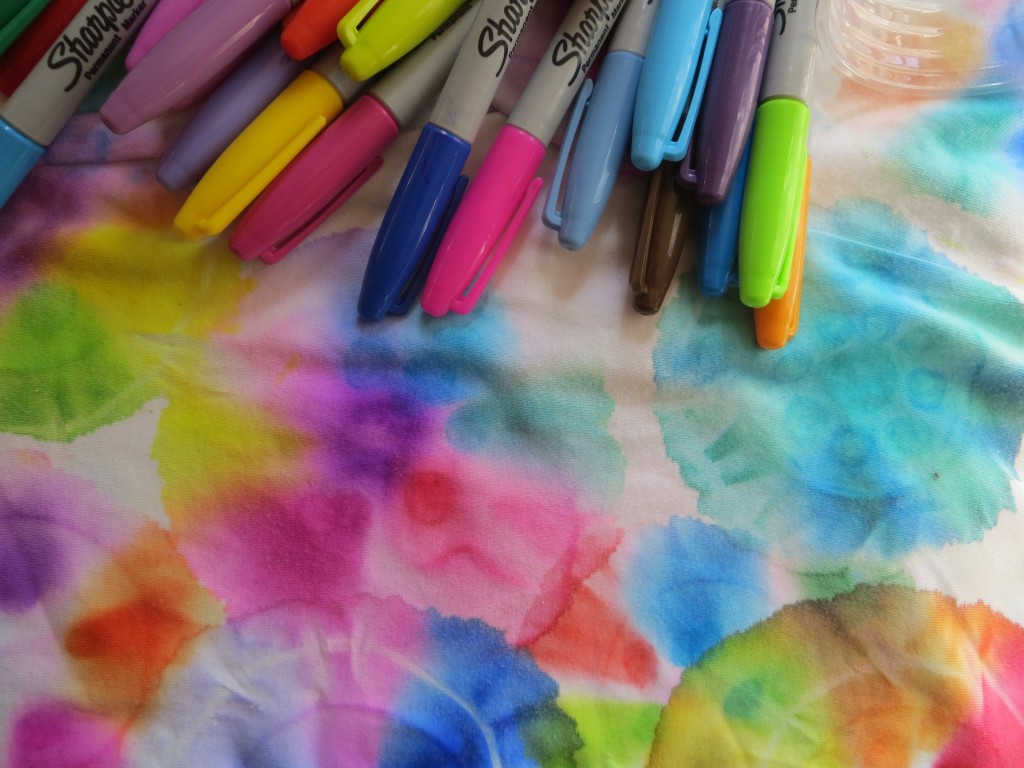
-white coffee filters: can be used for magic marker chromatography, in place of a paper bag for a coffee-filter volcano or making red cabbage litmus paper.
-cornstarch:Lets you play with Cornstarch Goo, a non-newtonian fluid. Here’s the video.
-marshmallows with rubber bands and prescription bottle rings you have around the house can be used to make marshmallow catapults. My kids used theirs to make their own Angry Birds game.
-Knox gelatin and beef bouillon cubes can be used to make petri plates for culturing microbes from around the house. You can also use the gelatin for cool osmosis experiments!
-food coloring Helps you learn about surface tension by making Tie Dye Milk. Here’s the video. You can also easily make colorful sugar-water gradients that illustrate liquid density!
-drinking straws are great for NASA soda straw rockets and a carbon dioxide experiment.
If your kid likes to cook, is an artist or you want more ideas, you can order all of my science experiment books online at Amazon, B&N, Indiebound, or anywhere else books are sold!
Happy Experimenting!
Ice Science: Lifting an Ice Cube Using Salt and a String
- by KitchenPantryScientist
Have you ever wondered why putting chemicals like salt on a road makes the ice melt?
To see how NaCl (table salt) melts ice by lowers the melting temperature of water, you’ll need an ice cube, a glass of water, and a piece of kitchen twine or string about 6 inches long and salt.
What to do:
Drop an ice cube in a glass of ice water. Try to pick the ice cube up without your fingers by simply placing the string on it and pulling up. Impossible, right?
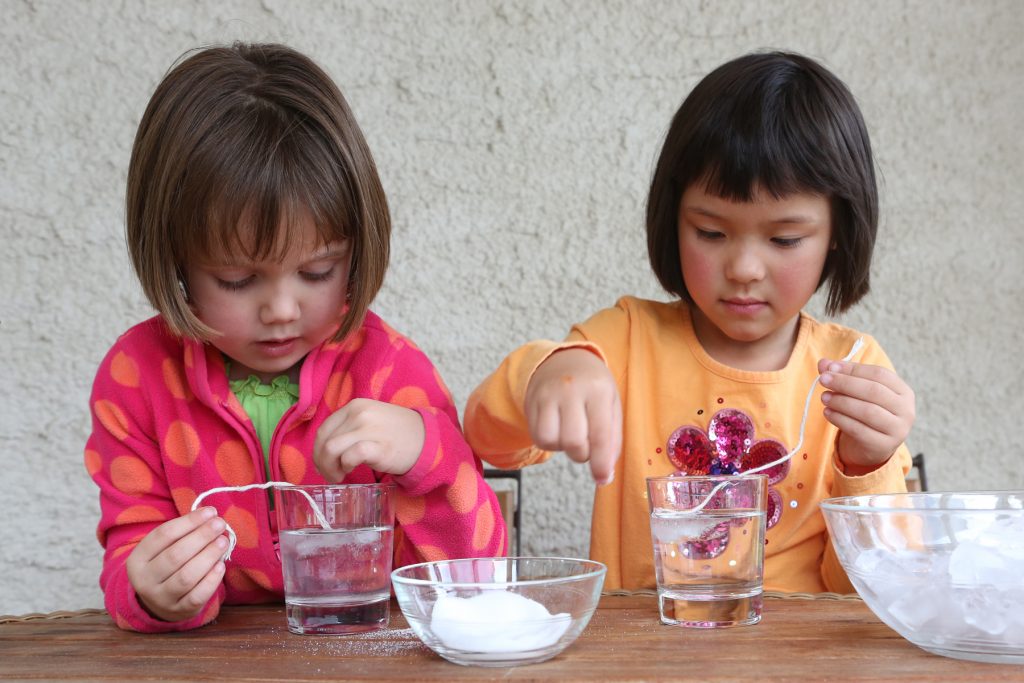
From Kitchen Science Lab for Kids (Quarry Books 2014)
Now, dip the string in water, lay it across the ice cube and sprinkle a generous amount of salt over the string/ice cube. Wait about a minute and try again to lift the cube using only the string. What happens?
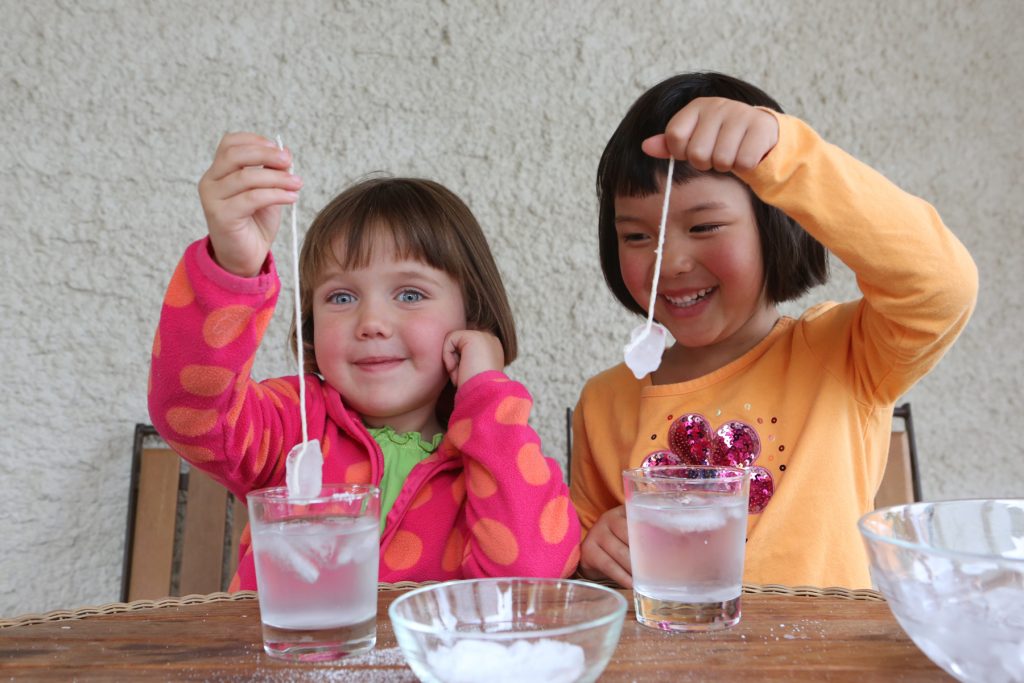
From Kitchen Science Lab for Kids (Quarry Books 2014)
It may seem like magic, but it’s only science. Watch me demonstrate the experiment by clicking here.
Salt lowers the temperature at which ice can melt and water can freeze. Usually, ice melts and water freezes at 32 degrees Farenheit, but if you add salt to it, ice will melt at a lower (colder) temperature.
The salt helps the ice surrounding the string start to melt, and it takes heat from the surrounding water, which then re-freezes around the string.
Different chemicals change the freezing point of water differently. Salt can thaw ice at 15 degrees F, but at 0 degrees F, it won’t do anything. Other de-icing chemicals they add to roads can work at much colder temperatures (down to 20 degrees below zero.) If it’s cold enough, even chemicals won’t melt the ice.
Brrr.
Pressure can also make ice melt at colder temperatures. This is why ice skates glide on rinks. The pressure is constantly melting the ice a where the blade presses down on it so the blade glides on a thin layer of water!
Supercool! Ice Science for Kids
- by KitchenPantryScientist
Under the right conditions, purified water can get much colder than 32 degrees before it freezes into a solid. This “supercooled” water will instantly freeze when it touches an ice crystal.
You don’t need a special lab to make supercooled water. In fact, you can make it in your own freezer!
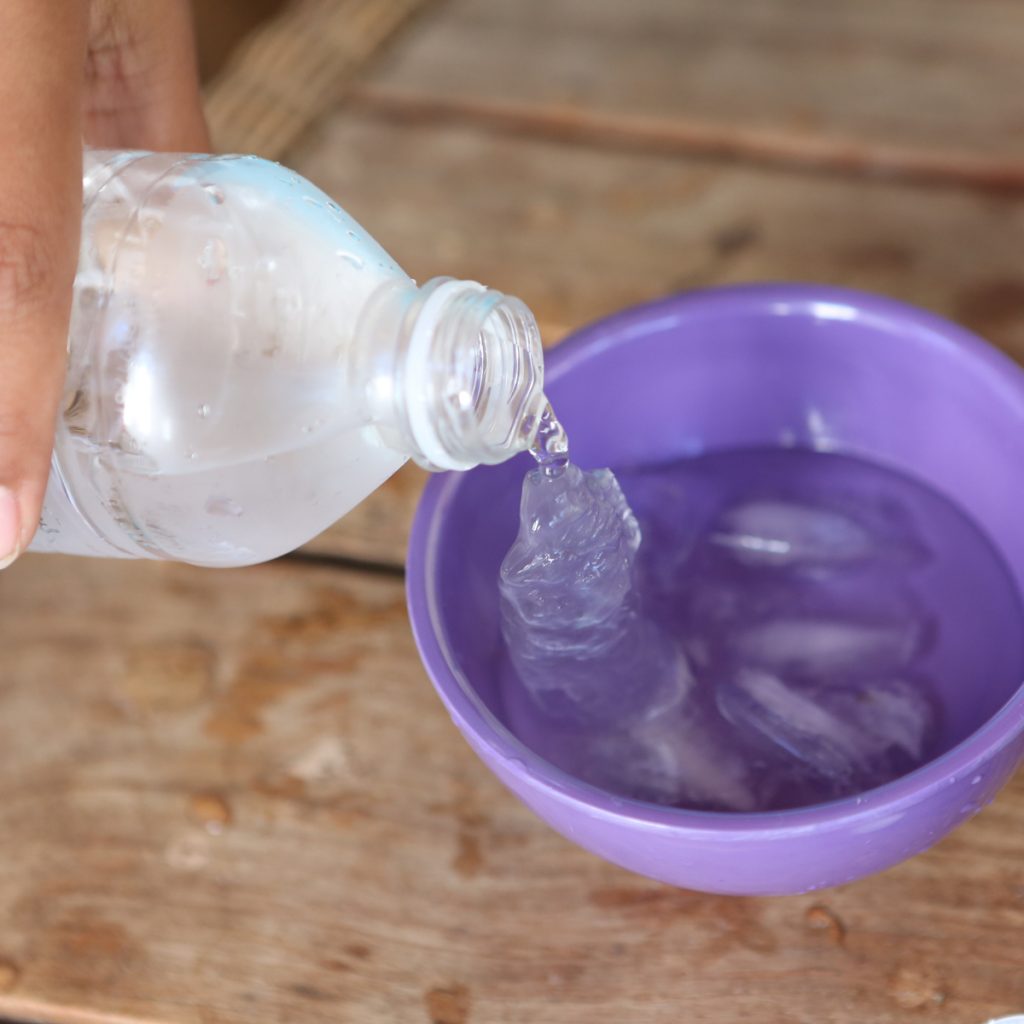
Image from Outdoor Science Lab for Kids (Quarry Books 2016)
1. Place three 12 oz bottles of water (caps loosened and re-tightened) in the freezer. Two should be filled with purified water and one with tap water.
2. Wait 2 hours and then check them every 5 minutes. When the tap water is frozen, gently remove the other two bottles from the freezer. (Tap water freezes first, because it contains some impurities that help ice crystals form more easily.)
3. Carefully open one bottle of purified water and pour it onto a few ice cubes on a plate. The supercooled water from the bottle will instantly crystallize into ice when it hits the cubes, making slush. Try it with the second bottle. There may be some freezing time variation between freezers, so you may have to experiment to find the perfect amount of time it takes your freezer to supercool water!
You can do the same thing by putting bottled water in a cooler full of ice, salt, and water. Salt lowers the melting temperature of ice, which makes the salty ice water cold enough to freeze bottles of liquid. Try the same experiment using soda to make a slushy! (From Outdoor Science Lab for Kids-Quarry Books 2014)
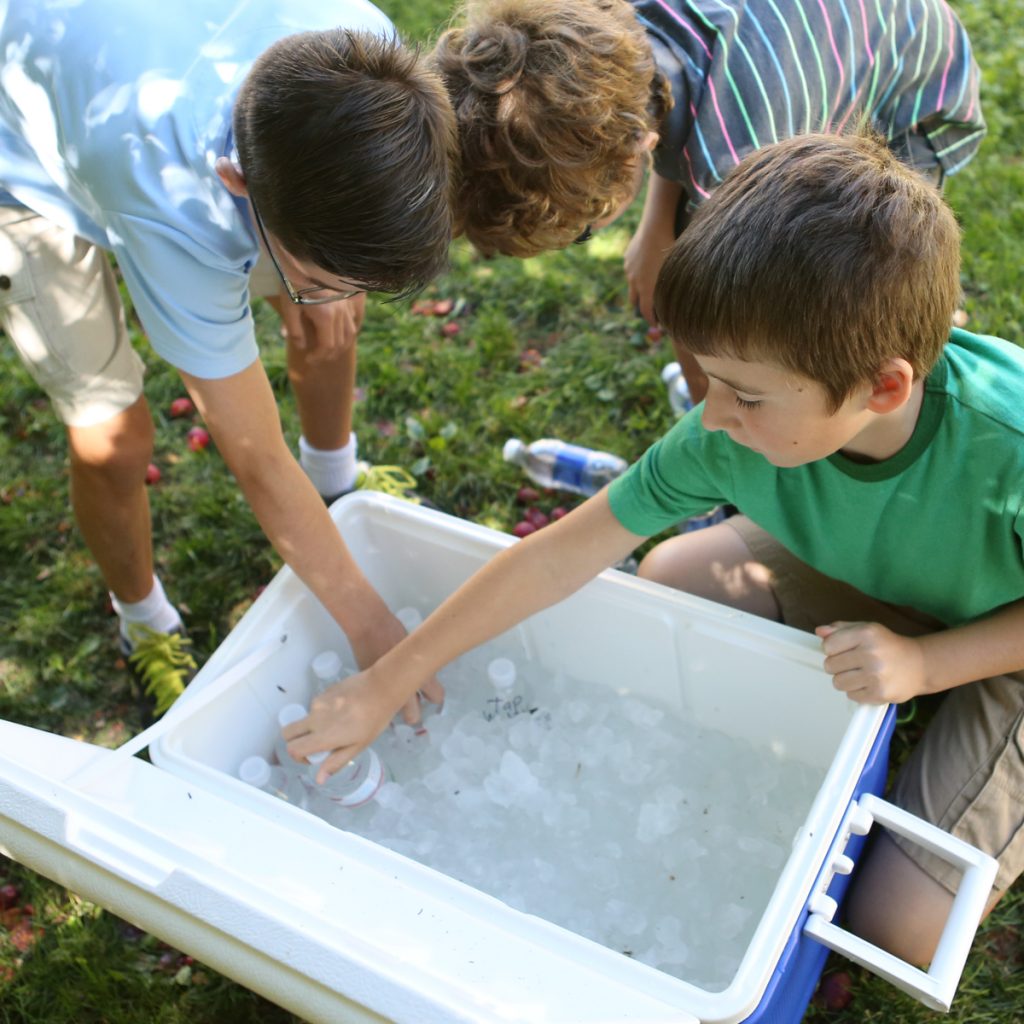
Image from Outdoor Science Lab for Kids (Quarry Books 2016)
Edible Science: Ice Cream Games
- by KitchenPantryScientist
")
Ice Cream Keep Away (Outdoor Science Lab for Kids-Quarry Book 2016)
Brrr. It’s really cold here in Minnesota. Perfect for making ice lanterns by filling balloons with water and setting them outside the back door. I had a great time talking ice lanterns and homemade ice cream (an edible experiment in my new book) on WCCO MidMorning this AM. As promised, here’s the recipe for “Ice Cream Keep Away.” After all, it’s never to cold to eat ice cream.
Ice Cream Keep Away (from Outdoor Science Lab for Kids- Quarry Books 2015)
Materials
- – 2 cups milk
- – 2 cups heavy cream
- – ½ cup sugar
- – 2 Tbs. vanilla
- – quart or pint-sized plastic zipper freezer bags
- – gallon-sized zipper freezer bags
- – 2 cups of rock salt or table salt
- -large bag of ice
- -dish towels
Safety Tips and Hints
- If the ice cream isn’t frozen when you check it, add more ice and salt to the outer bag and continue to throw it around for another five or ten minutes.
- You make enough ice cream mix in this lab to make 4 ice cream footballs at a time, so there’s plenty of ice cream and fun to go around!
Step 1: Make an ice cream mixture by combining 2 cups milk, 2 cups cream, ½ cup sugar and 2 Tbs. vanilla to a bowl and mix well.
Step 2. Add one cup of ice cream mixture to a quart or pint-sized freezer bag, squeeze out some of the air and zip it closed.
Step 3. Place the small bag of ice cream mixture in a second small bag, squeeze out the air and zip it closed as well.
Step 4. Place the double-bagged ice cream mixture into a gallon-sized bag and fill the larger back with ice.
Step 5. Pour a generous ½ cup of salt over the ice in the bag and zip the bag shut.
Step 6. Wrap a dish towel around the bag of ice and place it in a second gallon bag. Zip the outer bag closed.
Step 7. Play catch with the bag of ice and ice cream for ten or fifteen minutes.
Step 8. Remove the bag of ice cream mix from the outer bag and enjoy your frozen treat.

Enjoy eating your frozen experiment! (From Outdoor Science Lab for Kids-Quarry Books 2016)
The Science Behind the Fun:
Making ice cream is a lesson in heat transfer and crystallization.
Water is the solid form of ice. When you add salt to ice, it lowers the freezing temperature of the water, melting it and allowing it to remain a liquid far below water’s normal freezing temperature of 32 degrees F (O degrees Celsius.)
In this lab, adding salt melts the ice, making a really, really cold ice-salt-water mix. The icy salt water pulls, or transfers, heat out of the ice cream mixture, freezing the water molecules in the milk and cream into ice crystals.
Depending on how fast ice cream freezes and what ingredients it contains, the ice crystals will be different sizes. If you freeze the mixture very fast, you will probably get big ice crystals that make the ice cream grainy. Ingredients like gelatin encourage smaller crystals to form, making smoother frozen treats. Adding emulsifiers like eggs to the mix helps the fats and water combine better, creating ice cream that thaws more slowly.
- Try added less salt to the ice to freeze the ice cream more slowly. How does this change the texture of the final product?
- What happens if you add a Tbs. of gelatin to the mix?
Electroscopes and Static Electricity
- by KitchenPantryScientist
Repost from Dec.19th, 2010 (Photos from Kitchen Science Lab for Kids, Quarry Books 2014)
Have you ever gotten a shock from a doorknob after shuffling across a carpet? The term “static electricity” refers to the build-up of a positive or negative electrical charge on the surface of an object. In this case, the charged object is your body. You feel an electric shock as the charge you’ve collected from the carpet jumps from your hand to the metal doorknob.
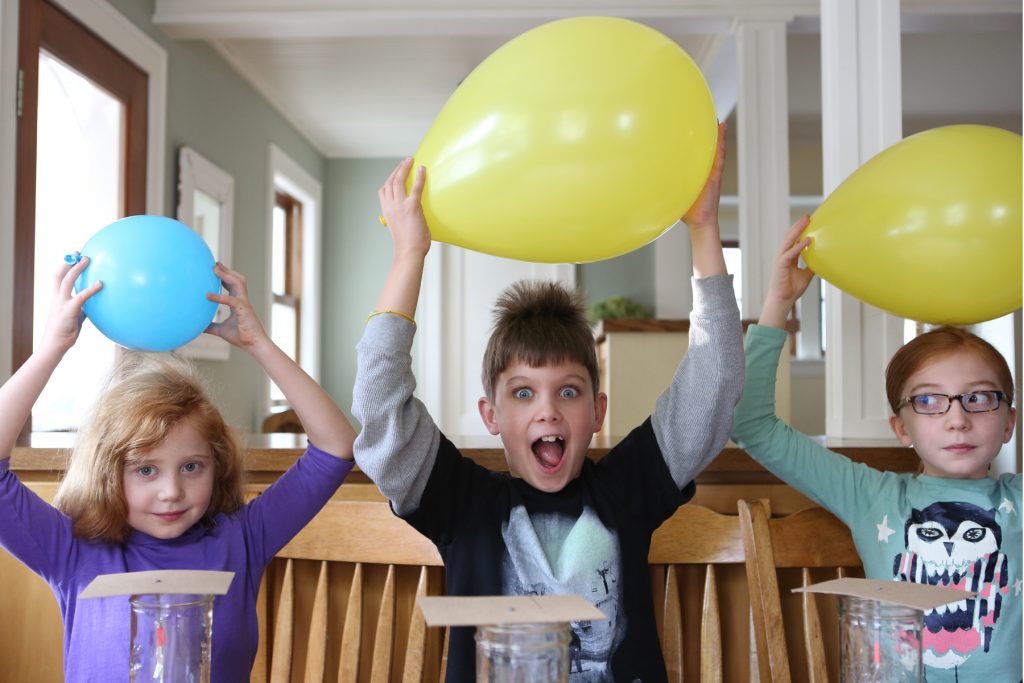
Tiny particles called electrons have negative charges and can jump from object to object. When you rub a balloon on your hair, or a comb through it, many of these electrons are stripped from your hair and move to the balloon or comb giving it a negative charge (and often leaving your hair all positively charged and standing up as the strands try to avoid each other.)
The negatively charged balloon or comb then makes a great tool for making electrons jump around!
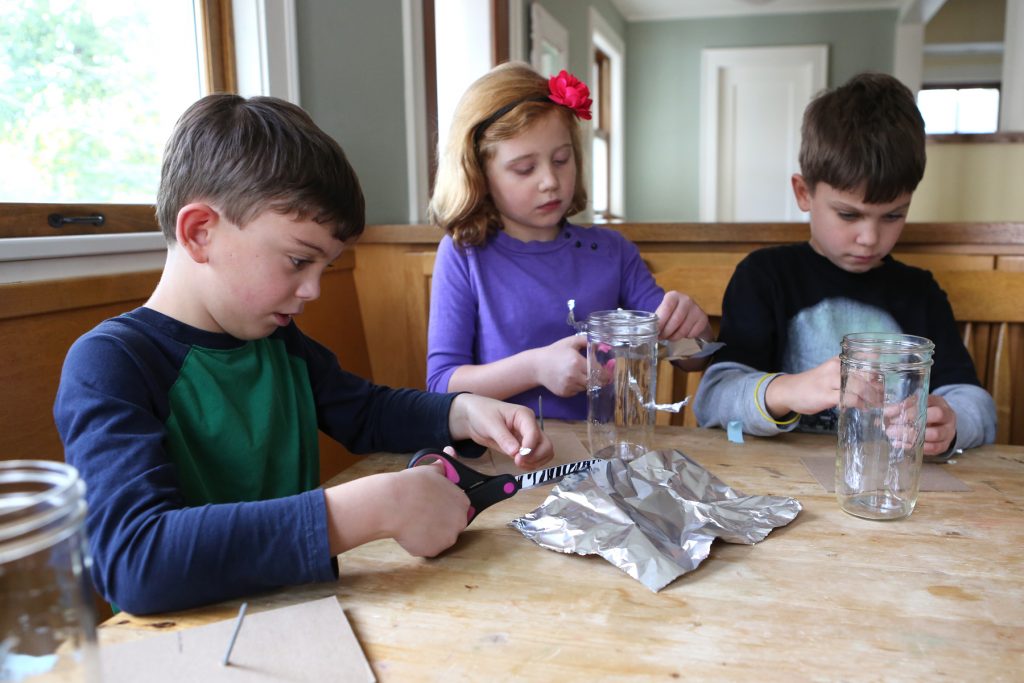
You can easily make a contraption called an electroscope using:
-a jar
-some thin aluminum foil or mylar (the shiny stuff balloons and candy wrappers are made from)
-cardboard
-a nail
-tape
-a balloon or comb.
from Kitchen Science Lab for Kids (Quarry Books 2014)
- Cut the cardboard to fit over the mouth of the jar, poke the nail through the cardboard, tape on two long, thin strips of foil or mylar (see photo) and place the whole thing in the jar so the foil strips hang down, touching each other.
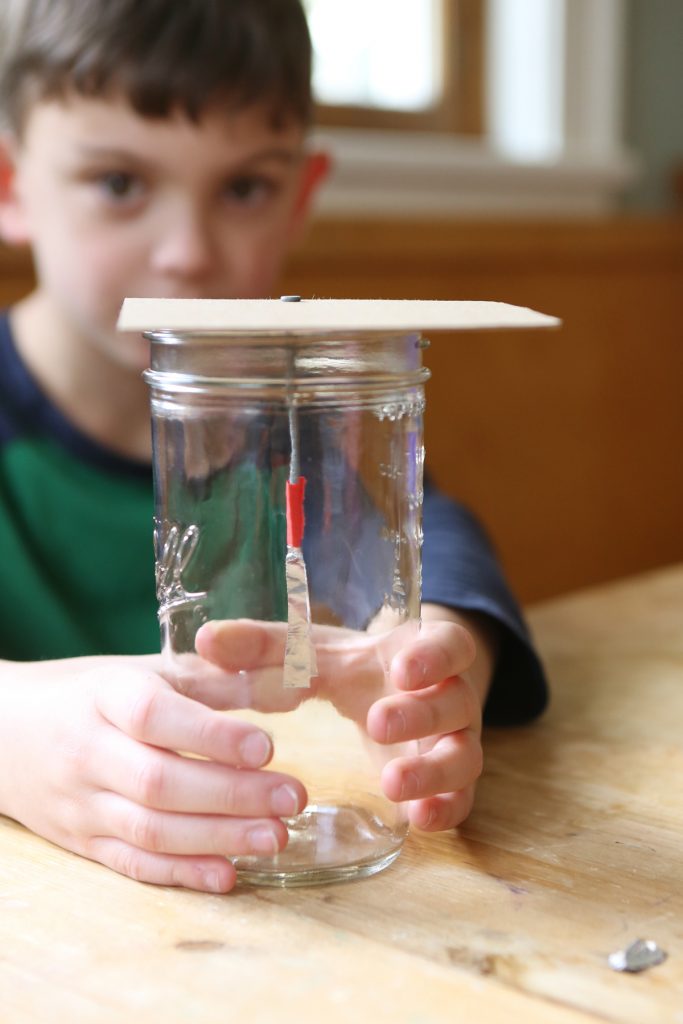
Electroscope from Kitchen Science Lab for Kids (Quarry Books 2014)
2. Charge your balloon or comb by rubbing it on your hair or clothing to give it a negative charge. Bring the charged object close to the nail head. You don’t even have to touch it!
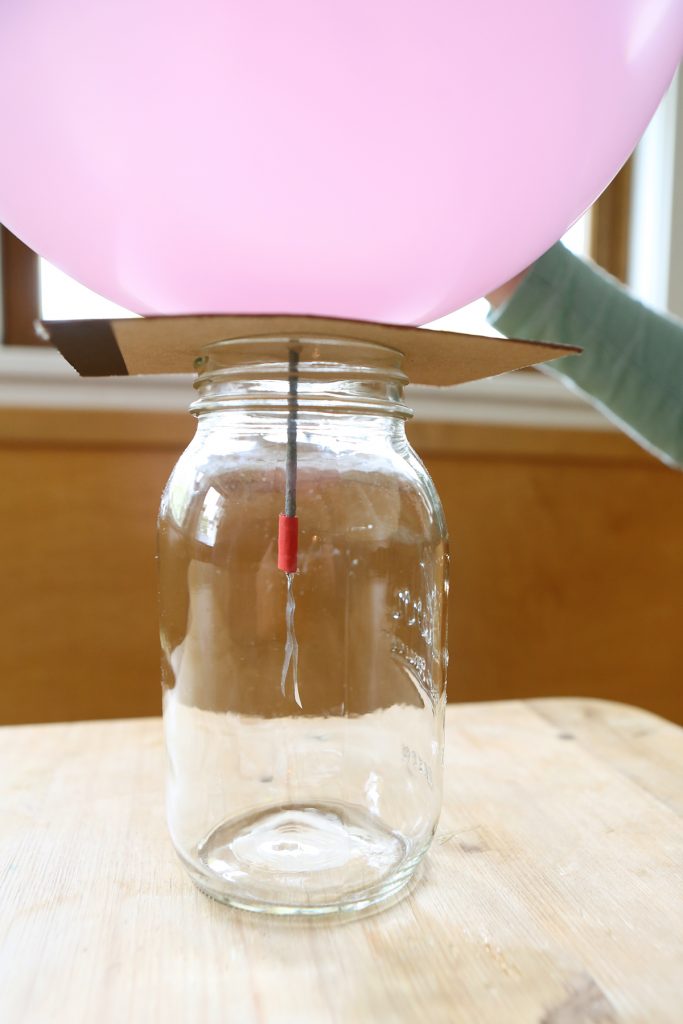
From Kitchen Science Lab for Kids (Quarry Books 2014)
What happened? Some negatively-charged electrons jump from the comb to the nail and into the strips of foil. The negative charge on the comb will push electrons (which are also negatively charged) down to the foil/mylar and give both strips a negative charge. The two strips try to move away from one another as the like charges repelled each other.
What happens when you make the strips out of different materials like paper? Are there other charged objects you can use to make your foil strips “dance”?
You can also bend a thin stream of water from the faucet by holding your charged comb next to it. The water is uncharged and is pulled toward the negative charge of the comb.

Try making small pieces of tissue paper float or dance by holding a charged comb or balloon next to them! We filled an empty soda bottle with tiny pieces of foil and made them jump around with a charged comb held close to the bottle.
Basketball Science for the Final Four
- by KitchenPantryScientist
Love basketball? Think you’re pretty good? Try taping some coins to a basketball, or covering one eye and shooting the ball. The coins change the ball’s center of mass, making it harder to shoot, and covering one eye messes with your depth perception! Try it!
I had fun thinking up these new basketball experiments that we tested on TV this week. Can you come up with one of your own? What could you try?