Category:Chemistry Experiments’
Homemade Holiday Light-Up Ornaments and Crystal Snowflakes
- by KitchenPantryScientist
Use science to make your holidays shine! Here are a few fun ornaments adapted from projects in my book “STEAM Lab for Kids.” Basic instructions can be found below. Buy your own copy of “STEAM Lab for Kids” anywhere books are sold to learn more about the “Science Behind the Fun!” Happy Holidays!
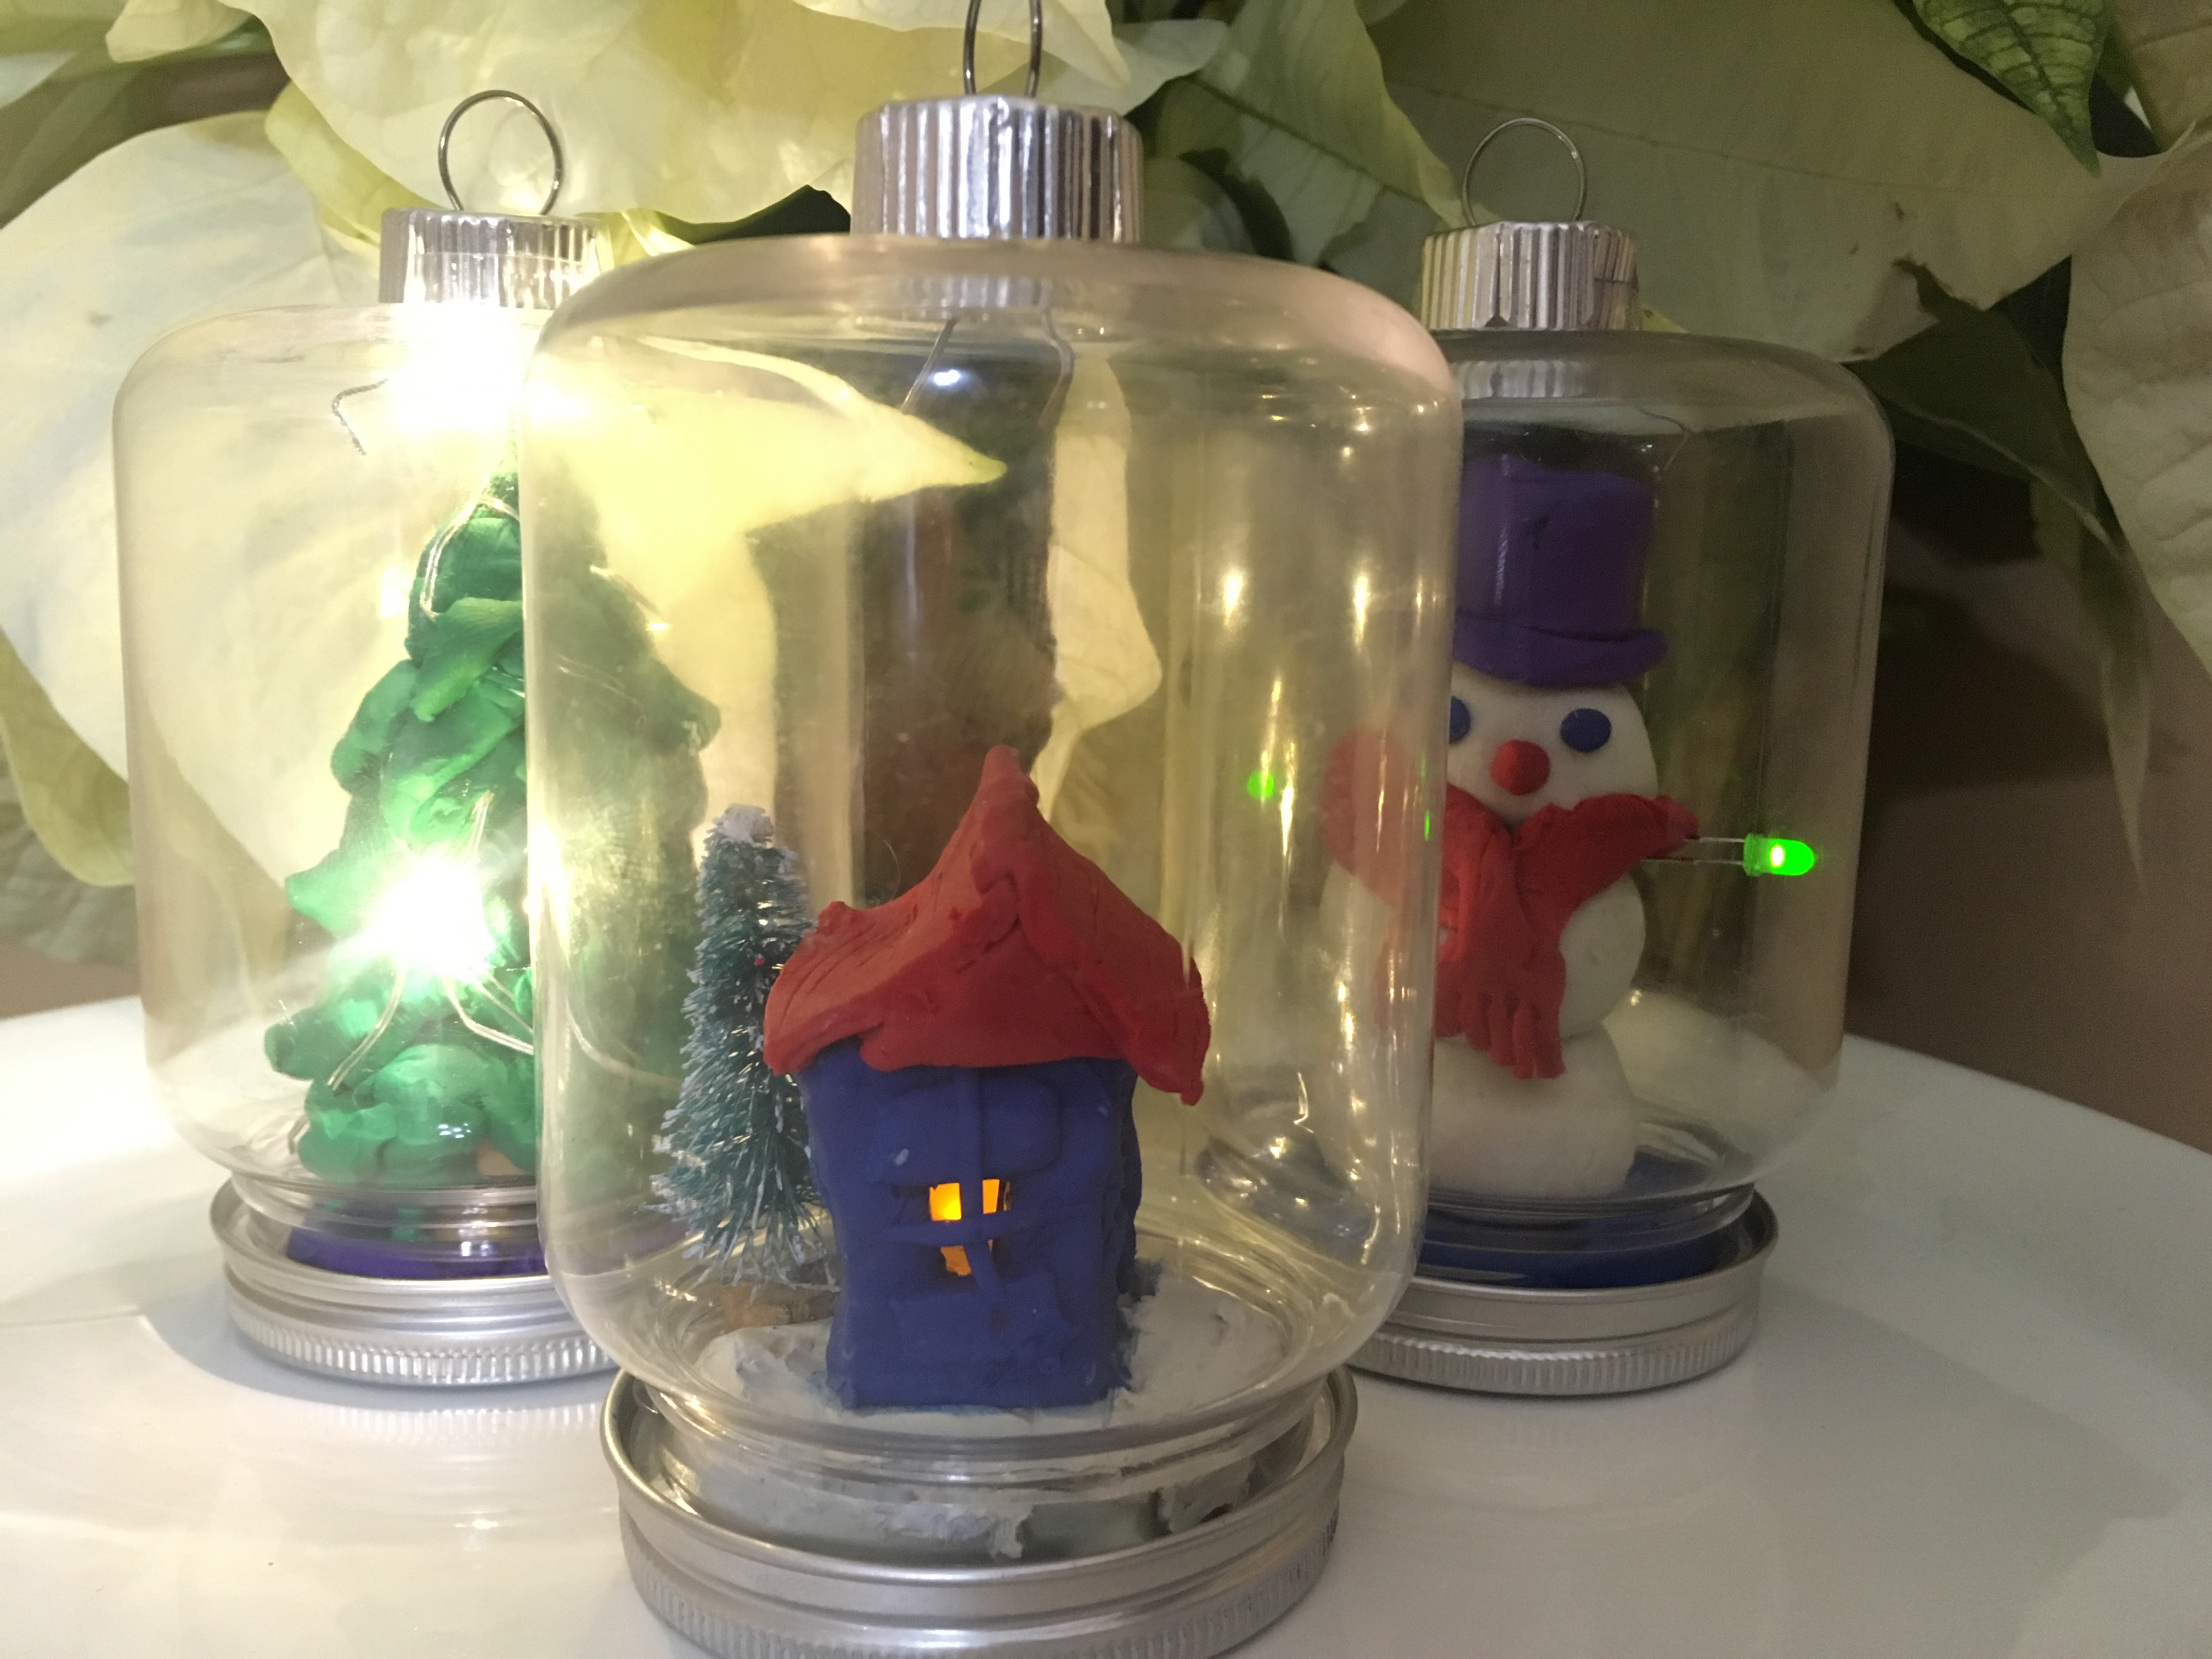
LED ornaments (or jar globes) made using circuit from Light-Up Creatures (STEAM Lab for Kids (Quarry Books 2018)
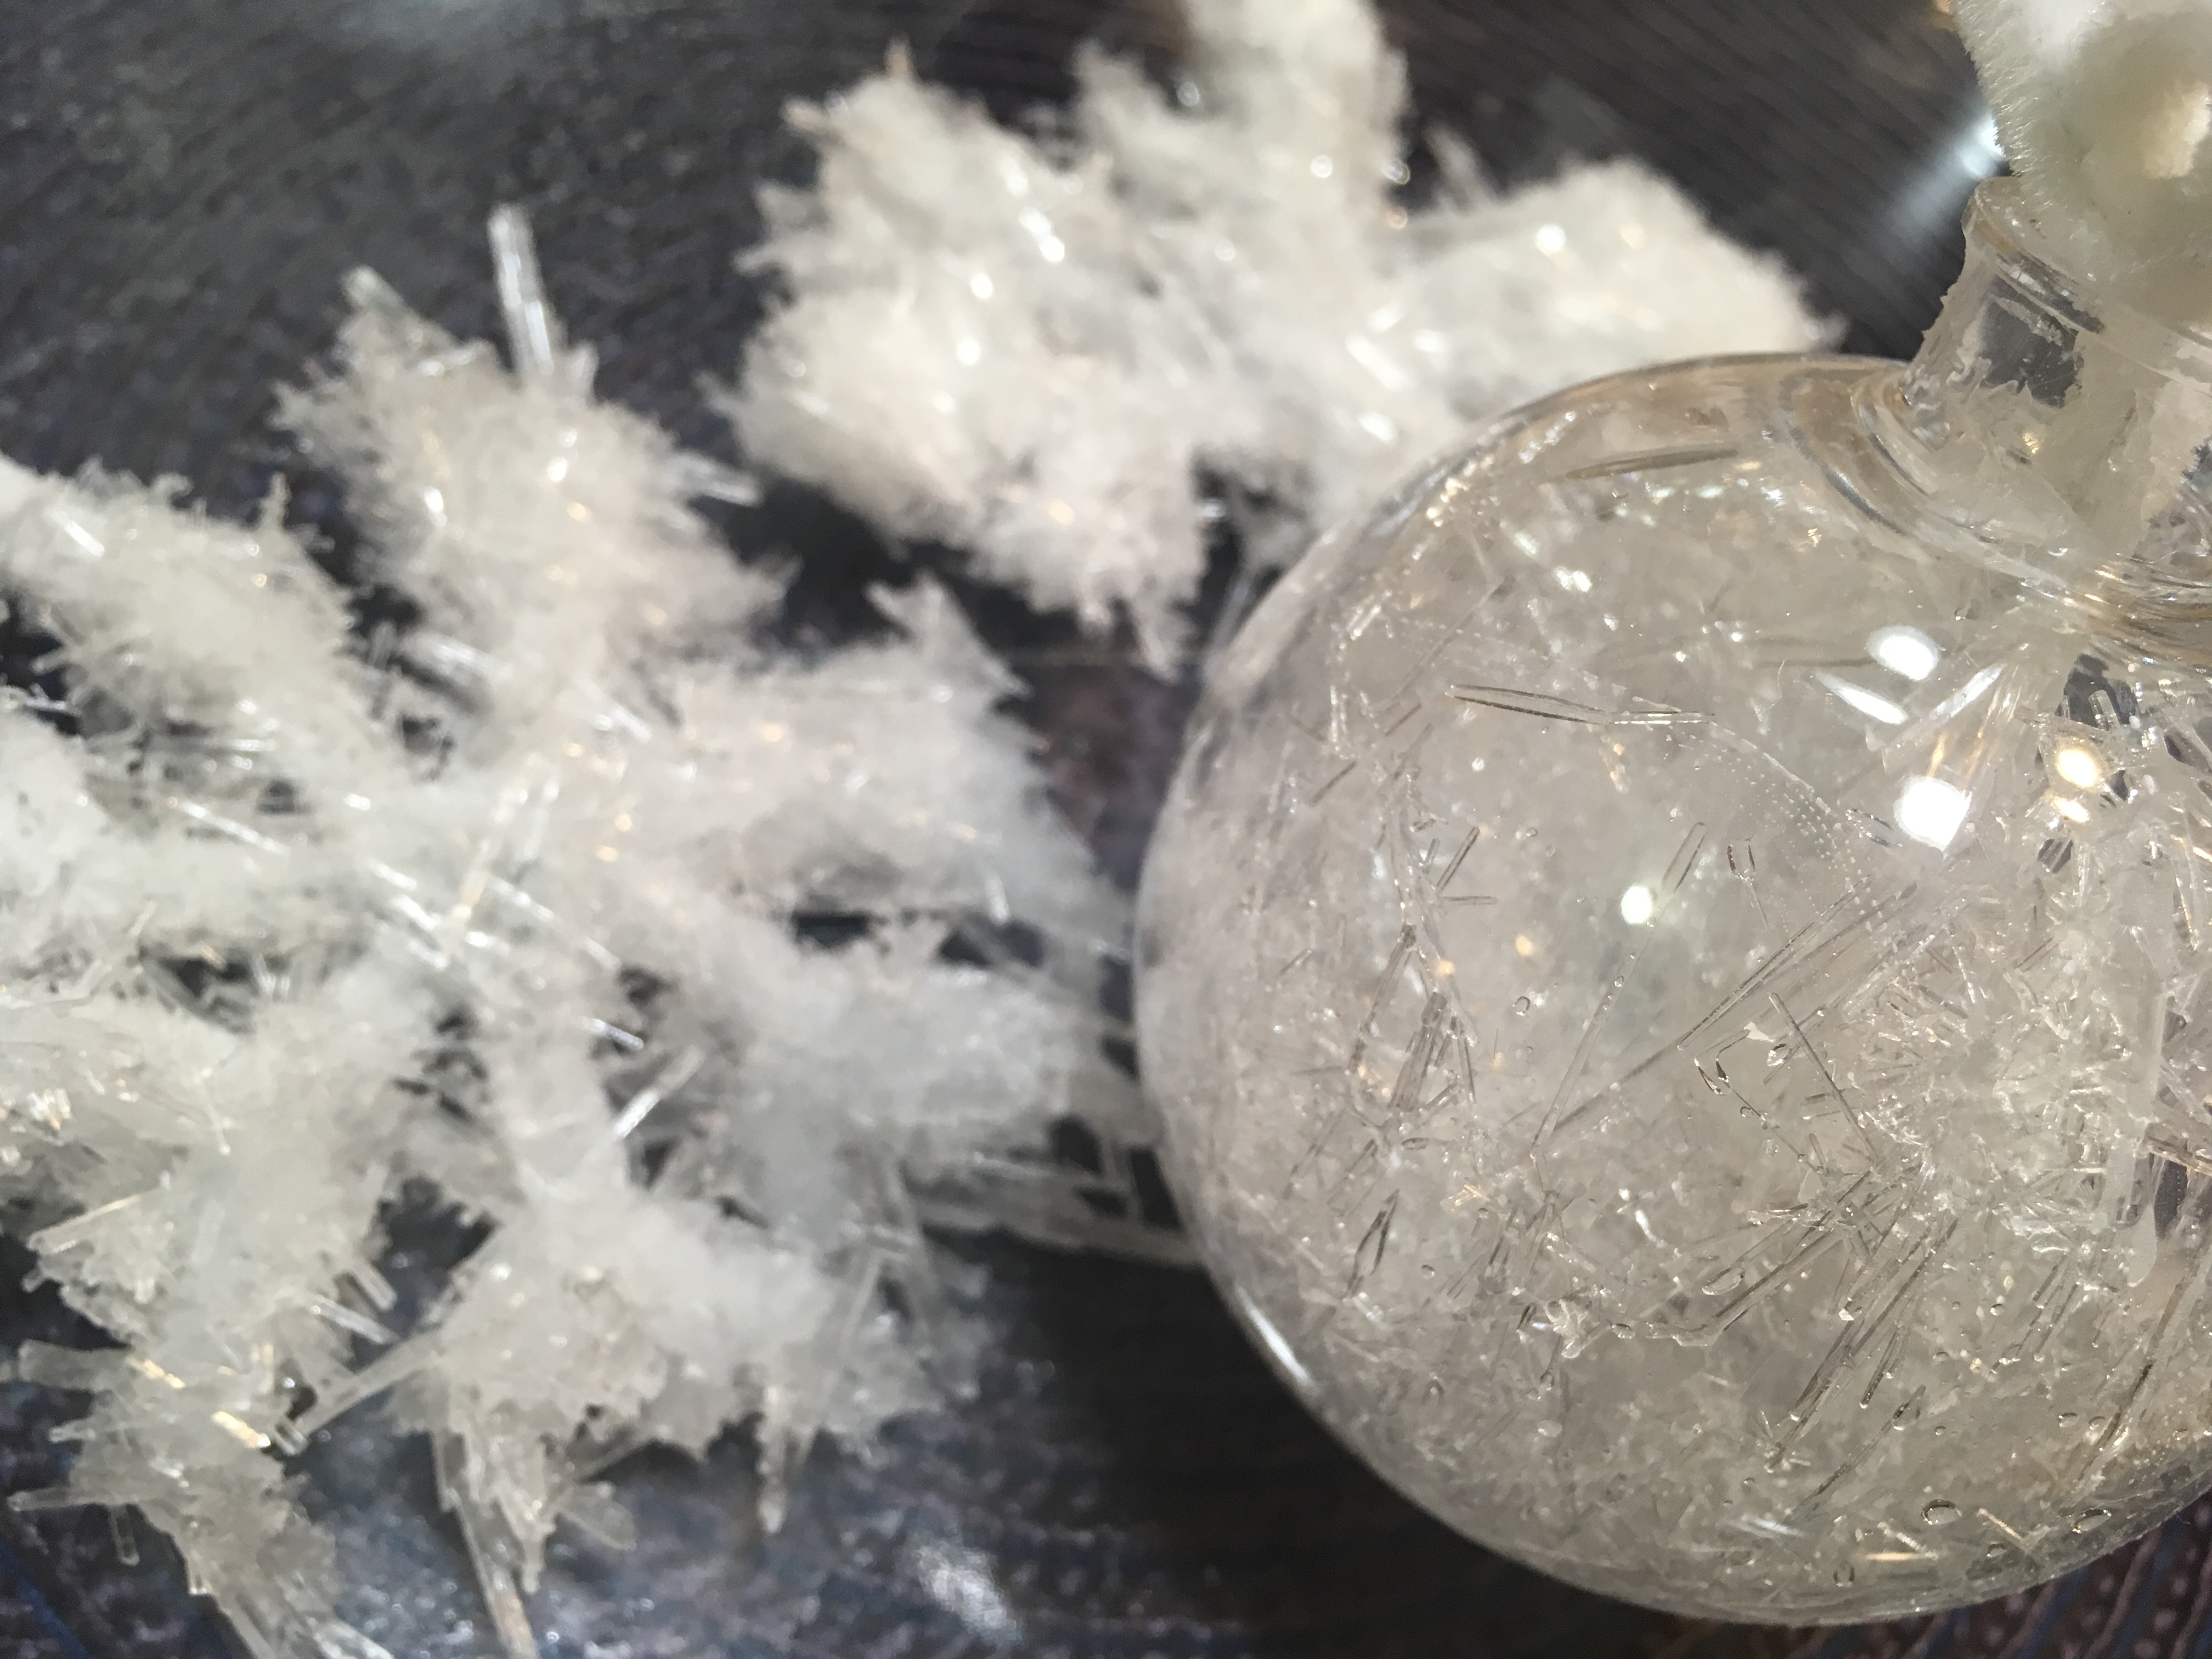
Epsom salt crystals from STEAM Lab for Kids (Quarry Books 2018)
LED Ornaments and Jar Globes:
To make LED ornaments, buy plastic jars or ornaments with removable bases. Use sculpting clay (the kind that won’t harden) to design a scene and add LEDs connected to a coin-cell battery to light your creation. LEDs can be ordered online. See images below.
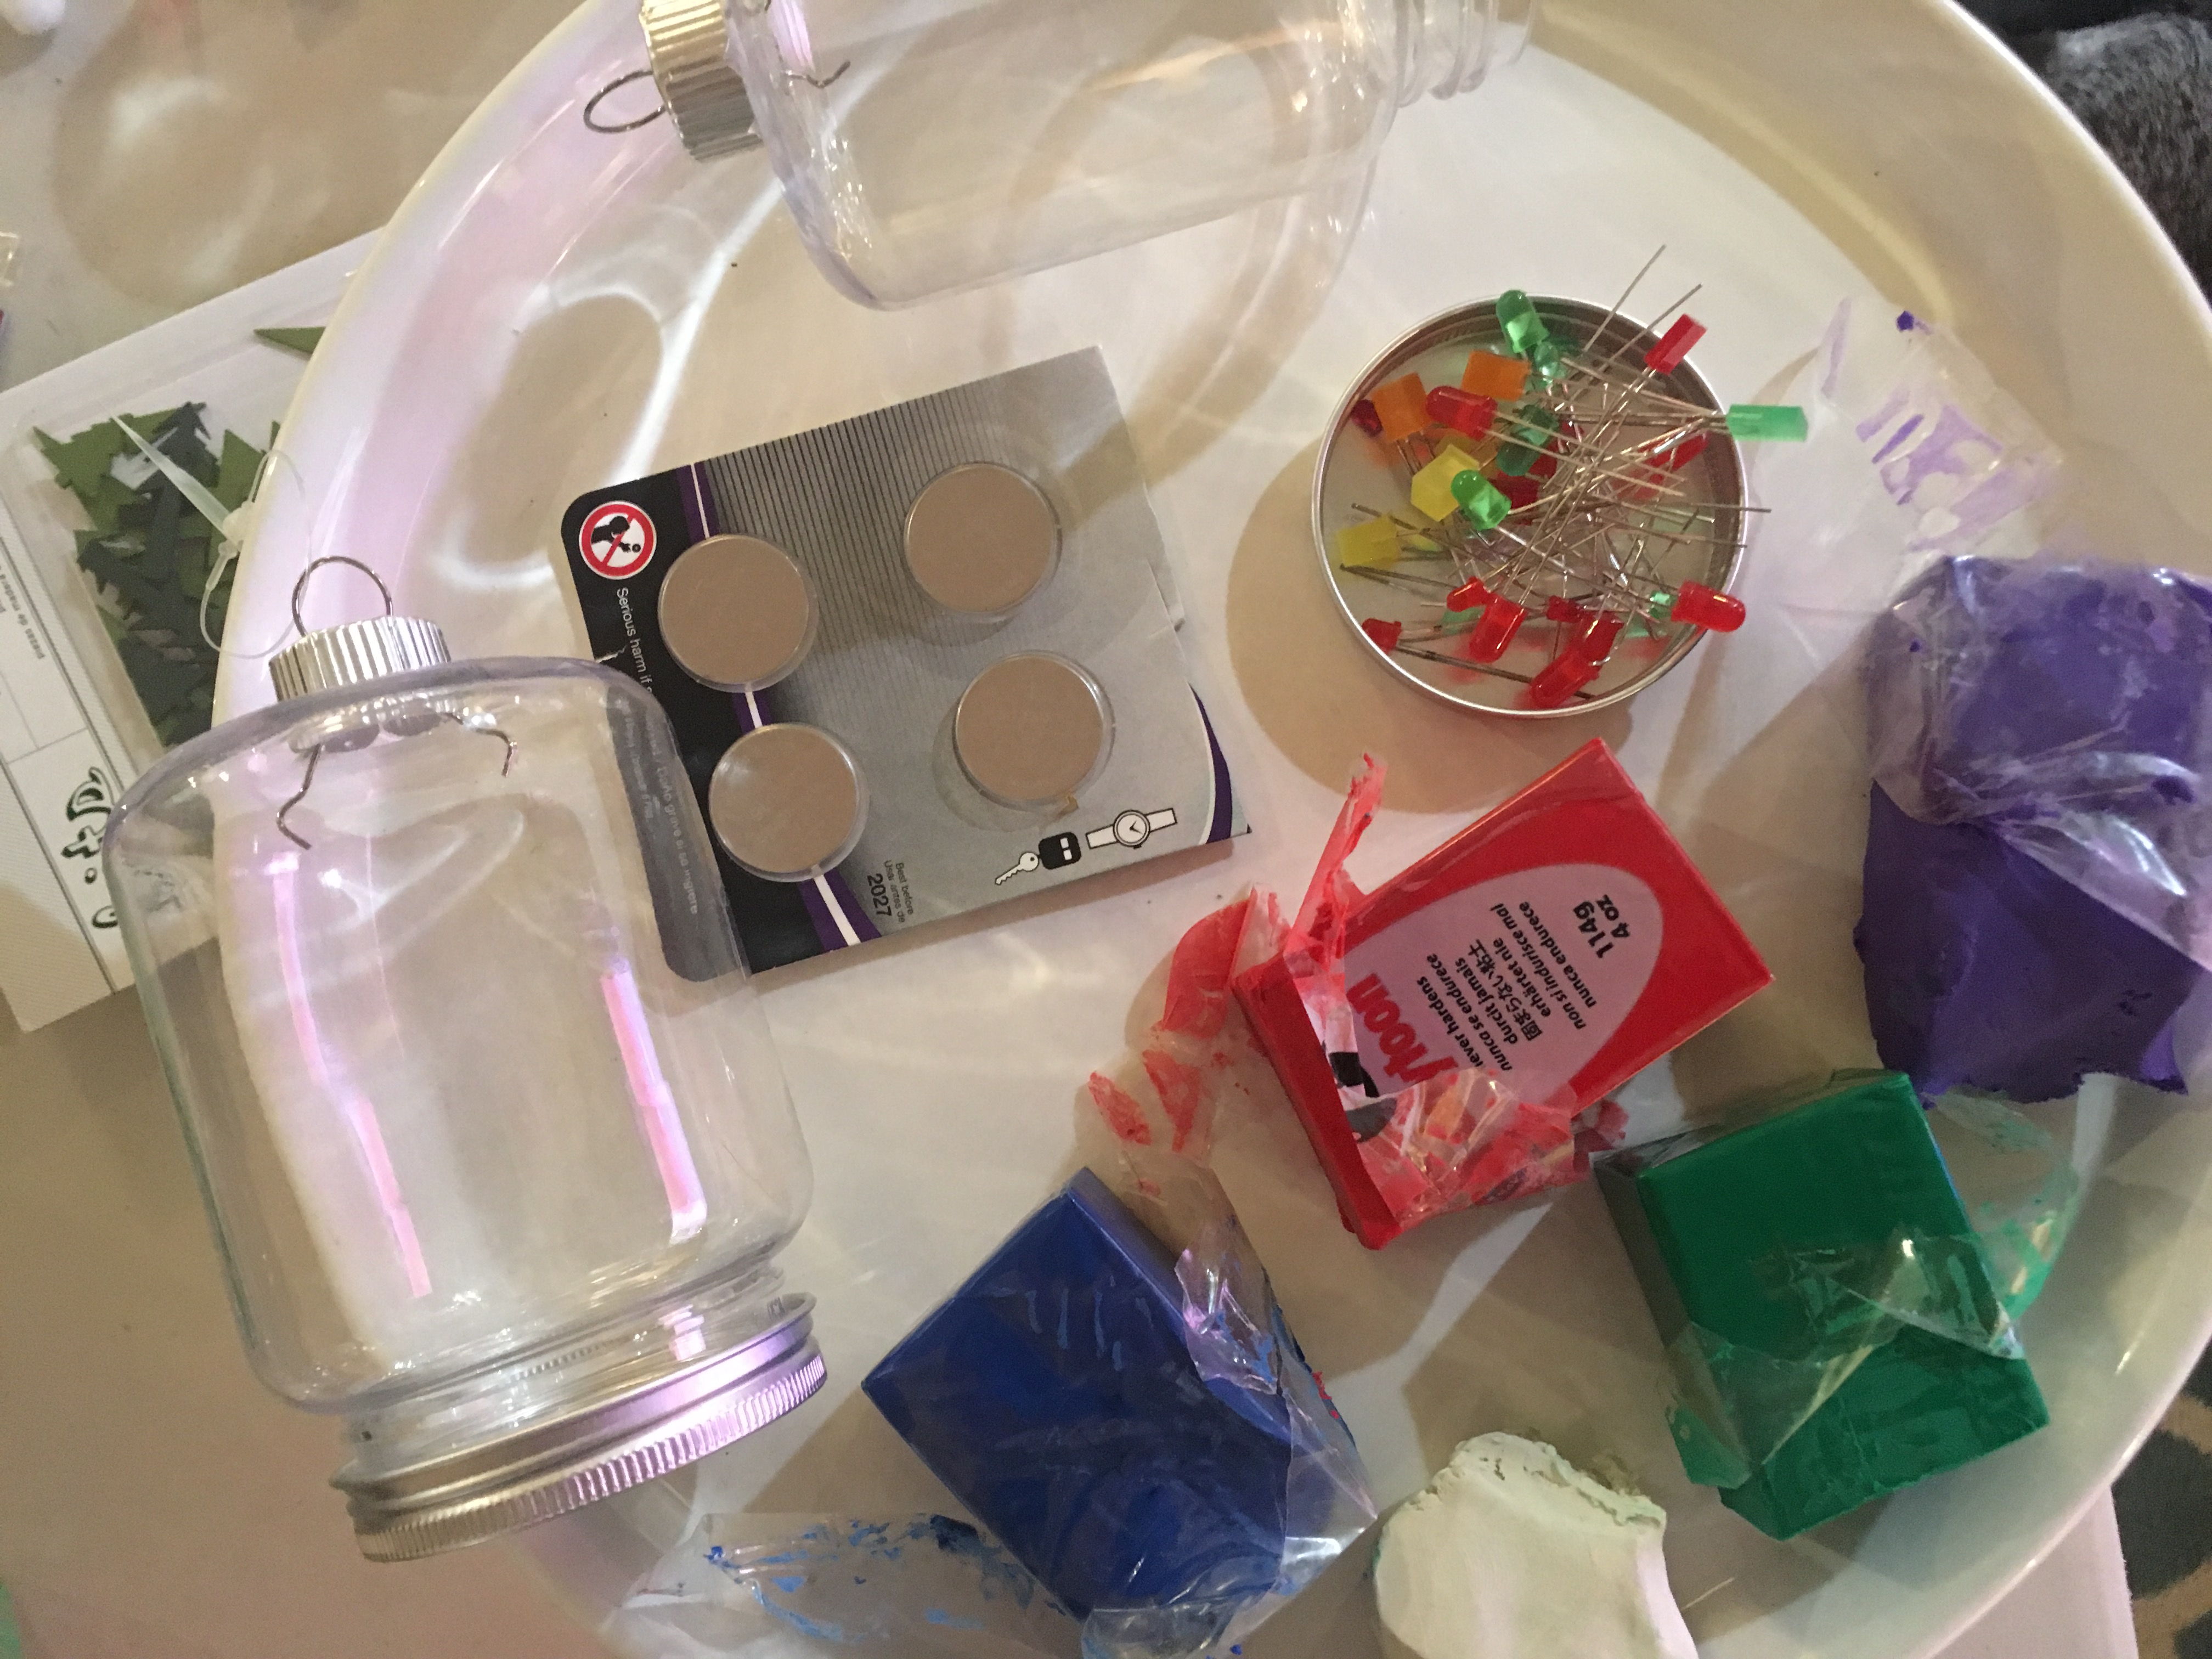
supplies for building LED-lit ornaments
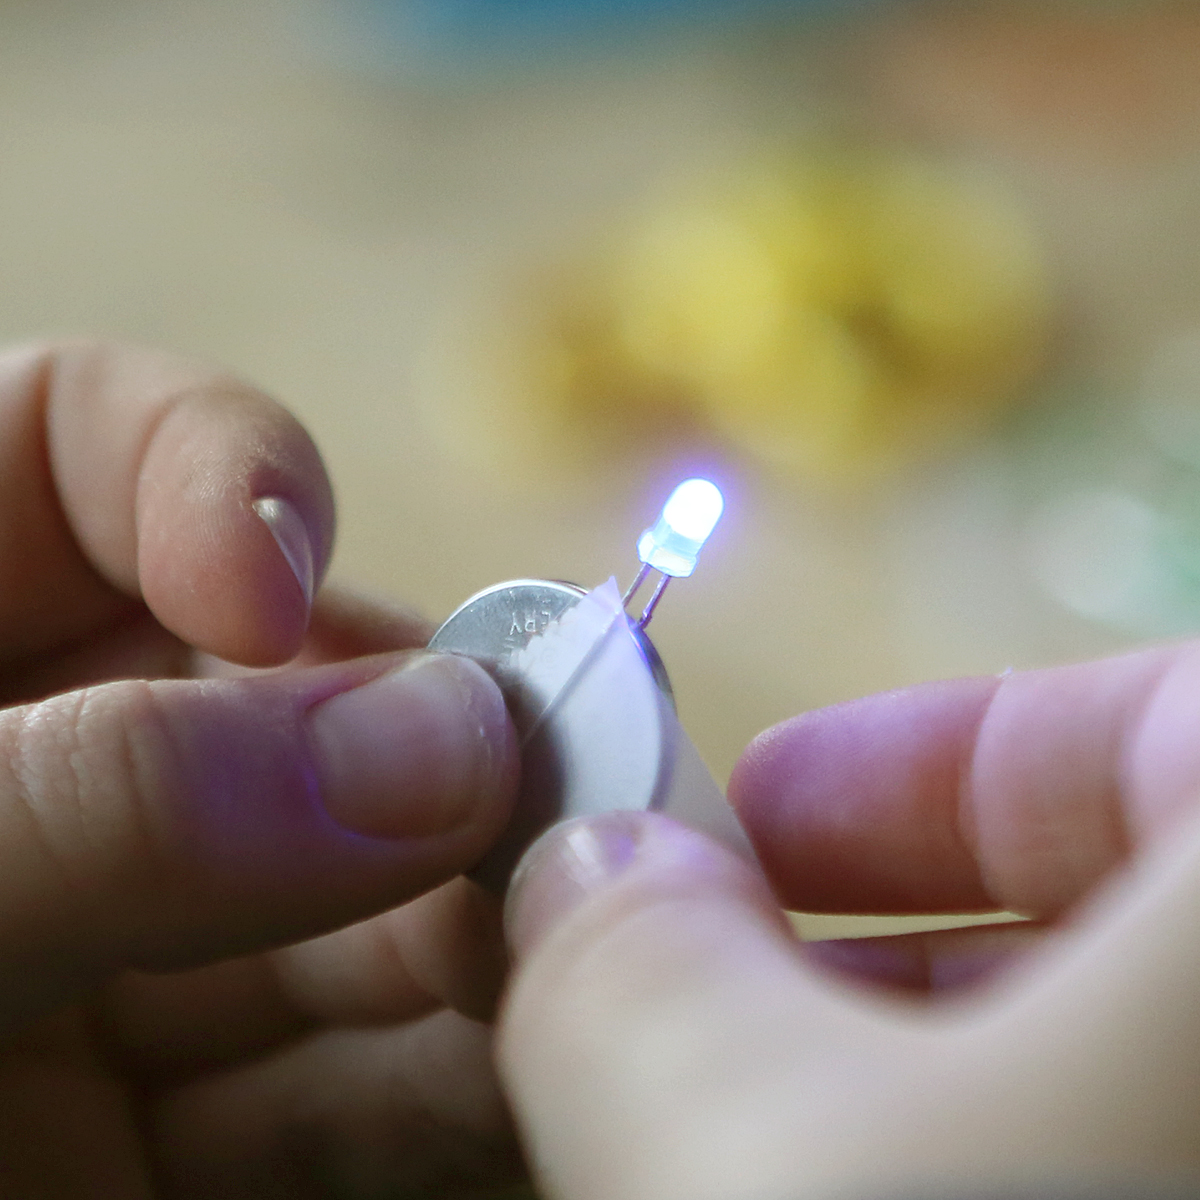
Connect the legs of the LED so that each leg touches a different side of the battery to complete the circuit. If it doesn’t light, try switching the legs to the opposite sides. (Image from STEAM Lab for Kids-Quarry Books 2018)
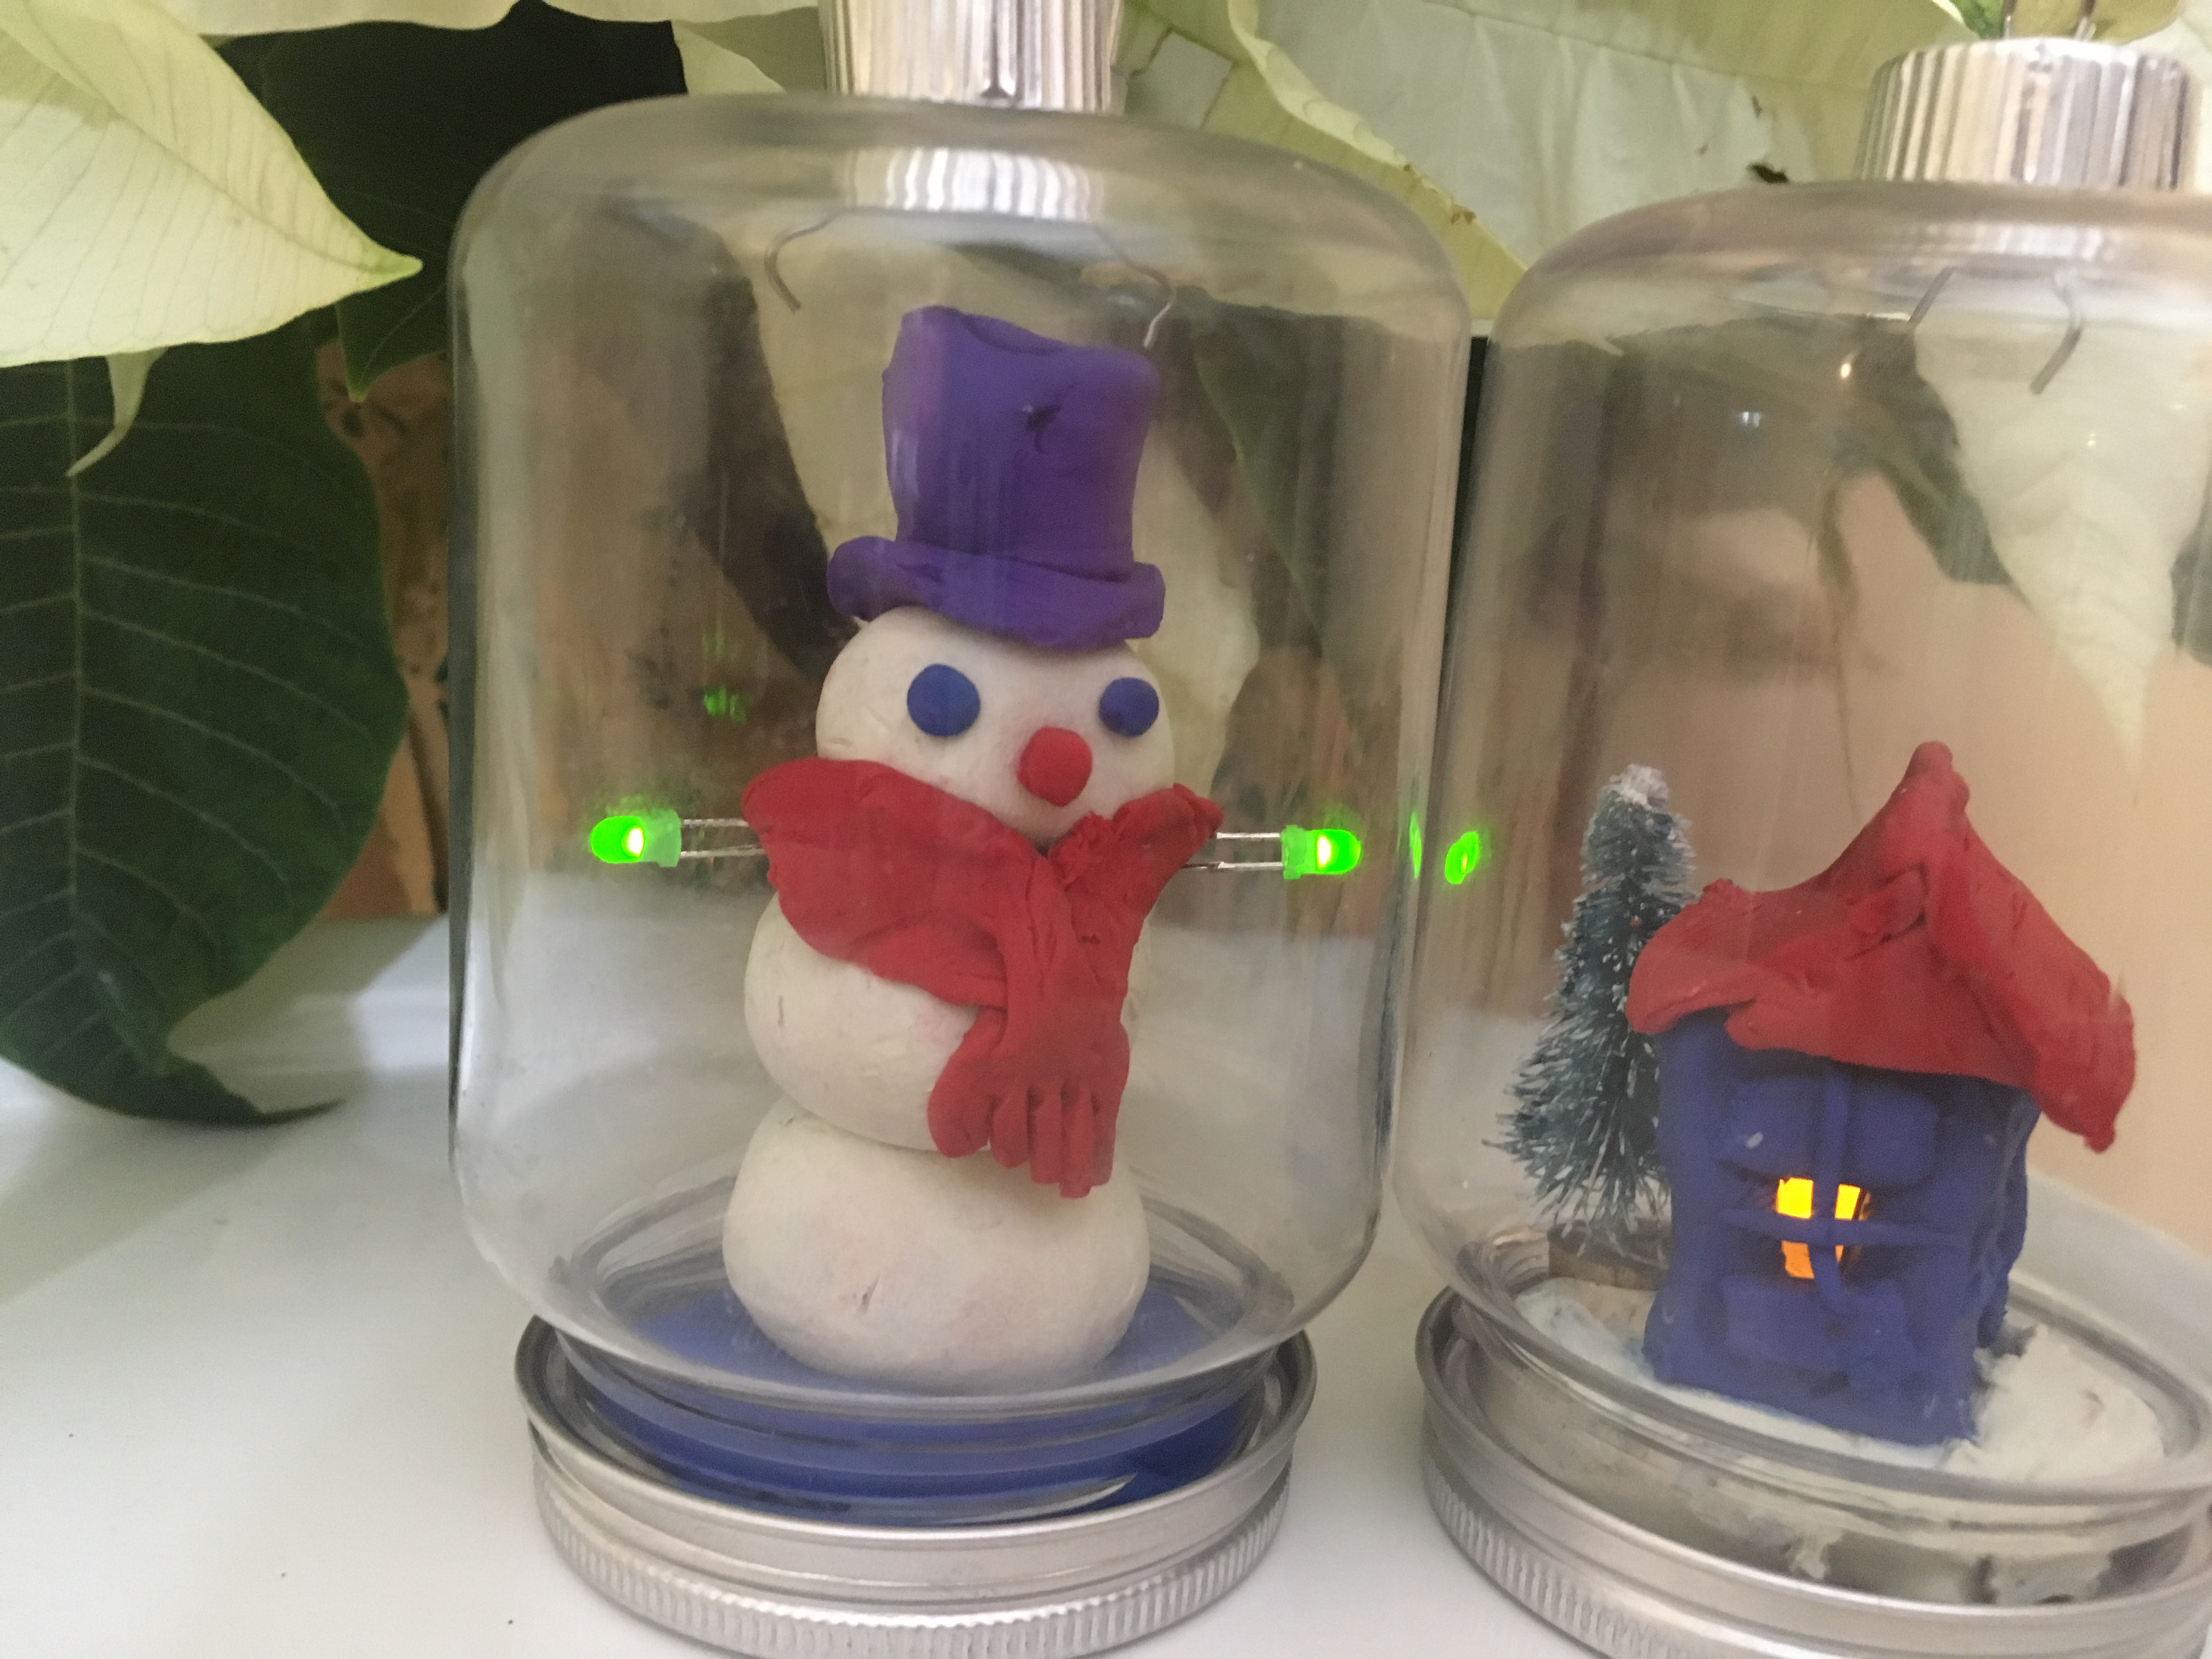
Hide the battery in the clay, keeping the connection tight so the LEDs stay lit. You can have more than one LED on a single battery. Put the bottom back on the jar and Voila!
Epsom Salt Crystal Ornaments:
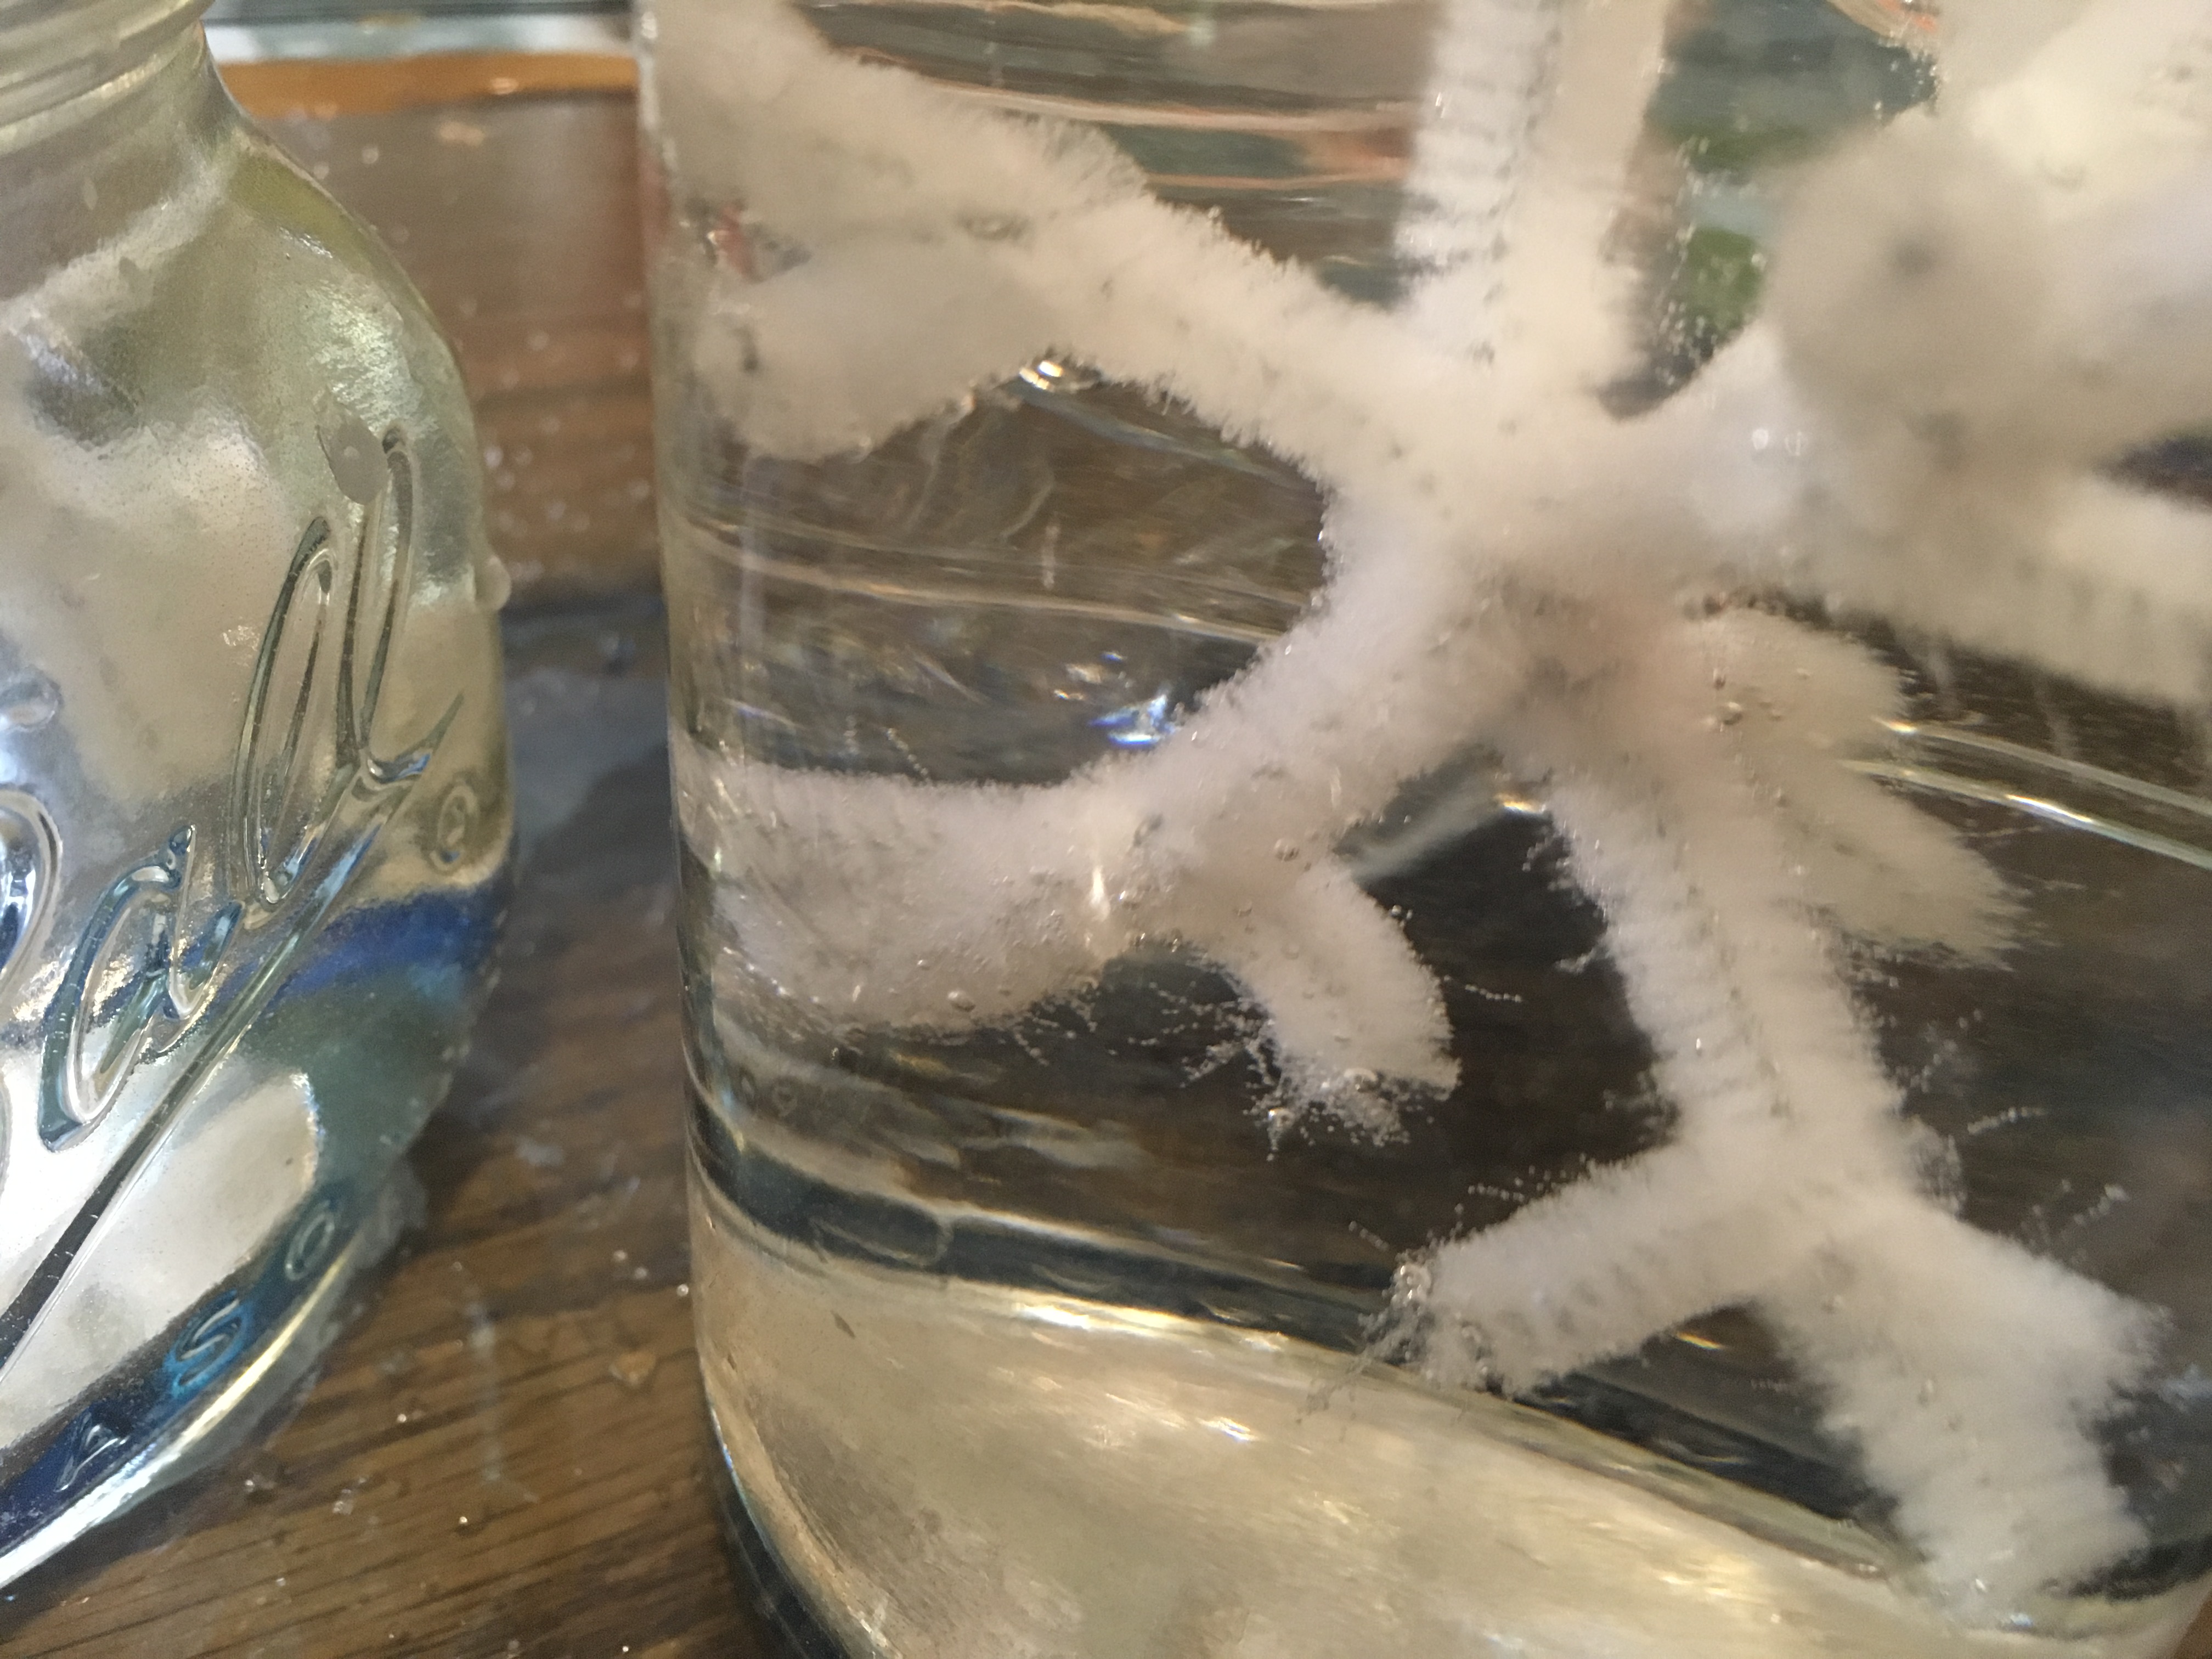
(Warning: Hot liquids require adult supervision.) To make the Epsom Salt crystals, dissolve 3 cups of Epsom salts in 2 cups of water by heating and stirring until no more crystals are visible. This creates a supersaturated solution. Allow the solution to cool slightly. Hang pipe cleaners formed into snowflakes in jars or hollow ornaments and pour the solution in. When long, needle-like crystals have formed, remove the pipe cleaners from the jars. You can leave them in the ornaments, and drain the liquid.

Hang pipe cleaners in supersaturated Epsom salt solution, or add them to ornaments and fill them with solution.
Wait for the crystals to grow. (4-12 hours.)
Remove the pipe cleaners from the solution. Knock off excess crystals.
Think #STEAM! Homemade Holiday Window Stickies
- by KitchenPantryScientist
Gelatin is the substance that makes Jell-O jiggle. See what happens when food coloring molecules move, or DIFFUSE through Jell-O.
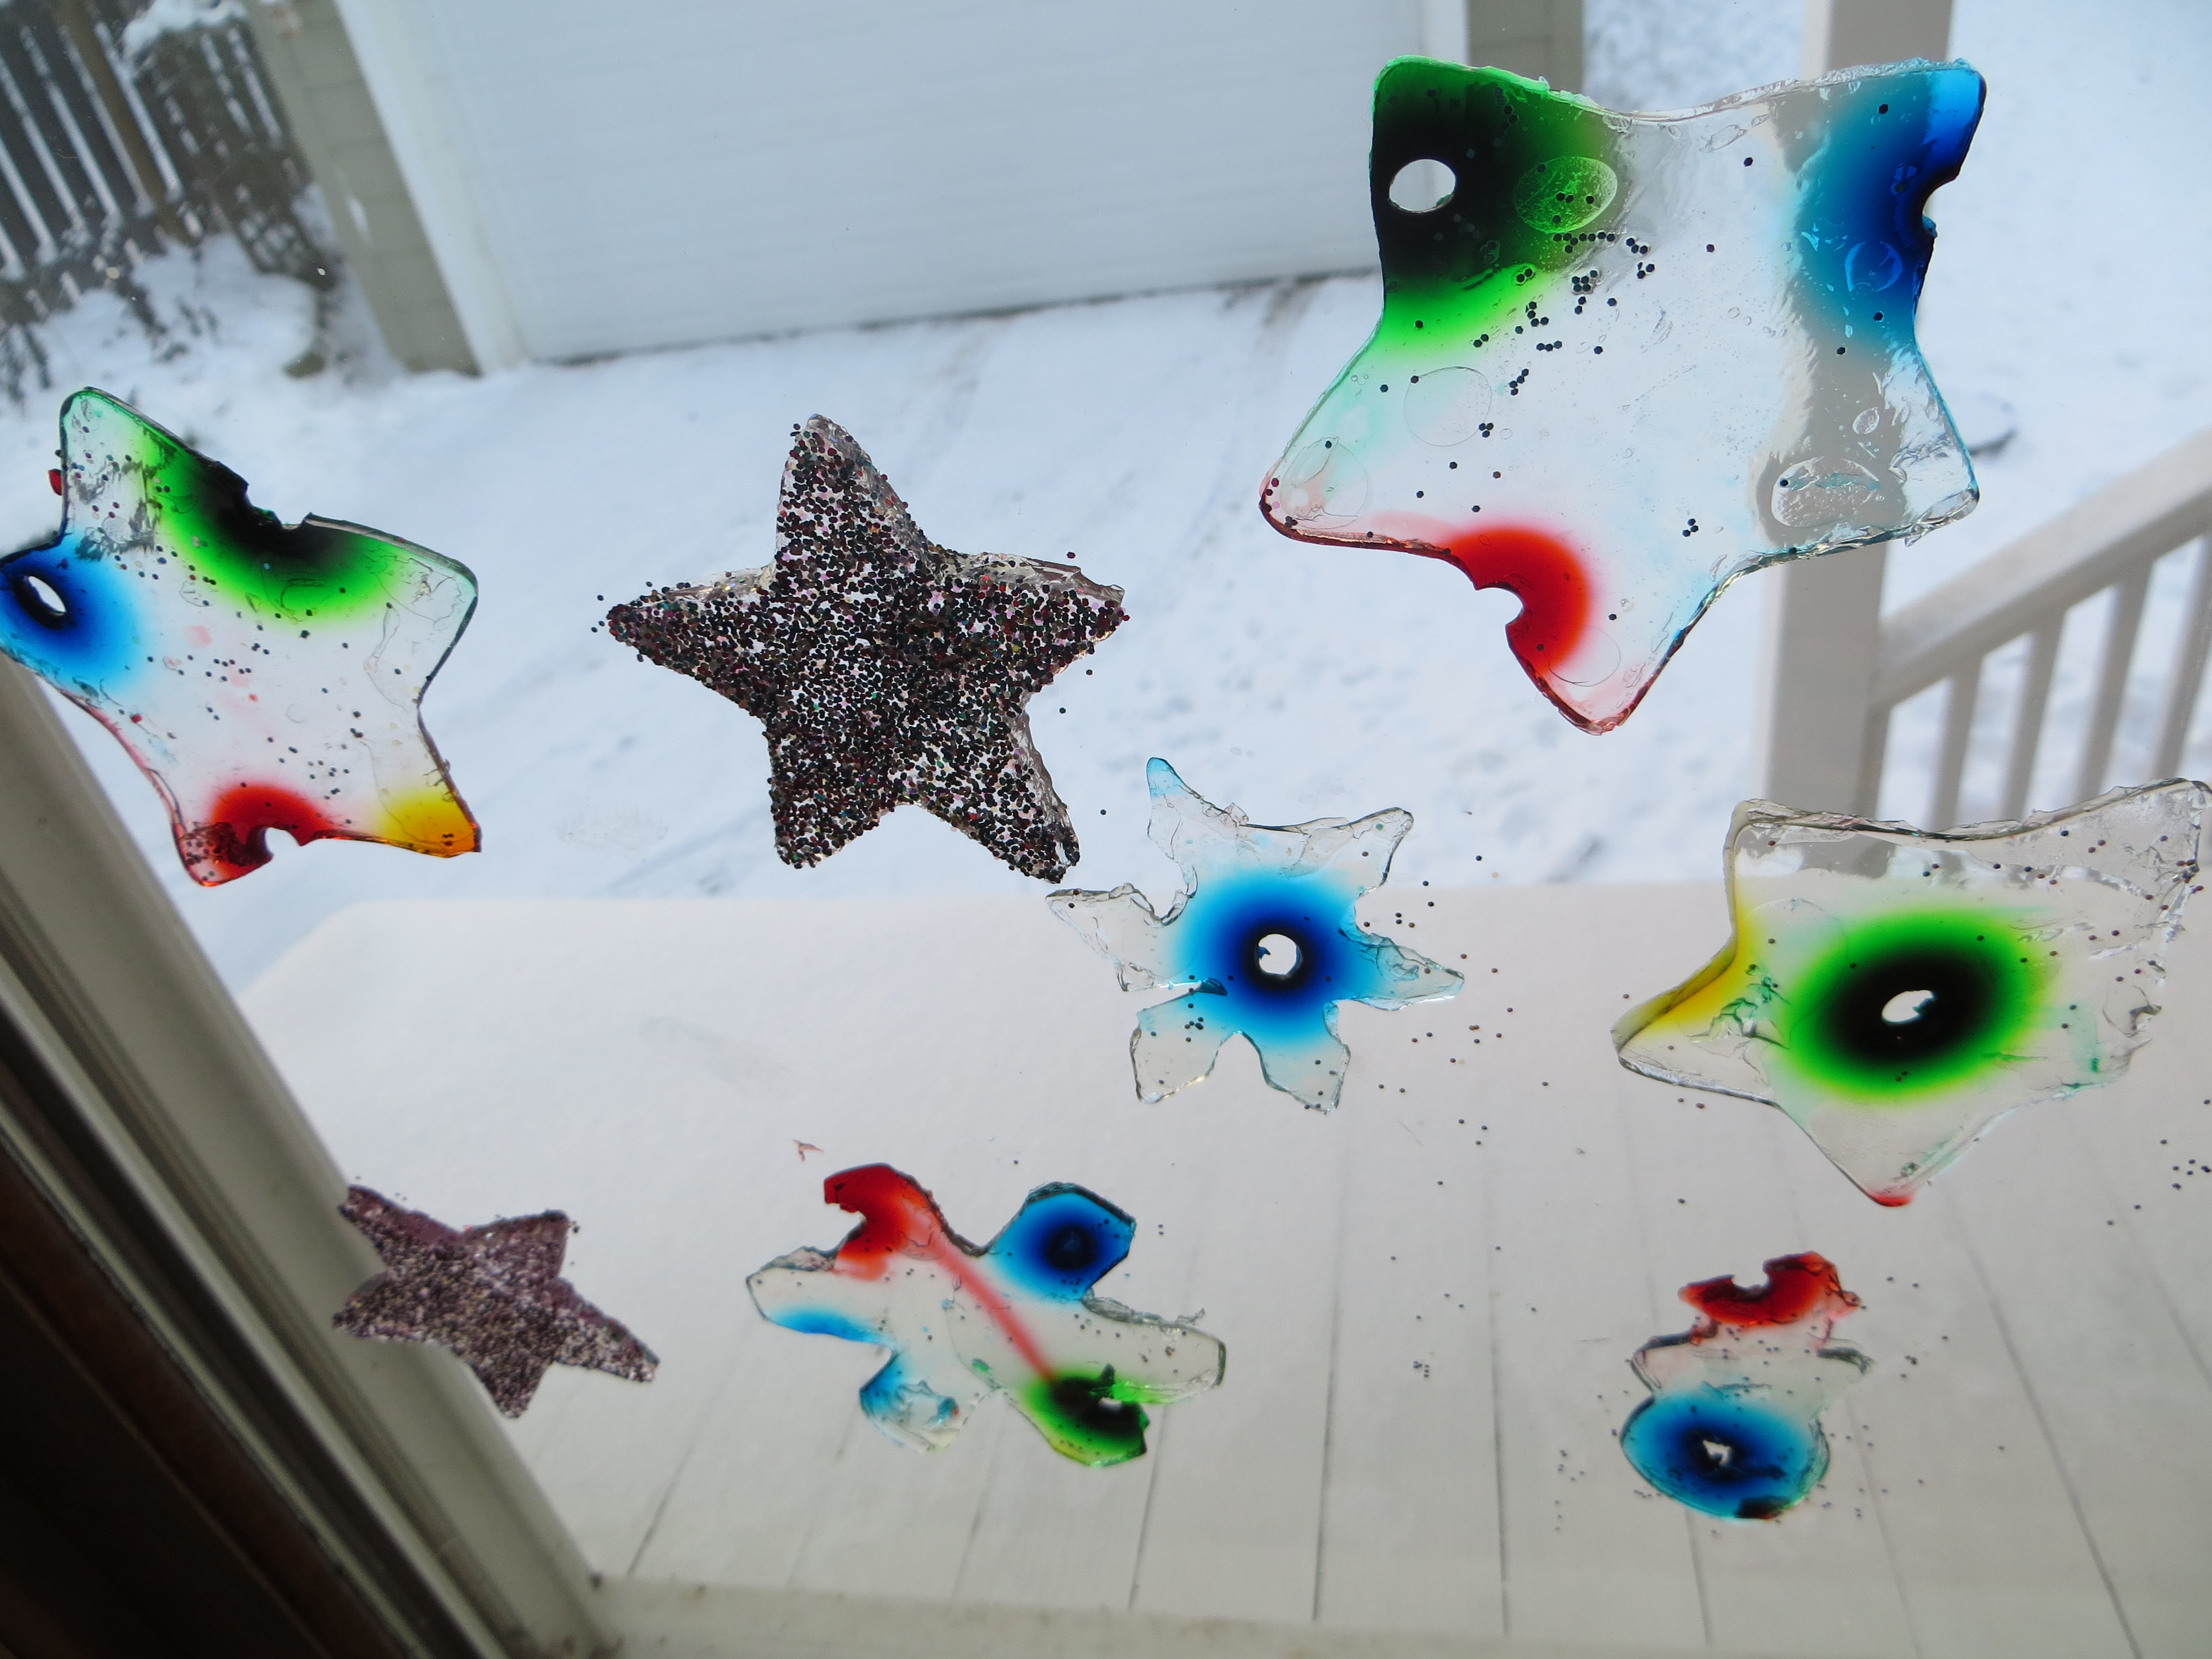
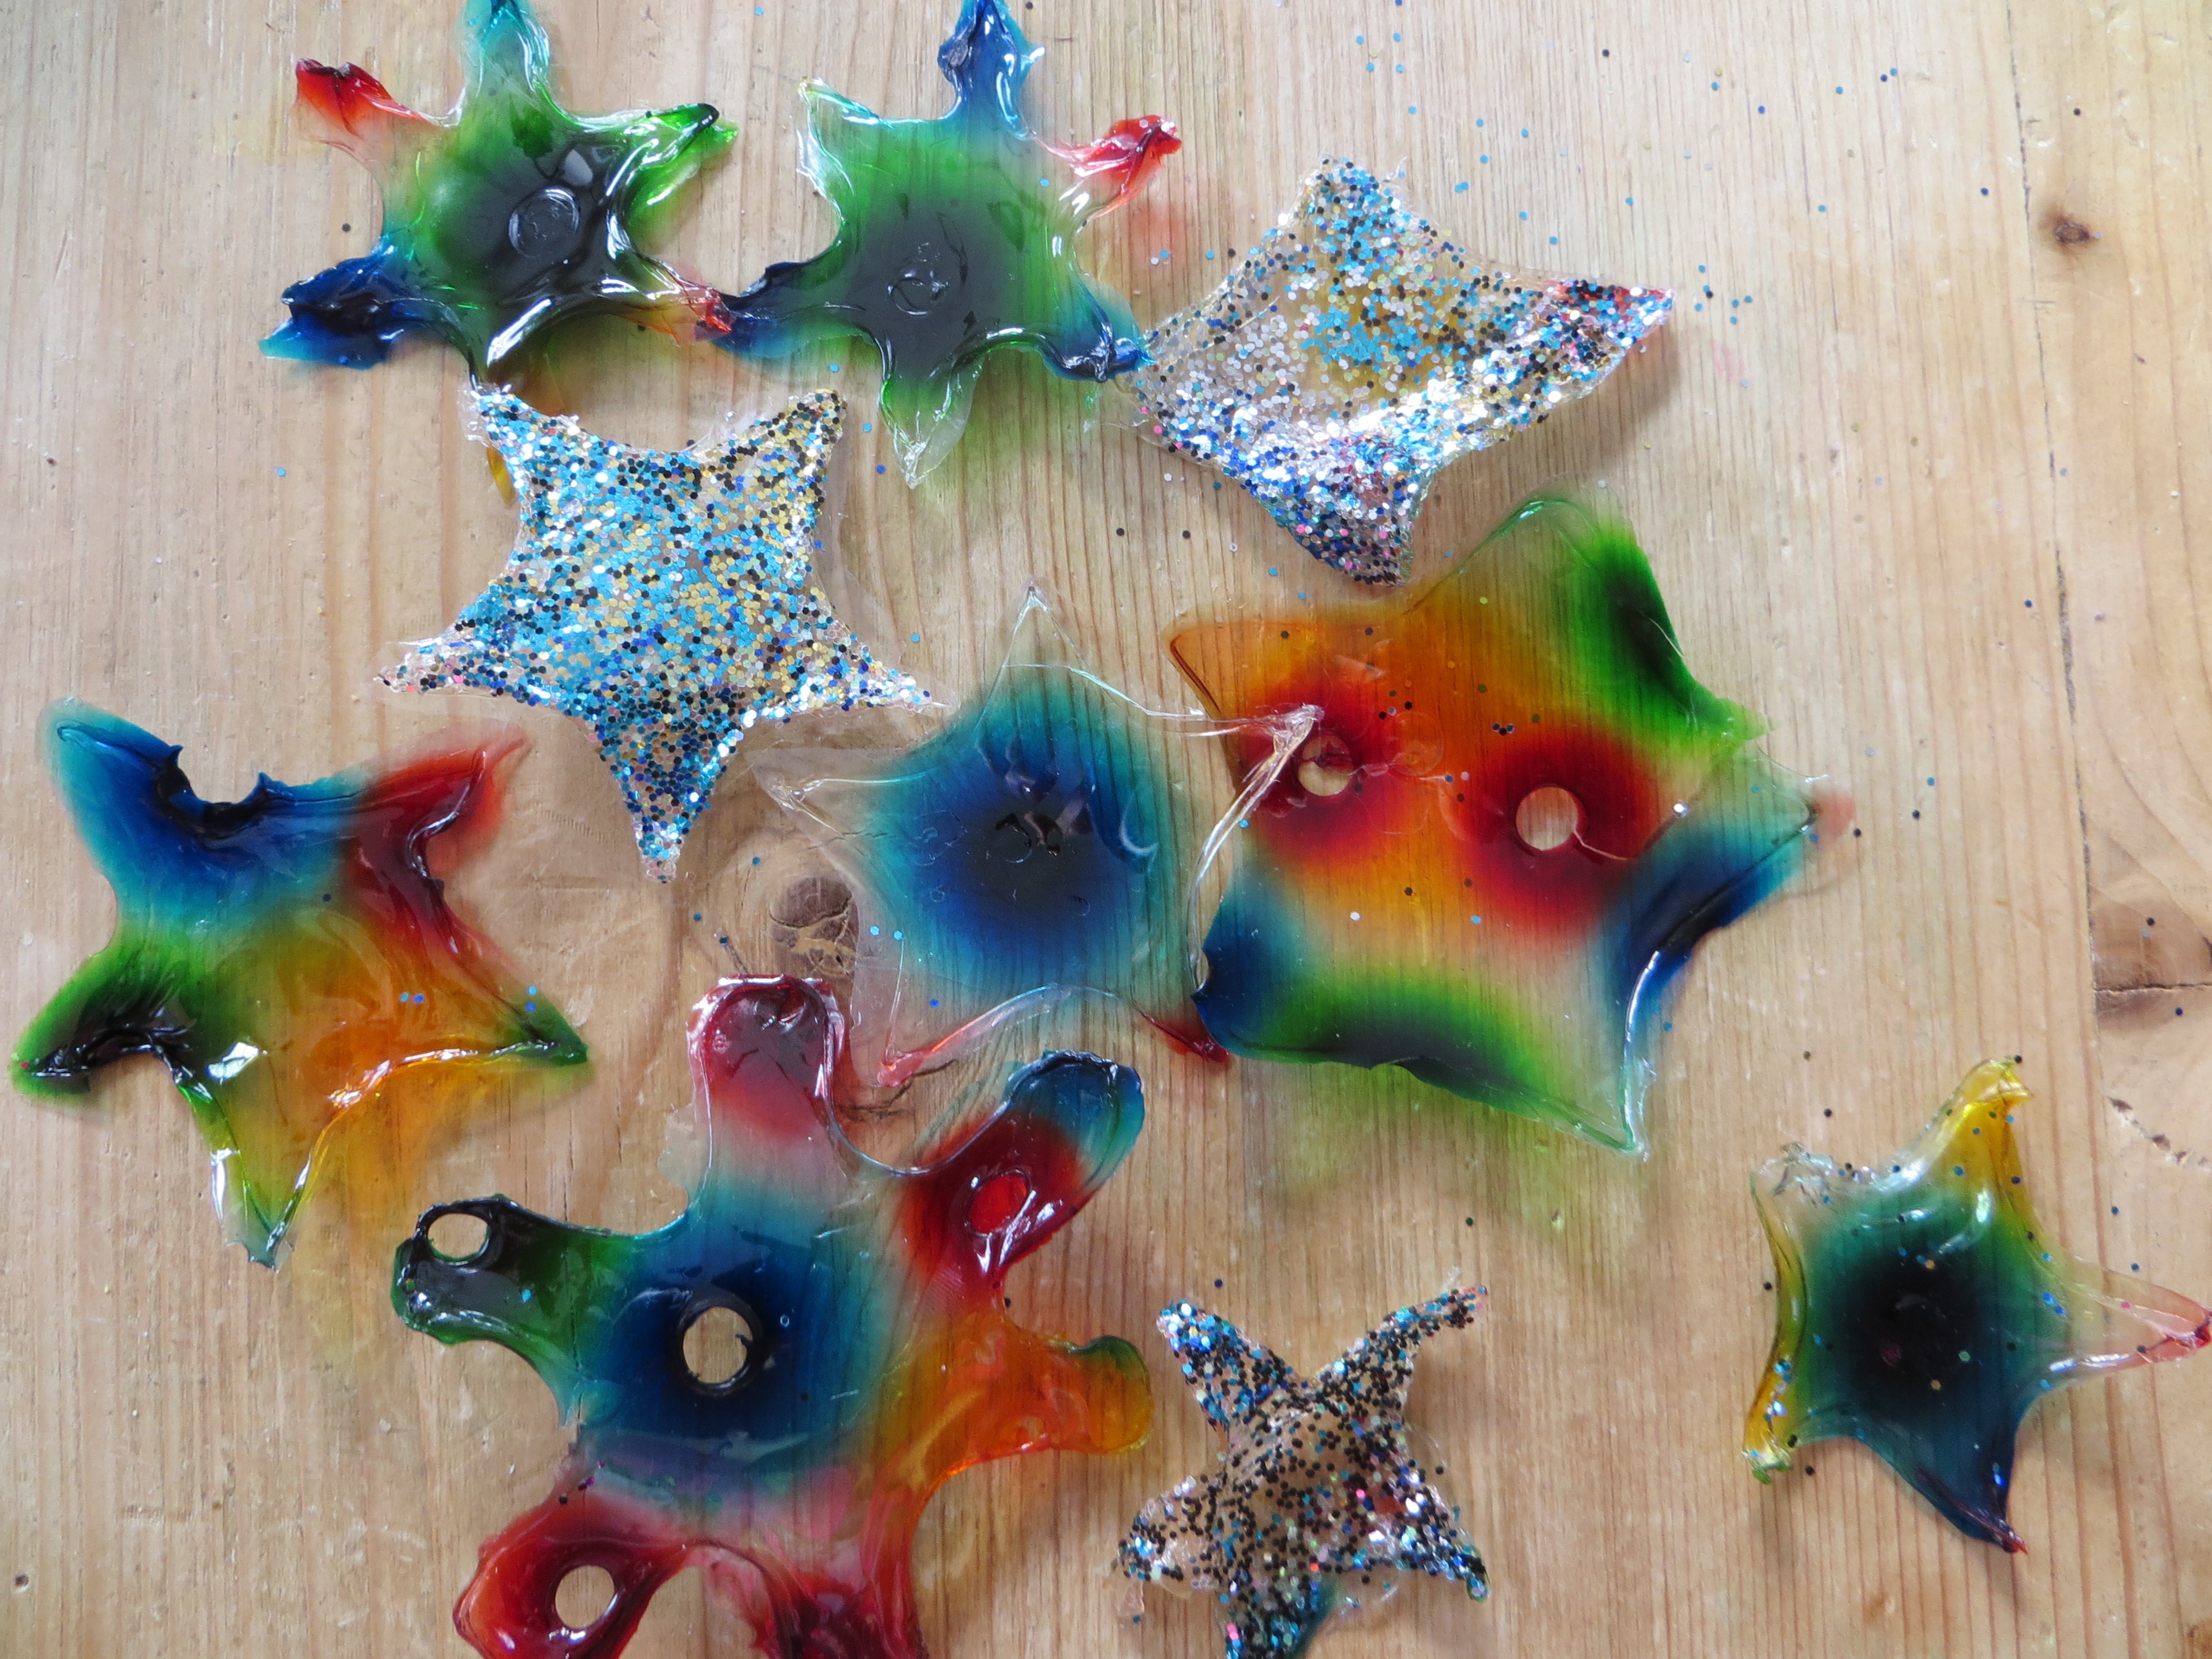
This creative science experiment that my kids and I invented lets you play with floatation physics by sprinkling glitter on melted gelatin, watch colorful dyes diffuse to create patterns and then use cookie cutters to punch out sticky window decorations. Water will evaporate from the gelatin, leaving you with paper-thin “stained glass” shapes.
You’ll need
-plain, unflavored gelatin from the grocery store or Target
-food coloring
–a drinking straw or toothpicks
-water
-a ruler
-glitter
*You can use the recipe below for two pans around 8×12 inches, or use large, rimmed cookie sheets for your gelatin. For a single pan, cut the recipe in half.
Step 1. Add 6 packs of plain, unflavored gelatin (1 oz or 28 gm) to 4 cups of boiling water. Stir well until all the gelatin has dissolved and remove bubbles with a spoon.
Step 2. Allow gelatin to cool to a kid-safe temperature. Pour the liquid gelatin into two large pans so it’s around 1-1.5 cm deep. It doesn’t have to be exact.
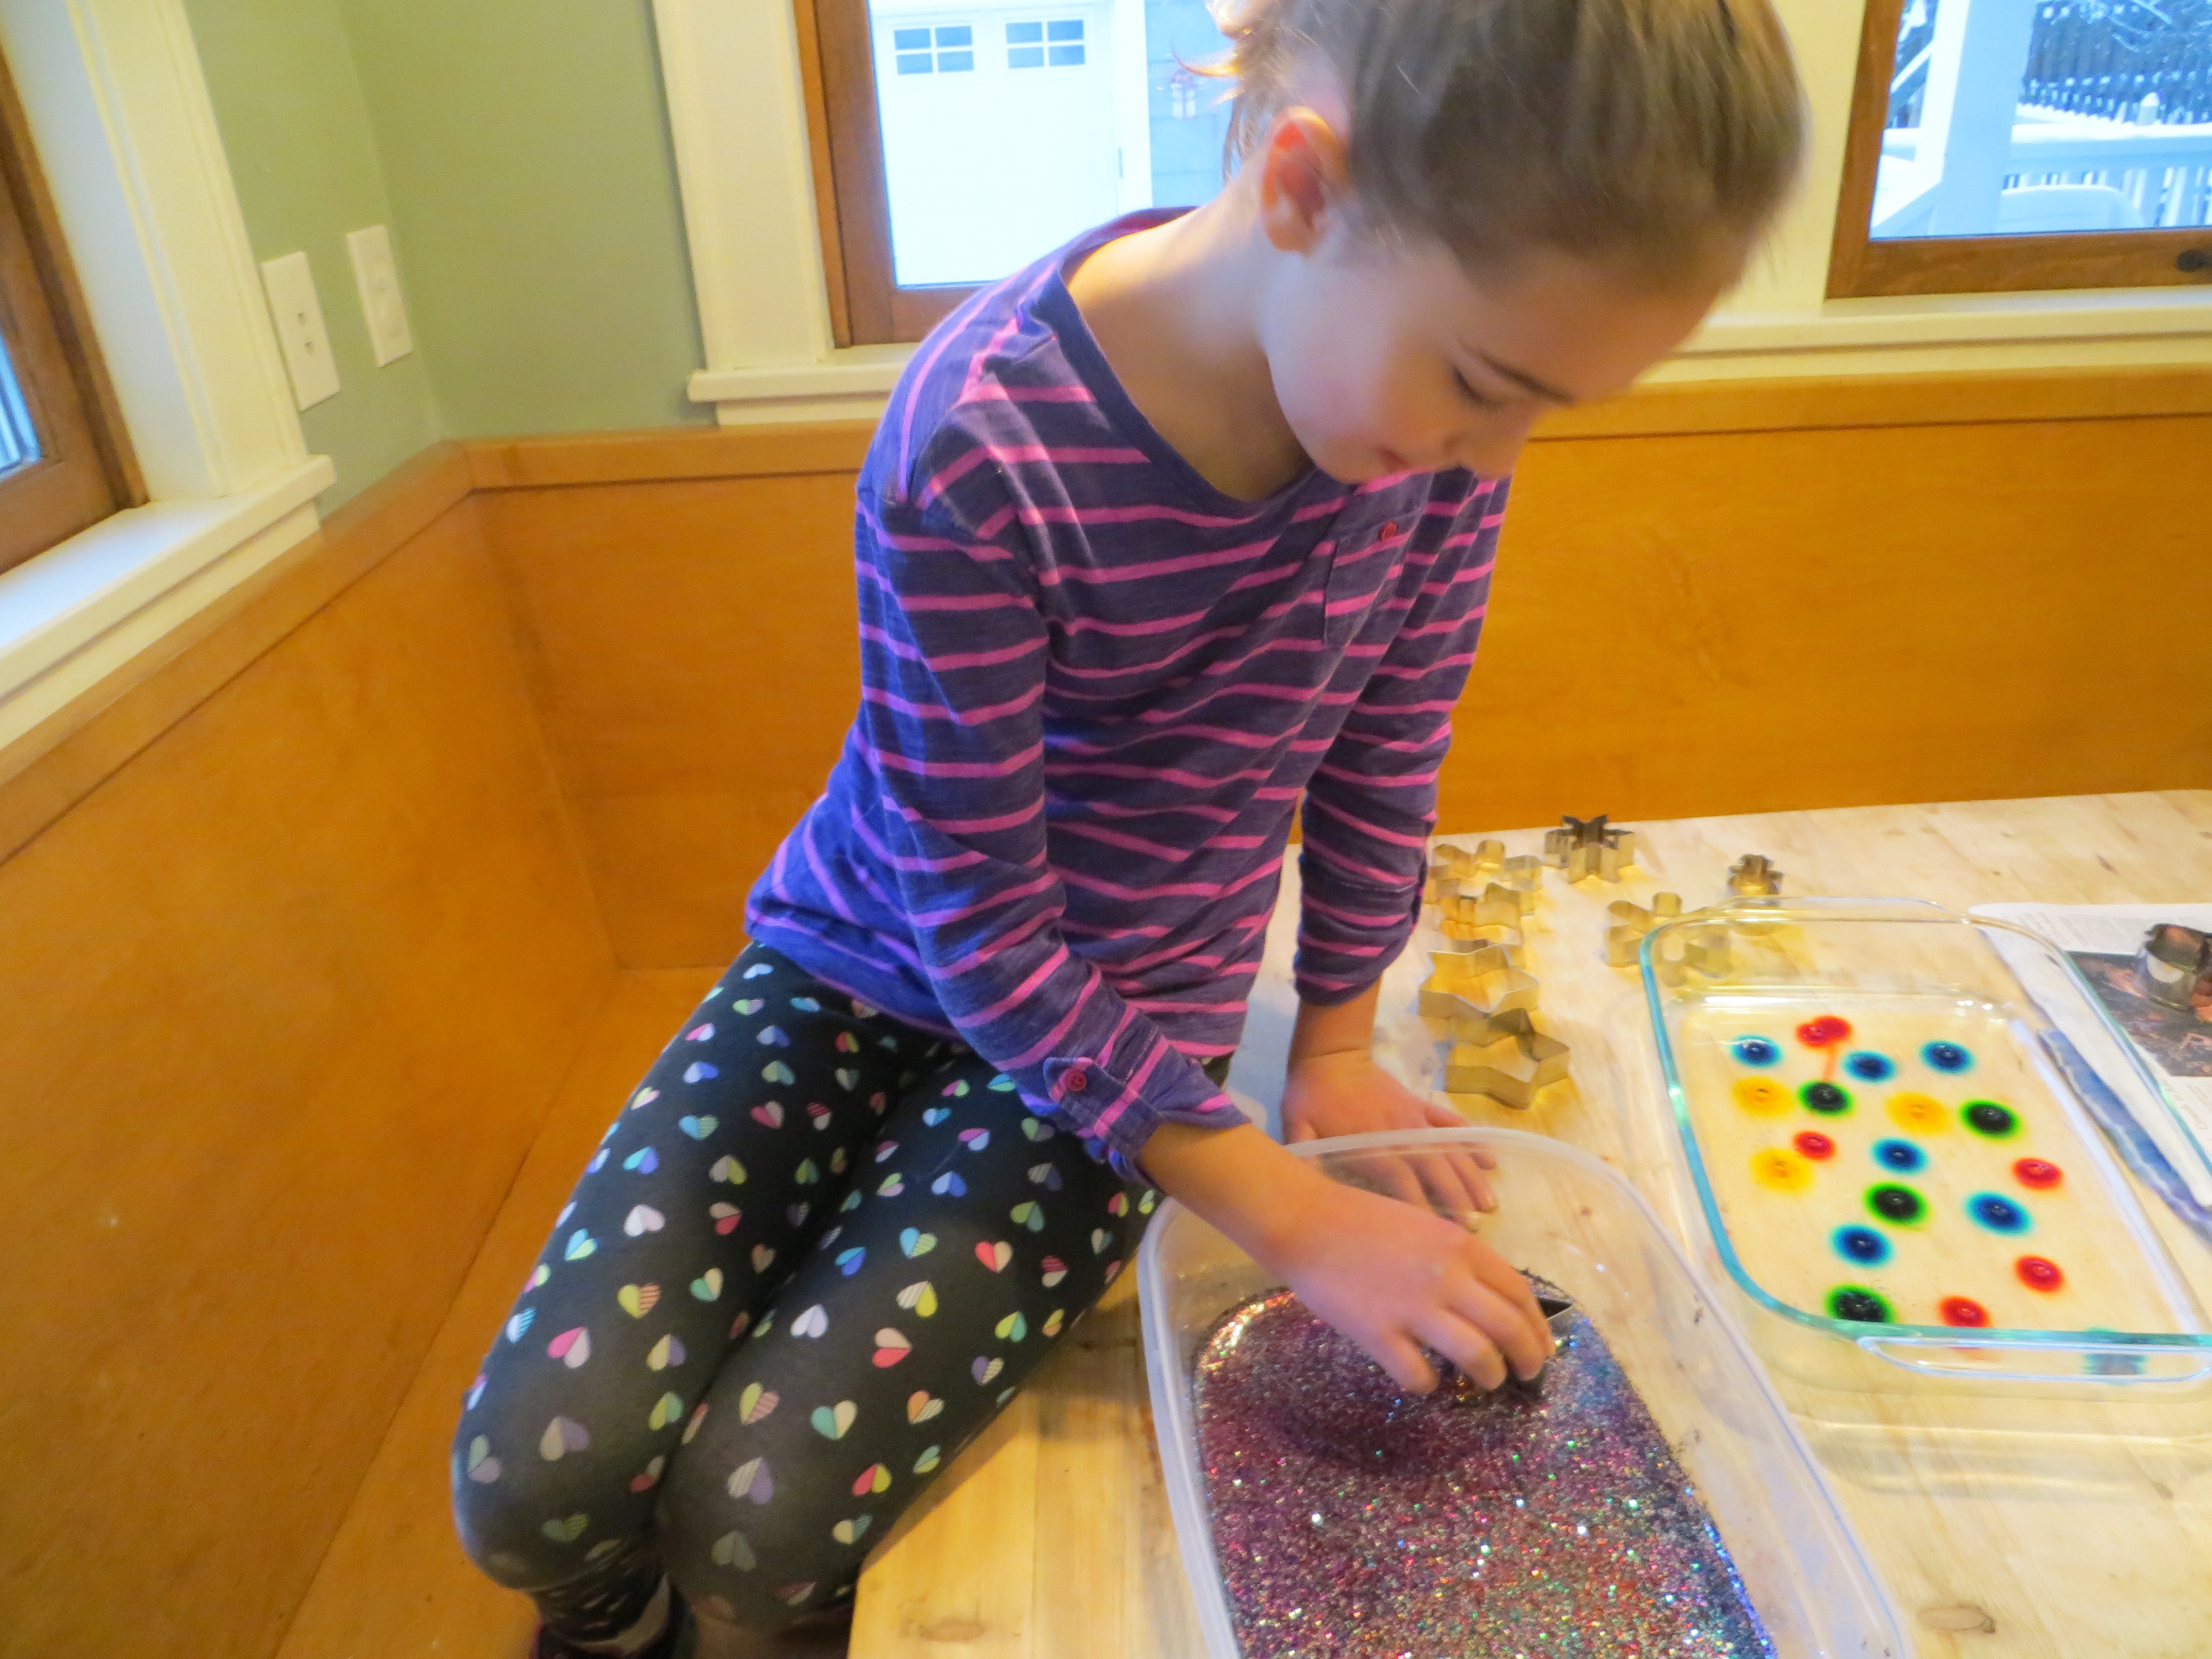
Step 3. Sprinkle glitter on the gelatin in one pan. What happens?

Step 4. Allow the gelatin to harden in both pans.
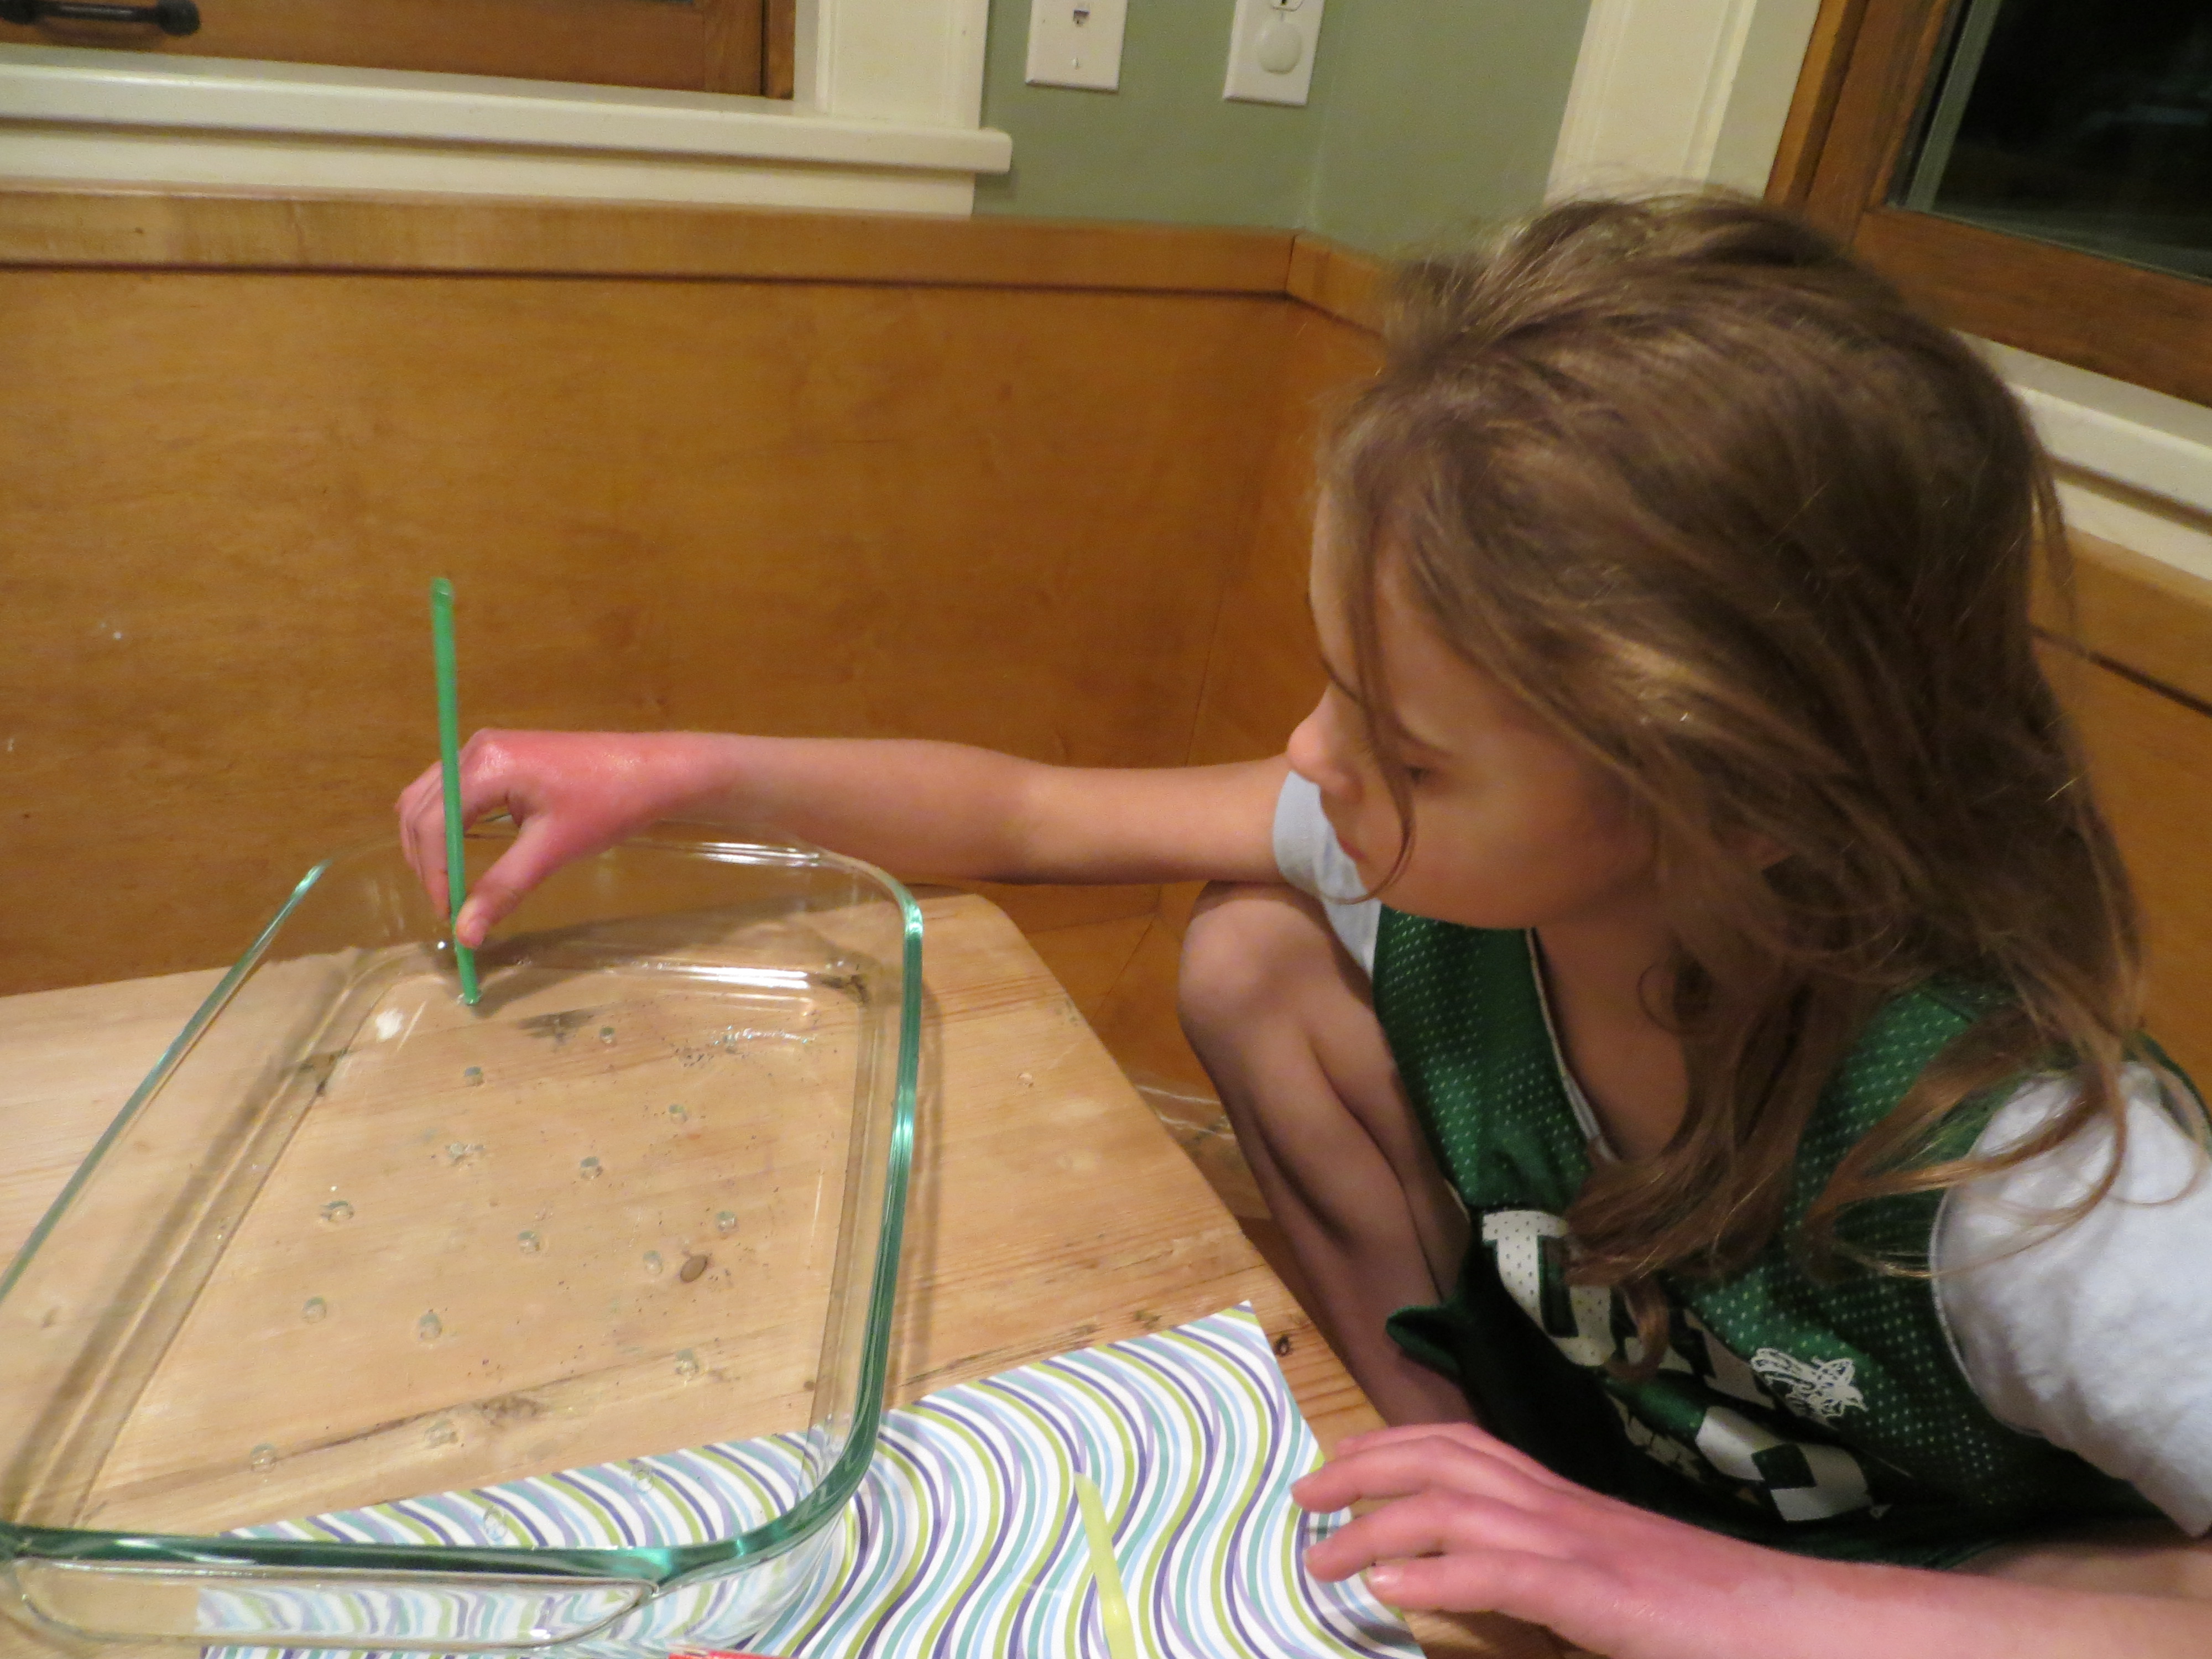
Step 5. In the pan with no glitter, use a toothpick dipped in food coloring to make designs in the gelatin. Alternately, use straw to create holes in the gelatin, a few cm apart, scattered across the surface. It works best to poke a straw straight into the gelatin, but not all the way to the bottom. Spin the straw and remove it. Then, use a toothpick or skewer to pull out the gelatin plug you’ve created. This will leave a perfect hole for the food coloring. Very young children may need help.
Step 6. If you poked holes with a straw, add a drop of food coloring to each hole in the gelatin.
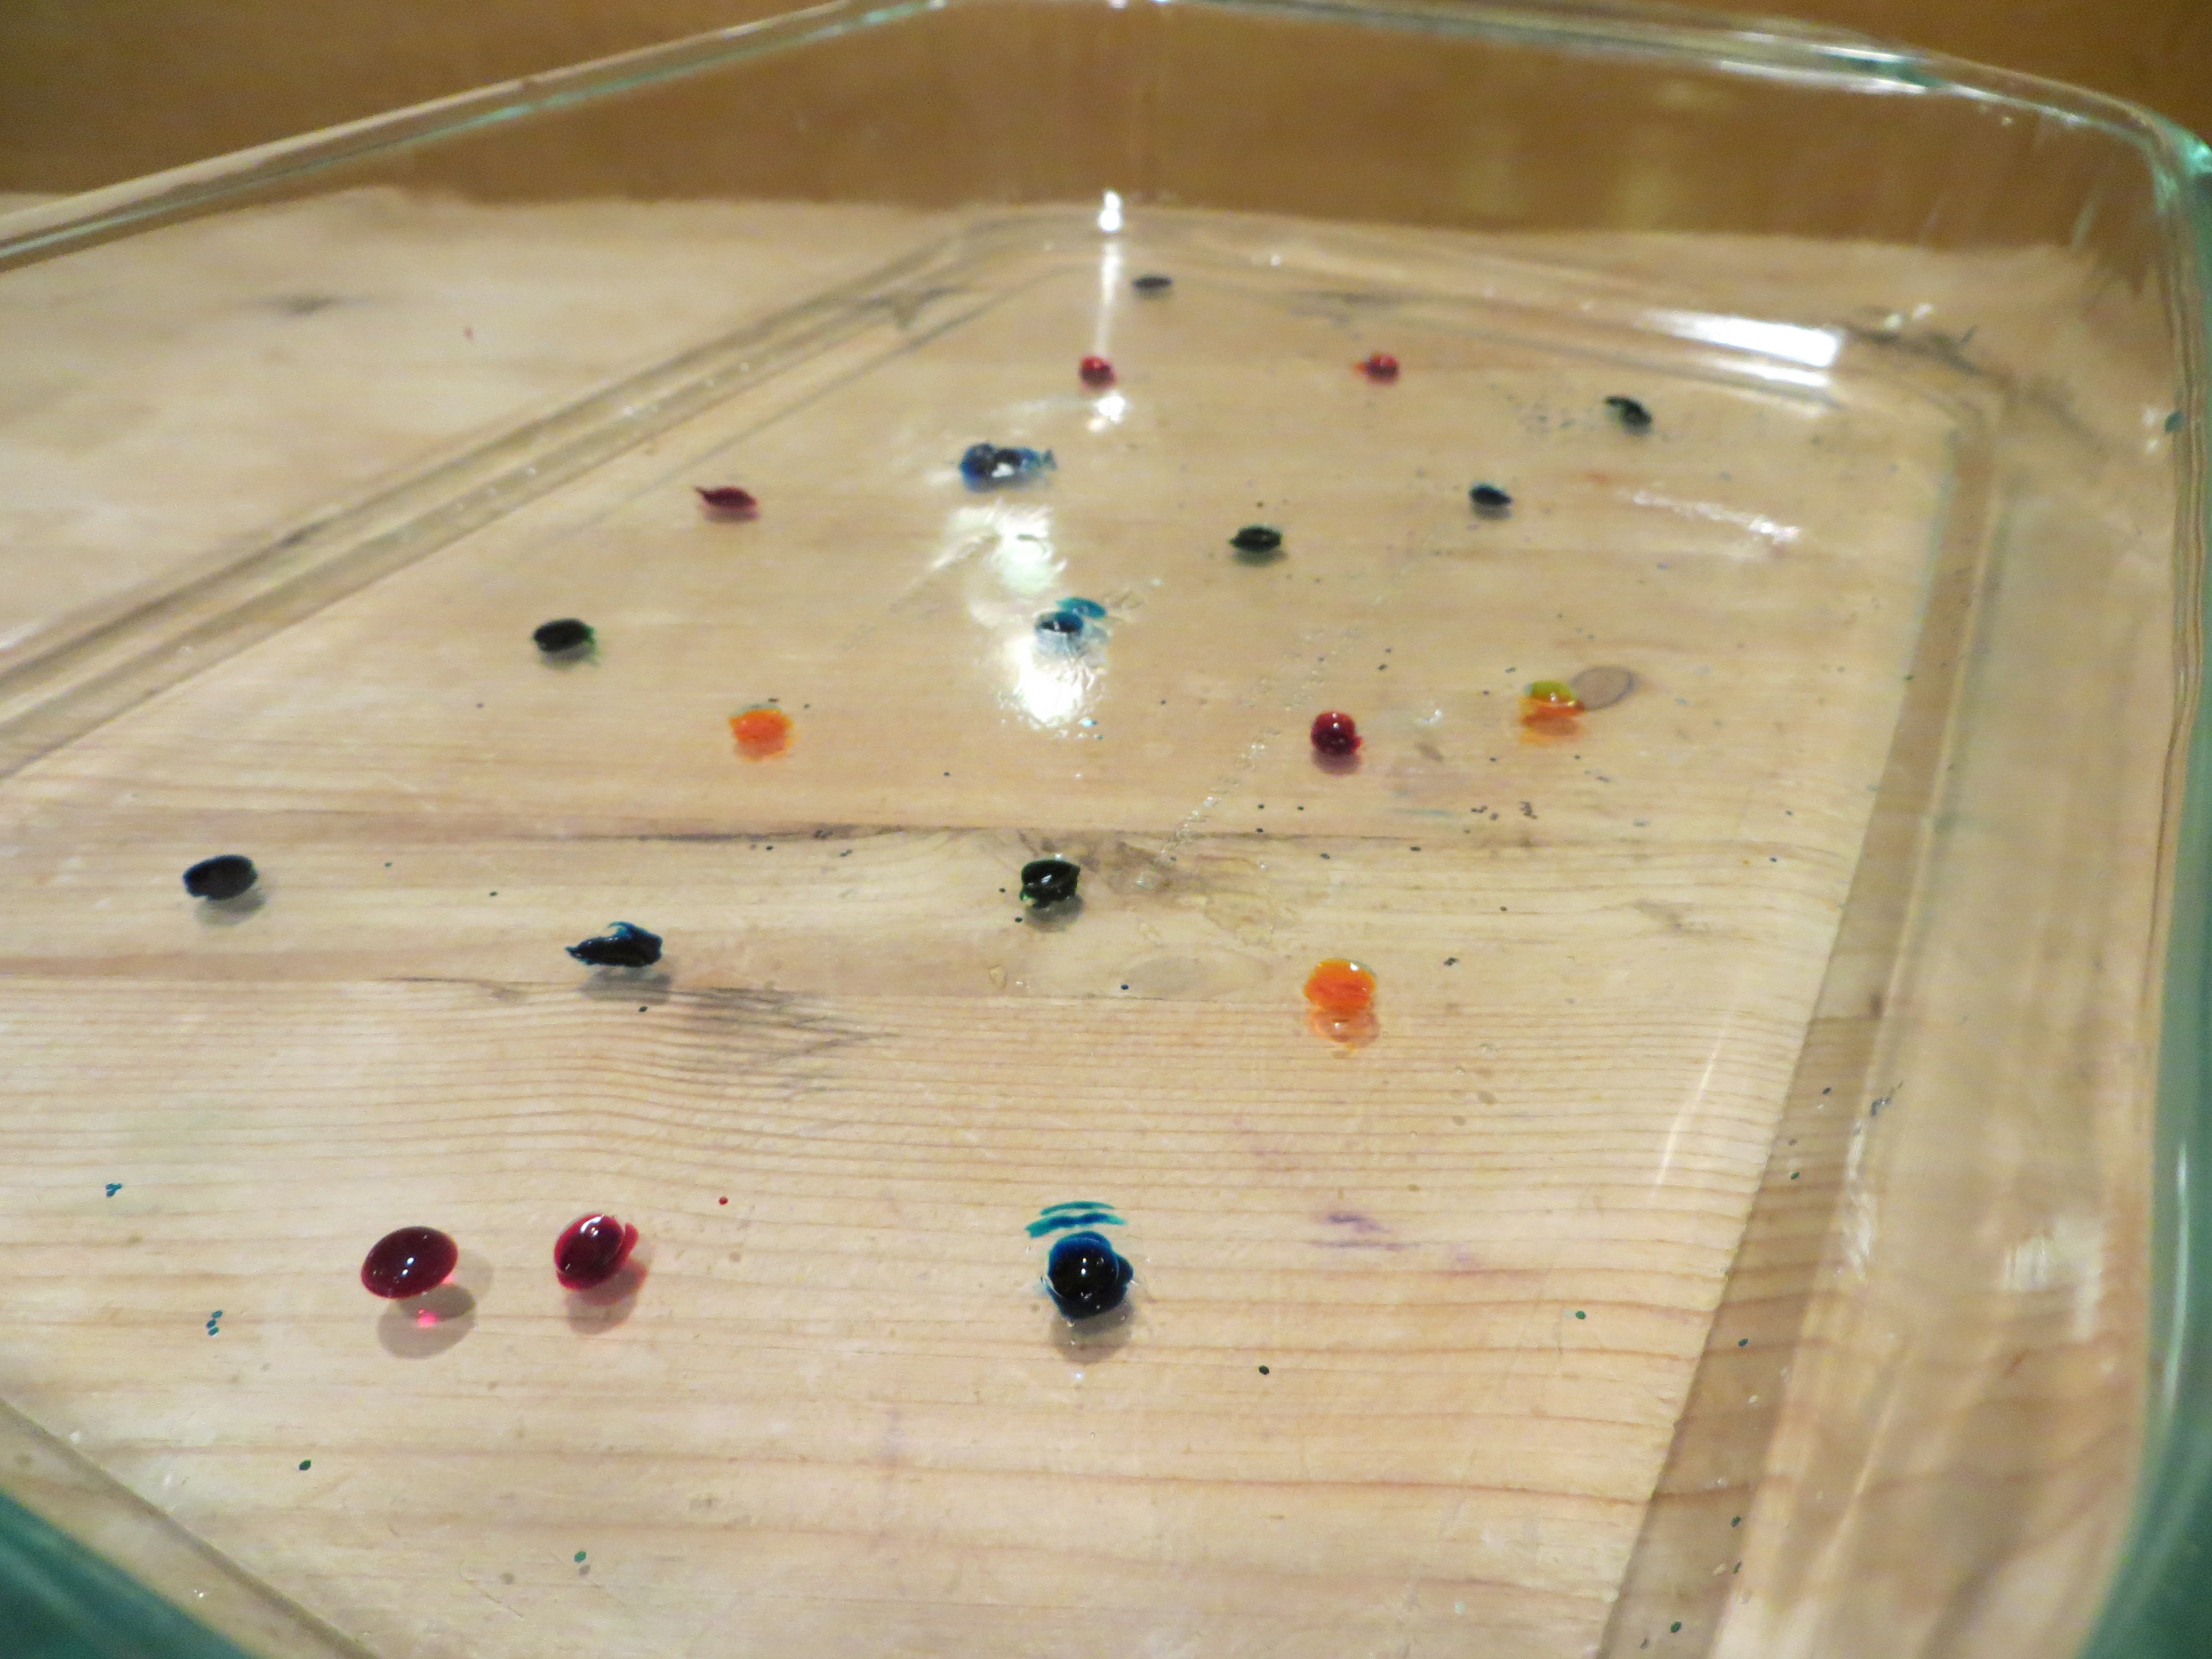
Step 7. Let the gelatin pans sit for 24 hours. Every so often, use a ruler to measure the circle of food coloring molecules as they diffuse (move) into the gelatin around them (read about diffusion at the bottom of this post.) How many cm per hour is the color diffusing? Do some colors diffuse faster than others? If you put one pan in the refrigerator and an identical one at room temperature, does the food coloring diffuse at the same rate?
Step 8. When the food coloring has made colorful circles in the gelatin, use cookie cutters to cut shapes from both pans of gelatin (glitter and food coloring), carefully remove them from the pan with a spatula or your fingers, and use them to decorate a window. (Ask a parent first, since some glitter may find its way to the floor!) Don’t get frustrated if they break, since you can stick them back together on the window.
Step 9. Observe your window jellies each day to see what happens when the water evaporates from the gelatin.
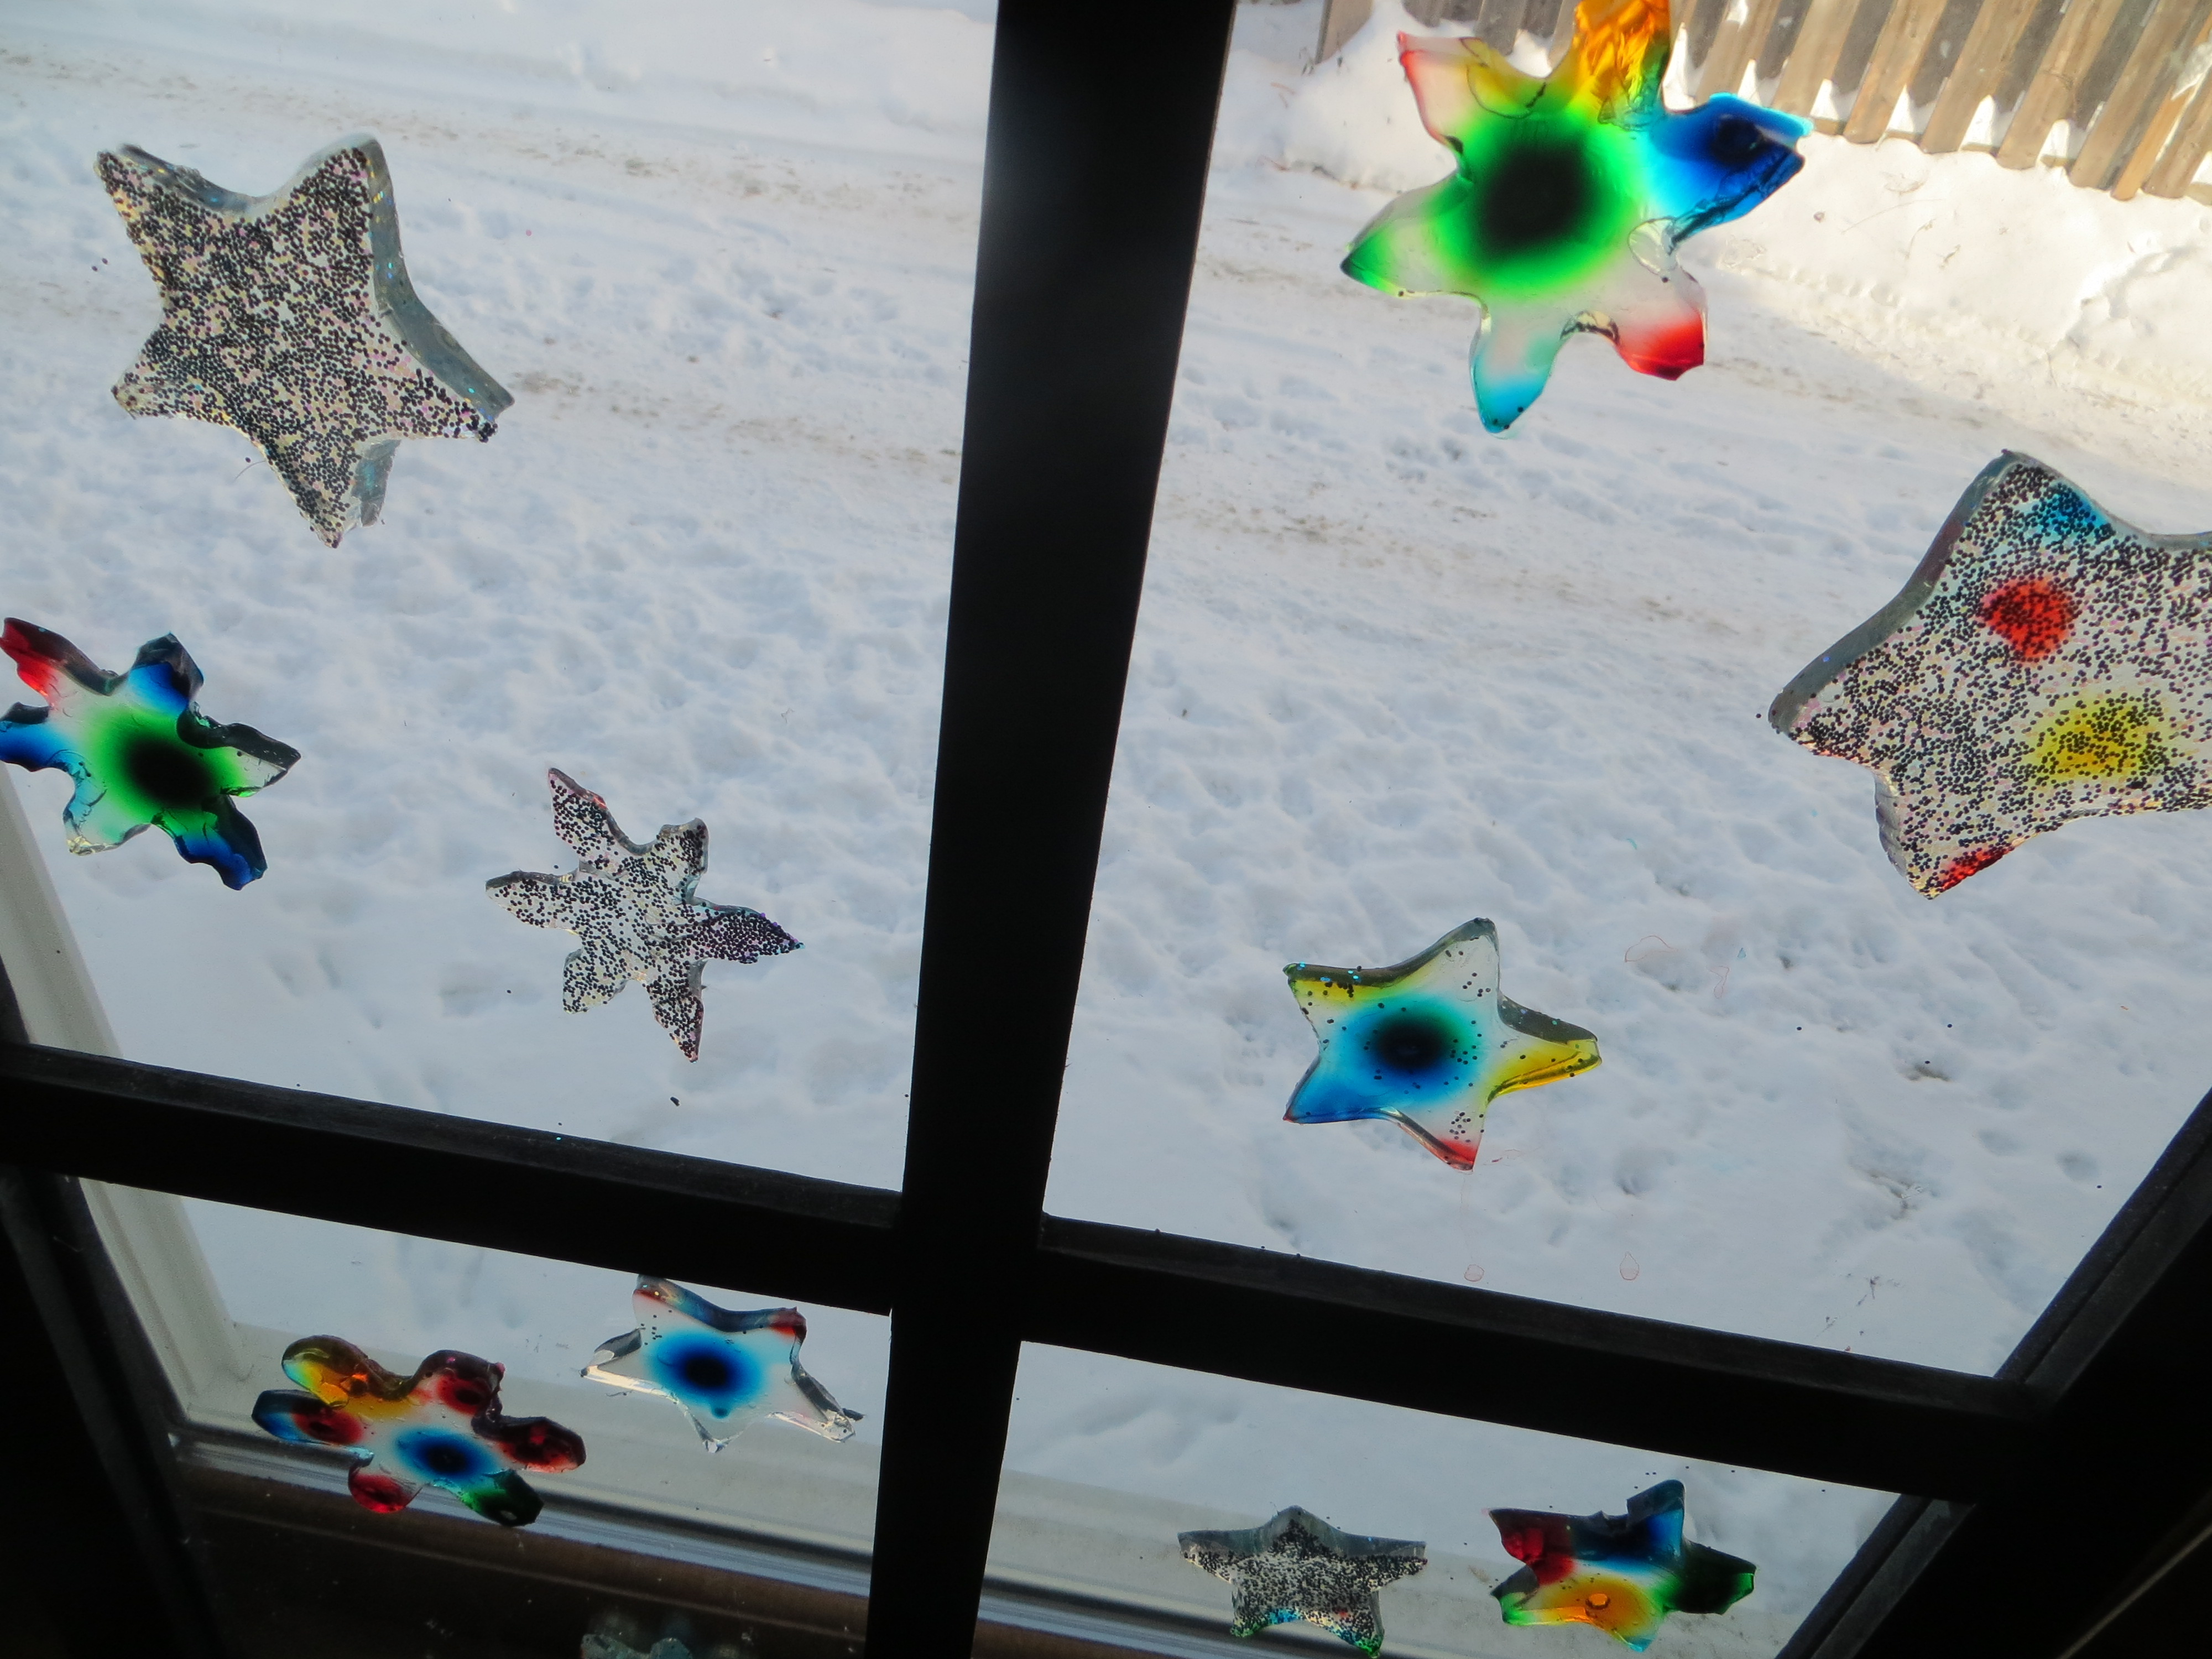 When they’re dry, peel them off the window. Are they thinner than when you started? Why? Can you re-hydrate them by soaking the dried shapes in water?
 The Science Behind the Fun:
Imagine half a box filled with red balls and the other half filled with yellow ones. If you set the box on something that vibrates, the balls will move around randomly, until the red and yellow balls are evenly mixed up.
Scientists call this process, when molecules move from areas of high concentration, where there are lots of other similar molecules, to areas of low concentration, where there are fewer similar molecules DIFFUSION. When the molecules are evenly spread throughout the space, it is called EQUILIBRIUM.
Lots of things can affect how fast molecules diffuse, including temperature. When molecules are heated up, they vibrate faster and move around faster, which helps them reach equilibrium more quickly than they would if it were cold. Diffusion takes place in gases like air, liquids like water, and even solids (semiconductors for computers are made by diffusing elements into one another.)
Think about the way pollutants move from one place to another through air, water and even soil. Or consider how bacteria are able to take up the substances they need to thrive. Your body has to transfer oxygen, carbon dioxide and water by processes involving diffusion as well.
Why does glitter float on gelatin? An object’s density and it’s shape help determine its buoyancy, or whether it will float or sink. Density is an object’s mass (loosely defined as its weight) divided by its volume (how much space it takes up.) A famous scientist named Archimedes discovered that any floating object displaces its own weight of fluid. Boats have to be designed in shapes that will displace, or push, at least as much water as they weigh in order to float.
For example, a 100 pound block of metal won’t move much water out of the way, and sinks fast since it’s denser than water. However , a 100 pound block of metal reshaped into a boat pushes more water out of the way and will float if you design it well!
What is the shape of your glitter? Does it float or sink in the gelatin?
Here’s a video I made for KidScience app that demonstrates how to make window gellies
Credit: My 11 YO daughter came up with the brilliant idea to stick this experiment on windows. I was just going to dry out the gelatin shapes to make ornaments. Kids are often way more creative than adults!
Soapy Science: Giant Bubbles
- by KitchenPantryScientist
From surface tension to evaporation, science come into play every time you blow a bubble. Here’s some bubble science, along with a recipe for making giant bubbles from my book Outdoor Science Lab for Kids!

Water molecules like to stick to each other , and scientists call this sticky, elastic tendency “surface tension.” Soap molecules, have a hydrophobic (water-hating) end and (hydrophilic) a water-loving end and can lower the surface tension of water. When you blow a bubble, you create a thin film of water molecules sandwiched between two layers of soap molecules, with their water-loving ends pointing toward the water, and their water-hating ends pointing out into the air.
As you might guess, the air pressure inside the elastic soapy sandwich layers of a bubble is slightly higher than the air pressure outside the bubble. Bubbles strive to be round, since the forces of surface tension rearrange their molecular structure to make them have the least amount of surface area possible, and of all three dimensional shapes, a sphere has the lowest surface area. Other forces, like your moving breath or a breeze can affect the shape of bubbles as well.
The thickness of the water/soap molecule is always changing slightly as the water layer evaporates, and light is hitting the soap layers from many angles, causing light waves to bounce around and interfere with each other, giving the bubble a multitude of colors.
Try making these giant bubbles at home this summer! They’re a blast! (It works best a day when it’s not too windy, and bubbles love humid days!)
To make your own giant bubble wand, you’ll need:
-Around 54 inches of cotton kitchen twine
-two sticks 1-3 feet long
-a metal washer
1. Tie string to the end of one stick.
2. Put a washer on the string and tie it to the end of the other stick so the washer is hanging in-between on around 36 inches of string. (See photo.) Tie remaining 18 inches of string to the end of the first stick. See photo!
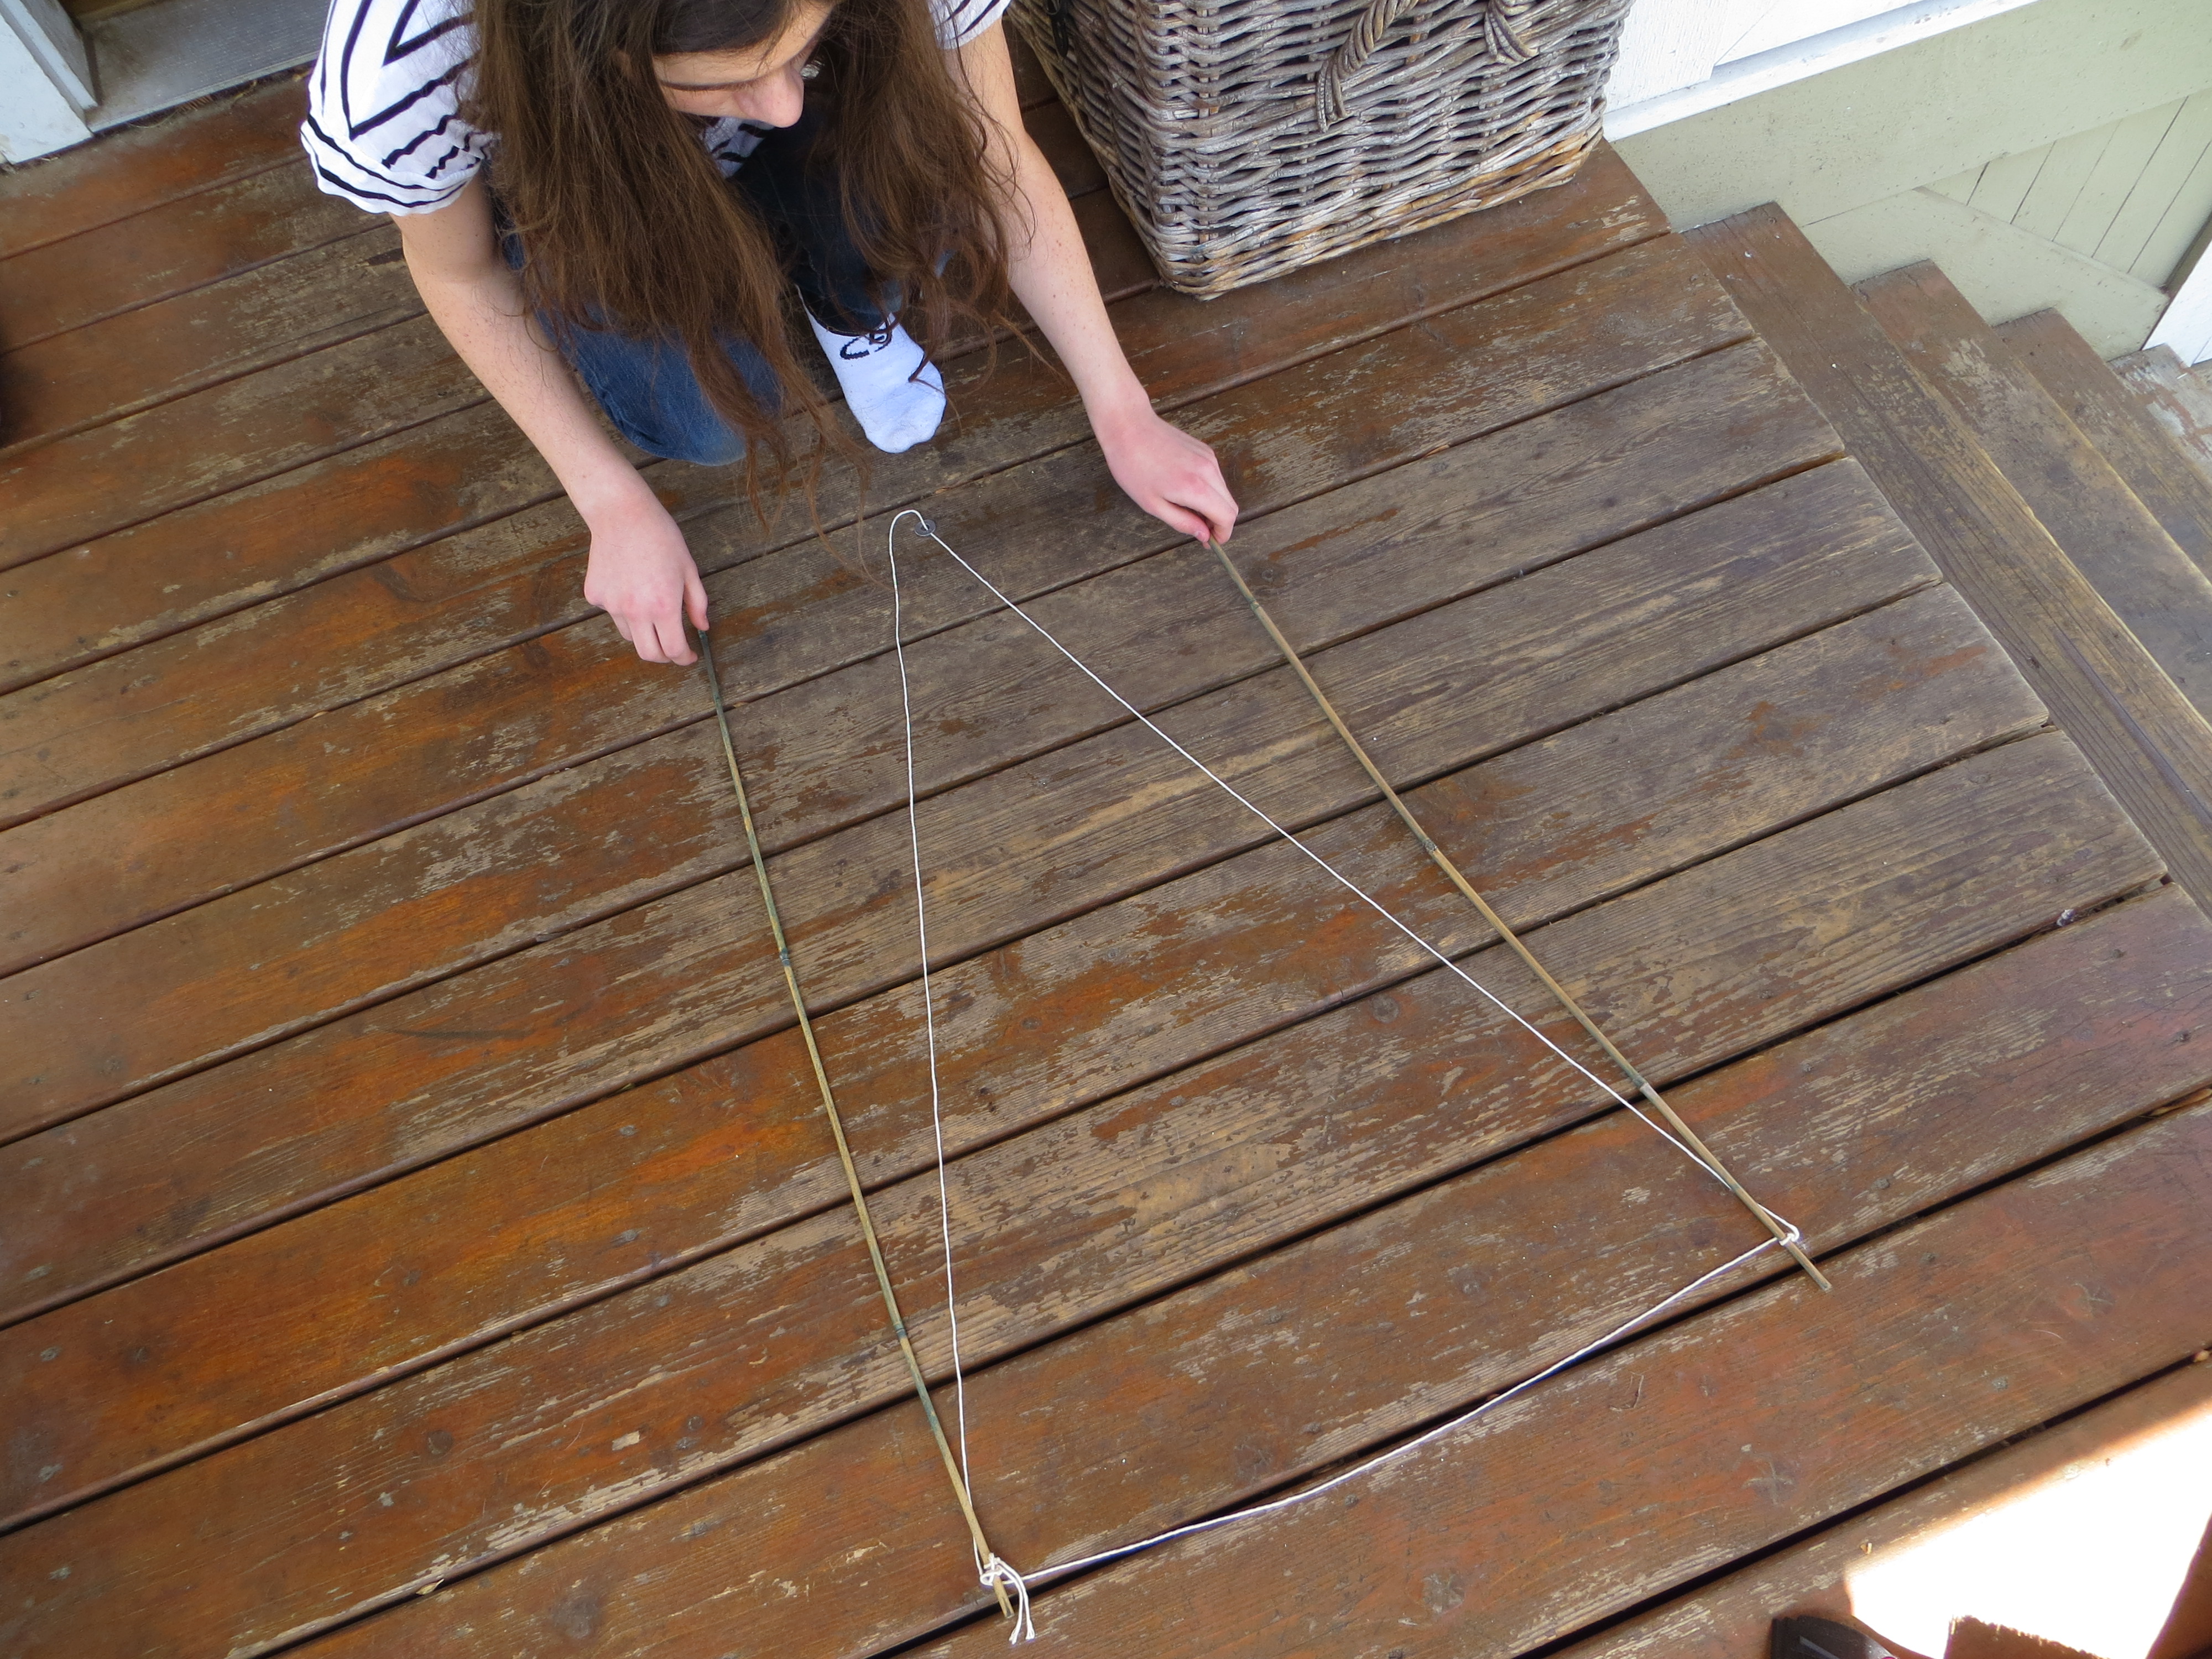
This bubble wand is a little longer than 18 inches on a side.
For the bubbles:
-6 cups distilled or purified water
-1/2 cup cornstarch
-1 Tbs. baking powder
-1 Tbs. glycerine (Optional. Available at most pharmacies.)
-1/2 cup blue Dawn. The type of detergent can literally make or break your giant bubbles. Dawn Ultra (not concentrated) or Dawn Pro are highly recommended. We used Dawn Ultra, which is available at Target.
1. Mix water and cornstarch. Add remaining ingredients and mix well without whipping up tiny bubbles. Use immediately, or stir again and use after an hour or so.
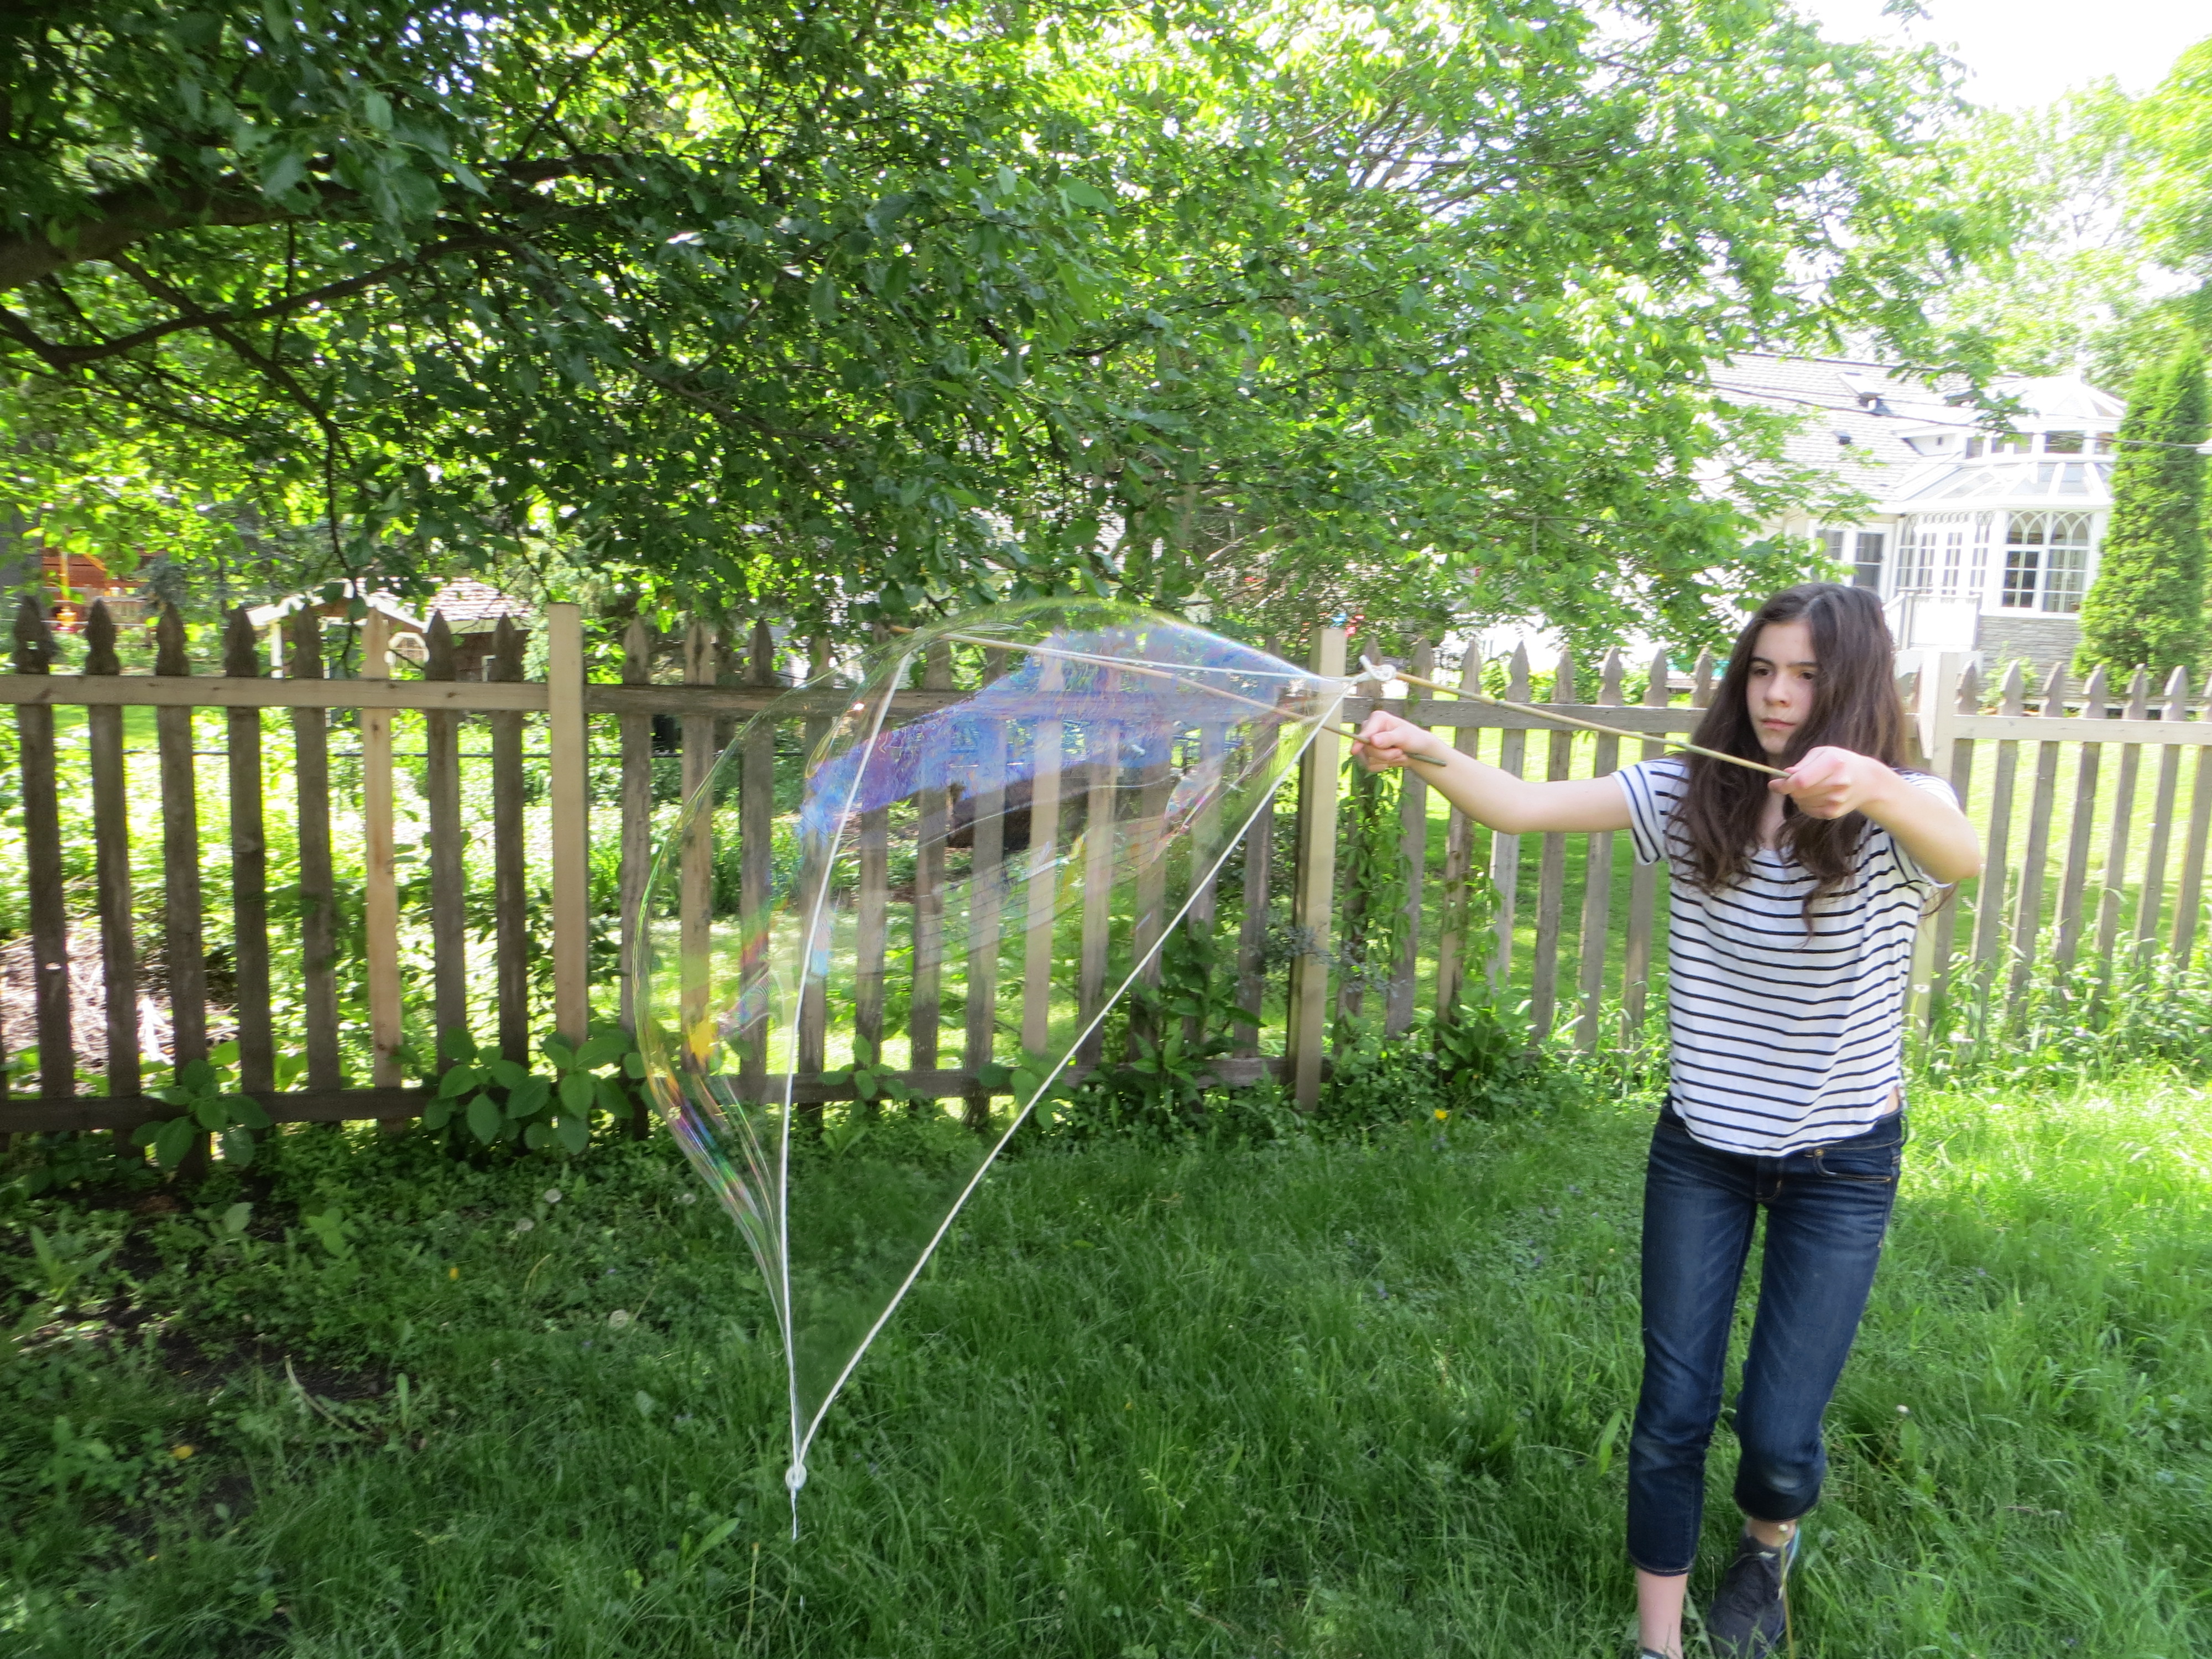
2. With the two sticks parallel and together, dip bubble wand into mixture, immersing all the string completely.

3. Pull the string up out of the bubble mix and pull them apart slowly so that you form a string triangle with bubble in the middle.

4. Move the wands or blow bubbles with your breath. You can “close” the bubbles by moving the sticks together to close the gap between strings.
What else could you try?
-Make another wand with longer or shorter string. How does it affect your bubbles?
-Try different recipes to see if you can improve the bubbles. Do other dish soaps work as well?
-Can you add scent to the bubbles, like vanilla or peppermint, or will it interfere with the surface tension?
-Can you figure out how to make a bubble inside another bubble?
Holiday Science: Candy Cane Art
- by KitchenPantryScientist
Crying over broken candy canes? Cry no more. Make art!
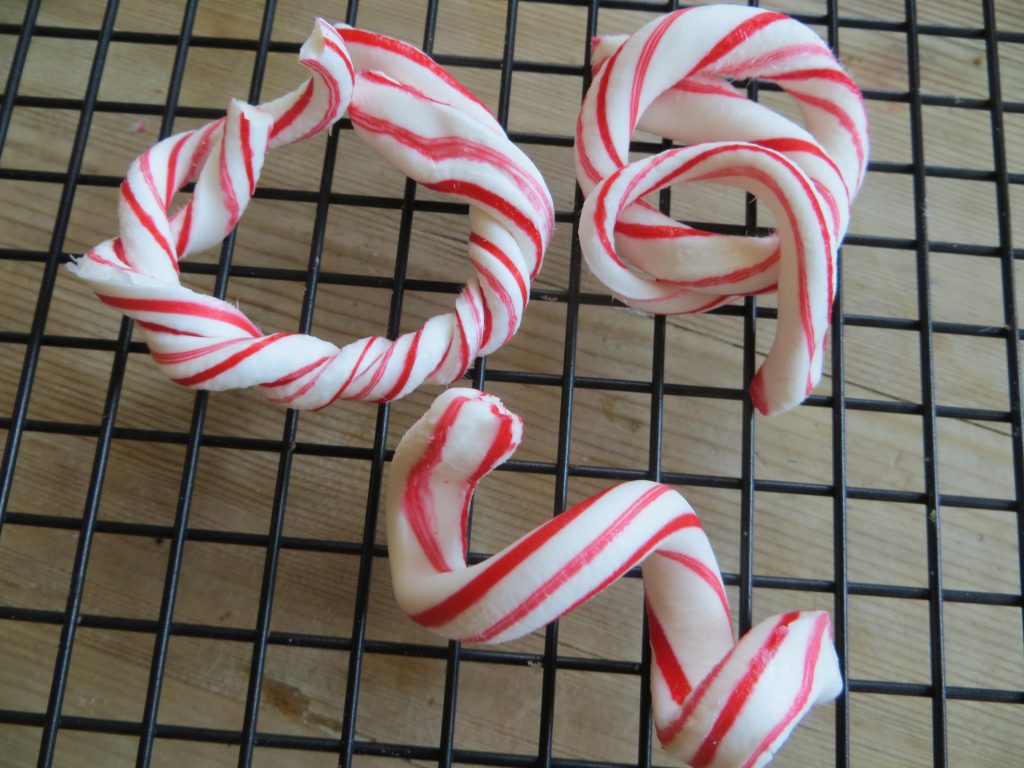
Candy Cane Art- image KitchenPantryScientist.com
This project is from “Amazing (Mostly) Edible Science,” by Andrew Schloss. For a cookbook full of delicious recipes and the Science-Behind-the-Fun, buy my book Kitchen Science Lab for Kids: Edible Edition here!
*Melted candy can get dangerously hot, so parental supervision is required!
You’ll need:
-candy canes (broken or whole), wrappers removed
-heavy-duty aluminum foil
-a cookie sheet
-a wire cooling rack
-an oven
What to do:
- Preheat oven to 250F.
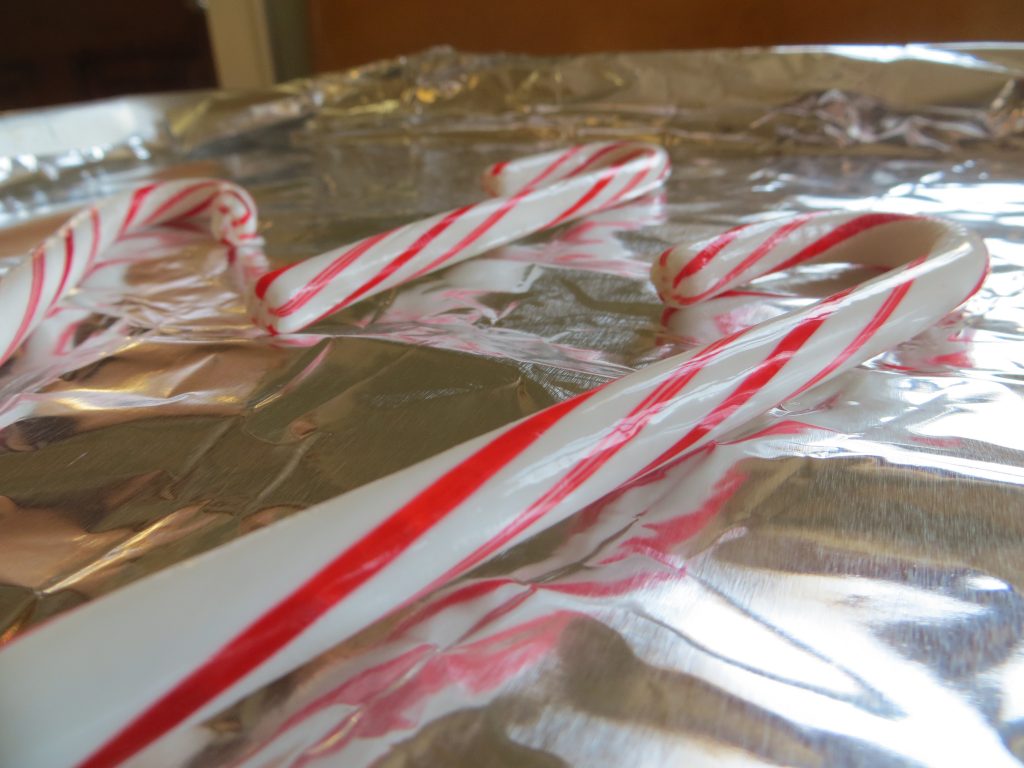
- Cover cookie sheet with foil
- Place candy canes on foil, not touching each other
- Bake candy canes for around 10 minutes and have an adult check them. They should be stretchy, but not too hot to touch.
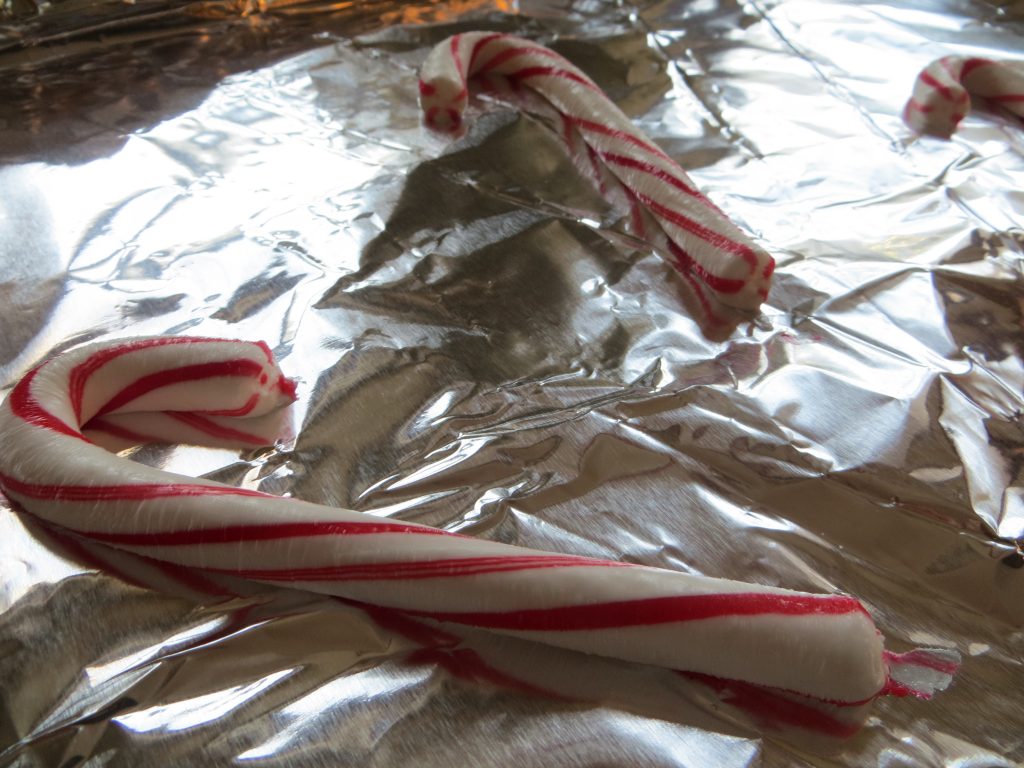
- When the candy canes are ready, bend, fold, twist and pull them into cool shapes. Try pulling one long and wrapping it around a chopstick to make a spiral. What else could you try?
- If the candy gets to brittle to work with, put it back in the oven for a few minutes to make it soft again.
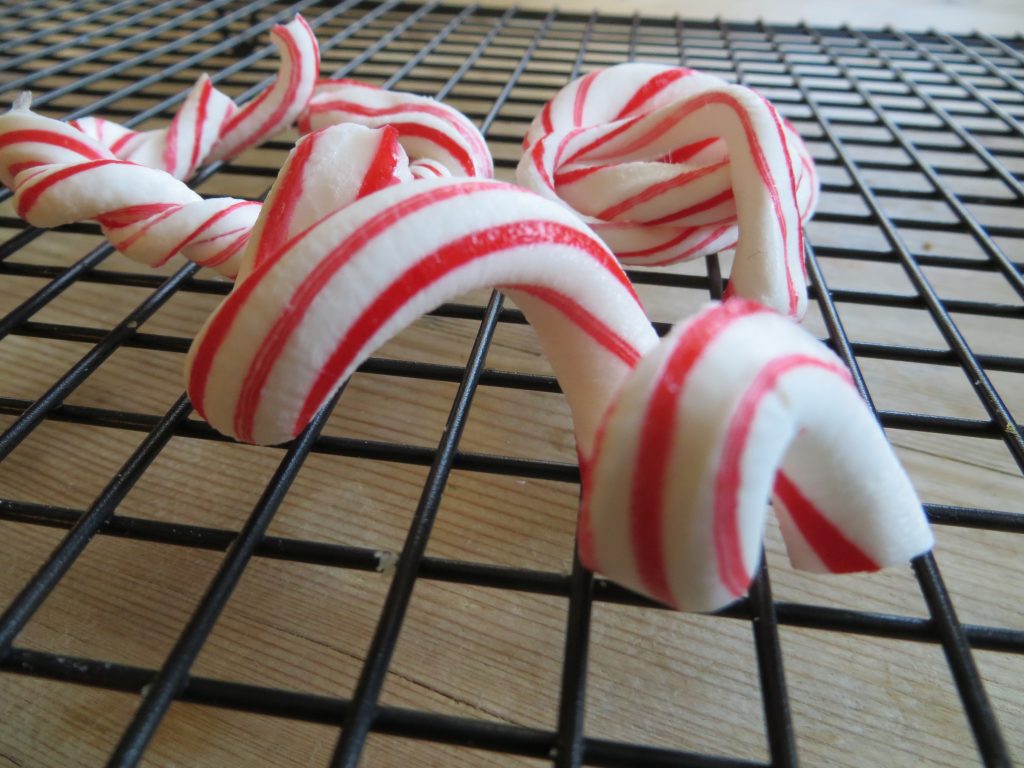
Candy Cane Art- image KitchenPantryScientistcom
The science behind the fun:
If you looks at the ingredients of candy canes, they’re usually made of table sugar (sucrose), corn syrup, flavoring, and food coloring. Glucose and fructose are sweet-tasting molecules that stick together to make up most of the sugars we eat, like table sugar (sucrose) and corn syrup. You can think of them as the building blocks of candy.
At room temperature, candy canes are hard and brittle, but adding heat changes the way the molecules behave. Both table sugar and corn syrup contain linked molecules of glucose and fructose, but corn syrup has much more fructose than glucose, and the fructose interferes with sugar crystal formation. According to Andrew Schloss, “the corn syrup has more fructose, which means the sugar crystals in the candy don’t fit tightly together. The crystals have space between them, which allows them to bend and move without cracking.”
Here’s a great article on the science of candy-making.
If you’re looking for holiday gifts for a science-loving kid, my books Chemistry Lab for Kids, Kitchen Science Lab for Kids and Outdoor Science Lab for Kids include over 100 fun family-friendly experiments! They’re available wherever books are sold.
Chemistry for Kids book
- by KitchenPantryScientist
Here’s some fun footage of kids doing projects from Kitchen Science Lab for Kids. I miss those mask-less photo shoots! (Book Photos by Amber Procaccini and illustrations by @kellyannedalton.) If you’ve got a young scientist on your list, “CHEMISTRY FOR KIDS -Homemade Science Experiments and Activities Inspired by Awesome Chemists, Past and Present” is available everywhere books are sold!
Thanksgiving Food Science: Cranberry Spy Juice
- by KitchenPantryScientist
(Adapted from Kitchen Science Lab for Kids)
Grab an extra bag of cranberries this Thankgiving! Kids can use it to reveal invisible messages they write with baking soda and water.
You’ll need:
-around 2 cups of cranberries
-water
-baking soda
-printer paper
-small paintbrush, Q-tip, or lollipop stick
Safety tips and Hints:
Boiling the berries should be done by an adult. Keep the lid on the pan, since the air pockets that make cranberries float can also make them explode. Kids can take over once the juice is cool.
When playing with cranberry juice, aprons or old clothes are a good idea, since it stains!
Directions:
Step 1. Cut a cranberry in half and observe the air pockets that make it float.
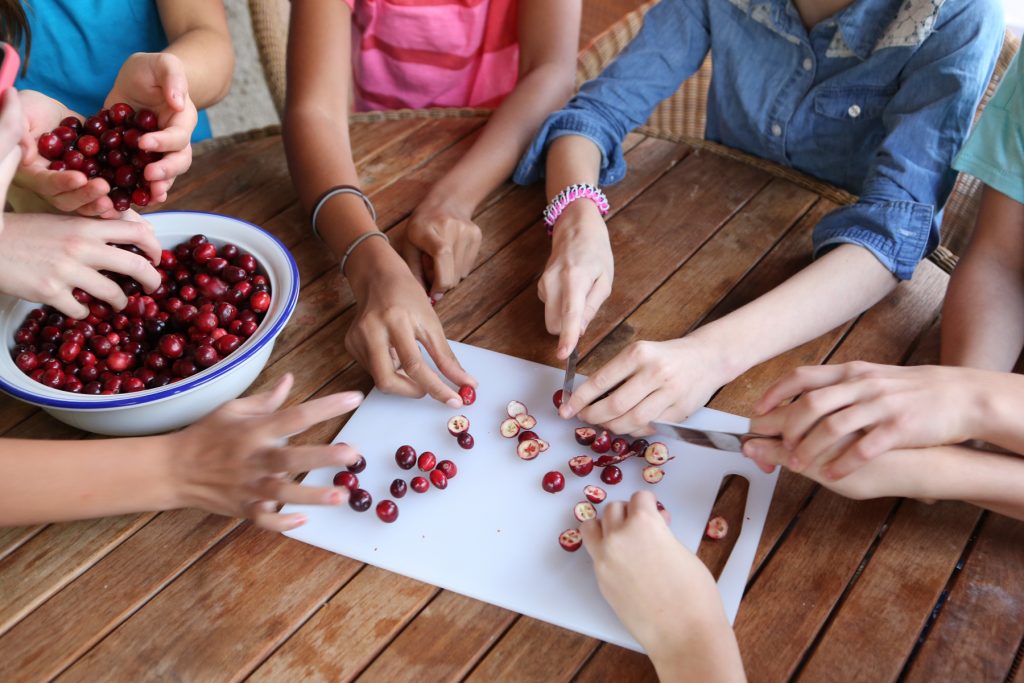
Step 2. Boil the cranberries in about three cups of water for 15 to 20 minutes, covered. Listen for popping sounds as the air in the cranberries heats up and they explode.
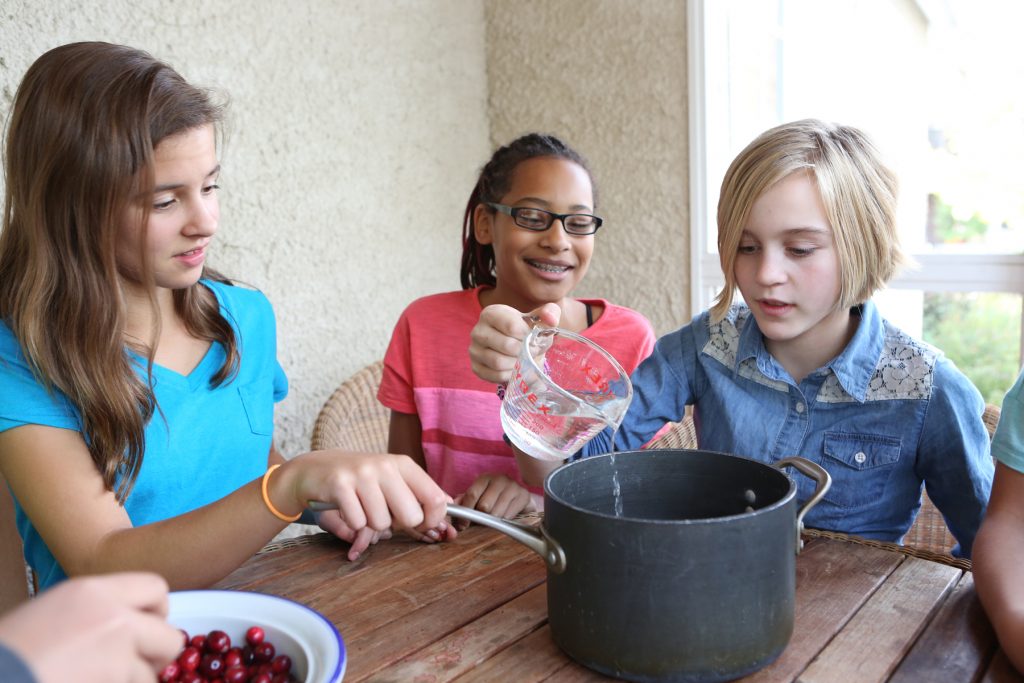
Step 3. Crush the cooked berries and push the liquid through a sieve or colander to collect the concentrated cranberry juice.
Step 4. Allow the juice to cool and pour it into a casserole dish or cake pan big enough to hold a piece of paper. If your cranberry juice seems thick and syrupy, add a little water, so that it’s thin enough to soak into paper!
Step 5. Test the paper you want to use by cutting a small piece and soaking it in the cranberry juice. If it stays pink, it will work, but if it turns blue or gray, try some other paper.
Step 6. Add a few teaspoons of baking soda to 1/3 cup of warm water and stir well. Don’t worry if you can still see some baking soda.
Step 7. Using a Q-tip, paintbrush, or a homemade writing tool, use the baking soda solution as ink to write a message on your paper. It may take a little practice, so don’t get frustrated.
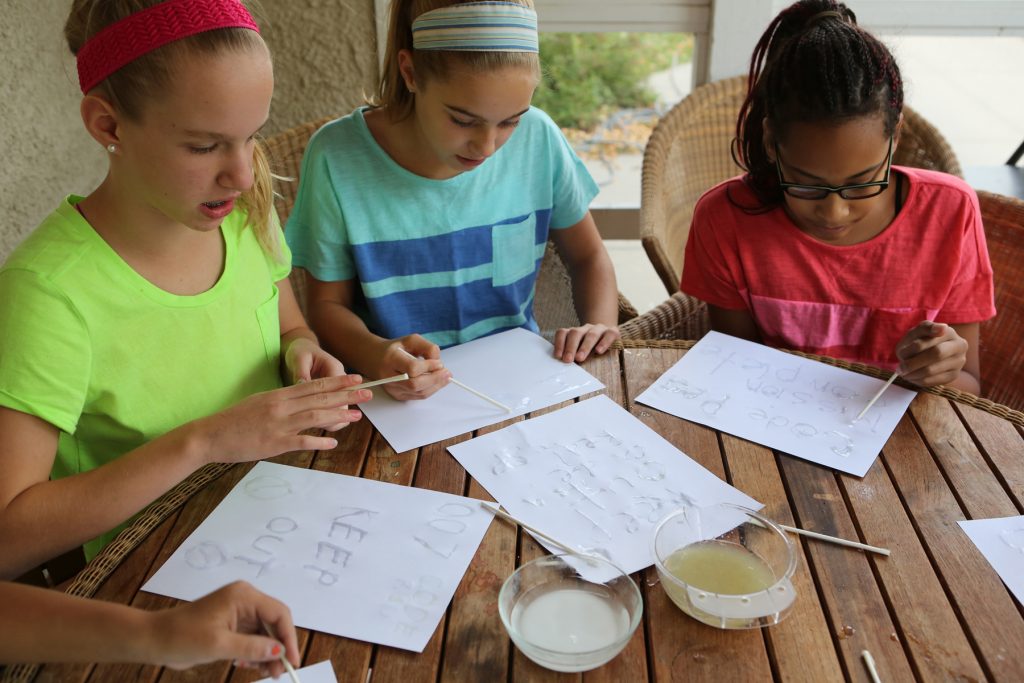
Step 8. Let your message air dry, or speed things up with a blow dryer.
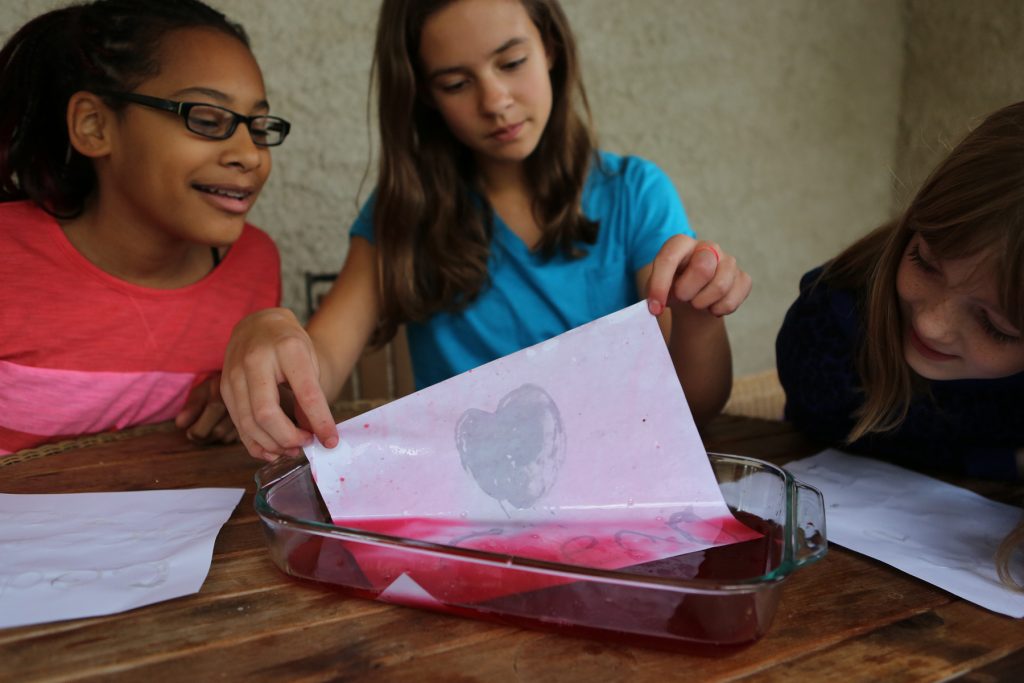
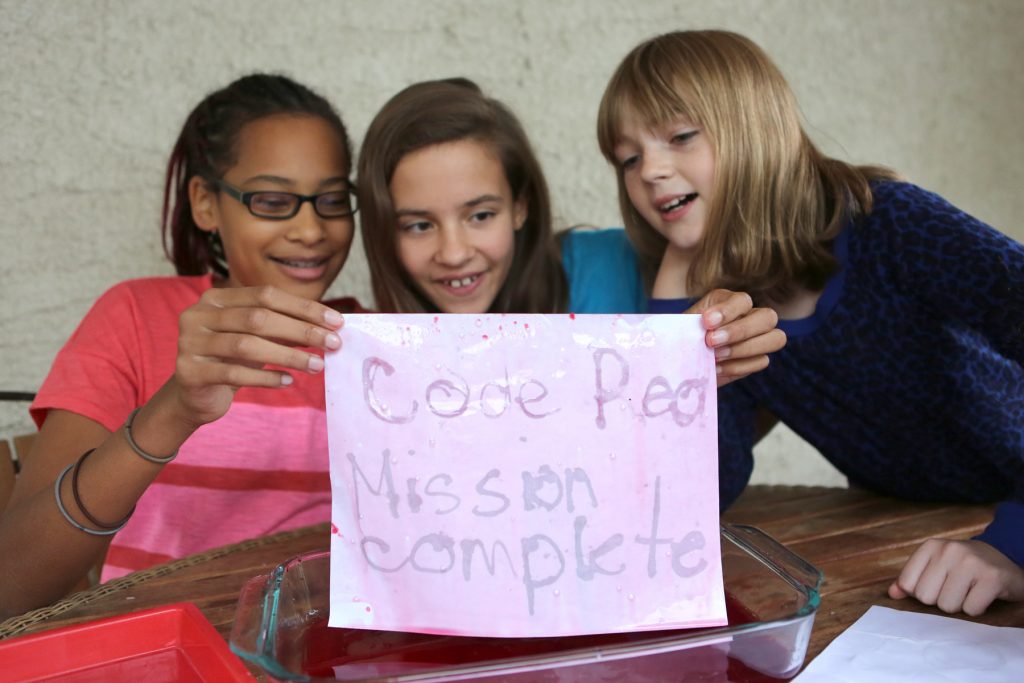
Step 9. To reveal your message, place your paper in the cranberry juice and see what happens!
*What other natural acid/base indicators could you use to do this experiment? What else could you use as ink.
The Science Behind the Fun:
Cranberries contain pigments called anthocyanins (an-tho-SY-a-nins,) which give them their bright color. In nature, these pigments attract birds and other animals to fruit. This is important because animals eat the berries and spread plants seeds from one place to another.
These pigments, called flavanoids, change color when they come in contact with acids and bases. Cranberry juice is very acidic, and the pigment is pink in acids, but when you add it to a base, it turns purple or blue.
Baking soda is a base, so your baking soda message will turn blue when it comes into contact with the pigments in the cranberry juice. Eventually, when enough cranberry juice soaks into the paper, it will dilute the baking soda, turning the pigment back to red and your message will disappear!
There are over 300 kinds of anthocyanins which are found in many fruits and vegetables including blueberries, red cabbage, grapes and blueberries. Scientists believe they may have many health benefits.
Halloween Candy Lava Lamps (Use chemistry to test whether candy contains citric acid.)
- by KitchenPantryScientist
Make mini “lava lamps” from water, baking soda and oil to test whether candy contains citric acid!
The science behind the fun: Oil floats on water because it is less dense. When citric acid in candy combines with baking soda, a chemical reaction occurs which produces carbon dioxide gas bubbles. As the bubbles move up through the oil, they carry water and food coloring with them. Once the gas escapes into the air, gravity pulls the water and food coloring back down through the oil.to the bottom of the container.
Three Fun Science Activities for Kids: Balloon Rockets, Bristle Robots and Evaporation Art
- by KitchenPantryScientist
If you have balloons, straws and string, you can send a balloon rocket shooting up a string to watch Newton’s third law of motion in action. As the air escapes the balloon in one direction, it sends the balloon rocket in the opposite direction! Art lovers will have fun making beautiful evaporation rings using vinegar, food coloring and cornstarch, and if you’re into engineering, order a small motor and some alligator clips to make a bristle robot!
Essential Oils and Chemical Precipitation from “Chemistry for Kids”
- by KitchenPantryScientist
Here’s a segment I did for TV last week, featuring of projects from Chemistry for Kids, which pairs the story of 25 scientists with hands-on projects related to their work! In the clip, I demonstrate how to collect essential oils from flowers, citrus or herbs using a crock pot and how to do a precipitation experiment similar to one Marie Curie used to extract radium from mining waste.
3 Projects from Chemistry for Kids
- by KitchenPantryScientist
I joined the hosts of Twin Cities Live yesterday to show off three projects from my newest book! Chemistry for Kids is available everywhere books are sold!