Category:Chemistry Experiments’
Fizzy Balloons Video
- by KitchenPantryScientist
Here’s a video that I just made for KidScience app about a fun chemical reaction we call fizzy balloons. Hope you have as much fun watching it as we had making it!
If you haven’t downloaded KidScience, it’s a great way to search for experiments based on kids’ ages, what you have around the house, or how much time you have. There’s a free version and a Premium version with extra videos, so you can have science at your fingertips wherever you go!
Flammable Science: Homemade Black Snake Fireworks
- by KitchenPantryScientist
***Always wear goggles and fireproof aprons, if you have them, when working with flammable substances like ethyl alcohol, which burns very hot with no color! Be sure to pull long hair back as well!
Fireworks are really just explosive chemical reactions, and they’ve been around for thousands of years. Most of them are far too dangerous to make at home, but with some parental supervision, it’s fun to make homemade “black snake” fireworks, which are basically just flambeed powdered sugar and baking soda! Thanks again to Pat Mullin of Labconco who sent me a video of this experiment, which I posted about a year ago.
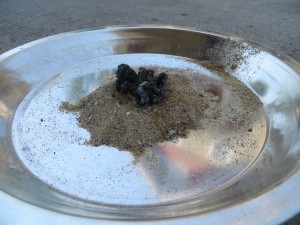
I had to mess around with the recipe to get it to work consistently, and each time we do it we get different-looking snakes, but it’s pretty neat. The key is to use enough fuel (alcohol) to keep your sugar burning.
BE SAFE! Set this experiment up on a heat-proof surface like a concrete driveway and have a hose ready, just in case. Make sure long hair is pulled back, and don’t try this on a windy day.
You’ll need:
1/3 cup sand, mounded in a pie plate with an indentation in the middle to hold the sugar/baking soda mix.
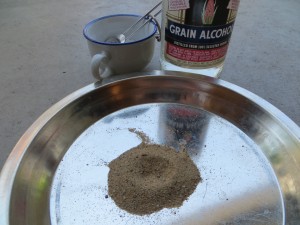
3 tsp. high-percentage alcohol (ethanol) like Everclear. I chose this as fuel rather than denatured alcohol or lighter fluid since there are no toxic fumes when you burn it.
4 tsp. powdered sugar mixed with 1 tsp. baking soda.
To make your snakes:
-Add the alcohol to the indentation in the sand.
-scoop 1 tsp. of the sugar/baking soda mix into a teaspoon and carefully drop it into the indentation in the sand. It’s fine if it holds the shape of the spoon, but try not to pack it down!
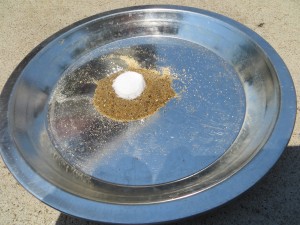
-Have an adult use a grill lighter or a long match to light the alcohol around the sugar on fire. It may be hard to see the flame, so stand back. You’ll see the sugar start to bubble when it’s lit. It will burn until the alcohol is gone, so wait until you’re sure it’s out before you try to touch the snakes!
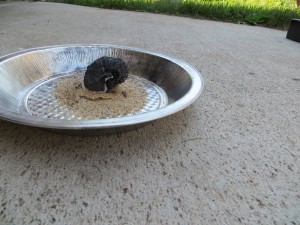
What happens? When the baking soda gets hot, it makes carbon dioxide gas. The pressure from this gas pushes the carbonate from the burning sugar out of the sand, producing the “black snakes” you see.
Did you know there’s carbon in plants, like sugar cane? It’s called new carbon and is constantly recycled between the environment and living things. There’s also old carbon, like the kind you find in fossil fuels, including coal and oil. Here’s a cool NASA video that talks about the carbon cycle:
KidScience app is on the App Store!
- by KitchenPantryScientist
I have to admit it. I’m ridiculously excited!
Our KidScience app is now available on the App Store, making it easy for kids of all ages to do science anywhere, any time, or to check out KidScience watch-and-do videos and learn a little science when they (or you) need a little portable screen time.
Let us know how you like it. It’s for you!
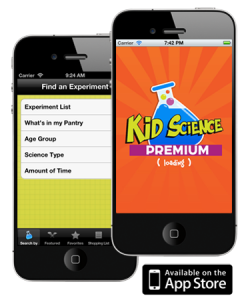
Here’s the scoop: If you’re ready to keep the kids busy this summer doing fun, educational projects without shopping trips and complicated directions, you’ll be as excited as we are that KidScience Premium, based on Kitchen Pantry Scientist science projects, has arrived.
Available for iphone, ipod touch and ipad, KidScience Premium brings entertainment and education to your fingertips with a continually updated list of experiments to choose from using things you already have on hand. It includes both photos and watch-and-do videos that make it easy for kids to do projects on their own or you can have fun doing projects together.
A free version of the KidScience app is on the way and will include all the same experiments and photos, but have limited free videos. I’ll let you know when it joins KidScience Premium on the App Store.
There are other kid science apps, but only one KidScience app! You’ll know us by our bright orange and blue logo.
Let’s do some science!
Earth Day Science
- by KitchenPantryScientist
On April 21st (the day before Earth Day), the Science Museum of Minnesota will celebrate Earth Day and open their new Future Earthexhibit to the public. Exploring the amazing planet that nurtures and sustains us, the thought-provoking exhibit examines climate science, looks at the impact of humans, and considers Earth’s future. Today’s young people will play an essential role in determining that future, and it’s essential that we raise our kids to be critical thinkers, as well as creators and innovators! Abby Harrison, a.k.a. Astronaut Abby, wants to be the first person on Mars and she visited Kare11 Sunrise news with me to talk about NASA and Earth Day.
 Every time you encourage a kid to ask “why?” or get them out into nature, you’re engaging their scientific brains! When they see you recycle, turn out the lights, walk instead of drive, or pick up a piece of trash, you’re teaching them lessons about stewardship and responsibility.
Here are some easy experiments that would be fun to do with your kids to help celebrate Earth Day. If you click on the experiment name, it will take you to directions and photos!
Window Sprouts: Plant a bean in a plastic baggie with a damp paper towel and see how plants need only water and air to sprout roots and leaves. Here’s a short video demonstrating how to put a window garden together.
Homemade Solar Oven: Using a pizza box, aluminum foil, plastic wrap, and newspaper, you can harness the sun’s energy to cook your own S’mores! Try it!
Nature Walk Bracelets: Wrap some duct tape around your wrist (inside out) and take a walk, sticking interesting natural objects like leaves and flowers to your bracelet. It’s a great way to get outdoors and engage with nature!
Carbon Dioxide and Ocean Acidity: See for yourself how the carbon dioxide in your own breath can make a water-based solution more acidic. It’s the same reason too much carbon dioxide in Earth’s atmosphere can be bad for our oceans.
Composting: Be a composting detective. Bury some things in your back yard (away from power cables) and dig them up in a few months to see how they look. Composting reduces methane gas emissions (a greenhouse gas) from dumps.
Diffusion and Osmosis: See for yourself how chemicals we add to water, put on our streets to melt ice, and spray on our lawns and crops can move into our soil, ground water, rivers, lakes and oceans.
Solar Water Purification: Another great illustration of the greenhouse effect and a fun experiment in general. Requires hot sun and some patience!
To continue to thrive, we’ll need countless innovations in energy, agriculture, health and environmental stewardship. Our children are our greatest natural resource, and we will depend on them to make a better future for us all. It’s up to us to nurture them, educate them, foster their innate sense of curiosity and fan their creative spark. Happy Earth Day!
Diffusion and Osmosis experiments
- by KitchenPantryScientist
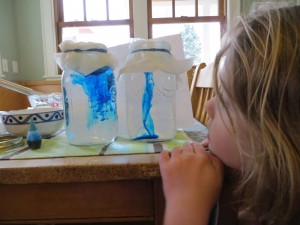 Diffusion is the name for the way molecules move from areas of high concentration, where there are lots of other similar molecules, to areas of low concentration, where there are fewer similar molecules. When the molecules are evenly spread throughout the space, it is called equilibrium. Imagine half a box filled with yellow balls and the other half filled with blue ones. If you set the box on something that vibrates, the balls will start to move around randomly, until the blue and yellow balls are evenly mixed up.
Think about the way pollutants move from one place to another through air, water and even soil. Or consider how bacteria are able to take up the substances they need to thrive. Your body has to transfer oxygen, carbon dioxide and water by processes involving diffusion as well.
Lots of things can affect how fast molecules diffuse, including temperature. When molecules are heated up, they vibrate faster and move around faster, which helps them achieve equilibrium more quickly than they would if it were cold.
Diffusion takes place in gases (like air), liquids (like food coloring moving through water,) and even solids (semiconductors for computers are made by diffusing elements into one another.)
You can watch food coloring diffuse through a colloid (gelatin) at home and measure how long it takes. Gelatin is a good substance to use for diffusion experiments since it doesn’t support convection, which is another kind of movement in fluids. You’ll need clear gelatin (from the grocery store or Target), food coloring and water.
Add 4 packs of plain, unflavored gelatin (1 oz or 28 gm) to 4 cups of boiling water. Pour the liquid gelatin into petri dishes, cups, or tupperware and let it harden. Then, using a straw, poke a hole or two in the gelatin, removing the plug so that you have a hole in the jello about 1/2 inch deep. Add a drop of food coloring in the hole in the jello.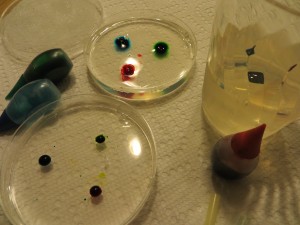
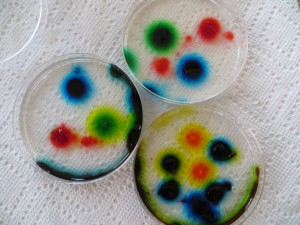
Every so often, measure the circle of food coloring as it diffuses into the jello around it. How many cm per hour is it diffusing? If you put one plate in the refrigerator and an identical one at room temperature, do they diffuse at the same rate? Why do you think you see more than one color for certain shades of food coloring? What else could you try?
Here’s a post on how to use this experiment to make sticky window decorations: https://kitchenpantryscientist.com/?p=4489
We made plates and did the same experiment using 2 cups of red cabbage juice, 2 cups of water and 4 packs of gelatin to see how fast a few drops of vinegar or baking soda solution would diffuse (a pigment in red cabbage turns pink when exposed to acid, and blue/green when exposed to a base!)
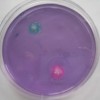
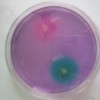
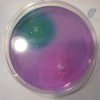 You can see the pink circle from the vinegar and the green one from the baking soda solution.
It’s also fun to experiment with the diffusion of substances across a membrane, like a paper towel. This is called osmosis. Membranes like the ones around your cells are selectively permeable and let water and oxygen in and out, but keep other, larger molecules from freely entering and exiting your cells.
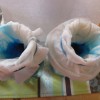
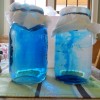
For this experiment, you’ll need a jar (or two), paper towels, rubber bands and food coloring. Fill a jar with water and secure a paper towel in the jar’s mouth (with a rubber band) so that it hangs down into the water, making a water-filled chamber that you can add food coloring to. Put a few drops of food coloring into the chamber and see what happens.
Are the food coloring molecules small enough to pass through the paper towel “membrane?” What happens if you put something bigger, like popcorn kernels in the chamber? Can they pass through the small pores in the paper towel?
Do the same experiment in side-by-side jars, but fill one with ice water and the other with hot water. Does this affect the rate of osmosis or how fast the food coloring molecules diffuse throughout the water?
Think about helium balloons. If you take identical balloons and fill one with helium and the other with air, the helium balloon will shrink much faster as the smaller helium atoms diffuse out more quickly than the larger oxygen molecules.
Lemon-painted Eggs
- by KitchenPantryScientist
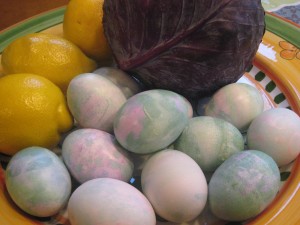 We’ve often used the water from boiling red cabbage to make Litumus (acid-indicator) paper, but last year, we used it to make egg dye! Simply follow the directions here to make your cabbage “juice” and put hard boiled eggs in the cabbage juice to dye them blue. Boil your eggs in the cabbage juice and refrigerate them in the juice overnight for the best color! The juice turns pink when you add an acid to it, so when your eggs are dry, you can paint pink designs on them with lemon juice or vinegar using paintbrushes, toothpicks or Q-tips. You can also dissolve baking soda in water (which makes a base) to add more color to the eggs (greenish-blue which shows up when they dry.) Here’s a video of a demonstration I did on Kare11 news of this experiment.
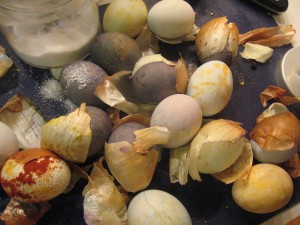
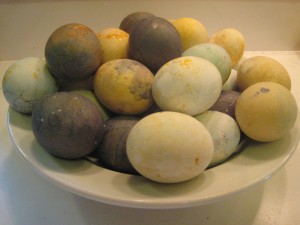
Try some other natural egg dyes! Boil colorful fruit, vegetables and spices with 4-8 cups water and a few Tbs. of white vinegar. When the water is boiling, add raw eggs and boil for 10 minutes. The pigment in the fruits and veggies will be absorbed by the egg’s porous surface as they cook. Let the eggs sit in the dye until cool. Then, wrap the wet eggs in onion skins or rub with paprika for yellow. We had the best luck with blueberries, curry and red cabbage. Experiment to see what makes the best colors! What worked best for you? Coffee? Tea? rhubarb? Don’t forget to eat your creations. Hard-boiled eggs make a great snack!
Marker Chromatography
- by KitchenPantryScientist
 You can take this project in many different directions, which is what science is all about! Chances are, you already have all the supplies you need for this project in your kitchen: coffee filters or paper towels, magic markers, and water.
Fill the bottom of a bowl or glass with a little water. Then, cut paper towels or coffee filters into long strips. Draw a large dot of color (black works best) about an inch from the bottom of the strip of paper. Place the bottom of the paper, below the dot, into the water. Once the water starts moving, the paper will stick to the side. You can hook it over the top of the glass, like we did.
 The water will be wicked up the paper and through the dot, dissolving and taking some of the dye up the strip with it. You’ll be able to see colors separate as the dyes travel up the strip. It’s fun to see what colors make up different black inks. My kids tried it with colors other than black too. They even made dots comprised of several different colors and watched them separate in the water. Another variation is to put ink on a large piece of paper, drip water on it from a dropper or straw and watch the color travel out in a circle!
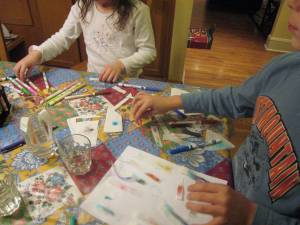
We taped some of the strips into our science notebooks. They’re very colorful. Older kids might enjoy trying a 10:1 mix of window cleaner and vinegar to separate the colors.
When you separate the colors from one another on the paper, you’re doing chromatography!
When paper is dipped in water, water molecules make it wet. The water molecules travel up the paper towel. When the water reaches the ink, it dissolves some of the dyes in the ink, and the dyes travel up the paper towel with the water. Some of the molecules that make up the dye are smaller and travel up the paper towel faster than the larger ones, so you can see some of the different colors that make up the ink separate from one another. The number of spots of color you see can tell you how many chemicals make up the color in your marker.
Most importantly, have fun!
Rainbow Sugar-Water Density Columns
- by KitchenPantryScientist
You can make colorful columns that demonstrate the concept of liquid density at your own kitchen table with just water, sugar and food coloring. An eyedropper, siphoning bulb, syringe (minus a needle,) or anything else that allows you to slowly drip liquid from one cup to another are useful for the layering step. If you have a tall, thin glass, like a cordial glass, or a test tube, it’s easy to see the layers in your gradient!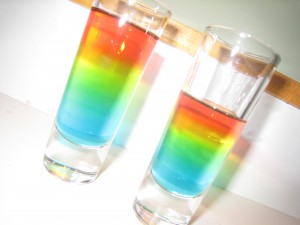
Start with two cups of hot tap water and measure half a cup into each of four cups. To the first cup, add 2 Tbs. sugar, to the second add 4 Tbs. sugar, to the third, 6 Tbs. sugar and to the fourth, 8 Tbs. sugar. Stir until the sugar dissolves. If the sugar won’t dissolve, an adult may microwave the cup for 30 seconds and stir again. Always use caution with hot liquids. If the sugar still won’t dissolve, try adding a Tbs. warm water.
Now, add 2 drops food coloring to each cup. We added red to the cup with 2Tbs, yellow to the one with 4Tbs, green to the to the one with 6Tbs, and blue to the cup with 8Tbs.
Density is mass (how many atoms are in an object) divided by volume (how much space an object takes up.) Sugar molecules are made up of lots of atoms stuck together. The more sugar you add to a half cup of water, the more atoms it will contain and the denser it will be. Less dense liquids float to the top of more dense liquids. Which of your sugar solutions is the most dense? The one with the most sugar in it (8 Tbs.)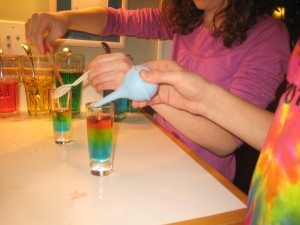
Put the most dense sugar solution(blue in this case) in the bottom of a tall, thin glass or test tube. Now, use your dropper to gently drip the next densest liquid (green) on top of the blue layer. It works best to drip the sugar solution against the side of the cup just above the surface of the liquid. You can also drip it onto the back of a spoon, like in the photo above. Add the yellow layer, and finally the red layer, which only contains 2Tbs sugar per half cup and is the least dense.
What happens if you mix the layers up? They won’t separate back out like oil and water would, because the sugar will disperse (spread) equally through the mixture.
Researchers sometimes use density gradients to isolate different parts of cells by breaking the cells up, putting the cell debris on top of a density gradient and spinning it in a centrifuge. Cellular fragments of different shapes and molecular weights move through the gradient at different rates.
Film Canister Season
- by KitchenPantryScientist
It’s holiday card season, and that means…film canisters!
When you’re picking up your photos, ask to dig through your camera or photo store’s film canister recycling bin. Pick out clear film canisters with lids that pop IN tightly, and you’ll be ready for some rocketing good times.
Make some film canister rockets to shoot off next spring, or brave the cold to shoot them off now. Do you think the chemical reaction that makes CO2 gas to power your rocket will take longer in the winter? Why?
Here are directions for how to make them. They’d be great holiday gifts for kids to make for siblings!
Globs of Fun
- by KitchenPantryScientist
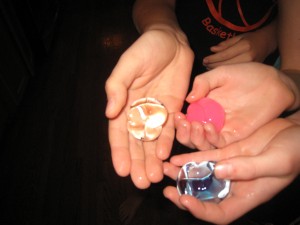
Although I don’t usually do product reviews, when Steve Spangler Science asked me to try out Larry’s Polymer Lab, I couldn’t resist. I’d seen some of Steve’s Halloween Science Demonstrations online and guessed that his kit would probably be both fun and educational.
When the package arrived, we unwrapped a clear paint can filled with 5 different polymer substances in smaller containers (and a big lizard named Larry.) The kids couldn’t wait to get started.
The only polymer we’d played with before was “Mad Scientist’s Green Slime,” made with glue, water and Borax. The kids know that polymers are long chains of molecules, like beads on a string, but Larry’s Polymer Lab’s instruction manual told us that the polymers we were about to play with were super-absorbant and could soak up mind-boggling amounts of water. We put down some newspaper on our kitchen table and opened the can.
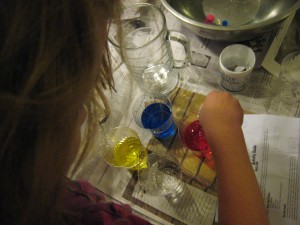 As we experimented, the words “awesome” and “feels cool” were uttered repeatedly.
As a note, the polymers we experimented with are considered safe, but I would not use the marble-like ones with small children, since they look like candy and are choking hazards. My 11,9 and 5 year olds were perfect ages for the kit.
First, we tried the Water Gel. “When you add water to this superabsorbent polymer, it instantly turns from a liquid to a slushy solid.” The kids were impressed as the water seemed to magically solidify, and it was a good way for them to practice measuring!
Next, came Jelly Marbles, “tiny 3 mm spheres that, when soaked in water, grow into 20 mm water-filled marbles.” The kids loved these and the color component of the experiment adds some fun variations to play with. We want to try growing plants in them!
The Gravi-Goo, “fascinating goo that finds a way to flows uphill,” was neat, but really hard to clean up. My kids always find a way to spill.
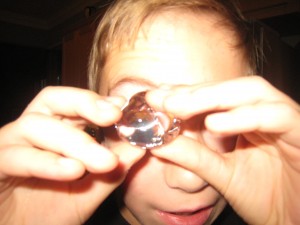 Giant Orbs, “gooey bouncing balls turn into massive, colorful spheres after soaking in water” were our favorite! They grow up to 11 times their own size in water over 6 or so hours and the kids played with them for days, checking them every time they came into the kitchen.
We’ve tried “Insta-Snow” before, but the snow-like polymer in this kit worked spectacularly well. My 5-year old asked for more of it for Christmas, not realizing that we still have a ton left over.
At $44.99, the kit seems a little pricey, but it contains enough of each polymer (at least 50 giant orbs and hundreds of jelly marbles) to do the experiments over and over again, use them for a birthday party, or even a classroom science project or party. I’ve started doing science experiments at my kids’ school holiday parties as a change from the usual arts and crafts. Many of the polymers also have a number of suggested variations on the basic experiments.
As I type, Larry the lizard is soaking in a bucket of water. What I thought was just a plastic lizard is actually made of water-absorbing polymer and will grow into a giant, slimy chameleon. What could be better than that?
The kit was sent to me free of charge, but I wasn’t paid to review it. The kids and I give it two thumbs up.
