Tag: STEAM’
Mirror Image Plant Prints
- by KitchenPantryScientist
Yesterday on Twin Cities Live, I demonstrated some fun botanical science projects for learners of all ages, including Vegetable Vampires and Leaf Chromatography.
This fun art/science project lets you transfer plant pigments to cloth, creating beautiful prints of your favorite leaves and flowers. It’s especially great for fall, when there are so many colorful leaves around.
Mirror Image Plant Prints- kitchenpantryscientist.com
You’ll need:
-Fresh leaves and flowers (Dry leaves won’t work.)
-A hard, smooth pounding surface, like a wooden cutting board or carving board
-Wax paper or plastic wrap
-Mallets or hammers
-Untextured cotton cloth, like a dishtowel. Heavy cloth works better than very thin cloth.
-*Alum and baking soda to treat cloth (This is optional. I don’t pre-treat my fabric, but the treatment step will help bond and preserve color, if you want to frame your prints. You can also buy fabric that’s pre-treated for dyeing.)
Mirror Image Plant Prints- kitchenpantryscientist.com
Safety tips: Protective eye wear is recommended. Young children should be supervised when using mallets and hammers.
What to do:
*If treating cloth: The day before you do the project, add 2 quarts water to a large pot. Add 1 Tb alum and 1 tsp baking soda to the water. Add the cotton and bring to a boil. Simmer for 2 hours, turn off heat and soak for at least two hours. Let fabric dry.
The next steps are the same, whether you’re using an untreated piece of cotton or treated cloth.
- Take a walk to collect colorful leaves and flowers. Choose plants that can be flattened. Flowers with huge centers, like coneflowers don’t work as well, but petals may be removed and pounded.
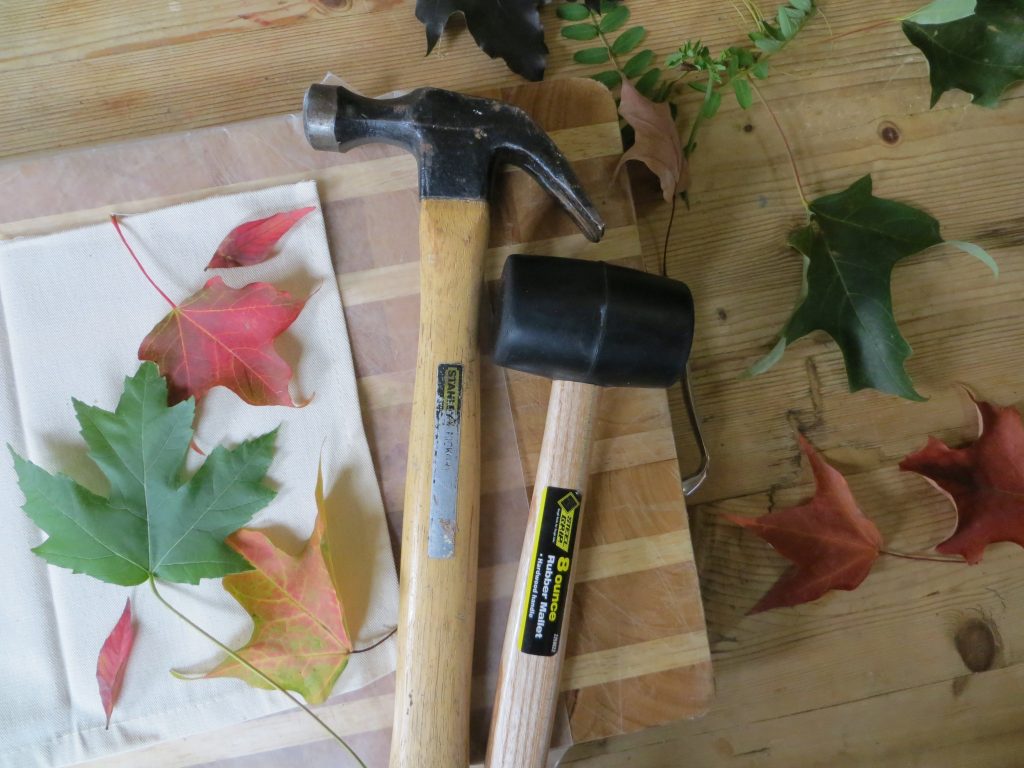
- Cover the pounding surface with waxed paper or plastic wrap.
- Cut a piece of cloth that will fit on the pounding surface when folded in half. Iron the fold.
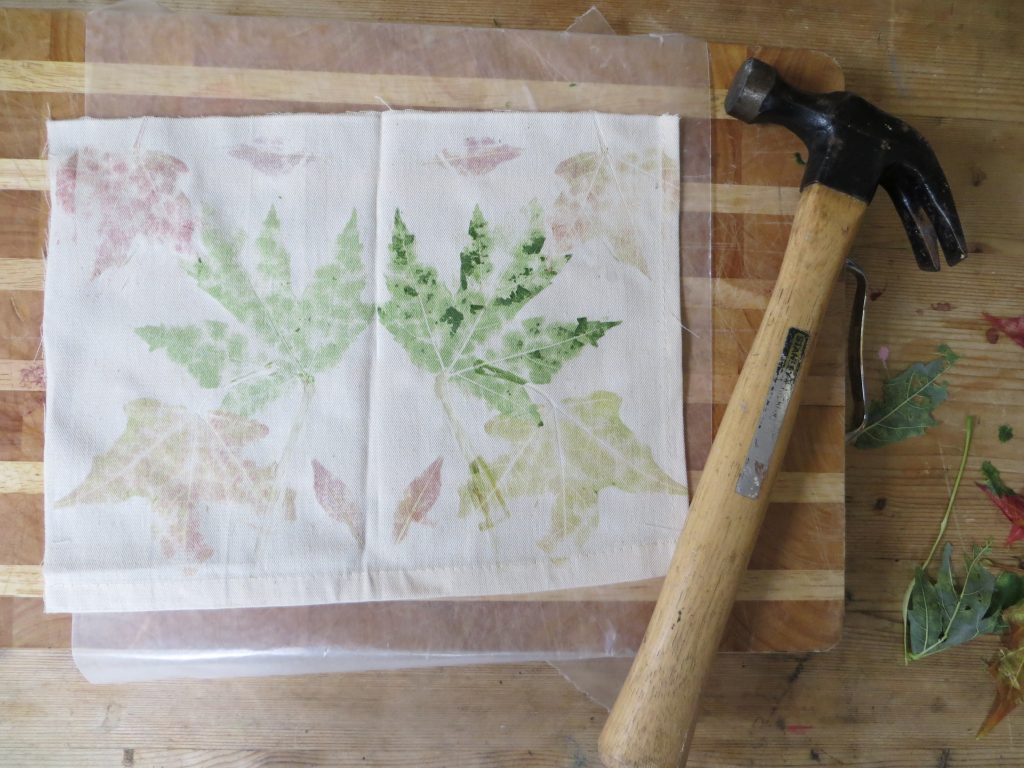
- Open the cloth and lay it on the pounding surface. (See image above)
- Arrange leaves and flowers on the cloth.
Mirror Image Plant Prints- kitchenpantryscientist.com
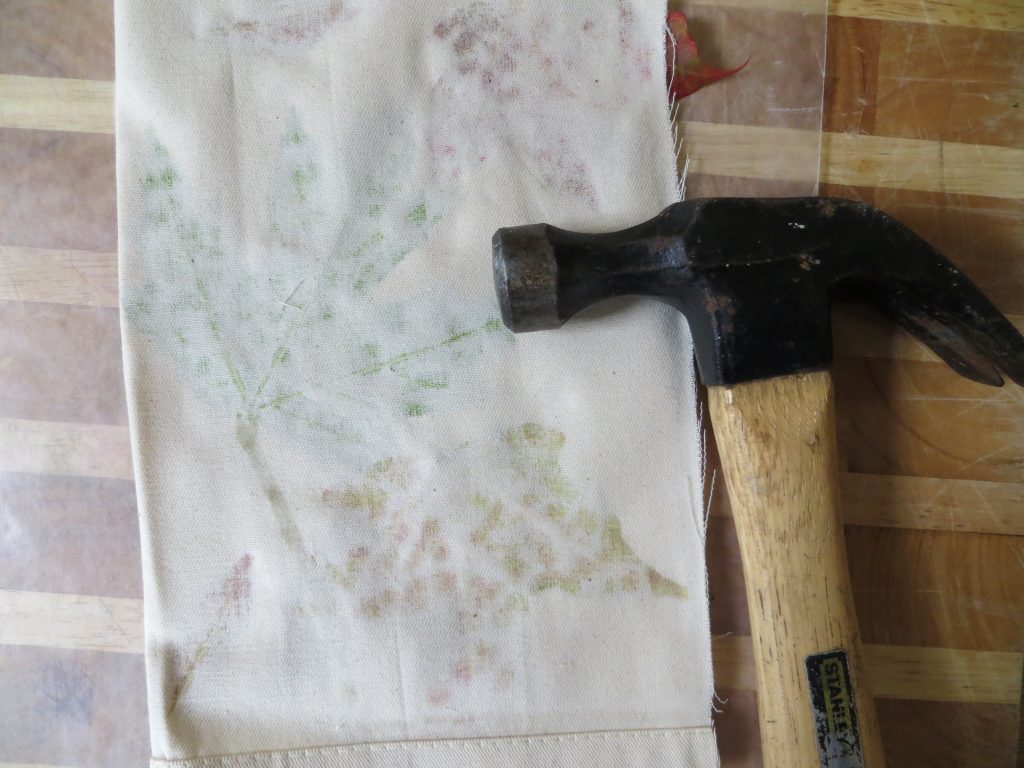
- Fold the cloth over the plants and pound it with the hammer or mallet. If you’re using a hammer, pound more gently.
- Pound until you can see the forms of the leaves through the fabric. As the pigment leaks through, you’ll see the outlines of what you’re smashing. Hint: Hammers work better than mallets for fall leaves. For juicy leaves and flowers, use a mallet or hammer gently.
Mirror Image Plant Prints- kitchenpantryscientist.com
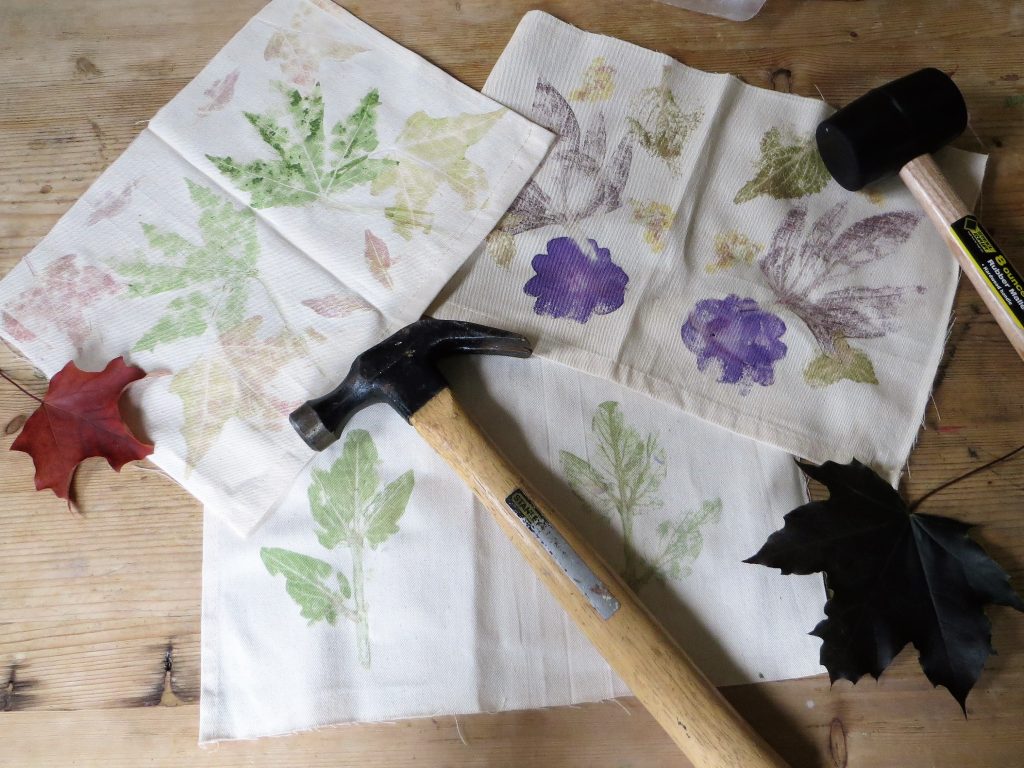
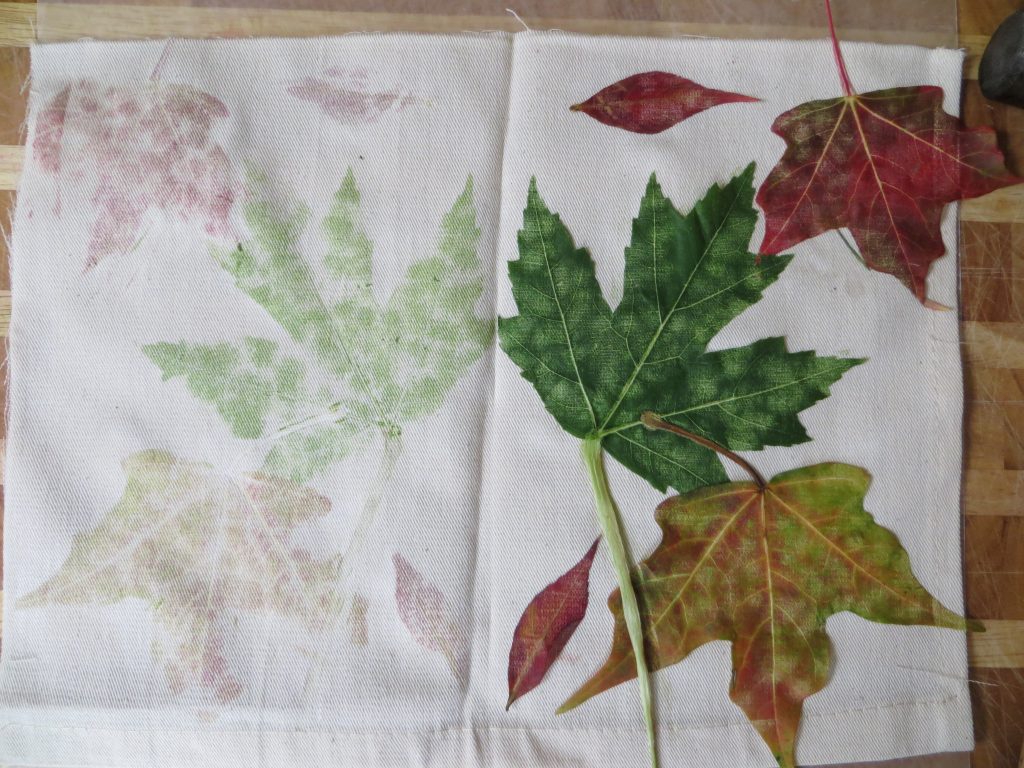
- When you’re finished pounding, unfold the fabric to reveal the print you created. Remove the leaves and petals.
Mirror Image Plant Prints- kitchenpantryscientist.com
- Label the image with plant names, enhance it with paint or markers, or leave nature’s design to speak for itself.
The Science Behind the Fun:
Pigments are compounds that give things color, and many of them are found in nature. Flowers, leave, fruits and vegetables are full of brilliant pigments. In this experiment, we transfer plant pigments to cloth by bursting plant cells using pressure from a hammer or mallet.
The green pigment found in leaves is called chlorophyll. In the fall, many trees stop making chlorophyll, and the red, yellow and orange pigments inside the leaves become visible.
Although you create a mirror image of leaves and flowers, you’ll notice that the color may be more intense on one side of the print. A waxy covering called a cuticle covers leaves, and is sometimes thicker on the top than on the underside of the leaf. It may affect the transfer of pigment to the cloth, making it easy to see structures like veins on the leaf print.
Enrichment:
What parts of the leaf can you identify in the print you created?
Bristlebots
- by KitchenPantryScientist
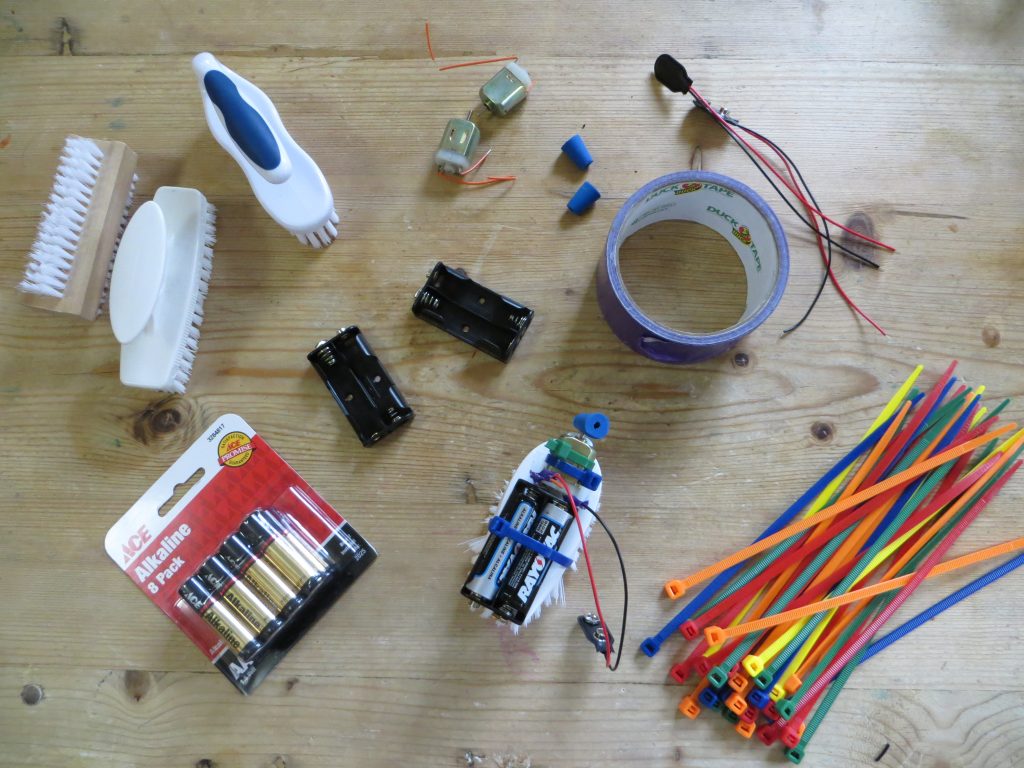
With a brush, some batteries, a small motor and a few wires, it’s easy to create a robot that spins, bumps and buzzes around on any smooth surface.
You’ll need:
-a small brush, like a vegetable brush or a cleaning brush
-two AA batteries
–battery holder for 2 AA batteries (optional)
-insulated wire
-a small toy motor with lead wires and pencil eraser or small rubber stopper (or vibrating motor)
–battery clip (optional)
-zip ties (optional)
-electrical tape or duct tape
Bristlebot-KitchenPantryScientist.com
Make your bristlebot!
- Attach the motor to one end of the top of the brush. If it’s not a vibrating motor, stick a eraser or rubber stopper onto the spinning post to make it vibrate. Use a zip tie or duct tape to secure it. Make sure the spinning parts can rotate freely.
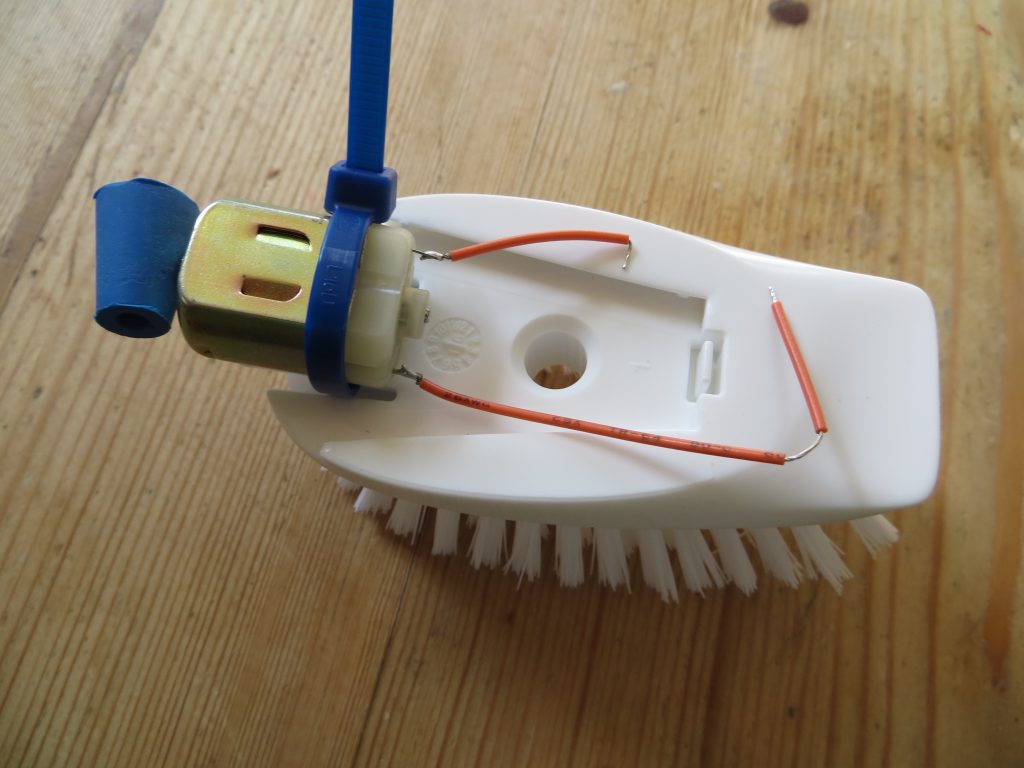
Attach motor- KitchenPantryScientist.com
- Attach the battery holder to the top of the brush near the motor.
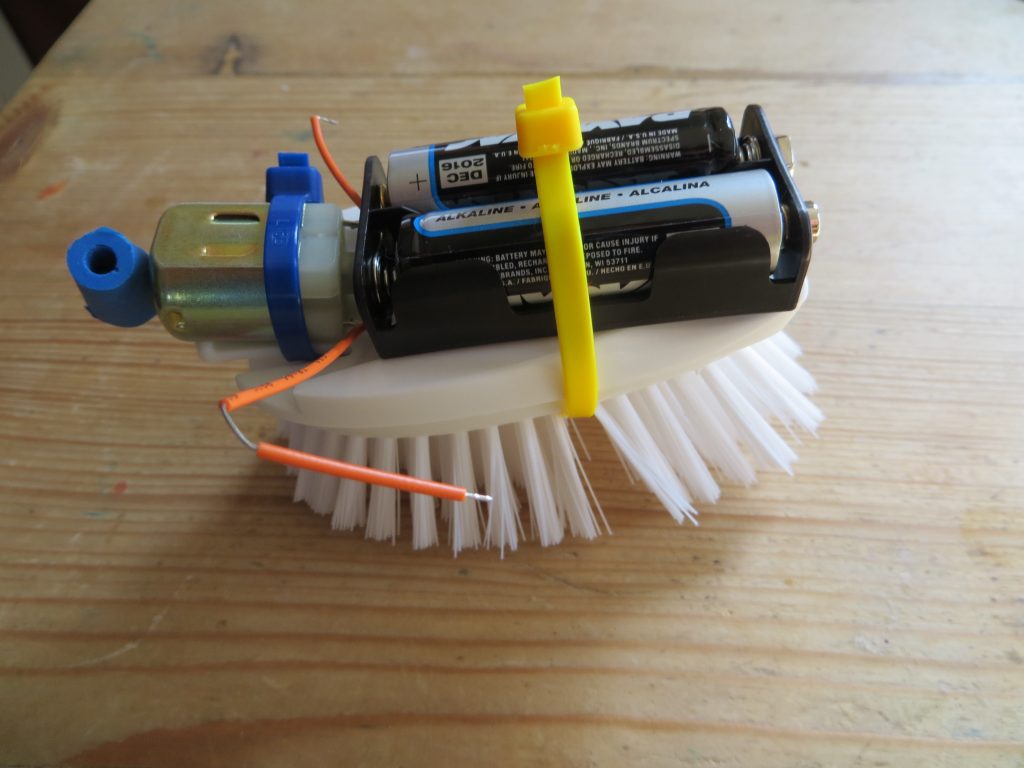
Attach batteries- KitchenPantryScientist.com
- Insert batteries in motor.
- Twist wires around the motor terminals and secure with tape. (These may be the wires on the battery clip, if you have one.)
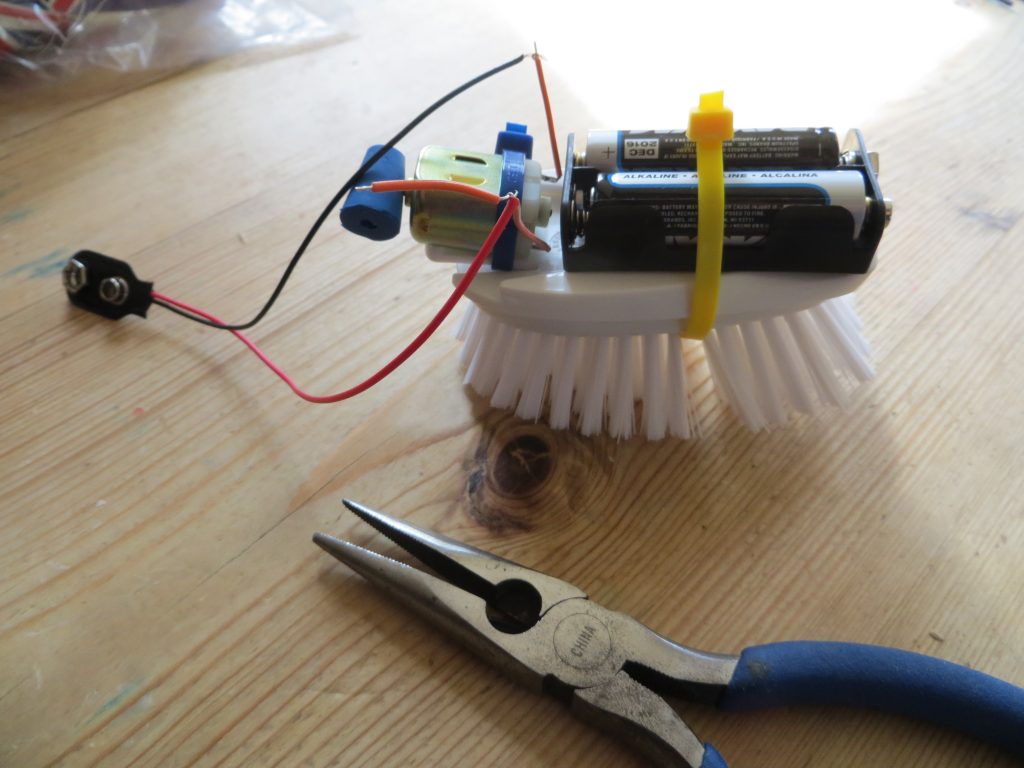
Connect battery clip- KitchenPantryScientist.com
- To start the motor, attach wires directly to the battery terminals, or to the battery clip and snap it onto the batteries.
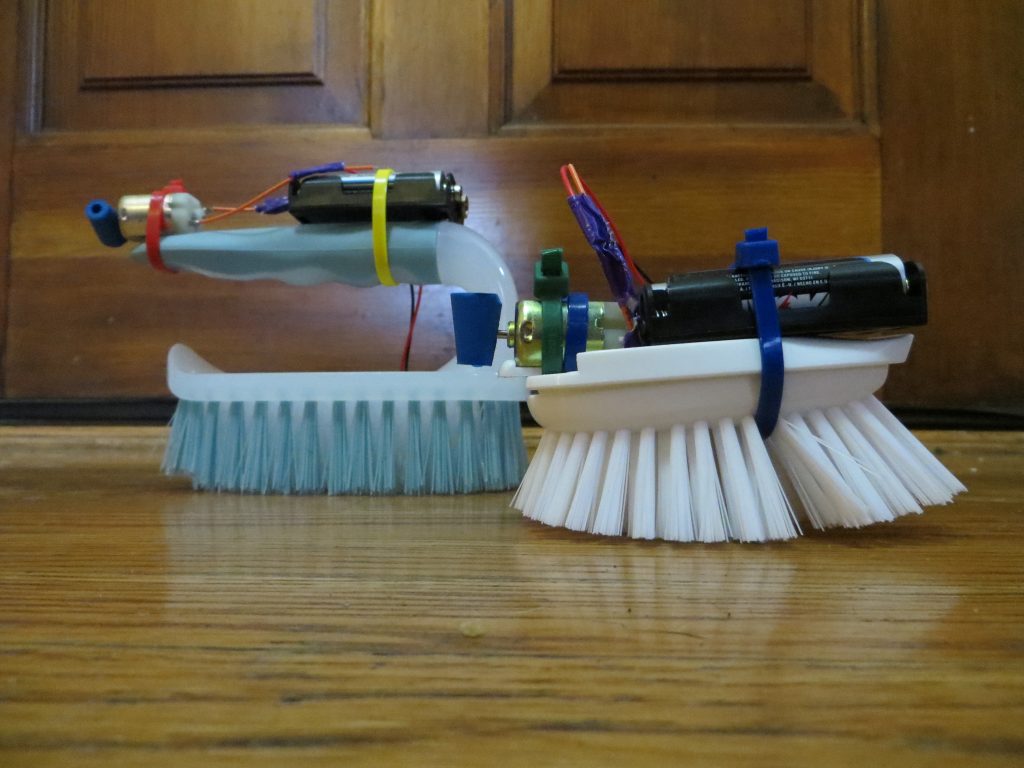
Bristlebot- KitchenPantryScientist.com
- Place your robot on a smooth surface to see what happens.
Enrichment: Try different brush shapes, sizes and angles to see how they move. Does your robot spin in the same direction as the motor, or the opposite direction?
The Science Behind the Fun: In this experiment, you complete a battery-powered electrical circuit to spin a vibrating motor. The vibrations traveling through the bristles of the brush move your robot around on the floor.
Graphite Circuits
- by KitchenPantryScientist
Electrons (negatively charged particles) can flow through substances called conductors.
Graphite, used to make pencil lead, among other things, is a conductor and can be used to make a simple circuit on paper. A circuit is just a path for electrical current.
You have to do this experiment with a graphite pencil, rather than the kind you use at school, but you can pick them up at most art supply stores. You’ll also need a few small LED bulbs, 2 wires with alligator clips on either end, and a 9 volt battery.
Adult supervision recommended.
- Make a thick, black rectangle using a graphite pencil. We used a #9 graphite crayon.
- Hook the two wires up to the battery terminals.
- Clip the wire attached to the positive battery terminal to one wire of an LED bulb. (Don’t test it on the battery, or you may blow it out.)
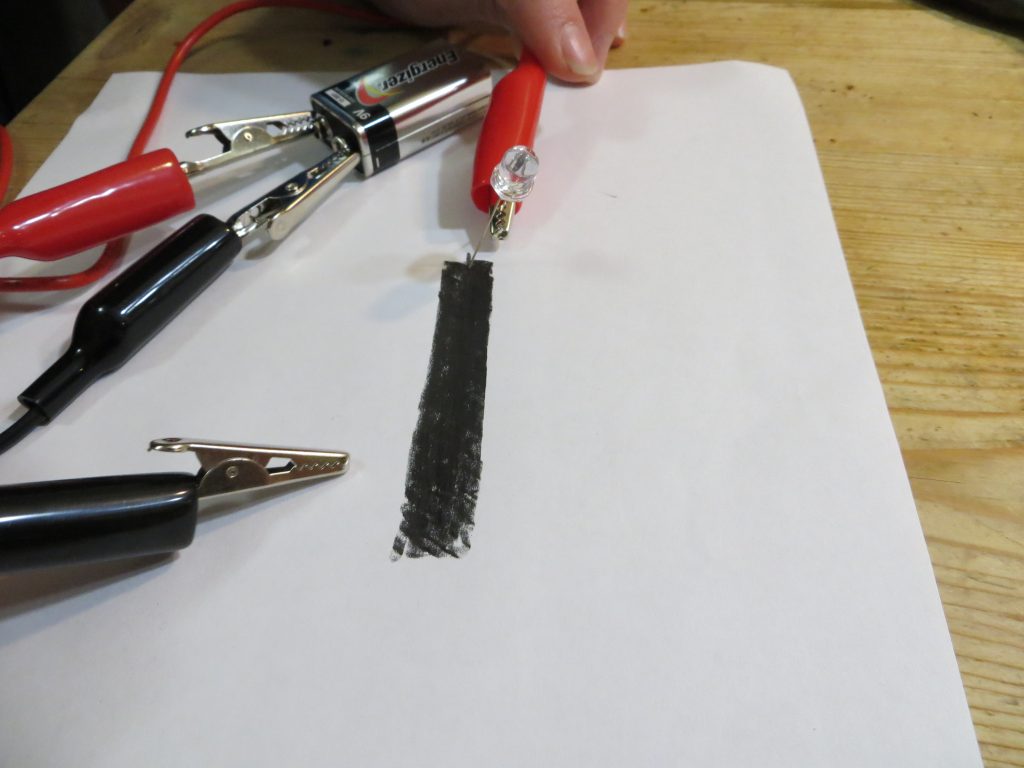 4. Touch the un-attached LED wire to the other (left) side of the graphite bar.
 5.Touch the alligator clip attached to the negative battery terminal to the right side of the graphite bar you drew.
6.If it doesn’t light, switch the positive alligator clip to the other wire of the LED bulb and try it again.
7. Move negative clip closer to the bulb. It should get brighter as you decrease the distance.
8 Spring Science Eggsperiments
- by KitchenPantryScientist
Spring is egg season. You may prefer dyed eggs, hard-boiled eggs, deviled eggs, or even dinosaur eggs. No matter what kind of eggs you like best, you’ll love these eggsperiments that let you play with the amazing architecture of eggs, dissolve their shells and even dye them with the pigments found in your refrigerator. Just click on experiments for directions and the science behind the fun!
Grow alum crystals in eggshells to create beautiful geode-like works of art.
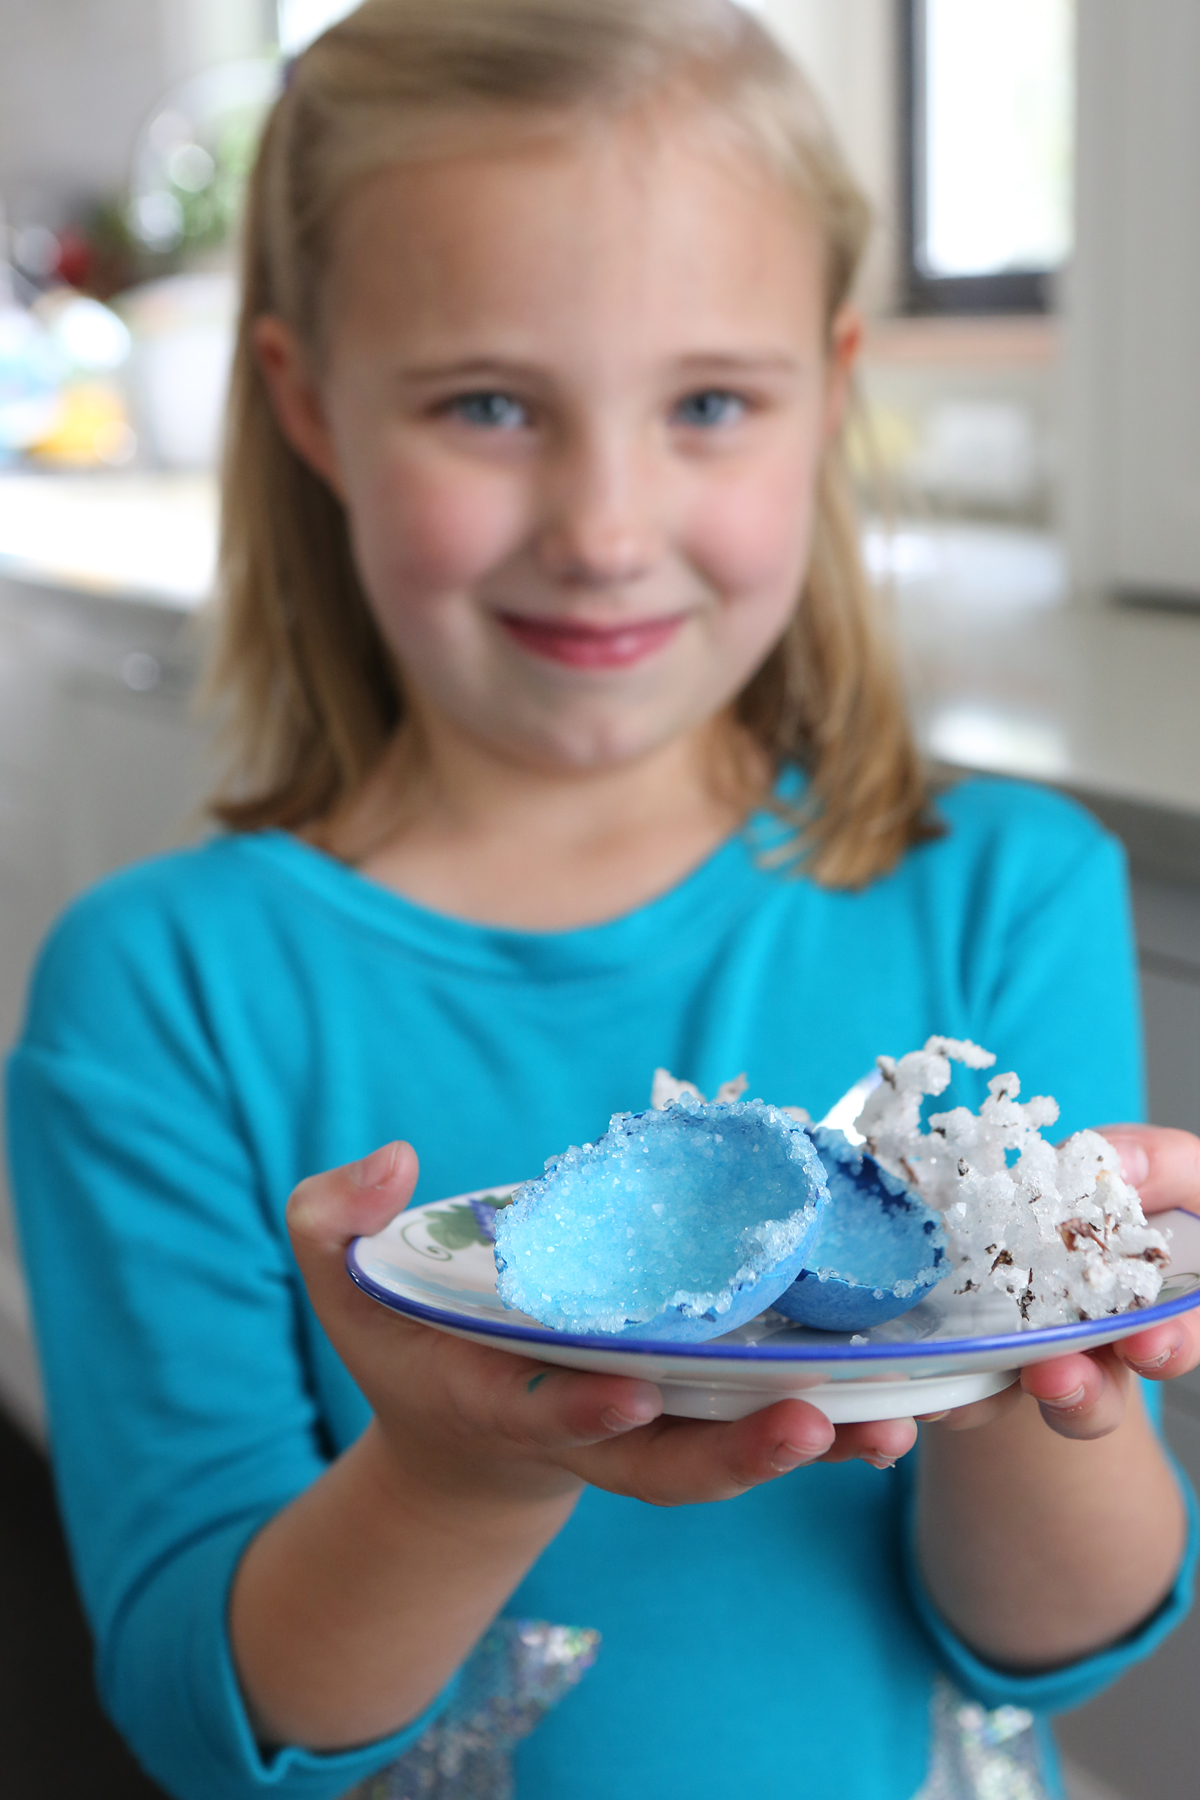
Egg Geode from Kitchen Science Lab for Kids (Quarry Books)
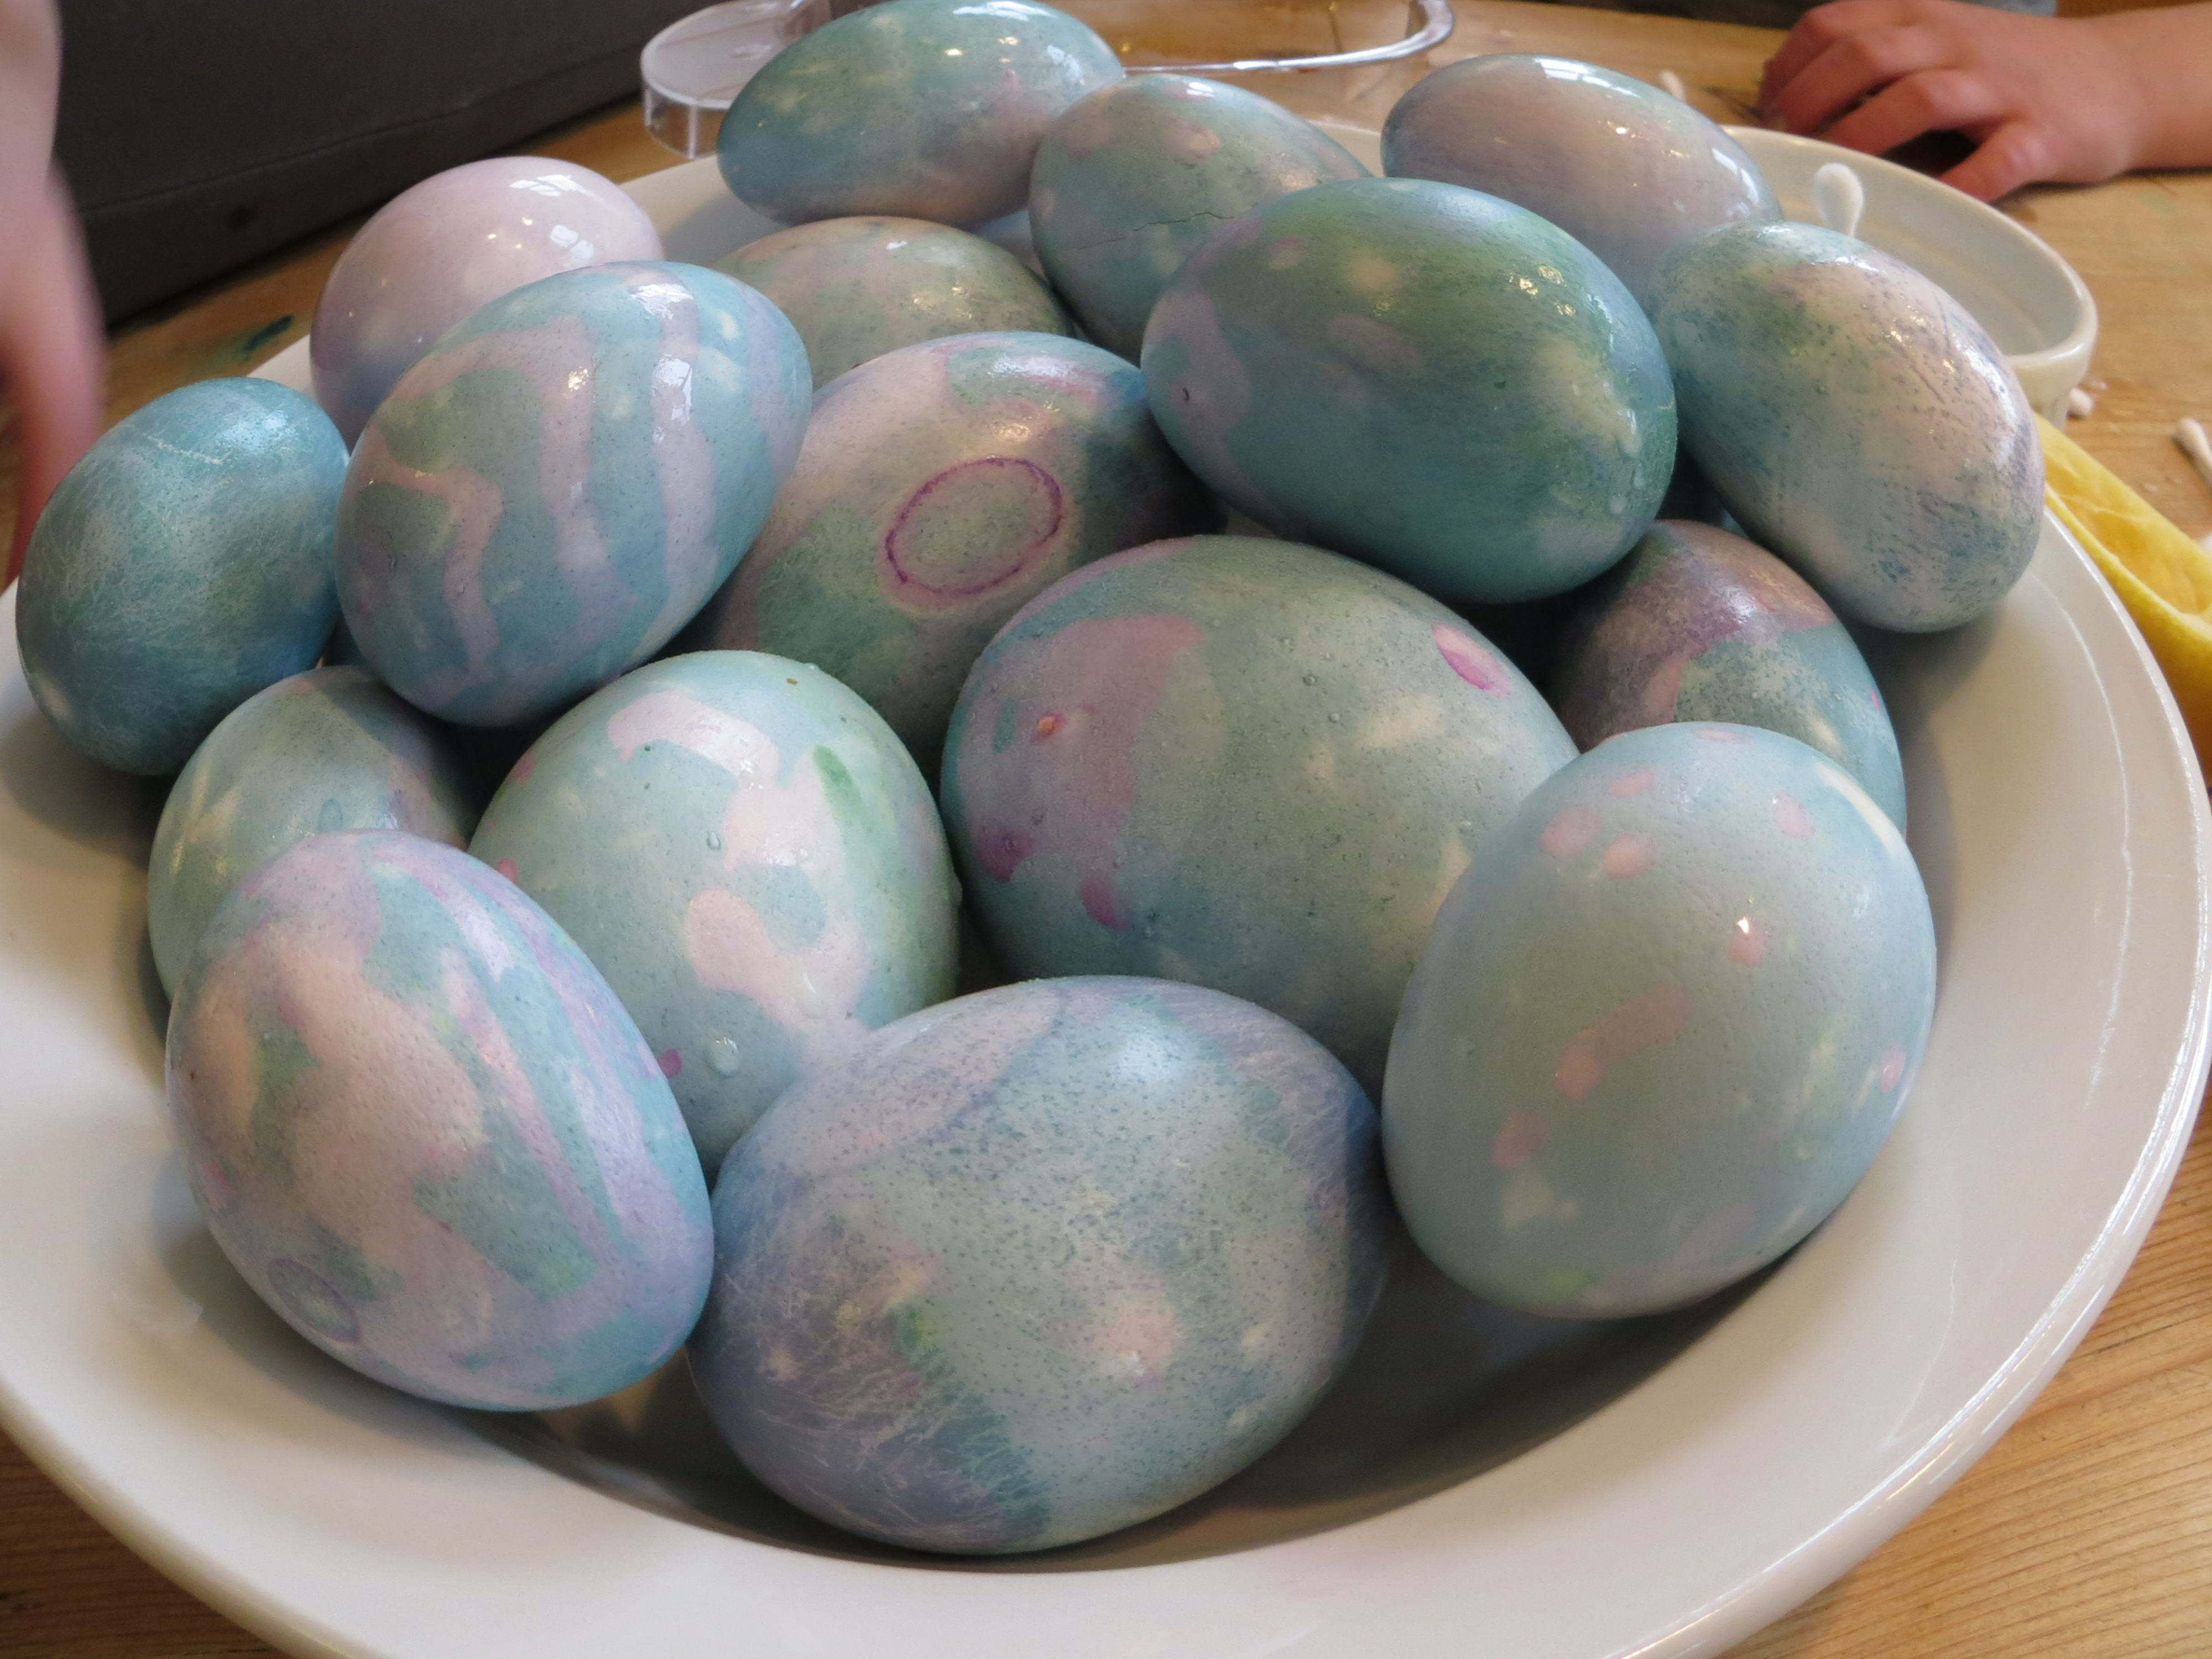
Dye eggs with spices, fruits and vegetables,
or dye them with red cabbage juice and use lemon juice and baking soda to paint them.
Dissolve eggshells with vinegar and play with osmosis when you make “Alien Monster Eggs.”
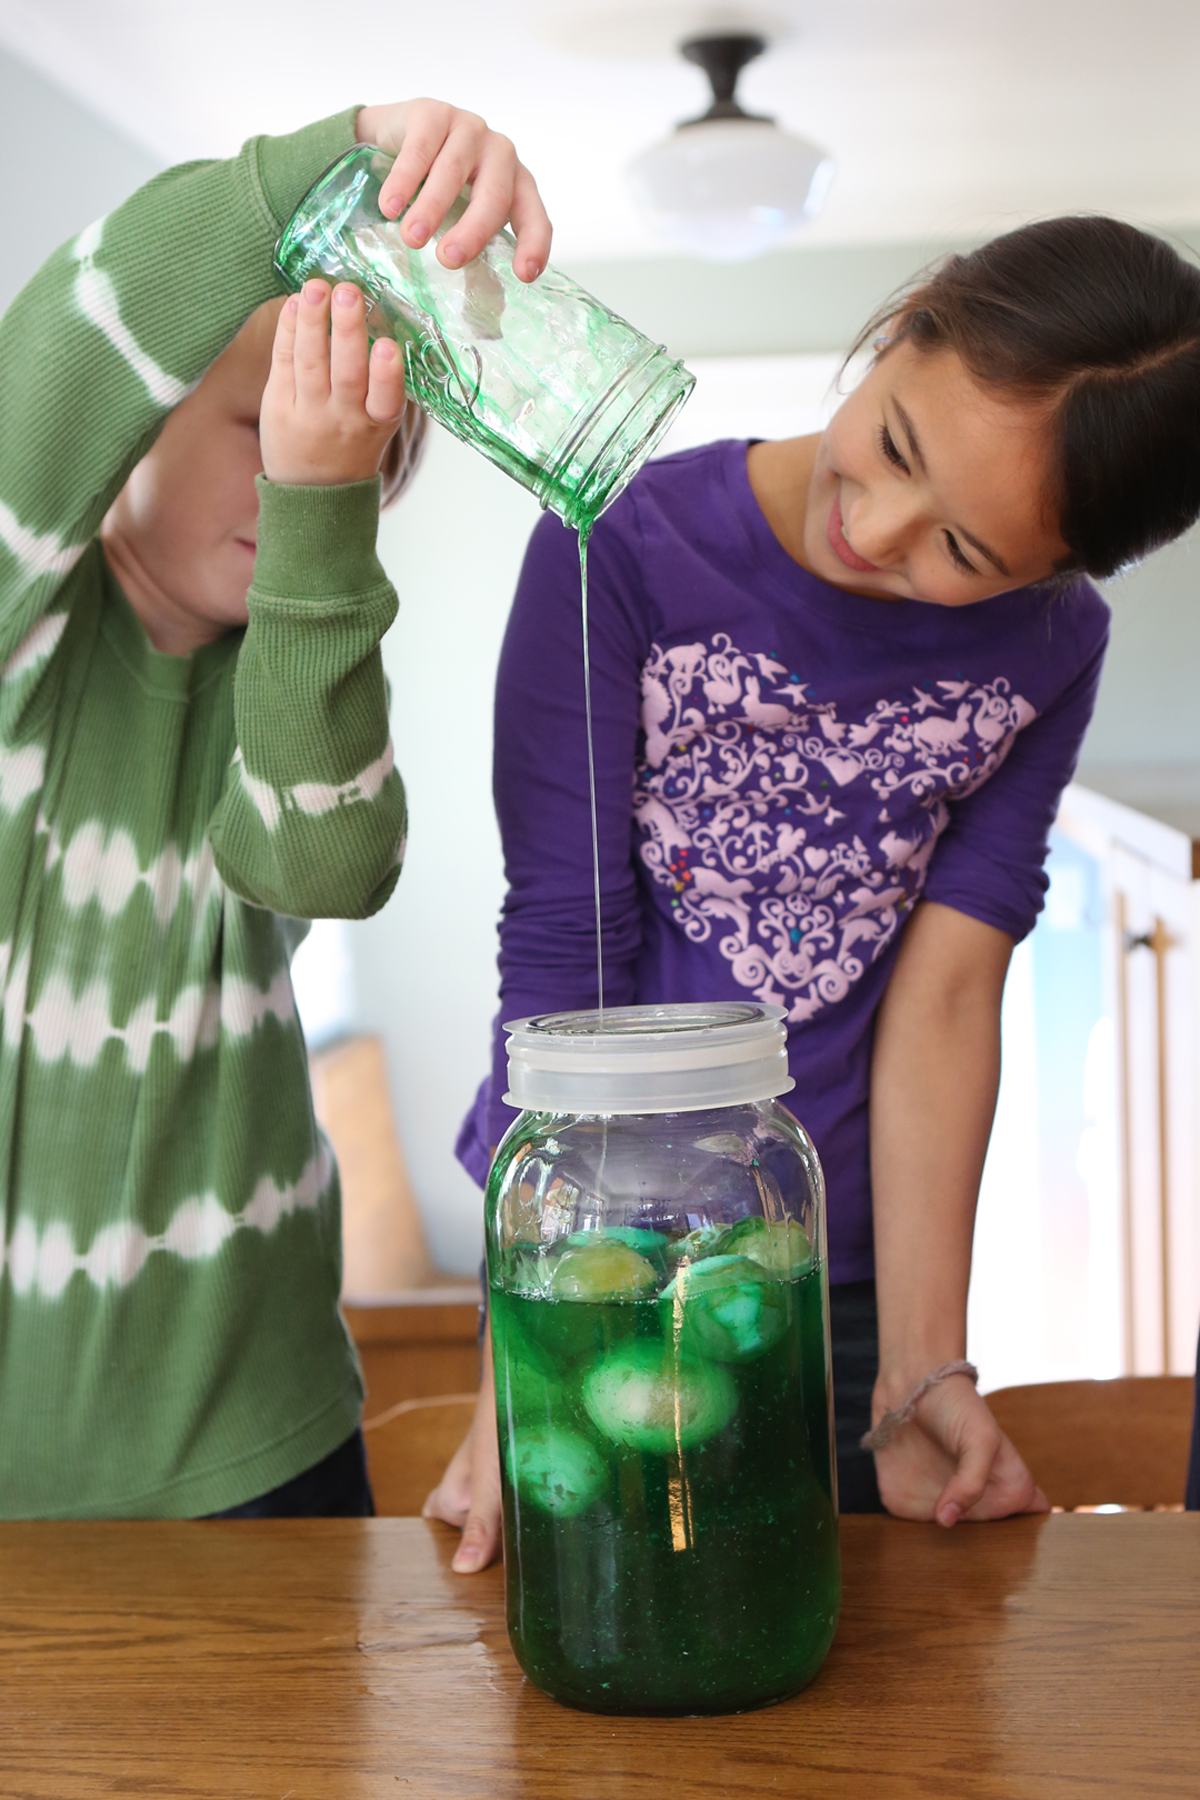
Alien Monster Eggs from Kitchen Science Lab for Kids (Quarry Books)
You can stand on a carton of eggs to test their strength.
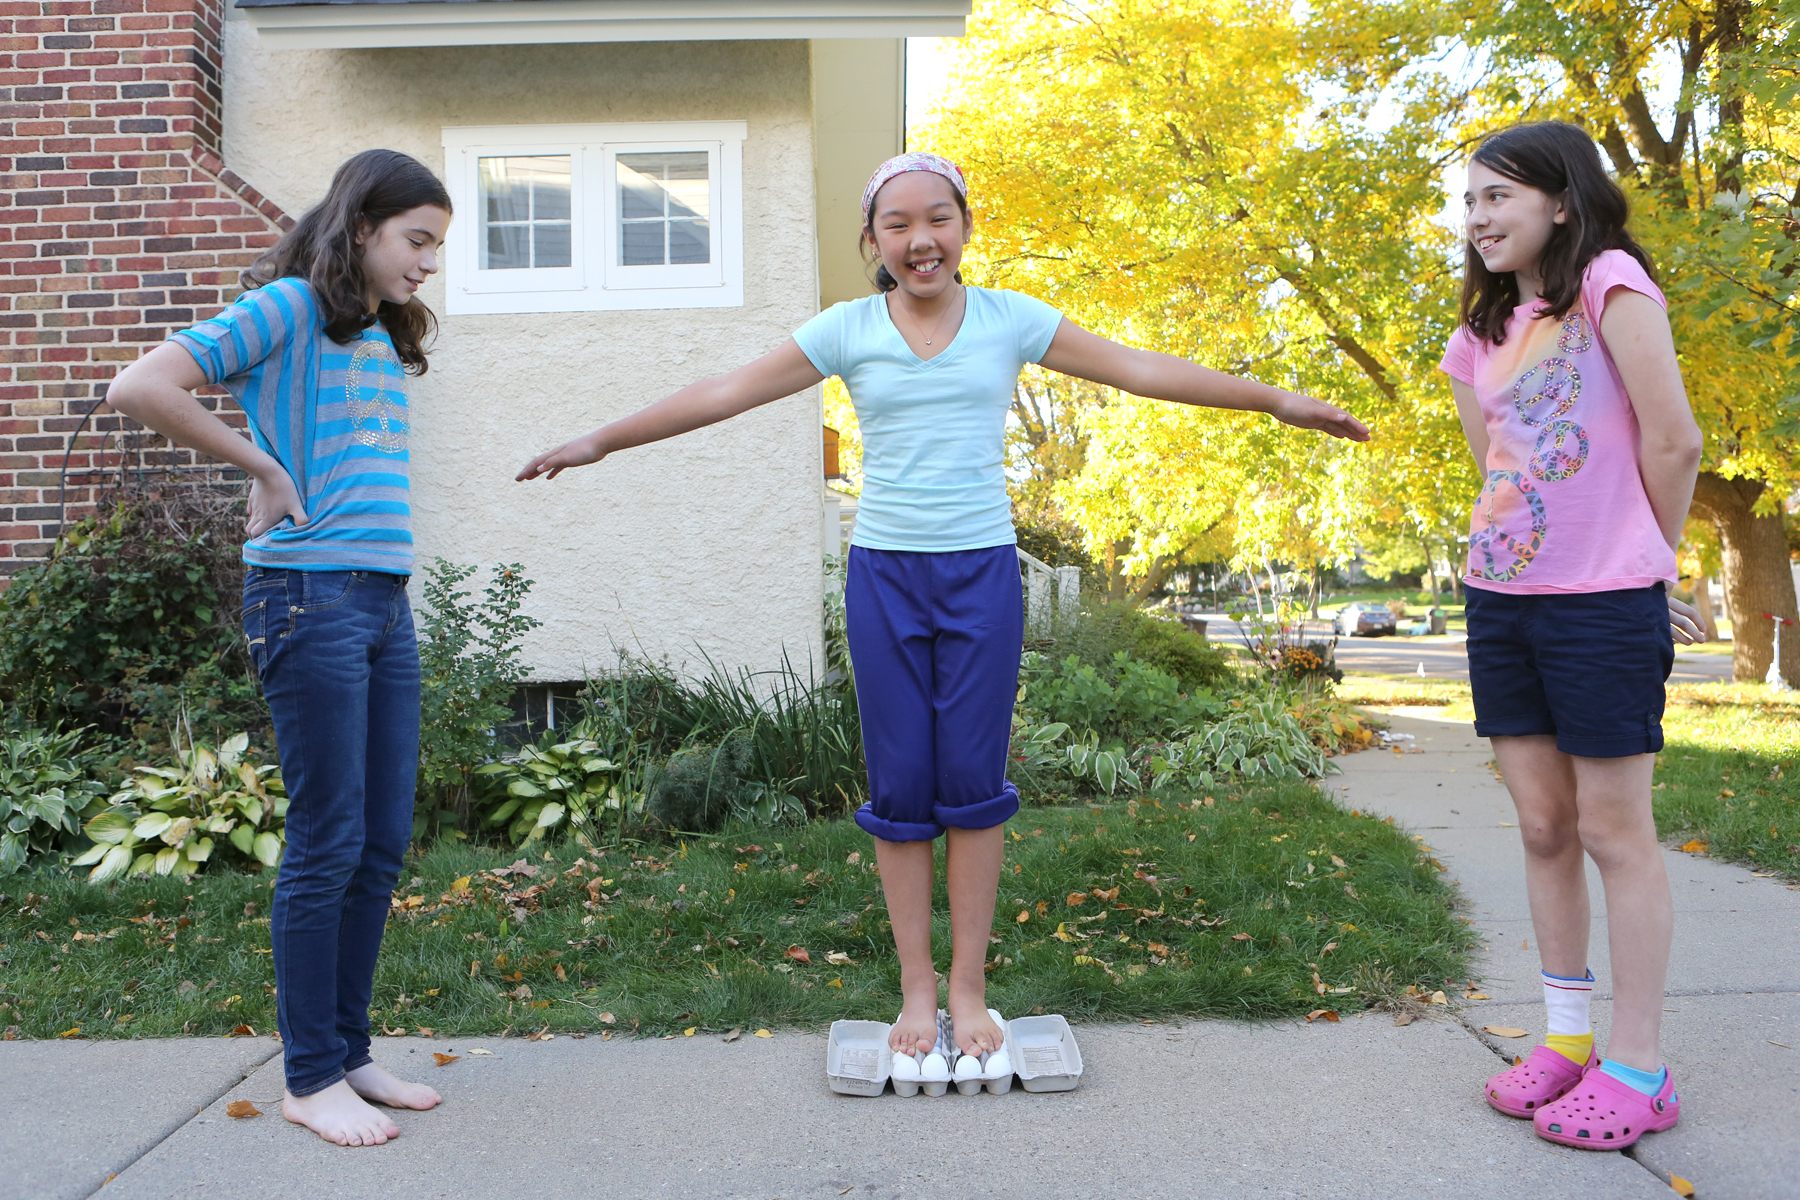
Standing on Eggs from Kitchen Science Lab for Kids (Quarry Books 2015)
For a fun physics experiment, throw eggs at a hanging sheet.
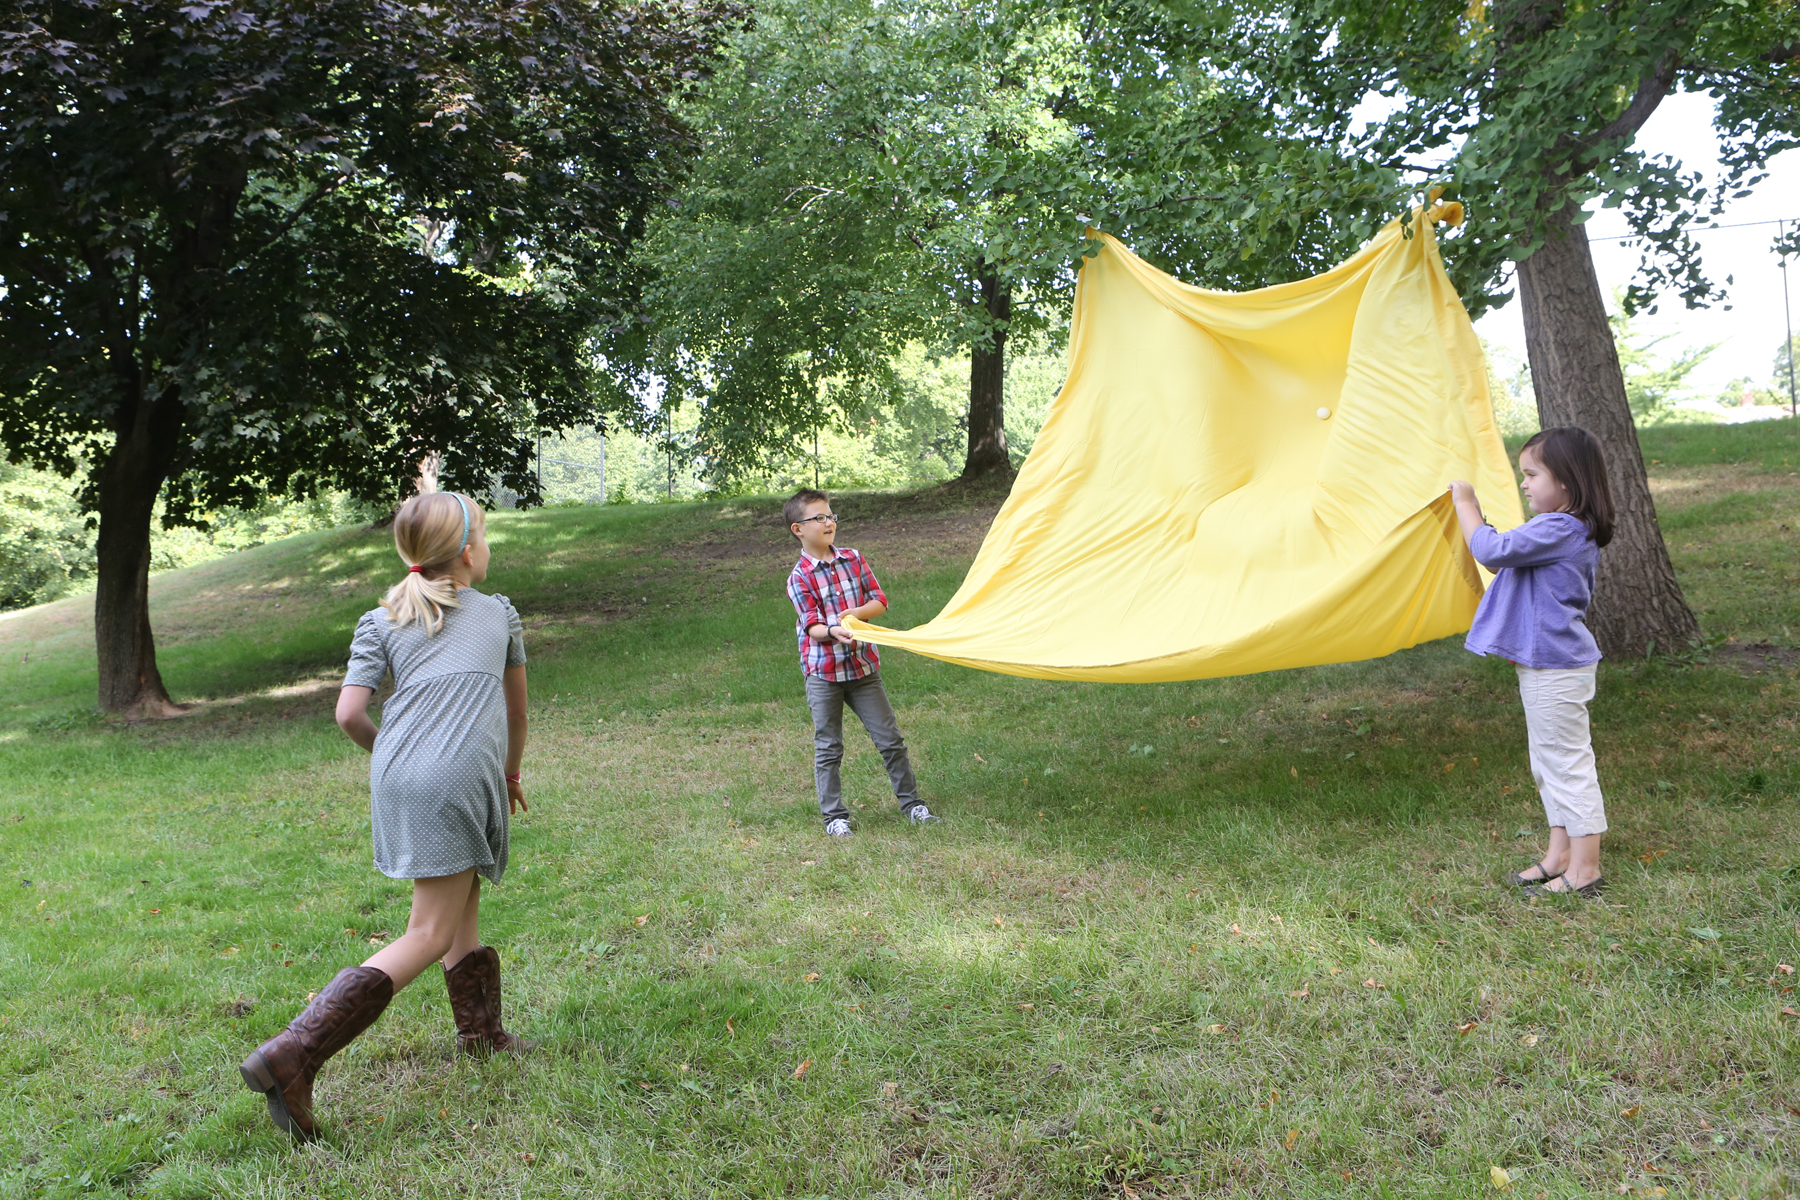
From “Kitchen Science Lab for Kids” Quarry Books
Make egg-eating monsters and watch atmospheric pressure push eggs up into a bottle.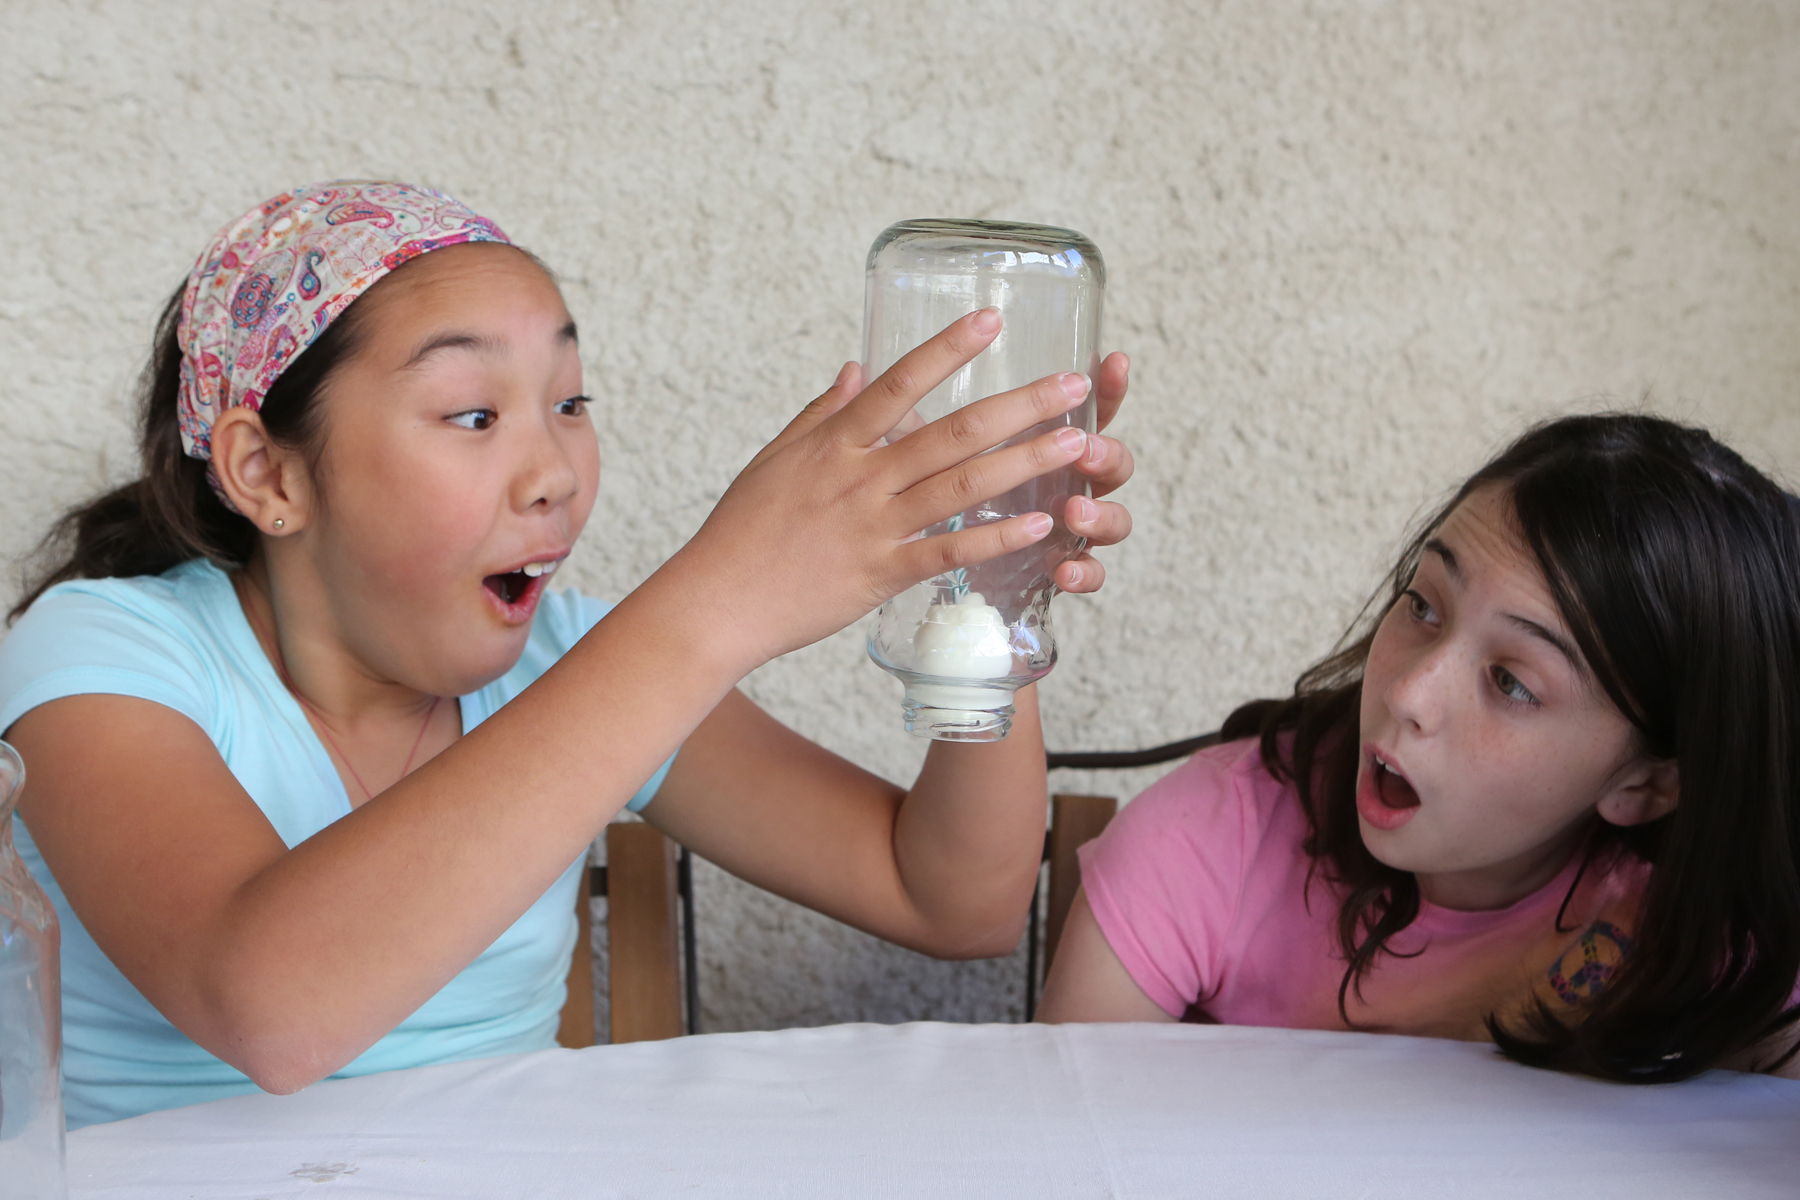
Egg drops are a fun way to test your engineering prowess.
And finally, here’s a little more about the science of hard-boiled eggs.
Physics! Biology! Chemistry! Yeah!
- by KitchenPantryScientist
I got together with some friends this weekend to do a quick iPhone recording of a chemistry song (on my Kitchen Pantry Scientist YouTube channel soon) and these awesome kids were nice enough take a break from playing to sing the Science Song with me. They had me laughing so hard that I could hardly get the words out!
Can you make up a song about science?
My New Book
- by KitchenPantryScientist
It’s been a busy summer, but we’re working on some sweet new experiments to share with you soon!
Last week, the kids and I got an advance copy of my new book “Kitchen Science Lab for Kids,” which will be available September 15th and we love how it turned out!
If you pre-order a copy from Amazon, Barnes&Noble, IndieBound, or Indigo before August 15th, I’ll send you a personalized, signed bookplate for each copy you order. Just email your receipt number and the address where you’d like the bookplate(s) sent. My email address is kitchenpantryscientist@earthlink.net. (Be sure to include the name(s) you’d like the book signed for!)
![IMG_4598[1]](https://kitchenpantryscientist.com/wp-content/uploads/2014/08/IMG_45981.jpg)
At-home science provides an environment for freedom, creativity and invention that’s not always possible in a school setting. In your own kitchen, it’s simple, inexpensive, and fun to whip up a number of amazing science experiments using everyday ingredients. Science can be as easy as baking. Hands-On Family: Kitchen Science Lab for Kids offers 52 fun science activities for families to do together. The experiments can be used as individual projects, for parties, or as educational activities groups. Kitchen Science Lab for Kids will tempt families to cook up some physics, chemistry and biology in their own kitchens and back yards. Many of the experiments are safe enough for toddlers and exciting enough for older kids, so families can discover the joy of science together.