A warm, sunny spring or summer day is perfect for making a solar oven from a pizza box!
When my friend Sheila, who works at NREL (the National Renewable Energy Laboratory) sent me this project, I couldn’t wait to try it out. We first tried it out on a cool spring day in Minnesota and to my surprise, it worked. The oven didn’t get very hot, but we were able to warm a chocolate chip cookie enough to make it soft and melt the chips.
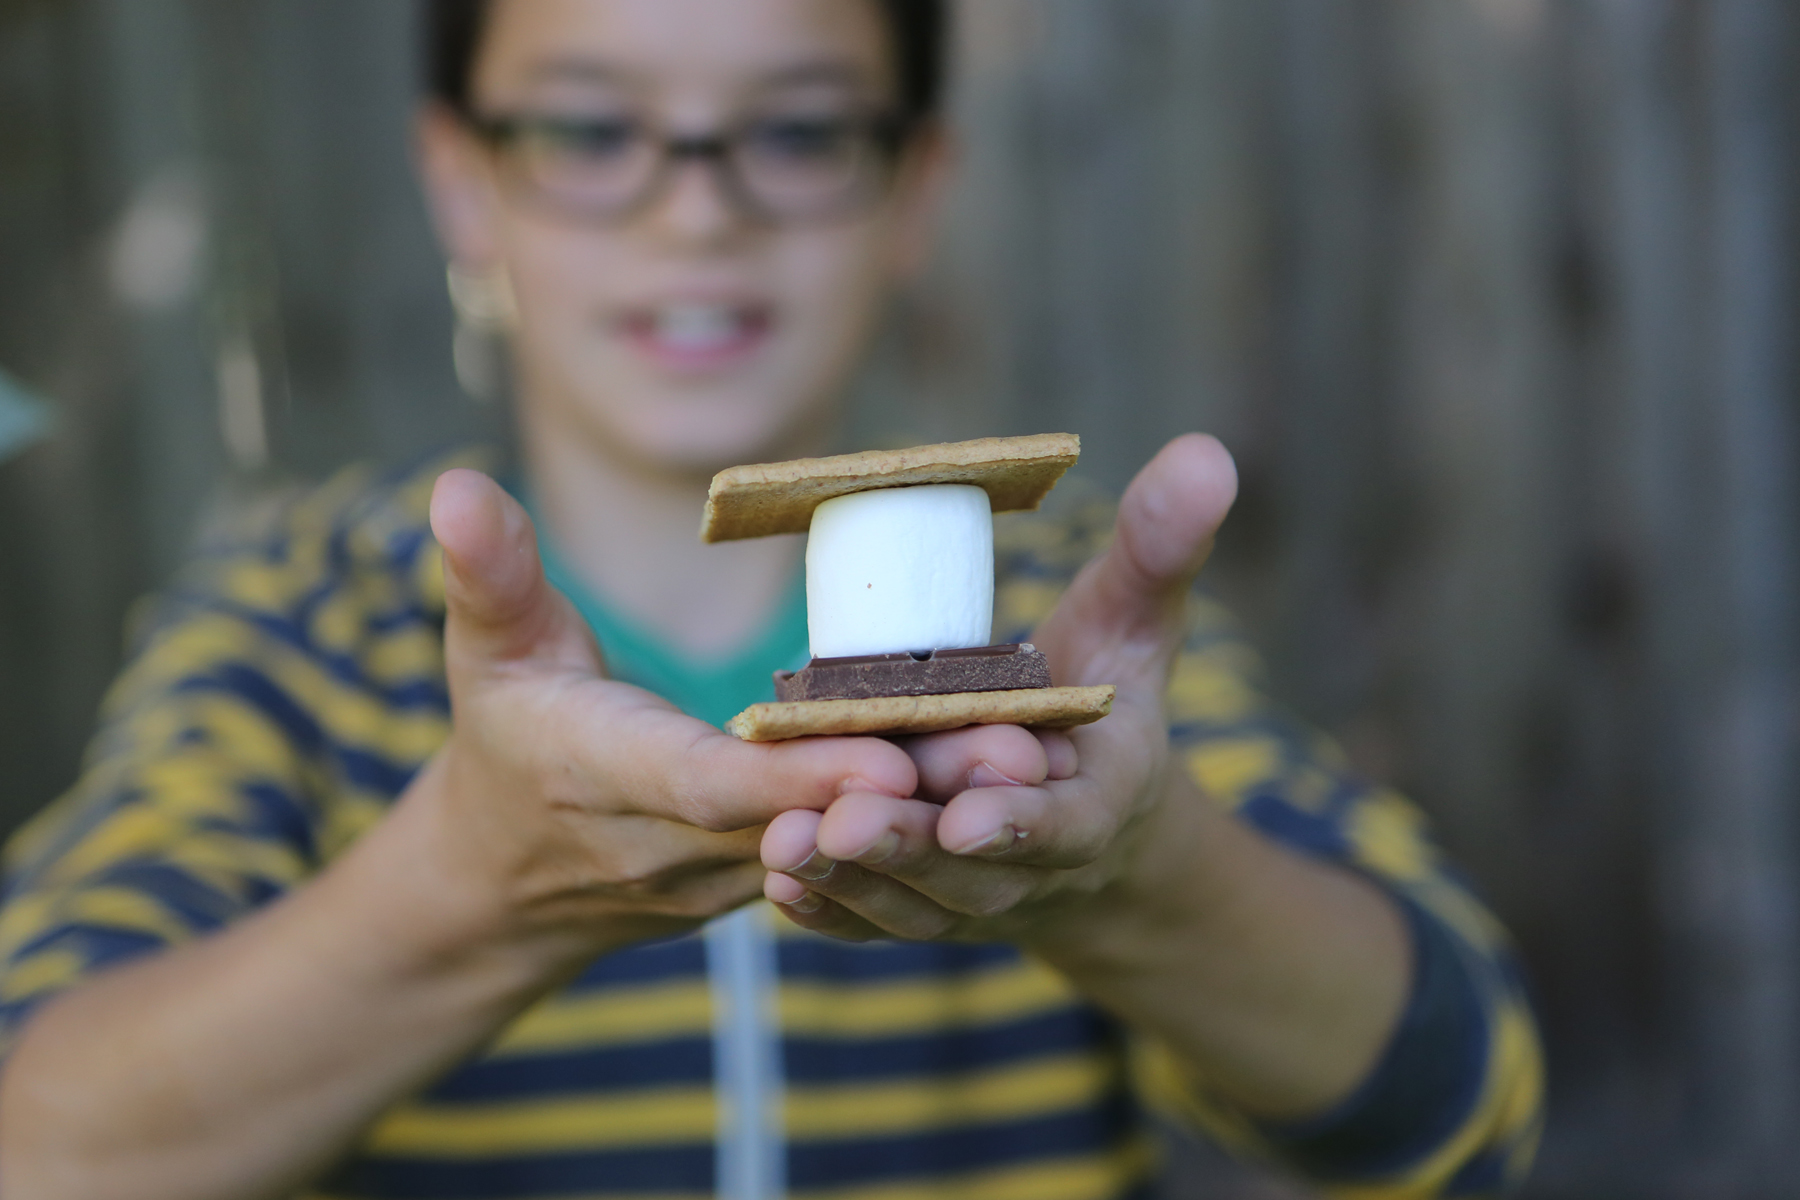
NREL suggests using your oven to make s’mores, which we’ve tried and is really fun. The solar oven is surprisingly easy to make and is one of the experiments featured in my book Kitchen Science Lab for Kids. (Quarry Books 2014)
Solar Oven from Kitchen Science Lab for Kids (Quarry Books)
You will need: 1 pizza box from a local pizza delivery store (Little Caesars, Domino’s, Pizza Hut, etc.), newspapers, tape, scissors, black construction paper, clear plastic wrap, aluminum foil and a dowel or stick to prop the lid up. You will also want to have some food to warm in your oven-marshmallows, chocolate, etc.
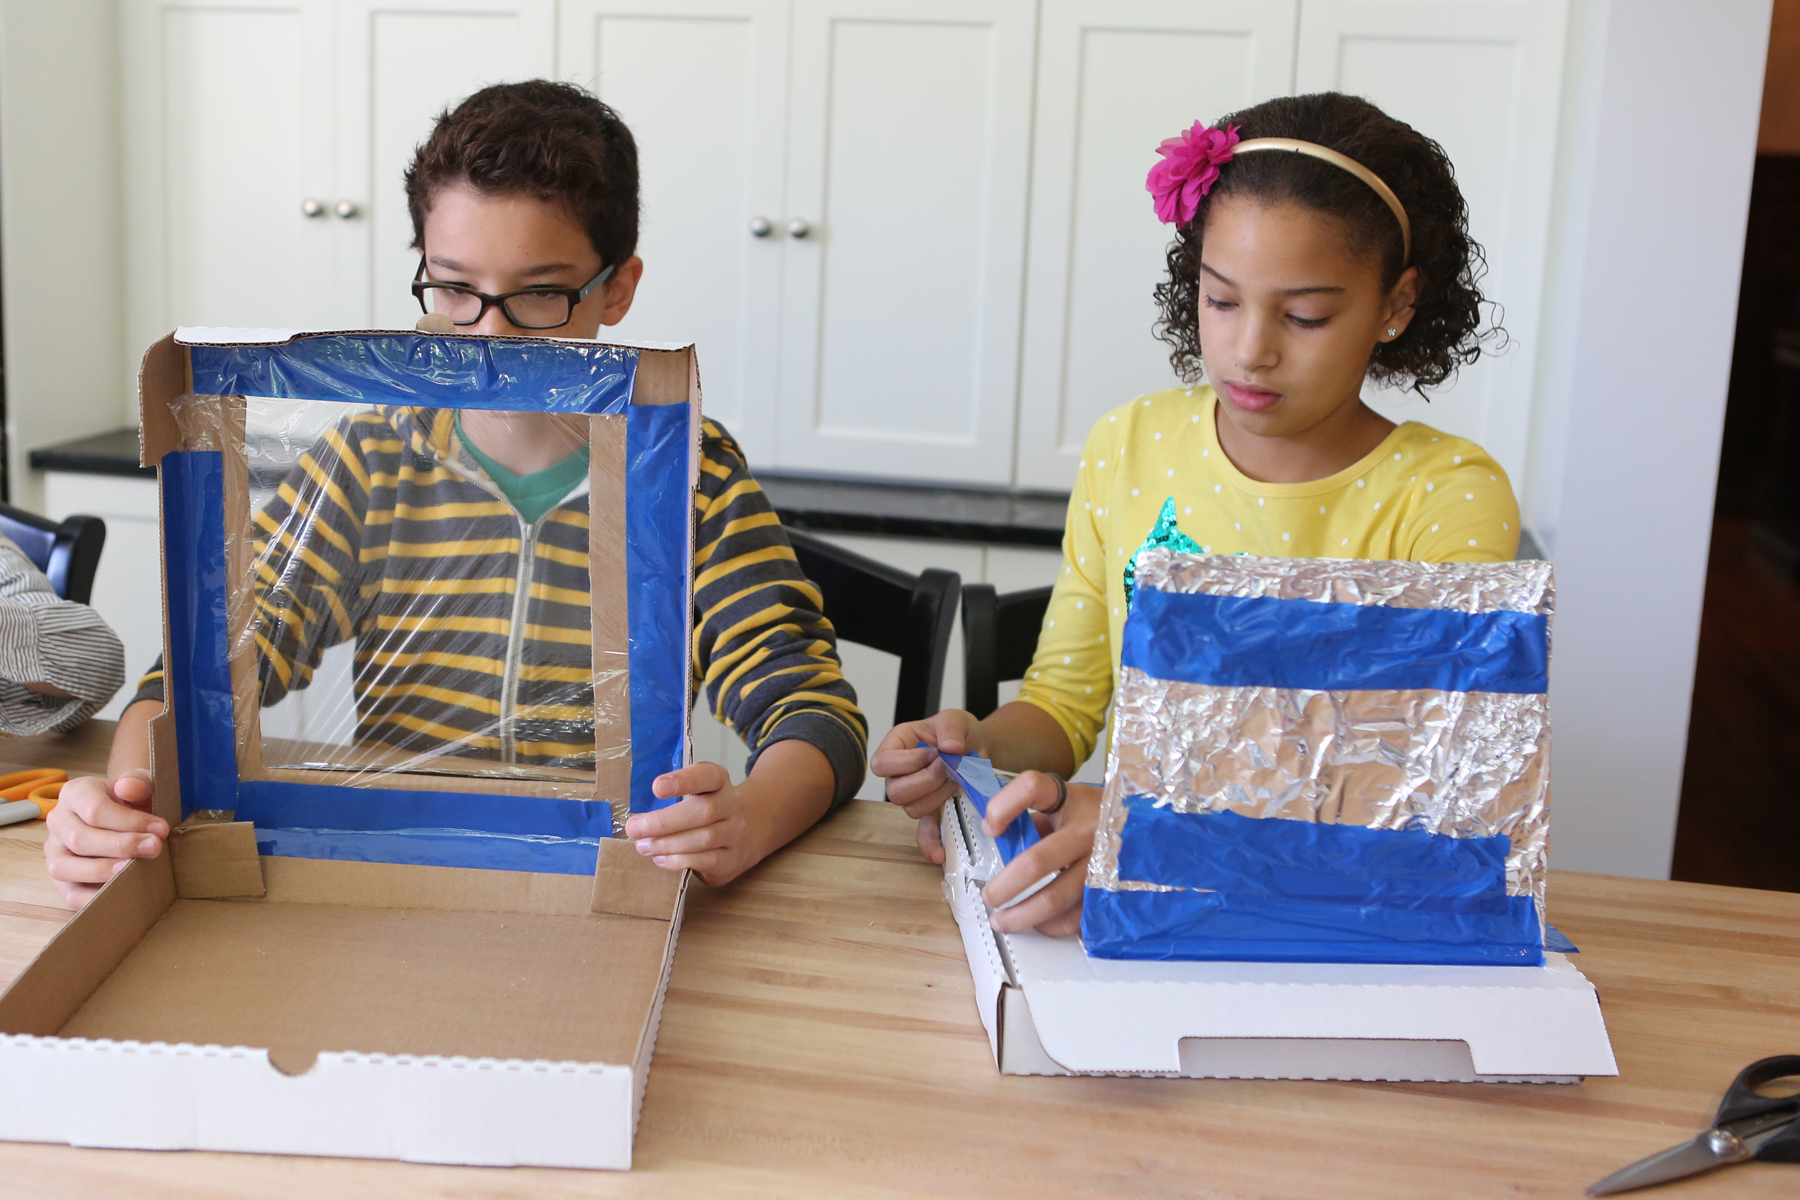
Make sure the cardboard is folded into its box shape. Carefully cut out 3 sides of a square in the lid of the box. Do not cut out the fourth side of the square, which is the one closest to where the pizza box lid hinges. Gently fold the flap back along the uncut edge to form a crease.
Now, Wrap the underside (inside) face of the flap that you made with aluminum foil. Tape it so that the foil is help firmly but so that there’s not too much tape showing on the foil side of the flap.
Solar Oven from Kitchen Science Lab for Kids (Quarry Books)
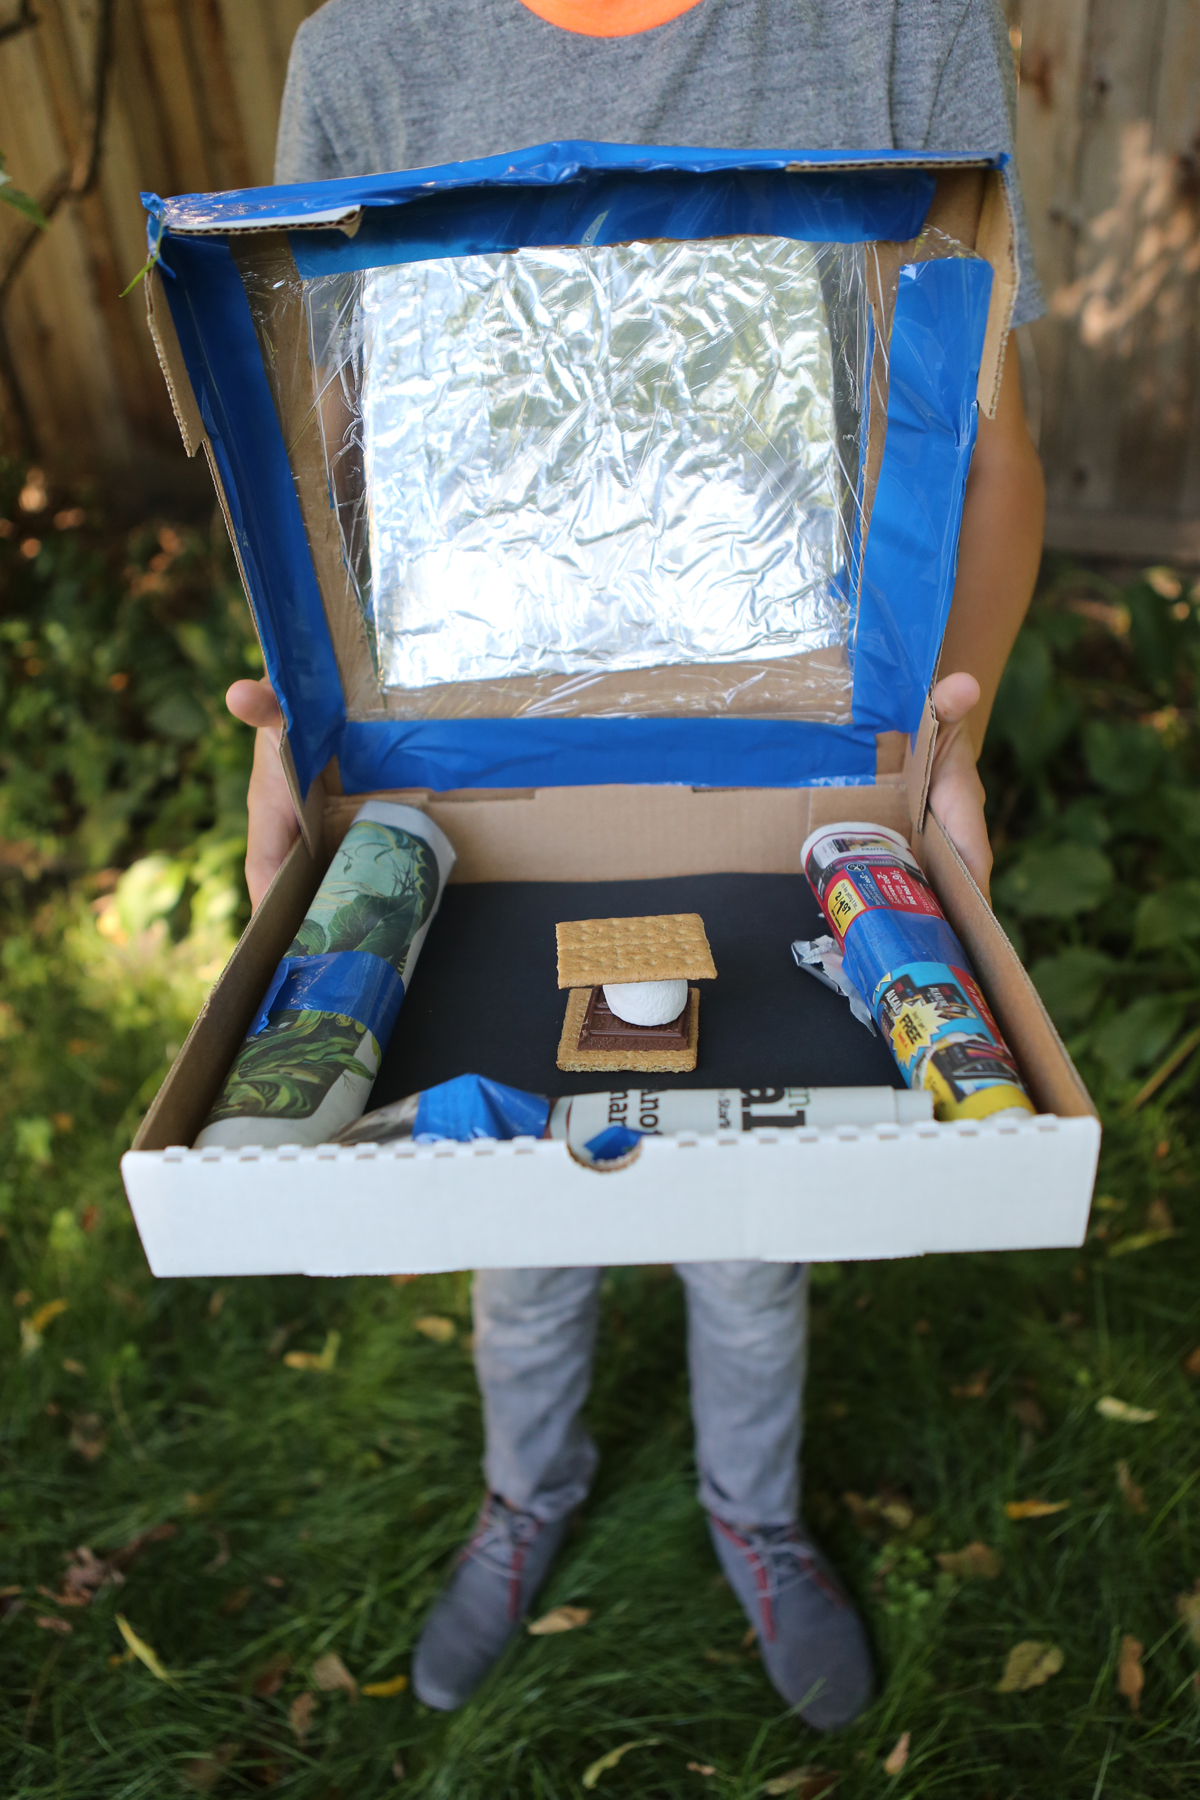
Open the box and place a piece of black construction paper so that it fits the bottom of the box. Tape it by the edges. (We used two pieces.)
Roll up some newspaper and fit it around the inside edges of the box. This is the insulation. It should be about 1-1 ½” thick. Use tape (or other materials you can think of) to hold the newspaper in place. Tape it to the bottom of the box so that you can close the lid. (We taped it to the sides and had to cut the tape so that we could close the lid. Luckily our newspaper fit in tightly enough that we didn’t really even need the tape.)
Finally, cut plastic wrap an inch larger than the lid opening on the box top. Tape it on the underside of the lid opening. Add another piece of plastic wrap to the top of the lid opening. This creates a layer of air as insulation that keeps heat in the box. It also makes a window you can look through at the food you’re “cooking.” BE SURE THE PLASTIC WRAP IS TIGHT.
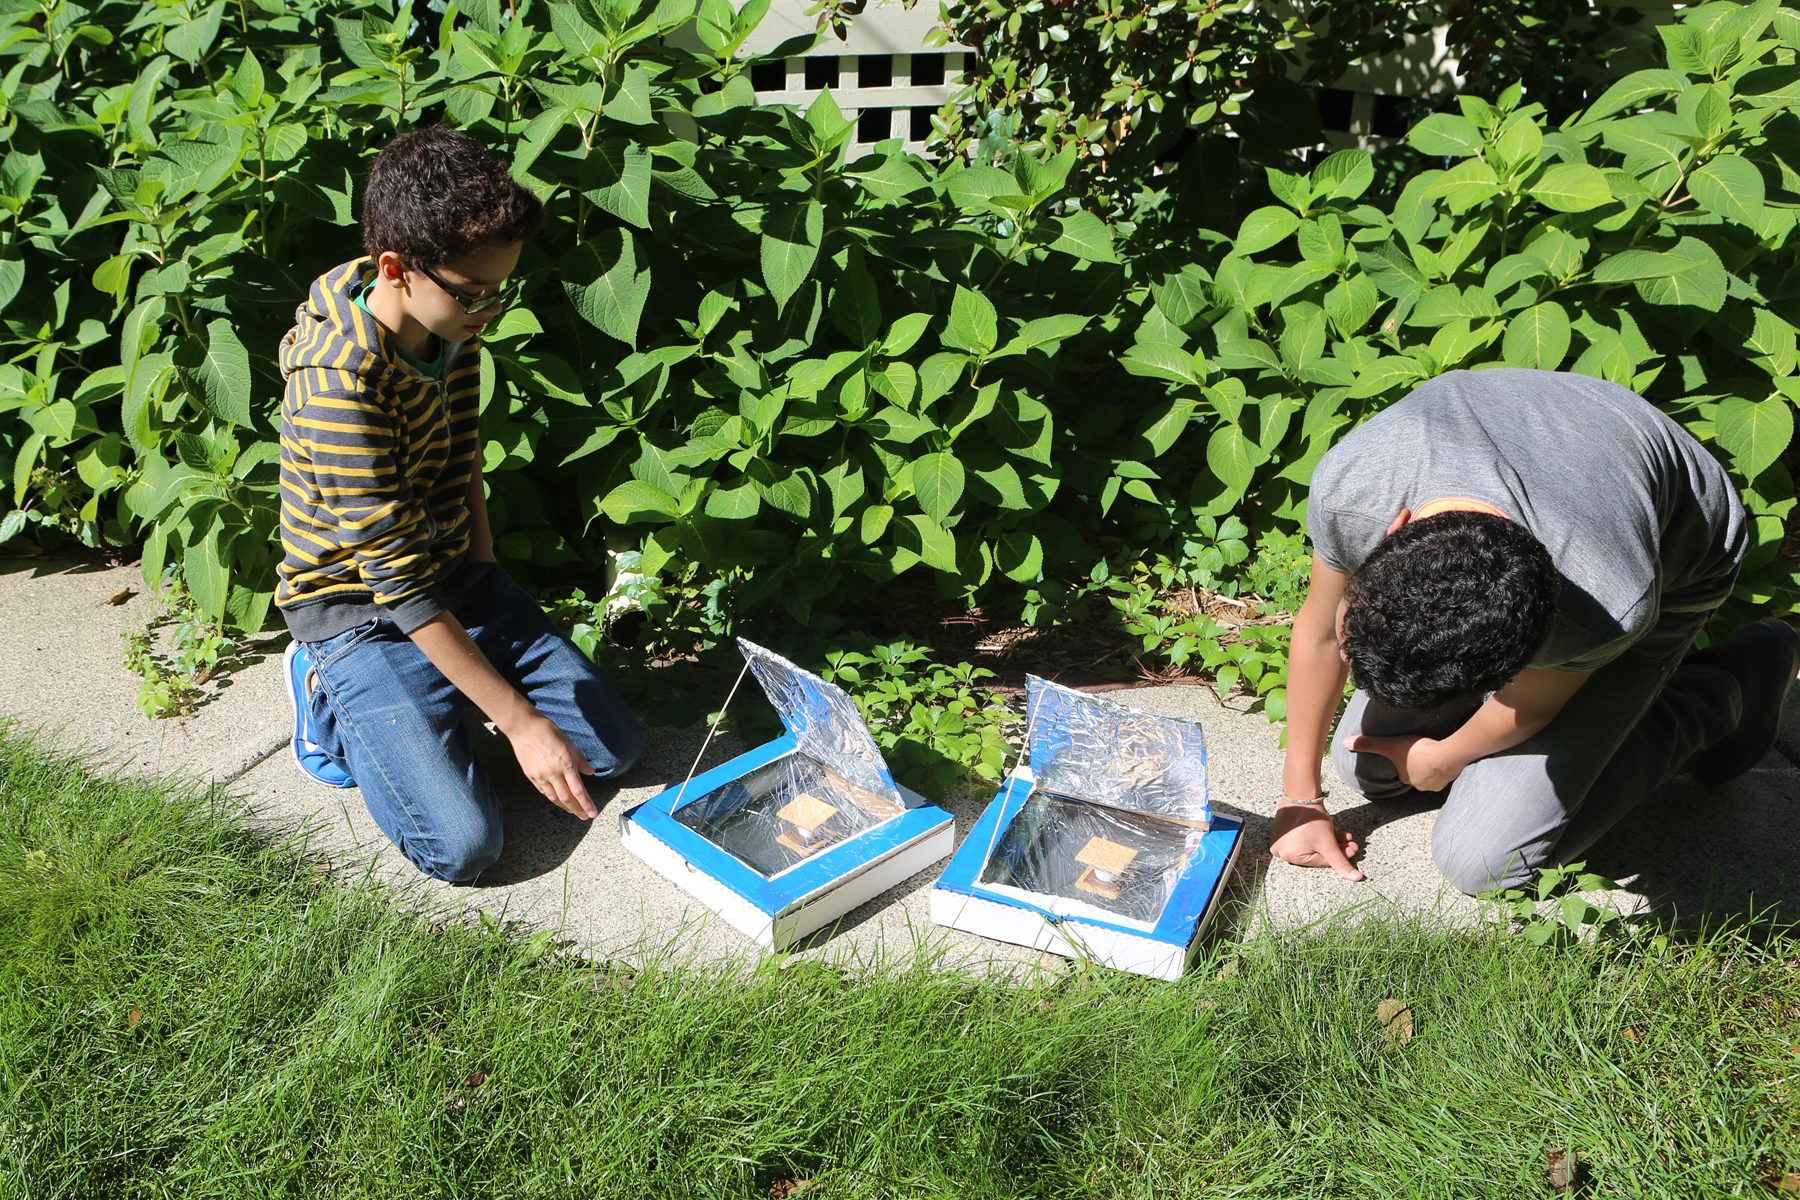
You are almost done! According to NREL, the oven needs to sit at an angle facing the sun directly so you’ll need to make a prop. You could probably just use a book or something under the hinged side of the oven. However, I missed this when I read the directions and we just put it flat on the ground. The flap of the box top needs to be propped open—a dowel or ruler works great. We used a wooden skewer that I broke the sharp point off of. This way you can change the amount of sunlight striking the oven window. Play with the angle of the flap to see how much sunlight you can get to reflect on the food.
Check every once in a while to see how well your food is being heated by solar thermal energy. If you’re is interested in finding out how the sun cooked your food, go to http://www.nrel.gov/ NREL’s website has great information on solar energy and many other sources of renewable energy.
Solar Oven from Kitchen Science Lab for Kids (Quarry Books)
Our KidScience app is now available on the App Store, making it easy for kids of all ages to do science anywhere, any time, or to check out KidScience watch-and-do videos and learn a little science when they (or you) need a little portable screen time.
Let us know how you like it. It’s for you!
Here’s the scoop: If you’re ready to keep the kids busy this summer doing fun, educational projects without shopping trips and complicated directions, you’ll be as excited as we are that KidScience Premium, based on Kitchen Pantry Scientist science projects, has arrived.
Available for iphone, ipod touch and ipad, KidScience Premium brings entertainment and education to your fingertips with a continually updated list of experiments to choose from using things you already have on hand. It includes both photos and watch-and-do videos that make it easy for kids to do projects on their own or you can have fun doing projects together.
A free version of the KidScience app is on the way and will include all the same experiments and photos, but have limited free videos. I’ll let you know when it joinsKidScience Premiumon the App Store.
There are other kid science apps, but only one KidScience app! You’ll know us by our bright orange and blue logo.
Want to do a science project for NASAthis summer? NASA scientists are very interested in learning more about how clouds affect Earth’s climate and you can help them collect data!
Although satellites can look down on the earth and study cloud cover, it can be difficult for them to distinguish clouds from other white surfaces, including snow and ice. Using your eyes, you can observe the clouds over your head within 15 minutes of the time a NASA satellite passes over to confirm what it sees from space.
On another note, our tadpoles are growing legs. We’ll have to put them in a taller container soon so I don’t come down some morning to find frogs hopping around our kitchen.
Our viewer is working really well! See Venus? We put a piece of paper behind the binoculars to get a bigger dark area on our viewer.
Although our pinhole viewers were great for watching the solar eclipse a few weeks ago, I was hoping to get a bigger projection of the sun’s image to watch the transit of Venus. (Venus is approximately the same size as earth and will be harder to see as it passes in front of the sun.)
With a pair of binoculars and a tripod, you can project the sun’s image on a piece of white paper so that it’s large enough to see even some sunspots. DO NOT LOOK AT THE SUN THROUGH THE BINOCULARS!!! Simply attach them to your tripod so that the eyepieces are pointing away from the sun and the bigger ends are pointing toward the sun. We used duct tape. The sun should be behind the binoculars.
Hold up a piece of paper and adjust the angle of the binoculars on the tripod until you see double suns (there are 2 lenses) appear on your paper. If you can, adjust the angle further so that one of the images appears in the middle of the shadow of the binoculars. This will make it easier to see. You’ll notice that the further from the binoculars you hold the paper, the bigger the image will appear. It will get out of focus if you hold it too far away though.
We taped our white paper to a shoebox that we’ll be able to set on something when we watch the transit and won’t have to hold it the entire time!
The kids and I have been keeping an eye on a local pond, and this week we were rewarded with the sight of tadpoles dotting the sand at the bottom like a swarm of commas. We pulled out a butterfly net, scooped up a bucket of pond water, and gently snagged a few of the frogs-to-be. Some tiny plants, baby fish, snails and a waterbug hitched a ride as well.
At home, we put our pollywogs in a bigger container (rinsed well with distilled water,) added more pond water and put some rocks in our tadpole habitat to make our visitors feel at home. A few times a week, we’ll siphon out some of the old water and add more pond water to keep our tadpoles healthy as they grow and change. When they’re almost frogs, we’ll lower the water level and be sure there are plenty of rocks for them to hop onto when metamorphosis is complete.
I’ll post a video of our tadpoles every so often so you can see how they’re changing. Eventually, we’ll release our frogs, along with the other plants and critters in our habitat, back into the pond where we found them!
Can you find some tadpoles of your own? If you do, be sure to keep them in pond/lake water and change it frequently. Chlorinated water will kill them! We’re feeding our tadpoles frog pellets and a little fish food, but I suspect they’re mostly eating algae in the pond water.
Summer is a great time to start a science notebook! Not only can you keep track of experiments, you can take your notebook with you when you go hiking, camping, to the lake, or on even on a walk through the neighborhood. How many different kind of trees do you see? Draw a bug, leaf or mushroom that you’re not familiar with and see if you can identify it when you get home. Walk the same trail every few weeks and record how the plants and animals you see change with through the season.
Note for parents: It is amazing how well kids observe the world. Mine notice things that I have become completely oblivious to, after years of exposure. If you look closely at children’s drawings, you’ll see that seemingly insignificant details achieve huge scale. Very young kids don’t understand perspective, but they also haven’t put on blinders the way most adults have.
A science notebook is a great way for kids to illustrate and catalog their discoveries and observations. You can buy a lab notebook, but it work equally well to just use a spiral notebook, a loose leaf binder they can add pages to, or a composition book. You can even staple some pieces of paper together and write “Lab Notebook” on the cover!
Send your kid outside to draw a bug or plant. Have them keep tally of how many birds they hear sing in five minutes. In the fall, they can press leaves in their notebook. If it’s rainy, have them find a rock or shell from one of their collections and draw it. My son loves to copy facts about his favorite animals from National Geographic!
Do a science experiment and have them draw a picture of what they did and make a chart of the results (there are tons of easy experiments on this website.) Anything they can think of is great. Be sure to have them or help them write the date on each page they write something on. Tell them this is very important for a junior scientist! Older kids will be able to write great descriptions and even take photos to tape into their notebooks.
Someday, far in the future, your kid’s lab notebook may help them remember what it is like to look at the world through a child’s eyes.
Our family trekked to the school parking lot to watch the Annular Eclipse last night. The kids ran and played, checking in every few minutes to peer through their solar viewers as the sun went from full circle to crescent-shaped. It was a blast!
Here’s what we saw in our shoebox viewers before the sun disappeared behind the trees.
Some teenagers showed up at the parking lot with a telescope and projected the sun on a piece of cardboard. It was really cool, and the image was big enough that you could see a sunspot!
Hold on to your shoe box viewers! On June 5th, Venus will pass between Earth and the sun. I’ll find out more about it and let you know how to watch it!
The word lever comes from the french verb “lever” which means “to raise.” A lever amplifies force, so you can lift something heavier with a lever than you would be able to lift without a lever. Scientists think the ancient Egyptians used levers to lift huge stones.
Levers are simple machines that require only a beam (a long piece of wood, metal or steel) and a fulcrum, the support on which a lever pivots. It’s easy to make your own lever using a can, a rag, a yardstick and some sticks of butter. We cut our sticks of butter in half, but you don’t have to.
The can is your fulcrum and you can keep it from rolling by placing it on a folded rag. Balance your yardstick (your beam) on the can. It’s nice to do this experiment with a yardstick, since you can use the markings to find the halfway point.
Place a stick of butter on either side of the ruler, halfway between the fulcrum (the can) and the end of the ruler. Is it balanced?
Here’s the neat part. Slide one of the sticks of butter all the way to the end of the ruler. What happens? Put a second stick of butter on the stick of butter that you left in its original position. Now is it balanced? You can move it a little if it’s not perfect, since it’s hard to get the can exactly in the center.
See how one stick of butter further from the fulcrum (the can) can easily hold the weight of two sticks of butter that are positioned closer to the can? This demonstrates how a lever can help you lift something heavy.
What happens if you move the two sticks of butter even closer to the fulcrum? Can you add more butter and make it balance?
The mathematical expression for how a lever works is M=f times d. M is the turning force, or torque, f is the force you apply and d is the perpendicular distance between the force and the fulcrum. Basically, this “law of the lever” tells you exactly what you see: that the further you are from the fulcrom, the more weight you can lift using a lever. (So one stick of butter at the end of a ruler can lift two or more sticks of butter on the other side of the fulcrum, depending on how far they are from the fulcrum.) You can also see why a longer lever might work better than a short lever.
The famous Greek mathematician Archimedes was also a physicist, engineer, inventor and astronomer, and he is credited with first explaining how levers work. Later, in the renaissance, levers were classified as one of six simple machines, which can be combined with other simple machines and devices to form more complicated machines, like a bicycles. What levers can you think of on a bike?
I don’t have Archimedes to help me out with physics, but I’m lucky enough to have a dad who is physicist and came up with the idea for this project. Not only is he my scientific consultant, but he’s the one who got me interested in science in the first place.
Next to the kitchen table, my back yard (or front yard) is my favorite science laboratory. It has the added bonus of being easy to clean up. For this fun, messy experiment, a hose and a few paper towels do the trick. Make your kids clean up whatever mess they make!
My dad, who is a physicist, told me about this great demonstration. It teaches kids a little bit about motion and force while letting them do something that they are rarely, if ever, allowed to do- throw eggs! All you need is a sheet, some clothespins or string, raw eggs, and some paper. (You could use newspaper or easel paper. It is just to make cleaning up easier.) I also used a portable table turned on its side as a wall, but you could just use a wall or the side of a garage and have your child hose it off when you are finished.
Hang the sheet up from a tree, if you have one. If you don’t have a tree, you could hang it from anything else, or have two tall children or adults hold it. Then have two kids hold the bottom of the sheet up, or tie it to chairs so it makes a J shape when you view it from the side. The idea is to keep the eggs from hitting the ground and breaking.
An object in motion wants to remain in motion. To stop an egg moving through the air, you have to apply force to the egg. In this case, the force will be applied by a hanging sheet, or a wall.
Throw a raw egg at the sheet as hard as you can. It won’t break because the sheet slows the movement of the egg as it comes to a stop. The law of motion says that the faster you change the speed of an object, the greater the force applied to the object will be. When you change the speed of the egg slowly, like the sheet does, it lessens the force applied to the egg and the egg remains intact.
Now, put some paper on a wall (or table like we did.) Throw an egg at the wall. You’ll see what happens when something stops fast. Once again, the law of motion rules. When you change the speed of the egg quickly, it stops with a lot of force. SPLAT. This is my kids’ favorite part.
This is why they put airbags in cars. If a car is moving and hits something, causing it to stop very quickly, the airbag act like the sheet, slowing the person in the car down SLOWLY and greatly reducing the amount of force they might hit the dashboard with.
Record your results in yourscience notebook, if you want to. Finally, be sure to wash your hands when you’re finished experimenting and cleaning up. Raw eggs can have bacteria called Salmonella living in them and on them. Have fun!
On April 21st (the day before Earth Day), the Science Museum of Minnesota will celebrate Earth Day and open their newFuture Earthexhibit to the public. Exploring the amazing planet that nurtures and sustains us, the thought-provoking exhibit examines climate science, looks at the impact of humans, and considers Earth’s future. Today’s young people will play an essential role in determining that future, and it’s essential that we raise our kids to be critical thinkers, as well as creators and innovators! Abby Harrison, a.k.a. Astronaut Abby, wants to be the first person on Mars and she visited Kare11 Sunrise news with me to talk about NASA and Earth Day.
Every time you encourage a kid to ask “why?” or get them out into nature, you’re engaging their scientific brains! When they see you recycle, turn out the lights, walk instead of drive, or pick up a piece of trash, you’re teaching them lessons about stewardship and responsibility.
Here are some easy experiments that would be fun to do with your kids to help celebrate Earth Day. If you click on the experiment name, it will take you to directions and photos!
Window Sprouts: Plant a bean in a plastic baggie with a damp paper towel and see how plants need only water and air to sprout roots and leaves. Here’s ashort video demonstrating how to put a window garden together.
Homemade Solar Oven: Using a pizza box, aluminum foil, plastic wrap, and newspaper, you can harness the sun’s energy to cook your own S’mores! Try it!
Nature Walk Bracelets:Wrap some duct tape around your wrist (inside out) and take a walk, sticking interesting natural objects like leaves and flowers to your bracelet. It’s a great way to get outdoors and engage with nature!
Carbon Dioxide and Ocean Acidity: See for yourself how the carbon dioxide in your own breath can make a water-based solution more acidic. It’s the same reason too much carbon dioxide in Earth’s atmosphere can be bad for our oceans.
Composting: Be a composting detective. Bury some things in your back yard (away from power cables) and dig them up in a few months to see how they look. Composting reduces methane gas emissions (a greenhouse gas) from dumps.
Diffusion and Osmosis: See for yourself how chemicals we add to water, put on our streets to melt ice, and spray on our lawns and crops can move into our soil, ground water, rivers, lakes and oceans.
Solar Water Purification: Another great illustration of the greenhouse effect and a fun experiment in general. Requires hot sun and some patience!
To continue to thrive, we’ll need countless innovations in energy, agriculture, health and environmental stewardship. Our children are our greatest natural resource, and we will depend on them to make a better future for us all. It’s up to us to nurture them, educate them, foster their innate sense of curiosity and fan their creative spark. Happy Earth Day!


