Category:Chemistry Experiments’
Holiday Break Science Experiments
- by KitchenPantryScientist
Snow, ice, wrapping paper and free time are abundant over the holidays. Here are a few fun experiments to fill the hours between celebrations. Click on the experiment name for directions.
Holiday Window Gellies: Kids of all ages love making these from gelatin and food coloring!
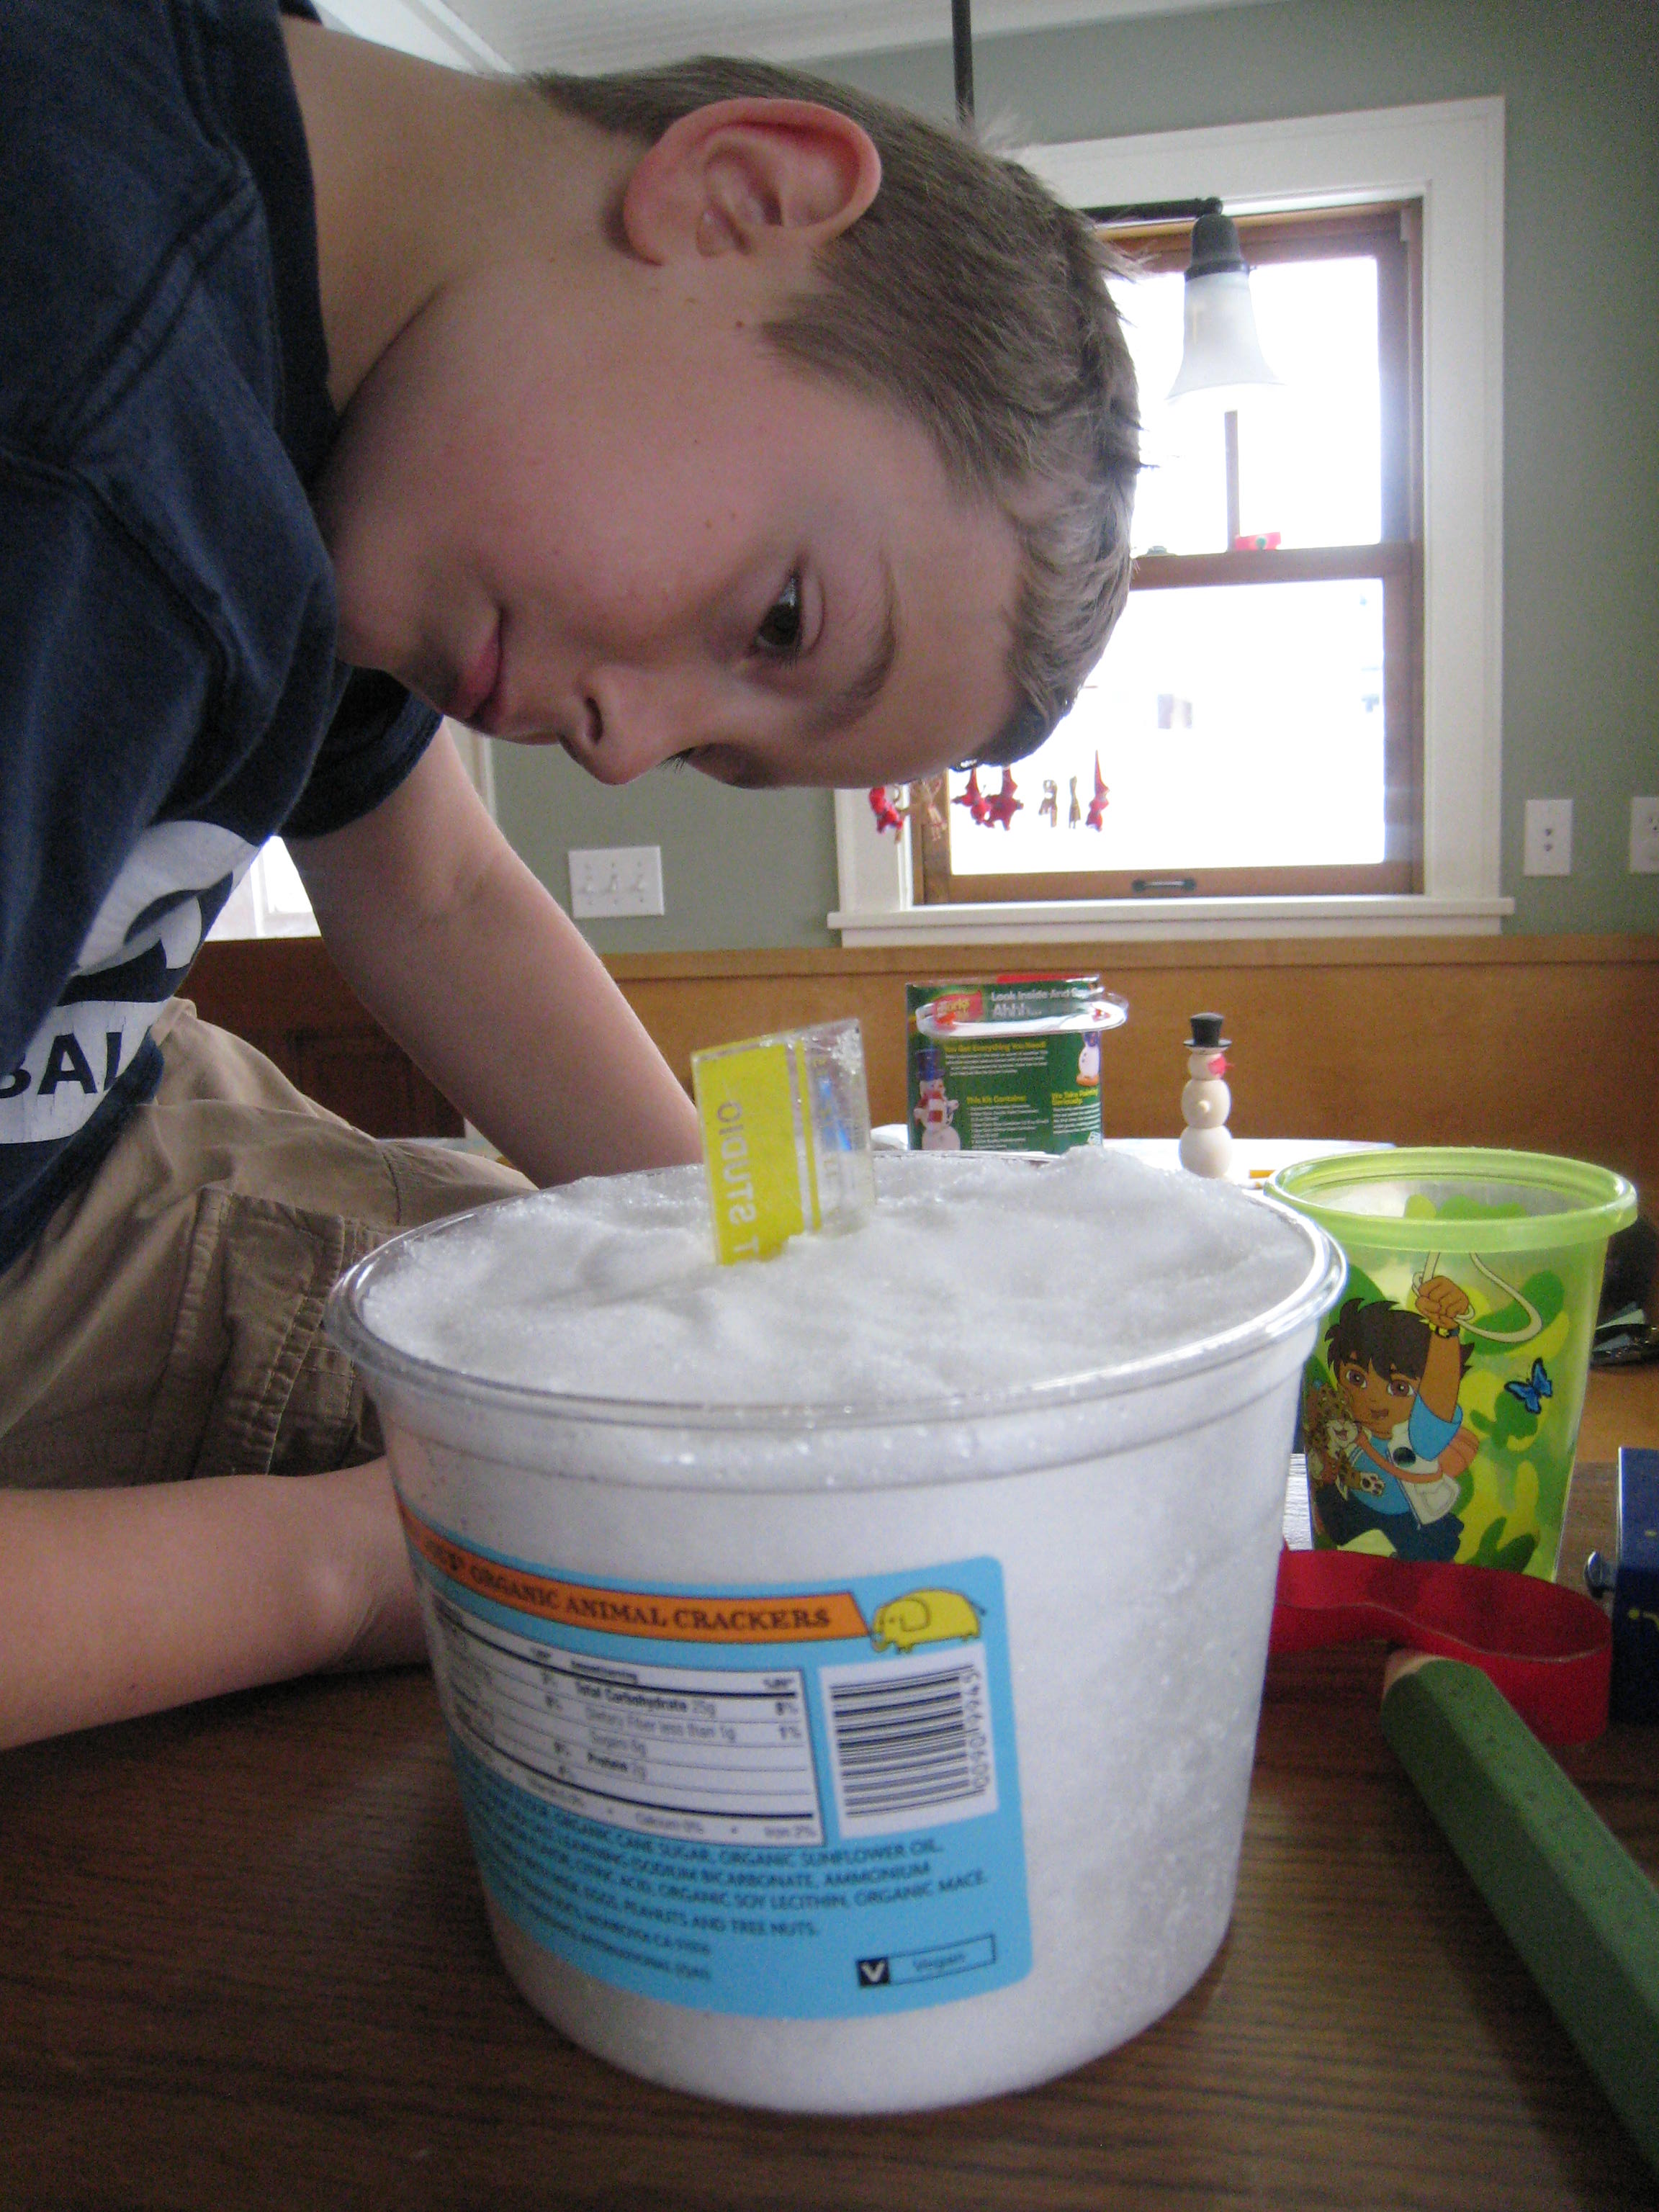
Snow Science: Melt snow to see how much water and dirt it contains.
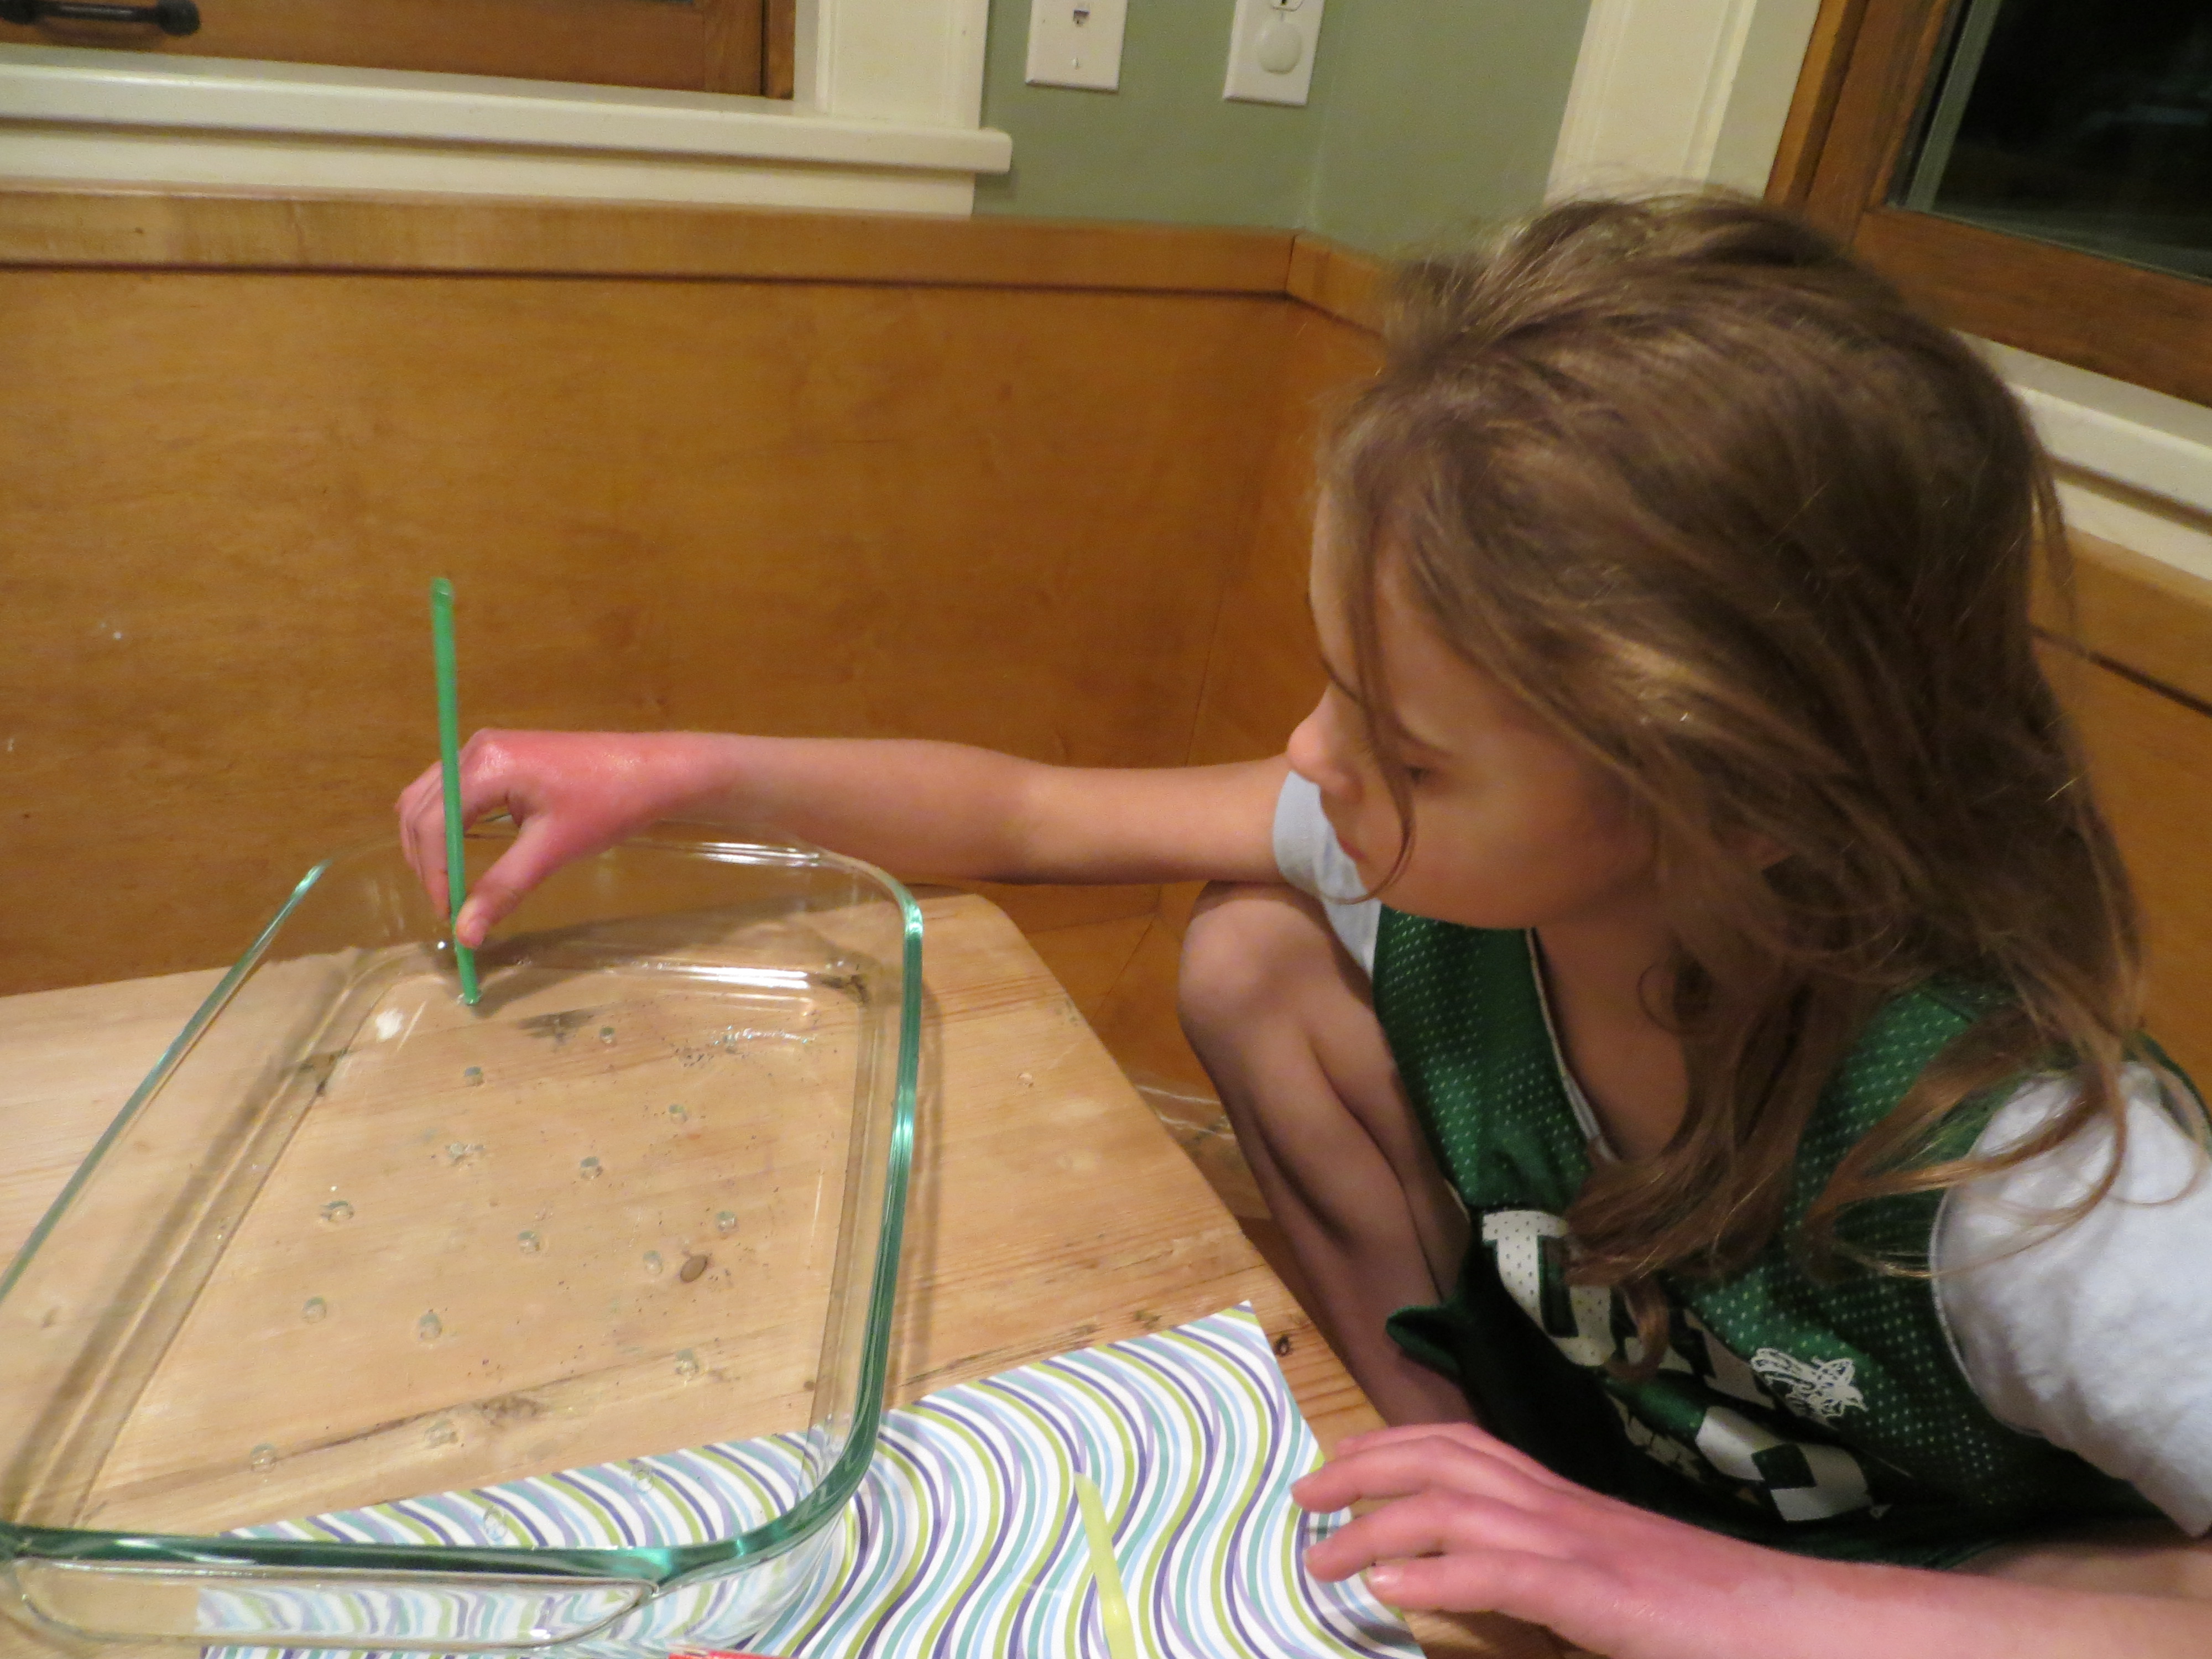
Magic Ice Experiment: Lift an ice cube from a glass of water using only a string and some salt.

Wrapping Paper Egg Drop: Have a contest to see who can engineer the best egg-protecting container from left-over boxes, wrappers and decorations.
Rock Candy: Grow your own sugar crystals on a stick. What happens if you add a little peppermint oil?
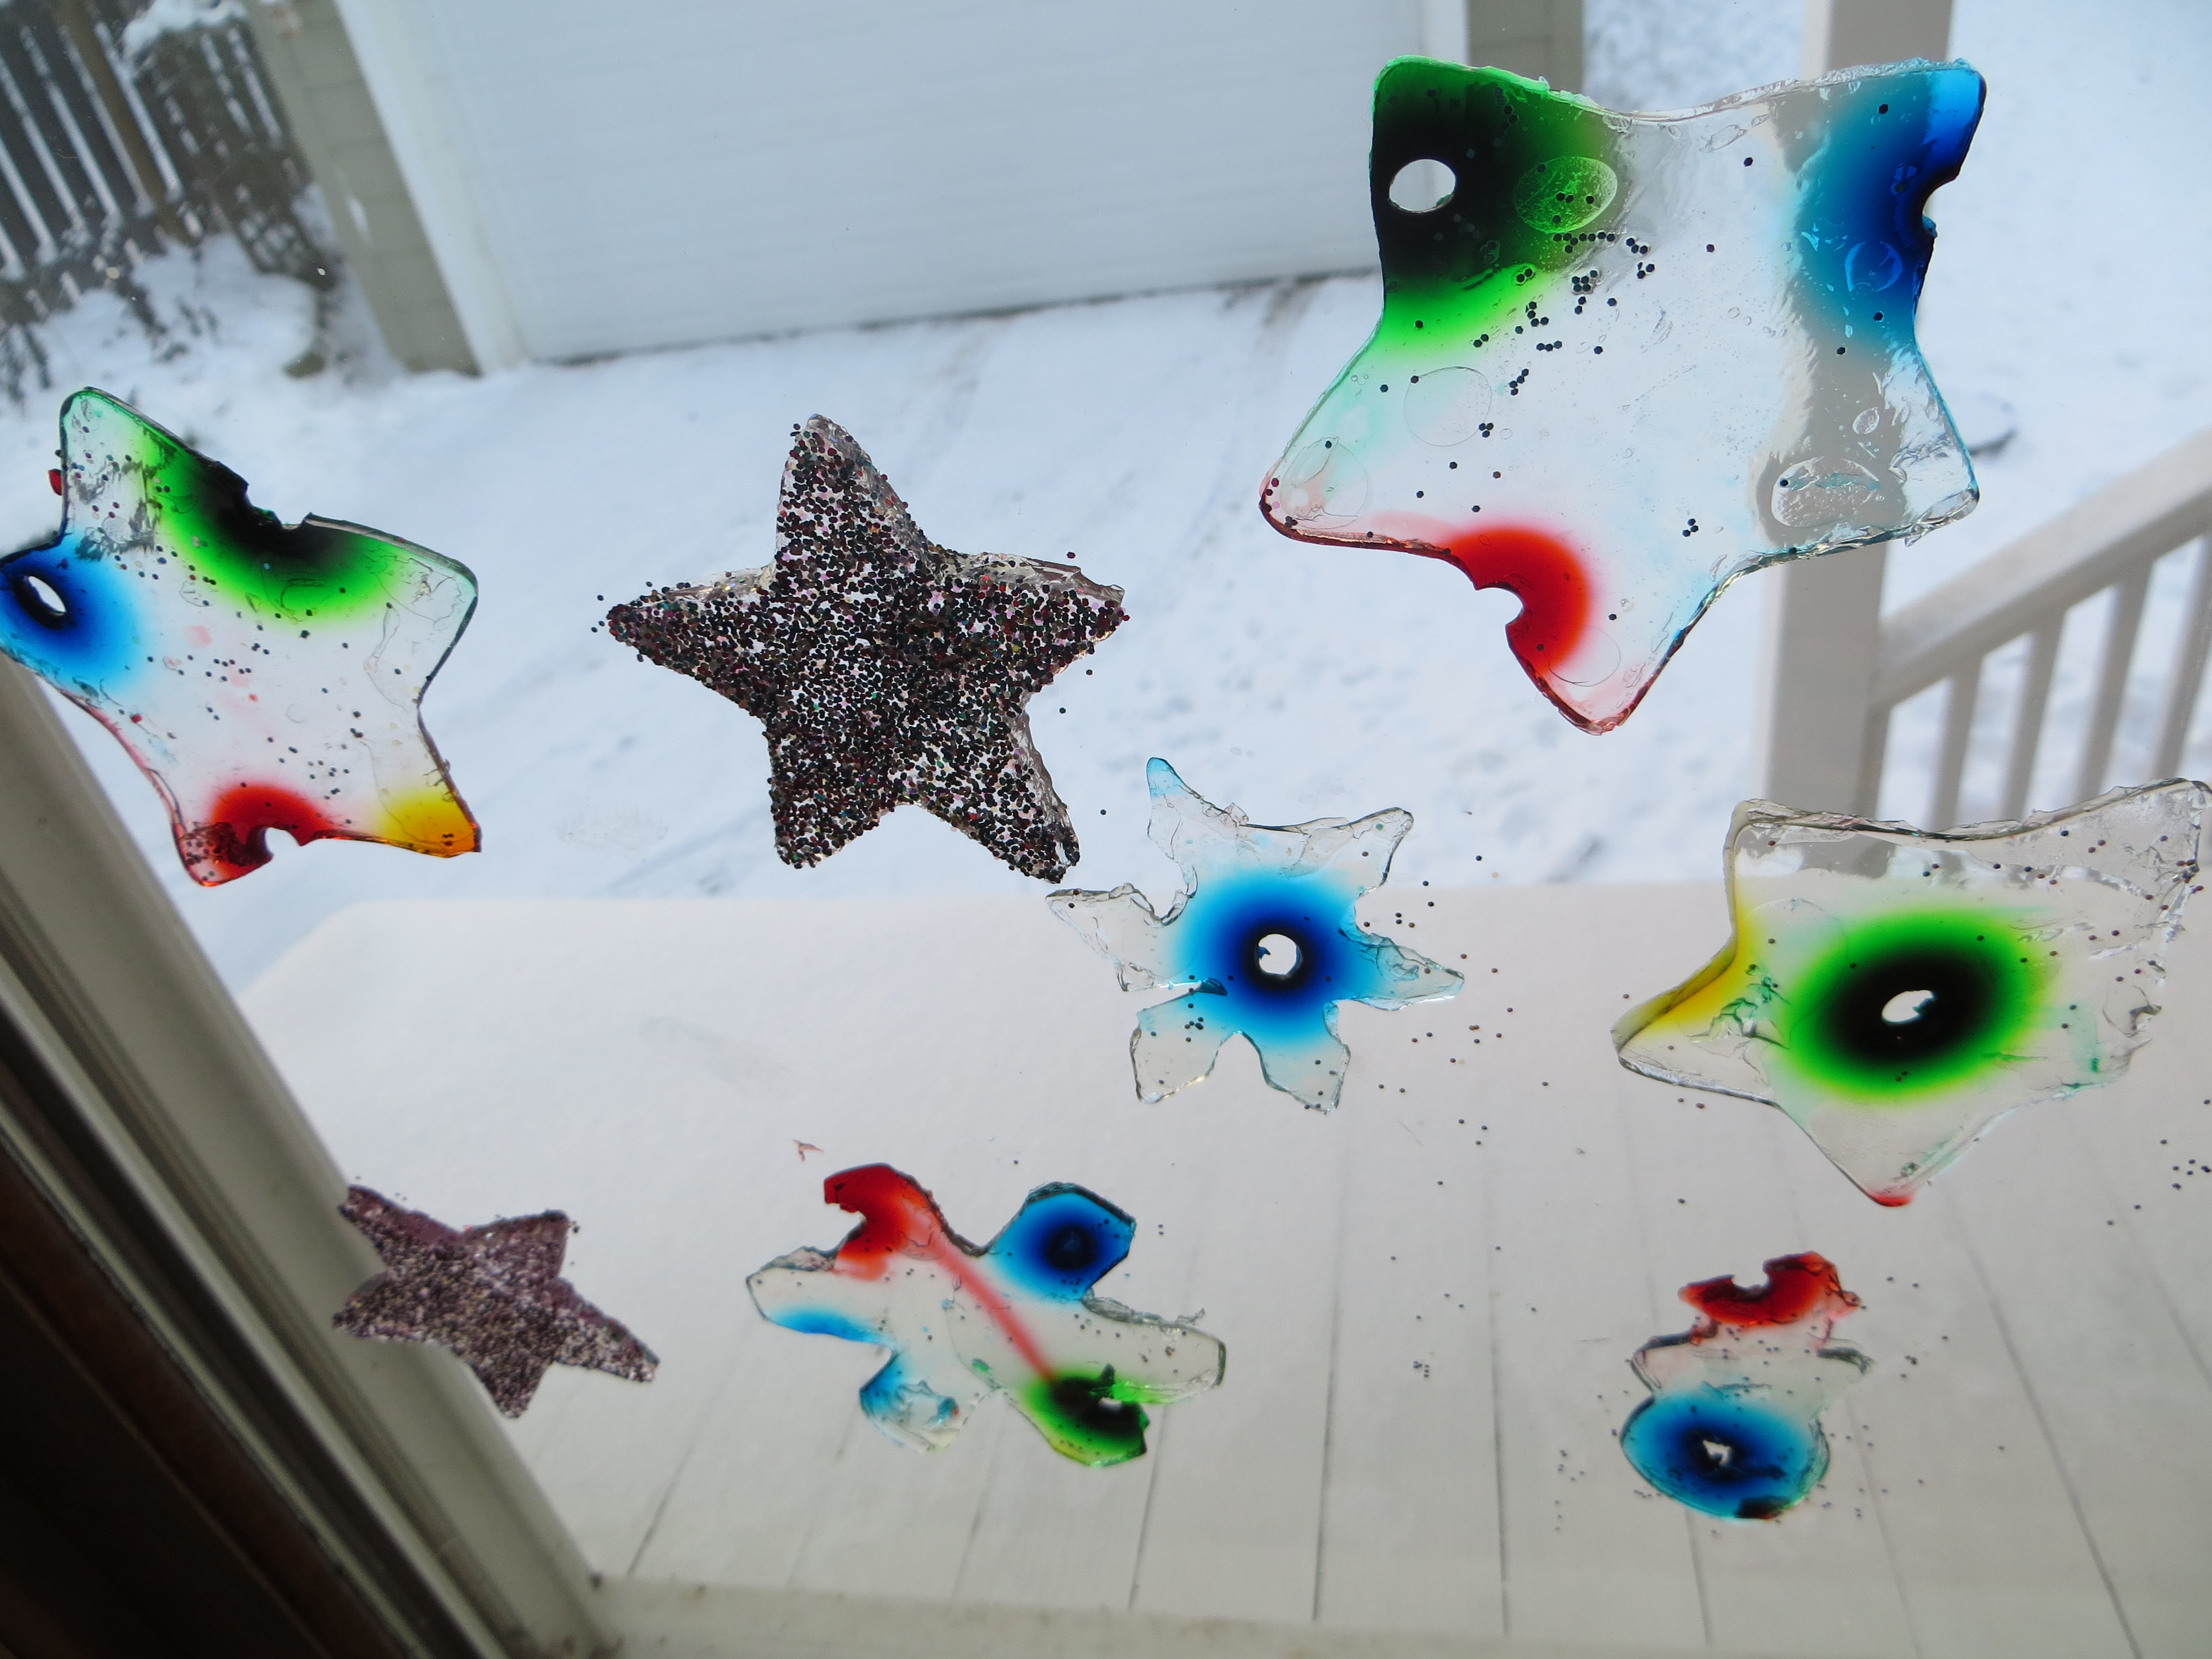
Homemade Sticky Window Gellies (Decorative Diffusion, Floatation and Evaporation Experiment)
- by KitchenPantryScientist
What happens when food coloring molecules move, or DIFFUSE through gelatin, the substance that makes jello jiggle?
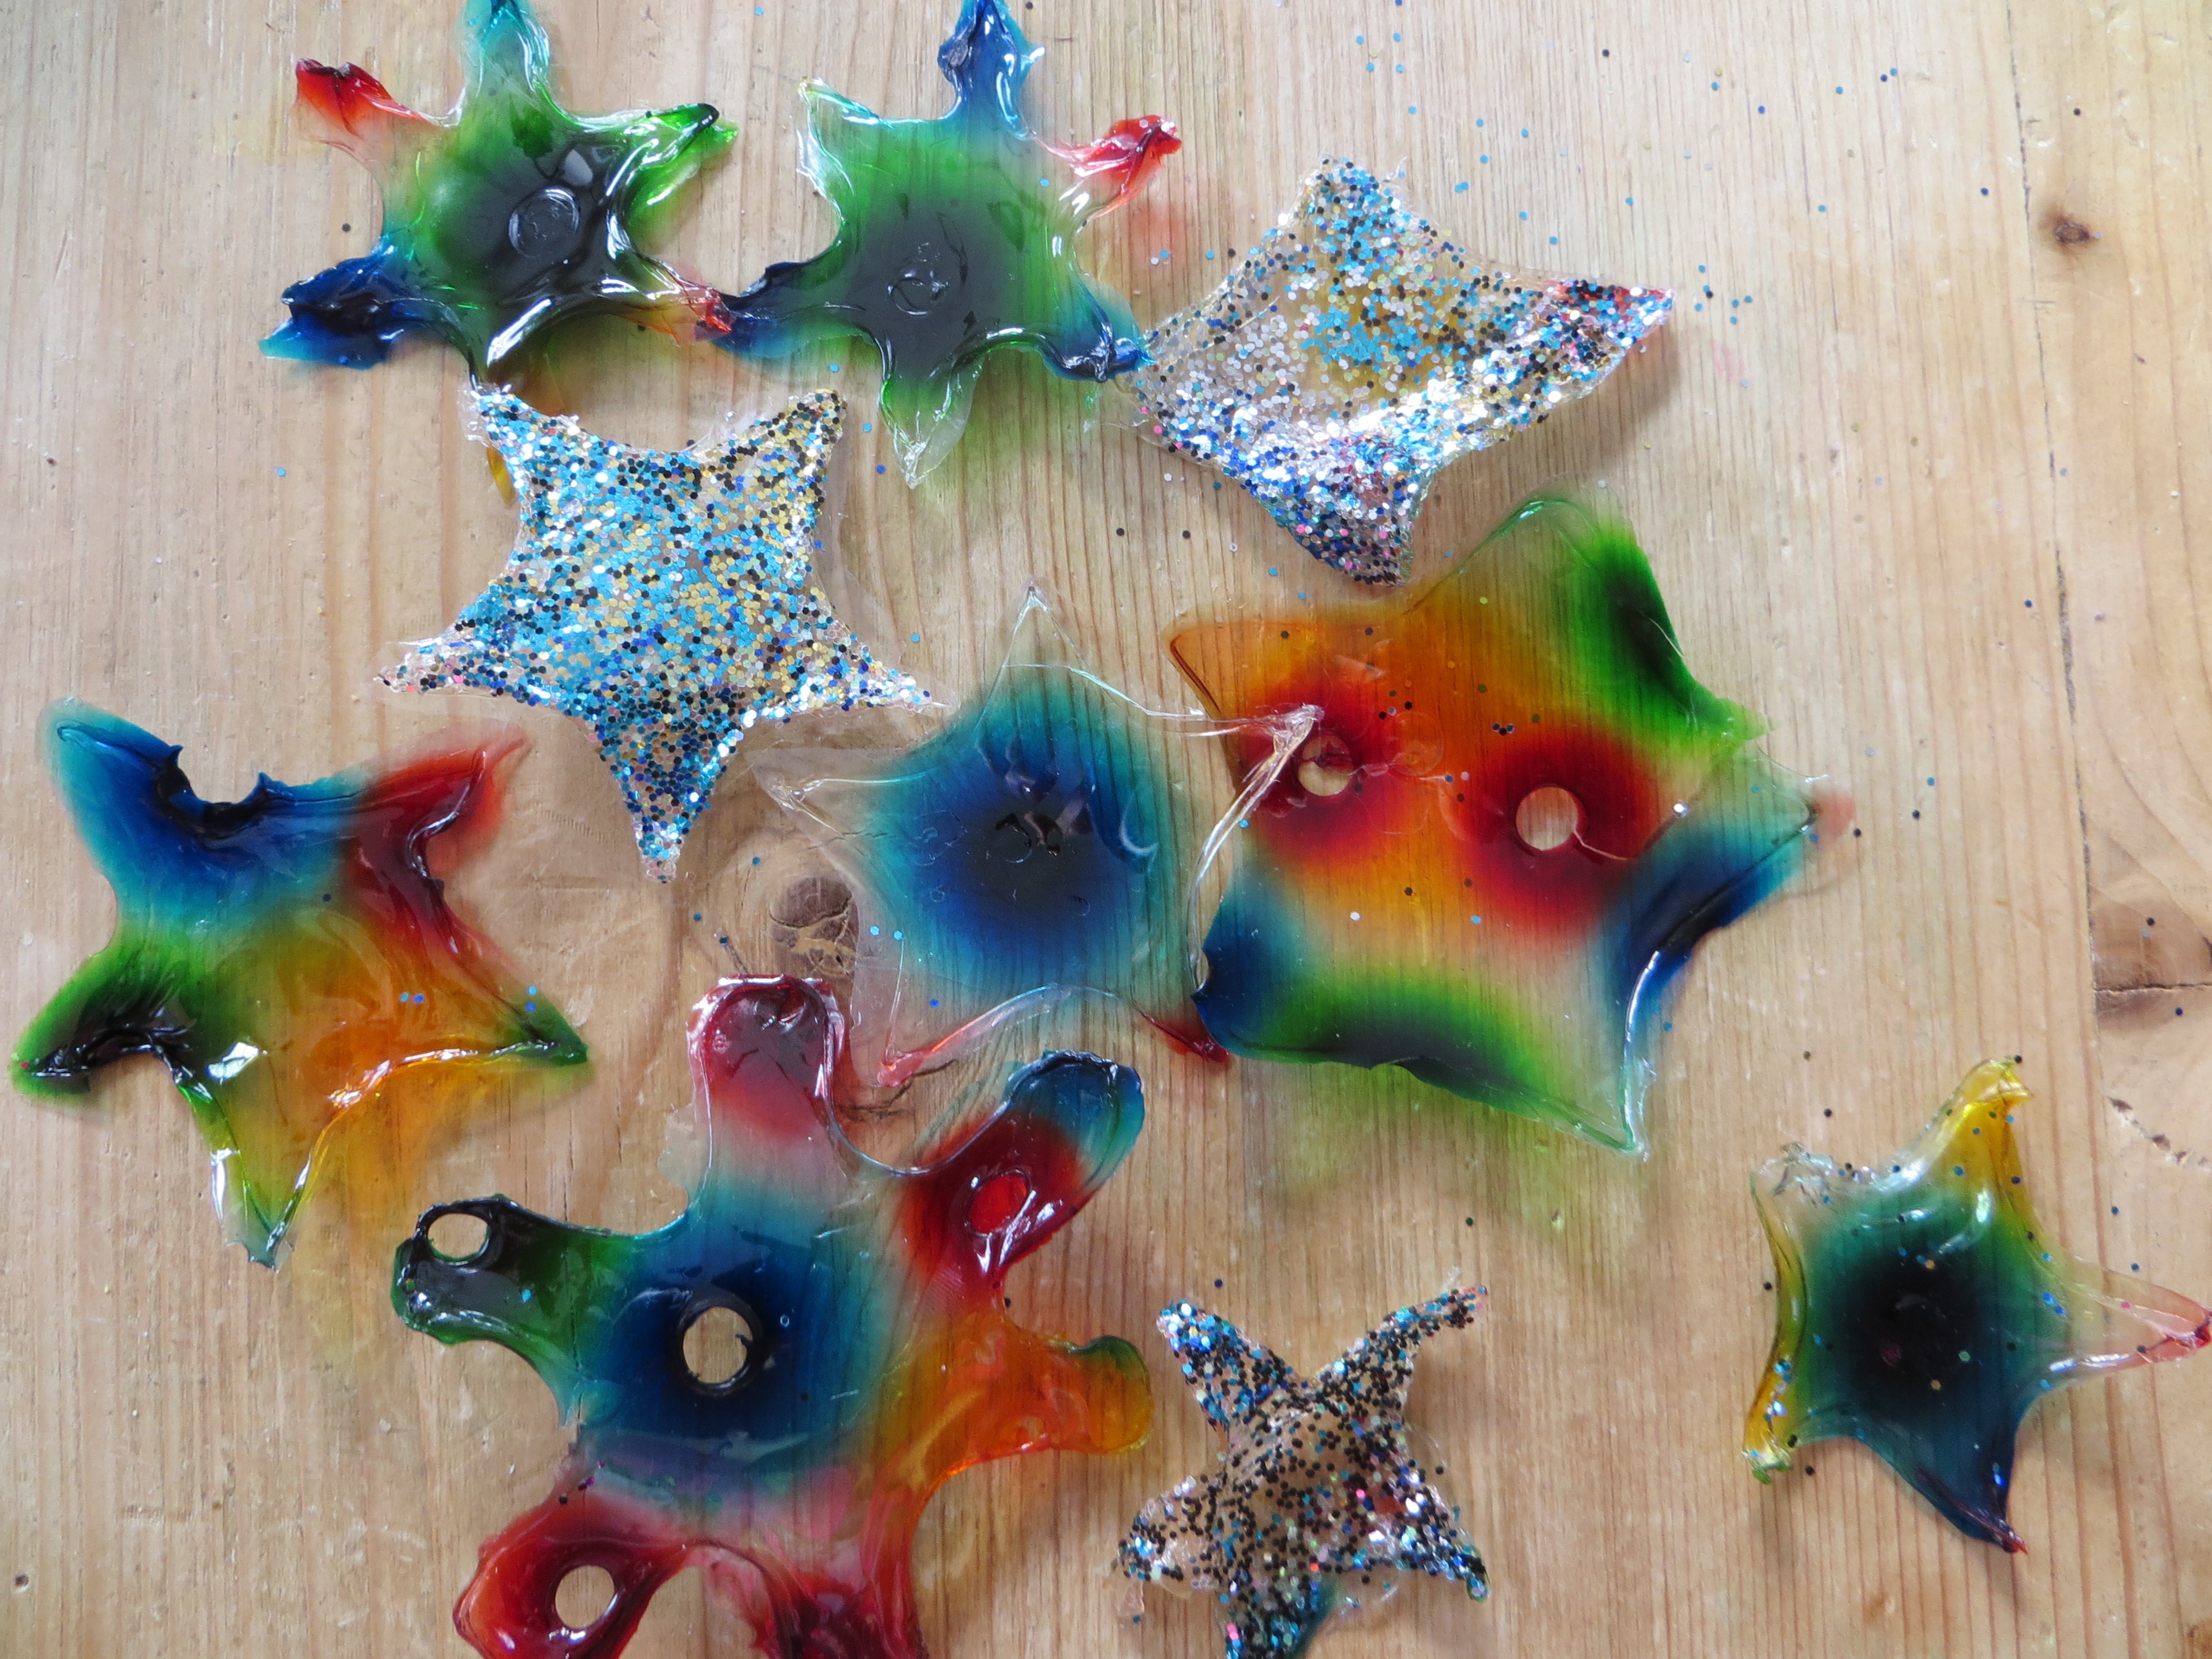
This creative science experiment that my kids and I invented lets you play with floatation physics by sprinkling glitter on melted gelatin, watch colorful dyes diffuse to create patterns and then use cookie cutters to punch out sticky window decorations. Water will evaporate from the gelatin, leaving you with paper-thin “stained glass” shapes.
You can watch us making them on Kare11 Sunrise News by clicking here.
You’ll need
-plain, unflavored gelatin from the grocery store or Target
-food coloring
–a drinking straw
-water
-a ruler
-glitter
*You can use the recipe below for two pans around 8×12 inches, or use large, rimmed cookie sheets for your gelatin. For a single pan, cut the recipe in half.
Step 1. Add 6 packs of plain, unflavored gelatin (1 oz or 28 gm) to 4 cups of boiling water. Stir well until all the gelatin has dissolved and remove bubbles with a spoon.
Step 2. Allow gelatin to cool to a kid-safe temperature. Pour the liquid gelatin into two large pans so it’s around 1-1.5 cm deep. It doesn’t have to be exact.
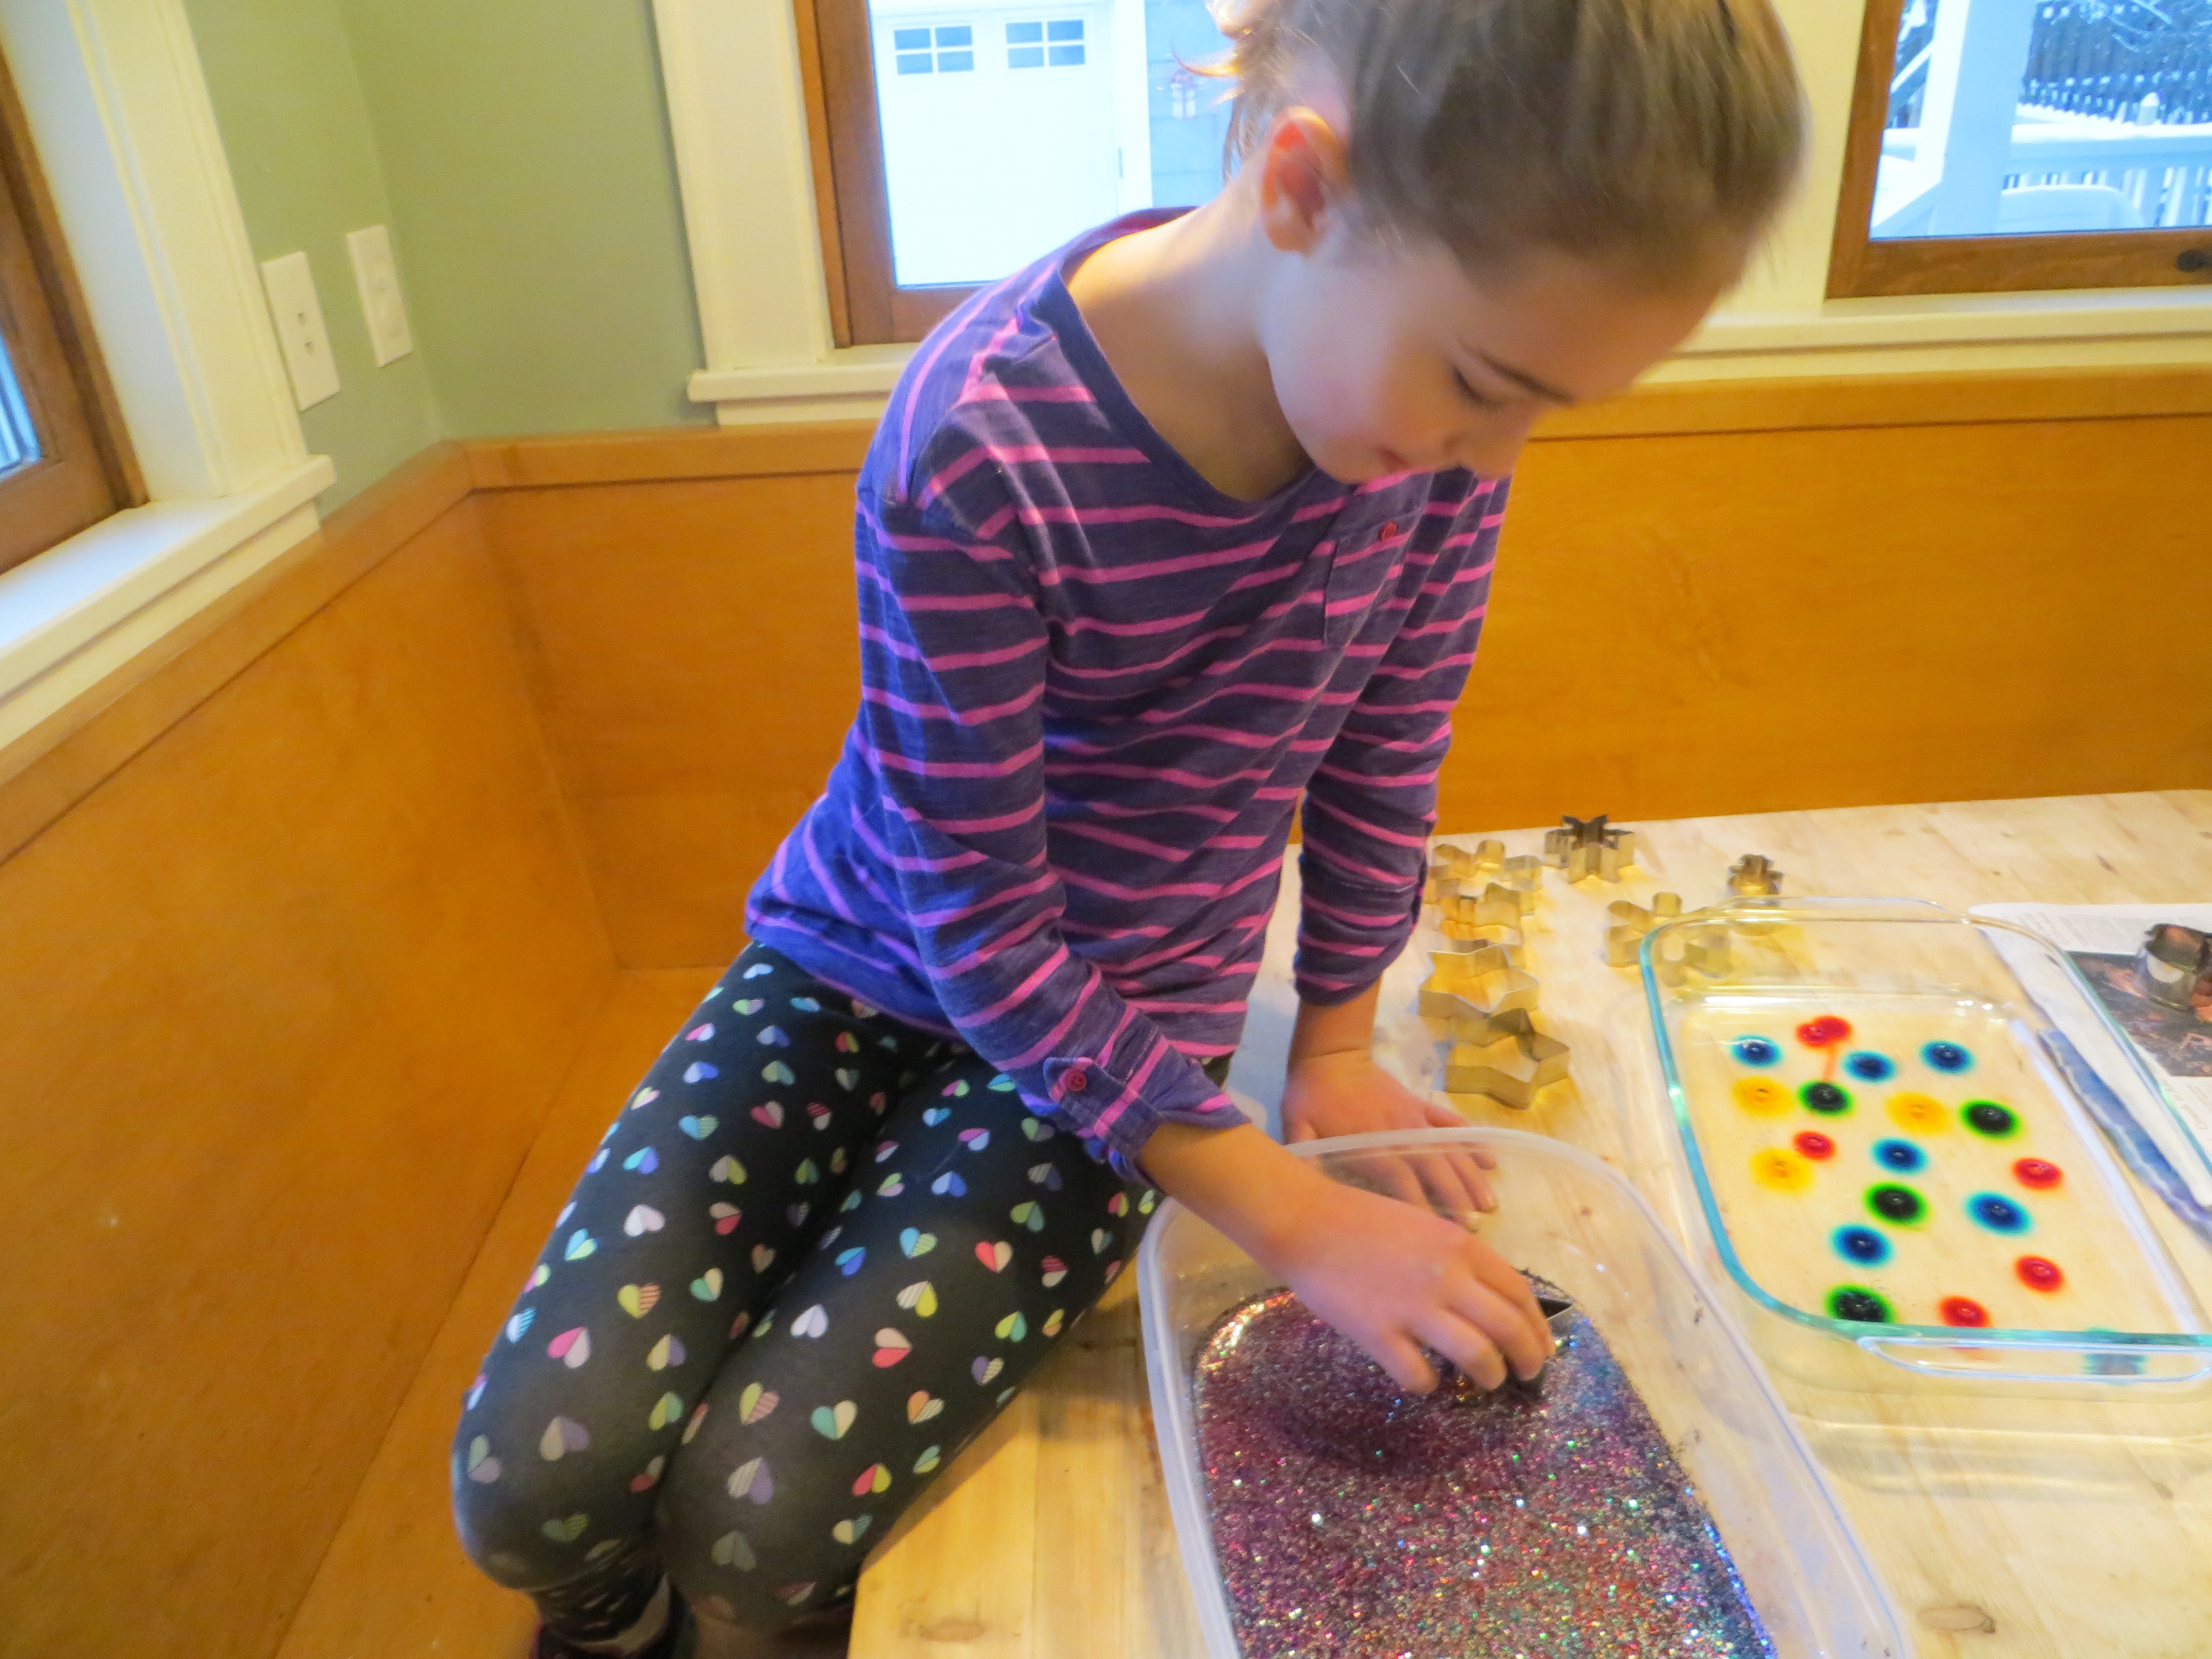
Step 3. Sprinkle glitter on the gelatin in one pan. What happens?

Step 4. Allow the gelatin to harden in both pans.
Step 5. In the pan with no glitter, use a straw to create holes in the gelatin, a few cm apart, scattered across the surface. It works best to poke a straw straight into the gelatin, but not all the way to the bottom. Spin the straw and remove it. Then, use a toothpick or skewer to pull out the gelatin plug you’ve created. This will leave a perfect hole for the food coloring. Very young children may need help.
Step 6. Add a drop of food coloring to each hole in the gelatin.
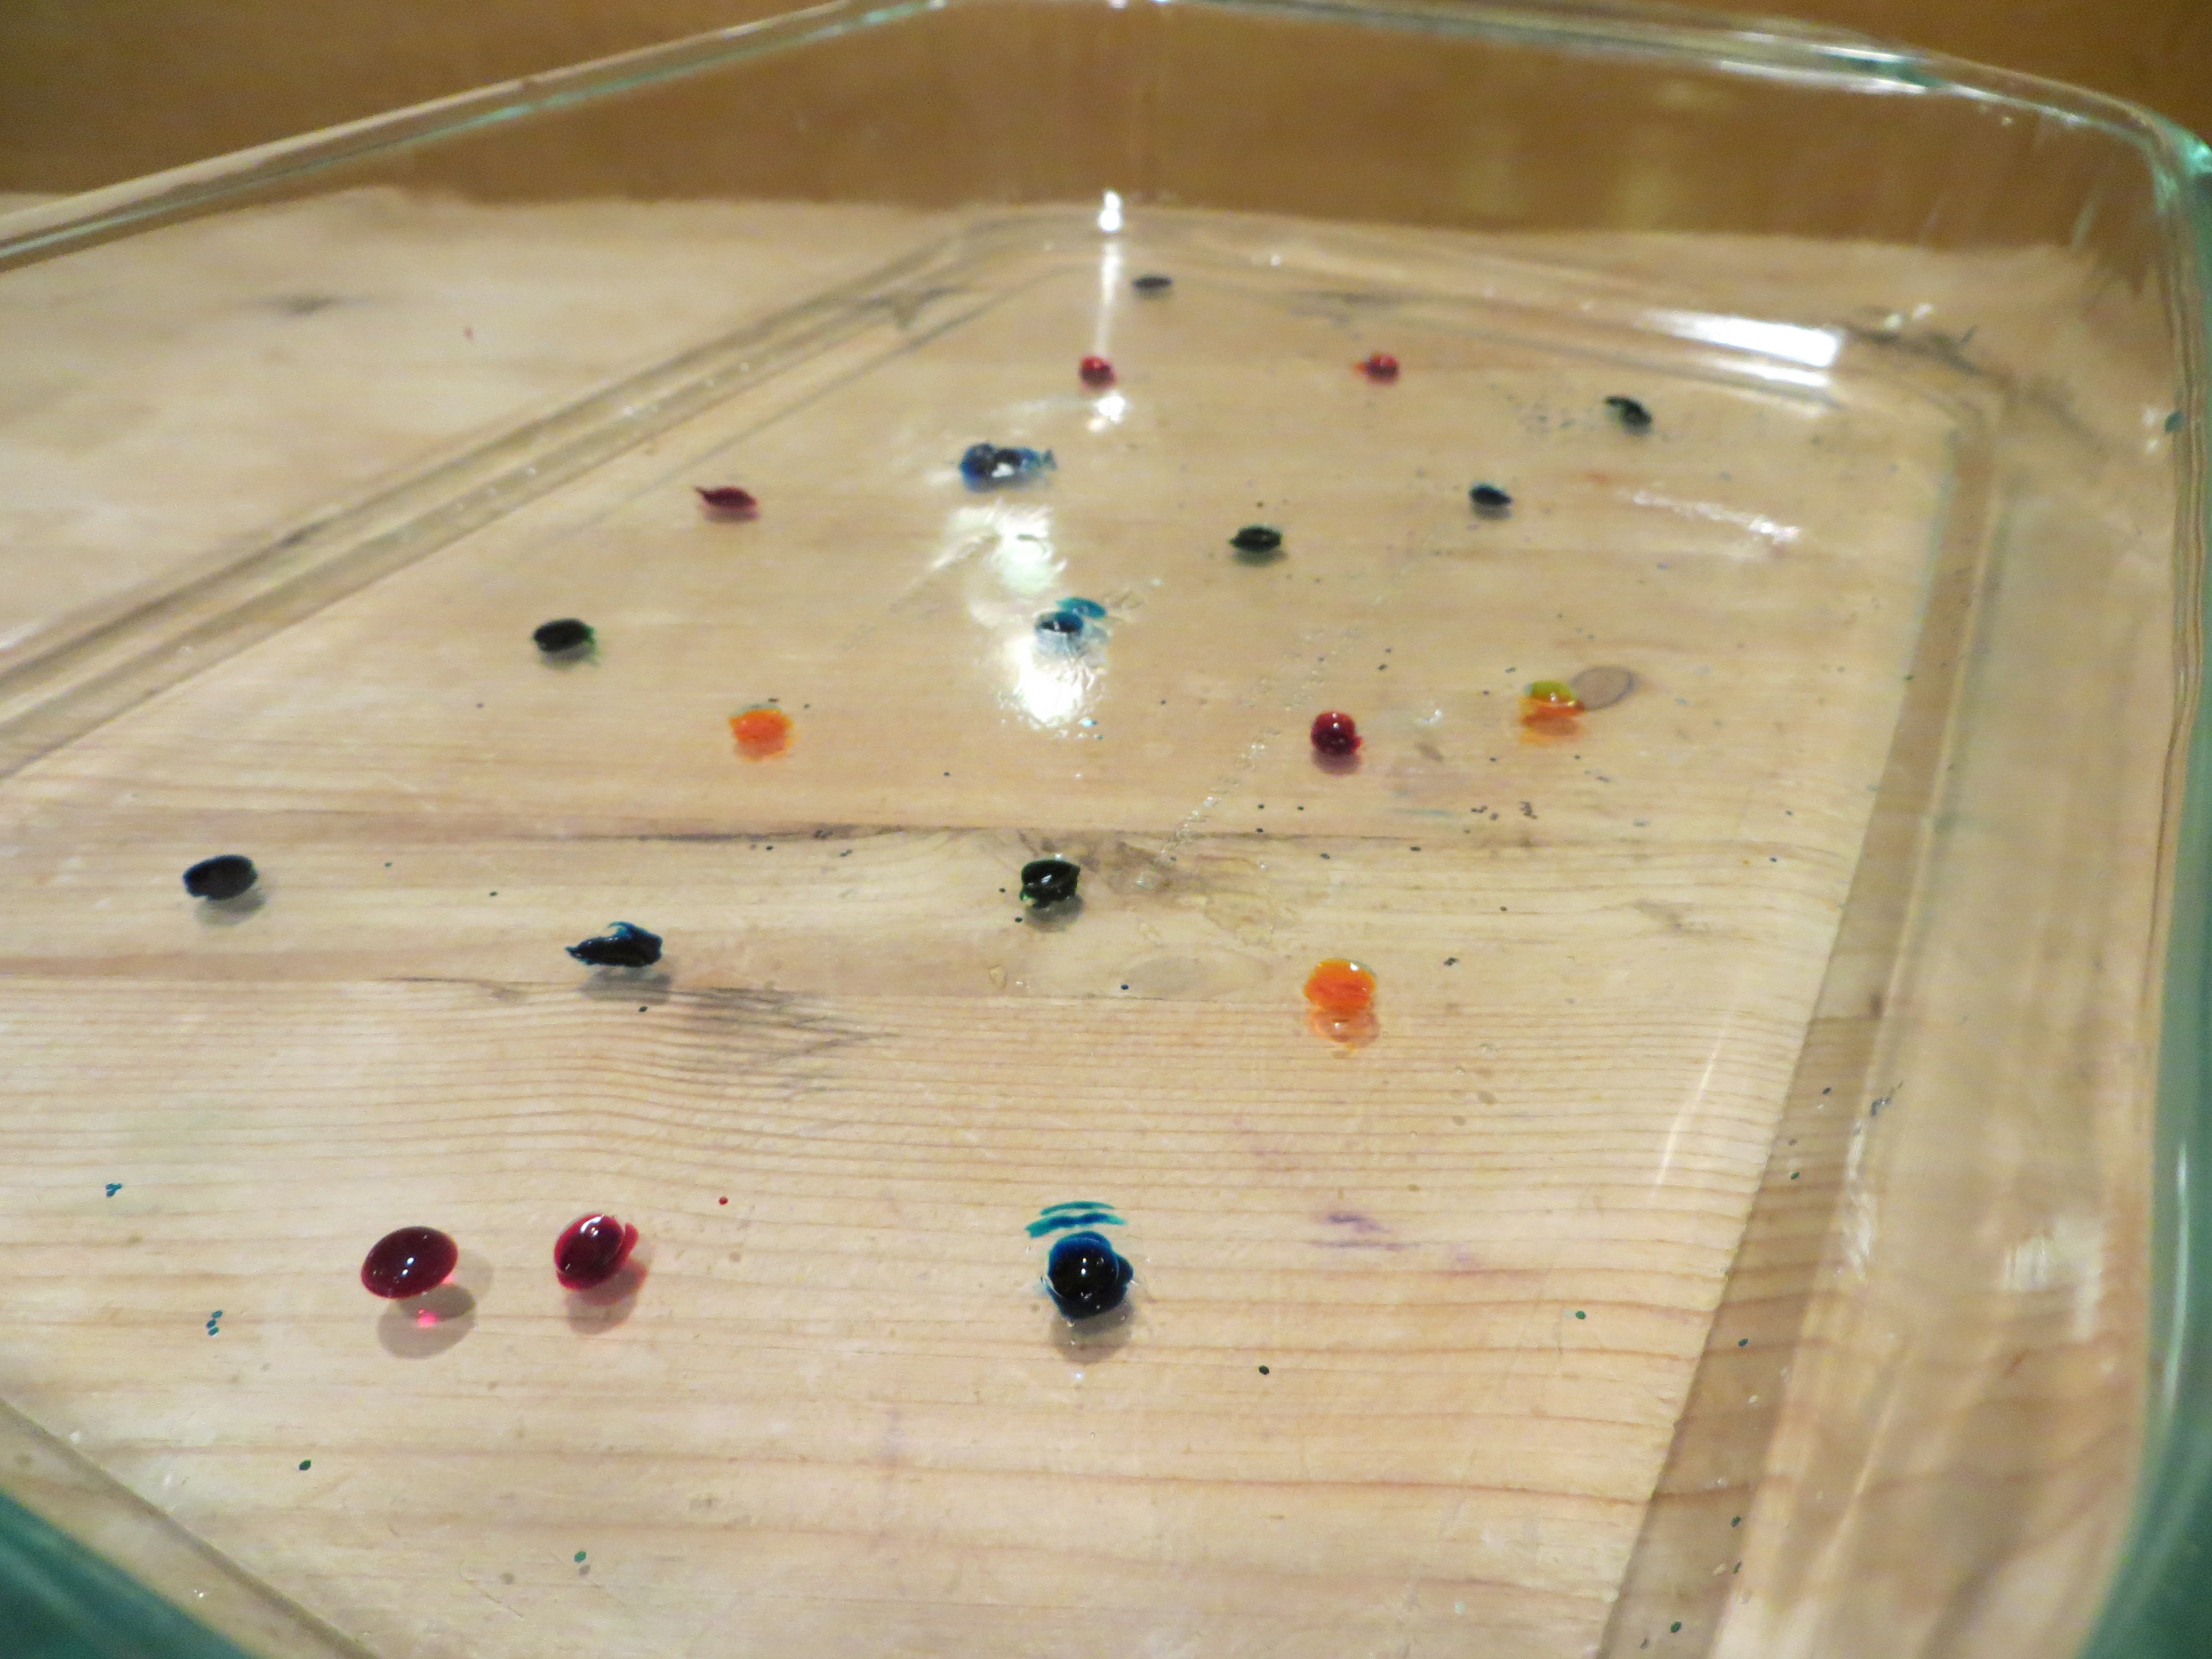
Step 7. Let the gelatin pans sit for 24 hours. Every so often, use a ruler to measure the circle of food coloring molecules as they diffuse (move) into the gelatin around them (read about diffusion at the bottom of this post.) How many cm per hour is the color diffusing? Do some colors diffuse faster than others? If you put one pan in the refrigerator and an identical one at room temperature, does the food coloring diffuse at the same rate?
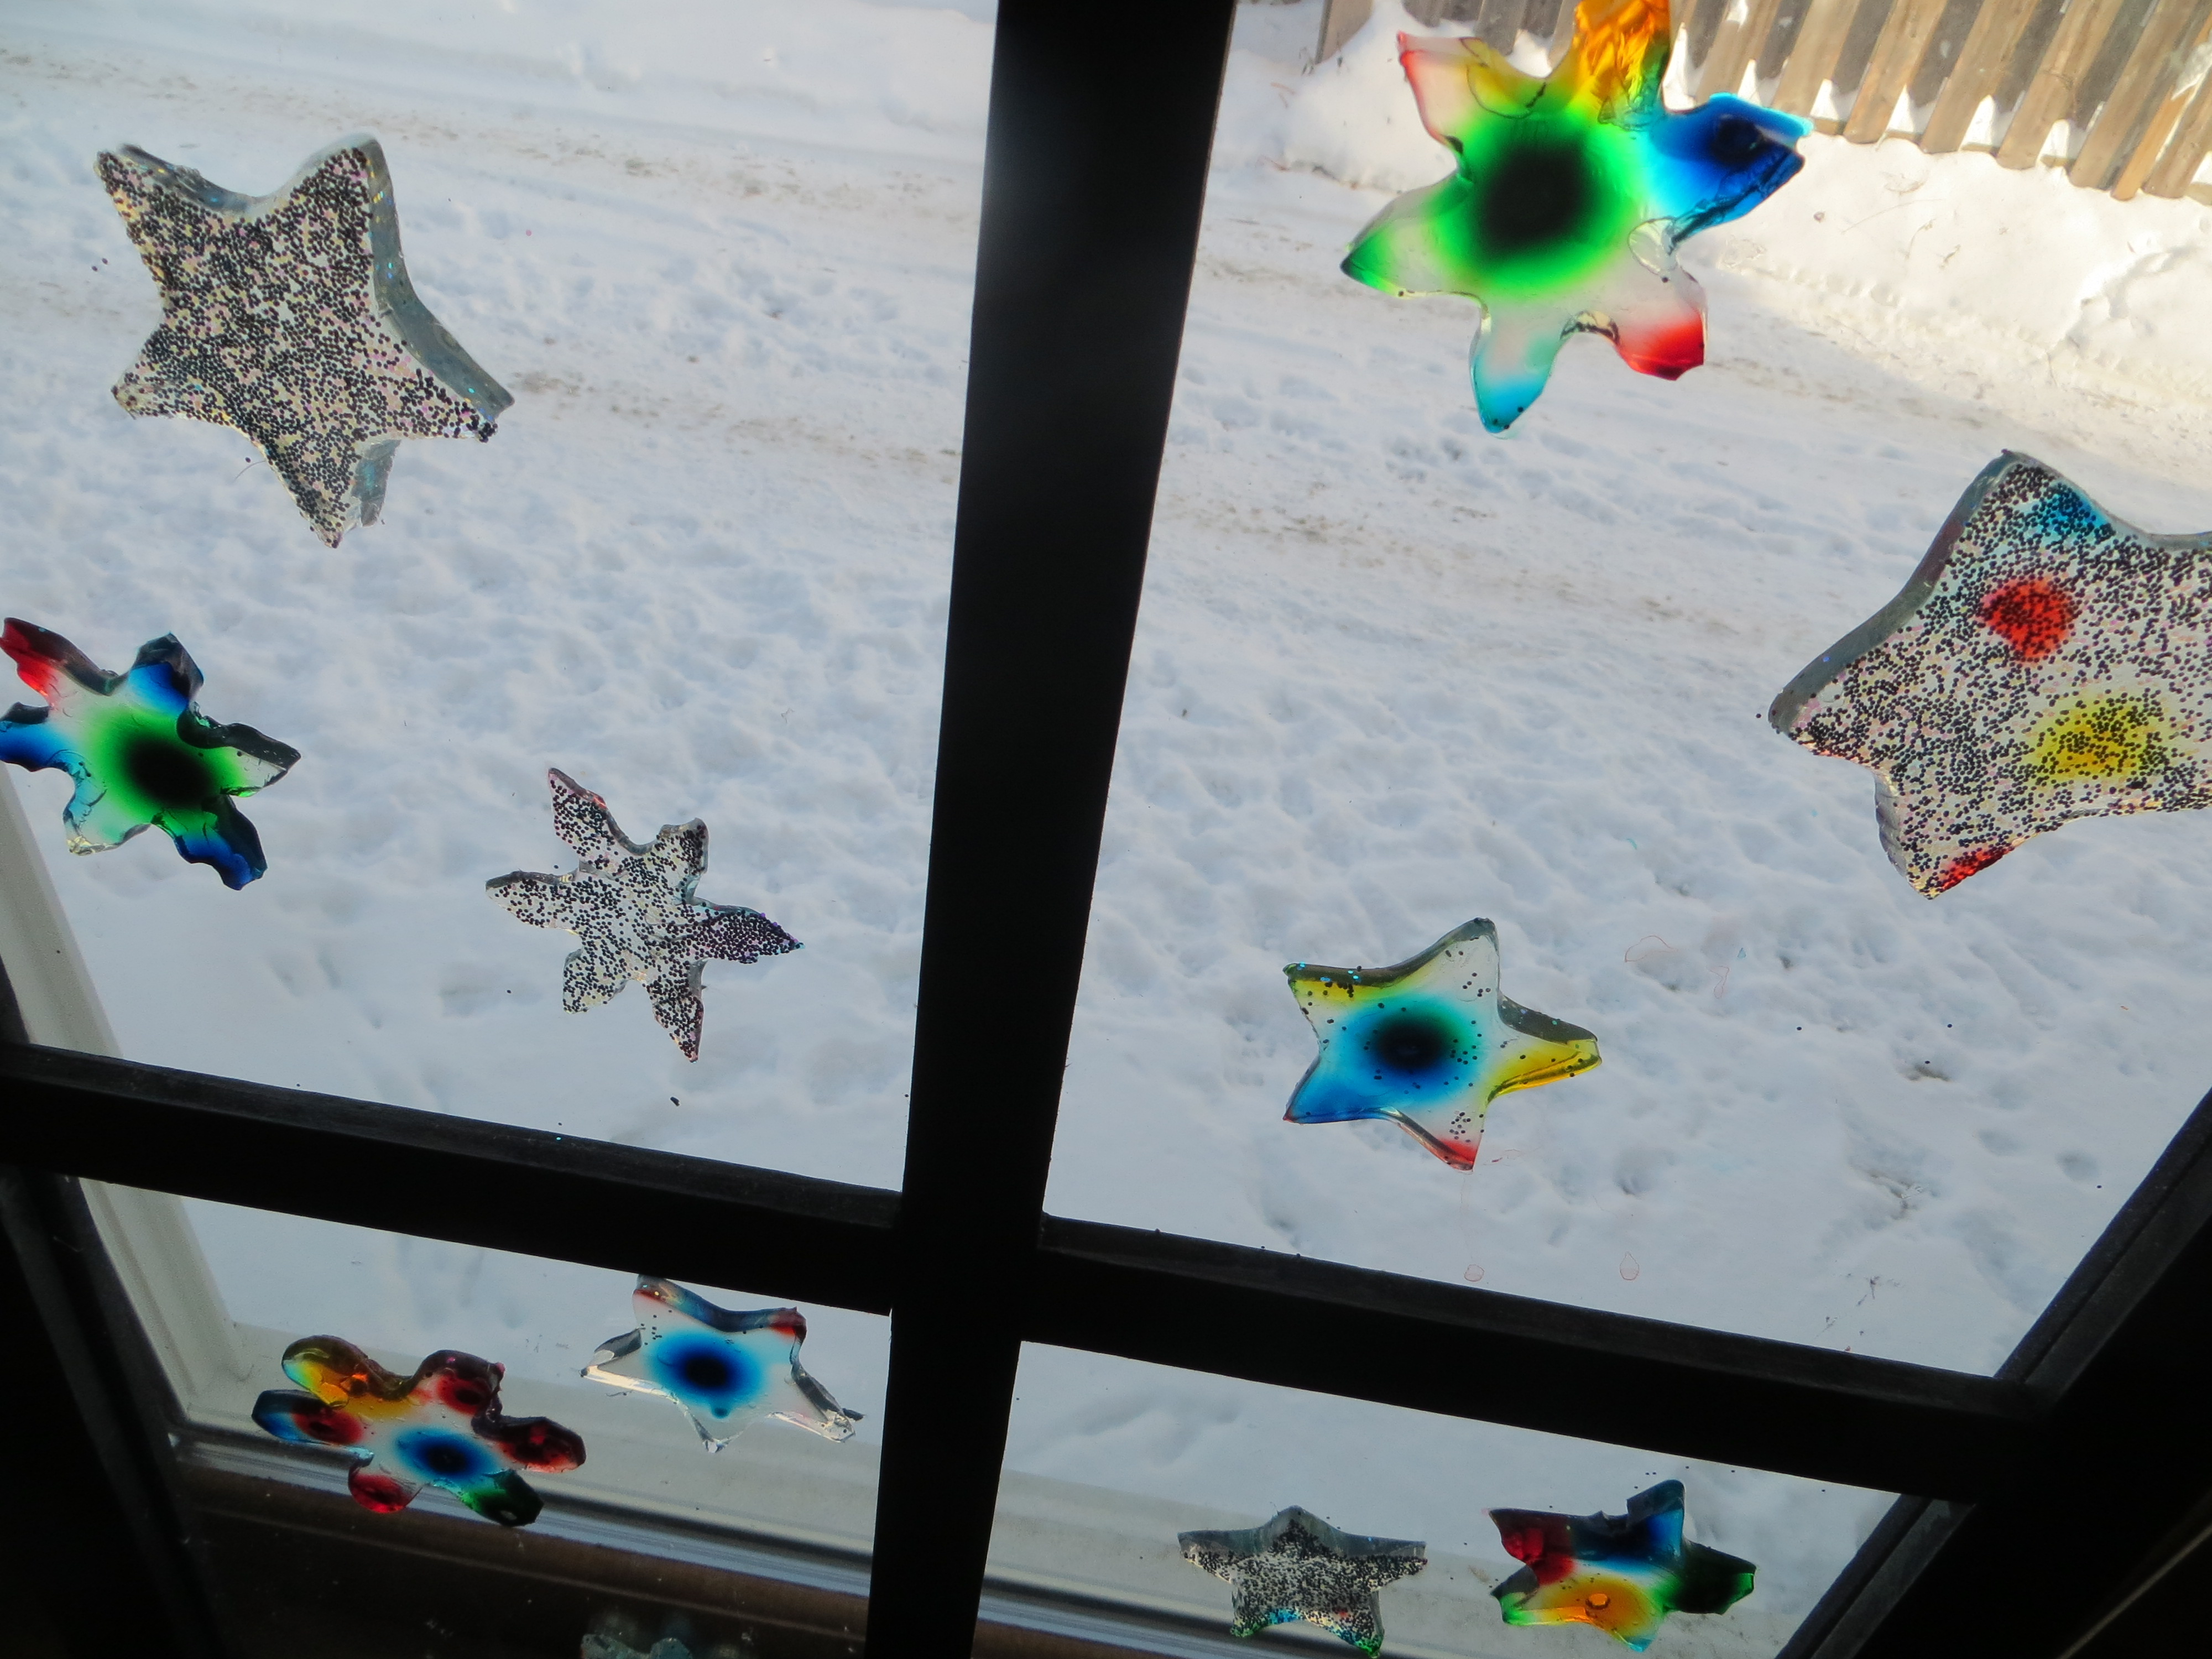
Step 8. When the food coloring has made colorful circles in the gelatin, use cookie cutters to cut shapes from both pans of gelatin (glitter and food coloring), carefully remove them from the pan with a spatula or your fingers, and use them to decorate a window. (Ask a parent first, since some glitter may find its way to the floor!) Don’t get frustrated if they break, since you can stick them back together on the window.
Step 9. Observe your window jellies each day to see what happens when the water evaporates from the gelatin.
 When they’re dry, peel them off the window. Are they thinner than when you started? Why? Can you re-hydrate them by soaking the dried shapes in water?
 The Science Behind the Fun:
Imagine half a box filled with red balls and the other half filled with yellow ones. If you set the box on something that vibrates, the balls will move around randomly, until the red and yellow balls are evenly mixed up.
Scientists call this process, when molecules move from areas of high concentration, where there are lots of other similar molecules, to areas of low concentration, where there are fewer similar molecules DIFFUSION. When the molecules are evenly spread throughout the space, it is called EQUILIBRIUM.
Lots of things can affect how fast molecules diffuse, including temperature. When molecules are heated up, they vibrate faster and move around faster, which helps them reach equilibrium more quickly than they would if it were cold. Diffusion takes place in gases like air, liquids like water, and even solids (semiconductors for computers are made by diffusing elements into one another.)
Think about the way pollutants move from one place to another through air, water and even soil. Or consider how bacteria are able to take up the substances they need to thrive. Your body has to transfer oxygen, carbon dioxide and water by processes involving diffusion as well.
Why does glitter float on gelatin? An object’s density and it’s shape help determine its buoyancy, or whether it will float or sink. Density is an object’s mass (loosely defined as its weight) divided by its volume (how much space it takes up.) A famous scientist named Archimedes discovered that any floating object displaces its own weight of fluid. Boats have to be designed in shapes that will displace, or push, at least as much water as they weigh in order to float.
For example, a 100 pound block of metal won’t move much water out of the way, and sinks fast since it’s denser than water. However , a 100 pound block of metal reshaped into a boat pushes more water out of the way and will float if you design it well!
What is the shape of your glitter? Does it float or sink in the gelatin?
Here’s a video I made for KidScience app that demonstrates how to make window gellies
Credit: My 11 YO daughter came up with the brilliant idea to stick this experiment on windows. I was just going to dry out the gelatin shapes to make ornaments. Kids are often way more creative than adults!
Spy Juice
- by KitchenPantryScientist
Thanksgiving isn’t the same without cranberries. This year, pick up an extra bag for this fun science experiment.

With cranberries and baking soda, you can create invisible messages that will be revealed to friendly eyes and self-destruct before your enemies have a chance to read them. You’ll see how some pigments in fruit can change color when they’re exposed to an acid or a base. *I discovered that some paper will turn blue in cranberry juice, so test the type of paper you want to use by first dipping a small piece it in the cranberry juice (before you start writing messages!) It should turn pink, not blue. Otherwise, you won’t be able to see your message!
We made Spy Juice on Kare11 Sunrise News a few years ago. Click here to watch.
You’ll need
-half a bag of cranberries
-water
-baking soda
-printer paper.
-a homemade pen: To write your message, you’ll also want to find a small paintbrush, Q-tip, or something else with an absorbent tip. We had the best luck using cake-pop sticks or cotton swabs cut in half (non-cotton end) as pens.
Have an adult or teenager boil the cranberries in about three cups of water for 15 or 20 minutes. Be sure to put a lid on the pan, since the small pockets of air that help cranberries float can make them explode as they cook. If you listen, you’ll hear some of the them popping! Crush the cooked berries and push the liquid through a sieve or colander to collect the concentrated cranberry juice. Most cranberry juice from the grocery store is diluted with water, corn syrup and other juices and won’t work as well!
Let the juice cool and pour it into a casserole dish or cake pan that the paper you’re writing your messages on will fit into. If your cranberry juice seems thick and syrupy, add a little water (maybe half a cup.) It has to have enough water in it so that it will soak into the paper!
To make your invisible ink, add a few teaspoons of baking soda to about 1/3 cup of warm water and dissolve it as well as you can. Don’t worry if you can still see some baking soda. Using your homemade writing tool, use the baking soda solution to write a message on your paper. It may take a little practice, so don’t get frustrated. You’ll get the hang of it!

Let your message air dry, or speed things up with a blow dryer.
To reveal your message, float and then submerge your paper in the cranberry juice and see what happens!

The science behind the fun:
Cranberries contain pigments called anthocyanins (an-tho-SY-a-nins), which give them their bright color. In nature, these pigments attract birds and other animals to fruit. This is important because animals eat the berries and spread plants seeds from one place to another.
These pigments, called flavanoids, change color when they come in contact with acids and bases. Cranberry juice is very acidic, and the pigment is red in acids. When you add it to a base, it turns purple or blue. Baking soda is a base, so your baking soda message will turn blue when it comes into contact with the pigments in the cranberry juice. Eventually, when enough cranberry juice soaks into the paper, it will dilute the baking soda and make the paper acidic, turning the pigment back to red and your message will disappear!
There are over 300 kinds of anthocyanins which are found in many fruits and vegetables including blueberries, red cabbage, grapes and blueberries. Scientists think they may have many health benefits and some researchers are even making organic solar cells using flavanoids!
Enrichment: What other juices can you use to reveal secret messages? What else could you use as ink? If you use lemon juice as ink, does it turn a different color?
Try making your own recipe for spy juice! I’d love to hear how red cabbage works! Check out my red cabbage litmus paper experiment to find out how to make red cabbage juice.
Halloween Science Roundup
- by KitchenPantryScientist
Halloween Halloween brings out the kid in all of us, and there’s no better way to celebrate than with some ghoulish science experiments. Next week, I’ll be adding Vegetable Vampires and Zombie Candy to the lineup!

Here’s a list of our favorites. Just click on the name of the experiment to go to the instructions, see photos of what to do, and learn a little science. Most have links to videos or TV segments where I demonstrate how to do the experiments.
Shocking Machine Make an electrophorus and Leyden jar to shock your friends! Here’s how to do it. We demonstrated it on Kare11 last week!
Frankenworms Gummy worms soaked in baking soda and water come to “life” when you drop them into vinegar! Click here for directions and a video.
Goblin Goo (All you need is cornstarch and water. Here’s a video on how to make the goo. You can add a little food coloring to the water if you want, but it may stain your hands!)
Bag of Blood (If you have ziplock baggies, water, red food coloring and skewers, you can do this experiment!) Here’s the video.
Fizzy Balloon Monster Heads (After we made Goblin Goo, I demonstrated how to make Fizzy Balloon Monster heads. Click here to watch.)
Magic Potion (Bubbly, stinky Halloween fun: I made a short video on how to make magic potion. Click here to watch it.
Mad Scientist’s Green Slime (To see a TV segment where we made Mad Scientist’s Green Slime, click here!) Here’s another video.
Apple Mummies (Here’s a link to a TV segment where the kids and I demonstrated how to make Apple Mummies. Click here.)
Alien Monster Eggs (These make a great centerpiece for a Halloween party, when you’re done playing with them.) I demonstrated how to make them on Kare 11! Click here to watch the video.
Creepy Critter Slingshots Lob Marshmallow eyeballs and spiders at a pumpkin or another target in this fun physics experiment.
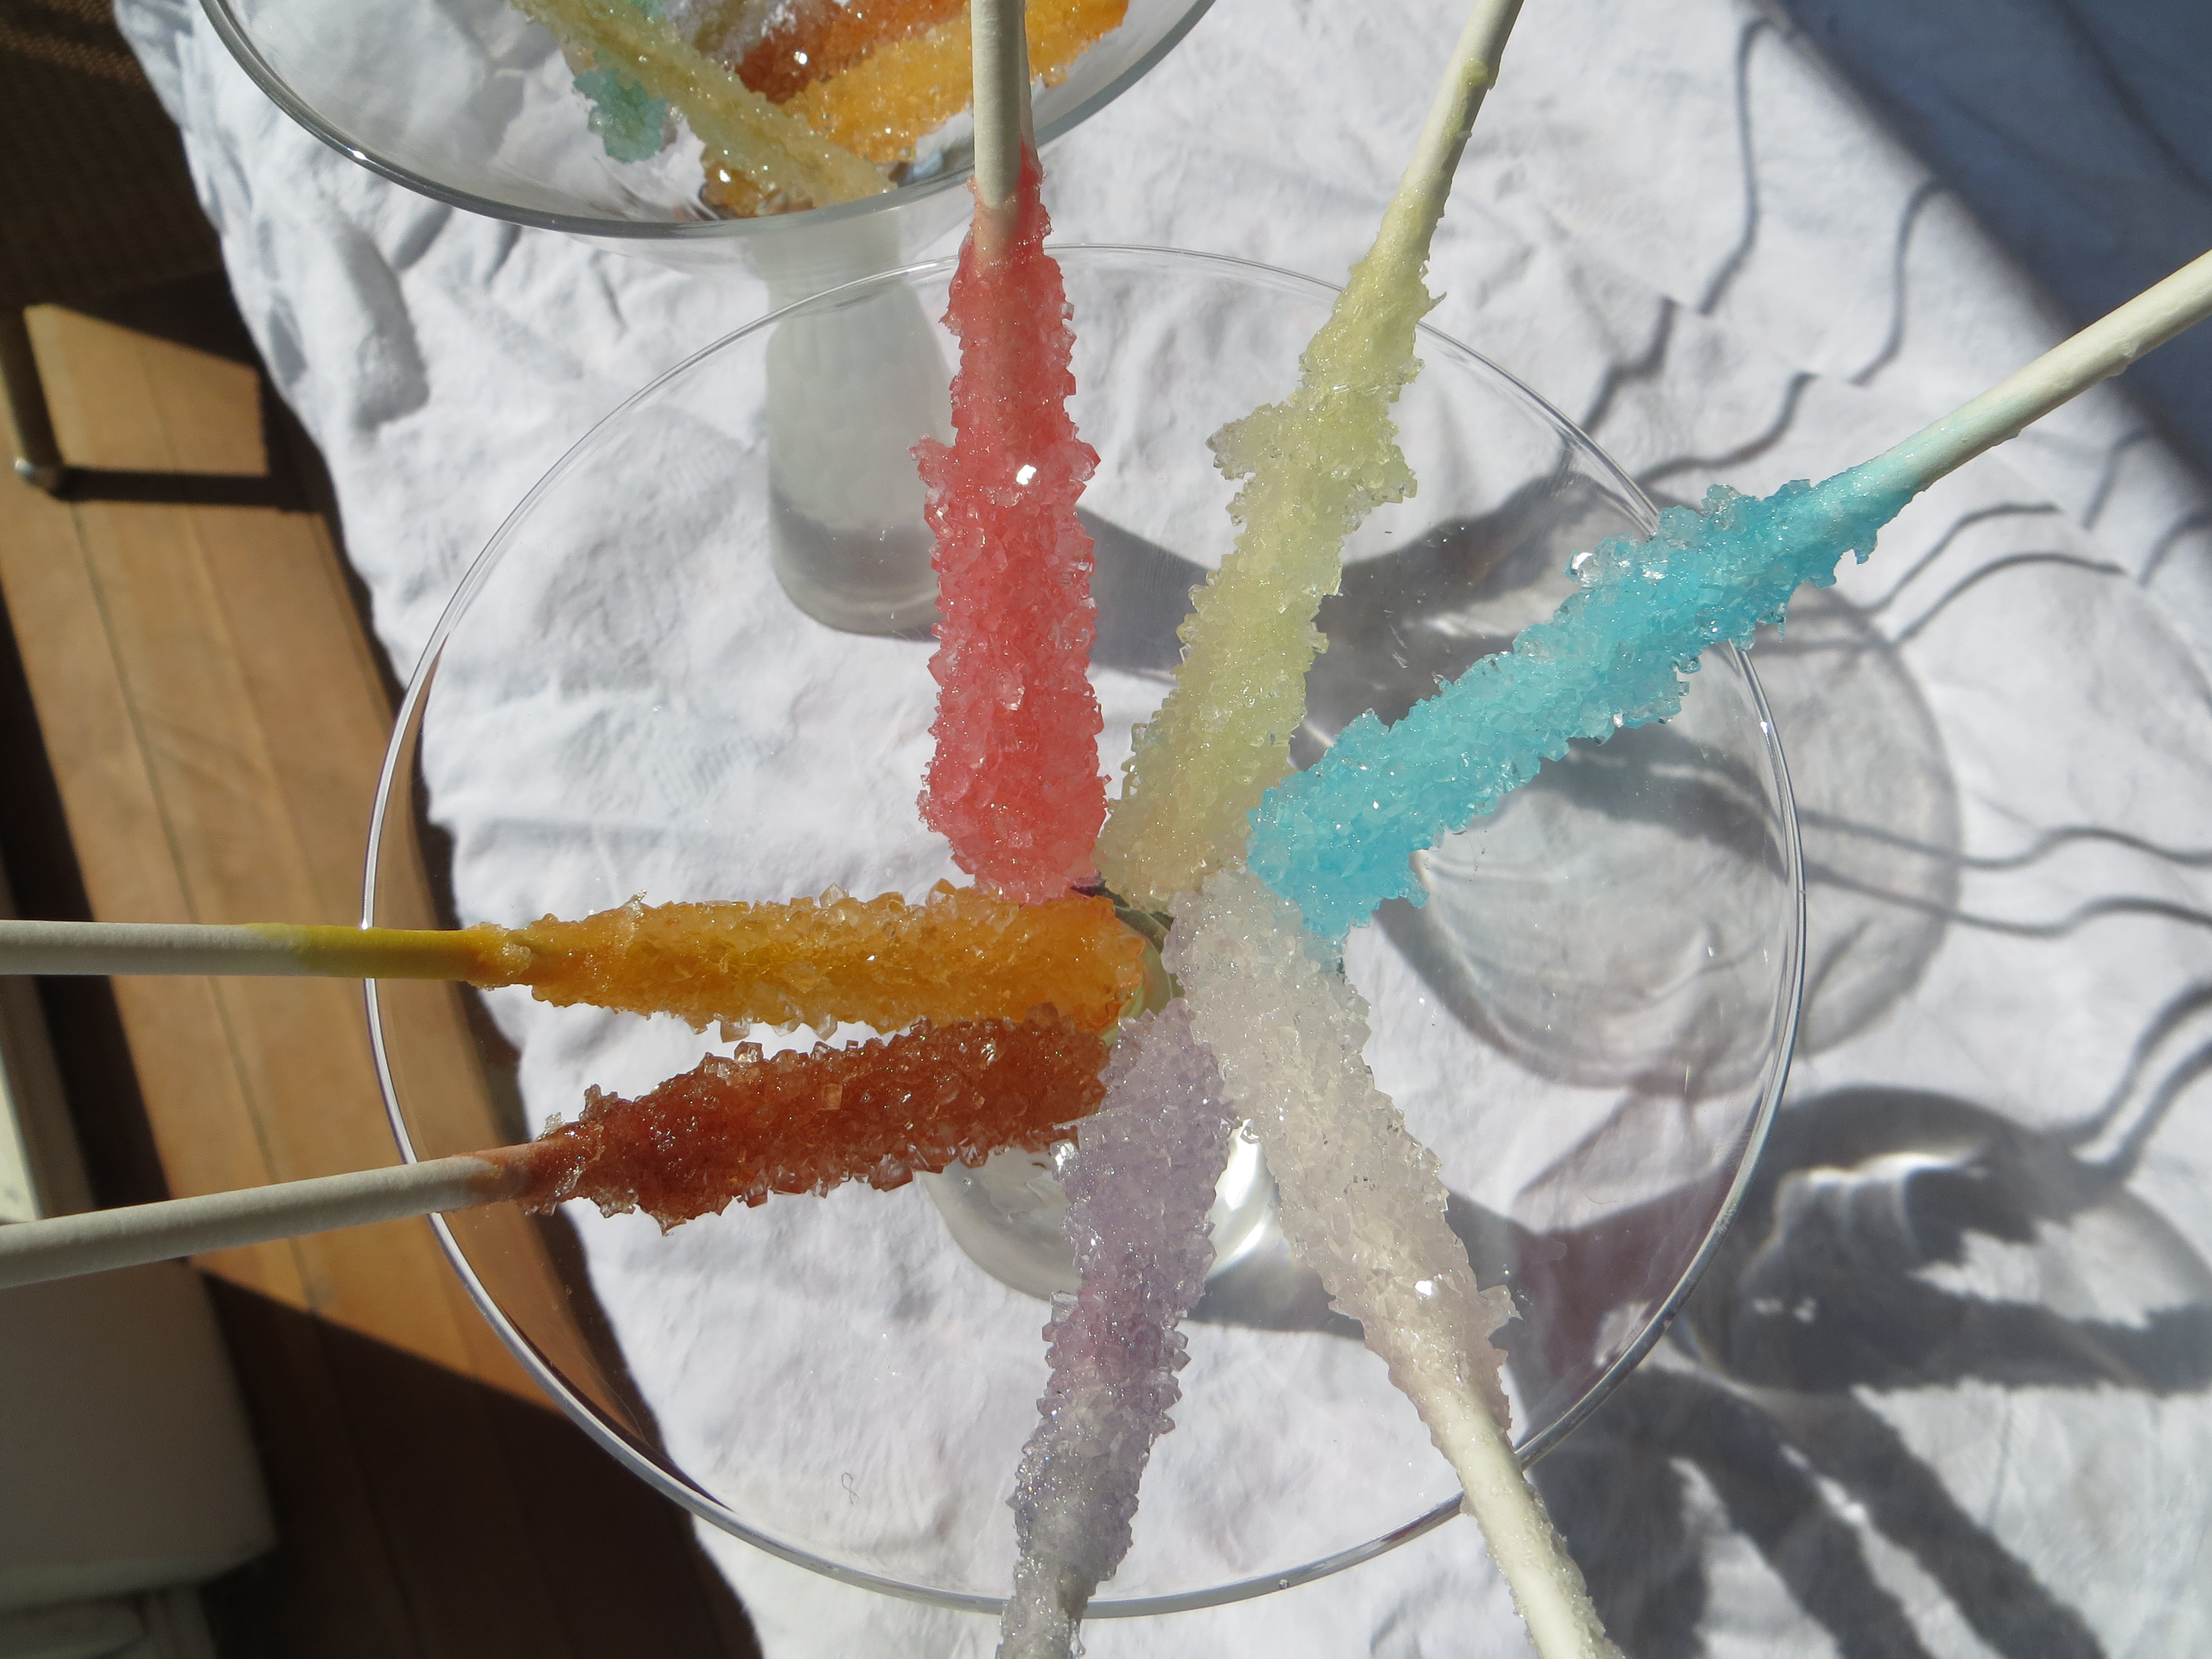
Science on a Stick: Rock Candy
- by KitchenPantryScientist
Got sugar? You can grow big, edible sugar crystals, commonly called “rock candy,” in your own kitchen. We thought they’d make a great science experiment to demonstrate at the Minnesota State Fair, where foods on a stick hold sway.
Like bricks in a wall, crystals are solids formed by repeating patterns of molecules. Instead of mortar, the atoms and molecules are connected by atomic bonds.
They can be big or small, but crystals made from the same atoms or molecules always form the same shape. Table sugar, or sucrose, is made up of a molecule composed of two sugars, glucose and fructose. The crystals formed by sucrose are hexagonal (six-sided) prisms, slanted at the ends.
To make rock candy on a stick, you’ll need: 5 cups white granulated sugar, 2 cups water, cake pop sticks or wooden skewers, and food coloring
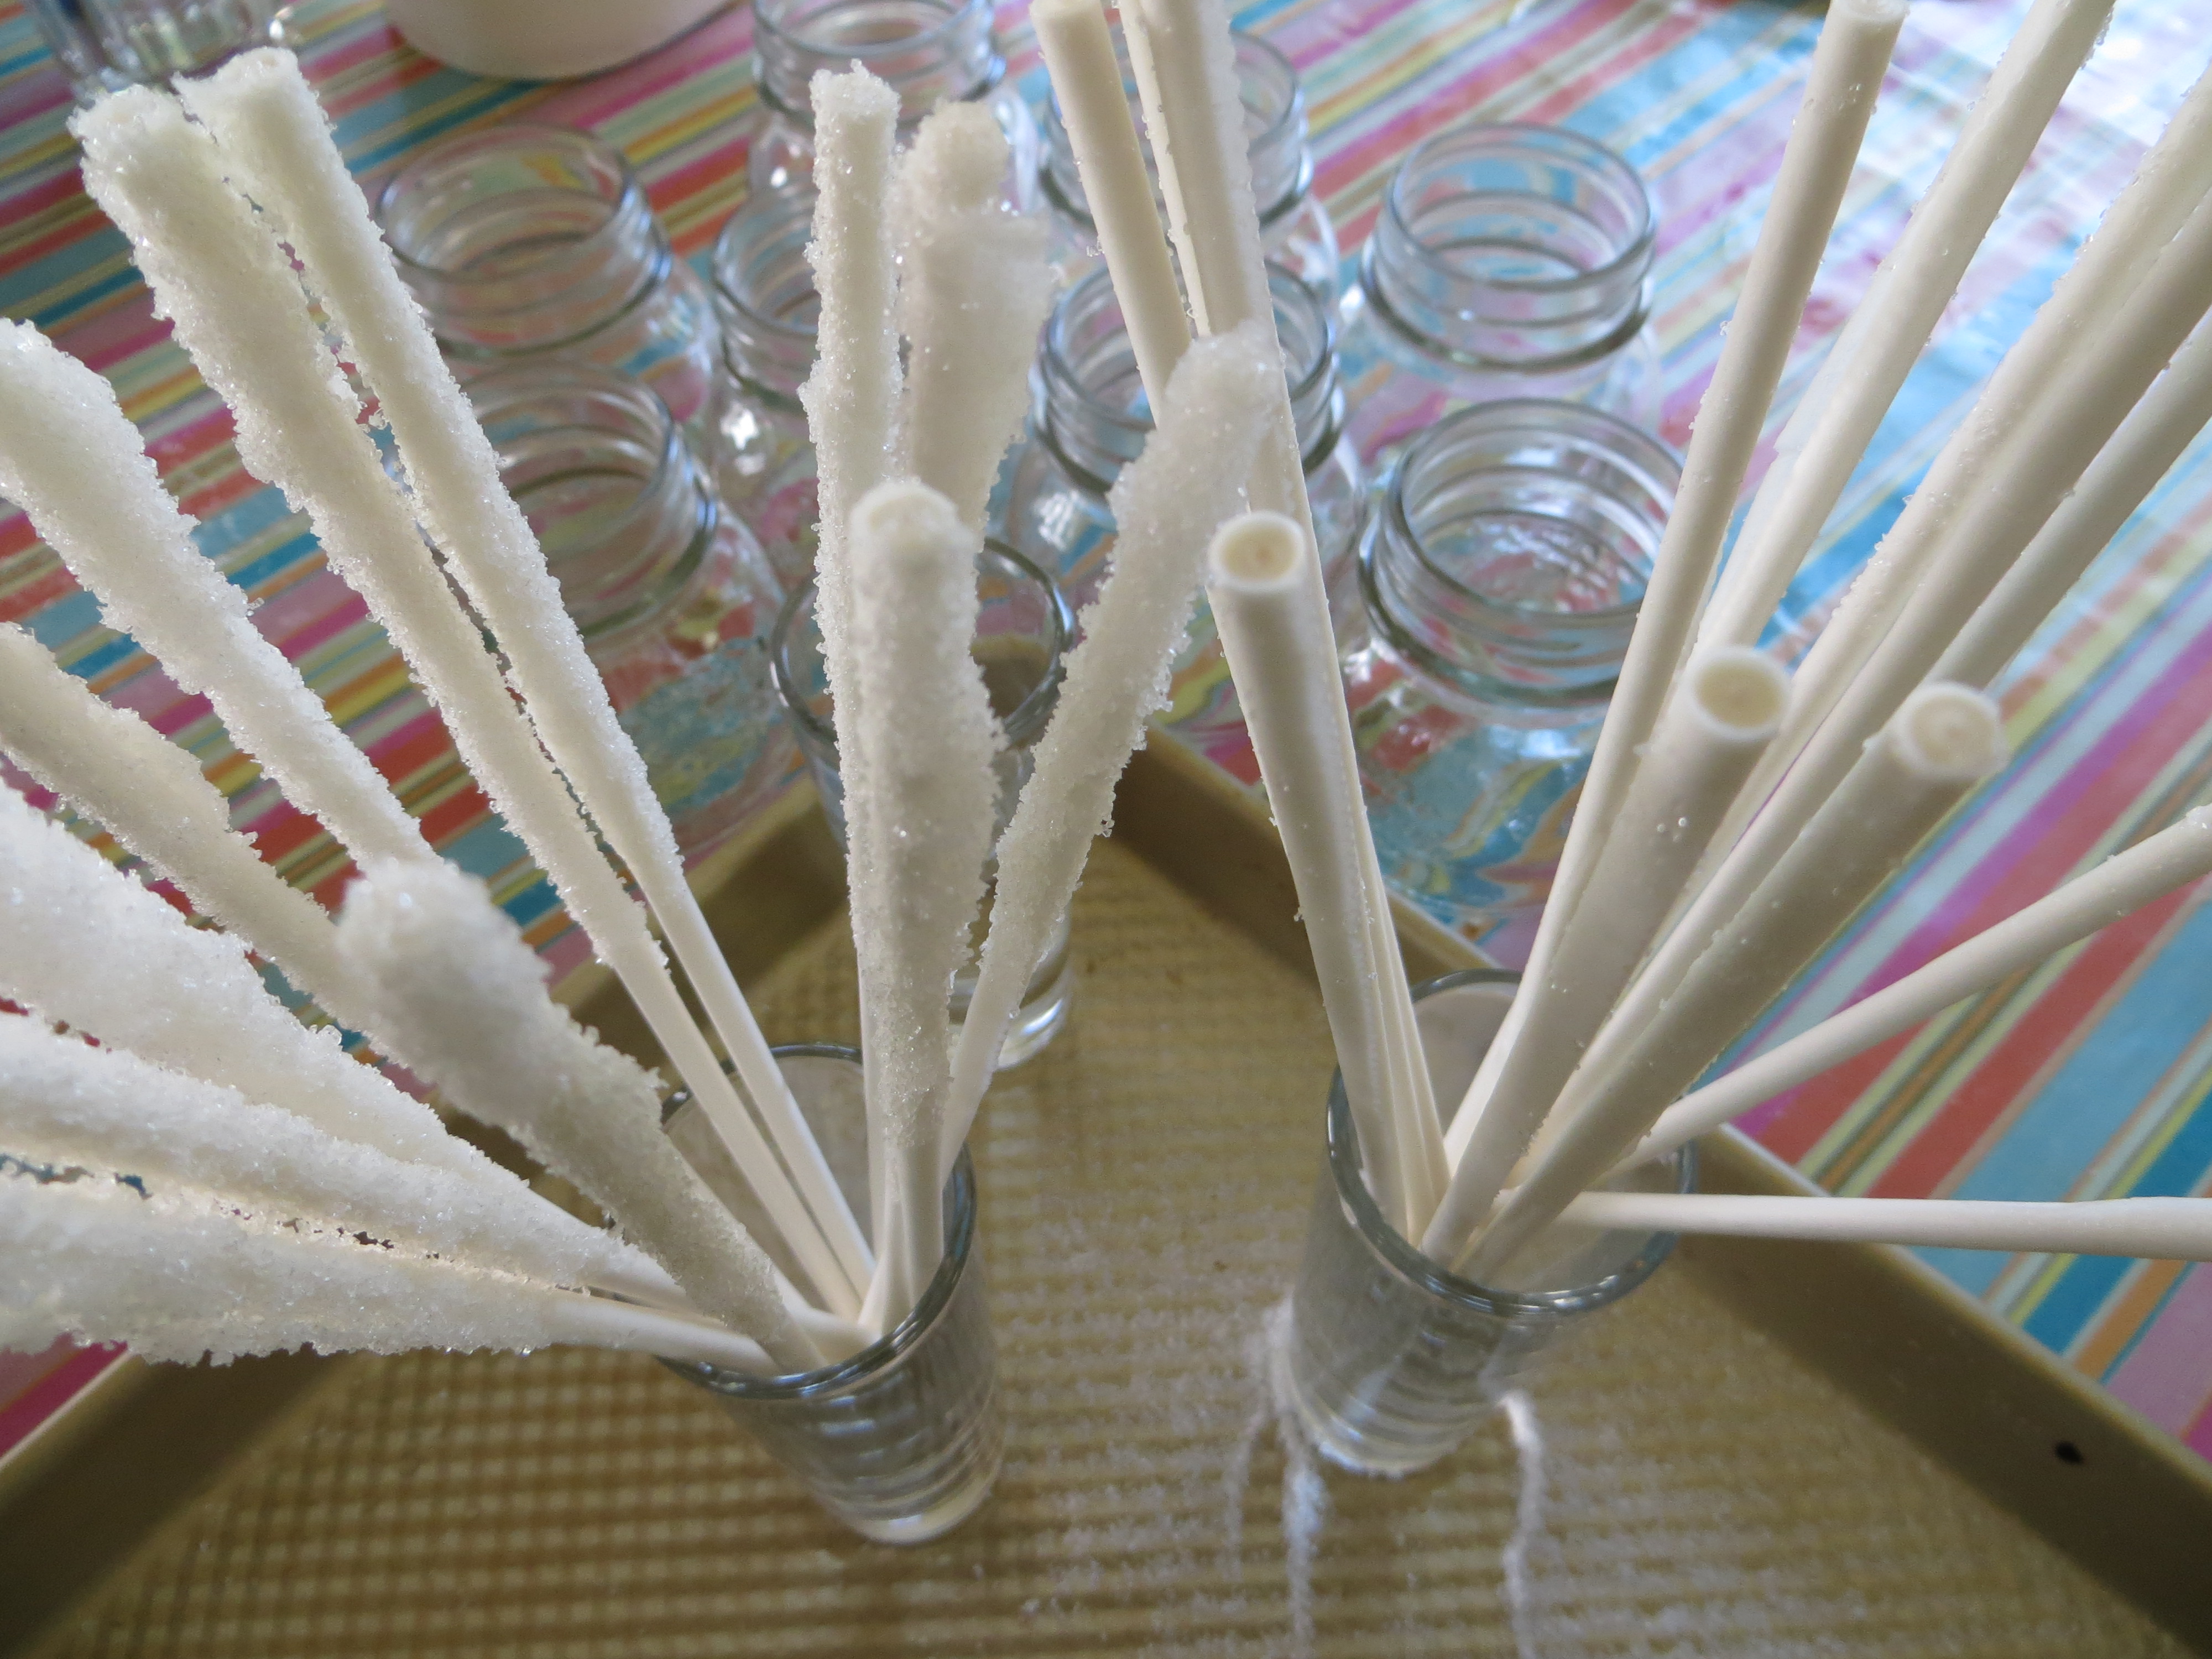
- Dip one end of cake-pop sticks or wooden skewers in water and then roll them in granulated white sugar. The sugar should cover 2-3 inches of the stick. Let them dry completely. These are the seeds for the sugar crystal growth.
- Boil 2 cups water and 5 cups sugar until sugar is dissolved as much as possible. It should look like syrup. This is your supersaturated sugar solution.
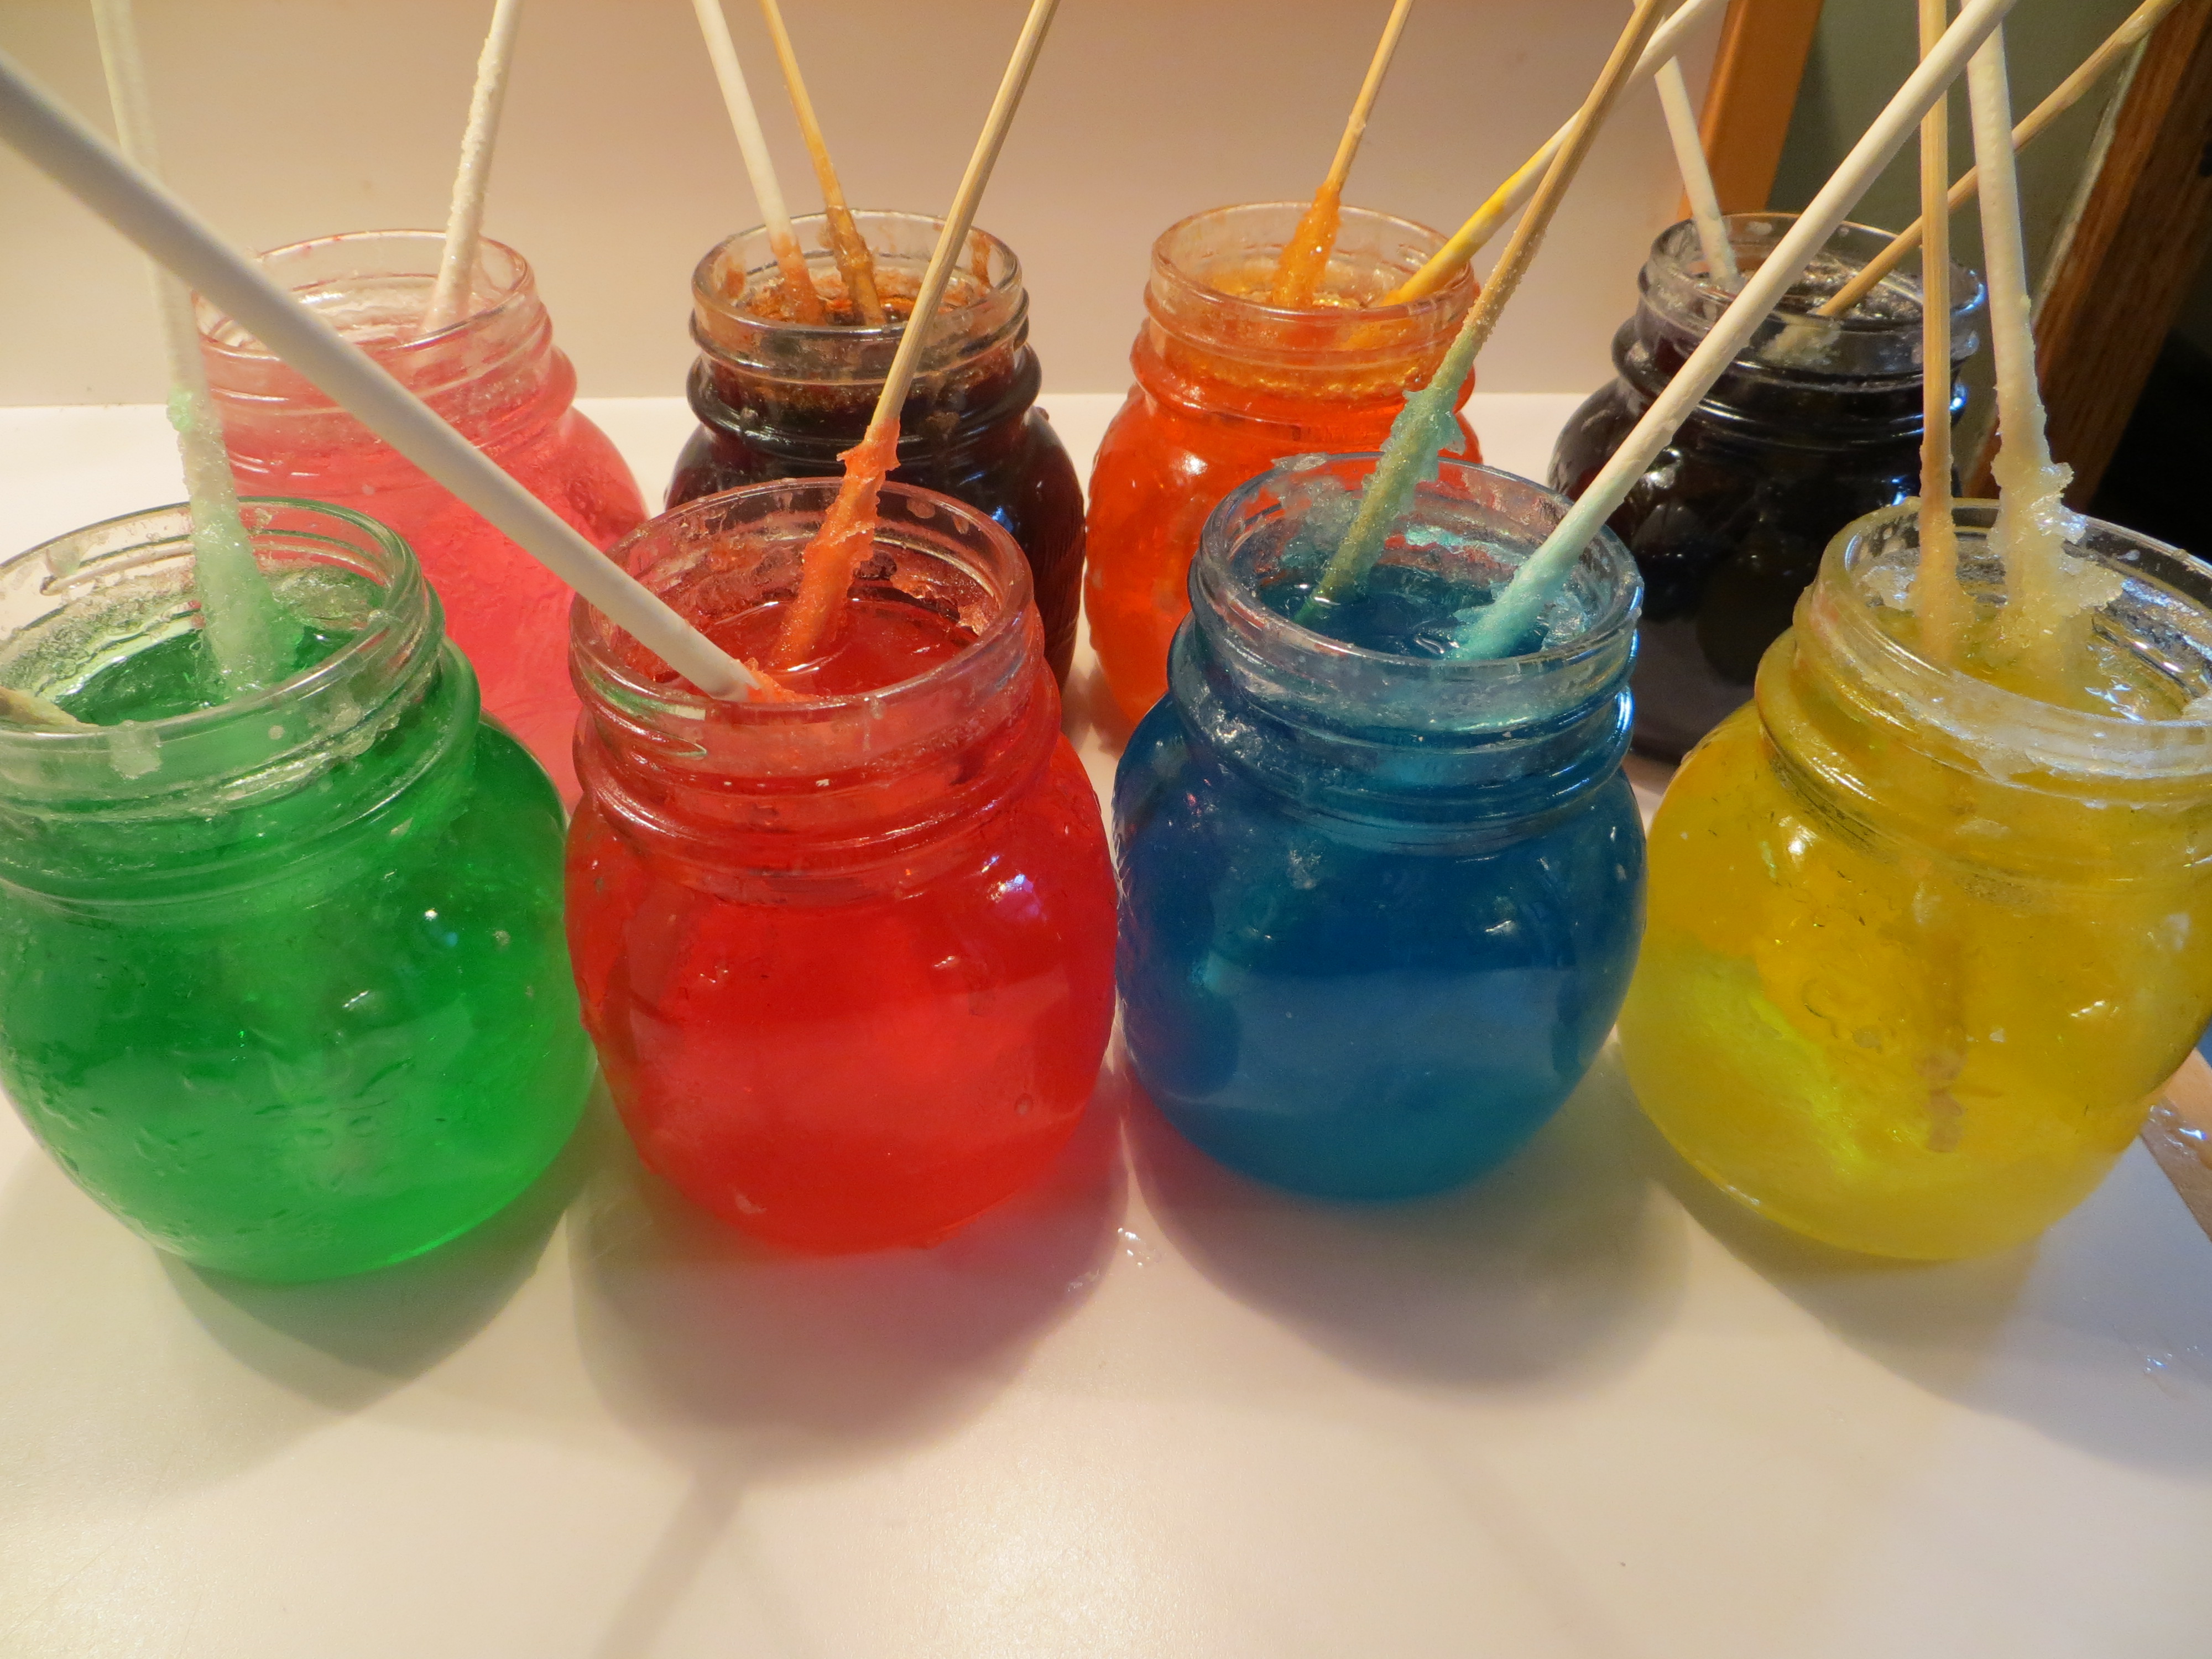
- Let syrup sit until it is no longer hot and pour into glass containers. Add food coloring and stir.
- When colored syrup is completely cool, set the sugary end of the sugar-seeded cake pops or skewers into the syrup and let them sit for about a week.
5. Gently move the sticks around occasionally, so they don’t stick to the crystals in the bottom of the glass. If the glass container gets too full of crystals, pour the syrup into a new container and move your stick into the cleaner syrup to grow more crystals. When the rock candy is done, drain the excess syrup and let them dry. Enjoy!

The science behind the candy? A supersaturated solution is one that is forced to hold more atoms in water or another solute than it normally would. Supersaturated solutions can be made using heat or pressure. Crystals start to form when a supersaturated solutions encounters a “seed” atom or molecule, causing the other atoms to come out of the solution and attach to the seed. In this case, the seed molecules were the sucrose molecules we dried onto the sticks.
Butter Candles and Biofuel
- by KitchenPantryScientist
Biofuels are burnable energy sources produced by living organisms, like corn, algae, and even cows. Microorganisms and plants gather carbon from the atmosphere and incorporate it into the organic compounds that make up things like leaves, fruit, stems and wood. When animals eat plants and microbes, they store some of the carbon energy they’ve gobbled up as fat, like the milk fat used to make butter. Scientists call carbon stored in plants, microbes and animals “new” carbon. Old carbon is carbon tied up in fossil fuels like coal and oil, that’s been underground for millions of years.
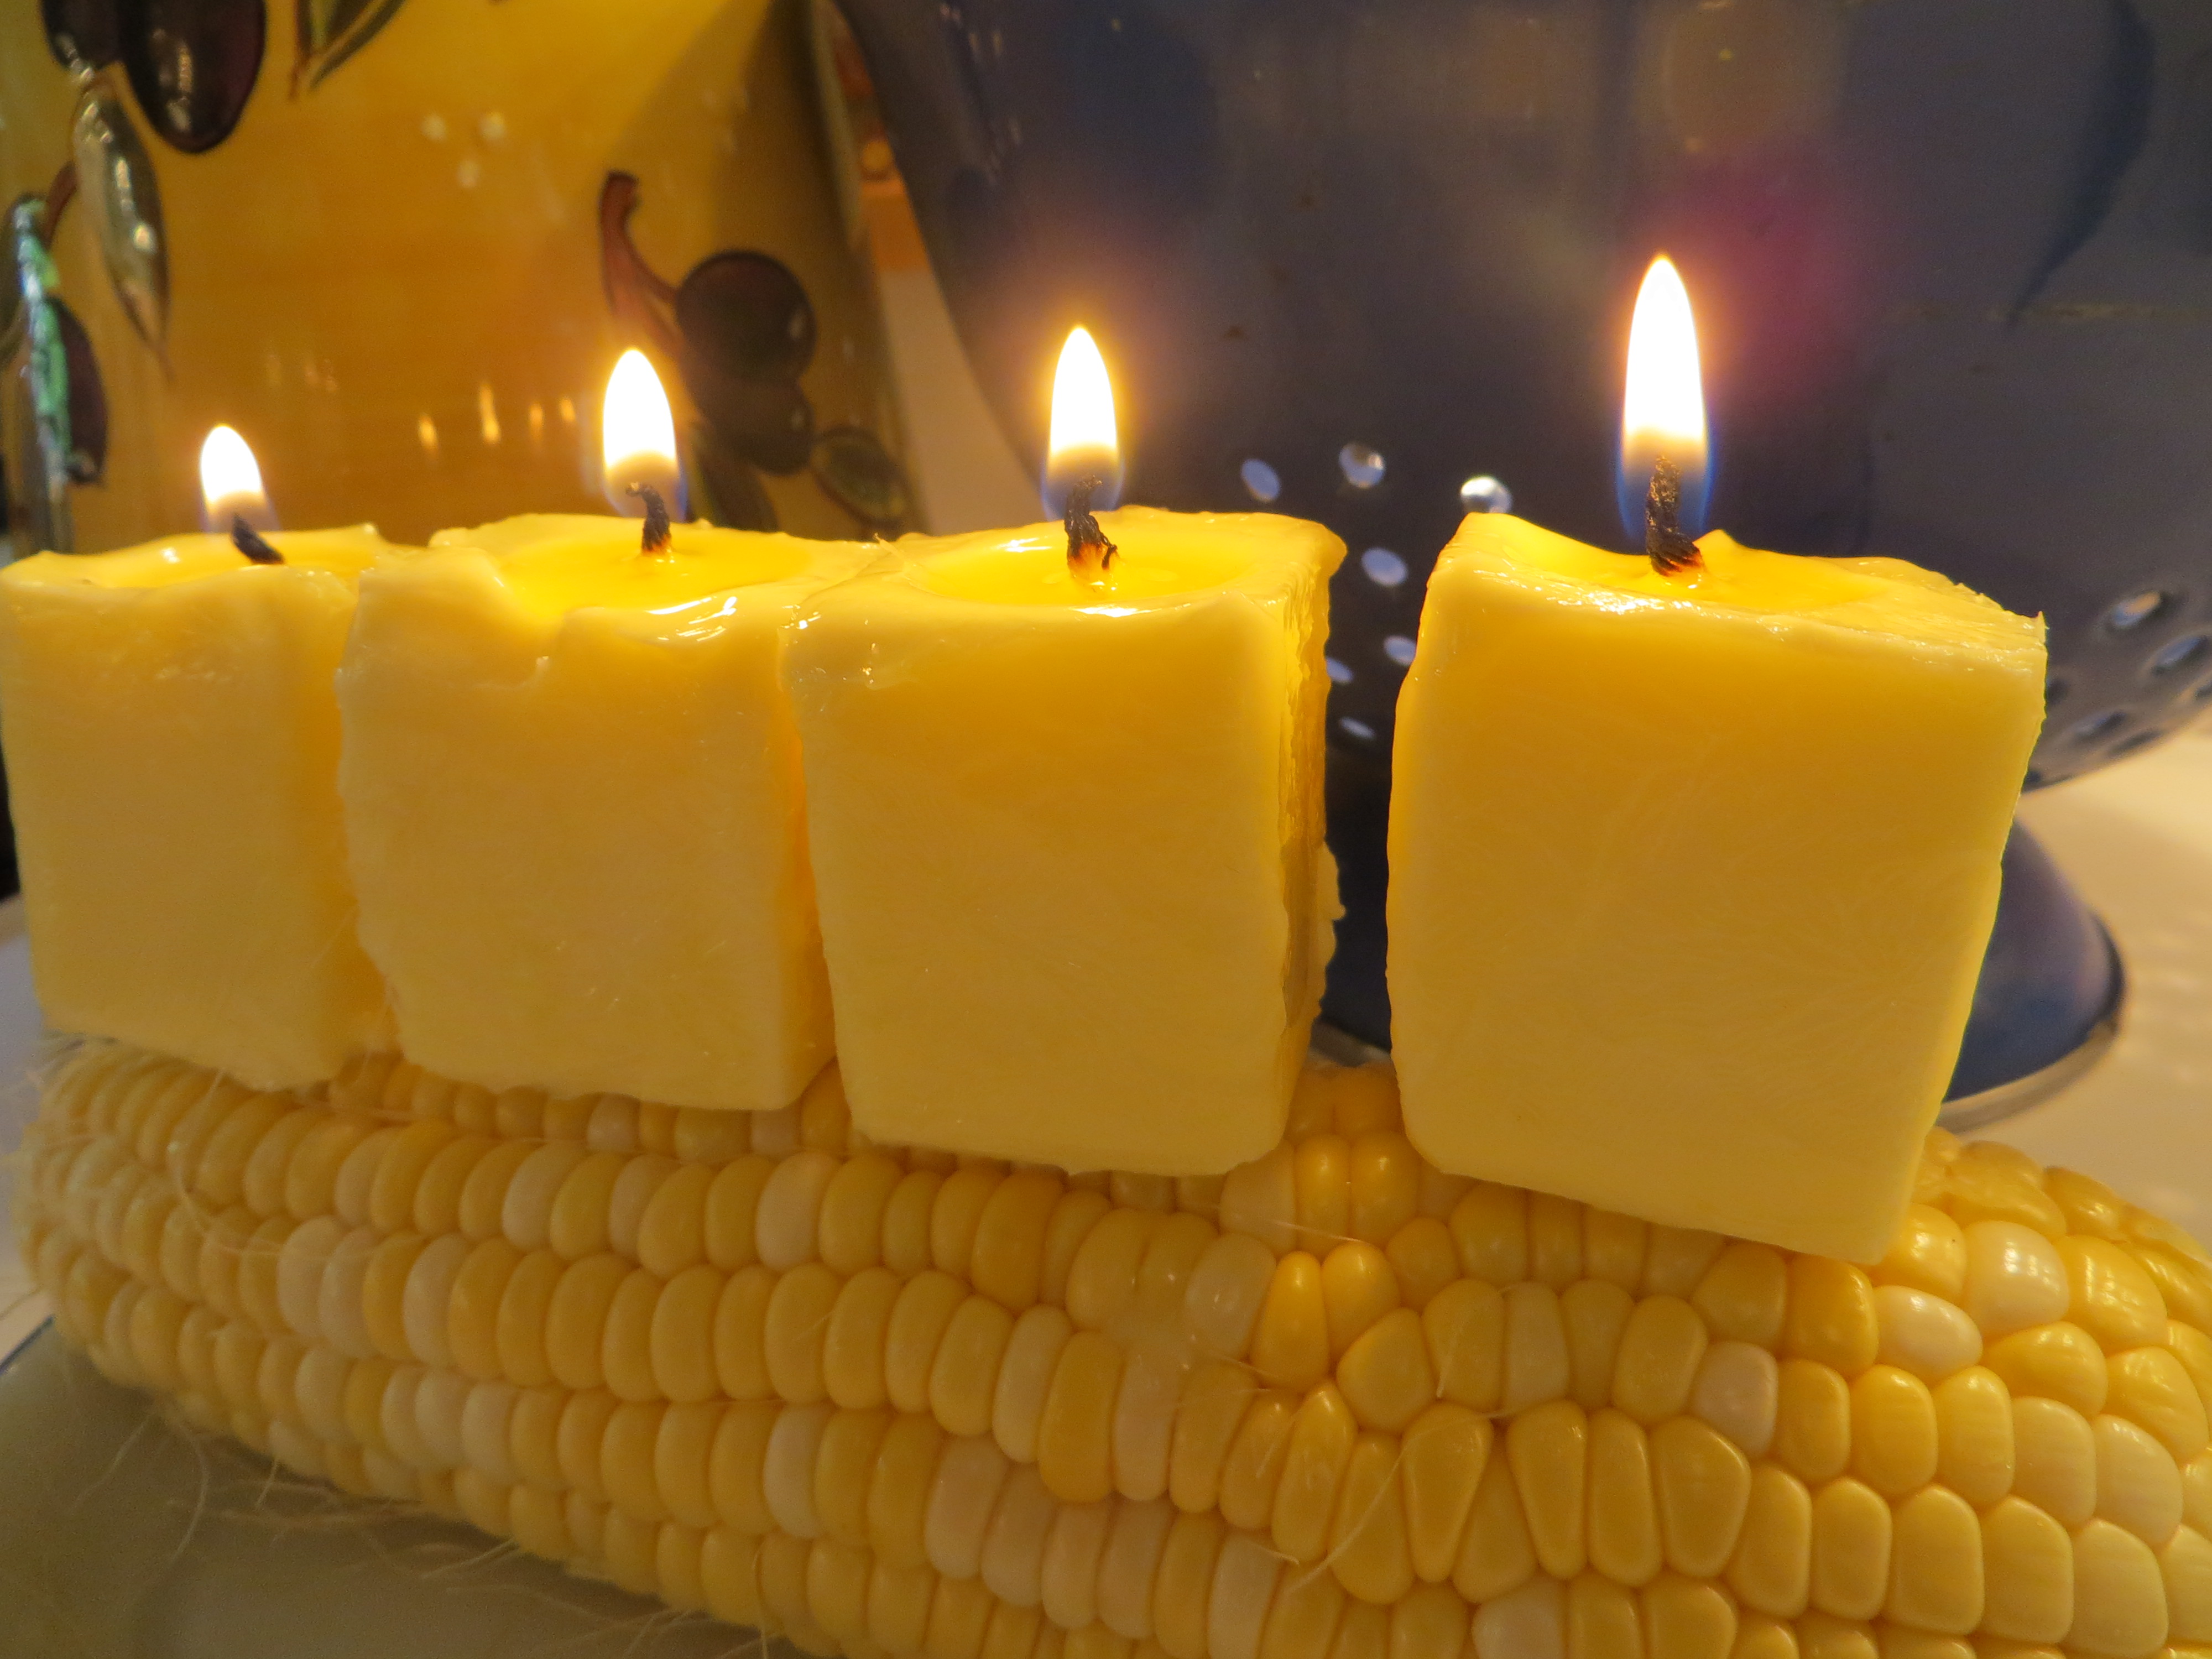
We used broken-off skewers to attach our butter candles to an ear of corn.
Although butter isn’t usually burned as a fuel, a Pennsylvania farm show recently converted their thousand pound butter sculpture into 3 days-worth of power for a local farm, using a methane digester. The New York State Fair turned its butter sculptures into biodiesel fuel. At home, you can make a stick of butter into a candle to see for yourself how an animal product can be used as a fuel.
To make butter candles you’ll need a stick of butter, a toothpick or skewer, some cotton kitchen twine and scissors.
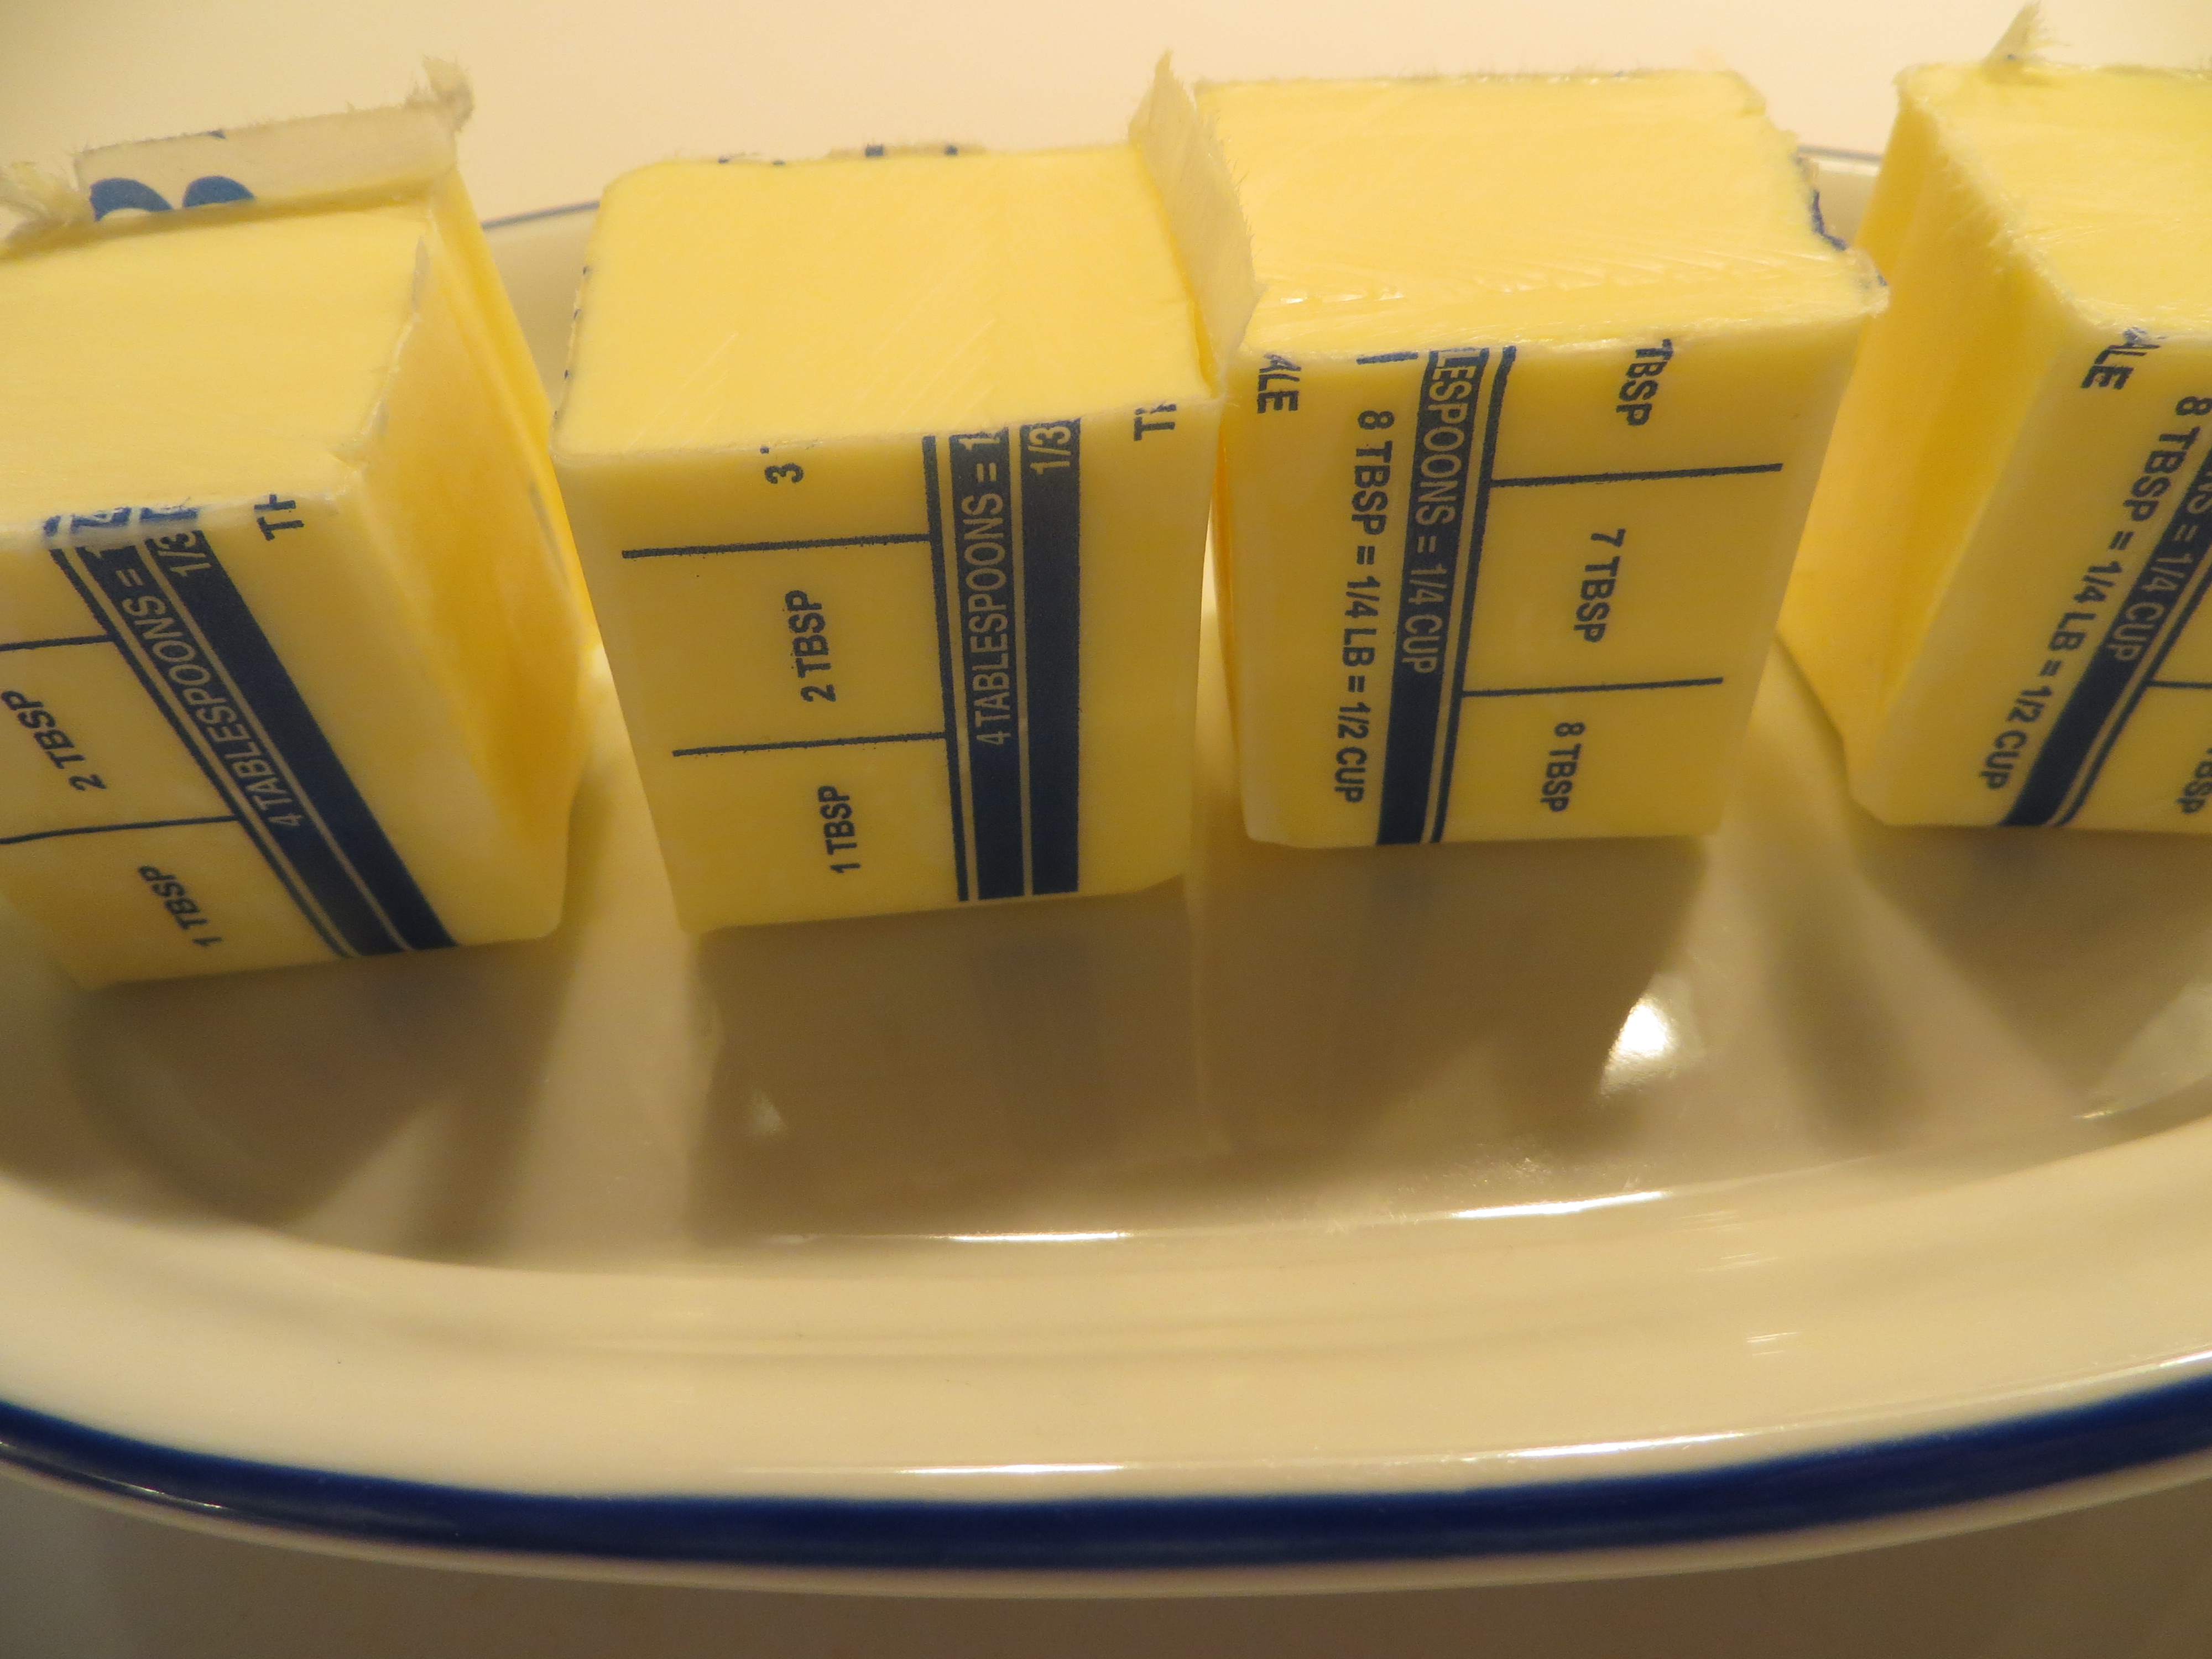
1. Cut the butter into the size candles you want. Place your candles on a fire-proof surface, like a metal plate.
2. Cut pieces of string slightly longer than the height of your candles.
3. Use a skewer or toothpick to poke a hole from the top of your candle to near the bottom.
4. Push your string into the hold using your skewer or toothpick. Leave 1/4 inch or so sticking out. This is your candle wick.
5. Rub a little butter onto the wick. Light your candle. It may take a few tries, but soon it should burn like a wax candle.
*As with all candles, butter candles should never be left unattended. Be sure to place your candles on a surface like a candle holder that cannot catch fire.
What happens? The lit cotton wick starts to burn and liquefies some of the butter fat. The wick then absorbs the melted butter and pulls it up,via capillary action, to the flame. The flame starts to burn the fat vapors rather than the wick, in a combustion reaction. This reaction produces heat, water vapor and carbon dioxide gas, putting the carbon is back in the atmosphere.
Since burning food isn’t an efficient use of energy or money (it takes lots of oil to raise and care for a cow,) scientists are coming up with ways to turn animal fats and byproducts that can’t be used as food into biofuels. Some inedible plant foods can be reused as well. For example, some cars can run on used cooking oil. Can you imagine how much oil a fast food restaurant throws away each week?
Although butter will never replace candle wax, butter candles are a good way to introduce the carbon cycle and get kids thinking about how new fuels and cleaner-burning fuel will impact the future of our planet.
To make the corn candle at the top of this post, we attached the butter candles to an ear of corn with broken off wooden skewers.
Outdoor Science Lab
- by KitchenPantryScientist
It’s hard to believe it’s already August. Other than reading, we don’t do much to fight summer brain drain at our house, but the end of summer is a great time to head to the back yard or driveway for some science experiments. They’re so much fun that kids won’t even realize they’re using their noggins! Just click on the experiment for how-to directions, photos and videos.

Learn physics by throwing eggs!
Got water? Make siphons, a water-purifier, water rockets, or fire-proof water balloons.
Hungry? Build a solar oven from a pizza box and bake s’mores.
Stand on eggs or throw them as hard as you can without breaking them. You can always clean up mistakes with your hose!
Play magician with the tablecloth trick, or make paper bag volcanoes erupt in your back yard.
Of course, there’s always the famous Mentos geyser, and film canister rockets are always a hit.
Nature walk bracelets add fun to any excursion, and you can collect water from trees or make water filters with grass and sand.
August is a great time to find Monarch caterpillars or study the earthworms in your back yard.
And no summer would be complete at our house without an epic marshmallow shooting competition. You’ll even learn some physics!
Paper Bag Volcano
- by KitchenPantryScientist
Last spring, I went into my daughter’s first grade classroom to do the famous volcano experiment that involves mixing baking soda (sodium bicarbonate) and vinegar (acetic acid). Unfortunately, with our hectic schedule there was no time to create a “work of art” volcano from paper mache or clay. So, we made one out of a paper bag. It was a smashing success.
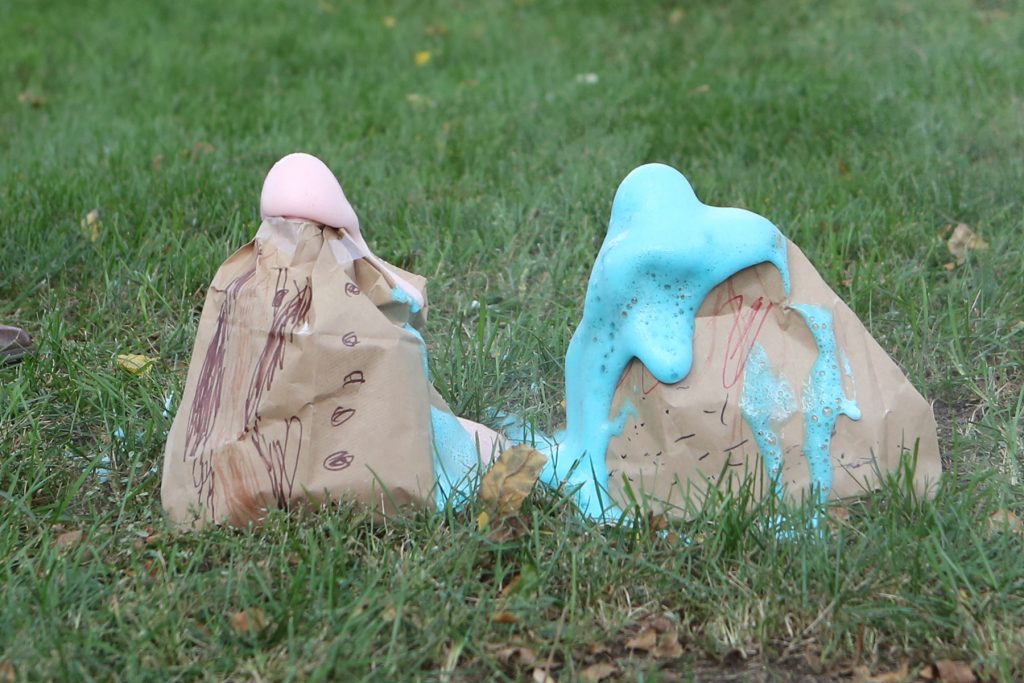
Paper bag volcanoes (image from Kitchen Science Lab for Kids- Quarry Books 2014
To make your own paper bag volcano, you’ll need a brown paper lunch sack (or a slightly bigger one like we used), an empty plastic water or soda bottle, a cup of vinegar, red food coloring and about a fourth of a cup of baking soda. *Cone coffee filters make great volcano cones too and work well on small plastic bottles!
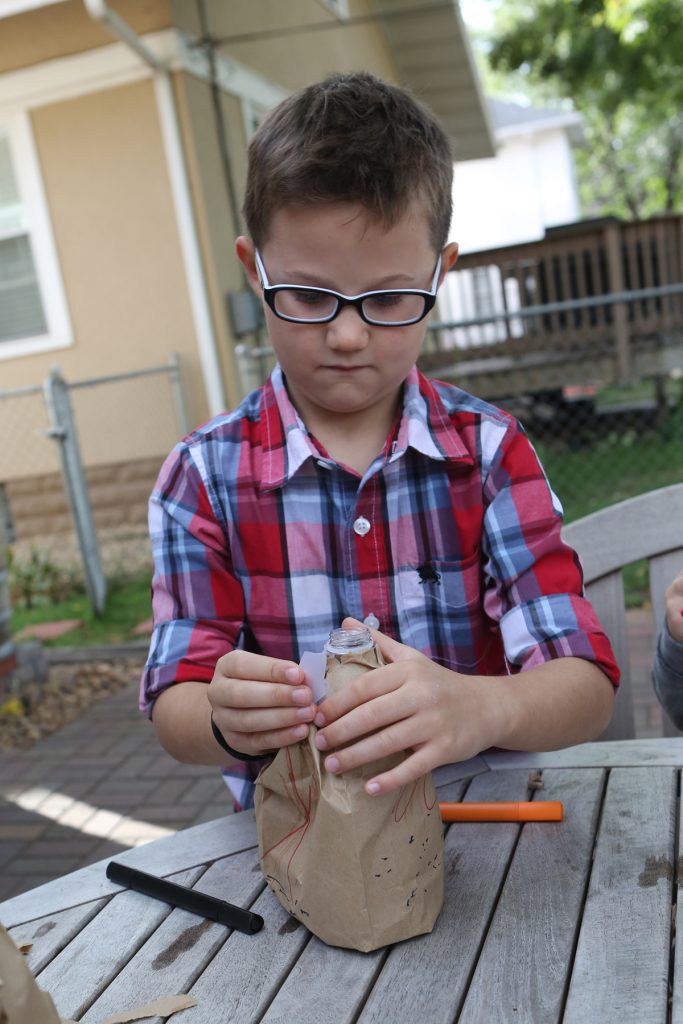
Remove the lid from the bottle, invert the brown bag over it, and tear open the bottom of the bag, along the flaps. Then, loosely tape the paper sack so that it fits around the mouth of the bottle. Don’t tape it to the bottle. If you like to draw, you can decorate the bag with markers.. We squashed and tore the bottom of the bag a little, to make it look more mountain-like.
Now, remove the bottle, fill it with the vinegar and add several drops of red food coloring for your “lava.” Place the bag bag over the bottle to hide the lava container.
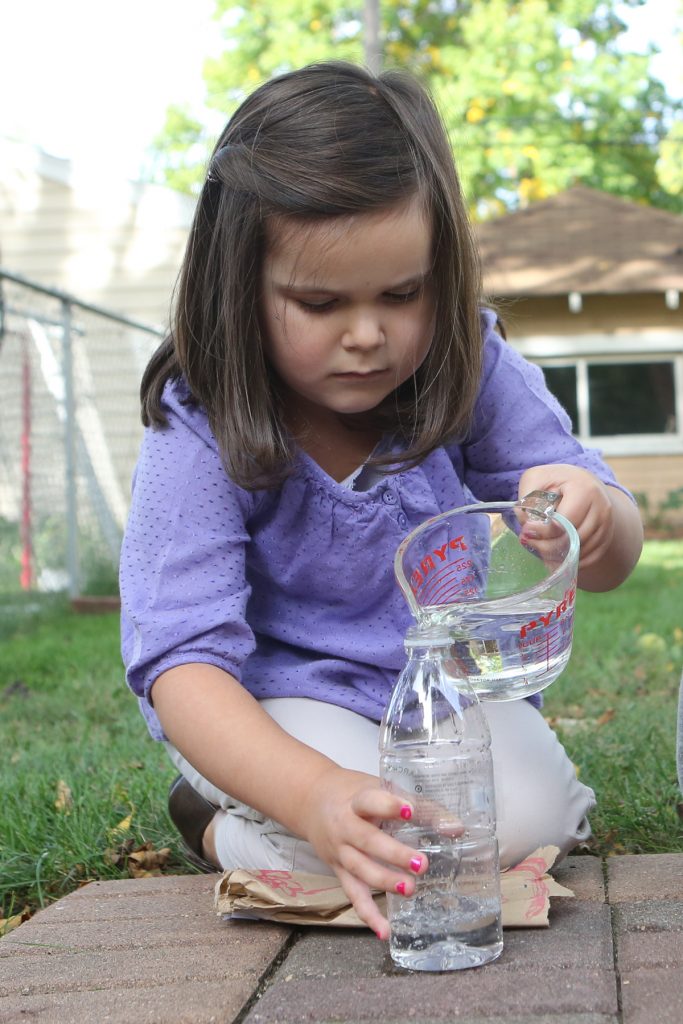
Place the volcano on a tray or something that will contain overflow and you’re ready for eruption!
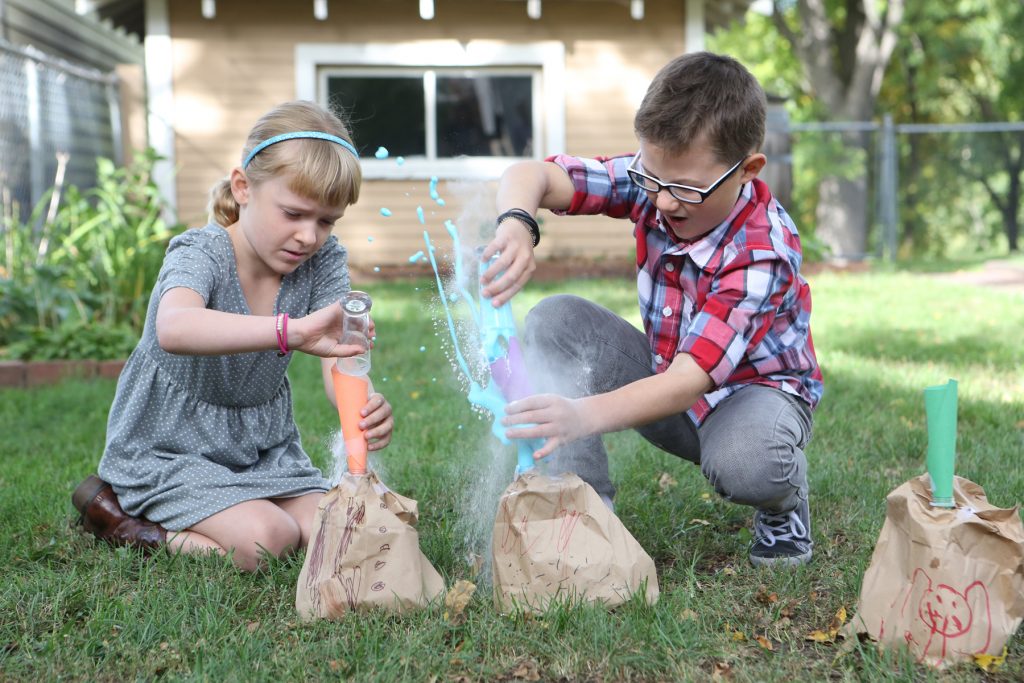
Using a folded piece of paper, quickly dump all of the baking soda into your bottle to start the chemical reaction. You’ll see the volcano erupt as the baking soda combines with the vinegar to produce carbon dioxide gas, which is one of the gases spewed by real volcanoes.
From Kitchen Science Lab for Kids (Quarry Books 2014)
From Kitchen Science Lab for Kids (Quarry Books 2014)
If you liked this experiment, try making “fizzy balloons“ with the same ingredients (plus a balloon, of course!) If you want to learn more about carbon dioxide gas and the carbon cycle, here’s a link to a cool video from NASA that explains it using a banana and a chunk of coal.
Zooming Fish Video
- by KitchenPantryScientist

Here’s a great project for pre-K kids. They can cut the fish out of paper or foam, pour the water and put a drop of soap behind the fish to make it “zoom.”
My original post and written directions for zooming fish can be found by clicking here.
Surface Tension in Space
- by KitchenPantryScientist
If you’ve done an experiment where you drip water onto a penny, or made Tie Dye Milk, you know what surface tension looks like here on Earth. How does it look in space?
Here’s an amazing video demonstrating how the surface tension of water looks in zero gravity on the international space station. Fascinating!