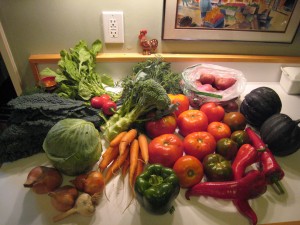
In today’s Science Times, Jane Brody tells us that it what we eat, rather than the supplements we take, that can help us live longer, healthier lives. She claims that eating a mostly plant-based diet with plenty of good fats (i.e. the Mediterranean diet), along with plenty of exercise, seems to be the key to lowering your risk of several types of disease. Read the article at http://www.nytimes.com/2010/01/12/health/12brod.html?ref=science . (Even if you’re not vitamin-takers, it is important to make sure that you and your family get plenty of calcium and vitamin D, through supplements if necessary, and keep in mind that you should always follow your pediatrician’s recommendations.)
Tags: diet, family, health, New York Times, supplements
In: Food Science |
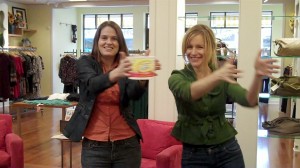
When I’m not busy with my kids or blogging, one of my favorite things to do is sing with my neighborhood garage/party band, ” The 952″. Recently, I got the chance to perform for a bigger audience when “I Can’t Believe it’s Not Butter!” sent my fellow blogger and good friend unplannedcooking.com a Flip video camera. They asked her to create and film a commercial for their new “Turn the Tub Around” campaign, advertising their new, healthier product which does not contain any hydrogenated oils* and is therefore trans-fat free.
Jennifer let me in on the fun, and with the help of a few friends, we managed to juggle our kids and our schedules just long enough to put a video together. Not only did we sing for the video, we had to learn a signature dance move (and I am NOT a great dancer.) Incredibly, we just found out that our video is a finalist in the video contest. We’re up against some very talented competition, but there’s a chance that part of our homespun video might air on a commercial during American Idol next Tuesday, Jan.12th. You will be able to view our video beginning on Jan.19th on the “Watch, Vote and Win Sweepstakes” at www.turnthetubaround.com. Check it out for a glimpse of a couple of moms acting like kids! You’ll also have a chance to win great prizes every time you vote for your favorite video! Hopefully, it will be ours.
Now for the science. Here’s your biochemistry lesson for the day: There are four kinds of fats: monounsaturated fat, polyunsaturated fat, saturated fat, and trans fat. Monounsaturated fat and polyunsaturated fat are considered to be the “good” fats in the human diet (think olive oil.) It is generally accepted that consumption of saturated fat should be kept low, especially for adults. Trans fat (which means trans fatty acids) is the considered the least healthy type of fat, far worse than saturated fat. Partial hydrogenation is an industrial process used to make vegetable oils, like soybean oil, into a less healthy product containing transfats. The process is used to make an oil more solid; provide longer shelf-life in baked products; provide longer fry-life for cooking oils, and provide a certain kind of texture or “mouthfeel.” The problem is that partially hydrogenated vegetable oil is laden with trans fat, which has been linked to health problems. In fact, there are currently several campains calling for the ban of partially hydrogenated oils. You, of course, have to decide what is best for you and your family. If you’re curious, there is much more specific information online about the health effects of transfats.
Note: The free video Flip camera was sent in exchange for our participation in the contest and I LOVE it! It’s small enough to fit in my purse and plugs right into my USB port to download videos.
Tags: I can't believe it's not butter, science, trans-fat, turn the tub around
In: Food Science |

You’re never too young to enjoy a good science experiment. This is a great project that requires very few supplies and very little effort for adult involved. It’s easy enough for a toddler to do and is a perfect activity for a cold or rainy day.
-Fill up a large bowl or tub with as much water as you’re comfortable cleaning up. (Safety Mama, if there were one, would remind you to always supervise young children around any amount of water!)
-Place a large towel under the bowl on some waterproof surface. (The kitchen floor works very well for us.)
-Have your child find several small objects around the house that they’d like to use in the experiment. Suggest they find some things that they think will float and some they think will sink. Do a quick check to make sure they won’t destroy anything that you want to keep dry.
-Ask them whether they think the object will float or sink and then let them try it out.
If they want, they can make a chart of their predictions and the results. Your child’s science notebook would be a great place to do this! (see science notebook post if you don’t already have one!)
Here’s some science for you parents, in case your kids want to know what’s happening. You can impress them with your vast knowledge:
One way to see how density affects things is to look at how things sink or float in water.
If something is more dense that water, it will sink, and if less dense than water, it will float.
In case they ask, which they always do:
Density is a measure of how much mass is contained in a given unit volume. Put simply, if mass is a measure of how much ‘stuff’ there is in an object, density is a measure of how tightly that ‘stuff’ is packed together.
Or, just tell them they’ll learn about it in science class someday!
Tags: density, float, kids, mass, science, sink, toddlers
In: Physics Experiments |
Tags: eye, kids, science, tarantula
In: Science News |

One thing I love about doing science with kids is that, regardless of their age, they can participate and enjoy it at some level. This is a perfect example. Even younger children will have fun putting apple slices into cups and watching what happens. Older children can make hypothesis (educated guesses) about what will happen and try to draw conclusions about what happened. I’ll do my best to make it simple to do and easy to understand!
Apples turn brown when they’re cut open and exposed to air. This is the result of oxygen in the air reacting with enzymes and other chemical compounds in the apples. We’re going to observe what happens when you treat apple slices with acids (lemon juice and vinegar) and a base (baking soda and water). We will also watch how fast treated apple slices turn brown compared to an untreated apple slice!
You could ask your child to choose one of the following hypothesis: 1. A solution with acid in it will stop the apples from turning brown so fast. or 2. A solution with acid in it will not change how fast the apples turn brown. Older kids could write their hypothesis in their notebooks!
Materials: an apple, vinegar (white or apple cider), lemon juice, baking soda, water, five clear containers (plastic cups or glasses) labeled as follows: no treatment, water, baking soda, lemon juice, vinegar.
Mix together about 1/2 tsp of baking soda in 1/4 cup water. Add it to the appropriate container. To another container, add 1/4 cup vinegar, to another add 1/4 cup water and to another add 1/4 cup lemon juice. Leave one cup empty for your “no treatment” apple, or the one just exposed to air. Your child can help you do this! Make sure small children don’t rub or splash vinegar or lemon juice in their eyes. Remember, they’re acids! Explain to them that lemon juice and vinager are acids and baking soda makes a basic solution. Water is pretty neutral (neither an acid or a base.) If they want to know more about acids and bases, go to http://library.thinkquest.org/J001539/
Slice the apple and immediately have your child add a slice to each cup, thoroughly coating the apple slices with solution. Pour the solutions out, leaving the apple slices in the cups. Help your child write down or draw how the slices look. They can make a table in their lab notebook to record their observations, with treatment in one column next to appearance in the next column (save room for more columns to note appearance over time.) I had to cover our cups loosely with foil due to the frightening number of fruit flies that have recently invaded my kitchen.
Have them observe the slices in a few hours and over the next few days, recording their observations if they want to . They may want to draw how the slices look over time, or even take pictures for their science notebooks.
Finally, have them draw a conclusion from their observations (data) and record it in their notebook if they want to. Did the solutions keep the apples from turning brown? Was their hypothesis correct? Which solutions worked best? Did both acids (lemon juice and vinegar) help preserve the color? If not, does this suggest that it was something else in the solution, and not just the acid that preserved the color? What did the water do? The base?
You can make it as simple or complicated as you want to! Just make it fun and don’t take over. Let your kids get their hands dirty!
Tags: acid, apples, base, kids, science
In: Chemistry Experiments |
First of all, I have nothing against real ground beef. That is, I will eat beef that has been ground by my local butcher or trusted grocer. I love a good burger.
However, starting today, I refuse to eat ground beef from an unknown source (i.e. fast food restaurants and big chain grocery stores.) Not only does the ground beef industry refuse to allow retesting of their meat (they won’t even sell it to stores who retest it,) I just read that one company is taking parts of cow that are considered unusable, treating the beef “trash” with ammonia gas to kill harmful bacteria that tend to contaminate those cow parts, and selling it to be mixed with higher quality ground beef to make it cheaper for restaurants and schools (yes, schools!) This disgusting meat product, which doesn’t list ammonia as an ingredient, although it remains following treatment, may still harbor dangerous bacteria. It’s unbelievable.
I’m not touching ground beef from an unknown source or letting my kids eat it until the beef industry and the U.S.D.A get their act together. I’d suggest you do the same. Maybe if we all boycott their substandard, potentially dangerous product, they’ll stop trying trying to feed us beef products that used to be made into dog food.
For a more complete story, read today’s New York Times article at http://www.nytimes.com/2009/12/31/us/31meat.html?_r=1&hp
Tags: ammonia, bacteria, dog food, ground beef, New York Times, pathogens
In: Food Science |
I am cooking hard-boiled eggs as I write so that we can do a quick experiment before dinner. My kids will always drop whatever they’re doing to do a science project and I am thrilled to see them so enthusiastic about something that doesn’t involve screen time or sugar.
The first experiment involves dissolving eggshells in vinegar. Put two raw eggs into two juice glasses or jars and cover the eggs with (white or cider) vinegar. Let them sit overnight and see what happens. Before handling the eggs, gently rinse them with water. Only the membrane of the egg will remain, which is like a rubbery balloon.) It’s pretty neat. Have your child draw or record what they observed and how long it took to dissolve the shells in their science notebook. (See earlier post.)
What happened? The shells are dissolved by the vinegar, which is an acid.

The second experiment uses the eggs with the dissolved shells that you made in the one. Return the eggs to two empty glasses or jars. Cover one egg with water and the other with corn syrup. Leave them for 24 hours in the refrigerator and see what happens. Have your child record their results!
What happens? From what I understand, the balloon-like membrane of the soft eggs will let water molecules pass through. The egg will expand appear even more balloon-like as it becomes filled with water. I can’t wait to see what happens with the corn syrup egg. I’m guessing that the membrane may not let the corn-syrup molecules through. That’s my “hypothesis”, but I won’t know until we complete the experiment. Ask your child what they think will happen.
For the final experiment, you will need a glass bottle who’s neck is a little smaller than a hard-boiled egg, and the hard-boiled egg itself. It’s called Egg-in-a-Bottle. I went out to my recycling bin and discovered that my Trader Joe’s grape juice bottle is the perfect size. It obviously requires adult supervision and I have to admit that we’ve had varying sucess with this, but when it works, it’s really neat.
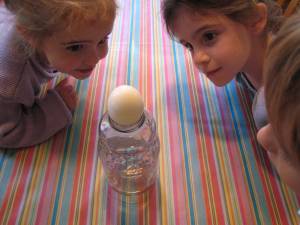
Peel the hard boiled egg, set it on the bottle, and let your children verify that it won’t easily squeeze through. Then, remove the egg, light three matches and drop them into the bottle. They may not stay lit for long, but it doesn’t matter. Do it fairly quickly. I had the best luck dropping them in unlit end first. Then, set the egg back on top of the bottle before the matches go out and watch the egg get sucked into the bottle. (My matches went out just before I put the egg back on top of the bottle, and it still worked.) It’s pretty cool!
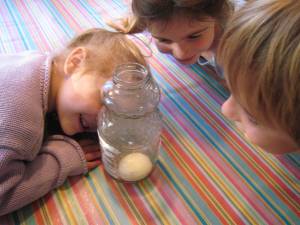
Ask your kids what they think happened. Have them draw a picture of the egg in the bottle in their science notebooks! The matches heat the air in the bottle. When the matches go out, the air rapidly cools, decreasing the air pressure in the bottle. The outside air, who’s pressure is higher actually pushes the egg into the bottle as it attempts to equalize the pressure inside of the bottle.
Tags: eggs, experiment, kids, science, vinager
In: Physics Experiments |
Do you have a child that loves the ocean? My son, a budding marine biologist, is very excited about this National Geographic Kids design contest. Some lucky kid’s winning design will be made into a flag and fly on the National Geographic Ocean Now expedition ship in 2010. Go to http://ow.ly/KnDO for rules and details! Entries must be postmarked by February 20, 2010 and the contest is for kids 8-14 years old (much to my 7-year old daughter’s disappointment.)
Tags: contest, design, kids, national geographic kids, science
In: Science News |
Did you know that flu viruses can survive longer than the viruses that cause colds on non-porous surfaces (like plastic or metal?) One study showed that avian influenza, the virus that causes bird flu, can survive for six days on some surfaces. Scary! Viruses only survive for minutes on your skin, but that’s plenty of time to spread infection, especially if you touch your face. Read more in the NYTimes article at http://bit.ly/55ngkM and, more importantly, remember to wash your hands.
In: Science News |

What could be more fun than creating your own green slime to play with? It’s easy to synthesize your own green goo using only Elmer’s glue (the non-washable kind), Borax (found in the laundry detergent section of most stores), green food coloring and water.
In a bowl, have your child mix together about 1/3 cup glue and 1/3 cup water with a spoon or Popsicle stick. These measurements don’t have to be exact. Add a few drops of green food coloring and mix well.
To make the Borax solution, add around a cup of water to a jar. To the water, add about a Tablespoon of Borax. Have your child shake the jar to dissolve as much of the Borax as possible. You are making what is called a saturated solution, so it may not all dissolve! Don’t worry, it will work just fine.
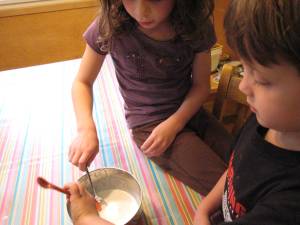
Have your child add about a teaspoon at a time of the Borax solution to the glue/water mix. After each addition, have them stir the mixture together. You should see long strings begin to form and stick together. Keep adding Borax until the mixture doesn’t feel gluey any more. It will form sort of a shiny playdough-like substance. If you add too much Borax solution, it will feel wet. You should be able to just knead it a little to absorb the extra water! The slime is not toxic, but Borax is soap, so don’t let your kids eat it!
I am a biologist and not a chemist, but here is the science, as I understand it.
Mixing Elmer’s glue with water forms a substance called a polymer, which is a long chain of molecules. (A molecule is the smallest amount of a specific chemical substance that can exist alone, like H2O, a single water molecule). The polymer formed by water and glue is called polyvinyl acetate.
The Borax solution (sodium tetraborate) is a cross-linking substance that makes the polymer chains stick together. As more and more chains stick together, they can’t move around and the goo gets thicker and thicker. Eventually, all the chains are bound together and no more Borax solution can be incorporated.
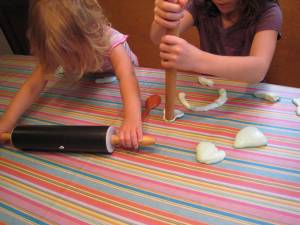
You can store the slime in plastic bags. If you want to make a larger batch, just remember to mix equal amounts of glue and water and add as much Borax solution as needed.
To make your child feel like a “real” scientist, find an old, button up shirt for your child to use as his or her “lab coat”. It’s fun and will protect their clothes. You could even try to find some old safety goggles in your garage for your child to wear, although the ingredients for this project are relatively safe. (Very young children should always be supervised while doing science projects.)
Have fun!
Tags: borax, fun, glue, kids, polymer, project, science, slime
In: Uncategorized |


