Super Siphon

 - by KitchenPantryScientist

You may have heard you can drain a fish tank with a siphon, but have you ever made one, just for fun?

With a few feet of clear, plastic tubing, you can create your own siphon, make a “roller coaster” for small objects,and watch physics in action.

You’ll need a long piece of flexible, plastic tubing (maybe 5 feet), a large container set off the ground, and another container to catch the water so you can reuse it. A hose is also helpful, if you’re outside.

Fill the upper container with water and put one end of the tube UNDERWATER in this container. For the siphon to work, one end must be submerged under water in the upper container and the other end must be lower than the level of the water! You can weight the upper end down to keep it submerged.

There are several ways to start the siphon. You can submerge the entire piece of tubing in the water to remove all the air, put your thumb over one end, remove it from the water and lower it below water level before removing your thumb to start the flow. Alternately, we’ve found it’s easiest to put one end of the tube in the upper container, have the other end out and lower than water level and then put the running hose to the underwater, upper end of the tubing to remove all the air and start the water running out of the lower end. Remember to keep the upper end underwater or your siphon won’t work!

You can put tiny objects at the mouth of the siphon and watch them get sucked through from one end to the other. We wrapped our siphon around a broom handle to make a water ride for broken water balloon fragments.

Exactly how siphons work is a little bit complicated, but it has to do with atmospheric pressure and gravity, which give the water in the upper container more potential energy than the water in the lower container. This energy allows the water in the siphon to essentially flow “uphill” for a short distance before it drops to the lower container. You can go to “Ask a Physicist” for a more detailed explanation.
Fireproof Water Balloon

 - by KitchenPantryScientist

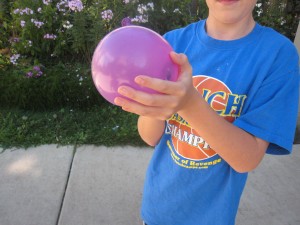
Living thing are made mostly of water.  Humans are, on average, are 60-70% water and the water in our bodies helps to stabilize our temperature.  A great way to illustrate this concept requires no more than a balloon, some water and a grill lighter.  (If young kids are doing the experiment, adult supervision is absolutely required.)

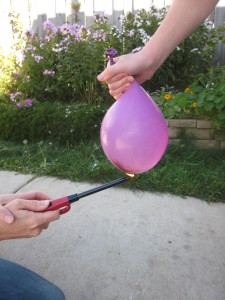
Simply fill the balloon with water, tie it and hold a flame to the bottom of the balloon.  We did the experiment outside, just to be safe!

What do you think will happen?

Specific heat is the amount of heat required to raise the temperature of a substance by one degree Celsius.  The specific heat of water  is higher than any other common substance, which allows water to absorb and release large quantities of heat with very little change in temperature.  Because of this, the water in the balloon absorbs the heat from the flame, and the rubber doesn’t melt.  Imagine that the balloon is a living cell, and you can see how the fluid in a cell helps keep it safe when the temperature changes!

The balloon will turn black where you flame it, but it won’t pop. When you’re done with the experiment, fill a few more balloons and have a water balloon fight!

Enrichment: What happens if you try the same experiment with a frozen water balloon?

Solar Water Purification

 - by KitchenPantryScientist

How would you get water to drink if you were stranded on a desert island, surrounded by salty ocean? If you happened to have a big leaf and a few concave (bowl-like) items- maybe a big shell and a smaller shell, you could make a solar water purifier to collect drinking water.

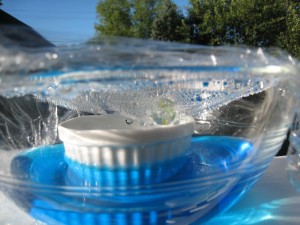
Even if you’re not on a desert island, it’s fun to make your own solar water-purifier using a big big bowl, a small bowl, some plastic wrap and a marble or a pebble. You’ll also need salt and food coloring to “contaminate” the water you’ll be purifying. This experiment works best on a hot, sunny day since it harnesses the power of the sun’s rays to clean the water.

Put the small bowl inside the big bowl. The top of the small bowl must be lower than the top of the big bowl.

In a separate container, mix together water, salt and food coloring until you have a mixture too salty to drink. Pour the water into the big bowl, making sure the liquid stays outside of your small bowl, since you’ll be collecting clean water in the small bowl.

Loosely cover the top of the bowl with a single piece of plastic wrap. Place a pebble or marble in the center of the plastic wrap and adjust the wrap so that there is a dip directly above the small collection bowl. Try to seal the plastic wrap around the edges of the bowl as well as you can.

Now, place the bowl in the sunlight. The sun’s ultraviolet rays will go through the plastic wrap and into the colored water, where they’ll be absorbed and re-released as heat energy. Since the heat can’t escape back out through the plastic wrap, the air and water in the bowl heat up.

The warm temperature helps water molecules on the surface evaporate, or escape, into the air in the bowl. When they collide with the plastic wrap, they encounter a cooler surface since the air outside the bowl is not as warm. This causes them to condense, or form droplets, on the plastic wrap. When the droplets get big enough, gravity pulls them to the lowest part of the plastic wrap (the dip) and they drip into the collection container.

When you’ve collected enough purified water (be patient- it can take a day or two), you can taste the water to see how your purifier worked. Be sure to wipe of the bottom of the collection bowl before you pour it out so you don’t contaminate your clean water!

A variation on the experiment is to add vinegar to the water, purify it, and check the pH of your starting and purified water using litmus paper. You can make your own litmus paper using red cabbage!

Grow Living Magnets from Pond Water

 - by KitchenPantryScientist

If you have a pond nearby, gallons of science projects await! Not only can you collect tadpoles and watch them change into frogs before your very eyes, but there is a microscopic world in every drop of pond water.

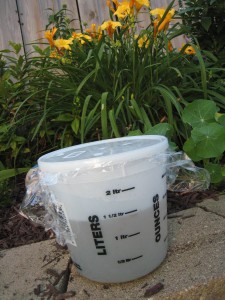
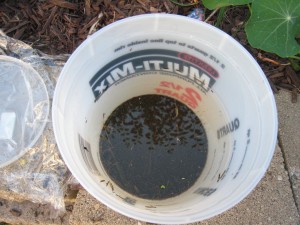
Grab a bucket, or whatever container you can find, and fill it with pond water. Be sure to scoop up a few inches of muck from the bottom when you fill your bucket, since lots of cool things live in muck.

Let the murk settle and peek into your bucket. Can you see any tiny creatures swimming around? Grab a magnifying glass, or if you’re lucky enough to have a microscope, see what else lives in the water.

There are special bacteria, called magnetotactic bacteria, that live in the mud of many ponds. Bacteria are tiny organisms made of just one cell, and these magnetotactic bacteria make tiny magnets called magnetosomes, which they store in microscopic “sacs” inside their single-cell bodies. The magnets in their bodies are arranged in long chains, and tell the bacteria what direction to swim. Not only do magnetotactic bacteria swim toward the nearest pole, but they swim down toward magnetic forces deflected through the earth’s center, which is made of molten metal. This helps them survive, since the oxygen in air can kill them and the nutrients they need are in the mud.

To grow your own magnetotactic bacteria, cover your bucket of muddy water and put it in a dark place (so algae won’t grow) for about a month. Take out a jarfull of the water and set a magnet outside the glass. After a few days, if magnetotactic bacteria have grown, you should be able to see white substance in the water near one pole of the magnet. This whitish stuff is actually millions of bacteria, attracted to the magnet by the opposite magnetic charges in their own bodies. If you have a microscope, collect the bacteria with an eyedropper and observe them. What happens if you set a magnet next to them?

Try growing these bacteria from water and mud from different ponds in your area. There are over 12 different strains of magnetotactic bacteria, and scientists are very interested in them. Not only do they have great possibilities in biotechnology and nanotechnology, but they may be clues to life on other planets. Magnetosomes in long chains, like those in bacteria, have been found in meteorites from Mars!

Algae Experiment

 - by KitchenPantryScientist

Did you know that you can add a bale of barley hay to a 1 acre pond to help keep it from getting green and scummy in the summer? The hay, or possibly microorganisms in the hay, keep algae from overgrowing in the pond.

Algae are tiny, single-celled organisms called plant-like protists. They use the sun’s energy to make carbohydrates in a process called “photosynthesis” and they grow mostly in moist, sunny environments.

However, there are some places we don’t want algae to grow- like aquariums, or water purifiers. Some metals, organic chemicals, and other things (like barley hay) can keep algae from growing, or slow its growth. You can create your own experiment and discover some good anti-algae materials!

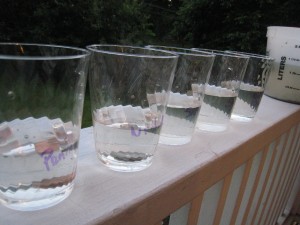
Take some lake or pond water and use it to fill several clear jars or glasses. Now, add a different non-toxic substance or item to each glass. Find things that you think might keep algae from growing. You might try pennies, tea bags, salt, vinegar, etc. Be sure to include a control sample, where you don’t add anything, so you can see normal algae growth. What happens if you cover glass one loosely with foil, so it gets air, but no light?

Place your samples in a warm, sunny spot for several weeks. You can lightly cover them with plastic wrap to reduce evaporation. Once you see green in your control sample, check the others. Did anything you add keep algae from growing? Did anything make it grow even better?

Homemade Solar Oven

 - by KitchenPantryScientist

IMG_3380

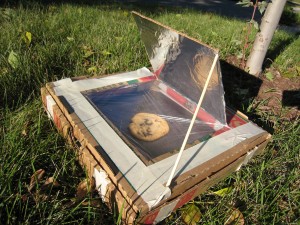
Did you know you can capture the sun’s energy in a solar oven and use it to cook food? Using a pizza pox, you can make an oven that will heat up to almost 200 degrees F on a sunny day (and will only take you 10 or 15 minutes to put together.) Try doing this on a hot, sunny day to get the best results. Kim Insley, from Kare 11 news, visited our backyard the other morning to make a pizza box solar oven and cook s’mores.

My friend Sheila, an engineer at NREL (the National Renewable Energy Laboratory), suggested we try this project. NREL’s website has great information on solar energy and many other sources of renewable energy.

You will need: 1 pizza box from a local pizza delivery store, newspapers, tape, scissors, black construction paper, clear plastic wrap, aluminum foil and a dowel or stick to prop the lid up.  You’ll also want to have some food to cook in your oven, like marshmallows or hot dogs.

Make sure the cardboard is folded into its box shape.   Carefully cut out 3 sides of a square in the lid of the box.  Do not cut out the fourth side of the square, which is the one closest to where the pizza box lid hinges.  Gently fold the flap back along the uncut edge to form a crease.  See photo below!

IMG_3387

Wrap the underside (inside) face of the flap that you made with aluminum foil.  Tape it so that the foil is help firmly but so that there’s not too much tape showing on the foil side of the flap. 

Open the box and place a piece of black construction paper so that it fits the bottom of the box.  Tape it by the edges. (We used two pieces.)

Roll up some newspaper and fit it around the inside edges of the box.  This is the insulation.  It should be about 1-1 ½” thick.  Use tape (or other materials you can think of) to hold the newspaper in place.  Tape it to the bottom of the box so that you can close the lid. (We taped it to the sides and had to cut the tape so that we could close the lid.  Luckily our newspaper fit in tightly enough that we didn’t really even need the tape.)

IMG_3386

Finally, cut plastic wrap an inch larger than the lid opening on the box top.  Tape it on the underside of the lid opening.  Add another piece of plastic wrap to the top of the lid opening.  This creates a layer of air as insulation that keeps heat in the box. It also makes a window you can look through at the food you’re “cooking.”  BE SURE THE PLASTIC WRAP IS TIGHT.

You’re almost done!  According to NREL, the oven works best sitting at an angle facing the sun directly so you’ll need to make a prop.  You could probably just use a book or something under the hinged side of the oven.  However, I missed this when I read the directions and we just put it flat on the ground.  The flap of the box top needs to be propped open—a dowel or ruler works great.   We used a wooden skewer that I broke the sharp point off of.  This way you can change the amount of sunlight striking the oven window. 

Put your food in the oven on a piece of saran wrap or a dark plate and close the lid, but remember to leave the flap open. Play with the angle of the flap to see how much sunlight you can get to reflect on the food. 


Try making s’mores, or heating up a hot-dog in your solar oven. It may take a while for your oven to heat up, so be patient.

How do solar ovens get hot enough to cook food? Ultraviolet rays from the sun go through the plastic wrap and are absorbed by the black paper. The sun’s energy is converted to lower-energy infrared rays, which don’t have enough energy to escape back through the saran wrap and are trapped in the pizza box. The saran wrap is a good illustration of how greenhouse gases, like carbon dioxide and methane, can trap the sun’s heat on a larger scale, causing the “greenhouse effect.” The newspaper insulation helps keep the heat in the box as the temperature rises.

How do you think the aluminum foil helps make the oven hotter?

Homemade “Black Snake” Fireworks (Adult Supervision Required)

 - by KitchenPantryScientist

I usually only post experiments safe for kids of all ages, but couldn’t resist this guest post from Pat Mullin of Labconco Corporation. Adult supervision is absolutely required due to the alcohol (a few tablespoons), which you light on fire to start the reaction.
As a kid, I remember watching long carbon worms emerge from glowing tablets our parents lit with matches on Independence Day. Pat’s video shows how (with the help of an adult), you can make your own “black snake” fireworks using only sand, powdered sugar, baking soda and denatured alcohol or ethanol. Very cool!

He does the experiment in a fume hood, but ethanol and denatured alcohol burn clean, so it’s perfectly safe to do in the driveway, with kids standing at a safe distance. Can’t wait to try it! Happy Fourth of July!

Tablecloth Trick- More Backyard Science

 - by KitchenPantryScientist

This is a fun “magic” experiment to try outside, on the lawn, where your kids can spill as much water as they want to.   It’s also nice to have grass under your table, so glass and ceramic dishes won’t break.

Since this can take practice, use old dishes and remind your kids to let you pick up anything that does get broken, so they don’t get cut! All you’ll need is a table, a sturdy, heavy glass that isn’t too tippy (we used a bar glass and it worked pretty well,)  a smooth tablecloth and water. You can also try this with a heavy plate or bowl! Tablecloths without seams or old sheets with edge seams cut off work best!

IMG_2880

We used easel paper as our tablecloth, but you can try a plastic tablecloth or a cloth one that doesn’t have a heavy seam on the edge.  The more slippery the tablecloth, the better it will work.  I’d also recommend bringing out a pitcher of water for refilling the glass and a towel for wiping up spills.

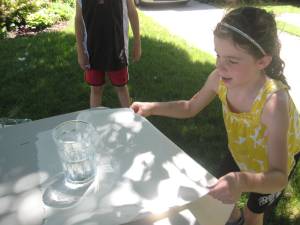
Put the paper or tablecloth near the edge of the table (see photo above.)  Place the glass of water or plate on the tablecloth near the edge of the table.  (I wouldn’t recommend filling your glass to the top.)

IMG_2877

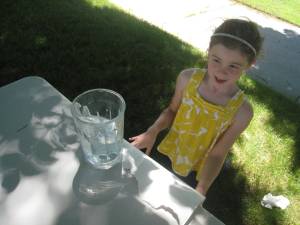
This part is important!  You MUST pull the tablecloth straight down, along the edge of the table, very fast.  If you pull it out, toward you, or pull it too slowly, it won’t work.  If you do it correctly (and it may take a few attempts), the water will slosh a little, but the cup will remain on the table, full of water.  We spilled a lot, but had a great time.  All of the older kids involved were able to do it successfully by themselves, but I had to help my three year old a little.

The science? The law of inertia says that objects don’t want to change how fast they’re moving (or not moving, in the case of our glass.)  They heavier something is, the more inertia it has.  In our experiment, the heavy glass of water is standing still and doesn’t want to speed up.  Since the tablecloth is moving under the glass very quickly, the heavy glass slips on it and doesn’t move very far. Even the friction between the glass and the tablecloth isn’t a strong enough force to make it move much. It seems like magic, but it’s just physics.

We did this experiment on Kare11 Morning news, if you want to see how it works!

En Route to the Space Station

 - by KitchenPantryScientist


My sound experiment post will have to wait, because the video NASA is posting from the space shuttle Endeavour is too cool not to share! The video above is from day 2 of the mission as STS-134’s crew travels to the International Space Station.

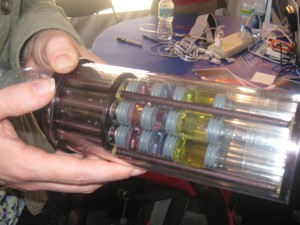
The astronauts are hard at work, and one of the first things you’ll see is Astronaut Mark Kelly shaking up some plastic cylinders to start a microbiology experiment!!! At the NASA tweetup, we got to see one of these culture tubes close up!

The tube has three compartments: bacteria, liquid food for bacteria, and tiny worms called nematodes that the bacteria can infect! First, they mix the bacteria with the food, then they mix the bacteria with the worms. In space, the bacteria get really “infectious”and “virulent”, and researchers on back earth study them and use the information to make better vaccines to keep people healthy.
Have you ever heard of Salmonella bacteria that can be in eggs and make people sick? This is one of the bacteria they’re studying!

Today, NASA posted this great video of Endeavour “doing a final backflip before docking with the space station.”

Godspeed Endeavour

 - by KitchenPantryScientist


Twenty kids stopped eating donuts long enough to shout out a countdown this morning in my living room. We gasped as Endeavour’s rockets blossomed, smiled at the crackle and roar and cheered as she ascended, rolled gracefully and disappeared into the clouds with a flash of orange. We watched in awe as the side booster rockets blew off and the shuttle floated free of the external tank with the curve of the earth in the background. I have to admit that I got a little misty- not because I wasn’t standing at the countdown clock to experience it live, but because despite the laws of physics and all the safety precautions, it still seems like a miracle each time we send people safely into orbit.