Category:Physics Experiments’
Super Siphon
- by KitchenPantryScientist
You may have heard you can drain a fish tank with a siphon, but have you ever made one, just for fun?
With a few feet of clear, plastic tubing, you can create your own siphon, make a “roller coaster” for small objects,and watch physics in action.
You’ll need a long piece of flexible, plastic tubing (maybe 5 feet), a large container set off the ground, and another container to catch the water so you can reuse it. A hose is also helpful, if you’re outside.
Fill the upper container with water and put one end of the tube UNDERWATER in this container. For the siphon to work, one end must be submerged under water in the upper container and the other end must be lower than the level of the water! You can weight the upper end down to keep it submerged.
There are several ways to start the siphon. You can submerge the entire piece of tubing in the water to remove all the air, put your thumb over one end, remove it from the water and lower it below water level before removing your thumb to start the flow. Alternately, we’ve found it’s easiest to put one end of the tube in the upper container, have the other end out and lower than water level and then put the running hose to the underwater, upper end of the tubing to remove all the air and start the water running out of the lower end. Remember to keep the upper end underwater or your siphon won’t work!
You can put tiny objects at the mouth of the siphon and watch them get sucked through from one end to the other. We wrapped our siphon around a broom handle to make a water ride for broken water balloon fragments.
Exactly how siphons work is a little bit complicated, but it has to do with atmospheric pressure and gravity, which give the water in the upper container more potential energy than the water in the lower container. This energy allows the water in the siphon to essentially flow “uphill” for a short distance before it drops to the lower container. You can go to “Ask a Physicist” for a more detailed explanation.
Fireproof Water Balloon
- by KitchenPantryScientist

Living thing are made mostly of water. Humans are, on average, are 60-70% water and the water in our bodies helps to stabilize our temperature. A great way to illustrate this concept requires no more than a balloon, some water and a grill lighter. (If young kids are doing the experiment, adult supervision is absolutely required.)
Simply fill the balloon with water, tie it and hold a flame to the bottom of the balloon. We did the experiment outside, just to be safe!

What do you think will happen?
Specific heat is the amount of heat required to raise the temperature of a substance by one degree Celsius. The specific heat of water is higher than any other common substance, which allows water to absorb and release large quantities of heat with very little change in temperature. Because of this, the water in the balloon absorbs the heat from the flame, and the rubber doesn’t melt. Imagine that the balloon is a living cell, and you can see how the fluid in a cell helps keep it safe when the temperature changes!

The balloon will turn black where you flame it, but it won’t pop. When you’re done with the experiment, fill a few more balloons and have a water balloon fight!
Enrichment: What happens if you try the same experiment with a frozen water balloon?
Solar Water Purification
- by KitchenPantryScientist
How would you get water to drink if you were stranded on a desert island, surrounded by salty ocean? If you happened to have a big leaf and a few concave (bowl-like) items- maybe a big shell and a smaller shell, you could make a solar water purifier to collect drinking water.

Even if you’re not on a desert island, it’s fun to make your own solar water-purifier using a big big bowl, a small bowl, some plastic wrap and a marble or a pebble. You’ll also need salt and food coloring to “contaminate” the water you’ll be purifying. This experiment works best on a hot, sunny day since it harnesses the power of the sun’s rays to clean the water.
Put the small bowl inside the big bowl. The top of the small bowl must be lower than the top of the big bowl.
In a separate container, mix together water, salt and food coloring until you have a mixture too salty to drink. Pour the water into the big bowl, making sure the liquid stays outside of your small bowl, since you’ll be collecting clean water in the small bowl.
Loosely cover the top of the bowl with a single piece of plastic wrap. Place a pebble or marble in the center of the plastic wrap and adjust the wrap so that there is a dip directly above the small collection bowl. Try to seal the plastic wrap around the edges of the bowl as well as you can.
Now, place the bowl in the sunlight. The sun’s ultraviolet rays will go through the plastic wrap and into the colored water, where they’ll be absorbed and re-released as heat energy. Since the heat can’t escape back out through the plastic wrap, the air and water in the bowl heat up.
The warm temperature helps water molecules on the surface evaporate, or escape, into the air in the bowl. When they collide with the plastic wrap, they encounter a cooler surface since the air outside the bowl is not as warm. This causes them to condense, or form droplets, on the plastic wrap. When the droplets get big enough, gravity pulls them to the lowest part of the plastic wrap (the dip) and they drip into the collection container.
When you’ve collected enough purified water (be patient- it can take a day or two), you can taste the water to see how your purifier worked. Be sure to wipe of the bottom of the collection bowl before you pour it out so you don’t contaminate your clean water!
A variation on the experiment is to add vinegar to the water, purify it, and check the pH of your starting and purified water using litmus paper. You can make your own litmus paper using red cabbage!
Homemade Solar Oven
- by KitchenPantryScientist

Did you know you can capture the sun’s energy in a solar oven and use it to cook food? Using a pizza pox, you can make an oven that will heat up to almost 200 degrees F on a sunny day (and will only take you 10 or 15 minutes to put together.) Try doing this on a hot, sunny day to get the best results. Kim Insley, from Kare 11 news, visited our backyard the other morning to make a pizza box solar oven and cook s’mores.
My friend Sheila, an engineer at NREL (the National Renewable Energy Laboratory), suggested we try this project. NREL’s website has great information on solar energy and many other sources of renewable energy.
You will need: 1 pizza box from a local pizza delivery store, newspapers, tape, scissors, black construction paper, clear plastic wrap, aluminum foil and a dowel or stick to prop the lid up. You’ll also want to have some food to cook in your oven, like marshmallows or hot dogs.
Make sure the cardboard is folded into its box shape. Carefully cut out 3 sides of a square in the lid of the box. Do not cut out the fourth side of the square, which is the one closest to where the pizza box lid hinges. Gently fold the flap back along the uncut edge to form a crease. See photo below!

Wrap the underside (inside) face of the flap that you made with aluminum foil. Tape it so that the foil is help firmly but so that there’s not too much tape showing on the foil side of the flap.
Open the box and place a piece of black construction paper so that it fits the bottom of the box. Tape it by the edges. (We used two pieces.)
Roll up some newspaper and fit it around the inside edges of the box. This is the insulation. It should be about 1-1 ½” thick. Use tape (or other materials you can think of) to hold the newspaper in place. Tape it to the bottom of the box so that you can close the lid. (We taped it to the sides and had to cut the tape so that we could close the lid. Luckily our newspaper fit in tightly enough that we didn’t really even need the tape.)

Finally, cut plastic wrap an inch larger than the lid opening on the box top. Tape it on the underside of the lid opening. Add another piece of plastic wrap to the top of the lid opening. This creates a layer of air as insulation that keeps heat in the box. It also makes a window you can look through at the food you’re “cooking.” BE SURE THE PLASTIC WRAP IS TIGHT.
You’re almost done! According to NREL, the oven works best sitting at an angle facing the sun directly so you’ll need to make a prop. You could probably just use a book or something under the hinged side of the oven. However, I missed this when I read the directions and we just put it flat on the ground. The flap of the box top needs to be propped open—a dowel or ruler works great. We used a wooden skewer that I broke the sharp point off of. This way you can change the amount of sunlight striking the oven window.
Put your food in the oven on a piece of saran wrap or a dark plate and close the lid, but remember to leave the flap open. Play with the angle of the flap to see how much sunlight you can get to reflect on the food.

Try making s’mores, or heating up a hot-dog in your solar oven. It may take a while for your oven to heat up, so be patient.
How do solar ovens get hot enough to cook food? Ultraviolet rays from the sun go through the plastic wrap and are absorbed by the black paper. The sun’s energy is converted to lower-energy infrared rays, which don’t have enough energy to escape back through the saran wrap and are trapped in the pizza box. The saran wrap is a good illustration of how greenhouse gases, like carbon dioxide and methane, can trap the sun’s heat on a larger scale, causing the “greenhouse effect.” The newspaper insulation helps keep the heat in the box as the temperature rises.
How do you think the aluminum foil helps make the oven hotter?
Tablecloth Trick- More Backyard Science
- by KitchenPantryScientist
This is a fun “magic” experiment to try outside, on the lawn, where your kids can spill as much water as they want to. It’s also nice to have grass under your table, so glass and ceramic dishes won’t break.
Since this can take practice, use old dishes and remind your kids to let you pick up anything that does get broken, so they don’t get cut! All you’ll need is a table, a sturdy, heavy glass that isn’t too tippy (we used a bar glass and it worked pretty well,) a smooth tablecloth and water. You can also try this with a heavy plate or bowl! Tablecloths without seams or old sheets with edge seams cut off work best!

We used easel paper as our tablecloth, but you can try a plastic tablecloth or a cloth one that doesn’t have a heavy seam on the edge. The more slippery the tablecloth, the better it will work. I’d also recommend bringing out a pitcher of water for refilling the glass and a towel for wiping up spills.
Put the paper or tablecloth near the edge of the table (see photo above.) Place the glass of water or plate on the tablecloth near the edge of the table. (I wouldn’t recommend filling your glass to the top.)

This part is important! You MUST pull the tablecloth straight down, along the edge of the table, very fast. If you pull it out, toward you, or pull it too slowly, it won’t work. If you do it correctly (and it may take a few attempts), the water will slosh a little, but the cup will remain on the table, full of water. We spilled a lot, but had a great time. All of the older kids involved were able to do it successfully by themselves, but I had to help my three year old a little.
The science? The law of inertia says that objects don’t want to change how fast they’re moving (or not moving, in the case of our glass.) They heavier something is, the more inertia it has. In our experiment, the heavy glass of water is standing still and doesn’t want to speed up. Since the tablecloth is moving under the glass very quickly, the heavy glass slips on it and doesn’t move very far. Even the friction between the glass and the tablecloth isn’t a strong enough force to make it move much. It seems like magic, but it’s just physics.
We did this experiment on Kare11 Morning news, if you want to see how it works!
Balloon Rocket Racers
- by KitchenPantryScientist

We use small chip clips to hold the air in until we're ready to rocket!
Duct-tape a balloon to a plastic straw, duct-tape the straw to a plastic car, blow up the balloon and let it go! The air escaping the balloon will propel the car in the opposite direction. This is an example of Newton’s Third Law (for every action there is an equal and opposite reaction) and demonstrates how rockets work. With balloons, escaping air molecules are essentially “thrown” from the balloon in one direction, pushing the balloon in the opposite direction. Since the balloon is attached to the car, the car moves along with it. These balloon racers work best on a very smooth surface with very light cars!
Similar technology is used to launch vehicles, like space shuttles, which are attached to a number of powerful rockets, burning rocket fuel. The rockets carry the shuttle into space as they’re pushed by the gases being “thrown” from them. Once outside the atmosphere, the space shuttles, or other space vehicles can maneuver through space, where there’s no air, by firing smaller rockets which push them in the opposite direction. Jet (turbine) engines and propellers don’t work in space, since they must push against air to work!
Don’t get frustrated if your rocket racer doesn’t work on the first try- it may take some work to get them going. Make sure the duct tape is tightly sealed against the straw, but isn’t mashing the straw, since the air must escape to push the car in the opposite direction! Engineers and scientists often have to work on designs for years to perfect them!
Egg in a Bottle
- by KitchenPantryScientist
For these experiments, you’ll need a glass bottle whose neck is a little smaller than a hard-boiled egg, medium- sized, peeled hard-boiled eggs, a banana, a birthday candle or two, and a long match or grill lighter. I’d recommend using the smallest eggs in the carton (extra-large eggs may not work) for this project. I went out to my recycling bin and discovered that my Trader Joe’s grape juice bottle is the perfect size. This experiment involves flame, so requires adult supervision, and may take a few tries, but it’s really fun when it works. Here’s a link to a demonstration I did (on Kare11 news) of this experiment that will walk you through the steps!

Peel the hard boiled egg, set it on the bottle, and let your children verify that it won’t easily squeeze through. Remove the egg. Cut a thick slice of banana as your “candle holder”, stick the candle in, and drop it into the bottle. Light the candle and set the egg on the bottle, making sure it forms a tight seal.

Now, sit back and watch what happens. Don’t pull the egg off when the candle goes out since it may take a while for the egg to be “pushed” into the bottle by the atmospheric pressure!
 What happens? When the candle goes out from lack of oxygen, the remaining air in the bottle cools rapidly, decreasing the air pressure in the bottle and creating a partial vacuum. The outside air, who’s pressure is higher, actually pushes the egg into the bottle as it attempts to equalize the pressure inside of the bottle.
It’s also really fun to do the same thing, upside down, and it’s a little less tricky. Put two birthday candles in the wide end of a hard-boiled egg. Light them and hold them under the inverted bottle to warm the air inside.
 Then, put the candle end of the egg into the bottle so it forms a seal.
 POP! Your egg will be pushed in by the atmospheric pressure as in the experiment above!
Have fun!
Marshmallow Slingshots and Transformation of Energy
- by KitchenPantryScientist
 I demonstrated how to make marshmallow catapults on Kare11. Here’s the link. It’s right after the apple mummy demo!
All you need for this experiment are some rubber bands, the plastic ring from the neck of a prescription bottle or the ring from the lid of a plastic milk jug, and a bag of marshmallows. You’ll also need a chair turned upside down to complete your catapult.
Make a chain of rubber bands (you can double it to make it stronger) with the ring in the center. You’ll figure out how to do it if you try, but basically, overlap two rubber bands and pull the bottom one through the one on top and then through itself. Voila!


Secure your catapult to a chair, set up a few targets and watch the elastic energy stored in the rubber bands become the energy of motion when you let go of the marshmallow. It may take some practice, but soon you’ll be a confectionery warrior. Let the marshmallows fly!


The science behind the fun is called TRANSFORMATION OF ENERGY. When you pull the rubber band back, you are doing WORK on the rubber band. How much WORK you do depends how hard you pull on the rubber band (FORCE) and on how far back (the DISTANCE) you pull the rubber band. WORK=FORCE X DISTANCE. The work you do is stored as ELASTIC ENERGY in the rubber bands. When you release the rubber band, the rubber band then does WORK on the marshmallow and the ELASTIC ENERGY is transformed into what is called KINETIC ENERGY (the energy of motion) in the flying marshmallow. When the marshmallow hits something and stops, the KINETIC ENERGY is then transformed into heat, or HEAT ENERGY. In other words, the ENERGY you produce by pulling back on the rubber bands isn’t lost. It’s just transformed from one kind of energy to another.
Snow Science
- by KitchenPantryScientist
A fun fact from NGKids :
“Bet You Didn’t Know: Twenty inches of snow equals one inch of water on average.”
From “Outdoor Science Lab for Kids” (Quarry Books 2016)
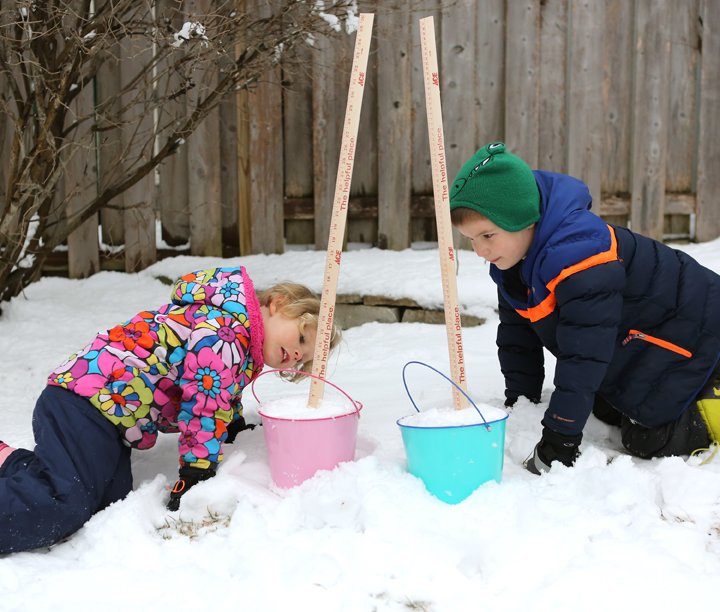
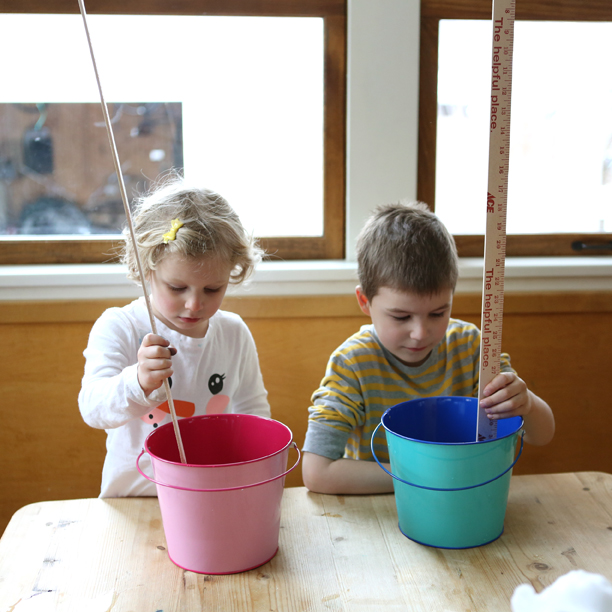
Try it! Put some snow in a clear container and measure how deep it is. Then, allow it to melt. Measure how deep the remaining water is.
from “Outdoor Science Lab for Kids” Quarry Books 2016
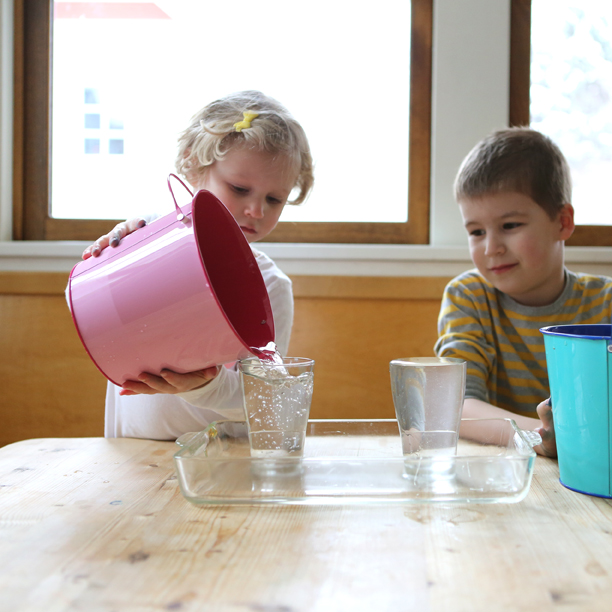
Now observe the melted water in a clear glass. How clear is it?
From “Outdoor Science Lab for Kids” Quarry Books 2016
You can figure out whether your results were consistent with the NG Kids fact (10 inches of snow* should melt down to around 1/2 inch of water or 50cm of snow* should melt down to 2.5cm.)
A snow crystal is a single crystal of ice formed when the water in a cloud freezes around a microbe or piece of dust. Some have long, feathery branches, while others are small and plate-like, but they all have six sides. Snowflakes can contain several snow crystals, stuck together. Sometimes they form large clumps, creating huge, fluffy snowflakes.
The shape of snow crystals, the weather, and the surface where the snow lands all affect how much air is trapped when snow piles up. The amount of air contained in a layer of snow determines much space it takes up.
When snow melts, the snow crystals turn to water and the trapped air is released. That’s why the snow in your bucket is much deeper than the water from the melted snow.
*I’m guessing that NG Kids was referring to unpacked snow. Our kids packed the snow into containers and we go more water than we expected. Ask your kids why they think packed snow melts to give you more water than unpacked snow.
Tie-dye Milk and Surface Tension
- by KitchenPantryScientist
This is one of my kids’ favorite science experiments of all time and could not be easier to do.

Food coloring isn’t just for frosting anymore! You will be amazed as you watch the forces of surface tension at work in this “brilliant” experiment.
All you’ll need is a small, shallow dish or plate, milk (2% or whole milk work best, but skim milk works too,) dishwashing liquid, Q-tips and food coloring.
I would recommend putting down newspaper and wearing an old shirt, since food coloring stains. You can make a lab coat from an old button-down shirt, by writing your name on the pocket with permanent marker.
First, add enough milk to cover the bottom of the dish. In a separate small container, mix together about a half cup of water with a squirt of dish-soap (a teaspoon or so.) Put several drops of different colored food coloring into the milk (maybe two drops of each color.)

Dip a Q-tip into the dish-soap mixture and then touch the Q-tip to the milk. You don’t need to stir! The detergent will break the surface tension of the milk and the food coloring will swirl around in interesting patterns, as if by magic.

Play with it! You can keep re-wetting your Q-tip with soapy water and touching it to the milk. If you want to, compare how the experiment works with skim milk versus whole milk. Sixth-graders will love it as much as two-year olds!
Now, draw a picture in your science notebook of how the milk looked before and after you touched it with the Q-tip! Take a picture of it and tape it your notebook! Describe what happened with words or pictures.
What Happened? Imagine that surface of liquids is a stretched elastic skin, like the surface of a balloon full of air. The scientific name for the way the “skin” of a liquid holds together is surface tension. When the skin of the liquid is broken, whatever is underneath will be able to escape, like the air rushing out of a balloon.
In this experiment, the surface of milk is like the elastic skin and dish detergent is what breaks the “skin” of the milk, sort of like a pin popping a balloon. Food coloring and more milk then escape from underneath the milk’s surface, swirling to the top.
Click here to watch my video on how to make tie-dye milk.