Tag: experiment’
Fireproof Water Balloon
- by KitchenPantryScientist

Living thing are made mostly of water. Humans are, on average, are 60-70% water and the water in our bodies helps to stabilize our temperature. A great way to illustrate this concept requires no more than a balloon, some water and a grill lighter. (If young kids are doing the experiment, adult supervision is absolutely required.)
Simply fill the balloon with water, tie it and hold a flame to the bottom of the balloon. We did the experiment outside, just to be safe!

What do you think will happen?
Specific heat is the amount of heat required to raise the temperature of a substance by one degree Celsius. The specific heat of water is higher than any other common substance, which allows water to absorb and release large quantities of heat with very little change in temperature. Because of this, the water in the balloon absorbs the heat from the flame, and the rubber doesn’t melt. Imagine that the balloon is a living cell, and you can see how the fluid in a cell helps keep it safe when the temperature changes!

The balloon will turn black where you flame it, but it won’t pop. When you’re done with the experiment, fill a few more balloons and have a water balloon fight!
Enrichment: What happens if you try the same experiment with a frozen water balloon?
Grow Living Magnets from Pond Water
- by KitchenPantryScientist
If you have a pond nearby, gallons of science projects await! Not only can you collect tadpoles and watch them change into frogs before your very eyes, but there is a microscopic world in every drop of pond water.

Grab a bucket, or whatever container you can find, and fill it with pond water. Be sure to scoop up a few inches of muck from the bottom when you fill your bucket, since lots of cool things live in muck.
Let the murk settle and peek into your bucket. Can you see any tiny creatures swimming around? Grab a magnifying glass, or if you’re lucky enough to have a microscope, see what else lives in the water.

There are special bacteria, called magnetotactic bacteria, that live in the mud of many ponds. Bacteria are tiny organisms made of just one cell, and these magnetotactic bacteria make tiny magnets called magnetosomes, which they store in microscopic “sacs” inside their single-cell bodies. The magnets in their bodies are arranged in long chains, and tell the bacteria what direction to swim. Not only do magnetotactic bacteria swim toward the nearest pole, but they swim down toward magnetic forces deflected through the earth’s center, which is made of molten metal. This helps them survive, since the oxygen in air can kill them and the nutrients they need are in the mud.
To grow your own magnetotactic bacteria, cover your bucket of muddy water and put it in a dark place (so algae won’t grow) for about a month. Take out a jarfull of the water and set a magnet outside the glass. After a few days, if magnetotactic bacteria have grown, you should be able to see white substance in the water near one pole of the magnet. This whitish stuff is actually millions of bacteria, attracted to the magnet by the opposite magnetic charges in their own bodies. If you have a microscope, collect the bacteria with an eyedropper and observe them. What happens if you set a magnet next to them?
Try growing these bacteria from water and mud from different ponds in your area. There are over 12 different strains of magnetotactic bacteria, and scientists are very interested in them. Not only do they have great possibilities in biotechnology and nanotechnology, but they may be clues to life on other planets. Magnetosomes in long chains, like those in bacteria, have been found in meteorites from Mars!
Algae Experiment
- by KitchenPantryScientist
Did you know that you can add a bale of barley hay to a 1 acre pond to help keep it from getting green and scummy in the summer? The hay, or possibly microorganisms in the hay, keep algae from overgrowing in the pond.
Algae are tiny, single-celled organisms called plant-like protists. They use the sun’s energy to make carbohydrates in a process called “photosynthesis” and they grow mostly in moist, sunny environments.
However, there are some places we don’t want algae to grow- like aquariums, or water purifiers. Some metals, organic chemicals, and other things (like barley hay) can keep algae from growing, or slow its growth. You can create your own experiment and discover some good anti-algae materials!

Take some lake or pond water and use it to fill several clear jars or glasses. Now, add a different non-toxic substance or item to each glass. Find things that you think might keep algae from growing. You might try pennies, tea bags, salt, vinegar, etc. Be sure to include a control sample, where you don’t add anything, so you can see normal algae growth. What happens if you cover glass one loosely with foil, so it gets air, but no light?
Place your samples in a warm, sunny spot for several weeks. You can lightly cover them with plastic wrap to reduce evaporation. Once you see green in your control sample, check the others. Did anything you add keep algae from growing? Did anything make it grow even better?
Tablecloth Trick- More Backyard Science
- by KitchenPantryScientist
This is a fun “magic” experiment to try outside, on the lawn, where your kids can spill as much water as they want to. It’s also nice to have grass under your table, so glass and ceramic dishes won’t break.
Since this can take practice, use old dishes and remind your kids to let you pick up anything that does get broken, so they don’t get cut! All you’ll need is a table, a sturdy, heavy glass that isn’t too tippy (we used a bar glass and it worked pretty well,) a smooth tablecloth and water. You can also try this with a heavy plate or bowl! Tablecloths without seams or old sheets with edge seams cut off work best!

We used easel paper as our tablecloth, but you can try a plastic tablecloth or a cloth one that doesn’t have a heavy seam on the edge. The more slippery the tablecloth, the better it will work. I’d also recommend bringing out a pitcher of water for refilling the glass and a towel for wiping up spills.
Put the paper or tablecloth near the edge of the table (see photo above.) Place the glass of water or plate on the tablecloth near the edge of the table. (I wouldn’t recommend filling your glass to the top.)

This part is important! You MUST pull the tablecloth straight down, along the edge of the table, very fast. If you pull it out, toward you, or pull it too slowly, it won’t work. If you do it correctly (and it may take a few attempts), the water will slosh a little, but the cup will remain on the table, full of water. We spilled a lot, but had a great time. All of the older kids involved were able to do it successfully by themselves, but I had to help my three year old a little.
The science? The law of inertia says that objects don’t want to change how fast they’re moving (or not moving, in the case of our glass.) They heavier something is, the more inertia it has. In our experiment, the heavy glass of water is standing still and doesn’t want to speed up. Since the tablecloth is moving under the glass very quickly, the heavy glass slips on it and doesn’t move very far. Even the friction between the glass and the tablecloth isn’t a strong enough force to make it move much. It seems like magic, but it’s just physics.
We did this experiment on Kare11 Morning news, if you want to see how it works!
Egg in a Bottle
- by KitchenPantryScientist
For these experiments, you’ll need a glass bottle whose neck is a little smaller than a hard-boiled egg, medium- sized, peeled hard-boiled eggs, a banana, a birthday candle or two, and a long match or grill lighter. I’d recommend using the smallest eggs in the carton (extra-large eggs may not work) for this project. I went out to my recycling bin and discovered that my Trader Joe’s grape juice bottle is the perfect size. This experiment involves flame, so requires adult supervision, and may take a few tries, but it’s really fun when it works. Here’s a link to a demonstration I did (on Kare11 news) of this experiment that will walk you through the steps!

Peel the hard boiled egg, set it on the bottle, and let your children verify that it won’t easily squeeze through. Remove the egg. Cut a thick slice of banana as your “candle holder”, stick the candle in, and drop it into the bottle. Light the candle and set the egg on the bottle, making sure it forms a tight seal.

Now, sit back and watch what happens. Don’t pull the egg off when the candle goes out since it may take a while for the egg to be “pushed” into the bottle by the atmospheric pressure!
 What happens? When the candle goes out from lack of oxygen, the remaining air in the bottle cools rapidly, decreasing the air pressure in the bottle and creating a partial vacuum. The outside air, who’s pressure is higher, actually pushes the egg into the bottle as it attempts to equalize the pressure inside of the bottle.
It’s also really fun to do the same thing, upside down, and it’s a little less tricky. Put two birthday candles in the wide end of a hard-boiled egg. Light them and hold them under the inverted bottle to warm the air inside.
 Then, put the candle end of the egg into the bottle so it forms a seal.
 POP! Your egg will be pushed in by the atmospheric pressure as in the experiment above!
Have fun!
“Rubber” Eggs
- by KitchenPantryScientist
 This experiment never gets old! Put some raw eggs into jars and cover the eggs with (white or cider) vinegar. Remember to always wash your hands after handling raw eggs, since they can carry a bacteria called Salmonella enteriditis!
Do you notice anything happening to the eggs when you add the vinegar?
Let them sit overnight in the refrigerator and see what they feel like the next day. Before handling the eggs, gently rinse them with water, and be careful not to get vinegar in your eyes, since vinegar is an acid and stings!
Only the membrane of the egg will remain, which is like a rubbery balloon. What does it feel like?
If you want, draw or record what you observed in your science notebook.
What happened? Egg shells are made up of two chemical elements called calcium and carbon, which stick together in calcium carbonate crystals. Vinegar is an acid that breaks the crystals apart in a chemical reaction. The carbon and vinegar react to form carbon dioxide bubbles, which you probably noticed when you added the vinegar to the eggs.
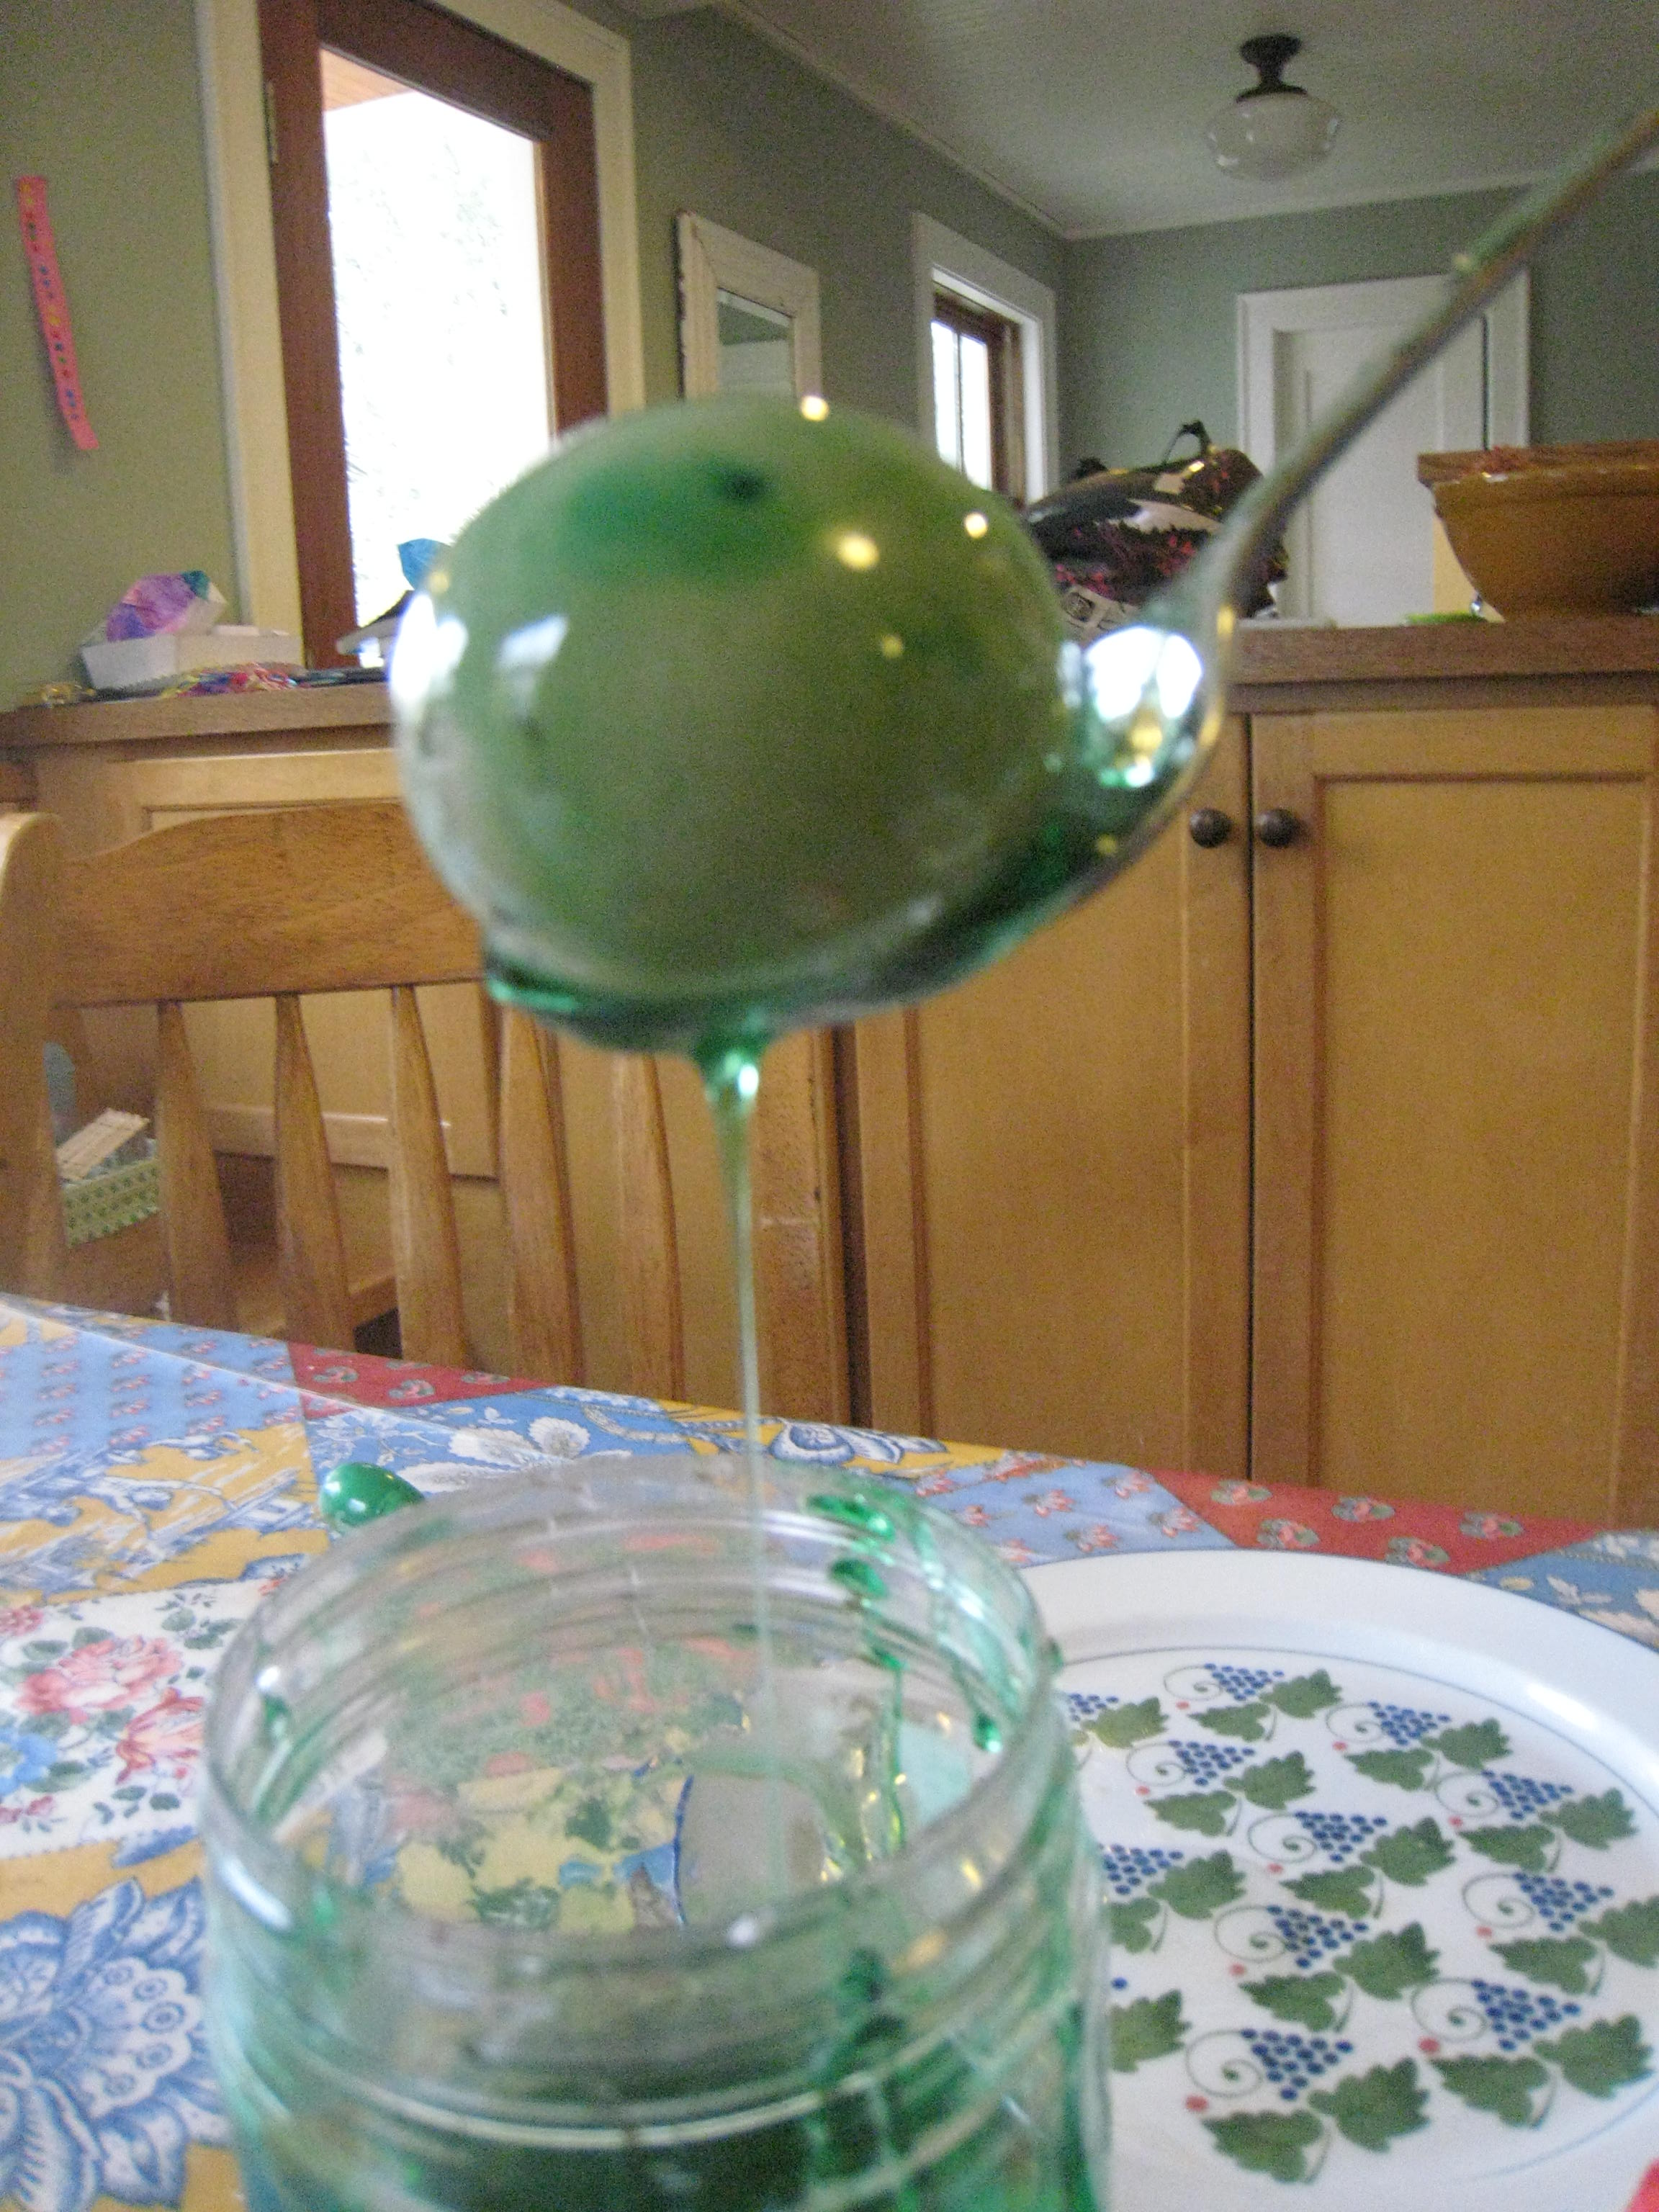
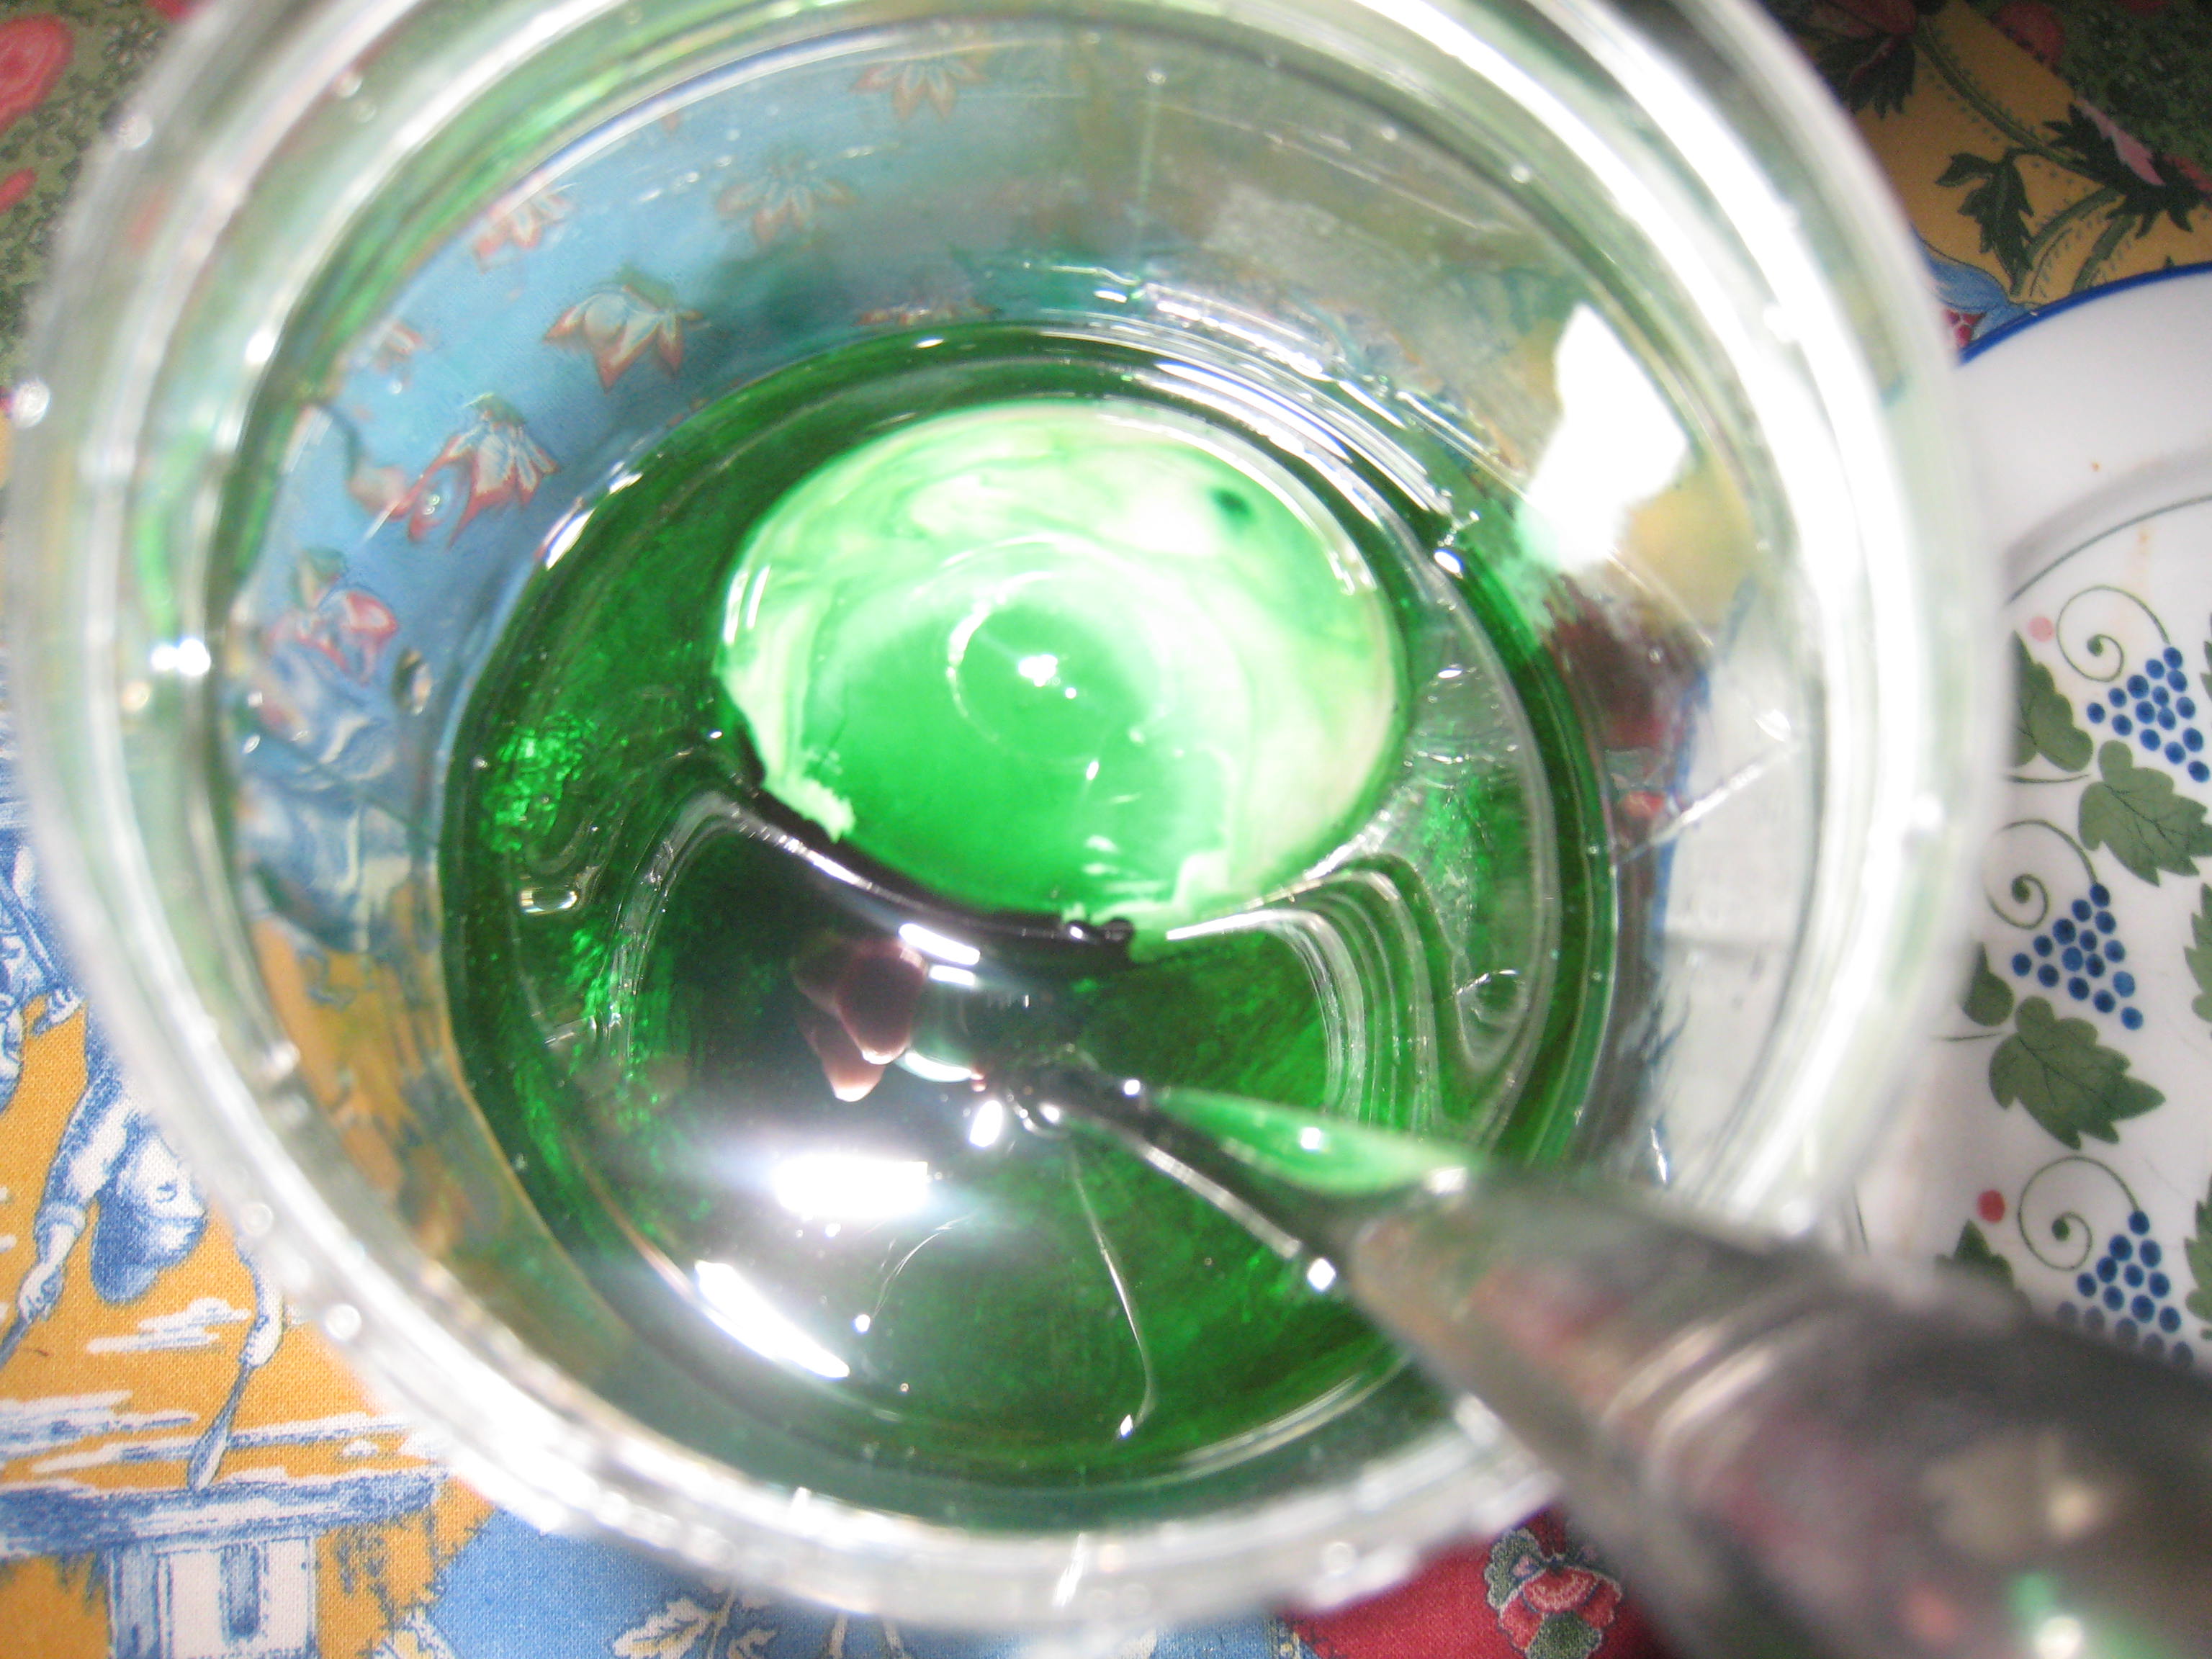
To make alien monster eggs, return the eggs to the jars. Cover them with corn syrup and add some green food coloring. Leave them for 24 hours in the refrigerator and see how they feel the next day!
What happens? The balloon-like membrane of the soft eggs let water molecules pass through. Corn syrup doesn’t have much water in it, and water molecules move out of the egg into the corn syrup, making the egg shrivel.
If you want to, now try rinsing the eggs and submerging them in water again overnight (in the fridge.)
Happy eggsperimenting!
Sun Chips Bag Experiment
- by KitchenPantryScientist
On August 8, the kids and I became consumer detectives as we buried a Sun Chips bag to see if it would break down. We don’t have a compost heap, since our neighborhood has organic compost collection, so we buried it about a foot down with some vegetable waste and melon rinds and watered it to kick the decomposing microbes into full gear. The hot August sun added heat to the brew and we imagined the bag slowly breaking down, like it does in the commercials.

Yesterday, after about 7 weeks, we unearthed the bag to see how the experiment was going. All of the organic compost we’d buried with the bag was gone-turned to black dirt, but to our eyes the Sun Chips bag looked almost as good as new, except where the shovel had torn it. It may be breaking down, but it’s hard to tell. We reburied it. It’s supposed to take 13 weeks to completely break down under ideal conditions, but we thought we’d see more progress.

I’ll admit, we didn’t have ideal conditions (a hot compost heap), but I wonder how many garbage dumps have ideal conditions? I don’t know. We’ll see what happens when we dig it up again next summer.
At least Frito Lay is making an effort. (I’m sure the bag will eventually break down.)
I think it’s good to teach kids to question companies’ claims. After all, you can’t believe everything you read.
Oil Spill Experiment Revisited
- by KitchenPantryScientist
I first posted this experiment on May 5, certain that the spill would soon be contained. Now we know it’s worse than we imagined and no immediate solution is in sight. If your kids don’t understand why it’s so hard to help the birds, have them try this project.
The oil spill in the Gulf of Mexico is devastating news to the already fragile and damaged ecosystems in the area. To demonstrate how hard it is to remove oil from water, and what materials work best, I found this experiment online at tryscience.org and decided to have my kids try it. It was messy and disgusting and oil got all over everything. In other words, it was a great demonstration of how hard it will be to clean up the mess made by BP’s Deepwater Horizen oil rig, which exploded on April 20th.

- Polyester scraps soak up oil.

You’ll need a clear bowl, water, yellow oil (vegetable, corn or canola will work,) cotton balls, cheese cloth, polyester cloth (the website said polypropylene, but I couldn’t find any,) feathers, and a spoon.
Put some water in the bowl and pour in some oil. I probably added a cup so it would cover the water. Then, using spoons and the other materials, try to remove the oil from the water. What works best?

- Oil is hard to clean off feathers.

We put our feathers in oil and then tried to clean them off using dish soap and water, which is how they clean off marine birds covered with oil following oil spills.
Polypropylene is a synthetic material made from Carbon and Hydrogen, the same elements in oil. Oil is attracted to polypropylene, and both float on water, so polypropylene is often used in cleaning up oil spills. You can also find it in gloves and sock liners.
If one cup of oil is this hard to clean up, can you imagine the mess pouring into the Gulf of Mexico right now, at the rate of about 210,000 gallons a day (according to the New York Times.) Here is a link to a map that is tracking the spill.
Fizzy Balloons
- by KitchenPantryScientist

I was never an enthusiastic chemistry student. That being said, I have to admit that chemical reactions can be lots of fun to watch as things turn colors, make bubbles, or smell different. They can change from liquids to solids and they can even explode.
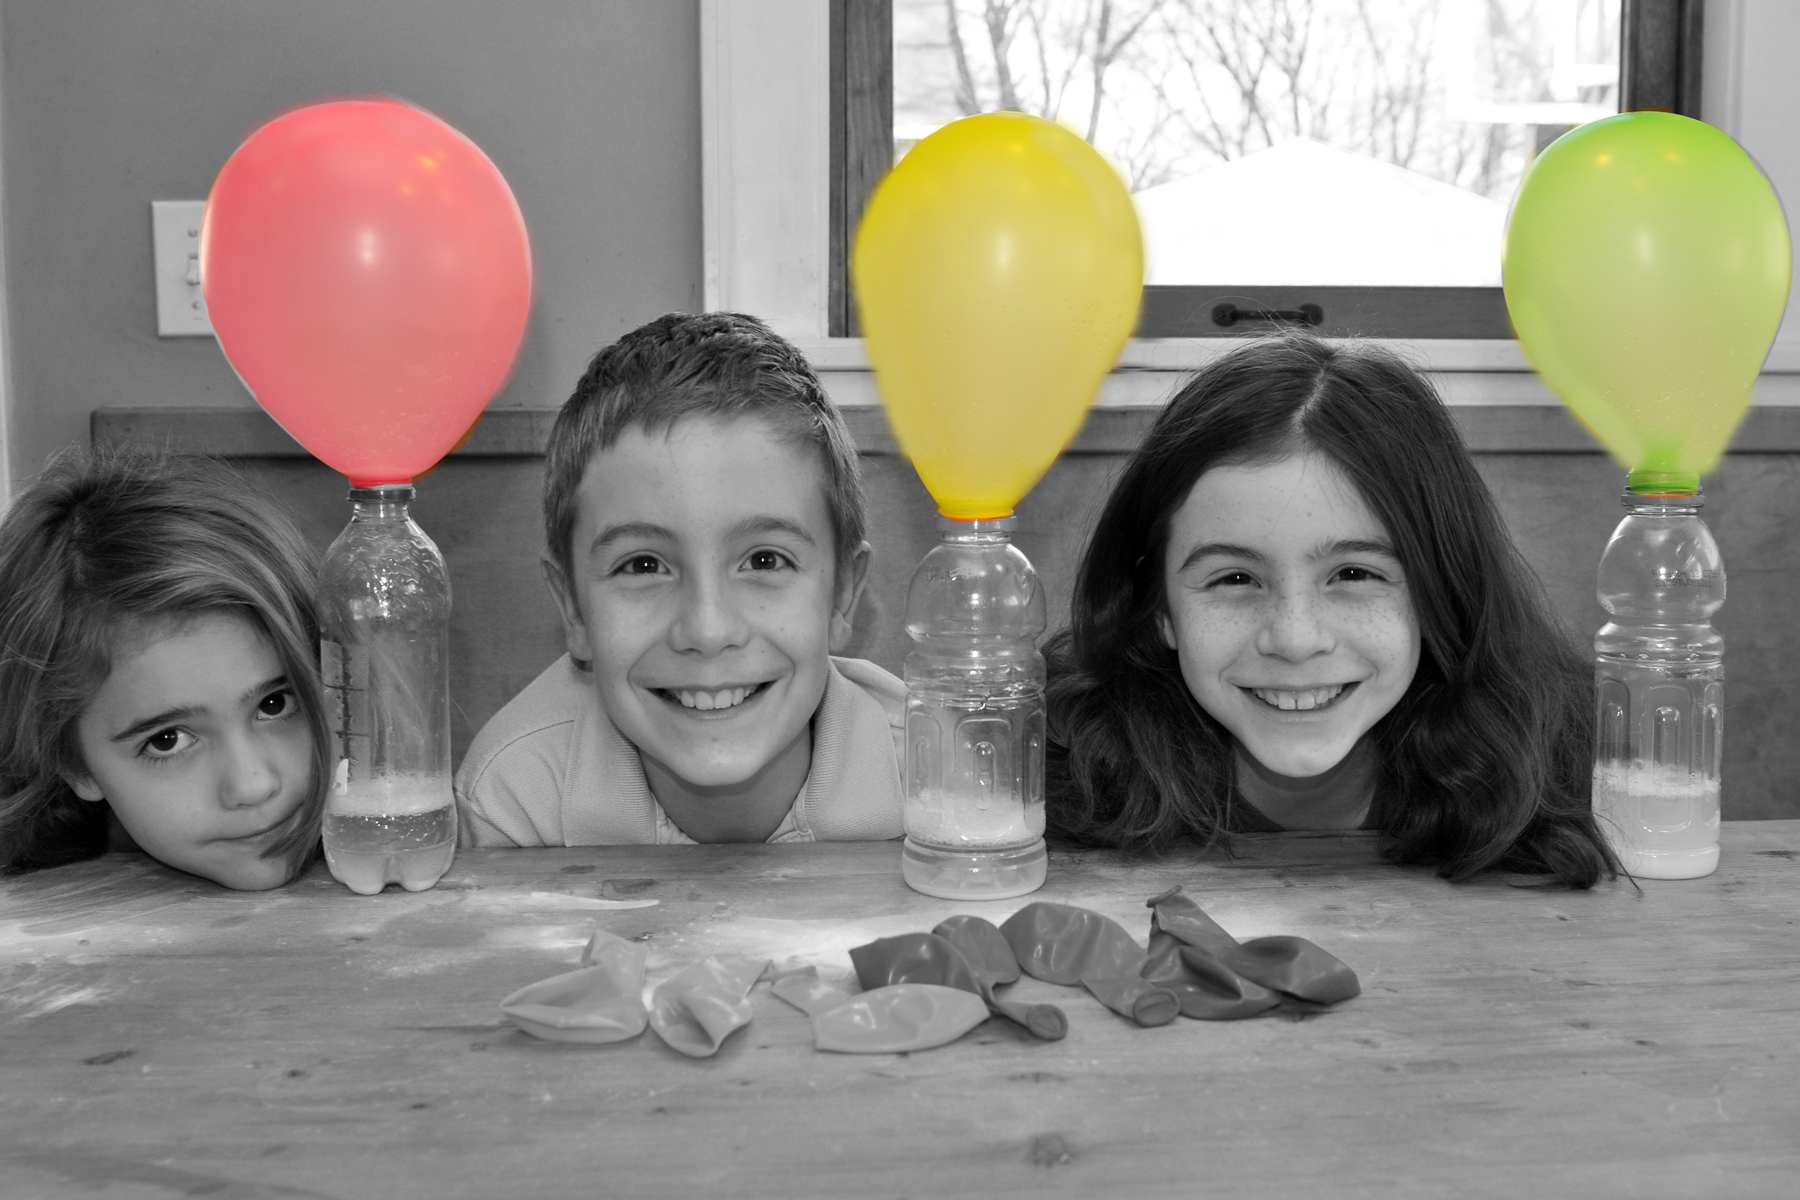
There are many fun, safe chemical reactions you can perform with your kids. I’d recommend having them put on safety goggles or sunglasses, if you have them, for most experiments where you mix things together. As you can see, my children aren’t wearing any eye protection for this project, but I did have them stand back to make sure the balloon wouldn’t explode the first time we did it. Just use common sense.

You will need: a balloon, an empty soda bottle, white vinegar, and baking soda. Put 1/4 to 1/2 cup vinegar into the soda bottle. Then, hold the mouth of the balloon open and have your child pour about a teaspoon of baking soda into the balloon. Shake the soda into the “bulb” or the main part of the balloon. Then, stretch the mouth of the balloon over the mouth of the bottle, trying to keep the main part of the balloon off to the side (so the soda isn’t dumped into the bottle right away.) Ask them what they think will happen when you mix the two things together. Finally, let your child shake the soda into the bottle, all at once.

Stand back and watch what happens!
If the seal is tight, which it should be, the reaction between the soda and the vinegar will form a gas that inflates the balloon. Our balloon was big enough that it didn’t explode, but if your balloon is over-inflating, simply take it off of the bottle. Just pay attention and you’ll be fine.
What happened?
Baking soda is a chemical called sodium bicarbonate. Vinegar is called acetic acid. These two chemicals react to form some different chemicals. One of these is carbon dioxide gas. This is called a chemical reaction. The gas is what inflates the balloon. We know a reaction is happening because we can see bubbles forming.
What else do your kids notice about the reaction? Have them record (or help them to record) what they see in their science notebooks. Older kids can draw what they see and then try to describe it. My kids loved it when I wrote down their descriptions for them before they could write. Have them touch the bottle. Does it feel warmer or cooler than room temperature? A temperature change is also a clue that a chemical reaction is occurring! They could even time how long it takes for the balloon to inflate.
My kids did this experiment three times and would have kept doing it all day. They thought it was pretty great. Give it a try! Put those budding brains to work!
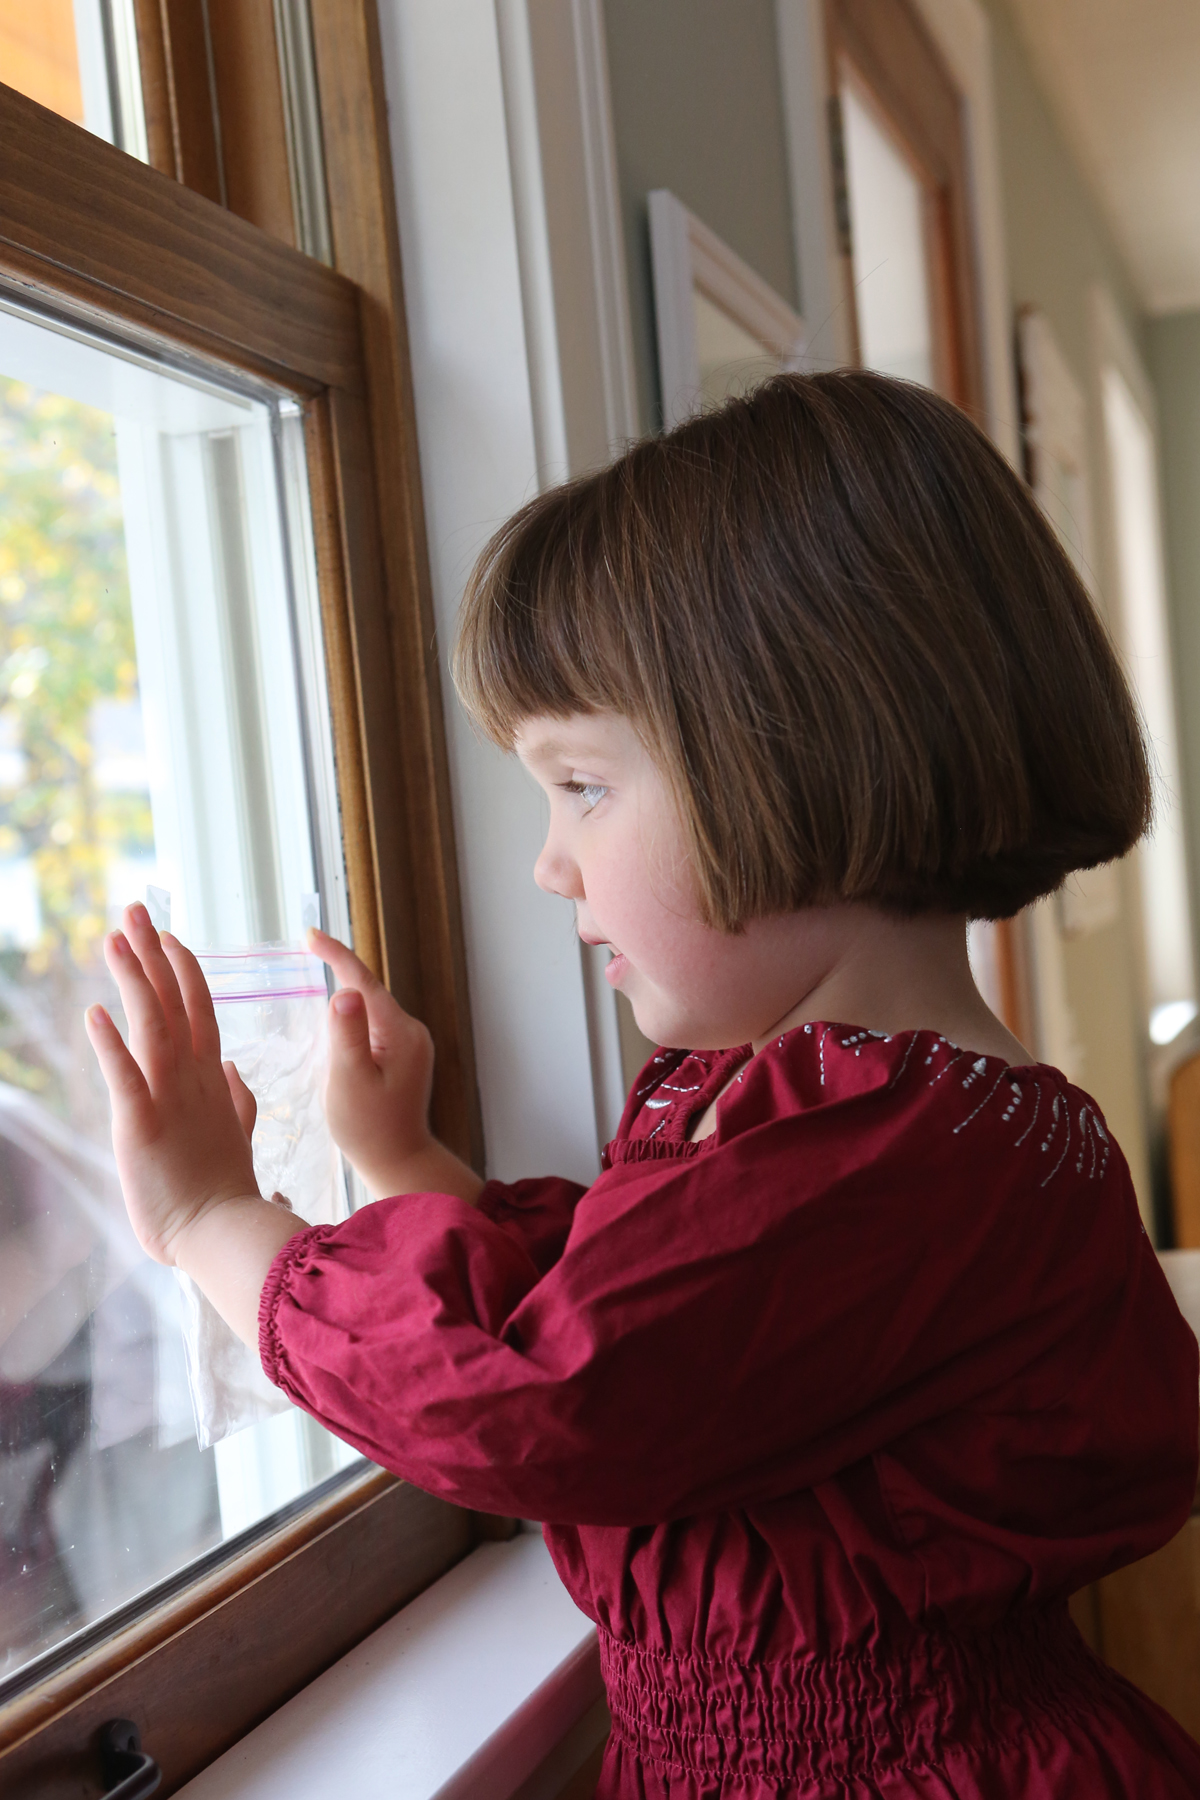
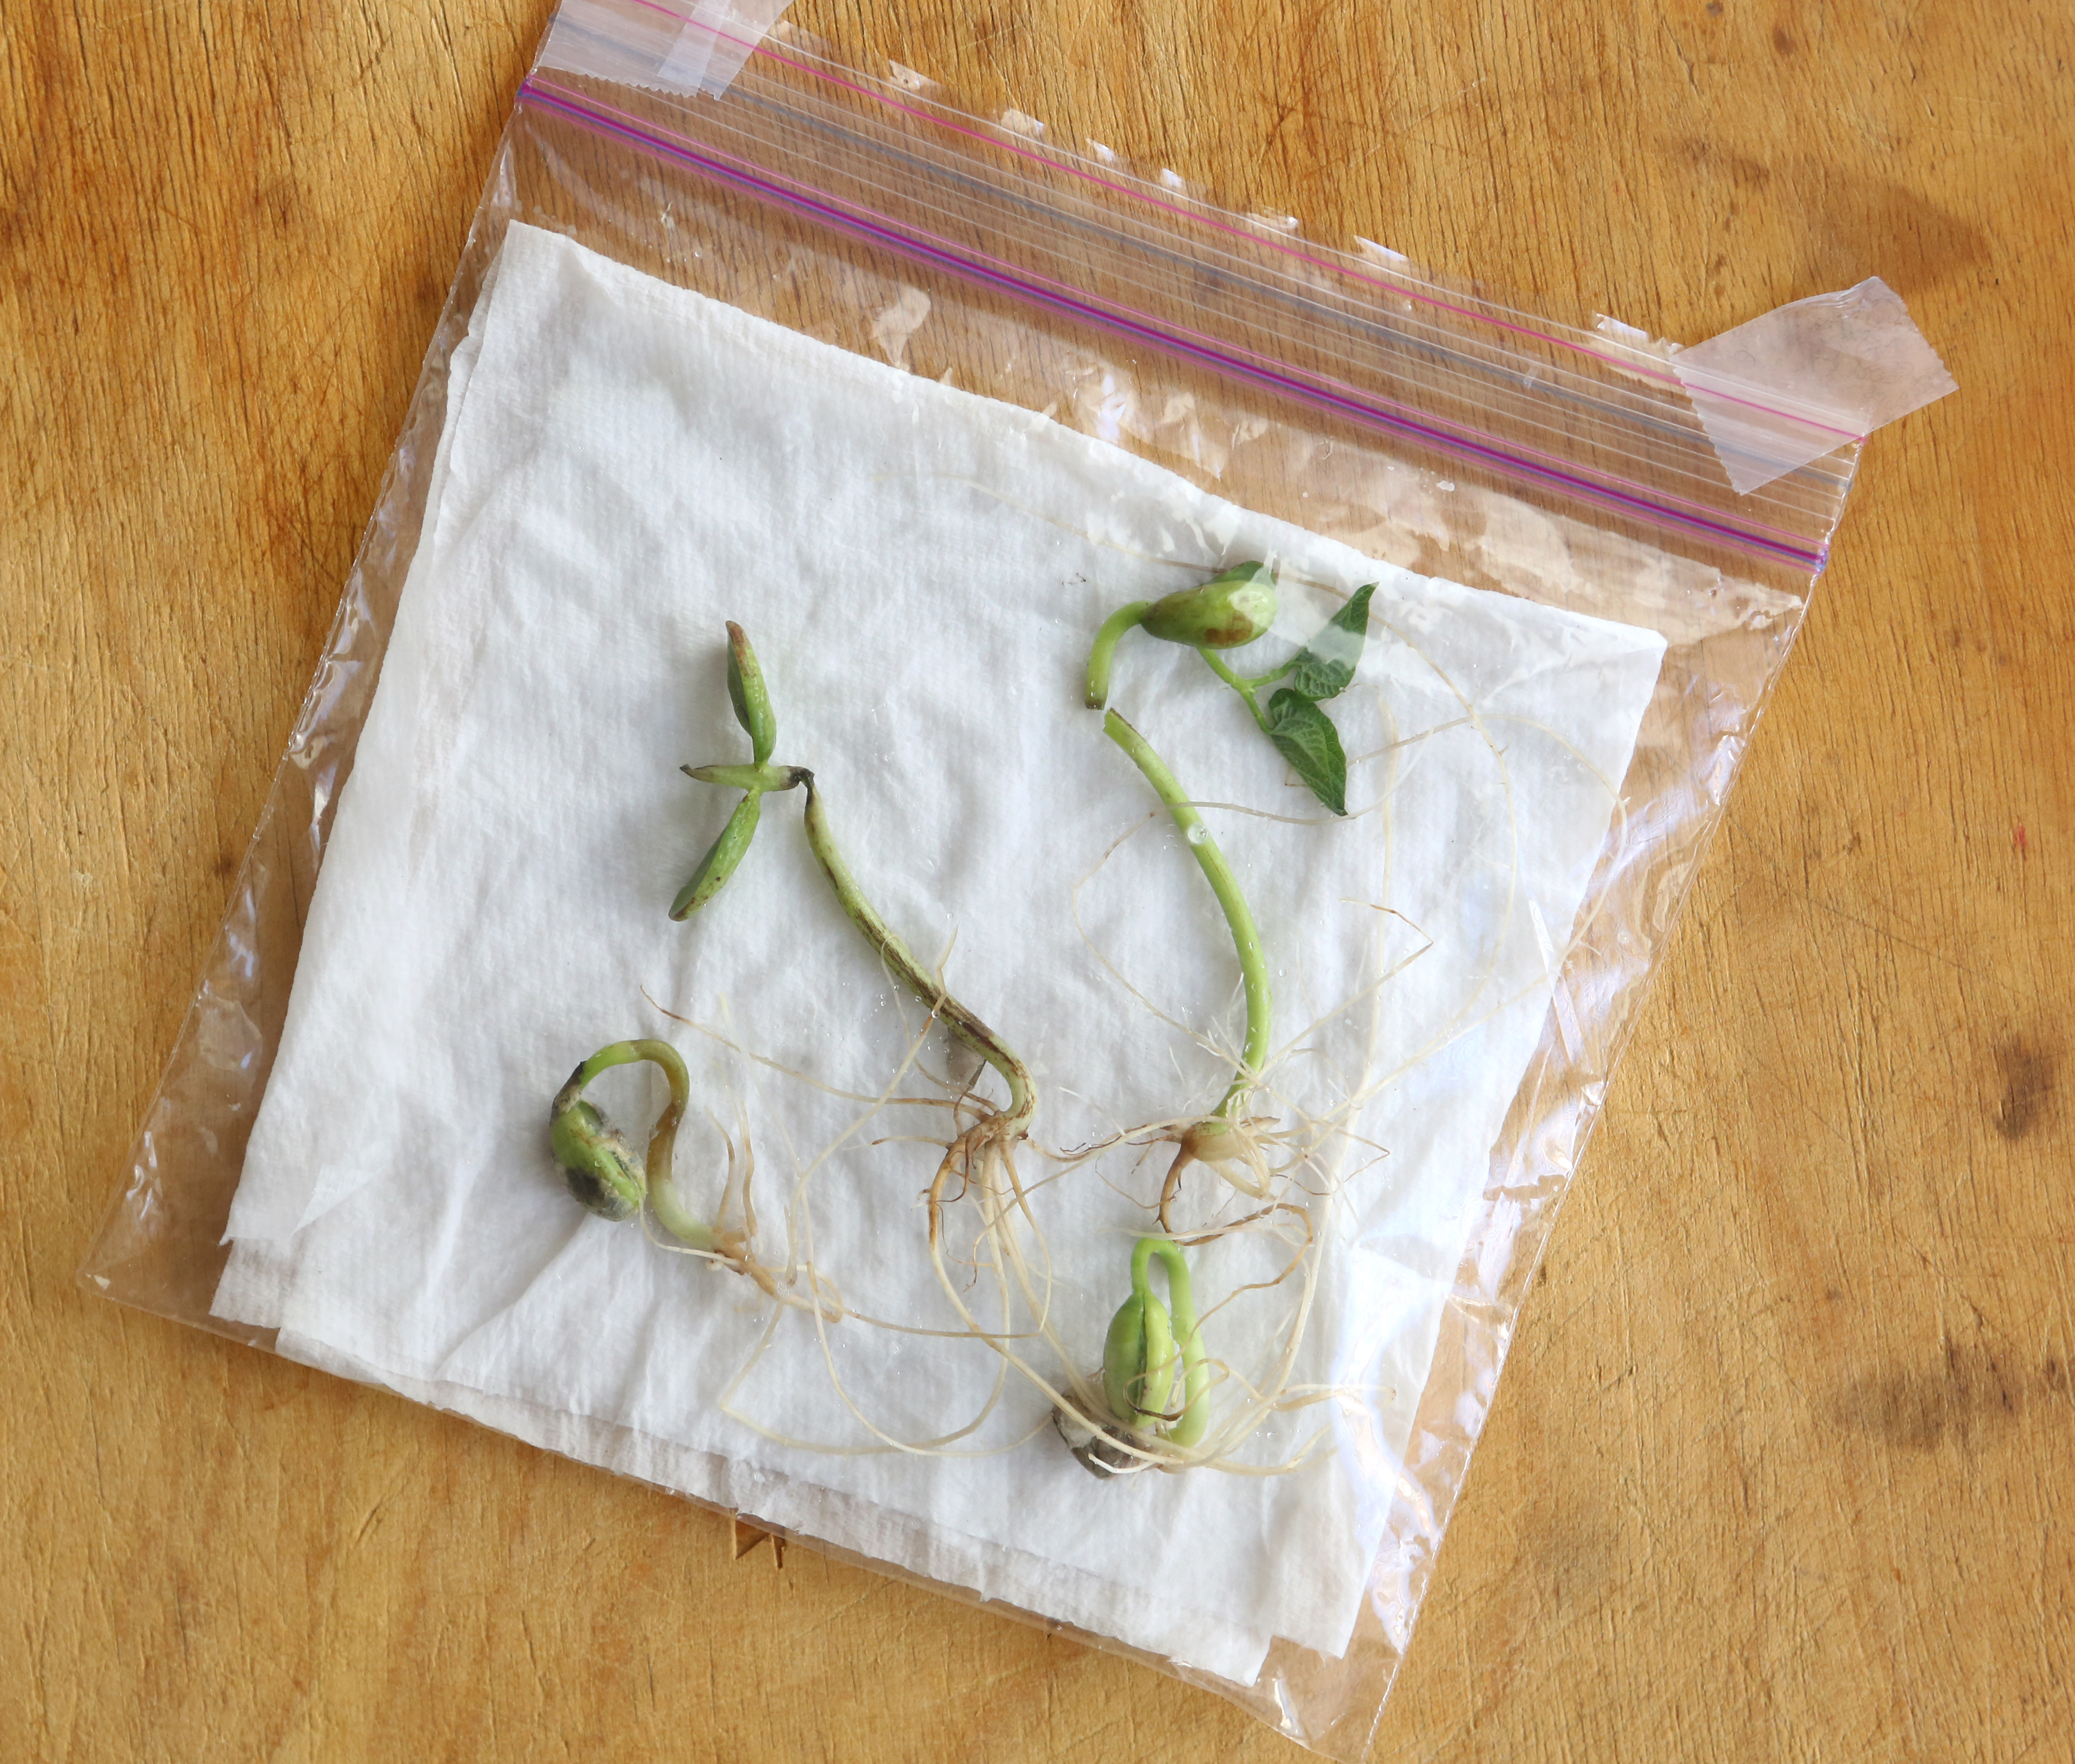
Window Sprouts
- by KitchenPantryScientist

Window Sprouts from Kitchen Science Lab for Kids Quarto Books
When I was growing up, we always had a vegetable garden. My mom grew up on a farm and was appalled when my sister or I would throw a fit upon finding a tiny bug in our lovely, homegrown lettuce salad. “Where do you think the lettuce came from?” she would ask, and we’d have to admit that it grew in dirt, outside, and that there are bugs out there. It was an invaluable lesson and one I hope I can pass along to my kids. Our world has become too sterile and disconnected from nature. Like plants, we need dirt, sunshine, fresh air and clean water to survive. Who cares about a few bugs?
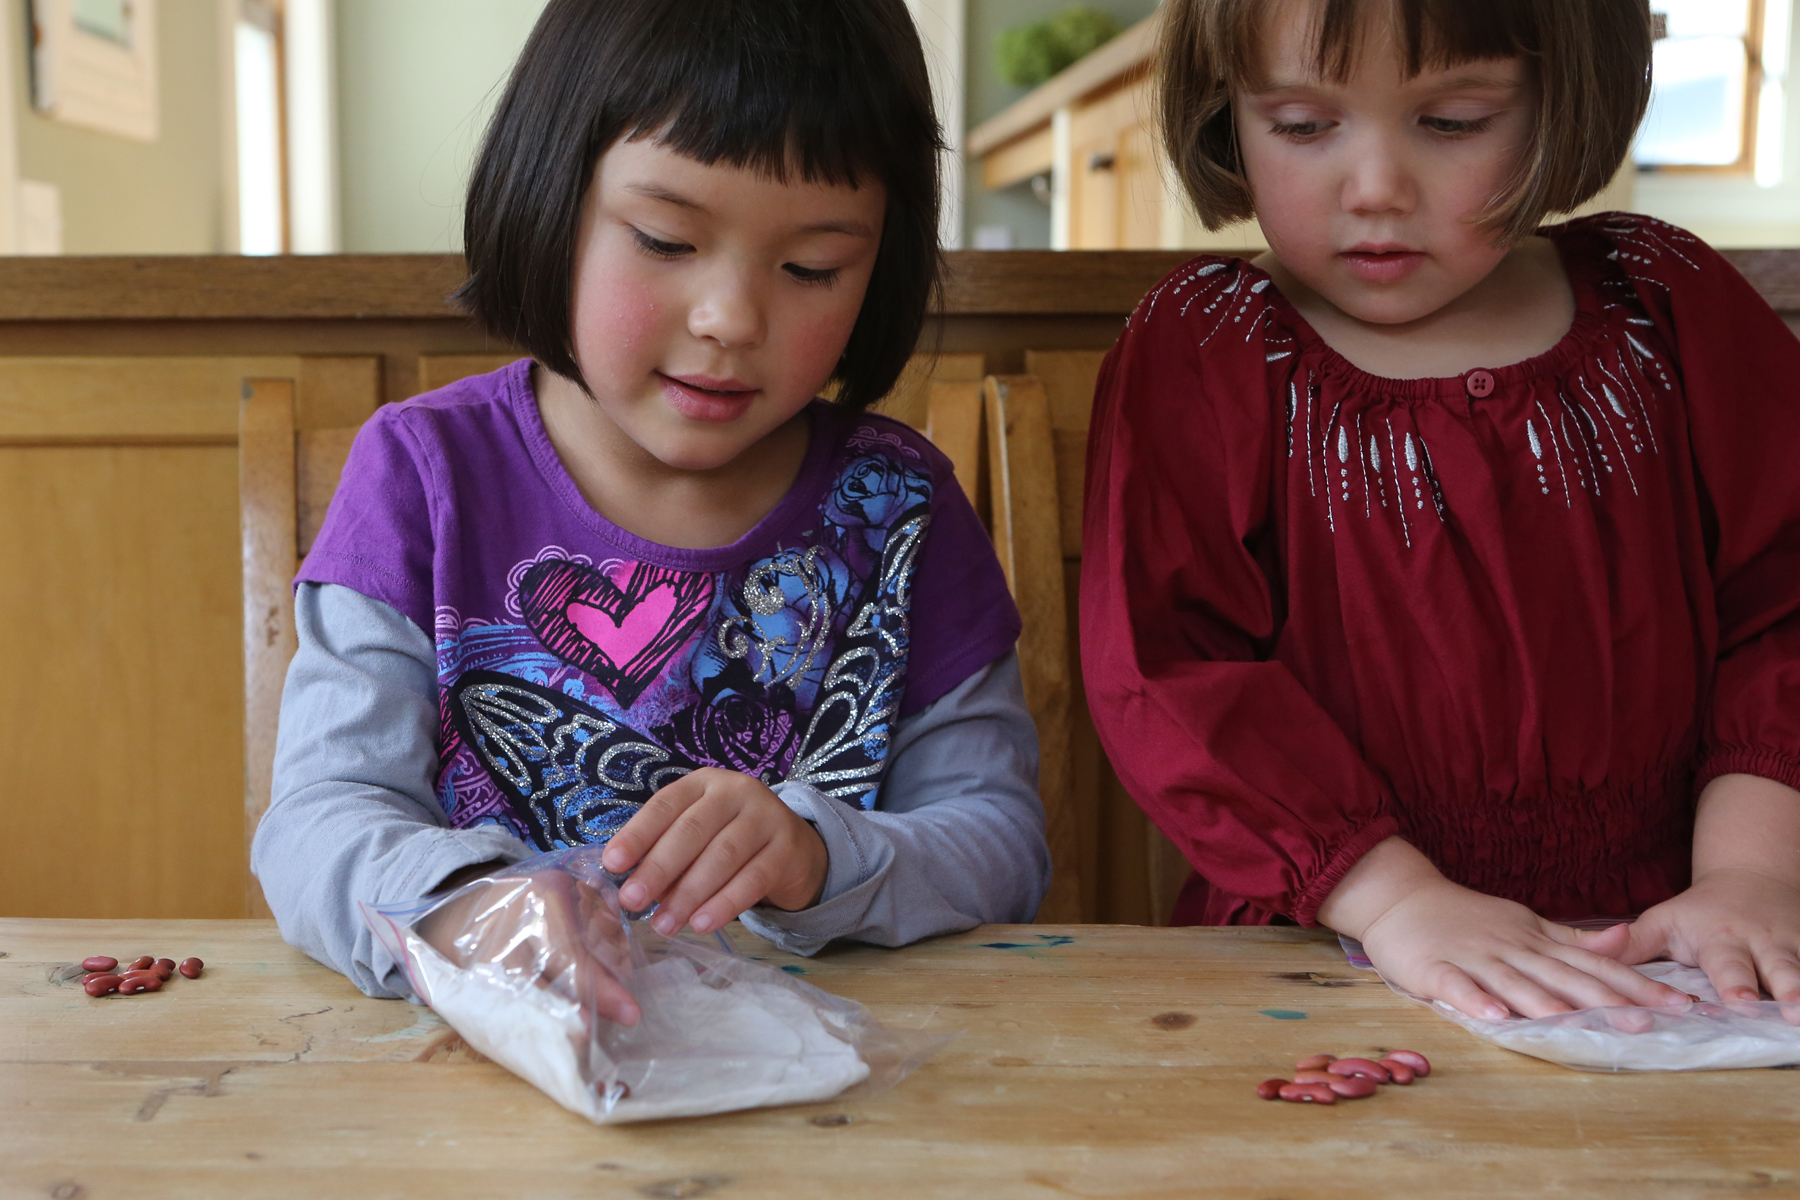
Try planting a few bean and pea sprouts in plastic bags to show your kids how sunshine and water can make a plant sprout!
You’ll need a few plastic zip-lock bags, dry beans from your pantry (or peas and beans from the garden seed packs you can find almost anywhere ), paper towels and water. Cut a paper towel so that you can fold it a few times and it will fit into the zip-lock baggie. Have your child soak it with water and help them put it into the bag so that it’s relatively flat. Then, give them two beans or seeds to place in the bag, near the bottom.
Window Sprouts from Kitchen Science Lab for Kids Quarto Books
I had to stuff a little piece of paper towel into the bottom of the bags so that the seeds wouldn’t sit in the extra water at the bottom. Let your child help seal the bag. Leave an opening near the top so the plants can get some air. Finally, tape the bag in a window with the beans facing you so that your child can watch them as they grow. (I’d recommend finding a window where they won’t get blasted by hot sun all day, or they might fry.)
Window Sprouts from Kitchen Science Lab for Kids Quarto Books
As you do the project, ask your child what they think plants need to grow (Plants need light, air, water and nutrients, or “food.”) Ask them how they think the seed can grow without the dirt as “food.” Tell them that when a plant first sprouts, it gets its nutrients from the seed itself. They can watch the seed shrink as the plant grows. Have them draw the seed/plant in their science notebook as it changes. Older kids can measure the plants as they grow. Eventually, you should be able to transplant them to a cup with dirt, or directly into a garden. You may have to add water to the paper towels if they dry out. Play it by ear.
Window Sprouts from Kitchen Science Lab for Kids Quarto Books
Plant a garden this spring, even a very tiny one in pots! Let your kids get their hands in the dirt. Help them nurture plants that will eventually nurture them. (Children are much more interested in tasting vegetables that they’ve grown themselves. ) It is one of the most rewarding activities you can do with your children, and takes only dirt, seeds and water! Find your inner farmer and let your children find theirs- organic food is cheap when you grow it yourself!