Incredible “Feets” with Eggs

 - by KitchenPantryScientist

Would you be surprised if I told you that you could stand on a carton of raw eggs barefoot without breaking them? Or that you can squeeze an egg with all your might without even cracking it (provided there are no cracks in the egg and you’re not wearing a ring?)Here’s a video of us doing these eggsperiments on Kare 11 Sunrise news!

Chicken eggs have delicate enough shells that chicks can peck their way out, but their architecture  is nothing short of amazing.  Their arched shape makes them able to handle large amounts of pressure without cracking, which is extremely important, since hens must sit on them in order to hatch them out. Humans use arches too, for designing strong building and bridges.

Remove any rings you’re wearing, place a raw egg in a plastic baggie and wrap your hand around it evenly.  Squeeze as hard as you can. Did you break it?

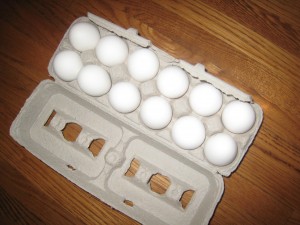
If you’re feeling brave, open a carton of raw eggs, remove any that are cracked and make sure they’re all pointing in the same direction (pointy side up or round side up) and set them on the floor.

Remove your socks and hold on to a chair or someone’s hand.  Carefully step onto the eggs with your entire foot. Remember: pressure is force per unit of area. The idea is to equally distribute your weight, and therefore the pressure, across all twelve eggs.  Let go of the chair.

Did it work?  How important do you think it is to keep your foot flat?  What would happen if you tried the same experiment in pointy high-heels?

Remember to wash your hands after touching raw eggs so you don’t spread Salmonella bacteria around!

Diffusion and Osmosis experiments

 - by KitchenPantryScientist

Diffusion is the name for the way molecules move from areas of high concentration, where there are lots of other similar molecules, to areas of low concentration, where there are fewer similar molecules. When the molecules are evenly spread throughout the space, it is called equilibrium. Imagine half a box filled with yellow balls and the other half filled with blue ones.  If you set the box on something that vibrates, the balls will start to move around randomly, until the blue and yellow balls are evenly mixed up.

Think about the way pollutants move from one place to another through air, water and even soil. Or consider how bacteria are able to take up the substances they need to thrive. Your body has to transfer oxygen, carbon dioxide and water by processes involving diffusion as well.

Lots of things can affect how fast molecules diffuse, including temperature.  When molecules are heated up, they vibrate faster and move around faster, which helps them achieve equilibrium more quickly than they would if it were cold.

Diffusion takes place in gases (like air), liquids (like food coloring moving through water,) and even solids (semiconductors for computers are made by diffusing elements into one another.)

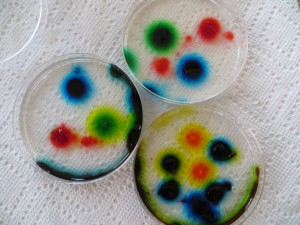
You can watch food coloring diffuse through a colloid (gelatin) at home and measure how long it takes. Gelatin is a good substance to use for diffusion experiments since it doesn’t support convection, which is another kind of movement in fluids. You’ll need clear gelatin (from the grocery store or Target), food coloring and water.

Add 4 packs of plain, unflavored gelatin (1 oz or 28 gm) to 4 cups of boiling water. Pour the liquid gelatin into petri dishes, cups, or tupperware and let it harden.  Then, using a straw, poke a hole or two in the gelatin, removing the plug so that you have a hole in the jello about 1/2 inch deep.  Add a drop of food coloring in the hole in the jello.

Every so often, measure the circle of food coloring as it diffuses into the jello around it.  How many cm per hour is it diffusing?  If you put one plate in the refrigerator and an identical one at room temperature, do they diffuse at the same rate?  Why do you think you see more than one color for certain shades of food coloring? What else could you try?

Here’s a post on how to use this experiment to make sticky window decorations: https://kitchenpantryscientist.com/?p=4489

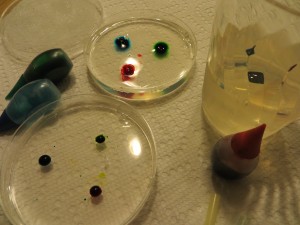
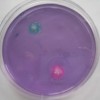
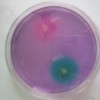
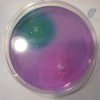
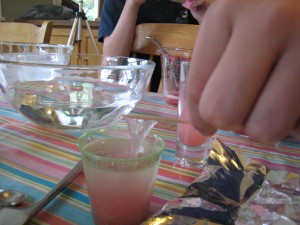
We made plates and did the same experiment using 2 cups of red cabbage juice, 2 cups of water and 4 packs of gelatin to see how fast a few drops of vinegar or baking soda solution would diffuse (a pigment in red cabbage turns pink when exposed to acid, and blue/green when exposed to a base!)

You can see the pink circle from the vinegar and the green one from the baking soda solution.

It’s also fun to experiment with the diffusion of substances across a membrane, like a paper towel.  This is called osmosis. Membranes like the ones around your cells are selectively permeable and let water and oxygen in and out, but keep other, larger molecules from freely entering and exiting your cells.

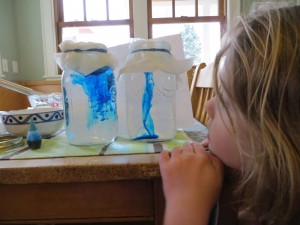
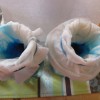
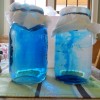
For this experiment, you’ll need a jar (or two), paper towels, rubber bands and food coloring.  Fill a jar with water and secure a paper towel in the jar’s mouth (with a rubber band) so that it hangs down into the water, making a water-filled chamber that you can add food coloring to.  Put a few drops of food coloring into the chamber and see what happens.

top “chambers” for food coloring

Are the food coloring molecules small enough to pass through the paper towel “membrane?”  What happens if you put something bigger, like popcorn kernels in the chamber? Can they pass through the small pores in the paper towel?

Do the same experiment in side-by-side jars, but fill one with ice water and the other with hot  water.  Does this affect the rate of osmosis or how fast the food coloring molecules diffuse throughout the water?

Think about helium balloons.  If you take identical balloons and fill one with helium and the other with air, the helium balloon will shrink much faster as the smaller helium atoms diffuse out more quickly than the larger oxygen molecules.

Lemon-painted Eggs

 - by KitchenPantryScientist

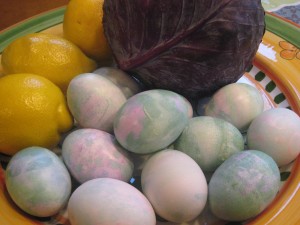
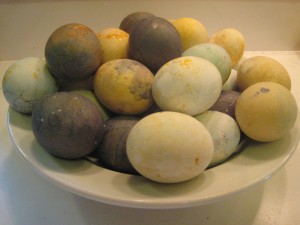
We’ve often used the water from boiling red cabbage to make Litumus (acid-indicator) paper, but last year, we used it to make egg dye!  Simply follow the directions here to make your cabbage “juice” and put hard boiled eggs in the cabbage juice to dye them blue.  Boil your eggs in the cabbage juice and refrigerate them in the juice overnight for the best color!  The juice turns pink when you add an acid to it, so when your eggs are dry, you can paint pink designs on them with lemon juice or vinegar using paintbrushes, toothpicks or Q-tips.  You can also dissolve baking soda in water (which makes a base) to add more color to the eggs (greenish-blue which shows up when they dry.)  Here’s a video of a demonstration I did on Kare11 news of this experiment.

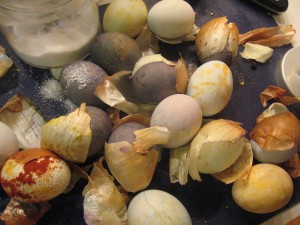
Try some other natural egg dyes!  Boil colorful fruit, vegetables and spices with 4-8 cups water and a few Tbs. of white vinegar.  When the water is boiling, add raw eggs and boil for 10 minutes.  The pigment in the fruits and veggies will be absorbed by the egg’s porous surface as they cook.  Let the eggs sit in the dye until cool.  Then, wrap the wet eggs in onion skins or rub with paprika for yellow.  We had the best luck with blueberries, curry and red cabbage.  Experiment  to see what makes the best colors!  What worked best for you?  Coffee?  Tea?  rhubarb? Don’t forget to eat your creations.  Hard-boiled eggs make a great snack!

A Day at the Museum

 - by KitchenPantryScientist

There was no school yesterday, so we went on a field trip of our own to the Science Museum of Minnesota.

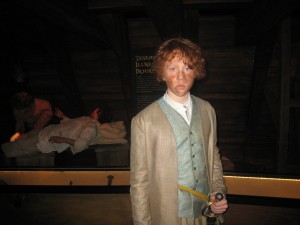
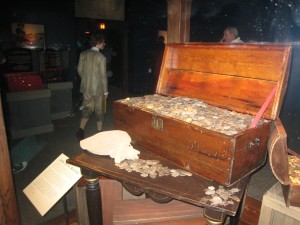
We started the day by being transported “Under the Sea” at the Omnitheater, watching sea lions frolic and giant sea turtles gobble jellyfish. (Did you know they close their eyes each time they take a bite, so they don’t get stung?) The kids loved “Real Pirates” and filled out activity sheets to win eyepatches. They especially liked playing dice and looking at the different coins in the Treasure Room!

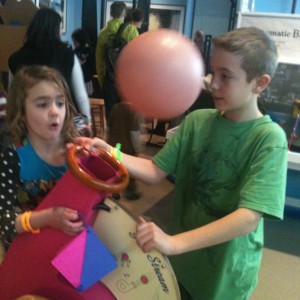
After lunch, they brought some fossils and flint they’d found in Kansas to the Collector’s Corner and then we spent the rest of the day playing at the museum!

The new wind tunnels, where kids could fashion flying machines from paper, cups and pipe cleaners were a huge hit! I wonder if we could figure out how to make one in our kitchen. Hmmm.

Solar Storms and the Zombie Apocalypse

 - by KitchenPantryScientist

My son came home from school the other day joking about a zombie apocalypse. Before that, it was the Mayan apocalypse.  And now, he keeps hearing about all these “freaky” solar storms.  He laughs, but I’m sure his 11-year-old imagination leaves plenty of room for worry.

I can’t kill the zombies lurking in his subconscience, but I can put his mind (and my own) at ease about the solar storms with this short NASA video that explains that we’re in a totally normal sun cycle and are protected by Earth’s atmosphere

The Science of Success- Mentors

 - by KitchenPantryScientist

As I listened to their stories, I couldn’t stop the tears.  They were teenagers now, but it was easy to imagine them as 5-year-olds, or 10-year-olds as I watched  their awkward gestures, shy eyes and beautiful smiles. I thought of my own children.

These were kids with stories no one wants to hear.  Some told of begging for food to feed their younger siblings while their parents, crippled by addiction, traded food stamps for drugs. They told of families struggling with depression, homelessness, suicides, neglect, and abuse. They told stories no child should be telling.

It would be nice to think that they were unusual, but they weren’t.  These kids represented some of the 15% of Minnesota kids who live in poverty. And poverty is often associated with conditions that put children’s health and development, education and future job success at risk. It’s a vicious, downward cycle. (And for the record, three-fourths of Minnesota families in poverty have at least one parent in the workforce.)

The kids I heard speaking about their hardships were special though.  Although they represented poor, at-risk kids in Minnesota, they had broken the cycle and overcome the hardships of poverty and broken families to succeed in school. They were finalists for the Children’s Defense Fund of Minnesota‘s “Beat the Odds” scholarship.   They were moving forward, out of poverty.

And what did they have in common?  Each of them had one person in their life who believed in them and told them that they could succeed.  Many of them only had one person.  One person.  That was all it took.

For many, it was a teacher or counselor.  For others, it was a sibling, parent or grandparent.  But those individuals, those mentors, saved the lives of each of these children in many ways, allowing them to move forward into education, propelling them forward to lead richer  lives where day to day existance isn’t  a struggle.

Organizations like Children’s Defense Fund help these kids in many ways, fighting for higher minimum wages for the working poor, researching maternal depression and helping poor families get the help they need.

What can you do to help?

Find a way to be a mentor.  Many communities organizations and churches have reading-buddy programs and a wealth of other opportunities to help at-risk kids succeed. Tell a child (other than your own) that you believe in them.  Tell them that they can be what they want to be.  They can do what they want to do.  They can succeed.

You might save a life, and in doing so, help build a brighter future for all of us.

Real Pirates and How to Make a Compass

 - by KitchenPantryScientist

Last week at the Real Pirates exhibit at the Science Museum of Minnesota, I walked below deck on a mock pirate ship, hoisted a pirate flag (Jolly Roger), touched real pirate treasure and played dice with pirates.  The bell of the Whydah, a 300-ton pirate ship greeted us, illuminated by lighting and suspended in a huge tank of water. I could almost imagine it spinning and tumbling to the bottom of  the sea off the Massachusetts coast. 146 people aboard the ship drowned when The Wyhdah went down.

I was lucky enought to meet the treasure hunter-turned-historian Barry Cifford who discovered the wreck of the Whydah. He explained to us that pirate ships were true democracies, where crew mates were equal, no matter their background, age, race or religion. As a result ,many rushed to be pirates- whether they had escaped slavery, unjust society, or were just trying to make their fortune. The captain of the Whydah, Sam Bellamy, needed money to marry the woman he loved.  There was even a 10-year old boy named John King aboard the Whydah when she went down…he left his mother to join the pirates. (My 11-year old claims he’d never do that.)

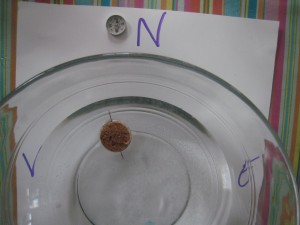
How did pirates navigate their way around the deep blue ocean well enough to ever utter the words “Land Ahoy?” In addition to maps and the stars, they used tools like the ones I saw from the Whydah: sounding weights to determine sea depth and ring dials to tell time. They also used compasses, simple tools for determining which direction North was, even in thick fog. A compass is an instrument containing a magnetized pointer that shows the direction of magnetic north, and you can easily make one with a needle, a magnet  and a piece of cork or Styrofoam and a  glass bowl (or pie plate) containing a few inches of water.Cut a slice of cork, maybe 1/2 inch thick) with a bread knife (see photo.) Then, magnify the metal in your needle by stroking it from one end to another with a magnet about ten times. (Go the same direction each time.) Push your needle through the cork or Styrofoam and gently set it in the bowl of water.  The needle, which you have turned into a magnet, will line up with Earth’s magnetic field, which runs from the South Pole to the North Pole. It should point North and South if you magnetized it correctly!

Scientists believe that because Earth’s core, or center, is made mostly of molten (melted) iron, that it generates an magnetic field.

Kitchen Table DNA Extraction

 - by KitchenPantryScientist

DNA, or deoxyribonucleic acid, contains all of the information needed to make every protein in a living thing and is sometimes called the “blueprint of life.”

This morning, on Kare11 Sunrise news, the kids and I showed viewers how easy it is to extract DNA from strawberries.

In higher organisms like plants and animals, DNA is stored in a compartment called a nucleus where the long, string-like DNA is tightly coiled. To separate DNA from the organism that contains it, you have to break the cells apart (lysis), filter out the big pieces of cell parts and collect the remaining liquid, or supernatent, and add chemicals like salt and alcohol to separate (precipitate) the DNA from the rest of the supernatent.

To extract DNA from strawberries at your own kitchen table, you’ll need: 3 strawberries, measuring spoons, 2 one or two-cup pyrex measuring cups, a cone-shaped coffee filter, a plastic zip-lock bag, small clear plastic or glass cups, laundry detergent (liquid or powdered), ice cubes, 2 big bowls, a timer, salt and ice-cold rubbing alcohol. *Always supervise children around cutting tools and alcohol.

Put the alcohol in the freezer at least an hour before you start the experiment so it gets cold enough to precipitate DNA.  Make sure the bottle is well-labeled and you remove it when you are done since rubbing alcohol is poisonous if it is consumed by accident.
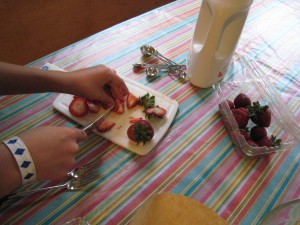
Cut strawberries into small pieces.

First, cut the strawberries into small pieces using a butter knife.  Put the pieces in one of the pyrex measuring cups and mash them up well with a fork until you can’t see chunks any more.
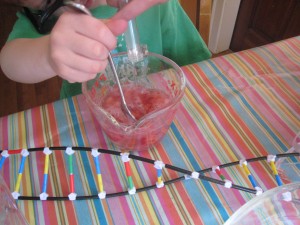
Mix mashed strawberries with detergent and 1/2 cup water.

Add a teaspoon of liquid or solid detergent to 1/2 cup of warm tap water, mix and pour this soapy mix over the strawberries.  Fill one of the big bowls about half way with hot tap water (as hot as it comes from the faucet) and set the pyrex cup containing strawberries inside the bowl of warm water. Mix well with your fork.  The detergent and warm temperature will start lysing (breaking up) the strawberry cells and proteins called enzymes will start chewing up cell parts, releasing the DNA from the nucleus. Wait 12 minutes, stirring the strawberry mixture once in a while.
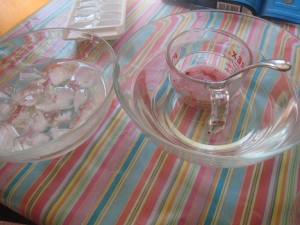
Set strawberry/detergent mix in warm water bath for 12 minutes, then ice bath for 5 minutes.

Fill the other bowl about halfway with water and lots of ice cubes to make an “ice bath”.  When the 12 minutes are up, set the cup containing the strawberry mixture into the ice bath for around 5 minutes, stirring once or twice.  The cold temperature will slow the enzymes down so they don’t start chewing up the strawberry DNA.

While you wait, cut a plastic bag into a funnel the same size as your coffee filter and clip off the corner of the plastic bag so liquid can flow out (see photo). Put the coffee filter inside your plastic bag funnel and set the whole thing in your other pyrex measuring cup (or a wide glass.)
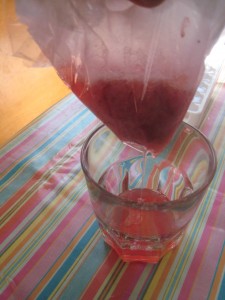
Put coffee filter inside plastic bag with tip cut off, pour strawberry mixture in and collect the supernatent.

When the 5 minutes are up, pour the strawberry solution into the filter/funnel and hold it while the strawberry gunk is filtered out and the supernatent containing the DNA flow through and into the cup below.  If  your filter gets clogged, use a spoon to carefully remove some of the strawberry gunk so more liquid can flow through.  Don’t worry if you don’t collect every drop.

Now you get to precipitate the DNA! Pour some supernatent into your small, clear glass until it is about 1/3 full. Add about 1/4 teaspoon salt to the supernatant and mix it up well with a spoon or knife.  Now, gently pour an equal volume (the same amount as your supernatent) of ice-cold alcohol into your supernatent.  Do not mix it, but put your hand over the top of the glass and rock it gently.  Set it down on the table and let it sit for a few minutes.
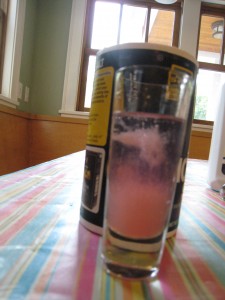
Cloudy white DNA precipitate will form near the top of your glass.

You should see a cloudy goo forming near the top of the liquid. It may look bubbly or slightly white.  This is strawberry DNA.
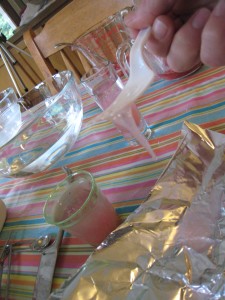
Remove DNA with a toothpick, stirring stick or plastic fork.

You can use a toothpick or plastic fork to gently lift the DNA from the glass.  It will look like clear slime.

Put it on a plate and touch it… how does it feel?

Congratulation scientist! You’ve just extracted DNA from a living organism!

*If you don’t see DNA, make sure you’ve added the salt.  You can also set the entire glass in the freezer for half an hour if your alcohol wasn’t cold enough and the DNA should precipitate out!
Yeast Experiment: Pyramids, Pasteur and Plastic Baggies

 - by KitchenPantryScientist

This month has found me ridiculously busy teaching microbiology and writing, while trying to keep up with my kids’ activities. To keep you busy doing science, I thought I’d repost this yeasty microbiology experiment from last year, since bacteria, viruses and fungi have been on my mind (and in my house a few times in the form of colds and stomach bugs.) If you’re starved for more projects, on January 31st, you’ll find me on Kare11 morning news (Minneapolis/St. Paul) demonstrating how to extract DNA from strawberries at your kitchen table!

I demonstrated this experiment on Kare11- you can watch it here.

Picture yourself living in ancient Egypt and imagine that it is your job to rise before the sun each day to bake crackers for your family. Mixing up ground wheat and honey one afternoon, you are distracted.  (Maybe you are watching a pyramid being built just across the Nile.)  You forget to cover up the cracker dough.  It sits all night in an open window, caressed by a warm breeze carrying tiny life forms that are too small to see. When you wake the next morning, you find the dough puffed up and overflowing its bowl.  Everyone will be awake and hungry soon and you don’t want to get in trouble, so you go ahead and bake it. The crackers are not hard and flat like usual, but emerge from the hearth light, puffy and delicious. You have just baked the first bread in human history.

No one really knows how the ancient Egyptians discovered yeast, but we have learned from their writings and artwork that they have been making bread for over 4,000 years.  How bread rose was a mystery though, until a famous scientist named Louis Pasteur proved that tiny living organisms called yeast were responsible for making bread dough puff up.

Bread yeast is a type of fungus and is related to mushrooms.  If you look at yeast cells under a microscope, you will see that they are shaped like balloons and footballs.  The single-celled organisms reproduce themselves by making tiny buds that will become new yeast cells.  The kind of yeast used to make bread is called Saccharomyces cerevisiae (sack-a-roe-MY-seas sair-a-VIS-e-ey).  Saccharomyces means “sugar fungus” and the word cerevisiae comes from the name of Ceres, who was a goddess of farming in Roman mythology.  Here’s what they look like under the microscope.

Growing yeast cells love to eat sugar and starches, like the ones in bread flour.  When they eat these starches, some of the proteins in the flour, called glutens, swell up.  Yeast cells eating starch make a gas called carbon dioxide that forms lots of tiny bubbles in the bread dough.  The tiny bubbles pop during baking, but leave tiny holes where they were.  You can see these holes in the bread you eat.  The yeast you buy at the store is alive, but it is dried and can’t grow until you add water to it.

Here’s a fun experiment you can try to see what makes yeast grow best.  All you will need are some zip-lock baggies, yeast, salt, sugar and water.

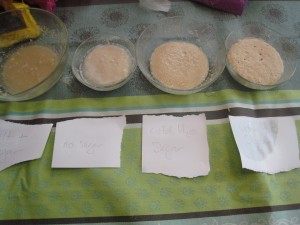
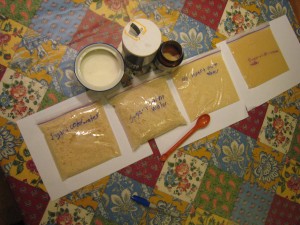
1. Label four baggies as follows:

Sugar + warm water

Sugar + cold water

Sugar + salt + warm water

No sugar + warm water

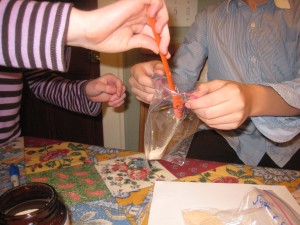
2.  Add a package of yeast (or 2 tsp.) to each plastic bag.  Add 2 tsp. of sugar to each of the bags that say sugar and 1 tsp. of salt to the bag that says salt.

3. Carefully, add ½ cup water to each baggie.  The warm water should be warm, but not too hot, or it will kill the yeast.  The cold water can be room temperature.

4. Seal the bags, squeezing out as much of the extra air as possible and let them sit.  (The yeast will grow faster in a warm room than a cold one.)

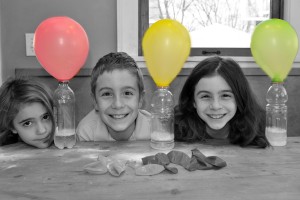
5. Watch the bags to see what happens.  You will know your yeast cells are growing if the baggie containing them puffs up. Keep an eye on your experimentIf a bag gets so puffy that it looks like it might explode, be sure to open it to let the pressure out!

Which ingredients help yeast grow best? Did you find an ingredient that kept them from growing well?  Do yeast cells grow better in warm or cold water?  What is making the bags puff up and how does this tell you that the yeast is growing?  (Hint: the answer is in the paragraph above about how yeast makes bubbles in bread!)

Try coating the yeast with oil before adding the sugar and water.  What happens if you add fruit juice to the bags?  Honey? Lemon juice?  What happens if you put the bags in the refrigerator just after adding the yeast?

It’s fun to try the same experiment in bowls, but you won’t be able to see the carbon dioxide gas puffing the bag up!

I wrote this post as an article for INGREDIENT magazine, a magazine for kids curious about food.  The January/Feb. issue contains lots of great articles and teaches kids to bake bread!