Tag: science’
Sweet (and Salty) Lava Lamps
- by KitchenPantryScientist

Pull out a jar, a bottle of vegetable oil, some food coloring, salt, sugar, and water to mix up this easy experiment! 
Fill the jar about halfway up with water and add a few drops of food coloring for contrast. Add about half as much vegetable oil to the jar and watch it float to the top. Now, a spoonful at a time, add salt to the jar. The salt will pull some of the oil down with it, but will release the oil as it dissolves and the oil will float back to the top. This will make your science experiment look like a real lava lamp. Keep adding salt to make it keep working. Now, try adding sugar or even sand. Kosher salt worked really well!
What worked the best for you? Do you know why oil floats to the top of the water? Email me your answers in the comments section of this post for a chance to win a KITCHENPANTRYSCIENTIST.COM tee shirt (size M.) I’ll do a drawing for a winner in two weeks! Thanks to PBSkids/DragonflyTV’s website for this fun idea. Check out their website for more great kids’ science!
Window Sprouts
- by KitchenPantryScientist

Window Sprouts from Kitchen Science Lab for Kids Quarto Books
When I was growing up, we always had a vegetable garden. My mom grew up on a farm and was appalled when my sister or I would throw a fit upon finding a tiny bug in our lovely, homegrown lettuce salad. “Where do you think the lettuce came from?” she would ask, and we’d have to admit that it grew in dirt, outside, and that there are bugs out there. It was an invaluable lesson and one I hope I can pass along to my kids. Our world has become too sterile and disconnected from nature. Like plants, we need dirt, sunshine, fresh air and clean water to survive. Who cares about a few bugs?
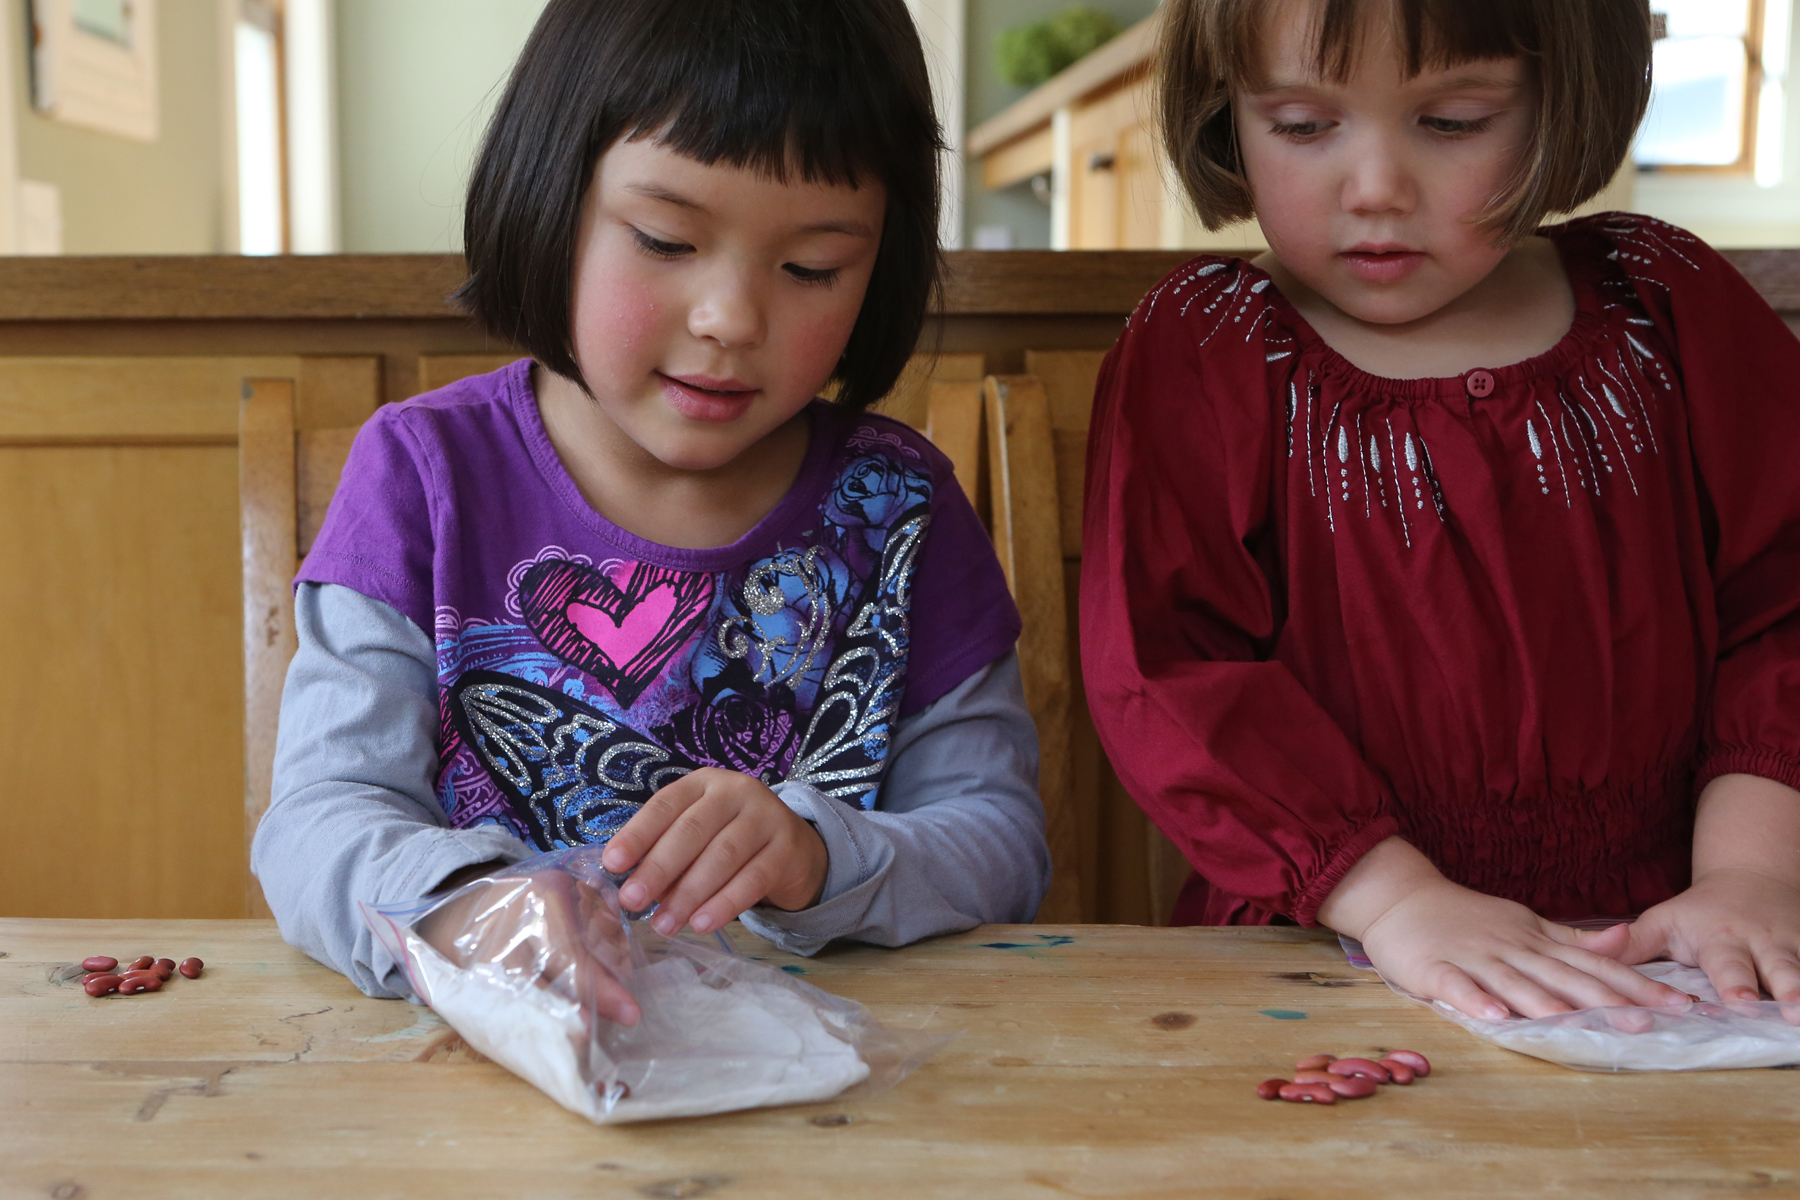
Try planting a few bean and pea sprouts in plastic bags to show your kids how sunshine and water can make a plant sprout!
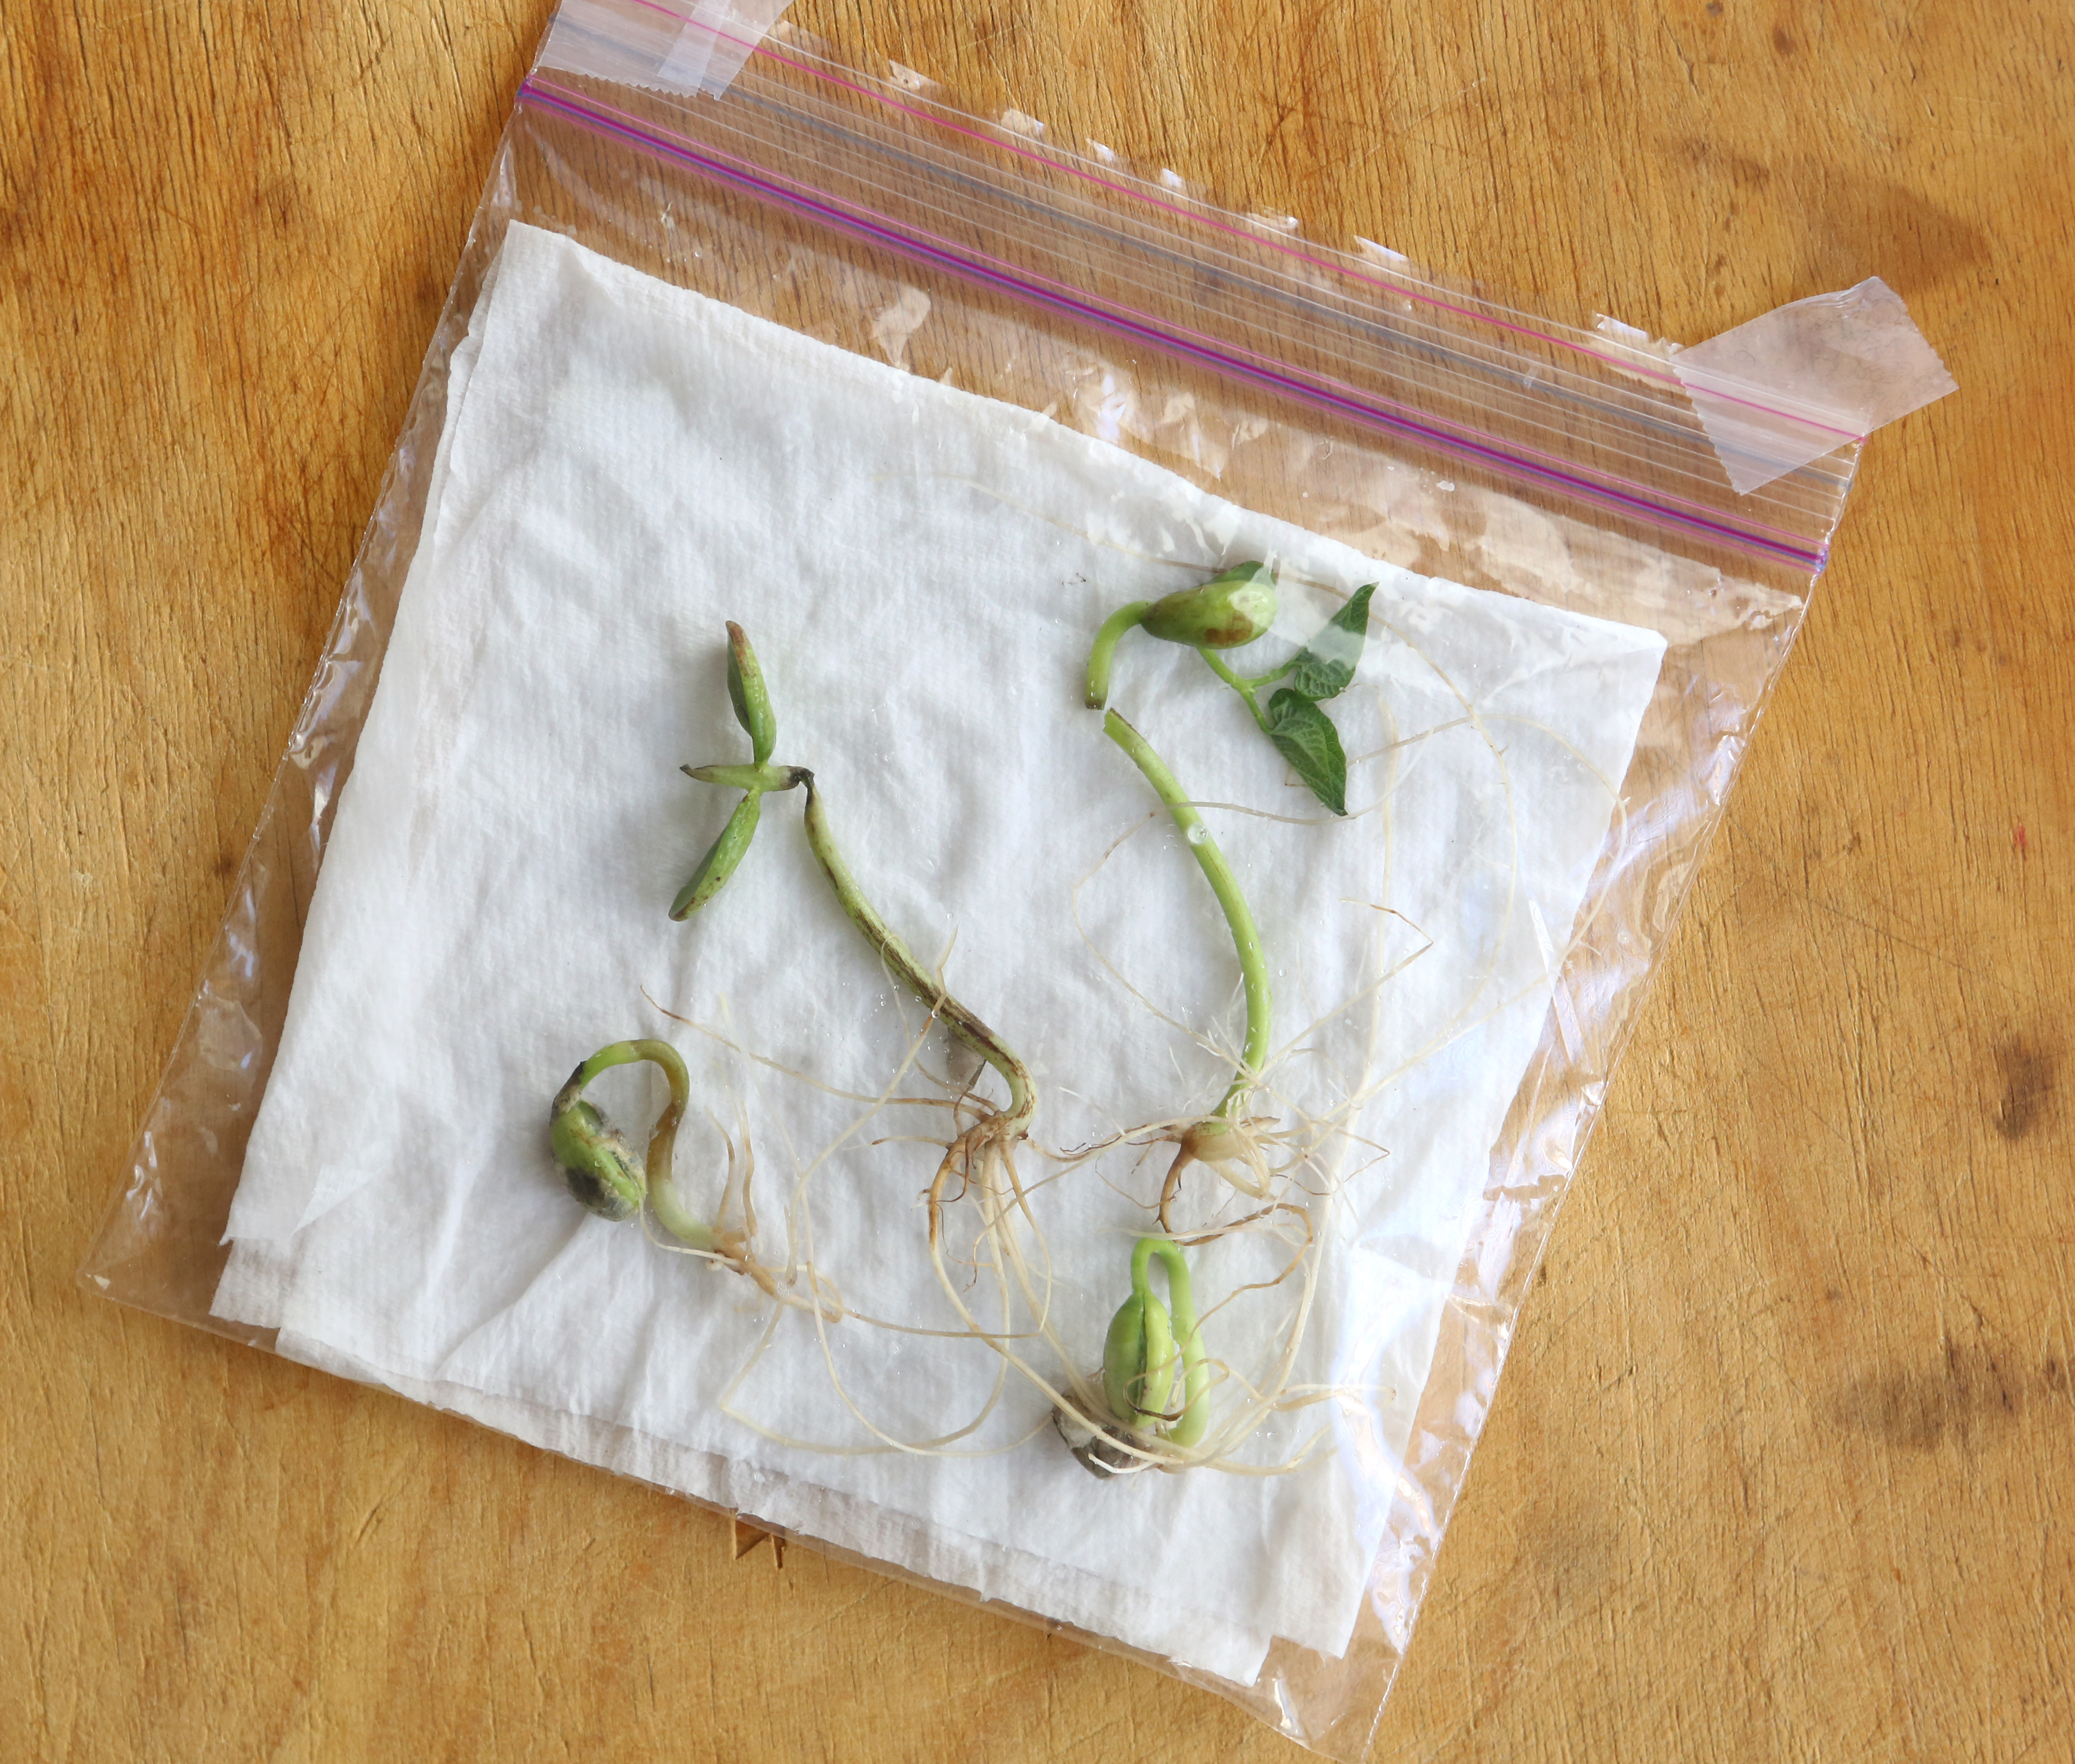
You’ll need a few plastic zip-lock bags, dry beans from your pantry (or peas and beans from the garden seed packs you can find almost anywhere ), paper towels and water. Cut a paper towel so that you can fold it a few times and it will fit into the zip-lock baggie. Have your child soak it with water and help them put it into the bag so that it’s relatively flat. Then, give them two beans or seeds to place in the bag, near the bottom.
Window Sprouts from Kitchen Science Lab for Kids Quarto Books
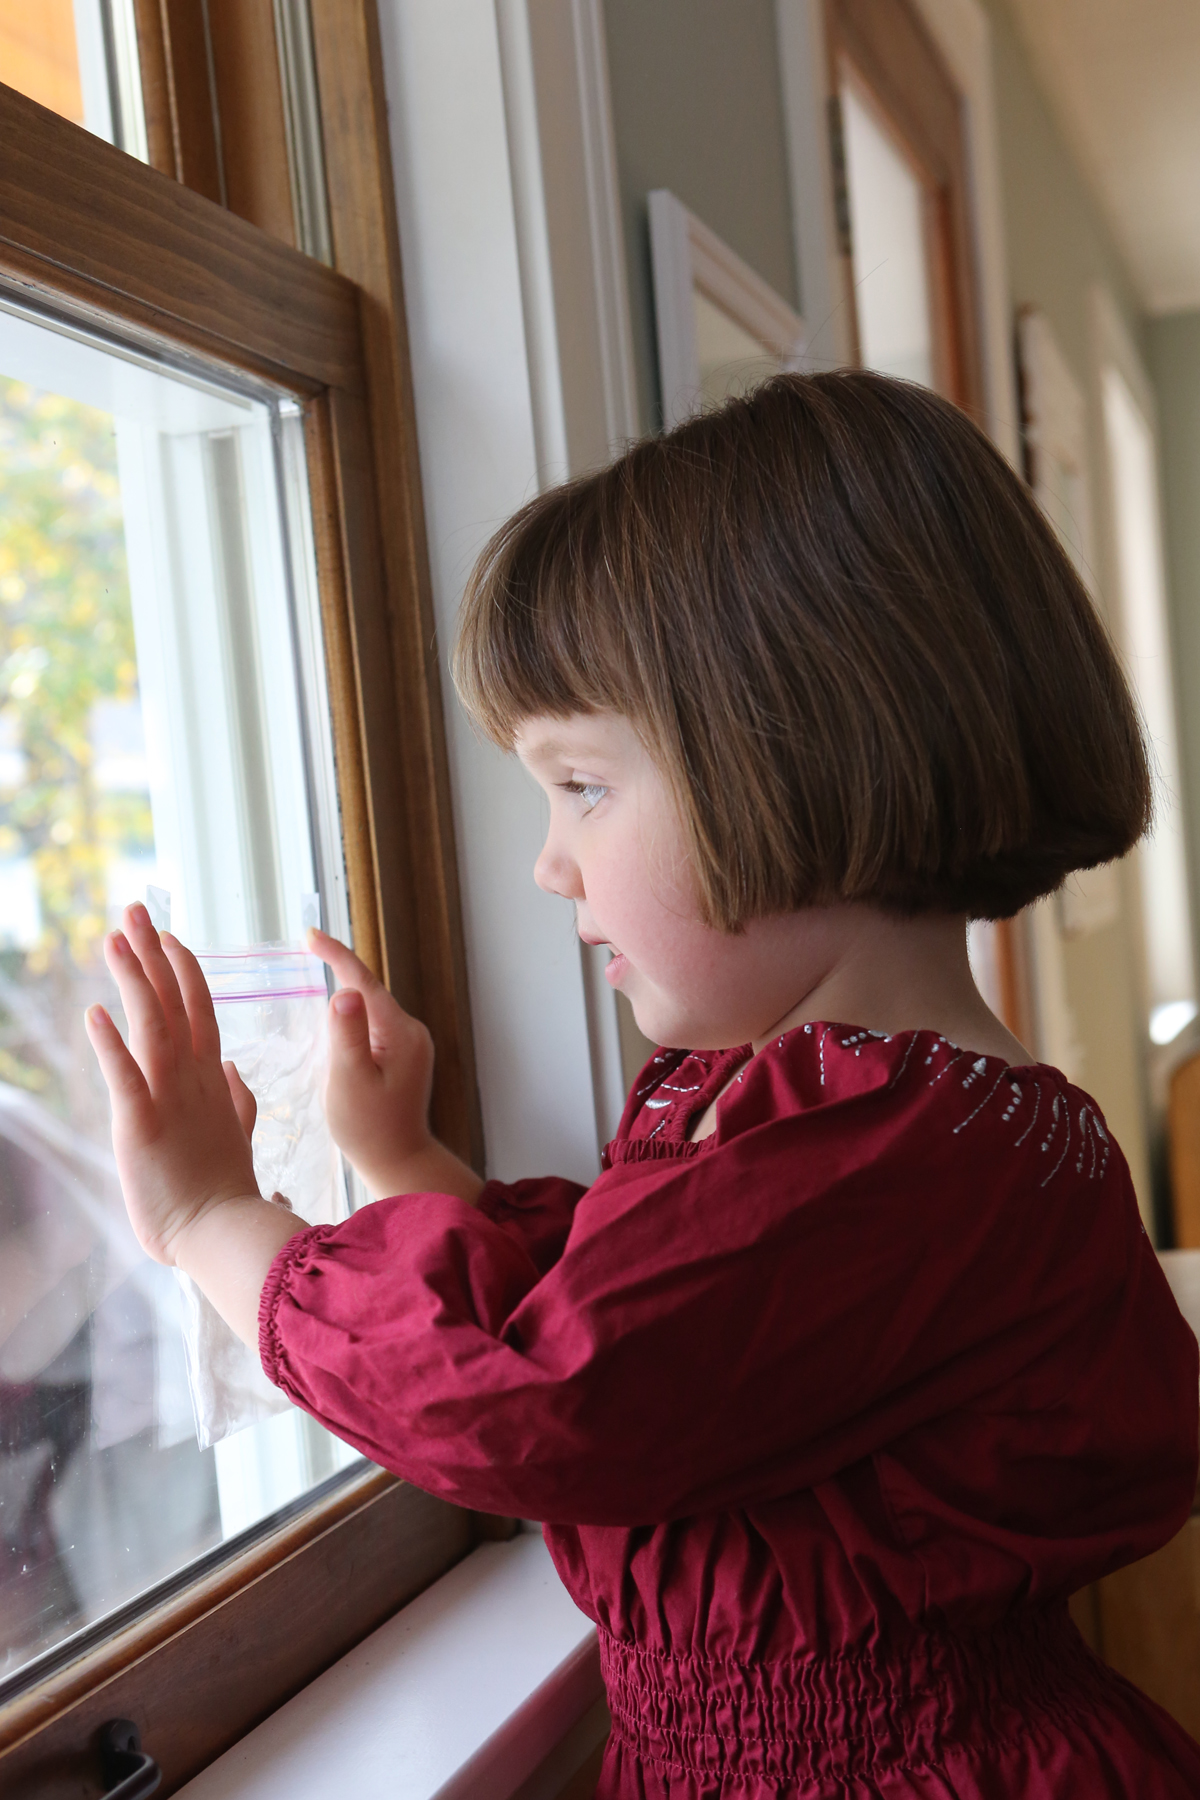
I had to stuff a little piece of paper towel into the bottom of the bags so that the seeds wouldn’t sit in the extra water at the bottom. Let your child help seal the bag. Leave an opening near the top so the plants can get some air. Finally, tape the bag in a window with the beans facing you so that your child can watch them as they grow. (I’d recommend finding a window where they won’t get blasted by hot sun all day, or they might fry.)
Window Sprouts from Kitchen Science Lab for Kids Quarto Books
As you do the project, ask your child what they think plants need to grow (Plants need light, air, water and nutrients, or “food.”) Ask them how they think the seed can grow without the dirt as “food.” Tell them that when a plant first sprouts, it gets its nutrients from the seed itself. They can watch the seed shrink as the plant grows. Have them draw the seed/plant in their science notebook as it changes. Older kids can measure the plants as they grow. Eventually, you should be able to transplant them to a cup with dirt, or directly into a garden. You may have to add water to the paper towels if they dry out. Play it by ear.
Window Sprouts from Kitchen Science Lab for Kids Quarto Books
Plant a garden this spring, even a very tiny one in pots! Let your kids get their hands in the dirt. Help them nurture plants that will eventually nurture them. (Children are much more interested in tasting vegetables that they’ve grown themselves. ) It is one of the most rewarding activities you can do with your children, and takes only dirt, seeds and water! Find your inner farmer and let your children find theirs- organic food is cheap when you grow it yourself!
Invisible Ink
- by KitchenPantryScientist

My kids love to play spy games. They spy on us, they spy on each other. They write notes in code and hide them all over the house. I knew right away that they would have fun with this science project. There’s definately enough 9-year old girl left in me to think it’s really cool too! This is a project that kids can actually do IN their science notebooks (or, they can just tape their note into the notebook when it is dry.) Like most projects, it doesn’t work perfectly. However, it is fun and you will see a message appear although it may be fuzzy.
All you need is paper, water, baking soda and grape juice. Simply add a few big spoonfuls of baking soda to a cup of water and mix it well (I heated the solution in the microwave to warm it in an attempt to dissolve more of the soda.) Dip a paint brush in the mixture and write a message or draw a picture on your paper. Let the paper dry completely.

When you are ready to reveal the secret code, have them paint over the paper with grape juice. Don’t use to much, or it will be a sloppy mess. The grape juice will react with the baking soda on the paper,changing the acidity of the grape juice and causing the words to appear a little darker than the background of the regular juice. Ours turned green. You could also try some different types of juice to see what happens. Have your kids record their results in their science notebooks! If they are interested, have them look up the definition for acid and base on a science website like chemistry.about.com. 
The words weren’t very clear, but it was still a fun project and my kids loved it. Maybe your kids can perfect the technique. After all, trouble-shooting is a great life skill.
Supersonic Science for Kids-Throw a Rock into a Pond
- by KitchenPantryScientist
StephenOrnes at sciencenews.org reports that scientists have measured the speed of air escaping the column that is formed when a rock thrown into a flat body of water, like a pond. When the column collapses, the air that is pushed out moves faster than the speed of sound (760 miles an hour.) To read more and watch a video, go to http://www.sciencenews.org/view/generic/id/55900/title/FOR_KIDS_Supersonic_splash_.
How to Make Tie-Dye Milk Video
- by KitchenPantryScientist
Kids from two to twenty will have fun playing with this science project. Click here for my blog post on Tie-Dye Milk and to read more about surface tension
[vsw id=”SDjHnmhakzU” source=”youtube” width=”425″ height=”344″ autoplay=”no”]
How to Make Cornstarch Goo video
- by KitchenPantryScientist
[vsw id=”pFyLGFXrIhw” source=”youtube” width=”425″ height=”344″ autoplay=”no”]
To read my printed post on this experiment, click here.
Sky Gazing
- by KitchenPantryScientist
If the sky is clear tonight (Friday, Jan.29,) be sure to look up. Not only will the moon be full, but Mars will be visible close by (about a fist’s length) and appear red to the naked eye as it comes within 62 million miles from earth and lines up opposite the sun. Read more here.
Fingerprint Fun
- by KitchenPantryScientist

For this project, I thought that it would be fun to mix a little science and a little art. My sister told me that she heard you could make Valentine’s cards using fingerprints. I’ve also heard that it’s pretty easy to lift fingerprints using scotch tape, so I thought we’d give it a try. All you need for the science part is paper, scotch tape and a pencil. For the valentines, you will need an ink pad, paper and markers.
On www.wikieducator.org/Fabulous_Forensic_Fingerprints, I found a fingerprint-lifting technique that works well, even for very young children. Simply take a pencil and scribble on a piece of paper until a small area is covered with the graphite from the pencil lead. Have your child rub his or her finger around in the graphite until it is covered with gray. Then, have your child carefully place their finger on the sticky side of a piece of scotch tape and carefully lift their finger off of the tape. A clear fingerprint should be visible. Place the tape face-down on another piece of paper to preserve the fingerprint.


Your child can then inspect the fingerprint under a magnifying glass, or just with their naked eye. If you go to the wiki website I mentioned, your child can decipher whether they think their fingerprint is a whorl, a loop, or an arch. It is fun to have them trace their hand, fingerprint each finger and thumb, and tape their fingerprints to the appropriate fingers. Your child’s fingerprints would be a great addition to their science notebook! I’ve found that their notebooks are great keepsakes of their drawings and observations at different ages. The kids had a lot of fun with this project and could do it unassisted once I showed them what to do.
For the Valentines, have your children put two fingerprints or thumbprints together in the shape of a heart. Of course, they will also want to make fish, bugs, and who knows what else? I gave my kids some ideas to get them started and they went from there! (It’s fun to add details with markers.) Have fun!

Singing about Hydrogenated Oils
- by KitchenPantryScientist

When I’m not busy with my kids or blogging, one of my favorite things to do is sing with my neighborhood garage/party band, ” The 952″. Recently, I got the chance to perform for a bigger audience when “I Can’t Believe it’s Not Butter!” sent my fellow blogger and good friend unplannedcooking.com a Flip video camera. They asked her to create and film a commercial for their new “Turn the Tub Around” campaign, advertising their new, healthier product which does not contain any hydrogenated oils* and is therefore trans-fat free.
Jennifer let me in on the fun, and with the help of a few friends, we managed to juggle our kids and our schedules just long enough to put a video together. Not only did we sing for the video, we had to learn a signature dance move (and I am NOT a great dancer.) Incredibly, we just found out that our video is a finalist in the video contest. We’re up against some very talented competition, but there’s a chance that part of our homespun video might air on a commercial during American Idol next Tuesday, Jan.12th. You will be able to view our video beginning on Jan.19th on the “Watch, Vote and Win Sweepstakes” at www.turnthetubaround.com. Check it out for a glimpse of a couple of moms acting like kids! You’ll also have a chance to win great prizes every time you vote for your favorite video! Hopefully, it will be ours.
Now for the science. Here’s your biochemistry lesson for the day: There are four kinds of fats: monounsaturated fat, polyunsaturated fat, saturated fat, and trans fat. Monounsaturated fat and polyunsaturated fat are considered to be the “good” fats in the human diet (think olive oil.) It is generally accepted that consumption of saturated fat should be kept low, especially for adults. Trans fat (which means trans fatty acids) is the considered the least healthy type of fat, far worse than saturated fat. Partial hydrogenation is an industrial process used to make vegetable oils, like soybean oil, into a less healthy product containing transfats. The process is used to make an oil more solid; provide longer shelf-life in baked products; provide longer fry-life for cooking oils, and provide a certain kind of texture or “mouthfeel.” The problem is that partially hydrogenated vegetable oil is laden with trans fat, which has been linked to health problems. In fact, there are currently several campains calling for the ban of partially hydrogenated oils. You, of course, have to decide what is best for you and your family. If you’re curious, there is much more specific information online about the health effects of transfats.
Note: The free video Flip camera was sent in exchange for our participation in the contest and I LOVE it! It’s small enough to fit in my purse and plugs right into my USB port to download videos.
Float or Sink
- by KitchenPantryScientist

You’re never too young to enjoy a good science experiment. This is a great project that requires very few supplies and very little effort for adult involved. It’s easy enough for a toddler to do and is a perfect activity for a cold or rainy day.
-Fill up a large bowl or tub with as much water as you’re comfortable cleaning up. (Safety Mama, if there were one, would remind you to always supervise young children around any amount of water!)
-Place a large towel under the bowl on some waterproof surface. (The kitchen floor works very well for us.)
-Have your child find several small objects around the house that they’d like to use in the experiment. Suggest they find some things that they think will float and some they think will sink. Do a quick check to make sure they won’t destroy anything that you want to keep dry.
-Ask them whether they think the object will float or sink and then let them try it out.
If they want, they can make a chart of their predictions and the results. Your child’s science notebook would be a great place to do this! (see science notebook post if you don’t already have one!)
Here’s some science for you parents, in case your kids want to know what’s happening. You can impress them with your vast knowledge:
One way to see how density affects things is to look at how things sink or float in water.
If something is more dense that water, it will sink, and if less dense than water, it will float.
In case they ask, which they always do:
Density is a measure of how much mass is contained in a given unit volume. Put simply, if mass is a measure of how much ‘stuff’ there is in an object, density is a measure of how tightly that ‘stuff’ is packed together.
Or, just tell them they’ll learn about it in science class someday!