Tag: tie-dye’
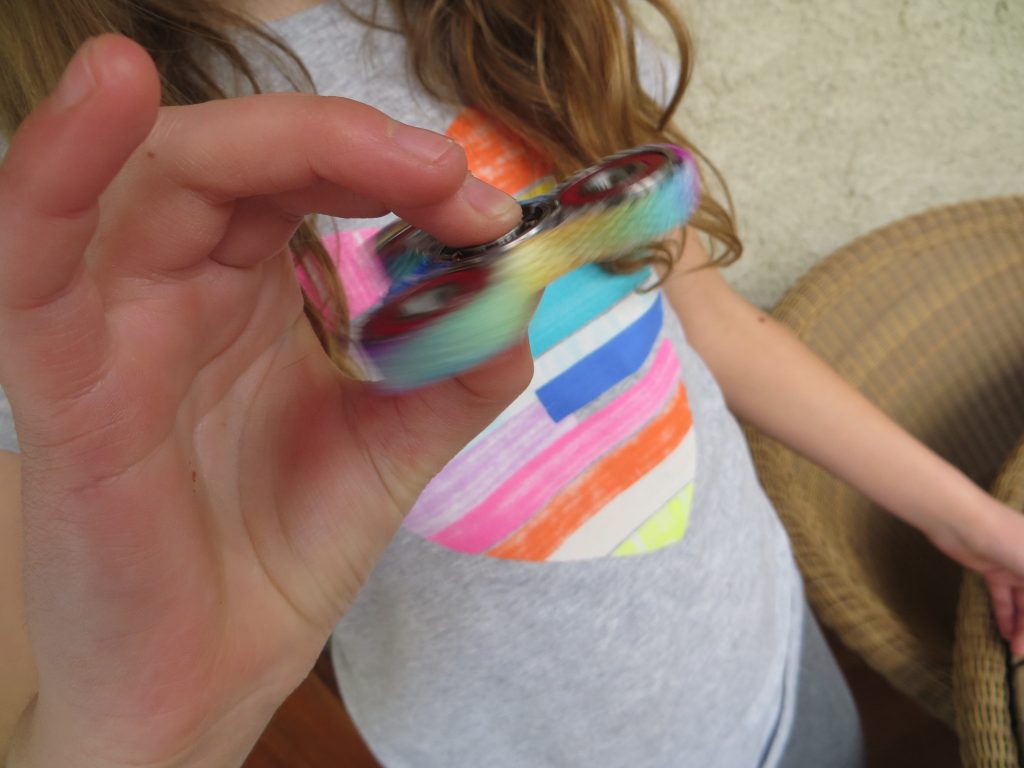
Homemade Tie-Dye Fidget Spinner
- by KitchenPantryScientist
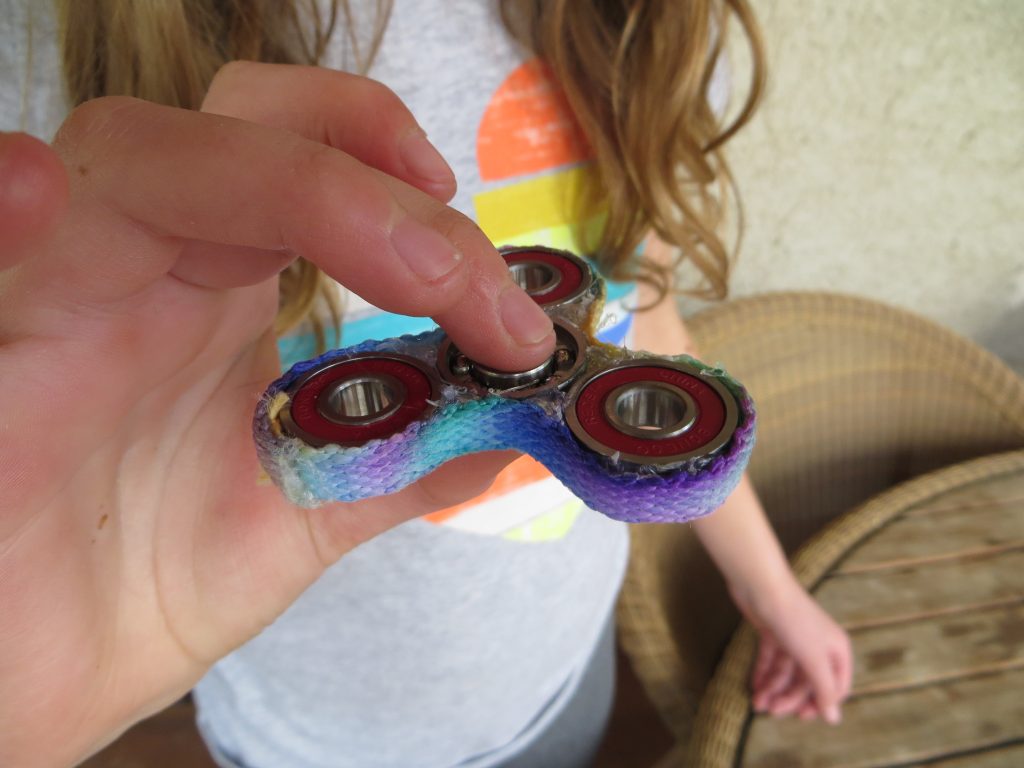
Homemade Spinner with Tie-Dye Edges (KitchenPantryScientist.com)
Make a super-cool spinning toy using skateboard bearings, super glue and a little physics. Customize your design with a marker tie-dyed shoelace.
Warning: Not for recommended for kids under 5. Use adult supervision for super glue, sharp points, rubbing alcohol and glue gun.
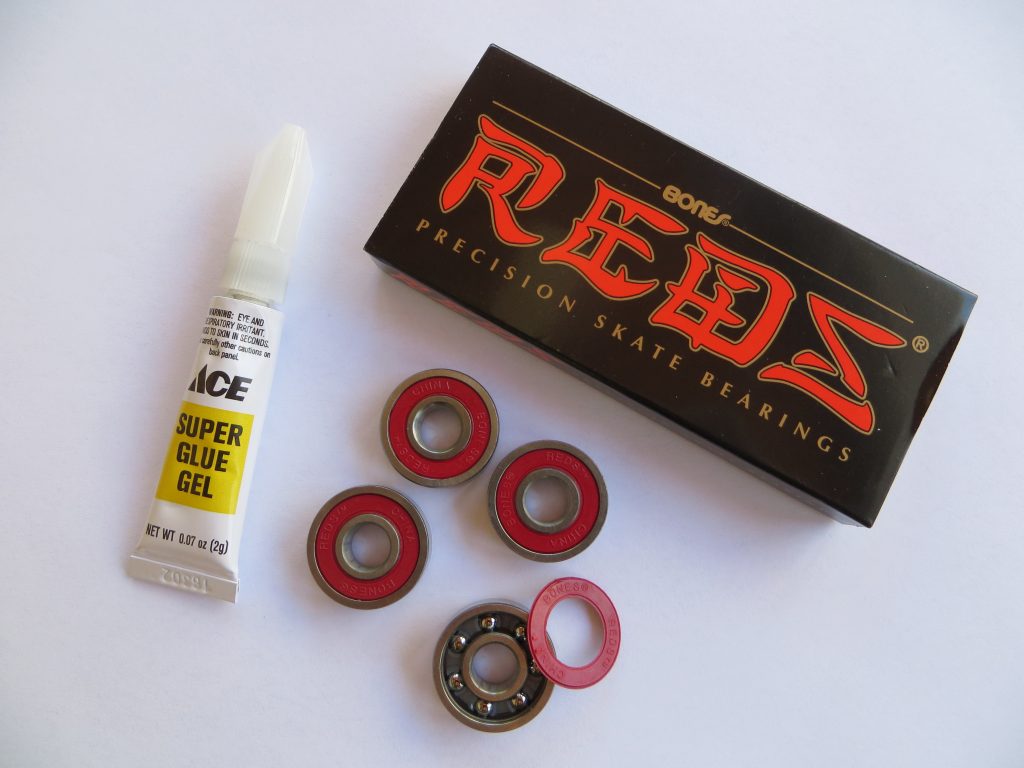
You’ll need:
-4 skateboard bearings (available online or at skateboard stores)
-superglue or Krazy Glue
-a white shoelace
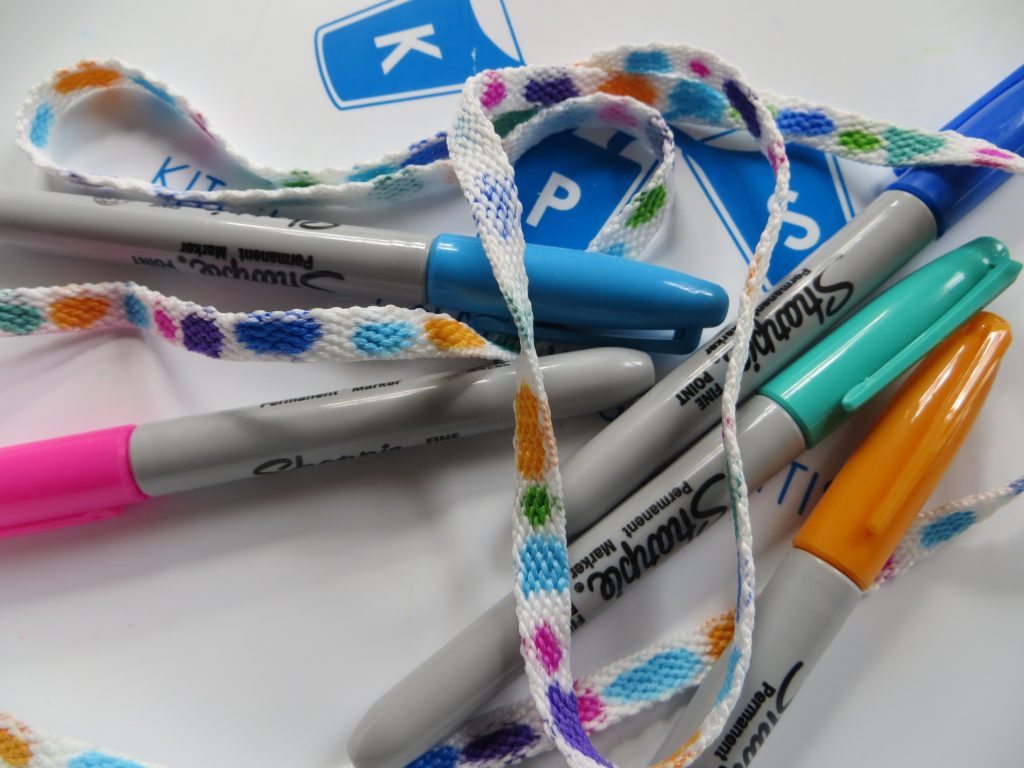
-permanent markers, like Sharpies
-rubbing alcohol (isopropanol)
-a glue gun
KitchenPantryScientist.com
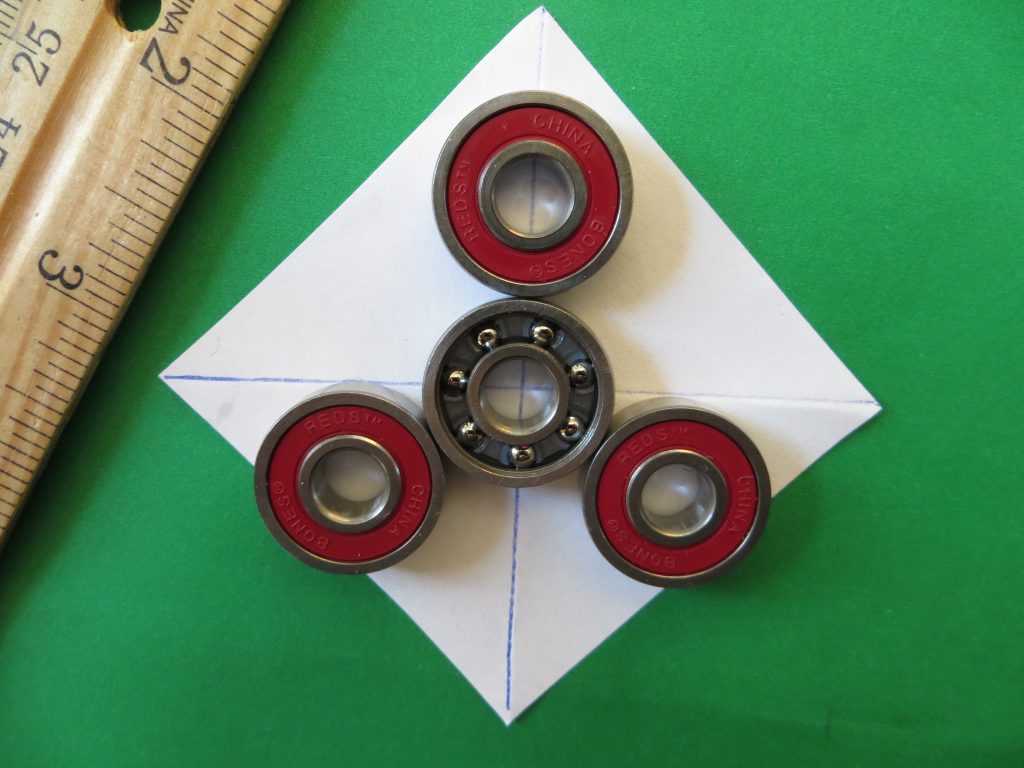
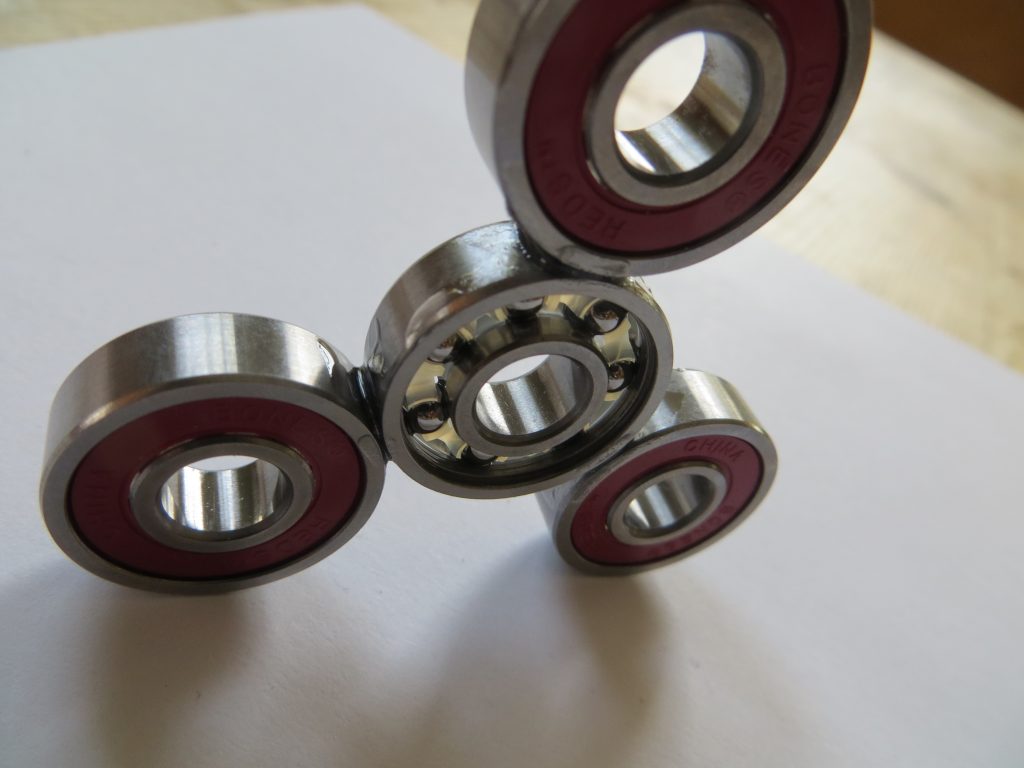
1. Use a sharp point to remove the cover from one of the bearings so that you can see the ball bearings inside. (See image above.)
2. Cut a piece of paper 6cm x 6cm and draw an X from corner to corner.
3. Center the bearing with the cover removed in the middle of the X. Then, center the other 3 bearings around the one in the middle so that they’re evenly spaced. You can use a ruler to check spacing. (See image below.)
KitchenPantryScientist.com
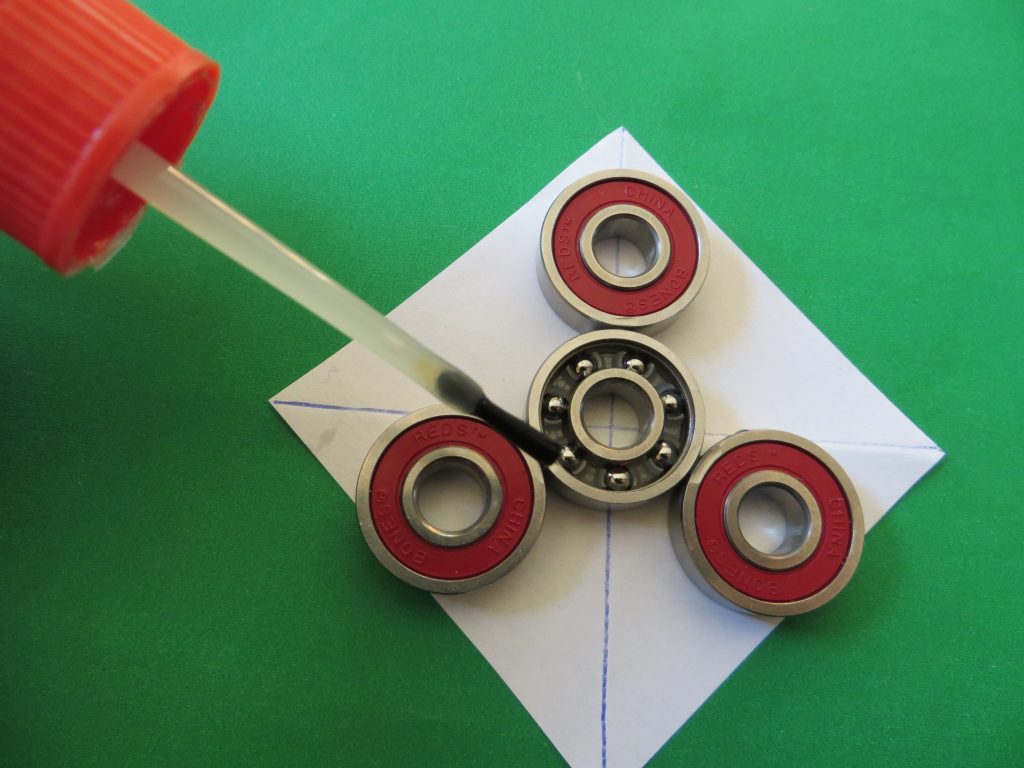
4. Add a single drop of super glue to the junction between each bearing to connect them. If you add too much, the spinner will stick to the paper. *Be careful not to get any glue onto the moving parts of the bearings.
KitchenPantryScientist.com
5. When the glue is dry, carefully turn the spinner over and place another drop of glue at each junction.
6. When the glue is dry, prop the spinner up on its side and add glue to the junctions on the sides. (See image below.) Repeat on each side.
KitchenPantryScientist.com
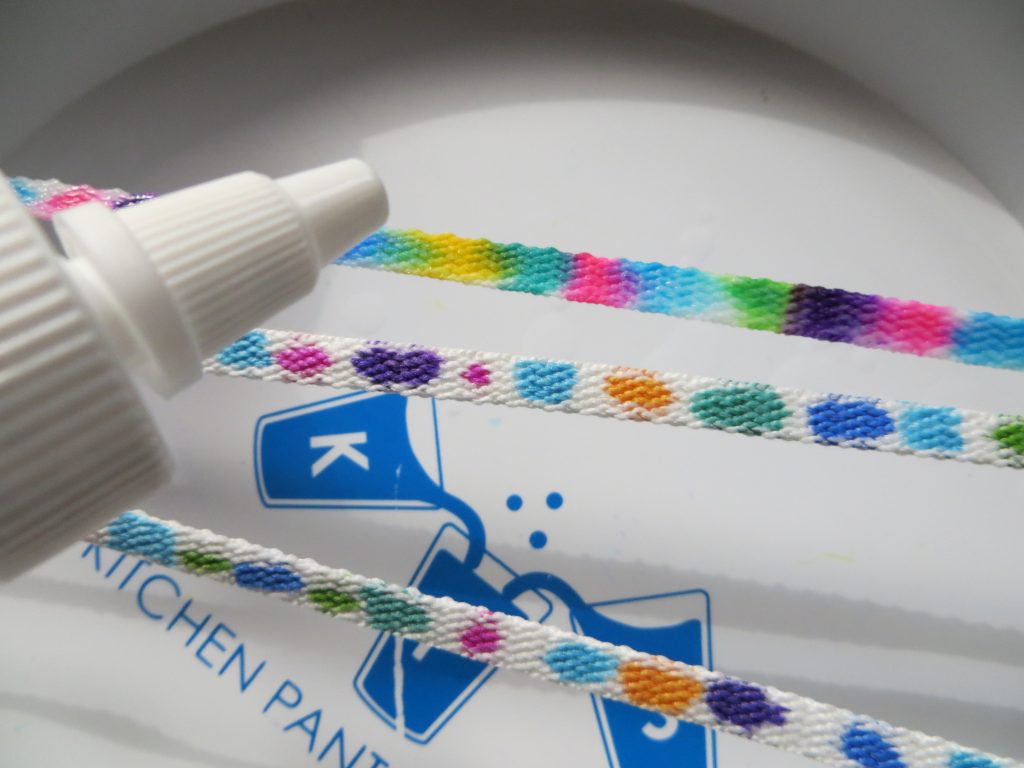
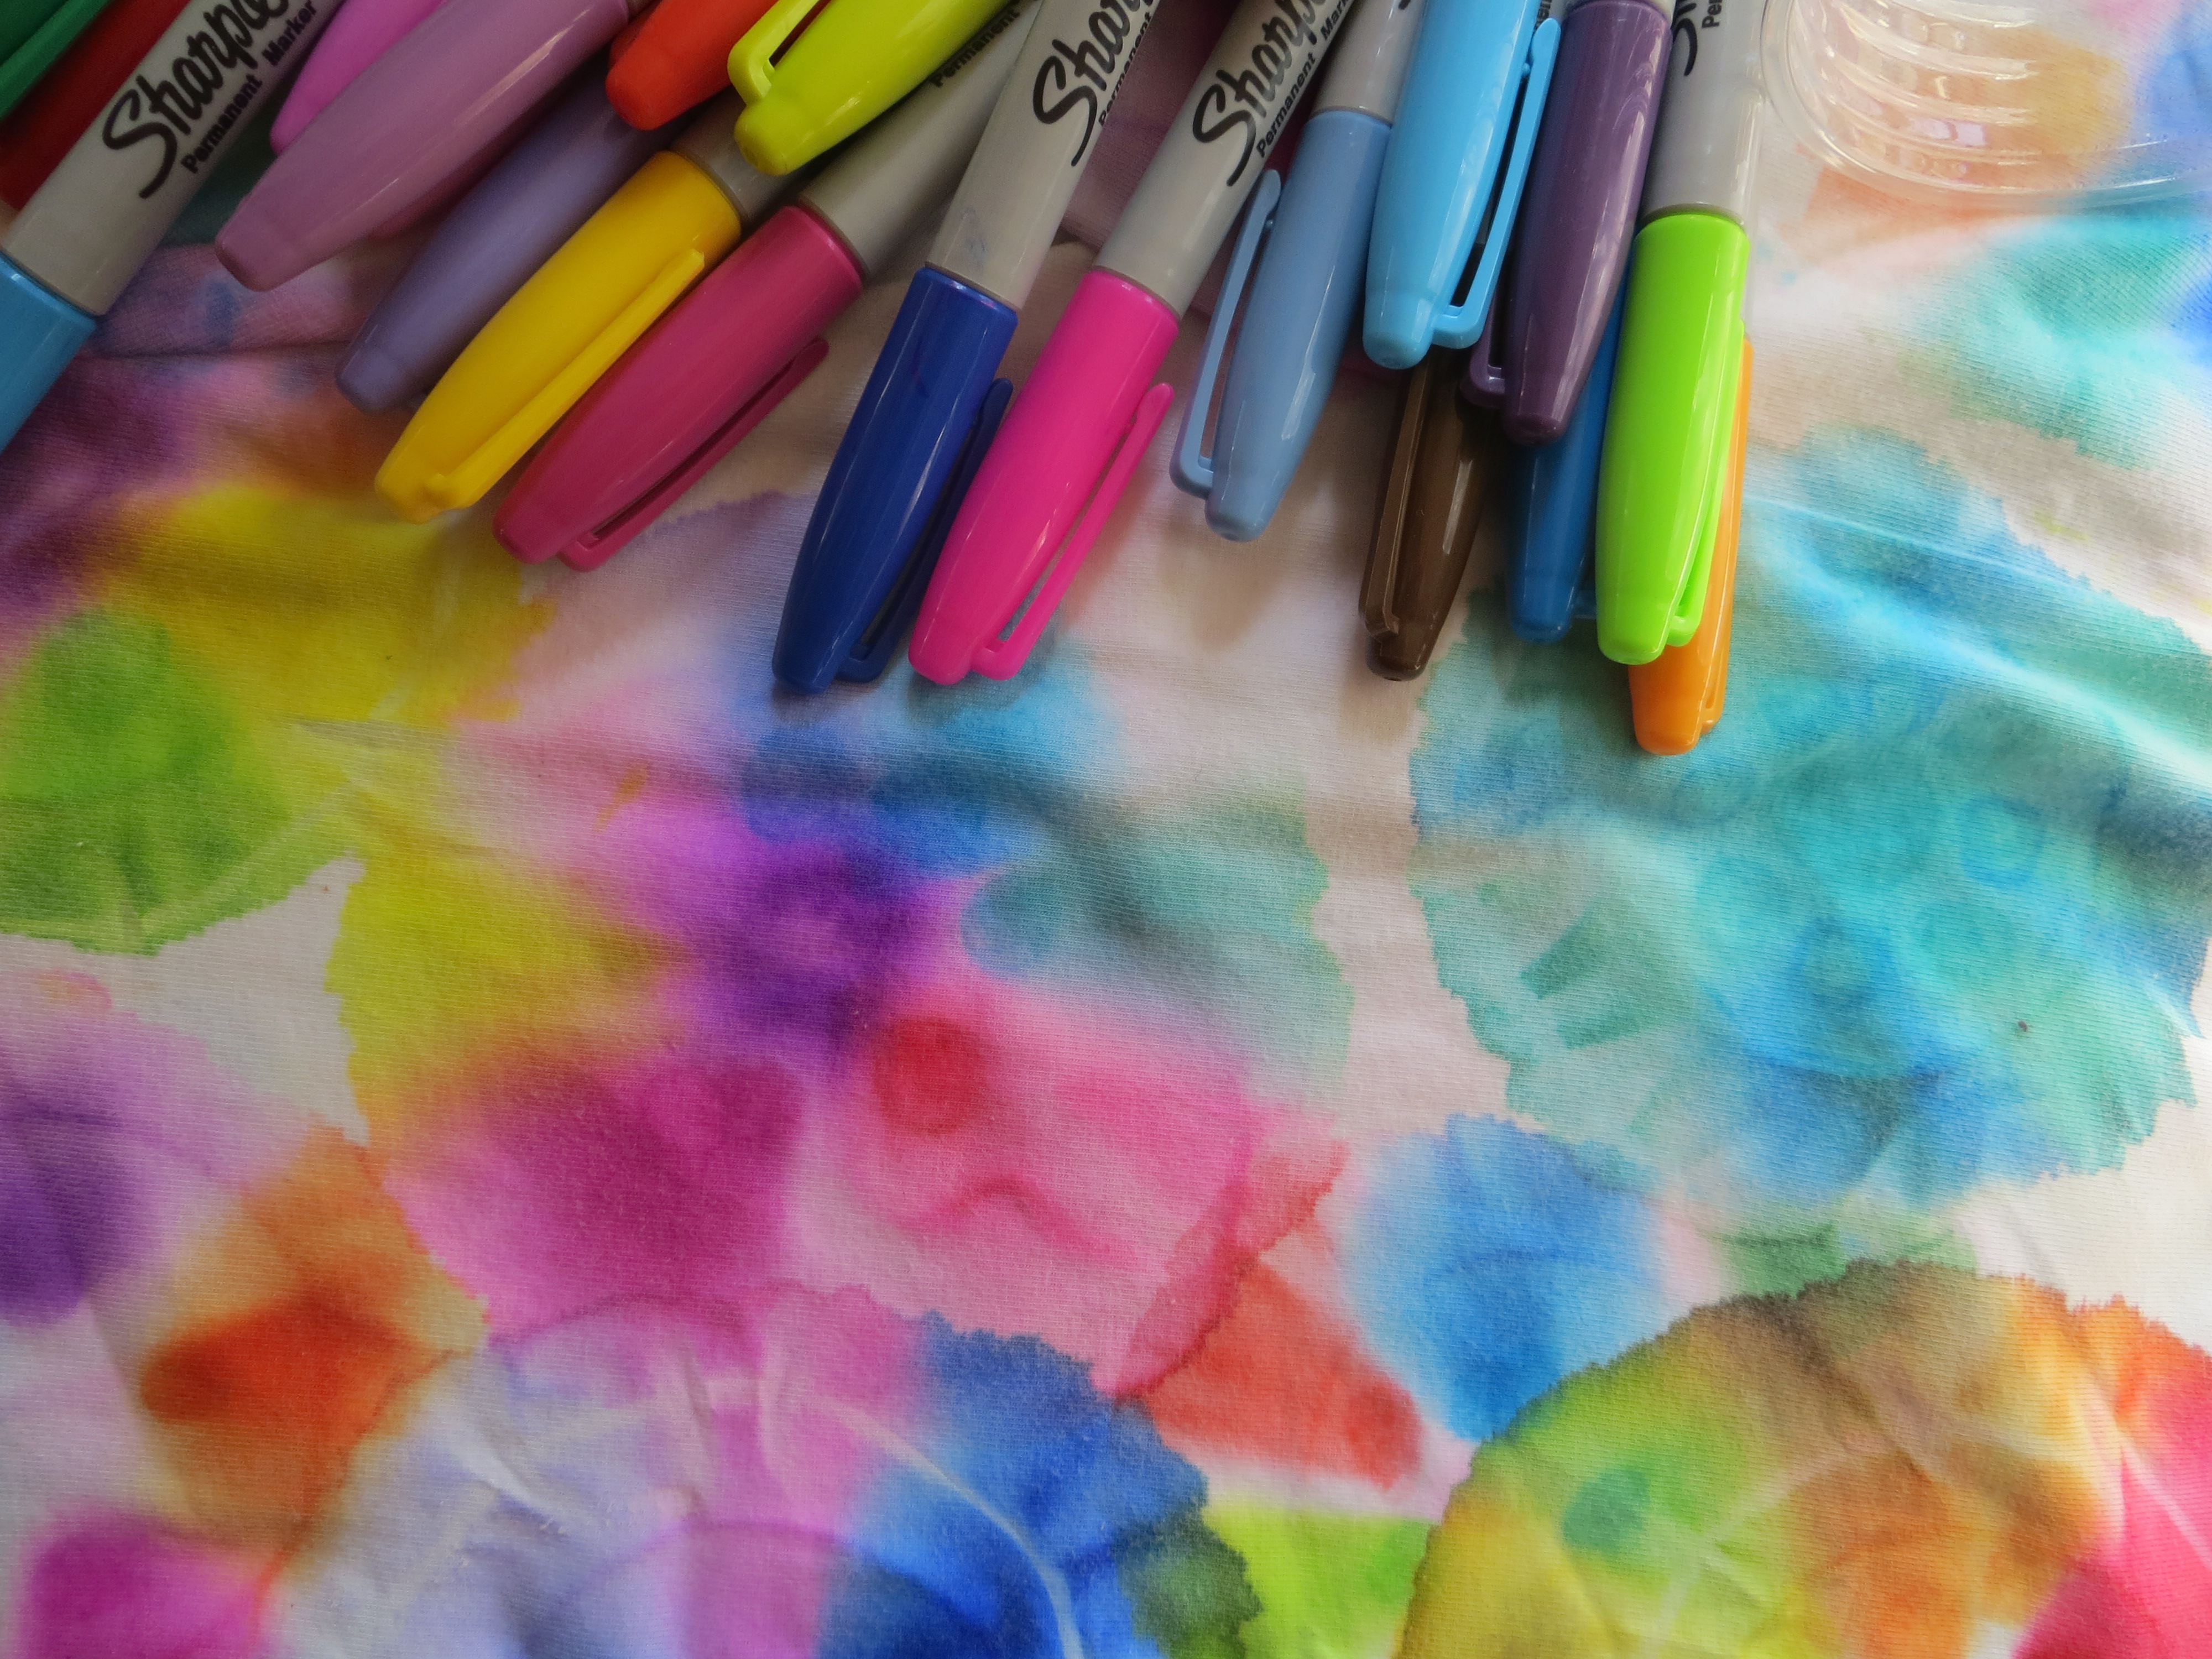
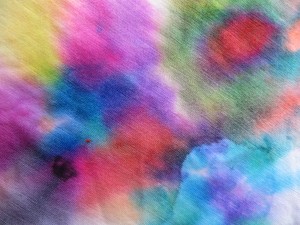
7. While the spinner glue is drying, make dots of permanent marker on the shoelace. In a well-ventilated area, suspend the shoelace over a tray or colander and drip rubbing alcohol onto it to make the colors run together. (See image.) Let it dry completely.
KitchenPantryScientist.com
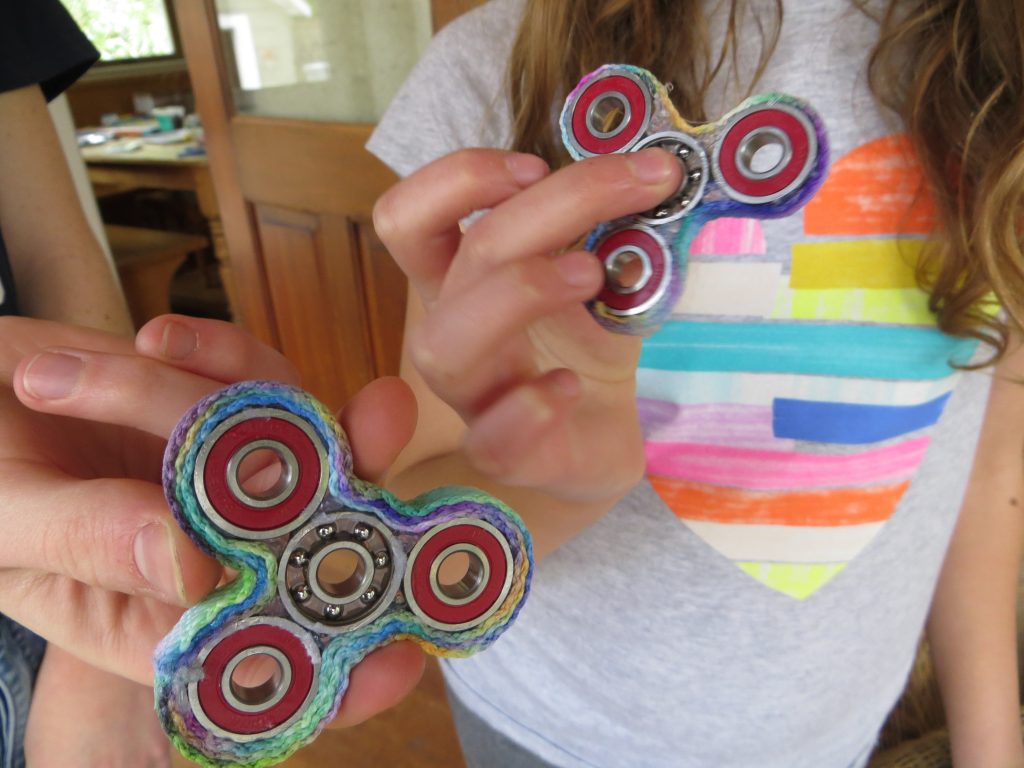
8. Use the glue gun to attach the shoelace to the outside edges of the spinner. Fill in gaps between the lace and bearings with hot glue.
KitchenPantryScientist.com
9. Spin away!
The Science Behind the Fun:
If you look closely at a skateboard bearing there are only a few ball bearings connecting the center and the outside part that spins. This means that there’s very little friction, or rubbing, between the parts. If you spin the toy around the center bearing, that bearing is called the axis of rotation.
The three bearings on the outside of the spinner provide the rotating mass that gives the toy a property called angular momentum, which keeps it spinning until the frictional force from the ball bearings in the center slows it down.
Pigments are molecules that give things color. The pigments in permanent markers are trapped in ink compounds that are insoluable in water, which means that they won’t dissolve in water. However, if you add a solvent, like rubbing alcohol, or isopropanol, to permanent markers, it dissolves the ink. As the alcohol moves through the cloth you are decorating, it carries the pigments along with it.
Permanent Marker Tie Dye (Color and Chemistry)
- by KitchenPantryScientist
(Re-post from April 14, 2016)
I love traditional tie-dye, but it’s fun to do this experiment that uses permanent markers and rubbing alcohol to make bright, gorgeous designs that mimic tie-dye, more easily, and with less mess.
This experiment was created by Bob Becker, a chemistry and AP chemistry teacher at Kirkwood High School in Kirkwood, MO. (To find a few of the original experiments I invented, check out Frankenworms, Sugar Cube Fizz Bombs, Homemade Window Stickies, Foaming Slime, and Cornstarch Frescos.)
Here’s a video from my YouTube channel on how to do this experiment, so kids can “watch and do.”
To play with permanent marker tie dye, you’ll need:
-permanent markers (like Sharpies)
-cotton items to decorate, like tee-shirts, socks, or dish towels
-rubbing alcohol (isopropanol)*Read warning labels. Parental supervision is required, since rubbing alcohol is poisonous if swallowed. Do this experiment in a well-ventilated area, and do not expose your artwork to heat until is is COMPLETELY dry, since rubbing alcohol and its fumes are flammable.
-rubber bands
-eye droppers
-containers like plastic cups or jars
To make your designs, stretch the cotton over the mouth of a jar or cup and secure it with rubber bands. (See video above.)
Use permanent markers to make several dime-sized dots of different colors on the stretched cotton.
Slowly drip rubbing alcohol onto the spots of color until the alcohol starts to soak outward, carrying the ink with it.
Allow your design to dry overnight. When completely dry, hang your shirt in the sun, or put it in the dryer for 15 minutes to set the color. Wash separately from other clothes, just in case!
The Science Behind the Fun: Pigments are molecules that give things color. The pigments in permanent markers are trapped in ink compounds that are insoluable in water, which means that they won’t dissolve in water. However, if you add a solvent, like rubbing alcohol, or isopropanol, to permanent markers, it dissolves the ink. As the alcohol moves through the cloth you are decorating, it carries the pigments along with it. Small pigment molecules move faster than big ones, so the colors sometimes separate into their different color components as they move through the cloth. The alcohol evaporates into the air, leaving the ink in the fabric, and since it is still insoluable in water, it won’t come out when you wash it.
Enrichment: What happens if you draw lines, concentric circles or different shapes on your designs? Can you layer colors and watch them separate? What if you add rubbing alcohol next to the color, instead of directly on it? How many drops of alcohol do you have to add to a dime-sized color spot before it starts to expand?
How to Make Tie-Dye Milk Video
- by KitchenPantryScientist
Kids from two to twenty will have fun playing with this science project. Click here for my blog post on Tie-Dye Milk and to read more about surface tension
[vsw id=”SDjHnmhakzU” source=”youtube” width=”425″ height=”344″ autoplay=”no”]