Tag: STEAM’
Homemade Water Bottle Insulator (Back to School Science)
- by KitchenPantryScientist
Combine science and art to engineer and decorate a custom water bottle jacket as unique as you are. Test different every-day insulators to see what works best to to keep water cold all day long!
water bottle jacket- KitchenPantryScientist.com
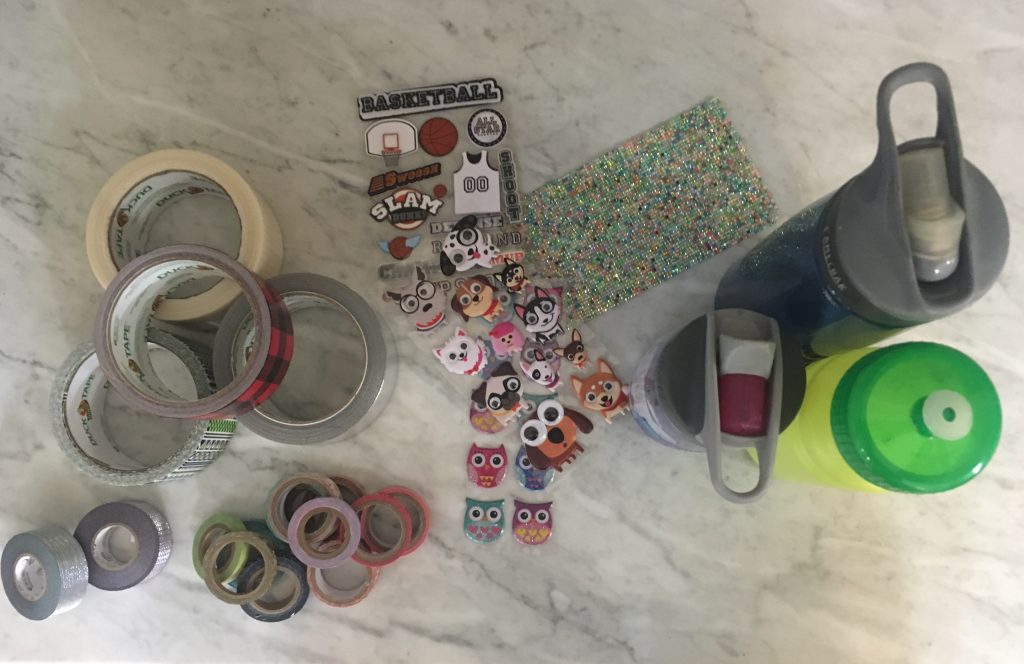
You’ll need:
-a washable plastic water bottle
-flexible insulating material, like craft foam, bubble wrap or fabric batting
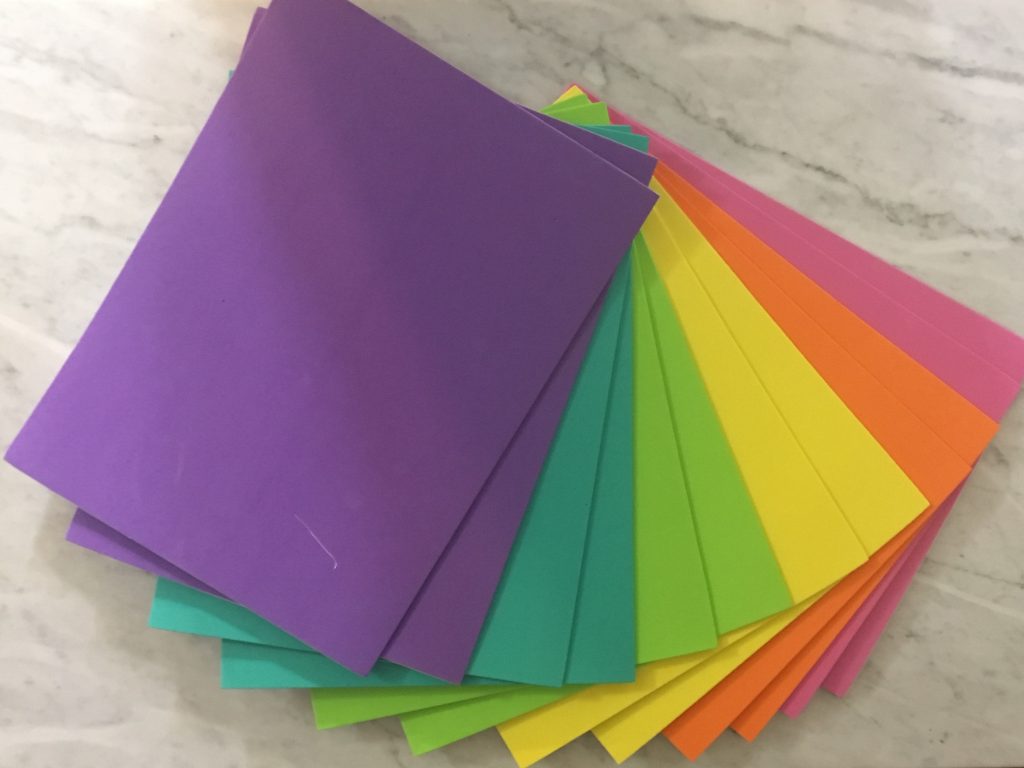
-decorating materials, like stickers, ribbons or foam stickies
-a thermometer (optional)
-4 disposable empty water bottles or cans that are the same size (optional)
What to do:
(Optional) Test insulators by insulating each of the empty cans or bottles with different material. Fill each of them with the same amount of hot tap water and check the temperature of each periodically to see which material does the best job of slowing cooling of the water. The one that keeps water hot the longest is the best insulator, since it slows the movement of heat from one area to another.
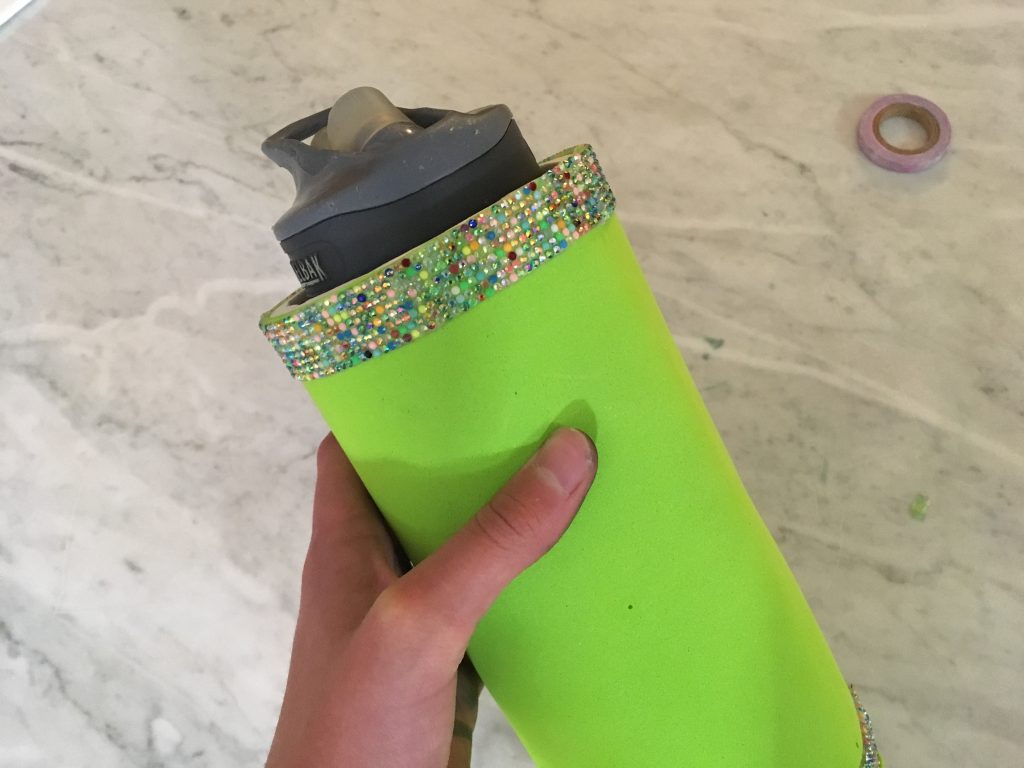
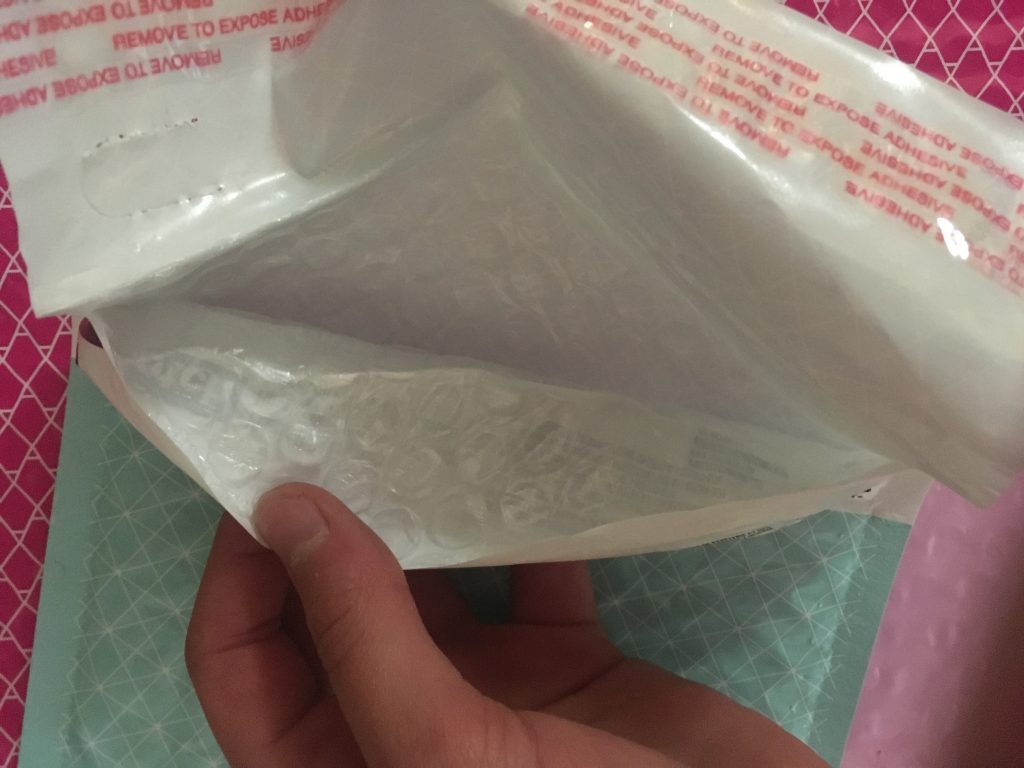
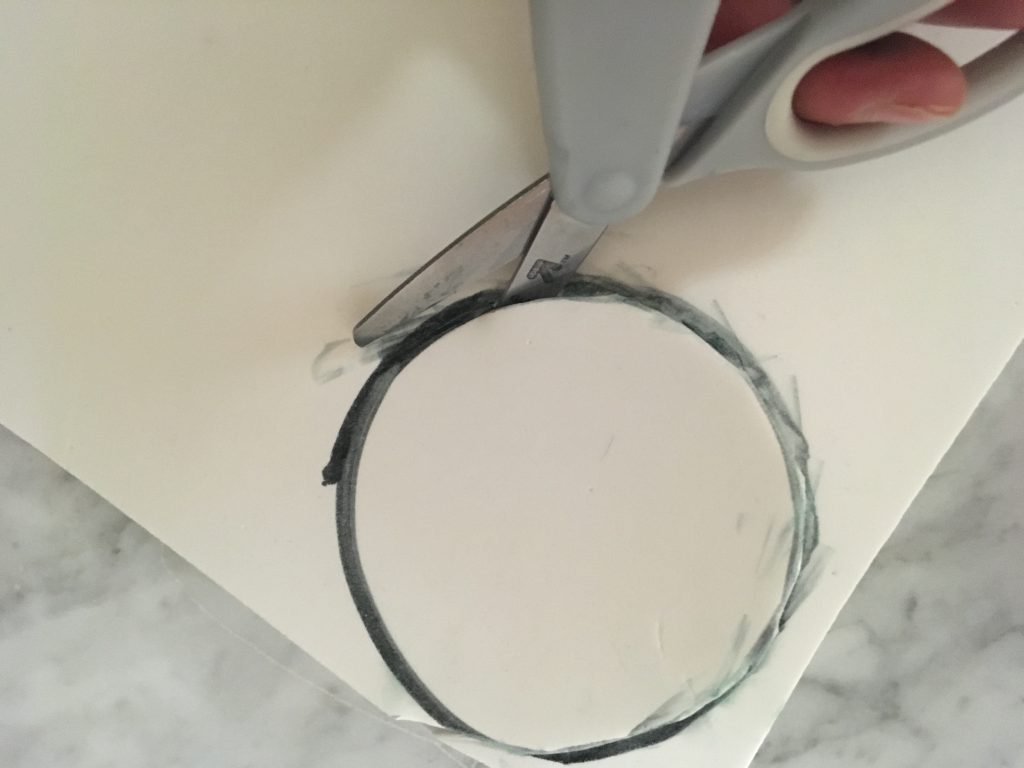
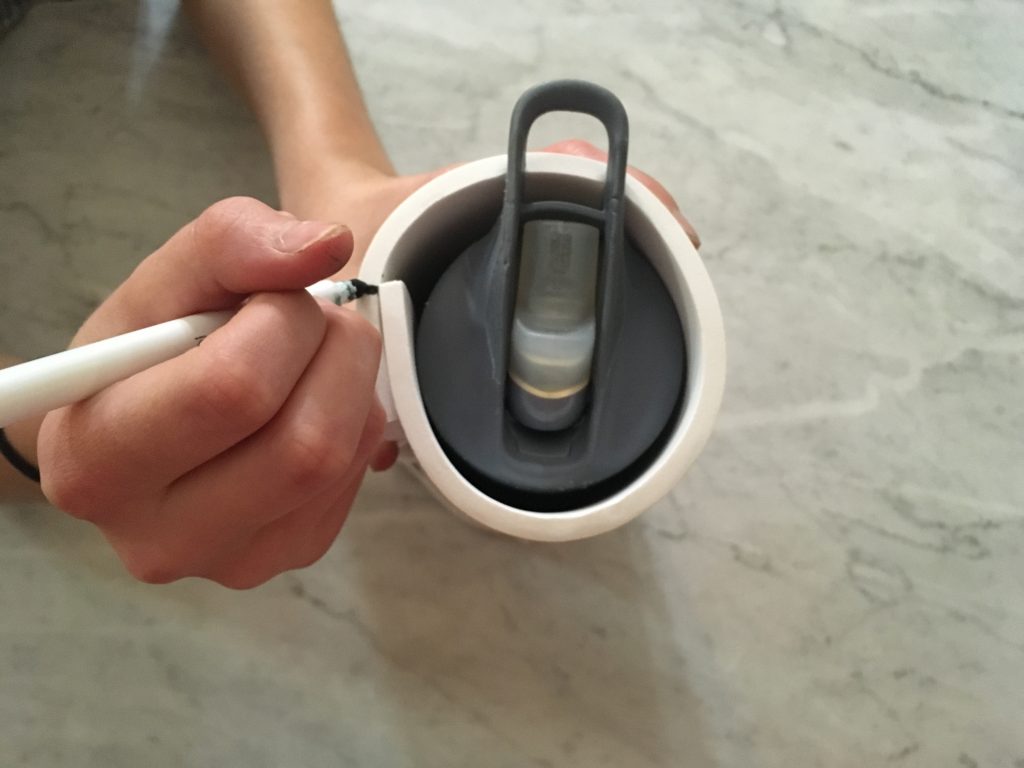
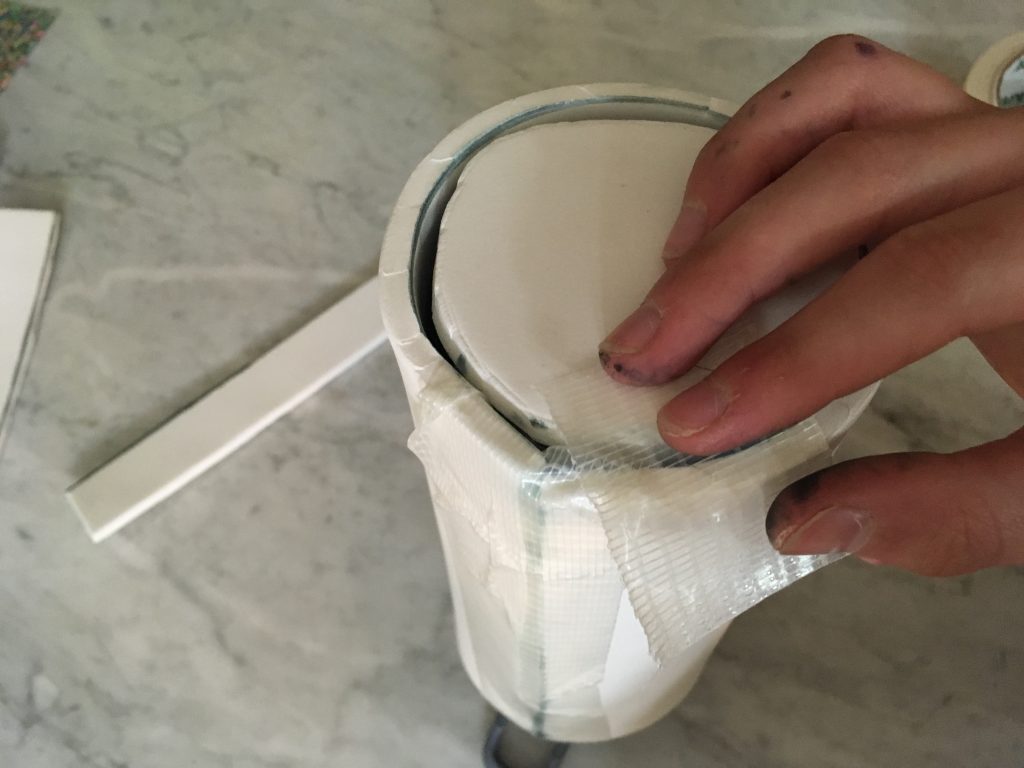
Use the best insulator to build an insulating case for your water bottle. Make it big enough so that your bottle will slide out for washing. We used thick craft foam and covered it with adhesive craft foam. Shipping folders made of bubble wrap work well too! Here’s how we built ours…

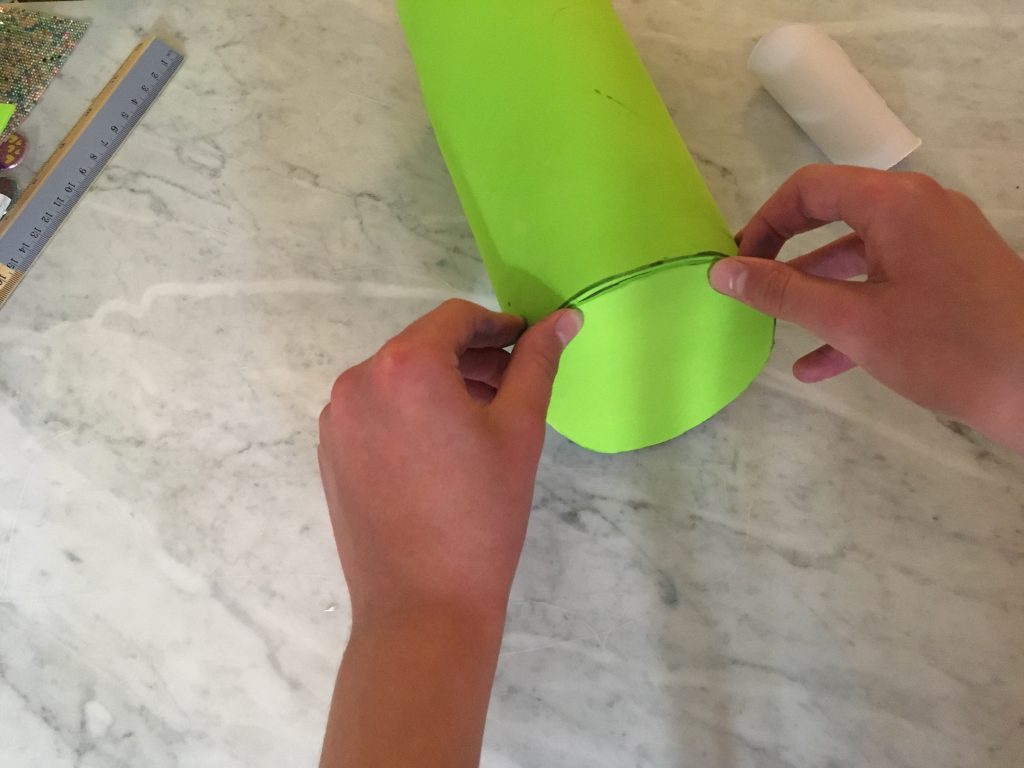
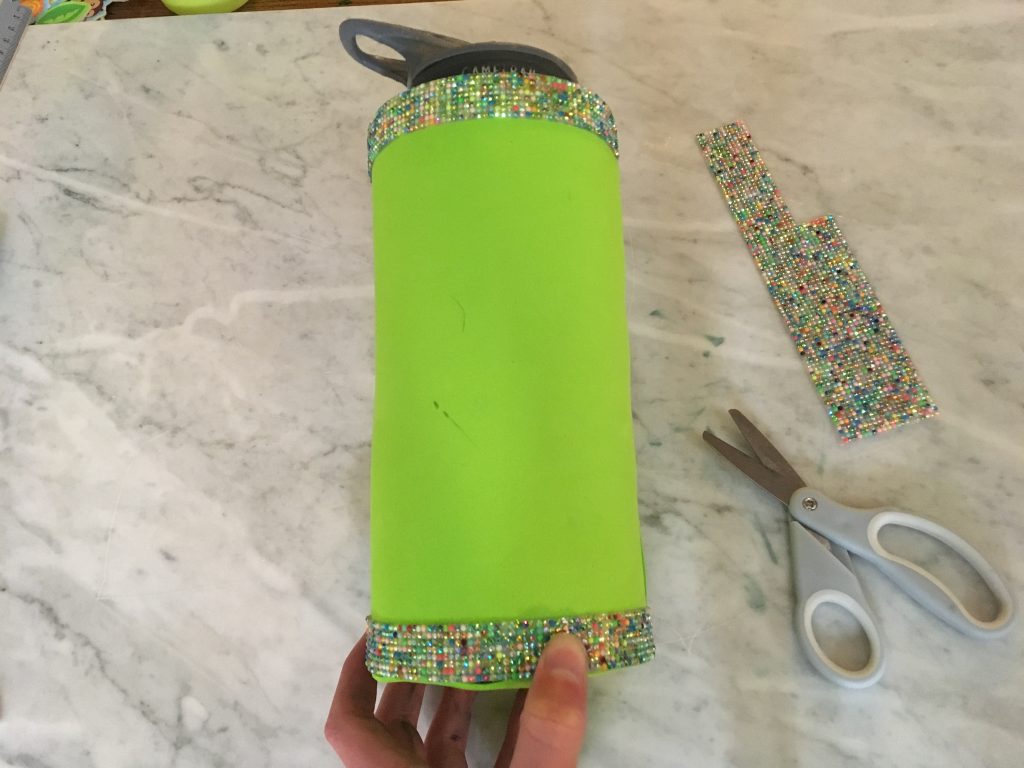
Add some ice water to the bottle and you’re good to go! Just remove the jacket when you wash the bottle.
Back-to-School Science Ideas for Parents and Teachers
- by KitchenPantryScientist
Hands-on science experiment books are a great way to ease kids back into creative learning!

I recently shared some of the fun, easy, inexpensive science project ideas from my two newest books, “STEAM Lab for Kids” and “Star Wars Maker Lab” with a group of teachers on Twin Cities Live. Check out the clip below to learn to make hoop gliders and grow gorgeous Epsom salt crystals!
You can find my books at your local library, or pick them up at your favorite online or bricks-and-mortar retailer!
Summer Food Science: Sorbet (No ice cream freezer needed!)
- by KitchenPantryScientist
Take your summer food game up a notch using… science! Sorbet recipe below. Vinaigrette recipe is in the post below this one.
&
Simple Freezer Strawberry Sorbet (adapted from Epicurious.com)
30 minutes hands-on prep time, 8 hours start to finish
*Parental supervision required for boiling sugar syrup
You’ll need:
a shallow dish
1 quart strawberries
1/3 cup lemon juice
1/3 cup orange juice
1 cup sugar
2 cups water
What to do:
- Make a sugar syrup by bringing 1 cup sugar and 2 cups water to a boil in a heavy sauce pan. Boil for 5 minutes.
- Puree strawberries in a blender or food processor until smooth.
- Add strawberries, lemon juice and orange juice to the sugar syrup.
- Pour mixture into a shallow dish and cool for 2 hours in the refrigerator.
- Put the chilled sorbet mix in the freezer for 6 hours, stirring every hour.
- Enjoy your sorbet!
The Science Behind the Fun:
In sorbet, sugar acts as an antifreeze agent, physically getting in the way of ice crystal formation to keep crystals small, so that you don’t end up with one big chunk of ice. Pre-chilling the mixture before freezing it allows it to freeze faster, which also encourages smaller crystals to form.
STEAM Lab for Kids: hot glue casting, candy molecules and tesselations
- by KitchenPantryScientist
Looking for fun, creative summer projects? I showed off some projects from STEAM Lab for Kids this morning on WCCO MidMorning!
CD Bots from “STEAM Lab for Kids”
- by KitchenPantryScientist
Robots took over the driveway last summer when we were photographing my new book “STEAM Lab for Kids: 52 Creative Hands-On Projects for Exploring Science, Technology, Engineering, Art and Math”
With a few supplies from your junk drawer and a few inexpensive tech supplies available online, kids can easily make their own CD Bots! Grab a copy of “STEAM Lab for Kids” for easy instructions, or figure out how to do it yourself by attaching a toy motor (connected to a battery) to a CD with toothbrushes glued to the bottom!
Have fun!
Balloon Rockets from “STEAM Lab for Kids”
- by KitchenPantryScientist
I took some behind-the-scenes video when we were photographing my new book “STEAM Lab for Kids” last summer. Here’s a fun engineering project from the book! #summer #fun #balloon #rockets #STEAM #STEM
Try it!
Candy Crush Stained Glass from “STEAM Lab for Kids”
- by KitchenPantryScientist
It’s hard to believe that my new book “STEAM Lab for Kids” is already in the Amazon book store! I studied both art and science in college, so this one was SO much fun to write!
Last summer, my publisher made a few videos of projects from the book for me to share with you. Here’s the first one, which features some sugar science!
Try it!
Rainbow Icicles -Winter Science for Kids
- by KitchenPantryScientist
Grab your coat and head outside to try this fun winter science project!
Rainbow Ice (kitchenpantryscientist.com)
You’ll need:
A large plastic zipper bag
Cotton kitchen twine
a toothpick or wooden skewer
ice-cold water
food coloring
a spray bottle
a squeeze bottle or syringe (optional, but helpful)
a very cold day (below 10 degrees F works best, but you can try it on any day when it’s below freezing)
Note: This experiment takes lots of playing around and results will vary depending on how cold it is outside. Remind your kids (and yourself) to be patient and try it on a colder day if it doesn’t work the first time around! If the bag leaks too quickly, try making one with smaller holes around the string.
Rainbow Ice (kitchenpantryscientist.com)
What to do:
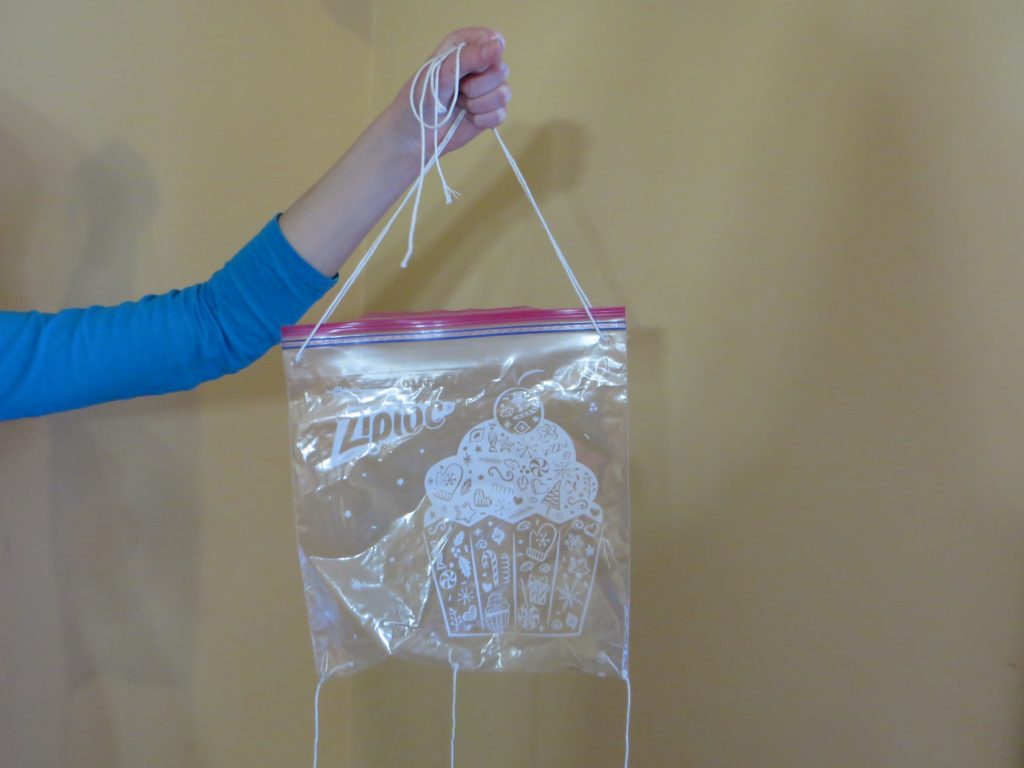
- Use a toothpick or skewer to poke 3 small holes in the bottom of a zipper plastic bag. Make one in the middle and one on each end.
- Cut three long (3 feet or so) pieces of kitchen twine and knot them at one end.
- Carefully thread the twine through the holes in the bag so that the knots are inside the bag to keep the strings from falling through. Try to keep the holes from getting too big, since the bag will be filled with water and you’ll want it to drip out very slowly around the string.
Rainbow Ice (kitchenpantryscientist.com)
4. Attach two more pieces of twine to each top corner of the bag (above the zipper) to use for hanging the bag
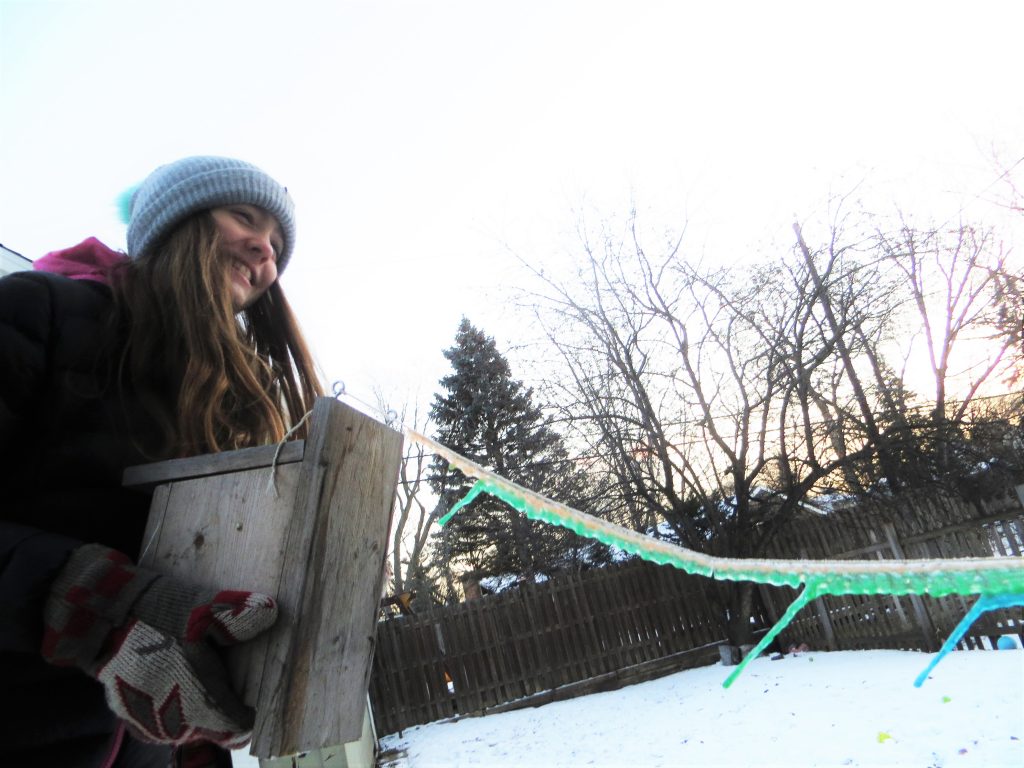
5. Go outside and hang the bag from a low tree branch or railing.
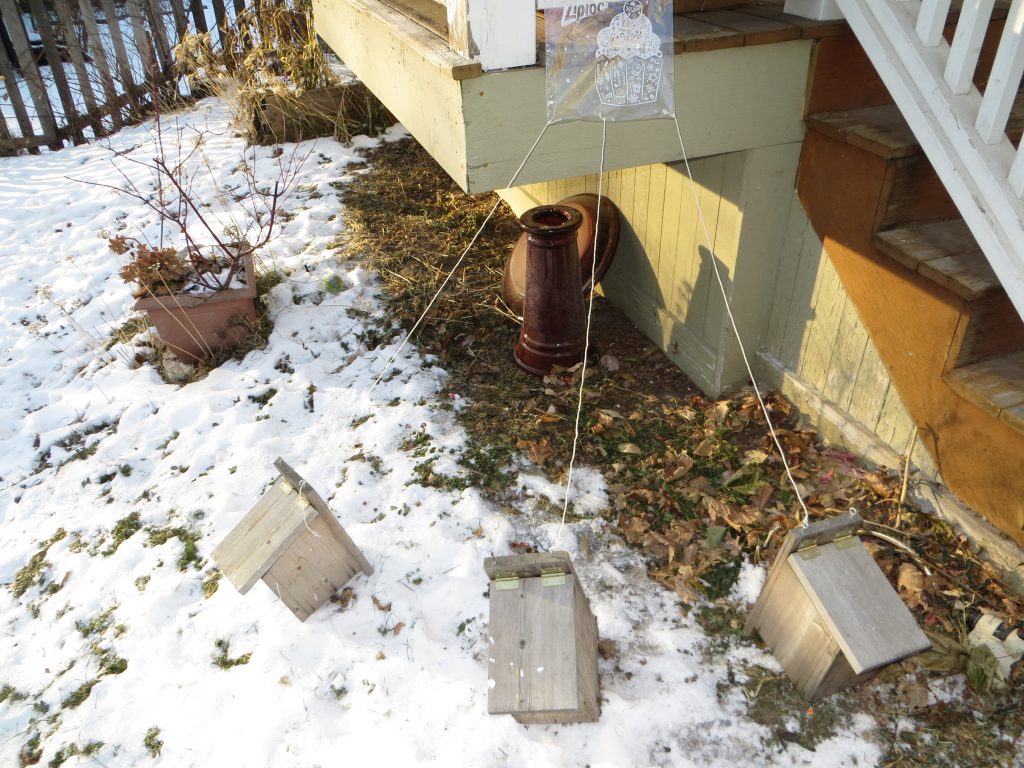
6. Tie each of the three strings to something on the ground, like a rock, piece of wood, or the handle of an empty milk carton filled with water to weight it down. Arrange the objects so that the strings loosely radiate out at around a 45 degree angle. (See photo)
7. Add food coloring to some ice-cold water in a pitcher.
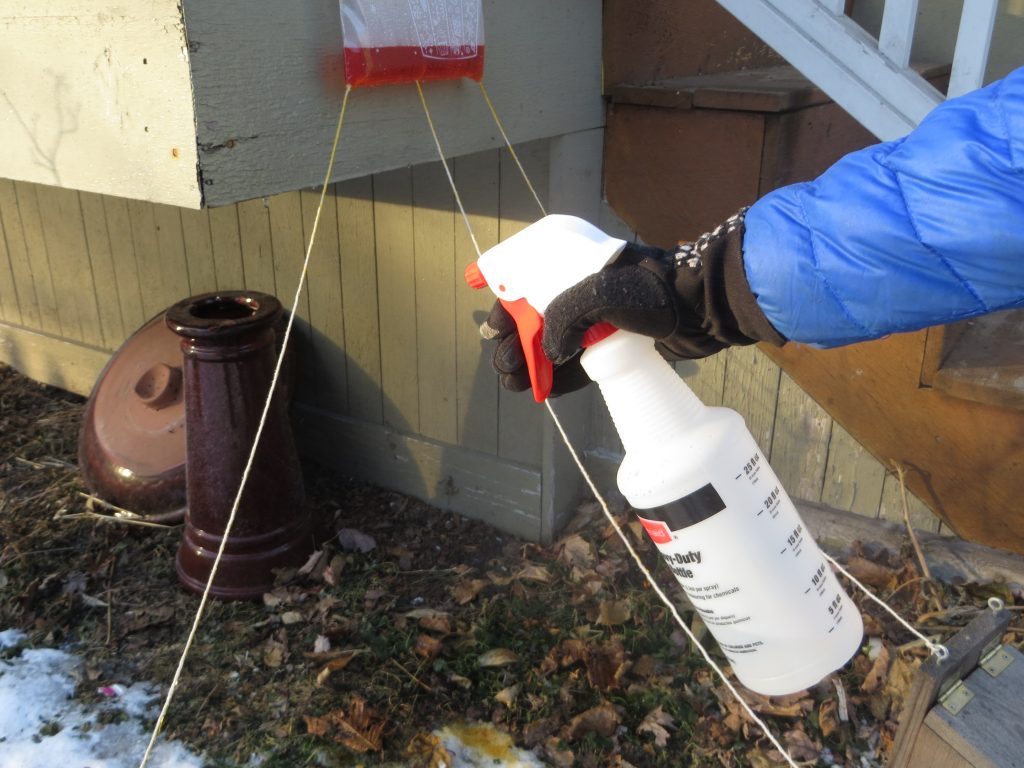
8. Fill the spray bottle with ice-cold water.
9. Add the cold colorful water to the zipper bag hanging outside. Zip the top of the back to slow the rate of leaking.
10. Immediately spray the strings with water to guide the leaking water down the strings.
10. Wait for the water on the strings to freeze. Use your syringe to add a little bit more water to the strings (same color) and wait for them to freeze again. Repeat until you have a nice layer of ice/icicles.
11. Refill the bag, using a different color of ice-cold water. Spray the strings lightly again. Repeat step 11.
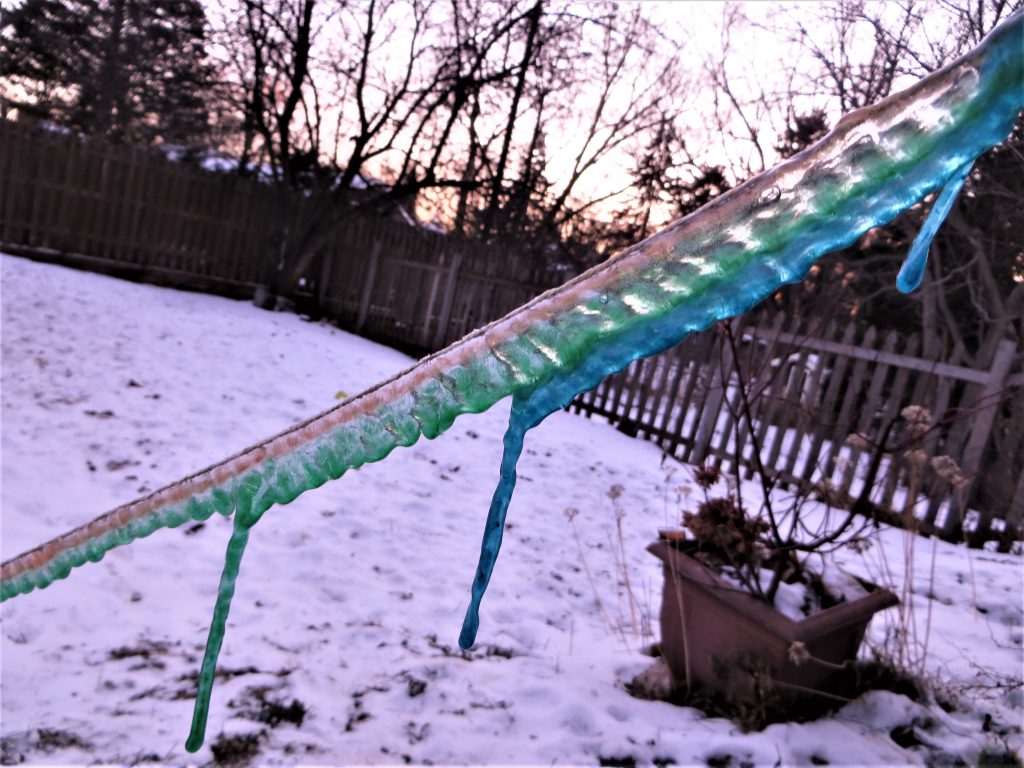
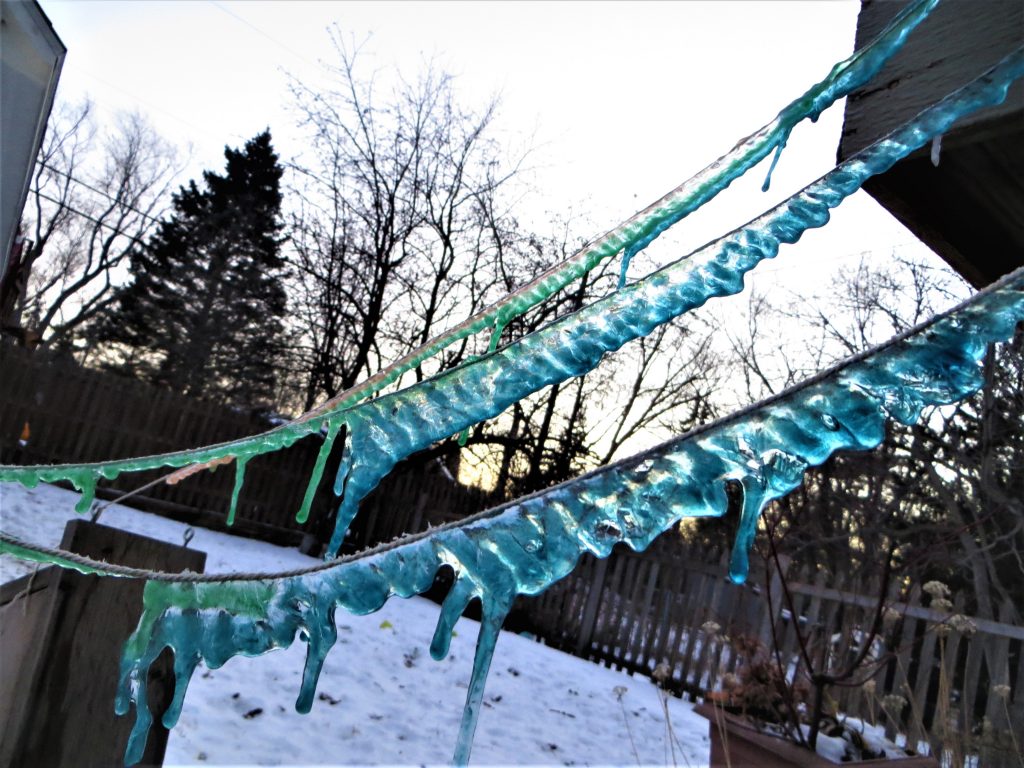
12. Add layers of color to the icicles until you’re happy with the way they look!
Rainbow Ice (kitchenpantryscientist.com)
The science behind the fun:
Icicles form when dripping water starts to freeze. Scientists have discovered that the tips of icicles are the coldest part, so that water moving down icicles freezes onto the ends, forming the long spikes you’ve seen if you live in a cold climate. When you add different colors of water to icicles in sequence, the color you add last will freeze onto the tip of the ice.
Here’s a cool article on icicle science by an expert, and another great article on “Why Icicles Look the Way They Do.”
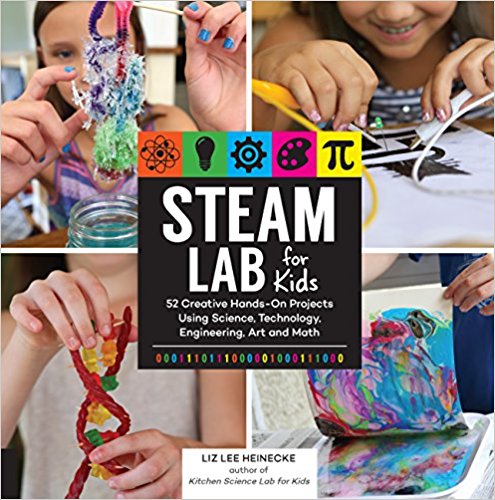
You’ll find more fun ice science experiments in my book “Outdoor Science Lab for Kids” and in my upcoming books “STEAM Lab for Kids” (Quarry Books April 2018) and “Star Wars Maker Lab” (DK- July 2018)
Rubber Band Car
- by KitchenPantryScientist
It’s fun to make a rubber-band powered car from cardboard, straws, and wooden skewers!
You’ll need:
-heavy cardboard
-rubber bands
-glue (a glue gun works best)
-a plastic straw
-wooden skewers
-a CD (or a compass)
-a ruler
-screwdriverCu
-pipe cleaner (optional)
Hints: Parental supervision recommended for hot glue gun use.
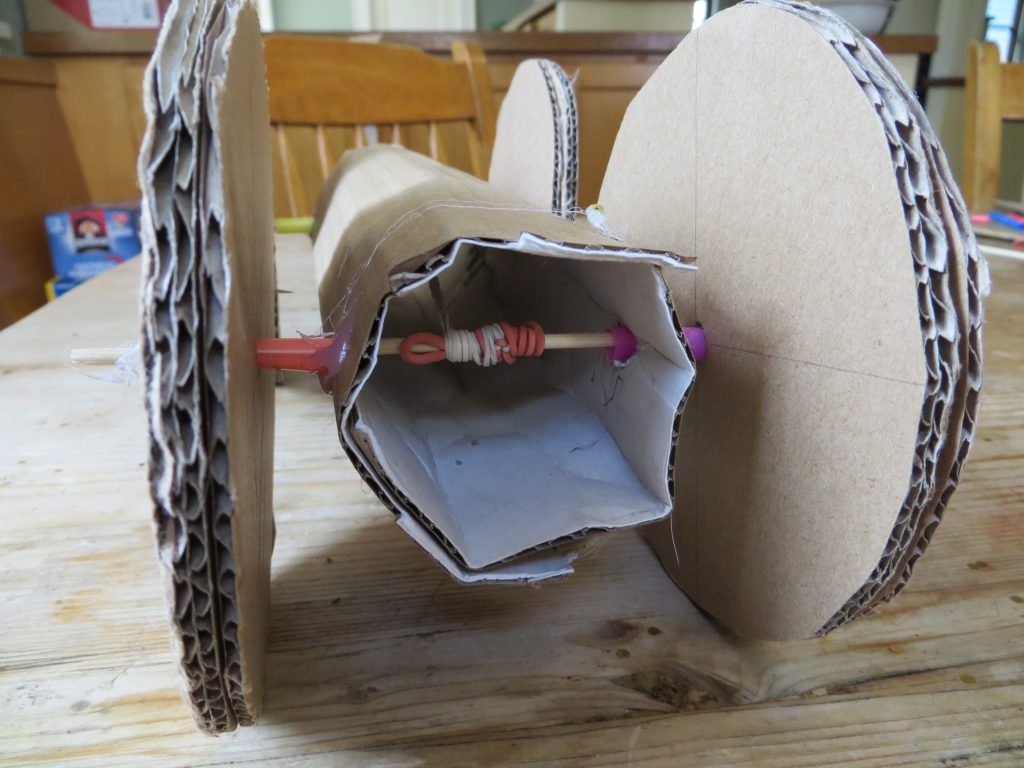
Here’s what you’ll be building:
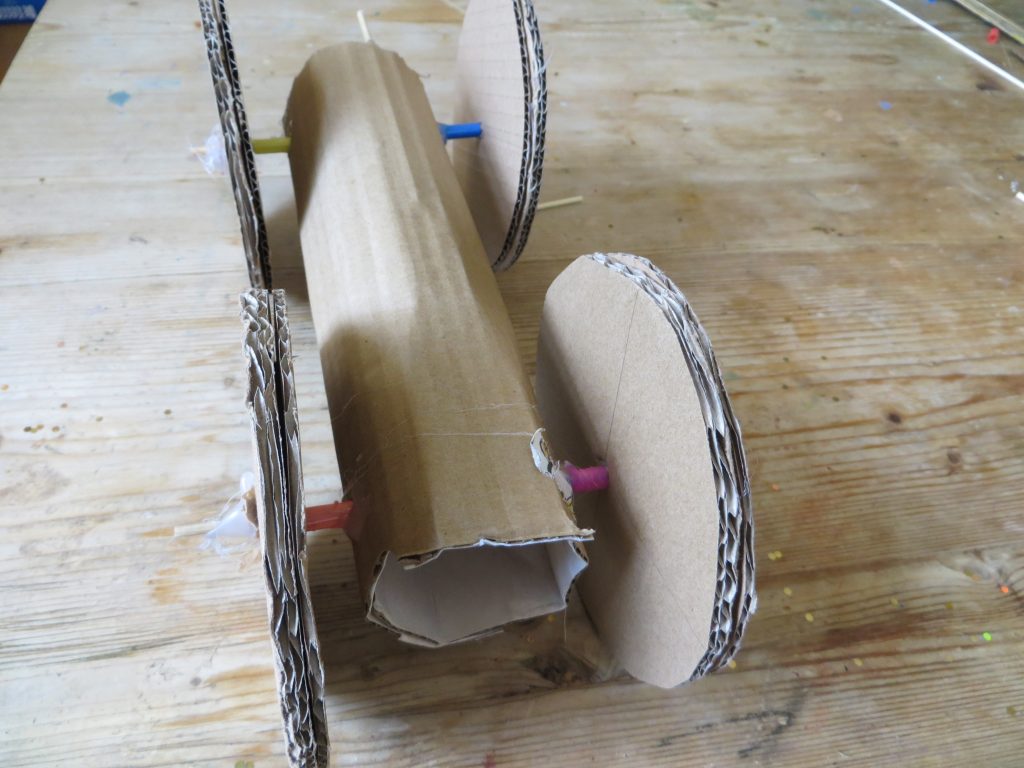
Rubber Band Car kitchenpantryscientist.com
What to do:
- Wrap cardboard around a large spice bottle so you can see how it bends. Cut a piece of cardboard about 9 inches (22cm) long to wrap around the bottle. Trim off the excess cardboard and tape it to create a tube.

kitchenpantryscientist.com
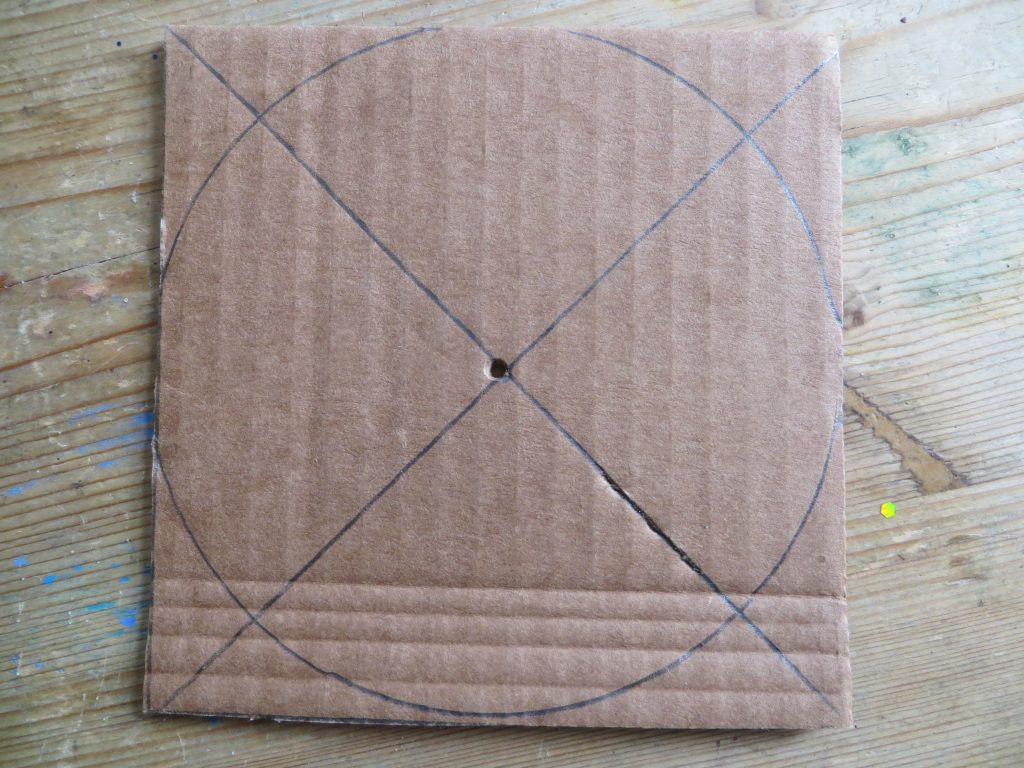
- Trace a CD or use a compass to make 8 circles that are around 4 and 1/2 inches (12 cm) in diameter. Use a ruler to make a square around each circle and then diagonal lines to mark the center of each circle. Cut them out and glue two circles together until you have four wheels. Use skewers to poke holes through the center of each wheel.
kitchenpantryscientist.com
- Poke skewers through each end of the cardboard tube, about 1 and 1/2 inches (4 cm) from the end of each tube. Make sure that the skewers are parallel and that they line up when you look through the end of the tube.
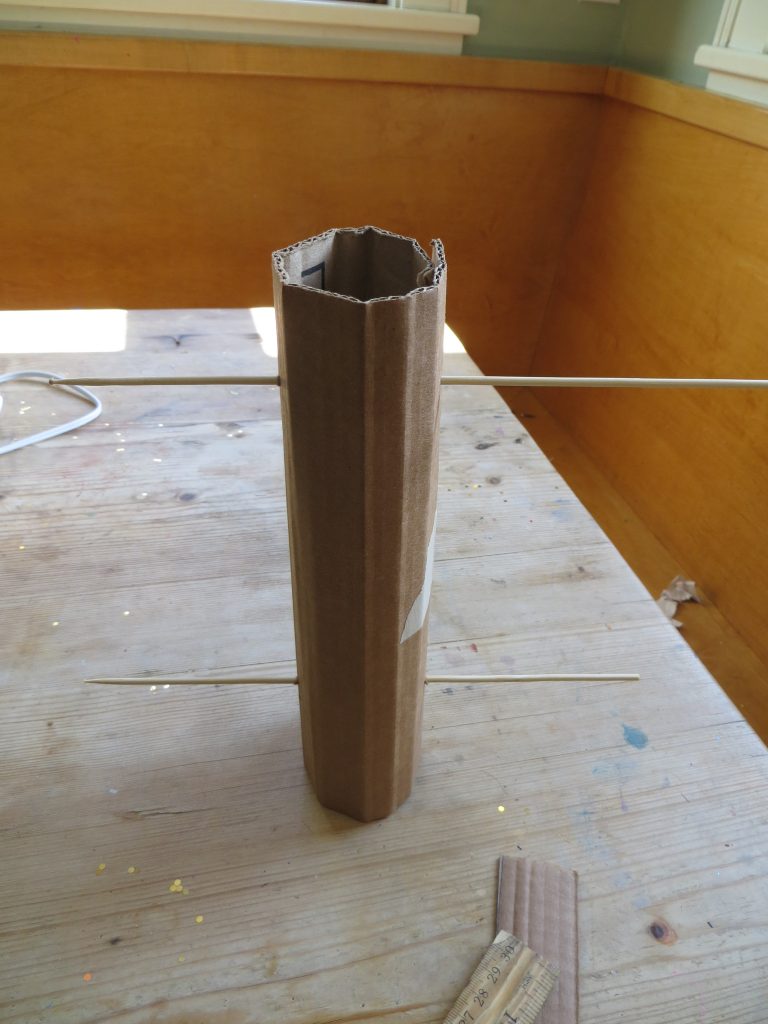
kitchenpantryscientist.com
kitchenpantryscientist.com
- Use a screwdriver to make the holes larger.
kitchenpantryscientist.com
- Cut 4 pieces off of a straw that are about 1/2 inch (1.5cm) long. Glue them to the outside of each hole in the tube. Use a skewer to help align them. The skewer should spin freely.
kitchenpantryscientist.com
- One at a time, put wheels on the skewers and glue the OUTSIDE of the wheel to the skewer. Make sure that the wheels are parallel to the car, and to each other as they dry. Cut off excess skewer.
kitchenpantryscientist.com

kitchenpantryscientist.com
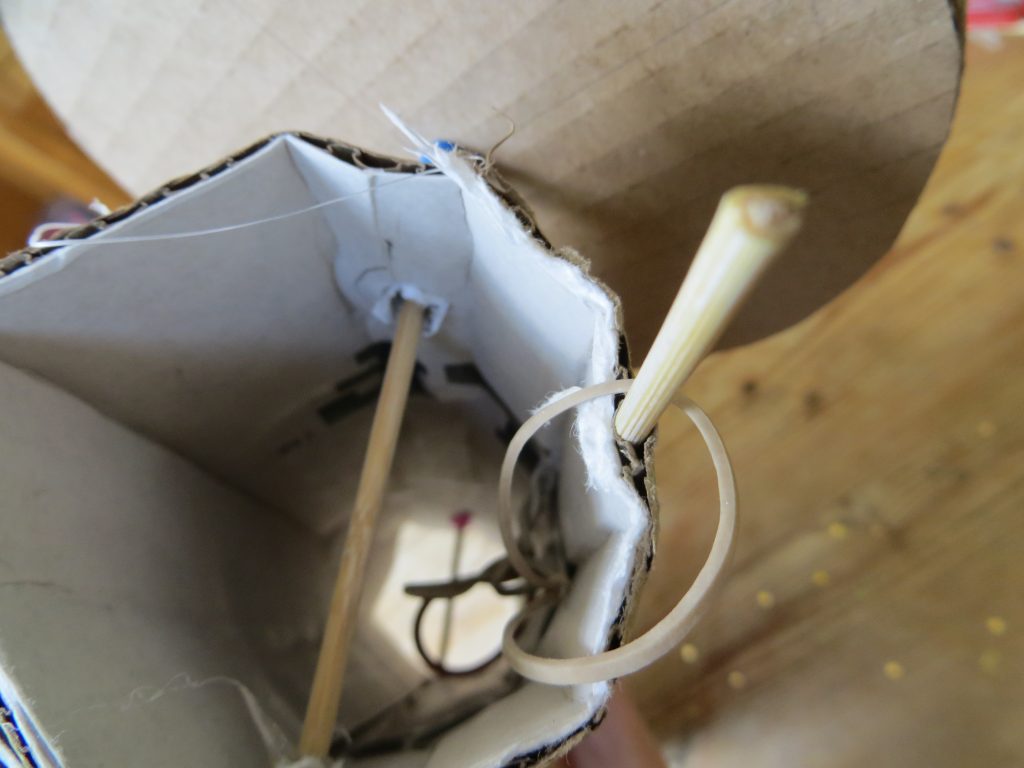
- Poke a skewer down the center of one end of the car, parallel to the wheels so that it’s sticking out about 1 inch (3 cm.) See image above.
- Decorate the car!
- Tie three thin rubber bands together and hook them over the skewer that’s sticking out. If you have a pipe cleaner or wire, hook it onto the other end of the rubber bands. Drop the rubber bands down through the center of the tube.
kitchenpantryscientist.com
- Grab the rubber bands from the end opposite where they are attached to the car. Remove the pipe cleaner hook and wind them around the skewer to create tension in the rubber bands. Wind them until they’re tight.
kitchenpantryscientist.com
- Set the car down and let the wheels start to spin to see what direction the car will go. When you’re ready, let go!
- Measure how far the car traveled.
Enrichment: How can you make the car go faster or farther. Try using different kinds and numbers of rubber bands. How could you redesign the car to make it work better?
The Science Behind the Fun:
In this experiment, you use your body’s energy to twist rubber bands around the wooden skewer axle of a cardboard car. The energy is stored as elastic energy in the tightly-stretched rubber bands. When you let the car go, the rubber bands apply enough force on the axle to turn the wheels on the car and elastic energy is transformed into the energy of motion, which is called kinetic energy.
Mirror Image Plant Prints
- by KitchenPantryScientist
Yesterday on Twin Cities Live, I demonstrated some fun botanical science projects for learners of all ages, including Vegetable Vampires and Leaf Chromatography.
This fun art/science project lets you transfer plant pigments to cloth, creating beautiful prints of your favorite leaves and flowers. It’s especially great for fall, when there are so many colorful leaves around.
Mirror Image Plant Prints- kitchenpantryscientist.com
You’ll need:
-Fresh leaves and flowers (Dry leaves won’t work.)
-A hard, smooth pounding surface, like a wooden cutting board or carving board
-Wax paper or plastic wrap
-Mallets or hammers
-Untextured cotton cloth, like a dishtowel. Heavy cloth works better than very thin cloth.
-*Alum and baking soda to treat cloth (This is optional. I don’t pre-treat my fabric, but the treatment step will help bond and preserve color, if you want to frame your prints. You can also buy fabric that’s pre-treated for dyeing.)
Mirror Image Plant Prints- kitchenpantryscientist.com
Safety tips: Protective eye wear is recommended. Young children should be supervised when using mallets and hammers.
What to do:
*If treating cloth: The day before you do the project, add 2 quarts water to a large pot. Add 1 Tb alum and 1 tsp baking soda to the water. Add the cotton and bring to a boil. Simmer for 2 hours, turn off heat and soak for at least two hours. Let fabric dry.
The next steps are the same, whether you’re using an untreated piece of cotton or treated cloth.
- Take a walk to collect colorful leaves and flowers. Choose plants that can be flattened. Flowers with huge centers, like coneflowers don’t work as well, but petals may be removed and pounded.
- Cover the pounding surface with waxed paper or plastic wrap.
- Cut a piece of cloth that will fit on the pounding surface when folded in half. Iron the fold.
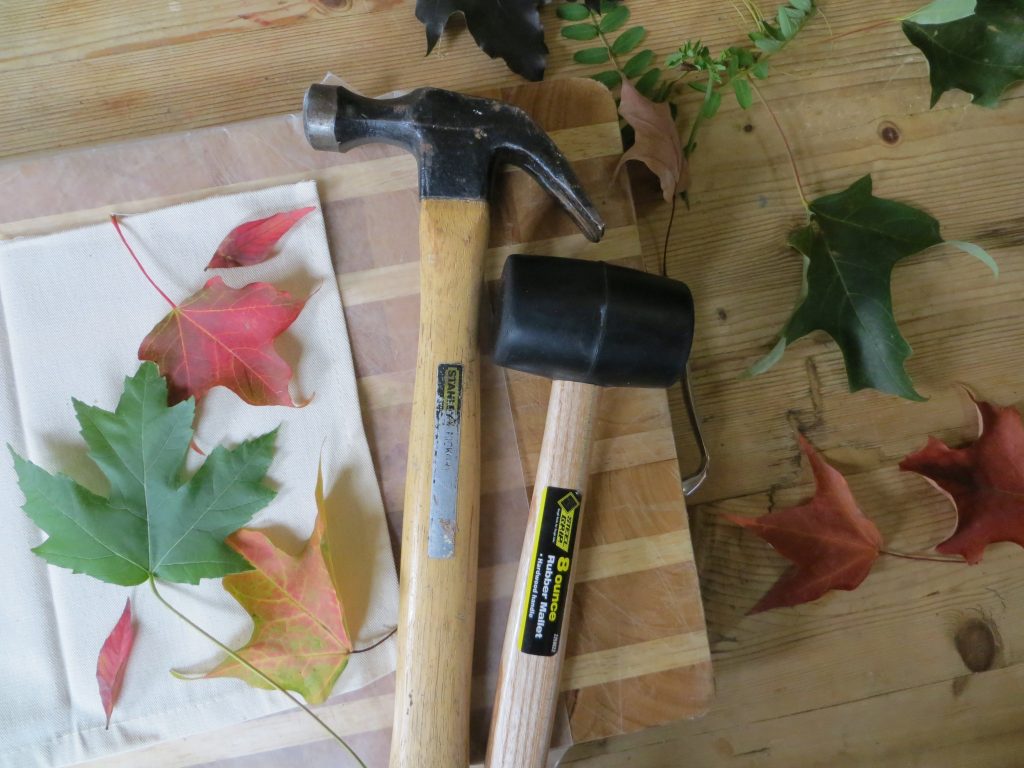
- Open the cloth and lay it on the pounding surface. (See image above)
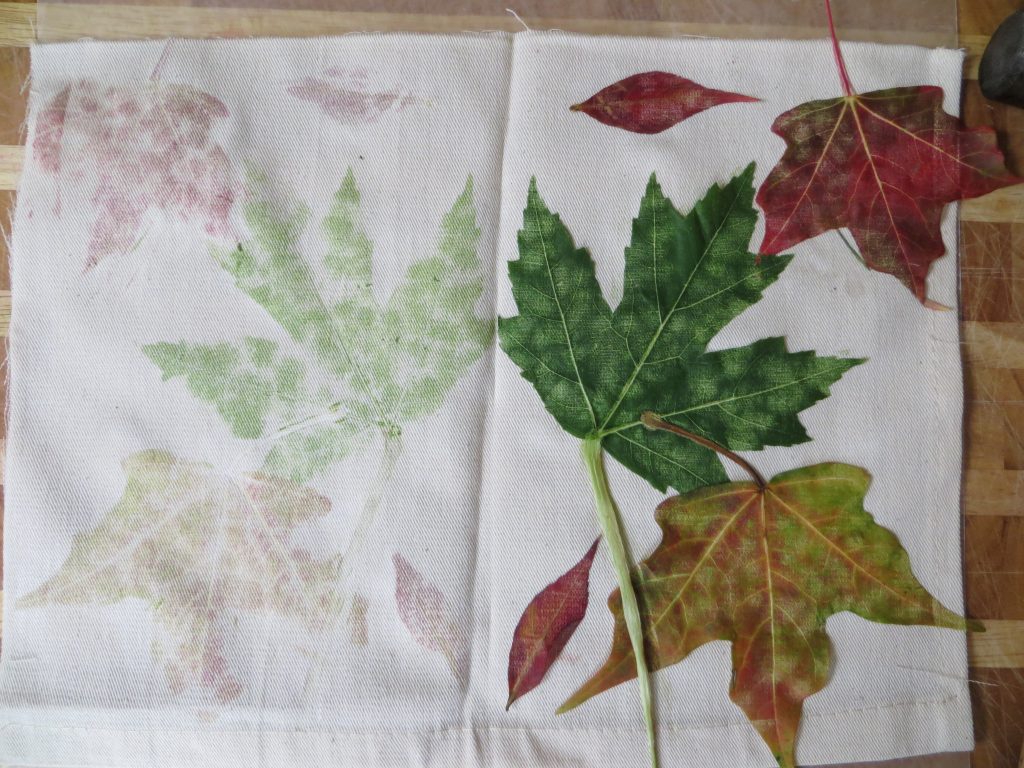
- Arrange leaves and flowers on the cloth.
Mirror Image Plant Prints- kitchenpantryscientist.com
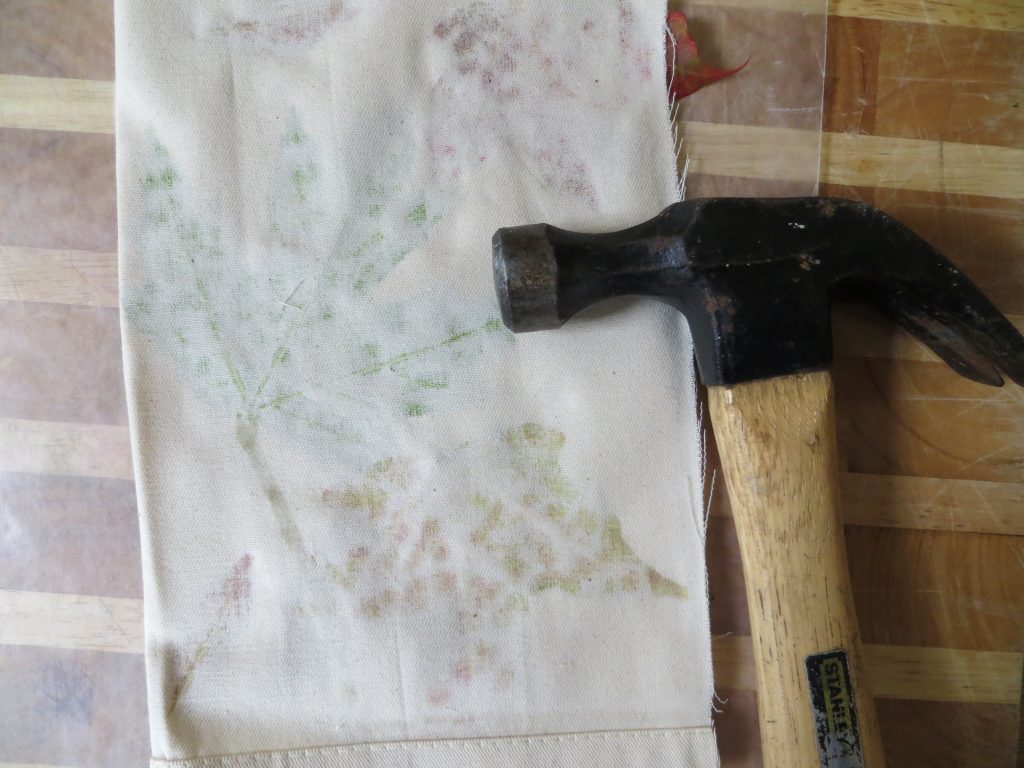
- Fold the cloth over the plants and pound it with the hammer or mallet. If you’re using a hammer, pound more gently.
- Pound until you can see the forms of the leaves through the fabric. As the pigment leaks through, you’ll see the outlines of what you’re smashing. Hint: Hammers work better than mallets for fall leaves. For juicy leaves and flowers, use a mallet or hammer gently.
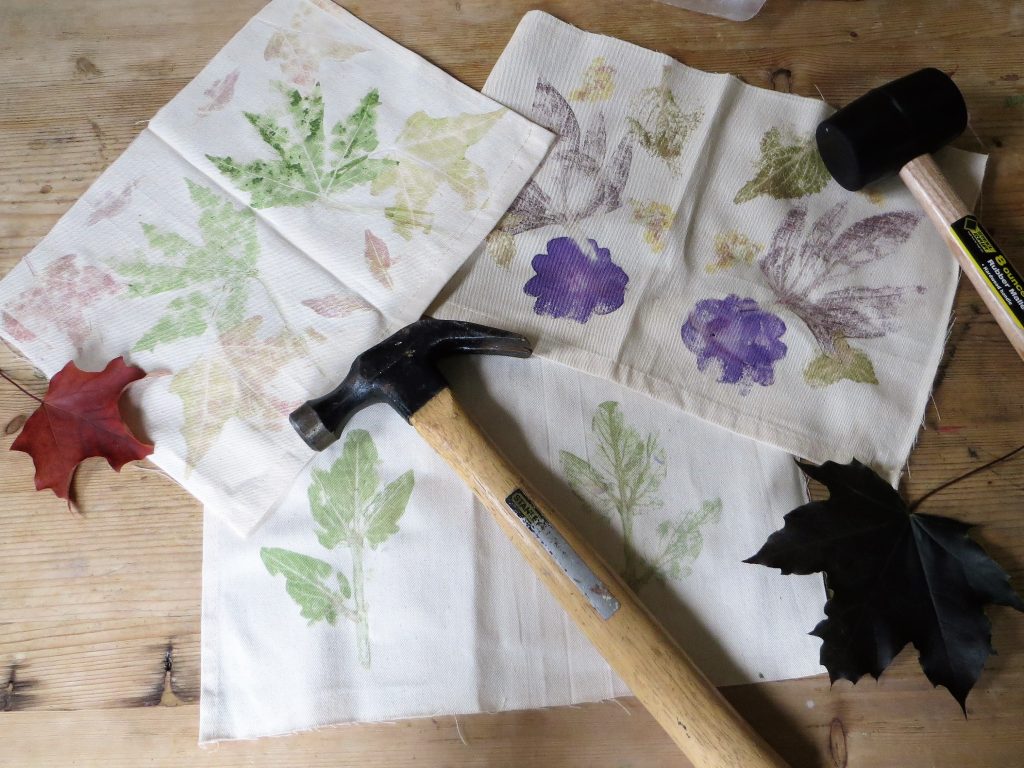
Mirror Image Plant Prints- kitchenpantryscientist.com
- When you’re finished pounding, unfold the fabric to reveal the print you created. Remove the leaves and petals.
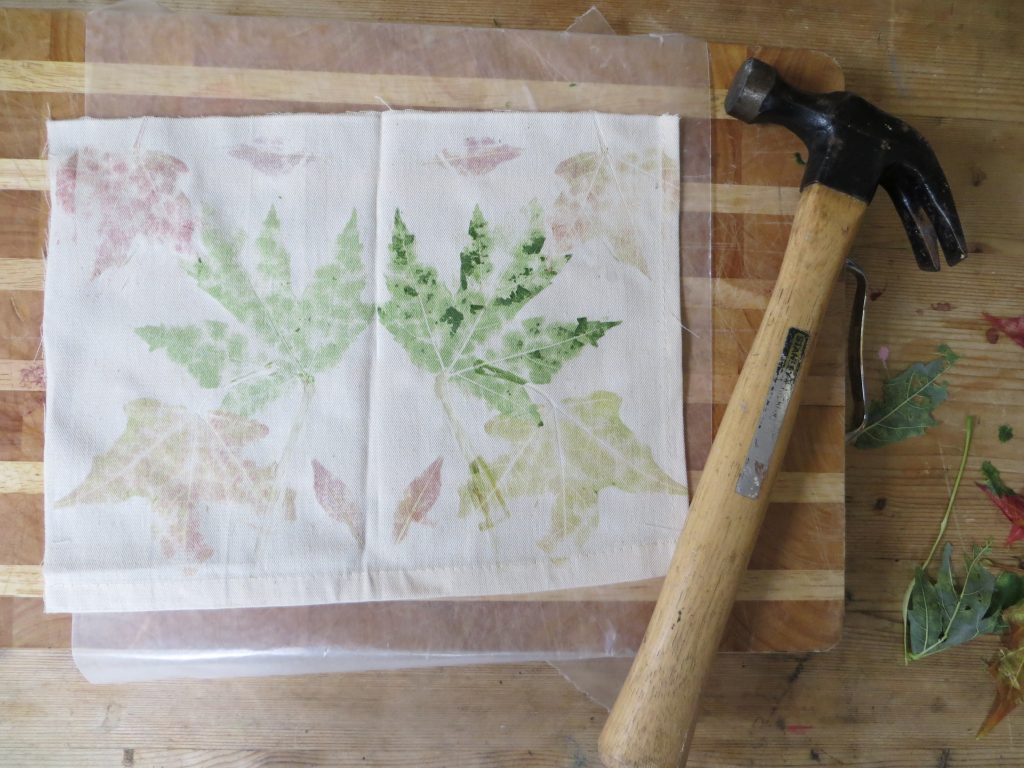
Mirror Image Plant Prints- kitchenpantryscientist.com
- Label the image with plant names, enhance it with paint or markers, or leave nature’s design to speak for itself.
The Science Behind the Fun:
Pigments are compounds that give things color, and many of them are found in nature. Flowers, leave, fruits and vegetables are full of brilliant pigments. In this experiment, we transfer plant pigments to cloth by bursting plant cells using pressure from a hammer or mallet.
The green pigment found in leaves is called chlorophyll. In the fall, many trees stop making chlorophyll, and the red, yellow and orange pigments inside the leaves become visible.
Although you create a mirror image of leaves and flowers, you’ll notice that the color may be more intense on one side of the print. A waxy covering called a cuticle covers leaves, and is sometimes thicker on the top than on the underside of the leaf. It may affect the transfer of pigment to the cloth, making it easy to see structures like veins on the leaf print.
Enrichment:
What parts of the leaf can you identify in the print you created?