Tag: ornaments’
Homemade Holiday Light-Up Ornaments and Crystal Snowflakes
- by KitchenPantryScientist
Use science to make your holidays shine! Here are a few fun ornaments adapted from projects in my book “STEAM Lab for Kids.” Basic instructions can be found below. Buy your own copy of “STEAM Lab for Kids” anywhere books are sold to learn more about the “Science Behind the Fun!” Happy Holidays!
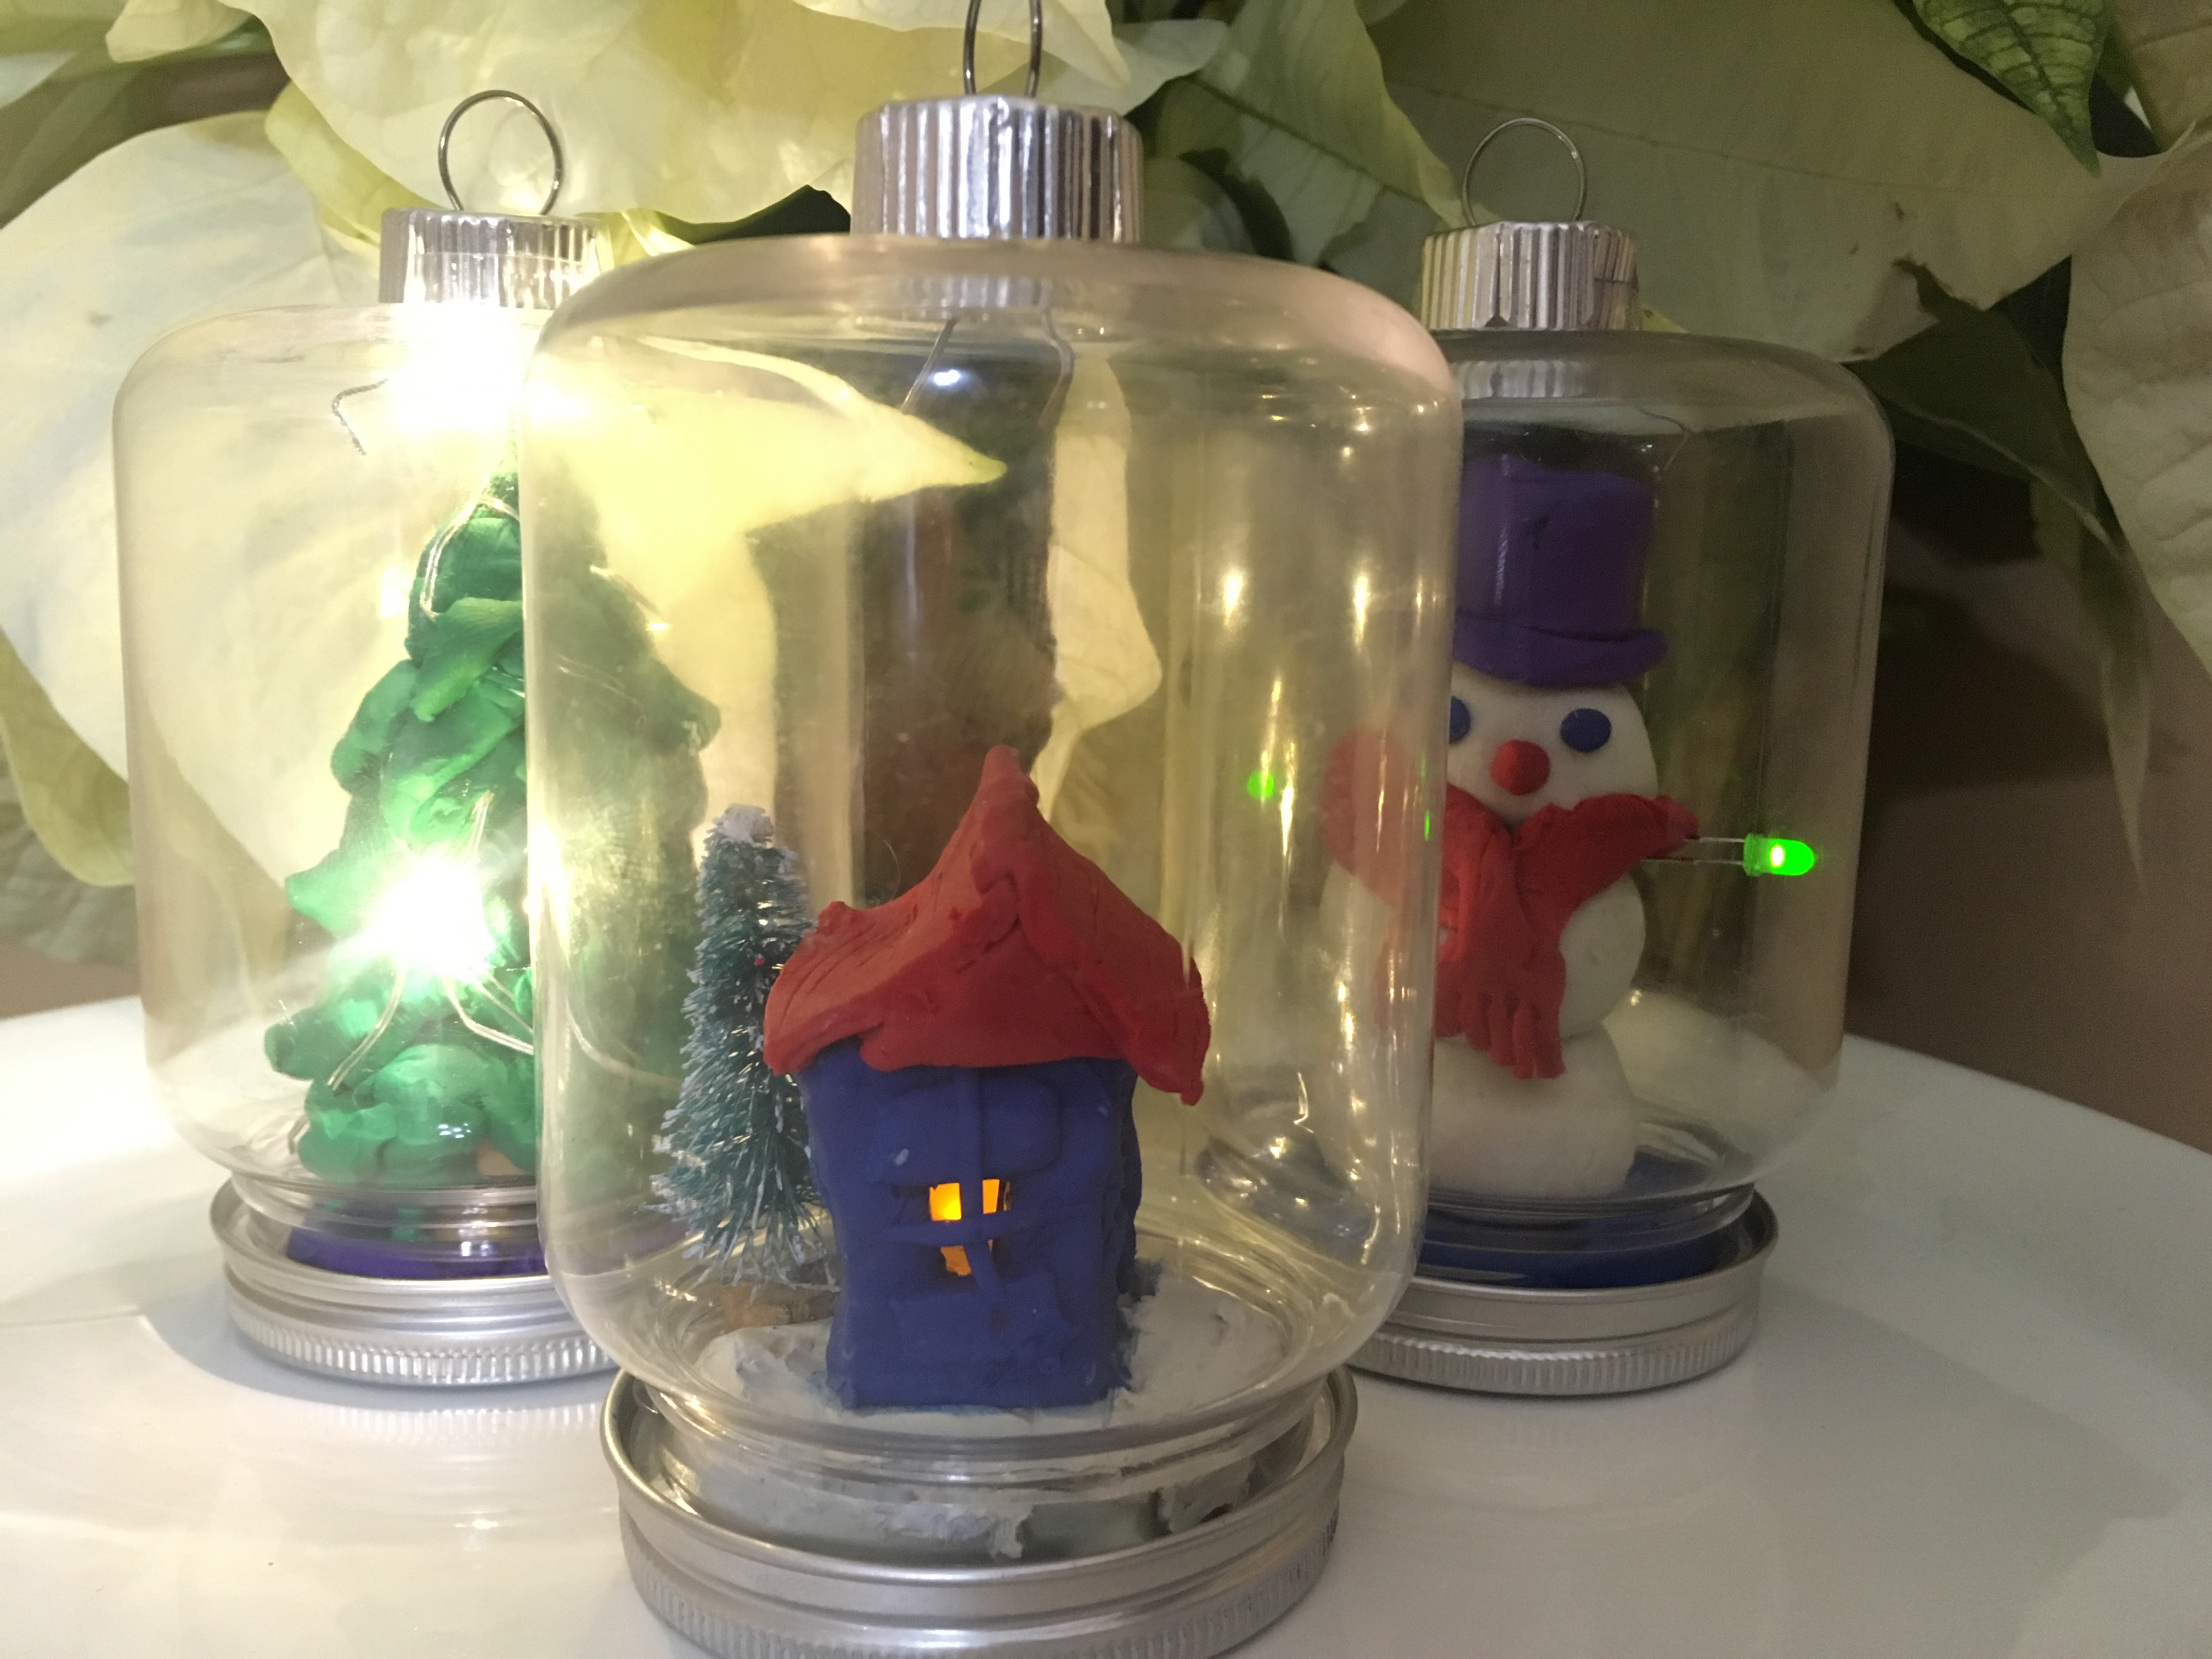
LED ornaments (or jar globes) made using circuit from Light-Up Creatures (STEAM Lab for Kids (Quarry Books 2018)
Epsom salt crystals from STEAM Lab for Kids (Quarry Books 2018)
LED Ornaments and Jar Globes:
To make LED ornaments, buy plastic jars or ornaments with removable bases. Use sculpting clay (the kind that won’t harden) to design a scene and add LEDs connected to a coin-cell battery to light your creation. LEDs can be ordered online. See images below.
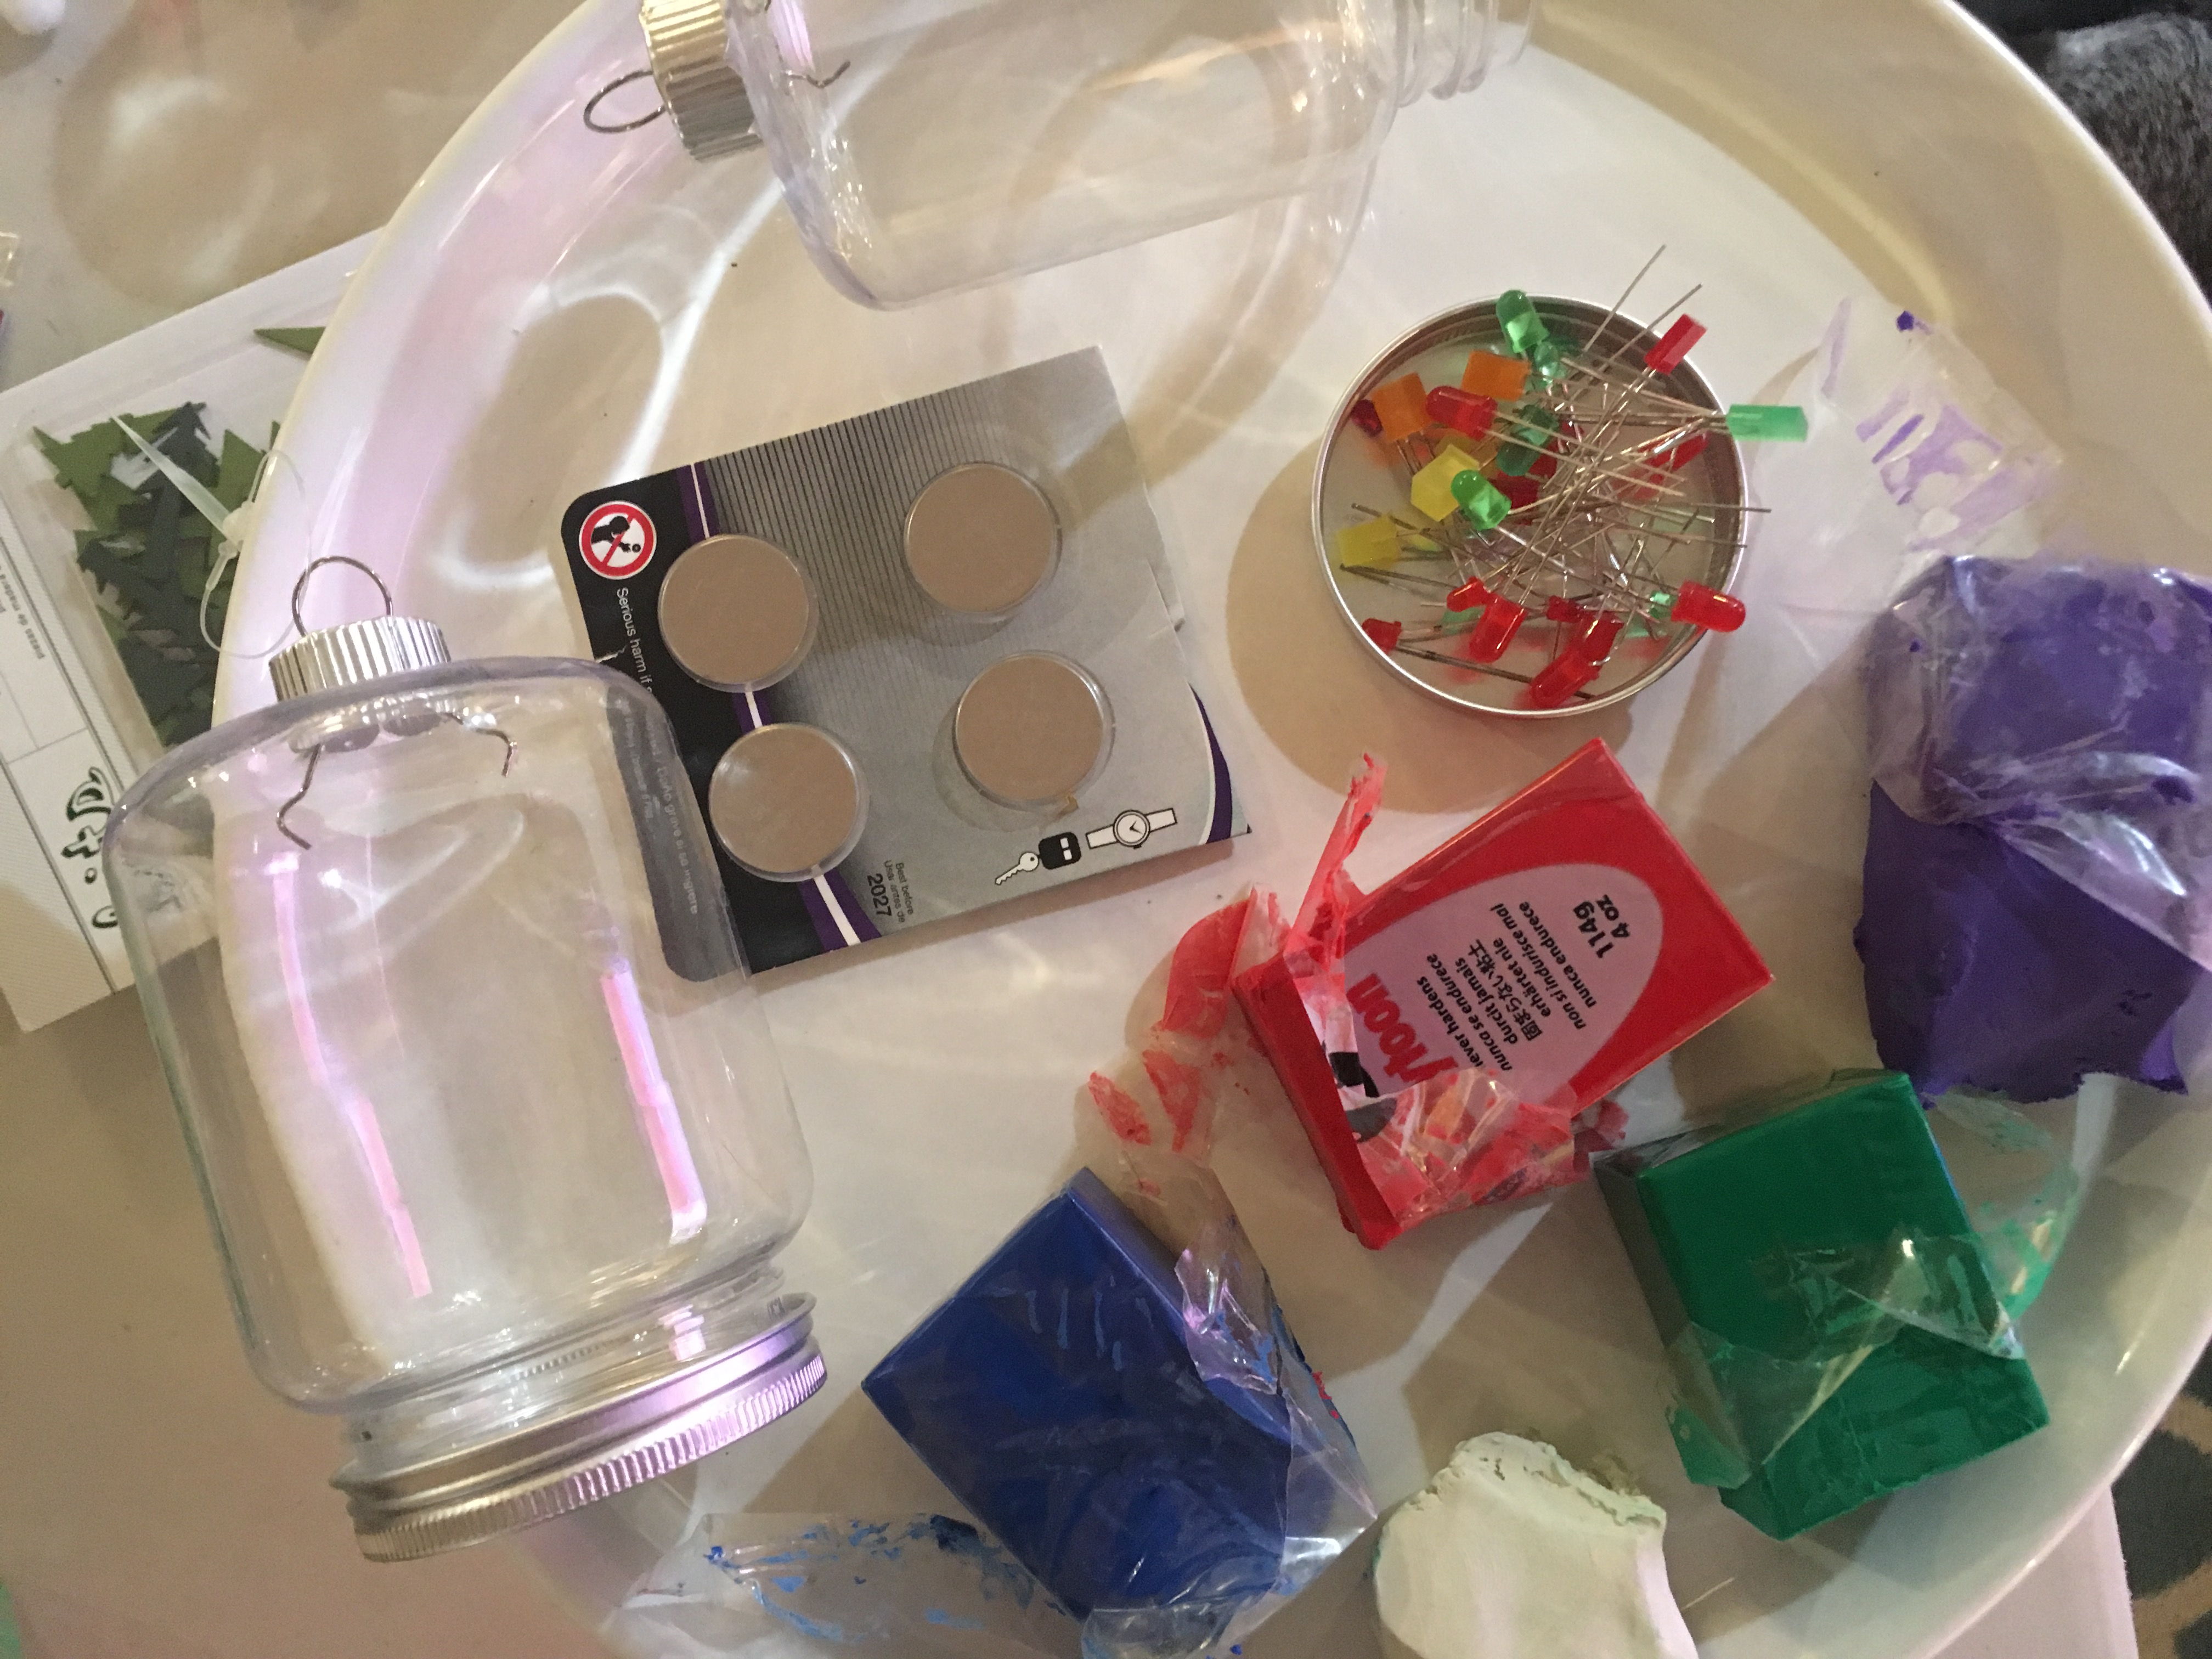
supplies for building LED-lit ornaments
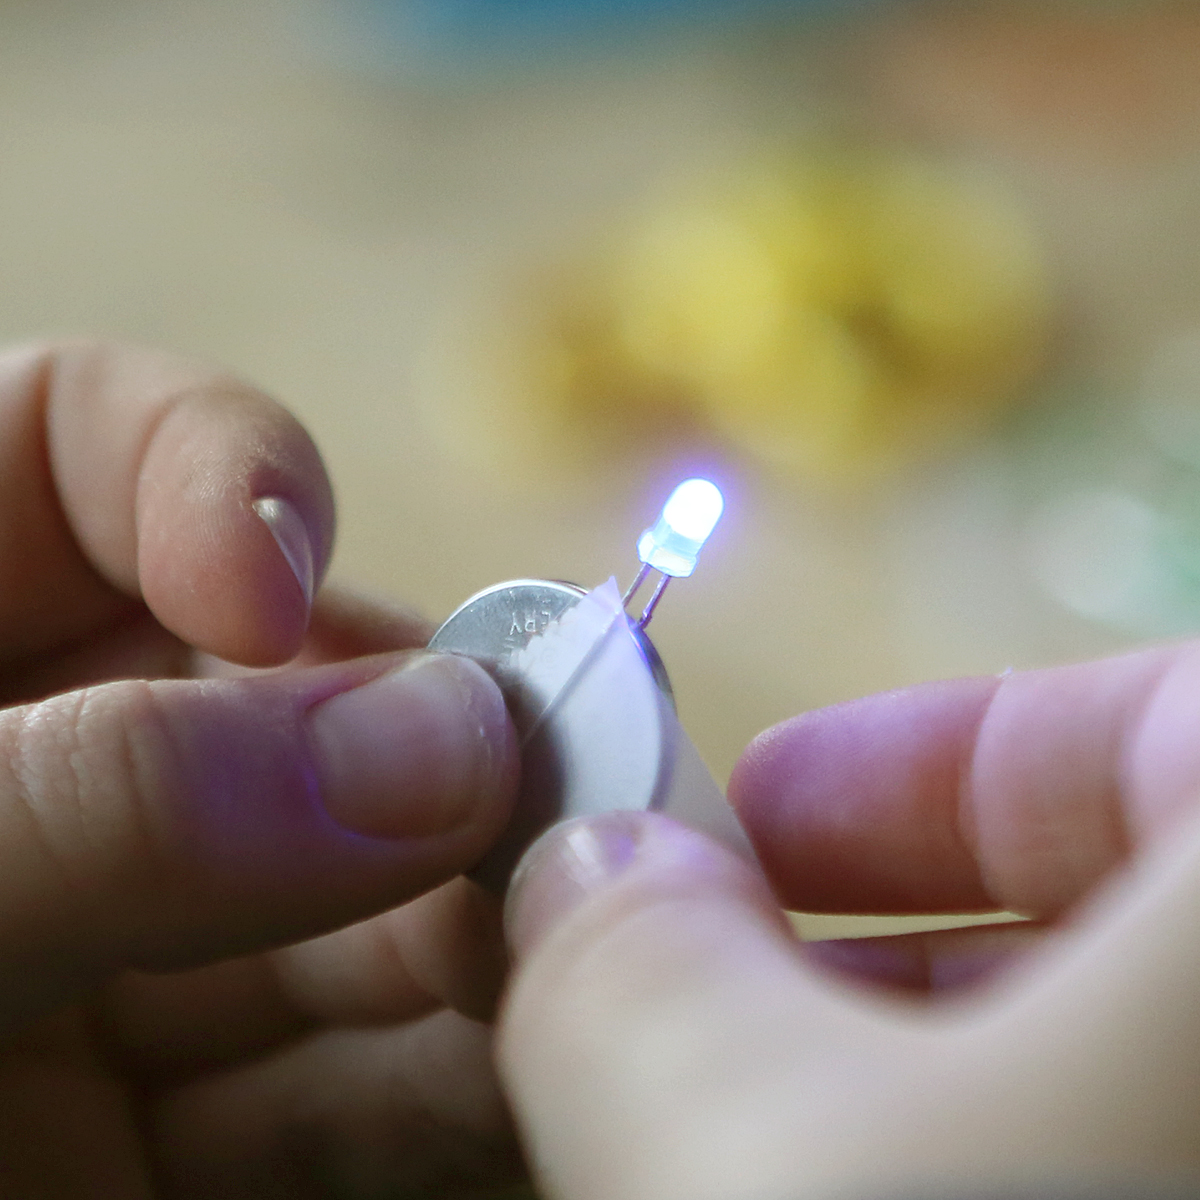
Connect the legs of the LED so that each leg touches a different side of the battery to complete the circuit. If it doesn’t light, try switching the legs to the opposite sides. (Image from STEAM Lab for Kids-Quarry Books 2018)
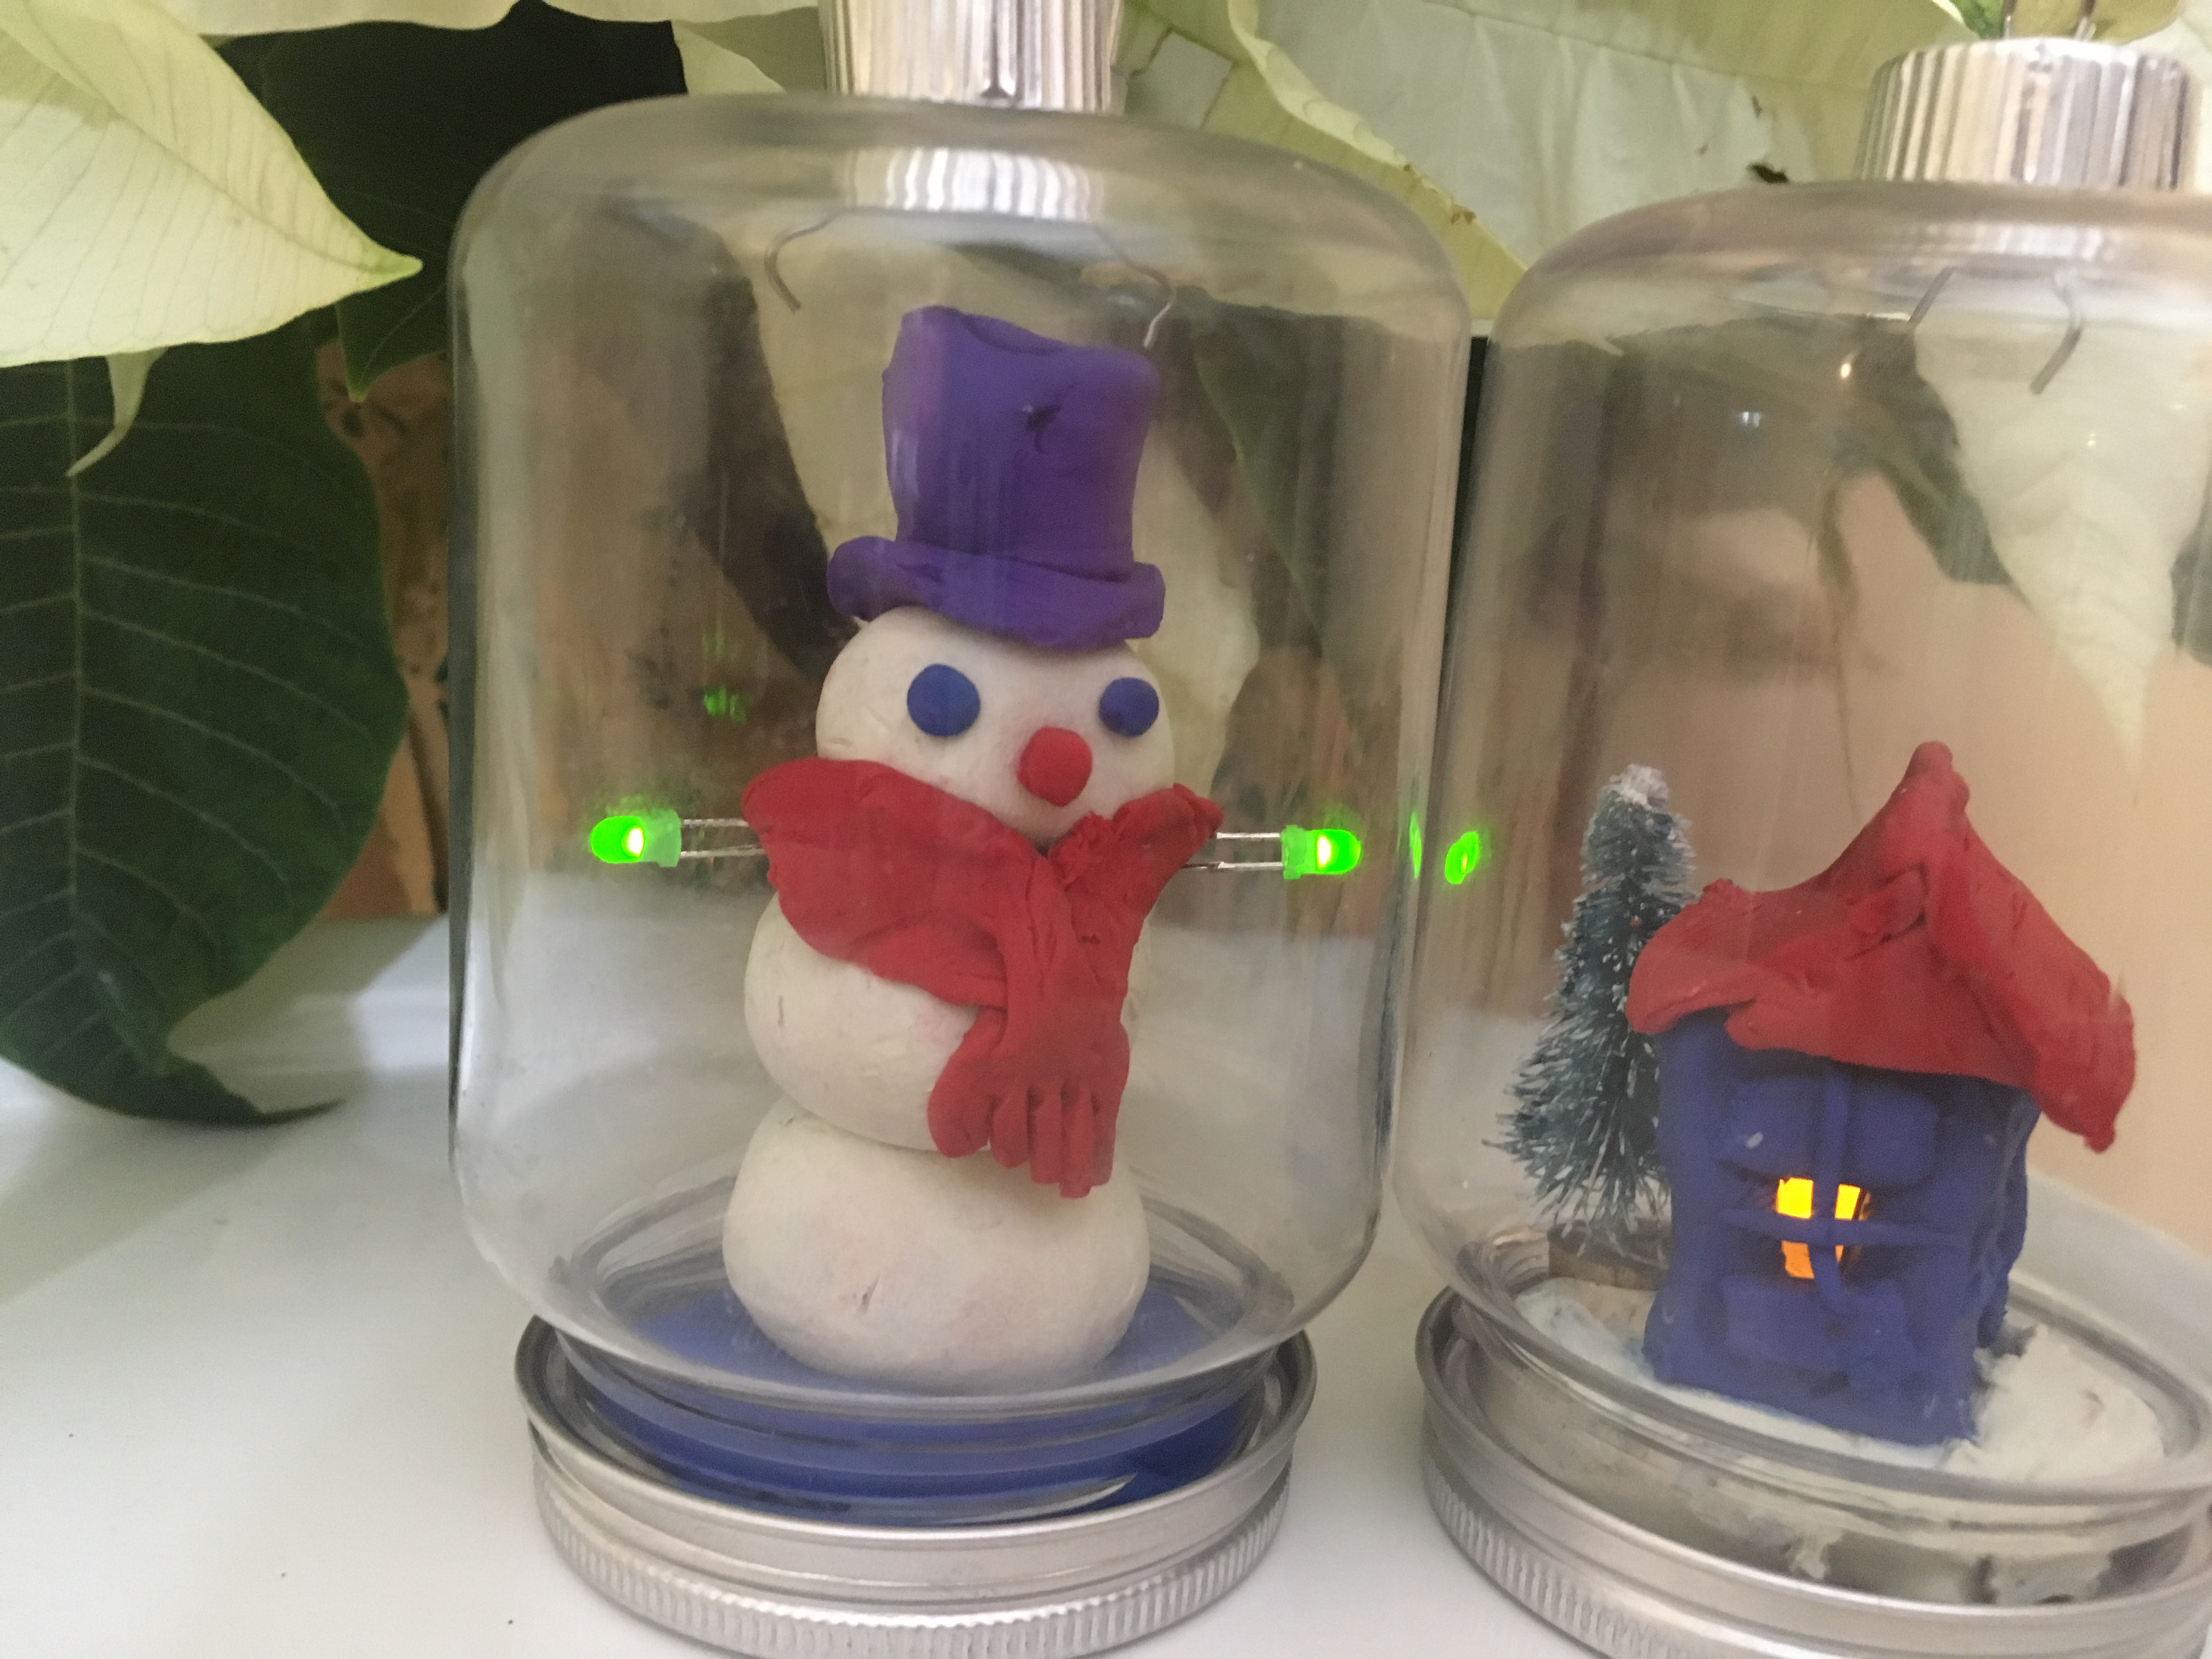
Hide the battery in the clay, keeping the connection tight so the LEDs stay lit. You can have more than one LED on a single battery. Put the bottom back on the jar and Voila!
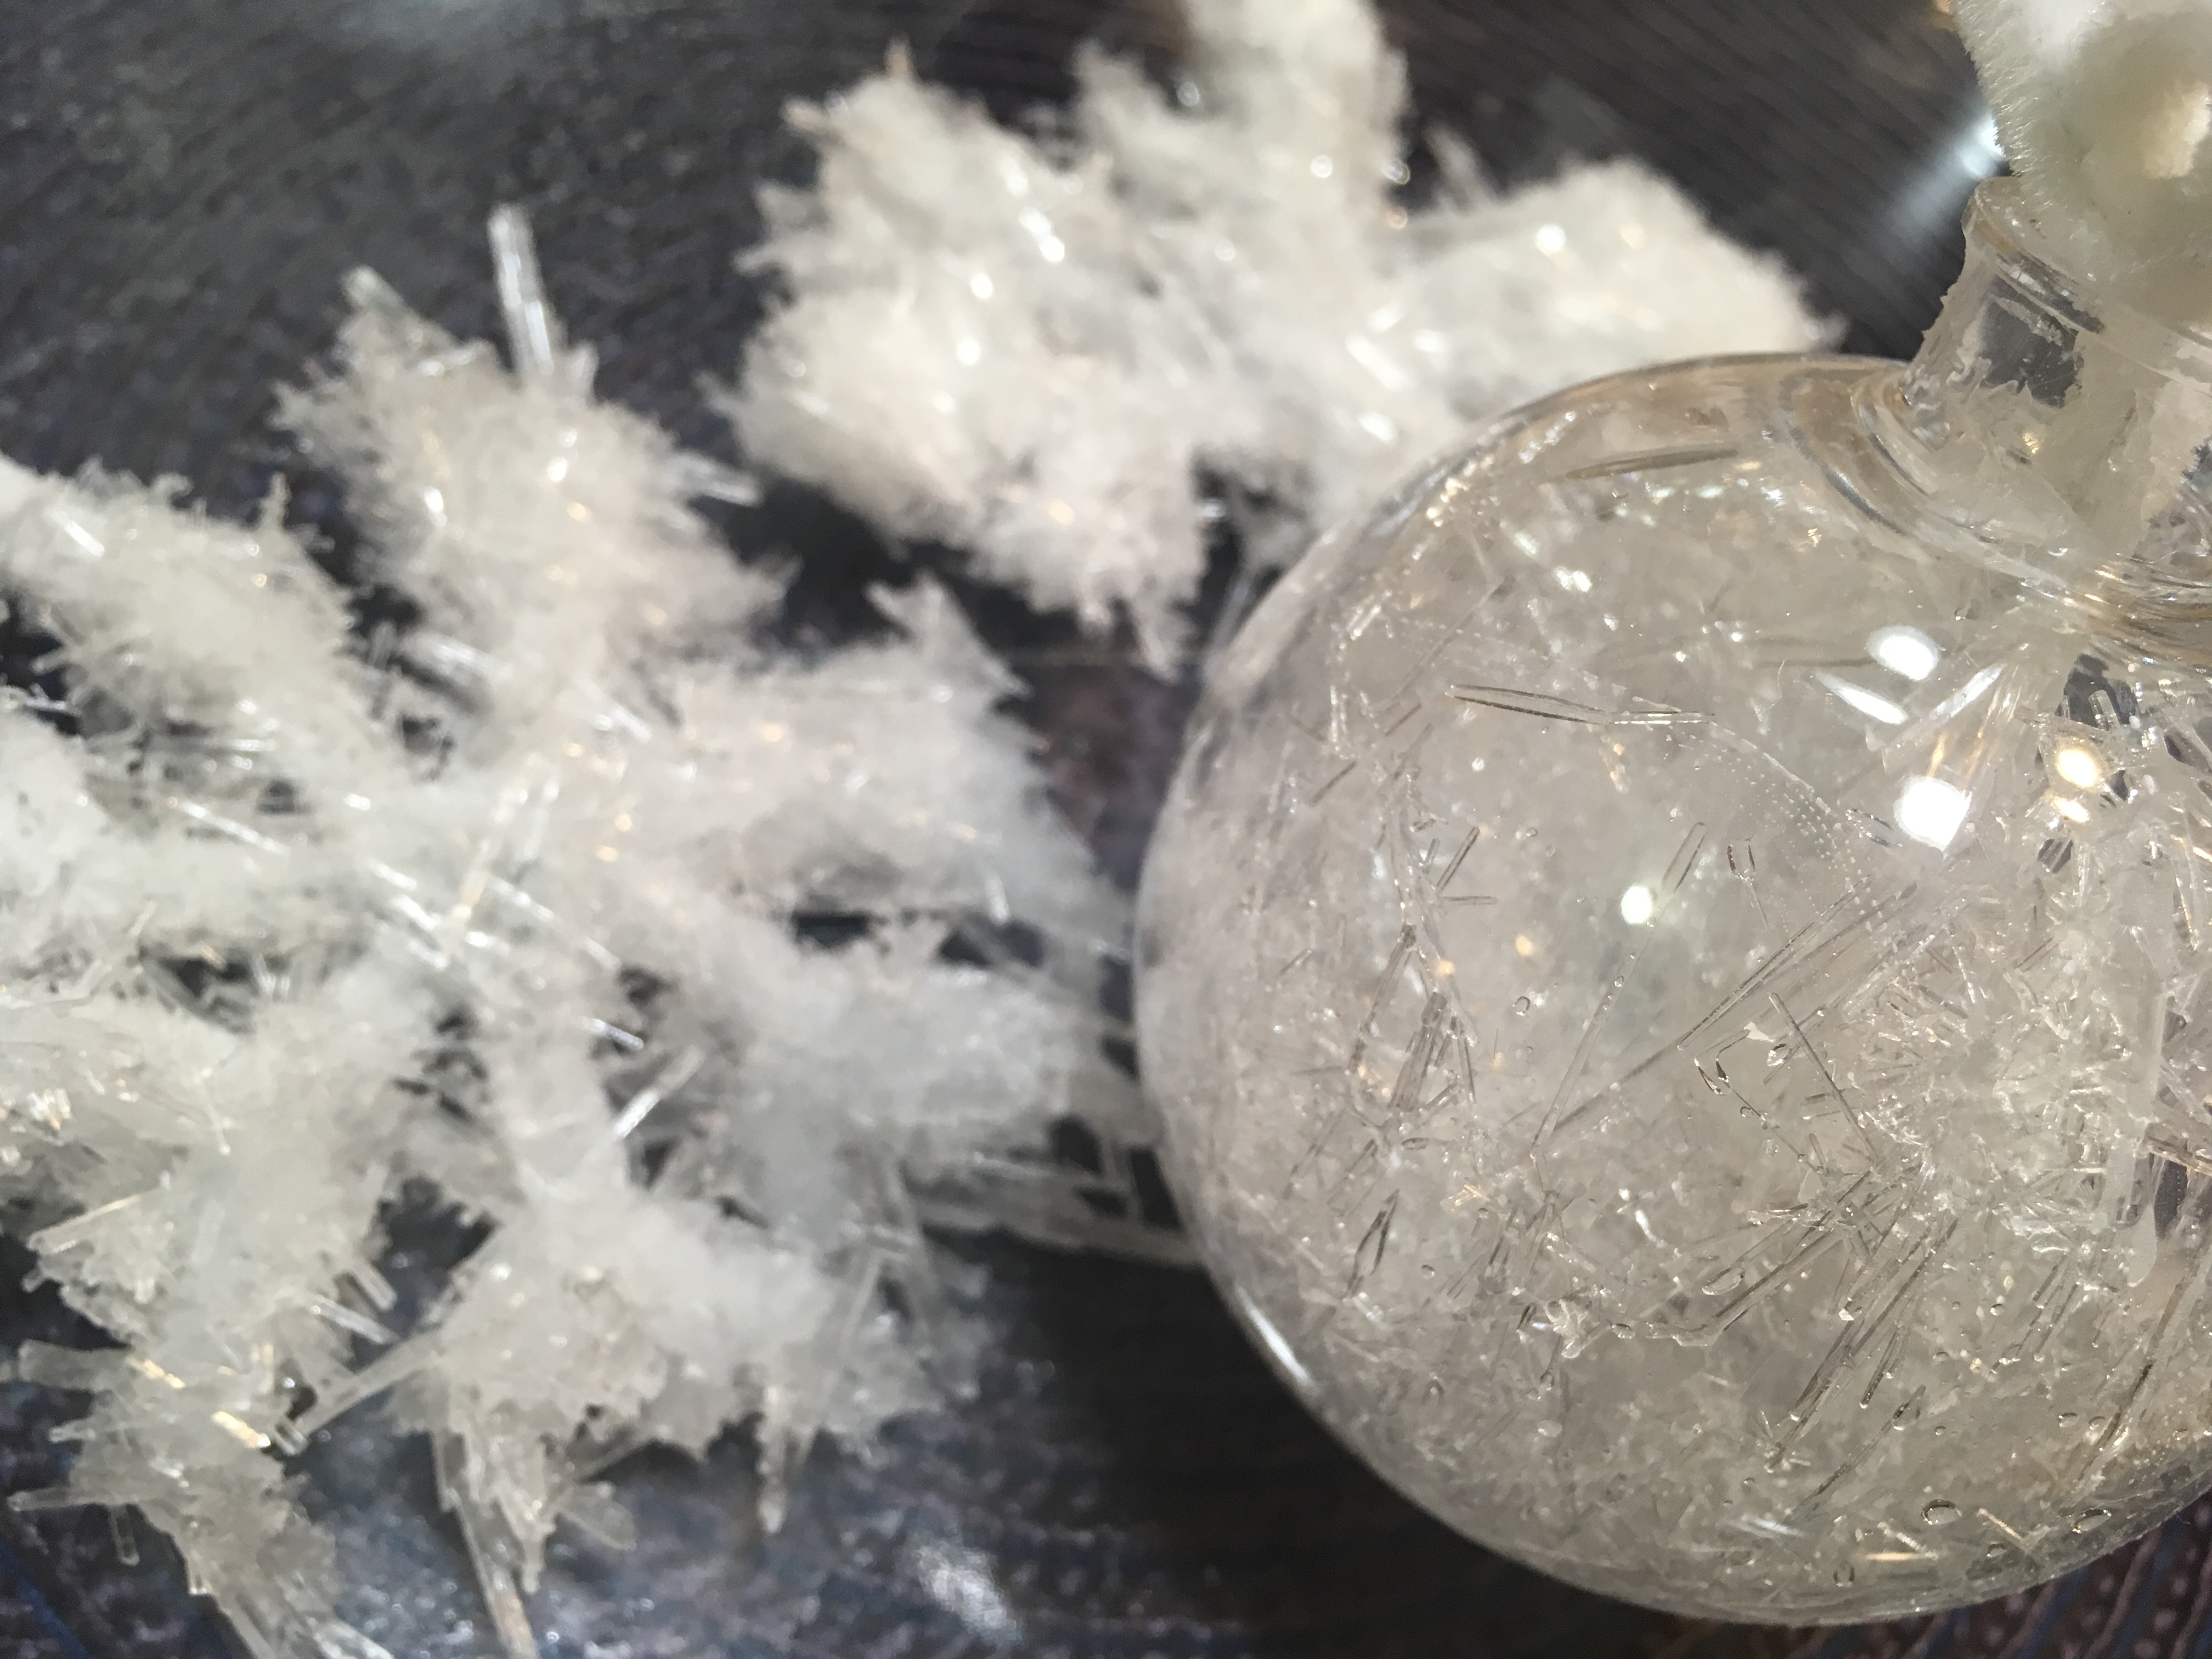
Epsom Salt Crystal Ornaments:
(Warning: Hot liquids require adult supervision.) To make the Epsom Salt crystals, dissolve 3 cups of Epsom salts in 2 cups of water by heating and stirring until no more crystals are visible. This creates a supersaturated solution. Allow the solution to cool slightly. Hang pipe cleaners formed into snowflakes in jars or hollow ornaments and pour the solution in. When long, needle-like crystals have formed, remove the pipe cleaners from the jars. You can leave them in the ornaments, and drain the liquid.

Hang pipe cleaners in supersaturated Epsom salt solution, or add them to ornaments and fill them with solution.
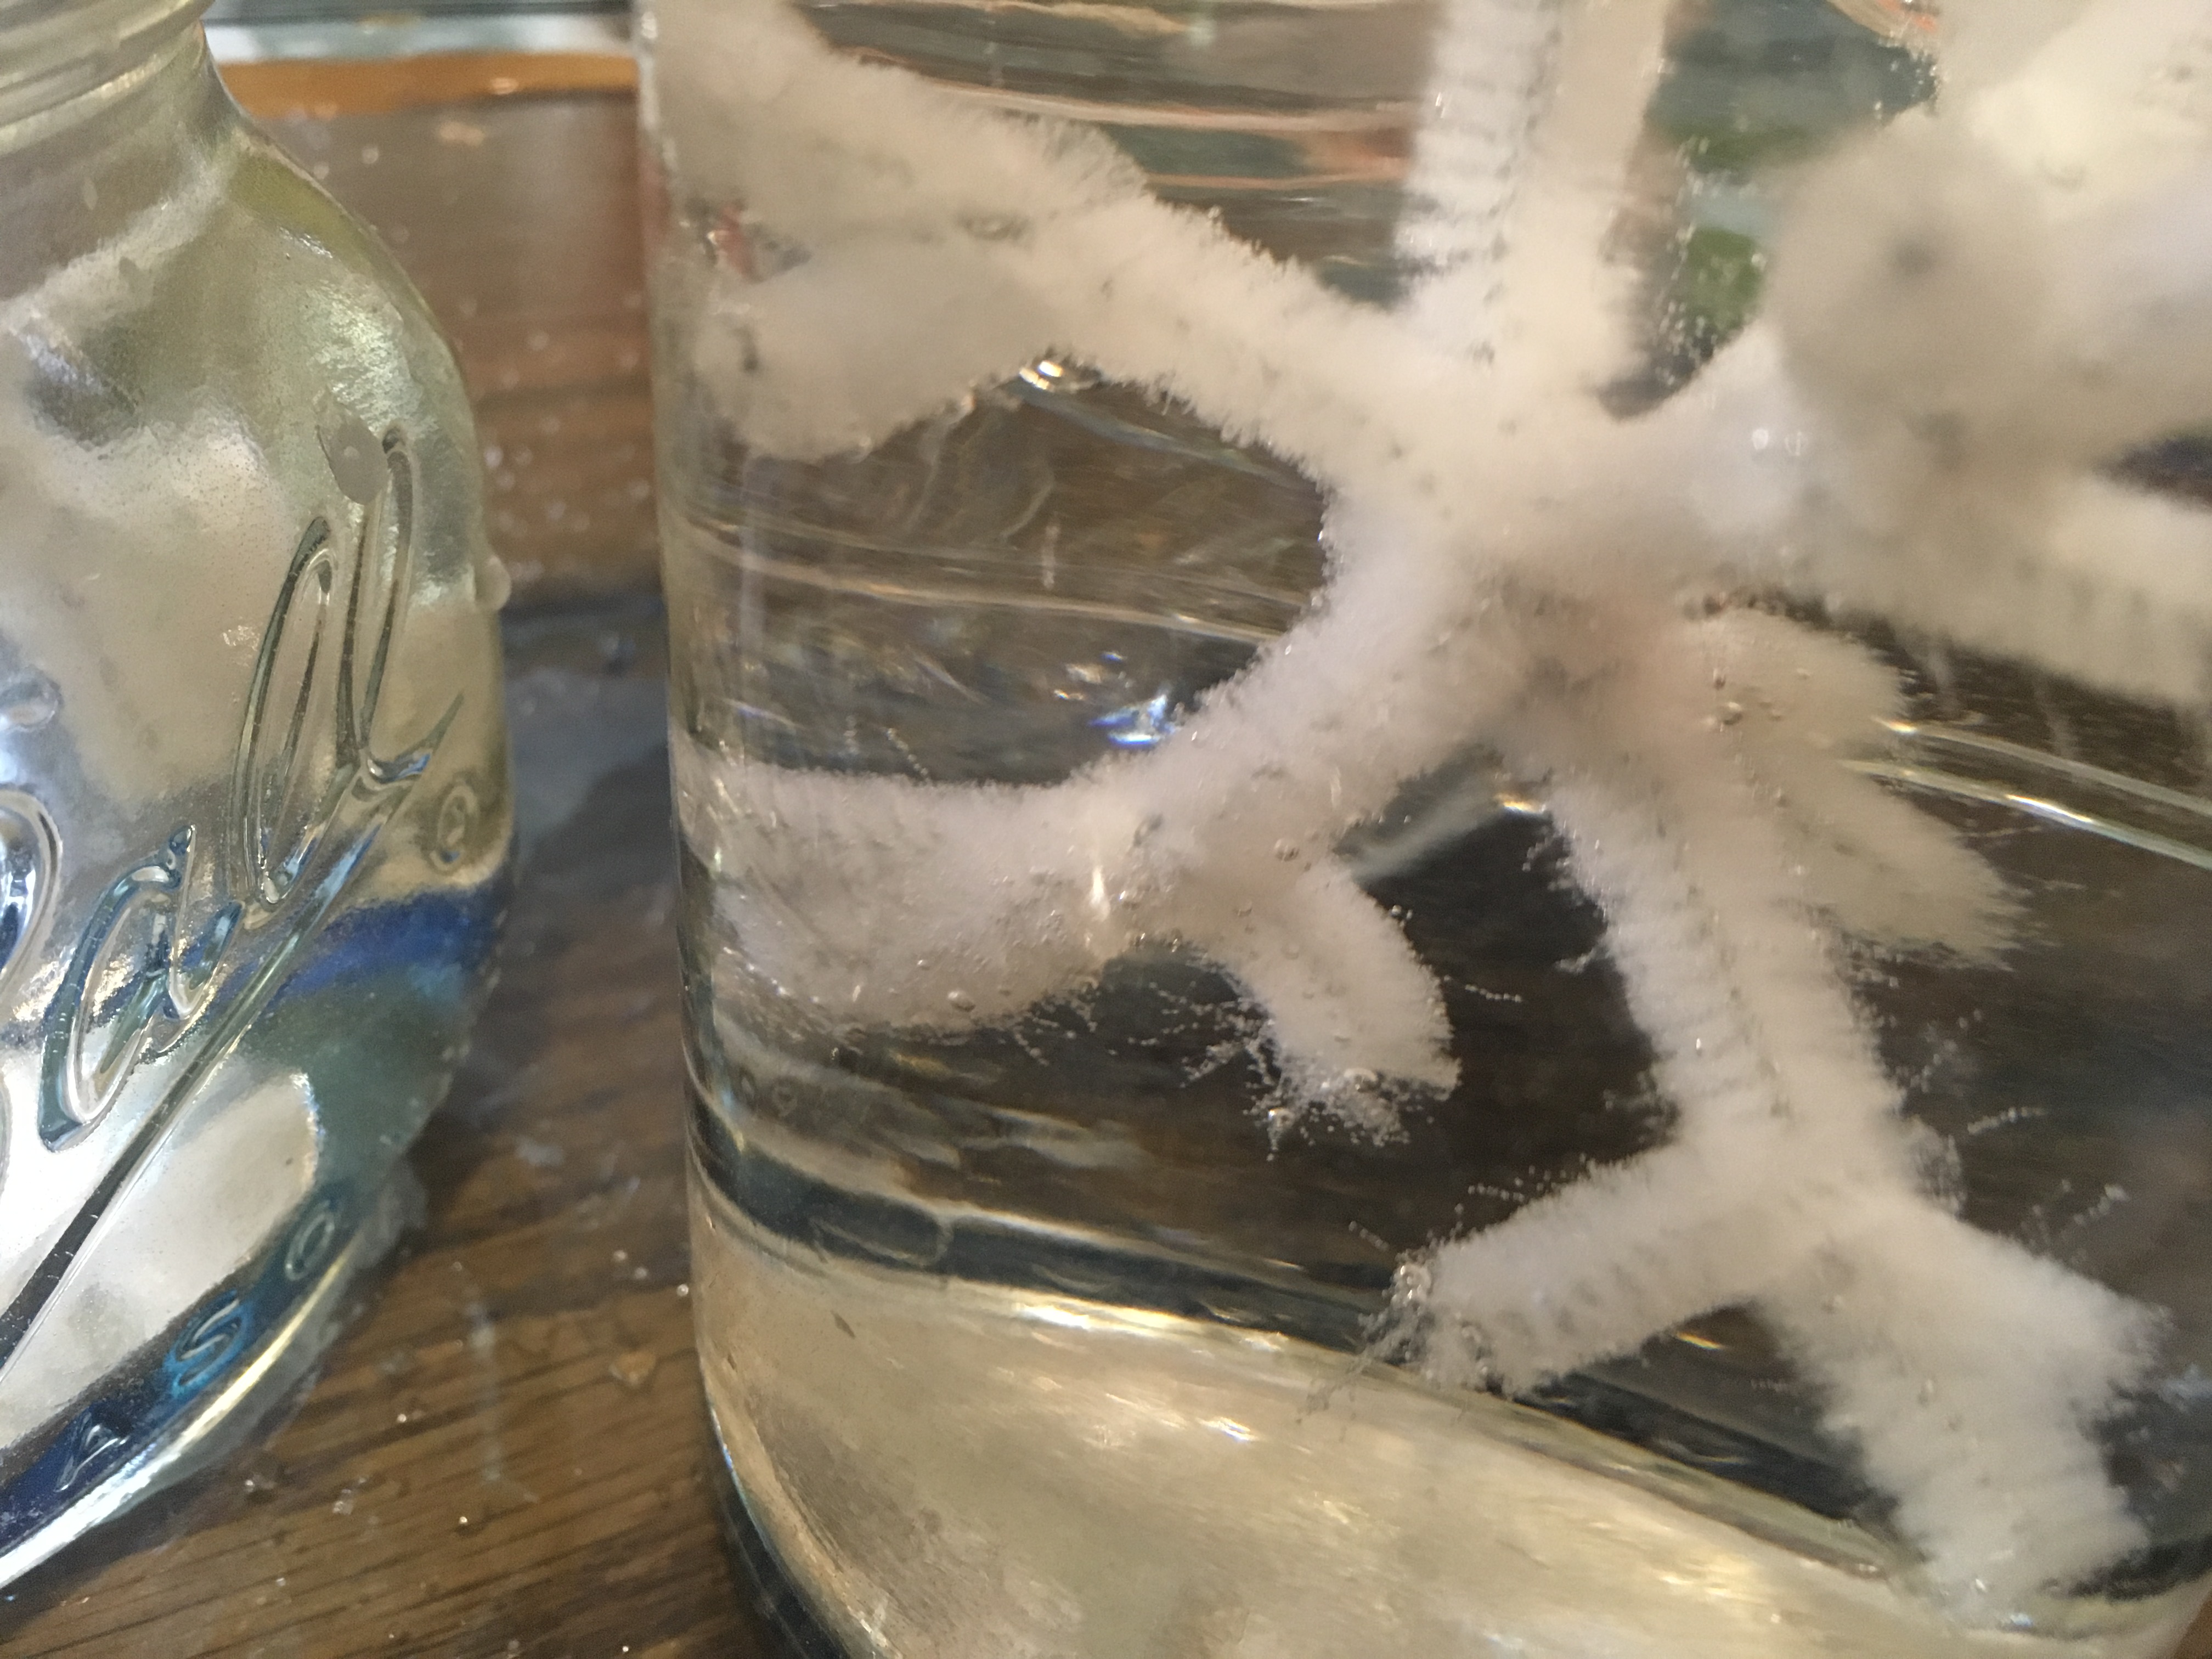
Wait for the crystals to grow. (4-12 hours.)
Remove the pipe cleaners from the solution. Knock off excess crystals.
Air Plant (Tillandsia) Holiday Ornaments
- by KitchenPantryScientist
Tillandsia, also known as Air Plants, come in many shapes, sizes and colors. In nature, you’ll find them living in trees in warm places like South America. They collect moisture from the air and rain, rather than pulling it up via roots like most plants, so you can care for them with a weekly misting.
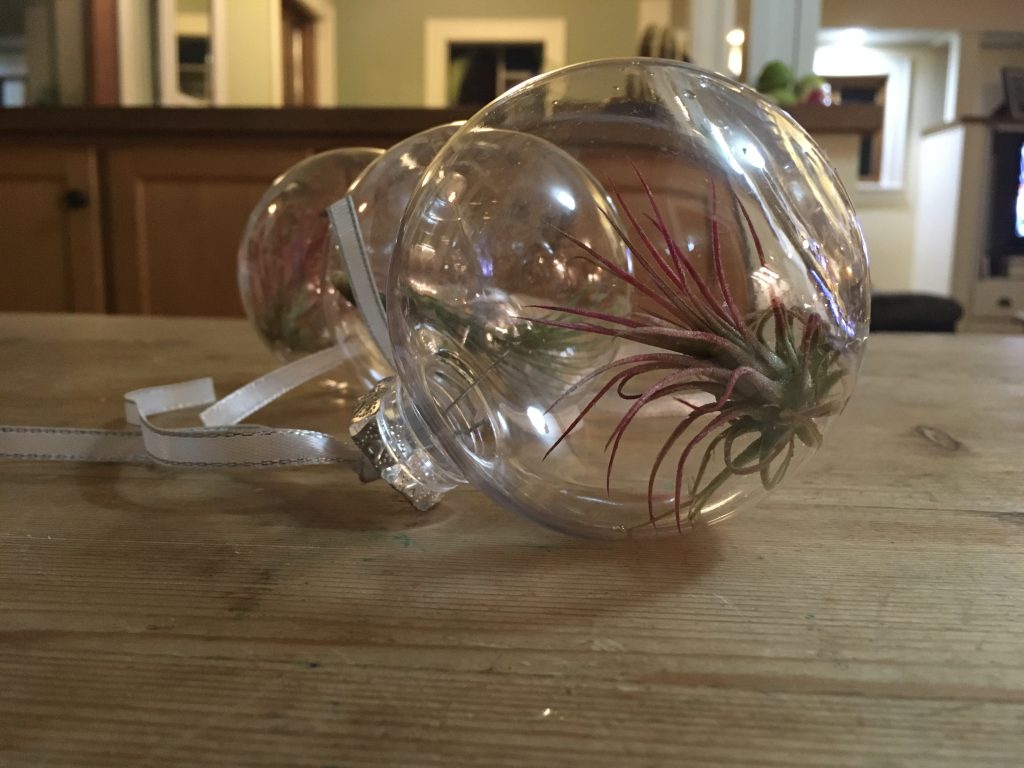
Tillandsia ornament (KitchenPantryScientist.com)
Pick up a few clear, hollow “decorate your own” ornaments, and you can use these living wonders to make unique homemade decorations. We’re giving them as gifts this year.
You’ll need:
-clear ornaments with removable tops
-small Tillandsia that will fit through ornament tops (Air Plants are available at most nurseries. Ask for care instructions, if they have them.)
-needle nose pliars, or tweezers
Note: Choose plants that are small enough to fit through the openings of your ornament!
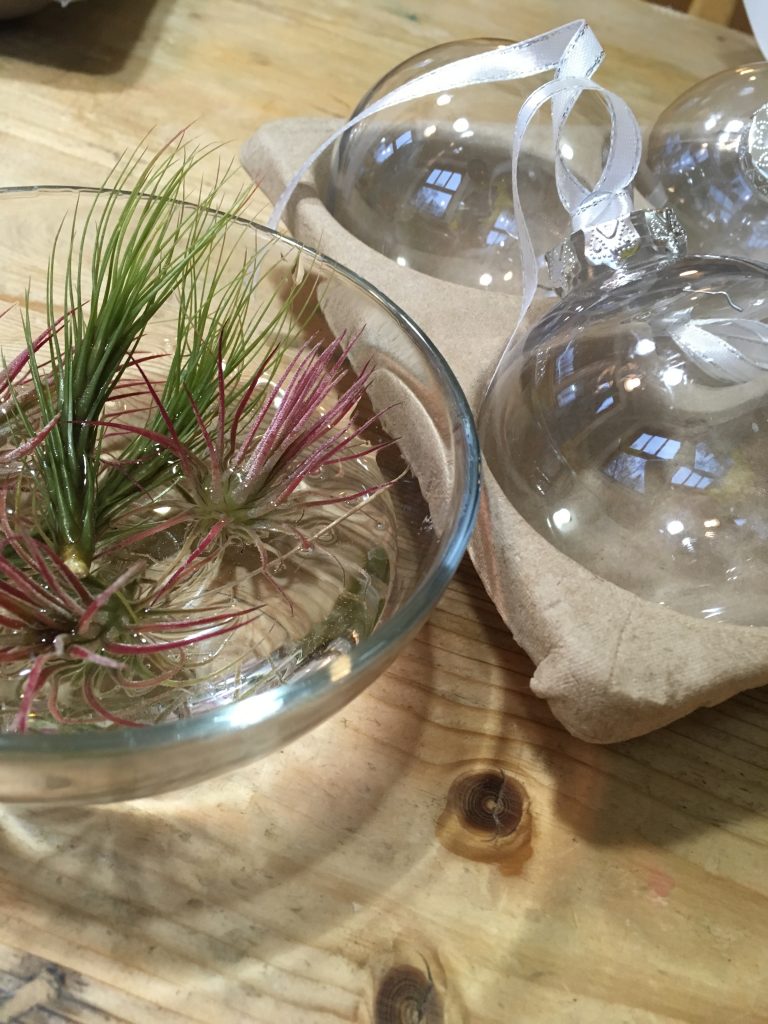
Tillandsia ornaments (Kitchen Pantry Scientist.com)
Mist your plants, or soak them in a bowl of clean water for 15 minutes or so, gently shake off the excess water, and carefully push them into the ornaments, bottom first so you don’t harm the plant. Put the top back on the ornament, leaving it loose enough for air to circulate.
Once a week or so, remove the top of the ornament and add some water. Coat the entire plant with water, pour out the excess and put the top back on. After the holidays, you can remove the plants with tweezers and move them to a new home in a vase, bowl or other clear container.