Tag: experiment’
Candy Science: Icy Worm Pond
- by KitchenPantryScientist
If you got any sour gummy worms for Halloween, they’re probably coated with sweet-sour powder made from citric acid and sugar crystals. Using the same science used to make rock candy, you can use sour gummy worms to crystallize sugar syrup and make an”icy worm pond.” It’s even more fun to add sugar cubes to your pond! After a few days, you can chip your worms out of the “ice” to see how they taste. I created this experiment for Imperial Sugar and Dixie Crystals. Check it out on their website (click here) for directions and to learn more about the science behind the fun!
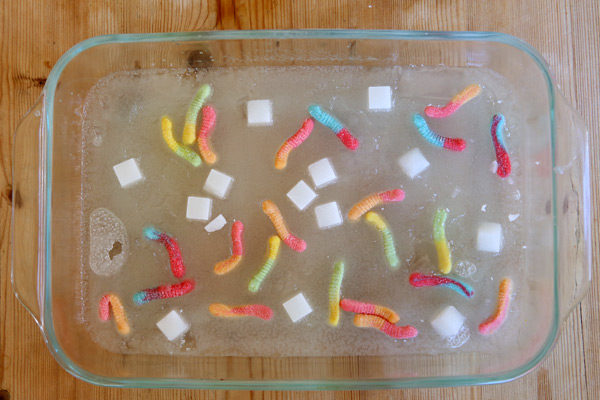
If you don’t have sour worms, try coating other (non-chocolate) candy with sugar by dipping it in water, rolling it in sugar and letting it dry before you add it to your pond. It would be fun to do this experiment with Swedish fish, or lifesavers!
Can you make up an experiment using Halloween Candy? Comment on this post with the experiment you created and you could win a copy of Kitchen Science Lab for Kids*!
*Winner will be chosen at random.
Flipped Water Glass Experiment from Beakman
- by KitchenPantryScientist
My book, “Kitchen Science Lab for Kids,”is finally out, and over Labor Day weekend, I traveled to Dragon Con in Atlanta to talk about it and do science with the kids at the convention. At the convention, I got to meet lots of fantastic scientists, science writers, science entertainers and science enthusiasts. One of them was the amazing Paul Zaloom, of “Beakman’s World.” I checked out his “Beakman Live” show and learned some awesome new experiments.
I tried one of them out this morning. Check it out, and then try it out! All you need is a playing card, a glass and some water. The science explanation is in the video.
Be sure to catch some episodes of Beakman’s World online!
Homemade Sticky Window Gellies (Decorative Diffusion, Floatation and Evaporation Experiment)
- by KitchenPantryScientist
What happens when food coloring molecules move, or DIFFUSE through gelatin, the substance that makes jello jiggle?
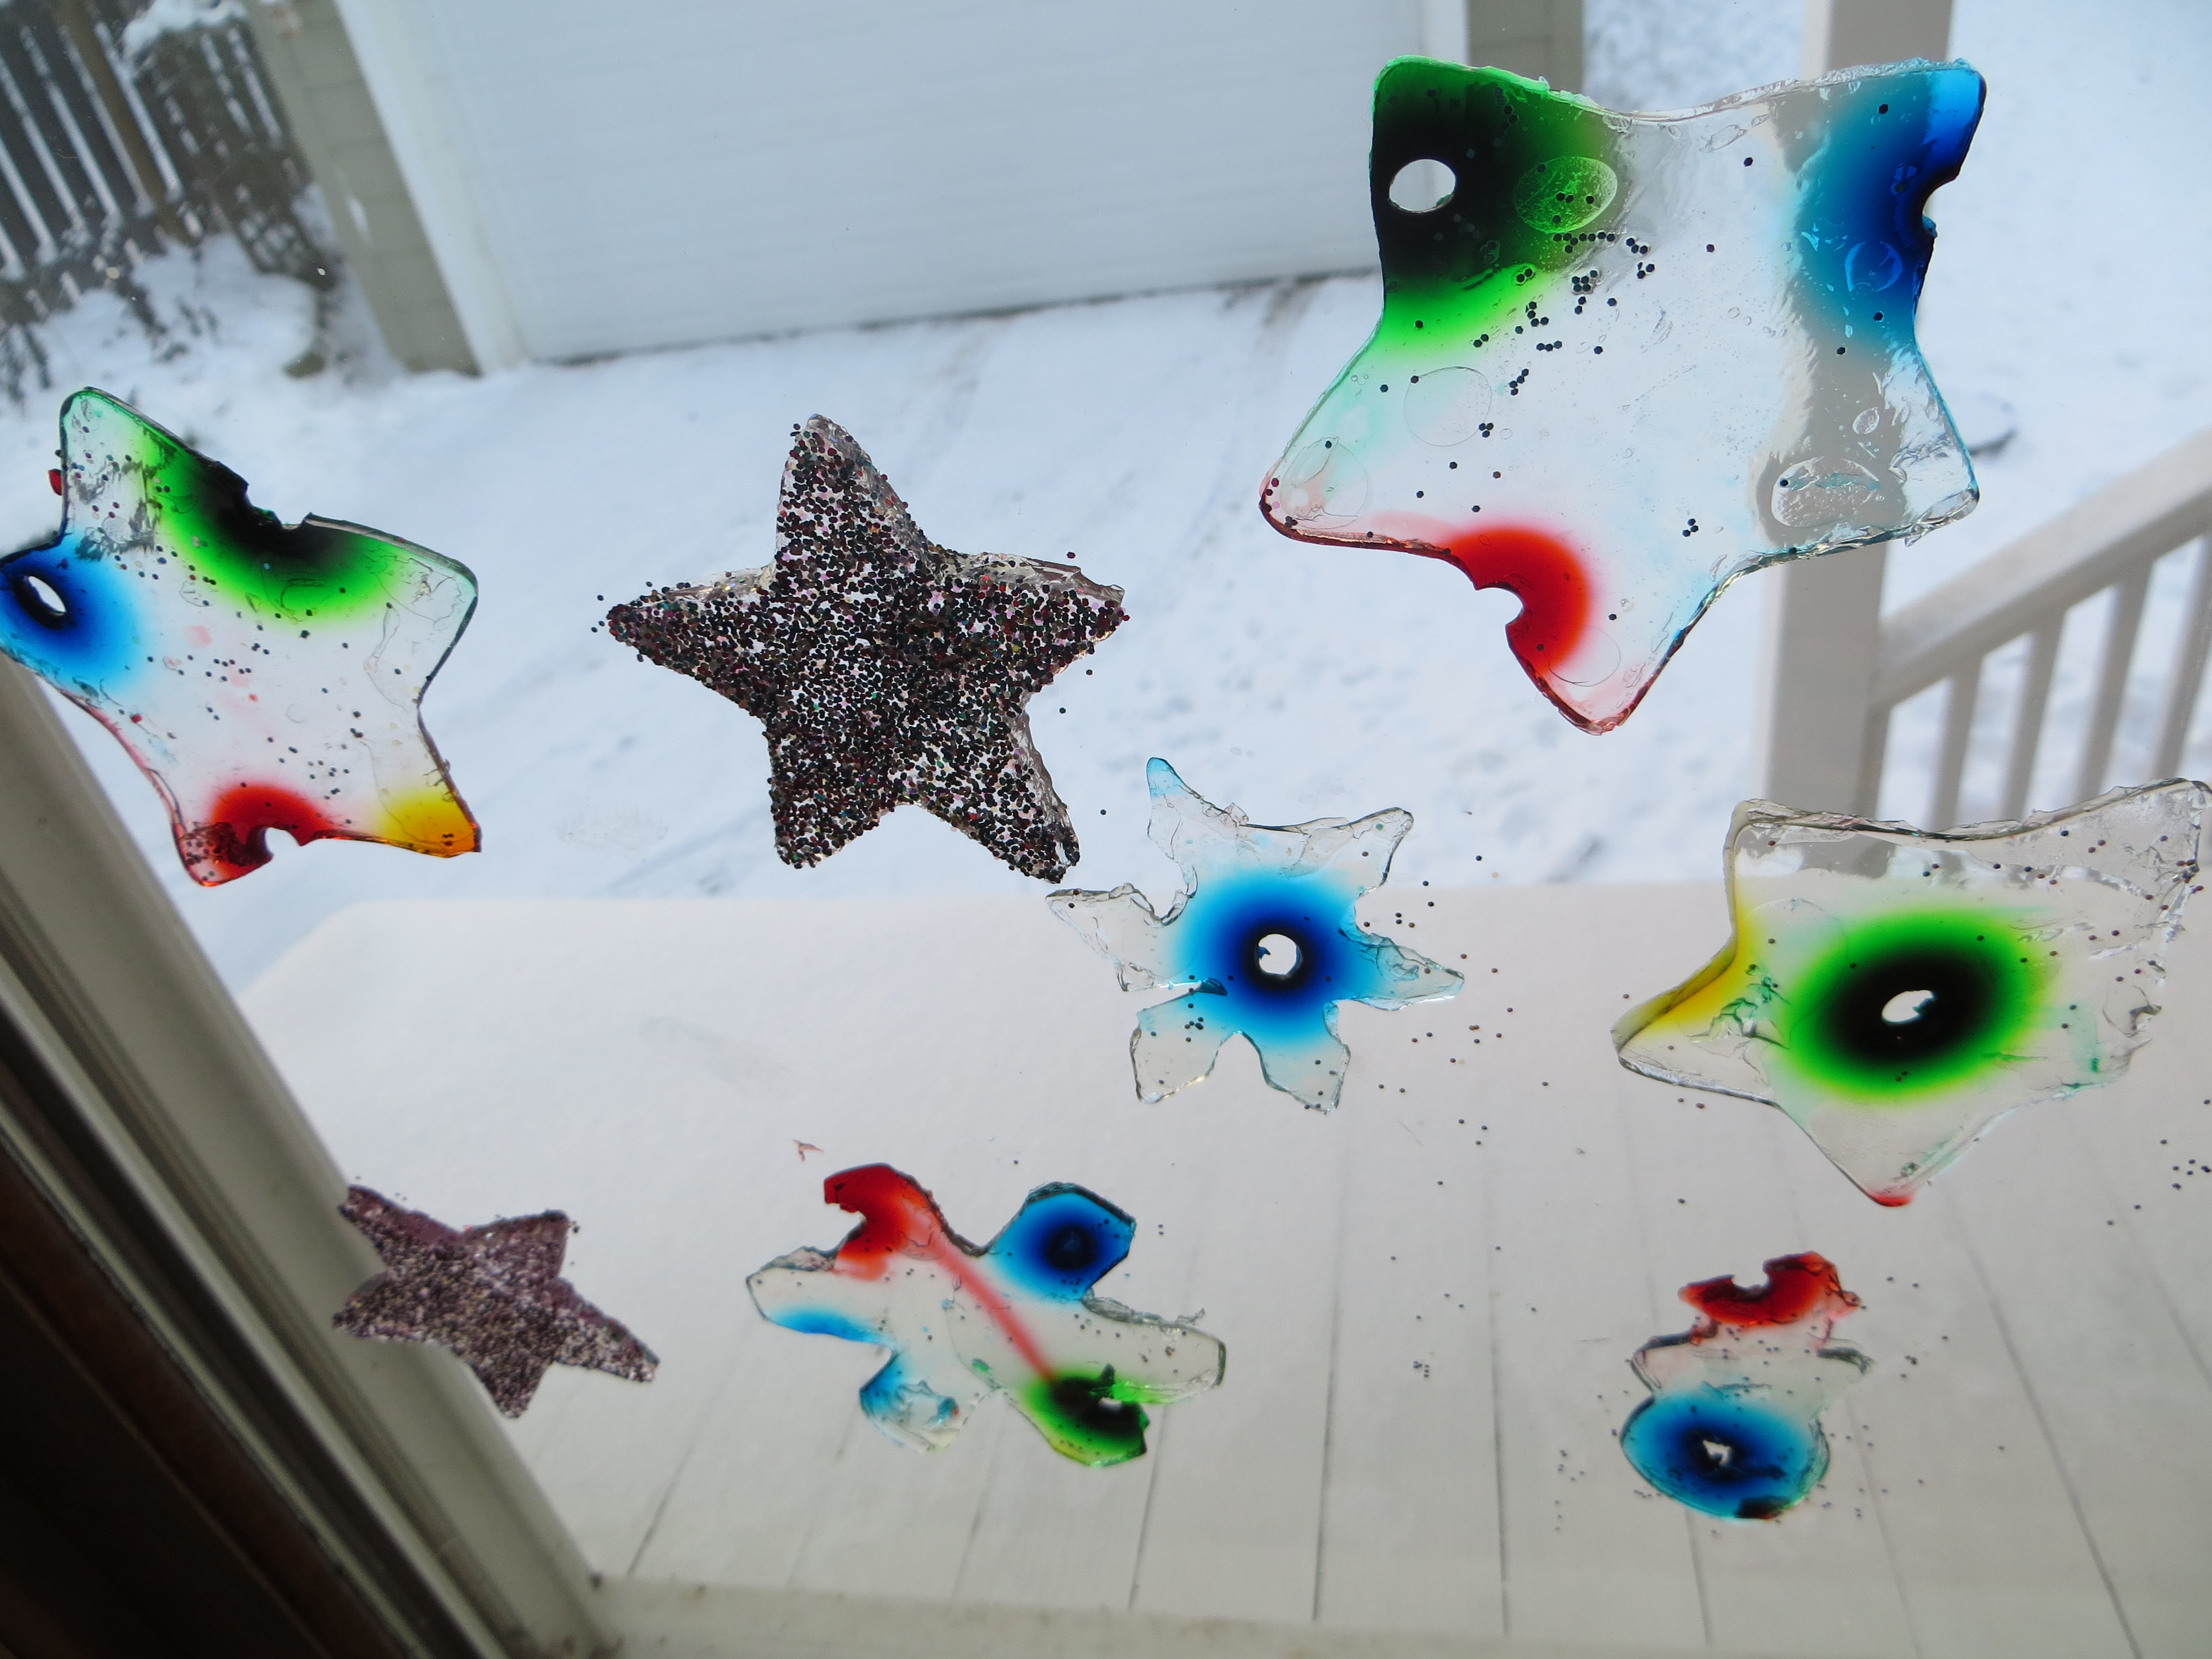
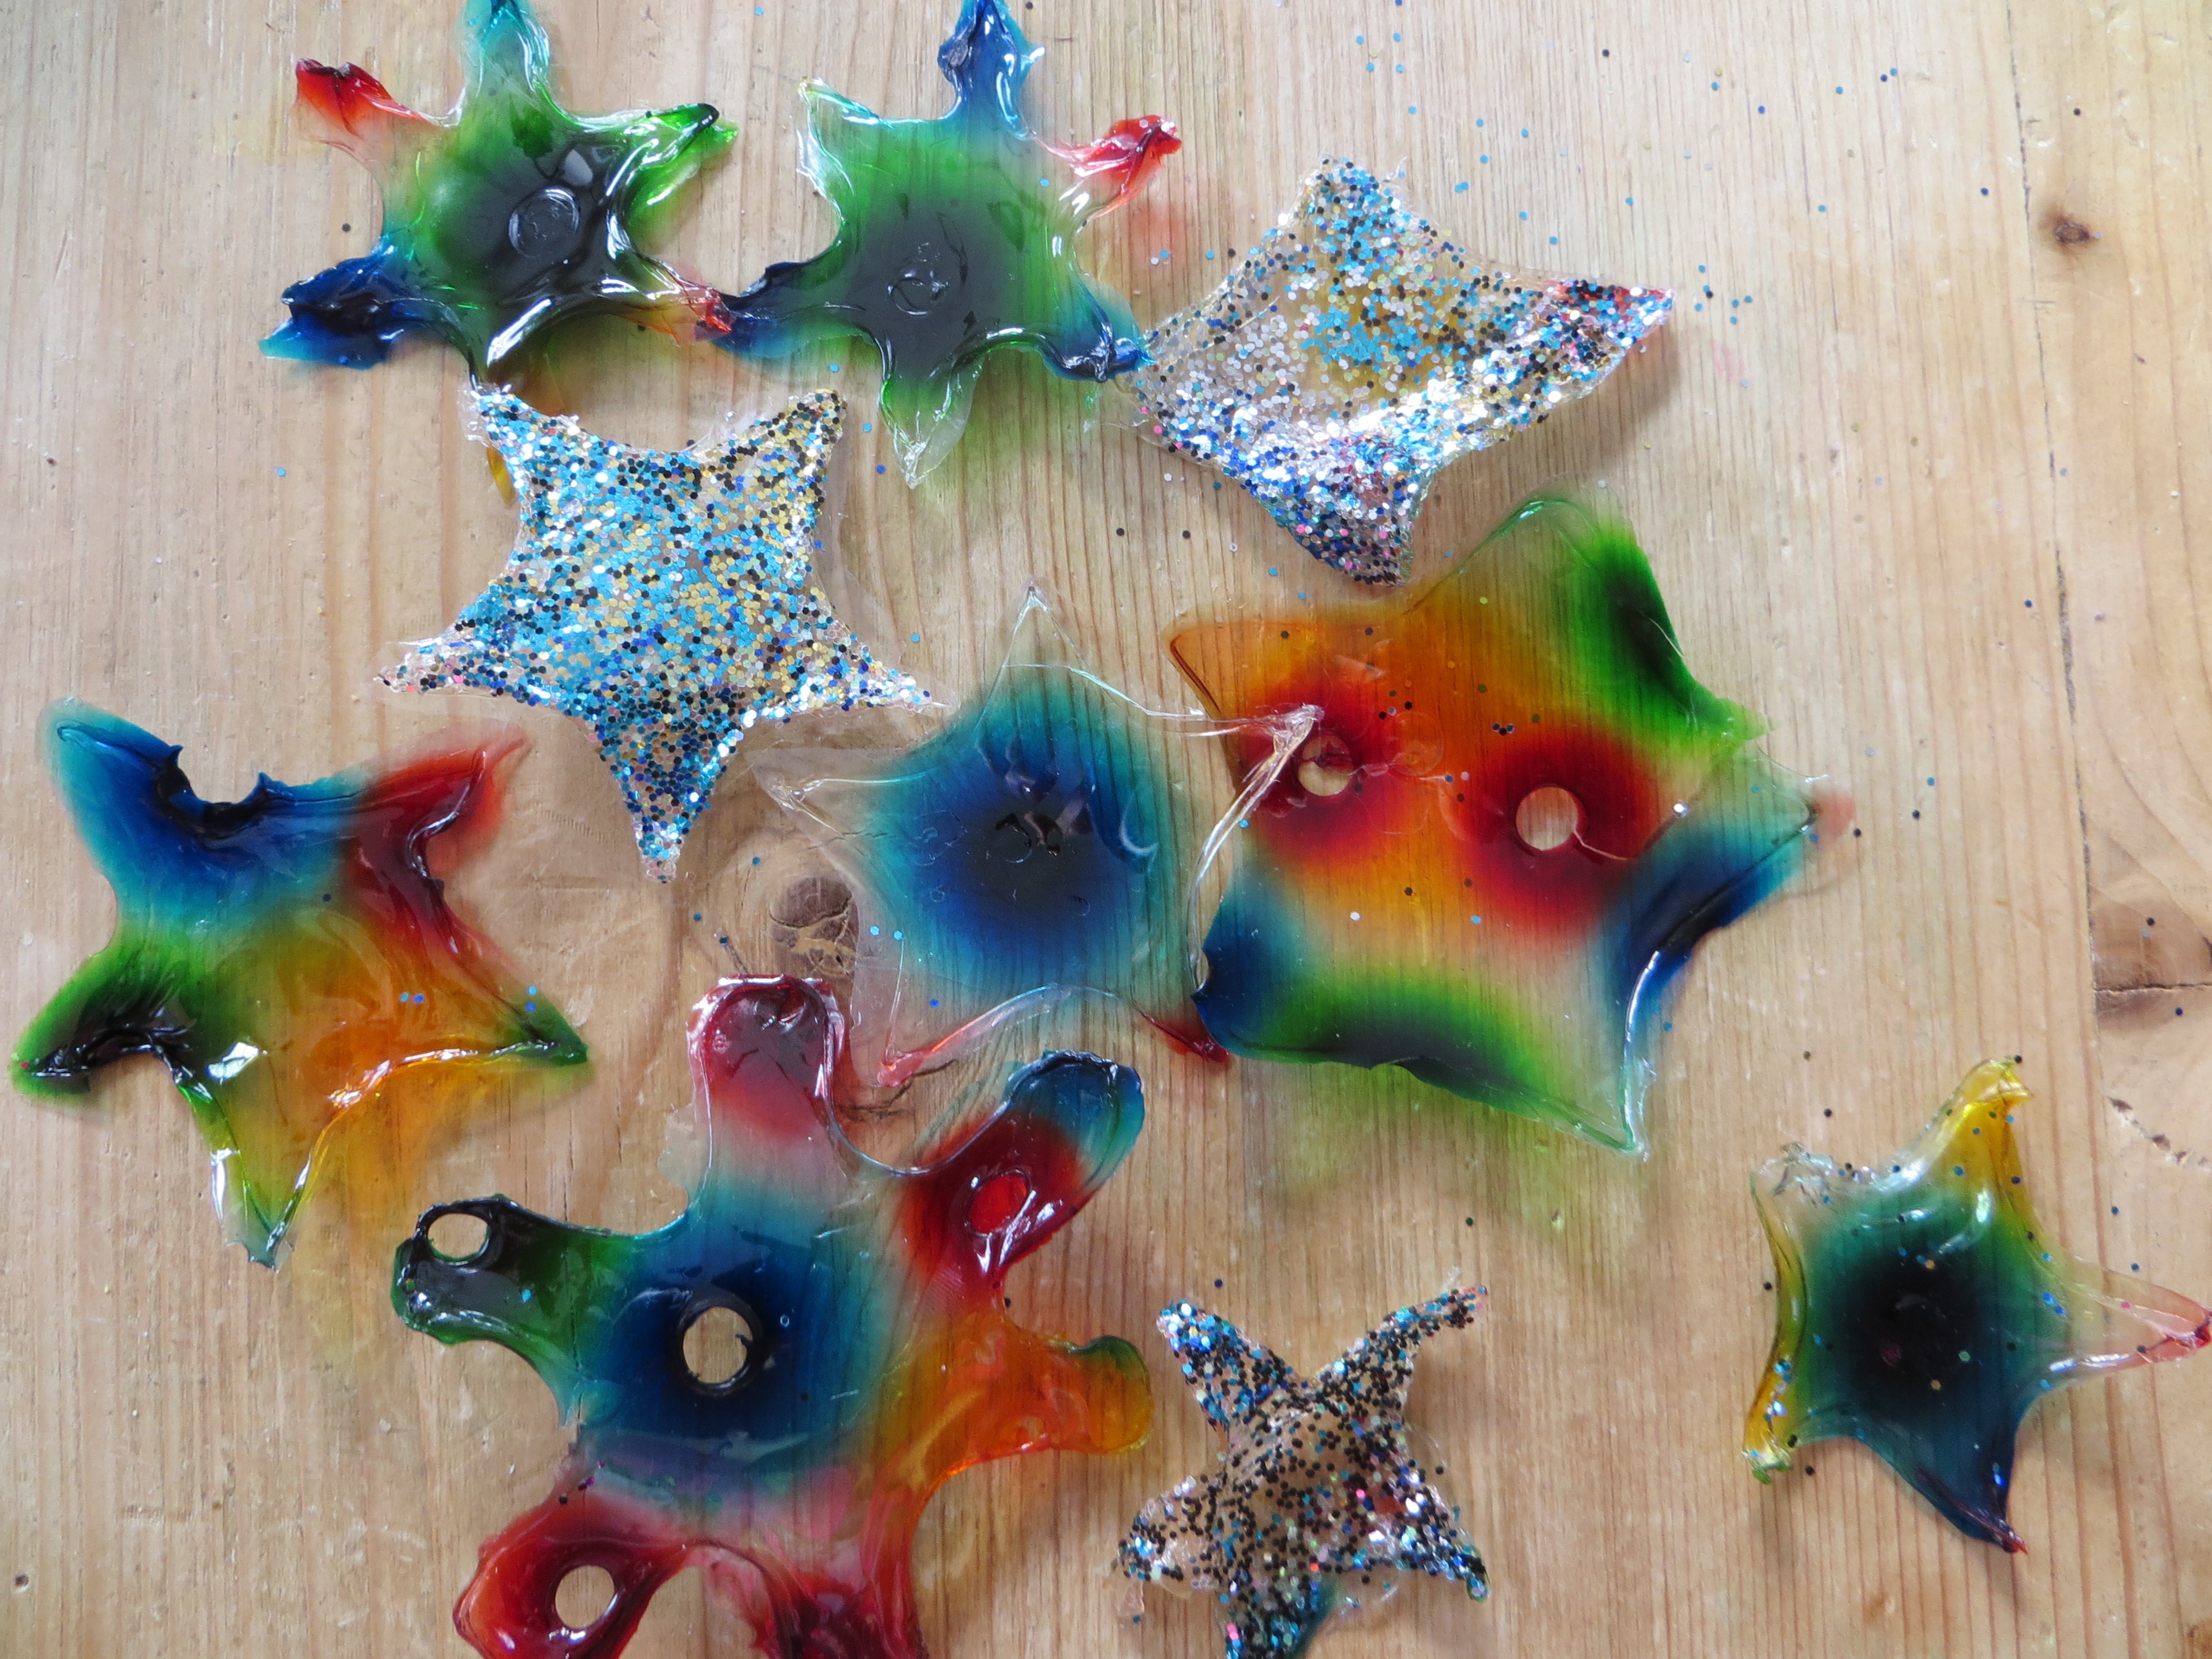
This creative science experiment that my kids and I invented lets you play with floatation physics by sprinkling glitter on melted gelatin, watch colorful dyes diffuse to create patterns and then use cookie cutters to punch out sticky window decorations. Water will evaporate from the gelatin, leaving you with paper-thin “stained glass” shapes.
You can watch us making them on Kare11 Sunrise News by clicking here.
You’ll need
-plain, unflavored gelatin from the grocery store or Target
-food coloring
–a drinking straw
-water
-a ruler
-glitter
*You can use the recipe below for two pans around 8×12 inches, or use large, rimmed cookie sheets for your gelatin. For a single pan, cut the recipe in half.
Step 1. Add 6 packs of plain, unflavored gelatin (1 oz or 28 gm) to 4 cups of boiling water. Stir well until all the gelatin has dissolved and remove bubbles with a spoon.
Step 2. Allow gelatin to cool to a kid-safe temperature. Pour the liquid gelatin into two large pans so it’s around 1-1.5 cm deep. It doesn’t have to be exact.
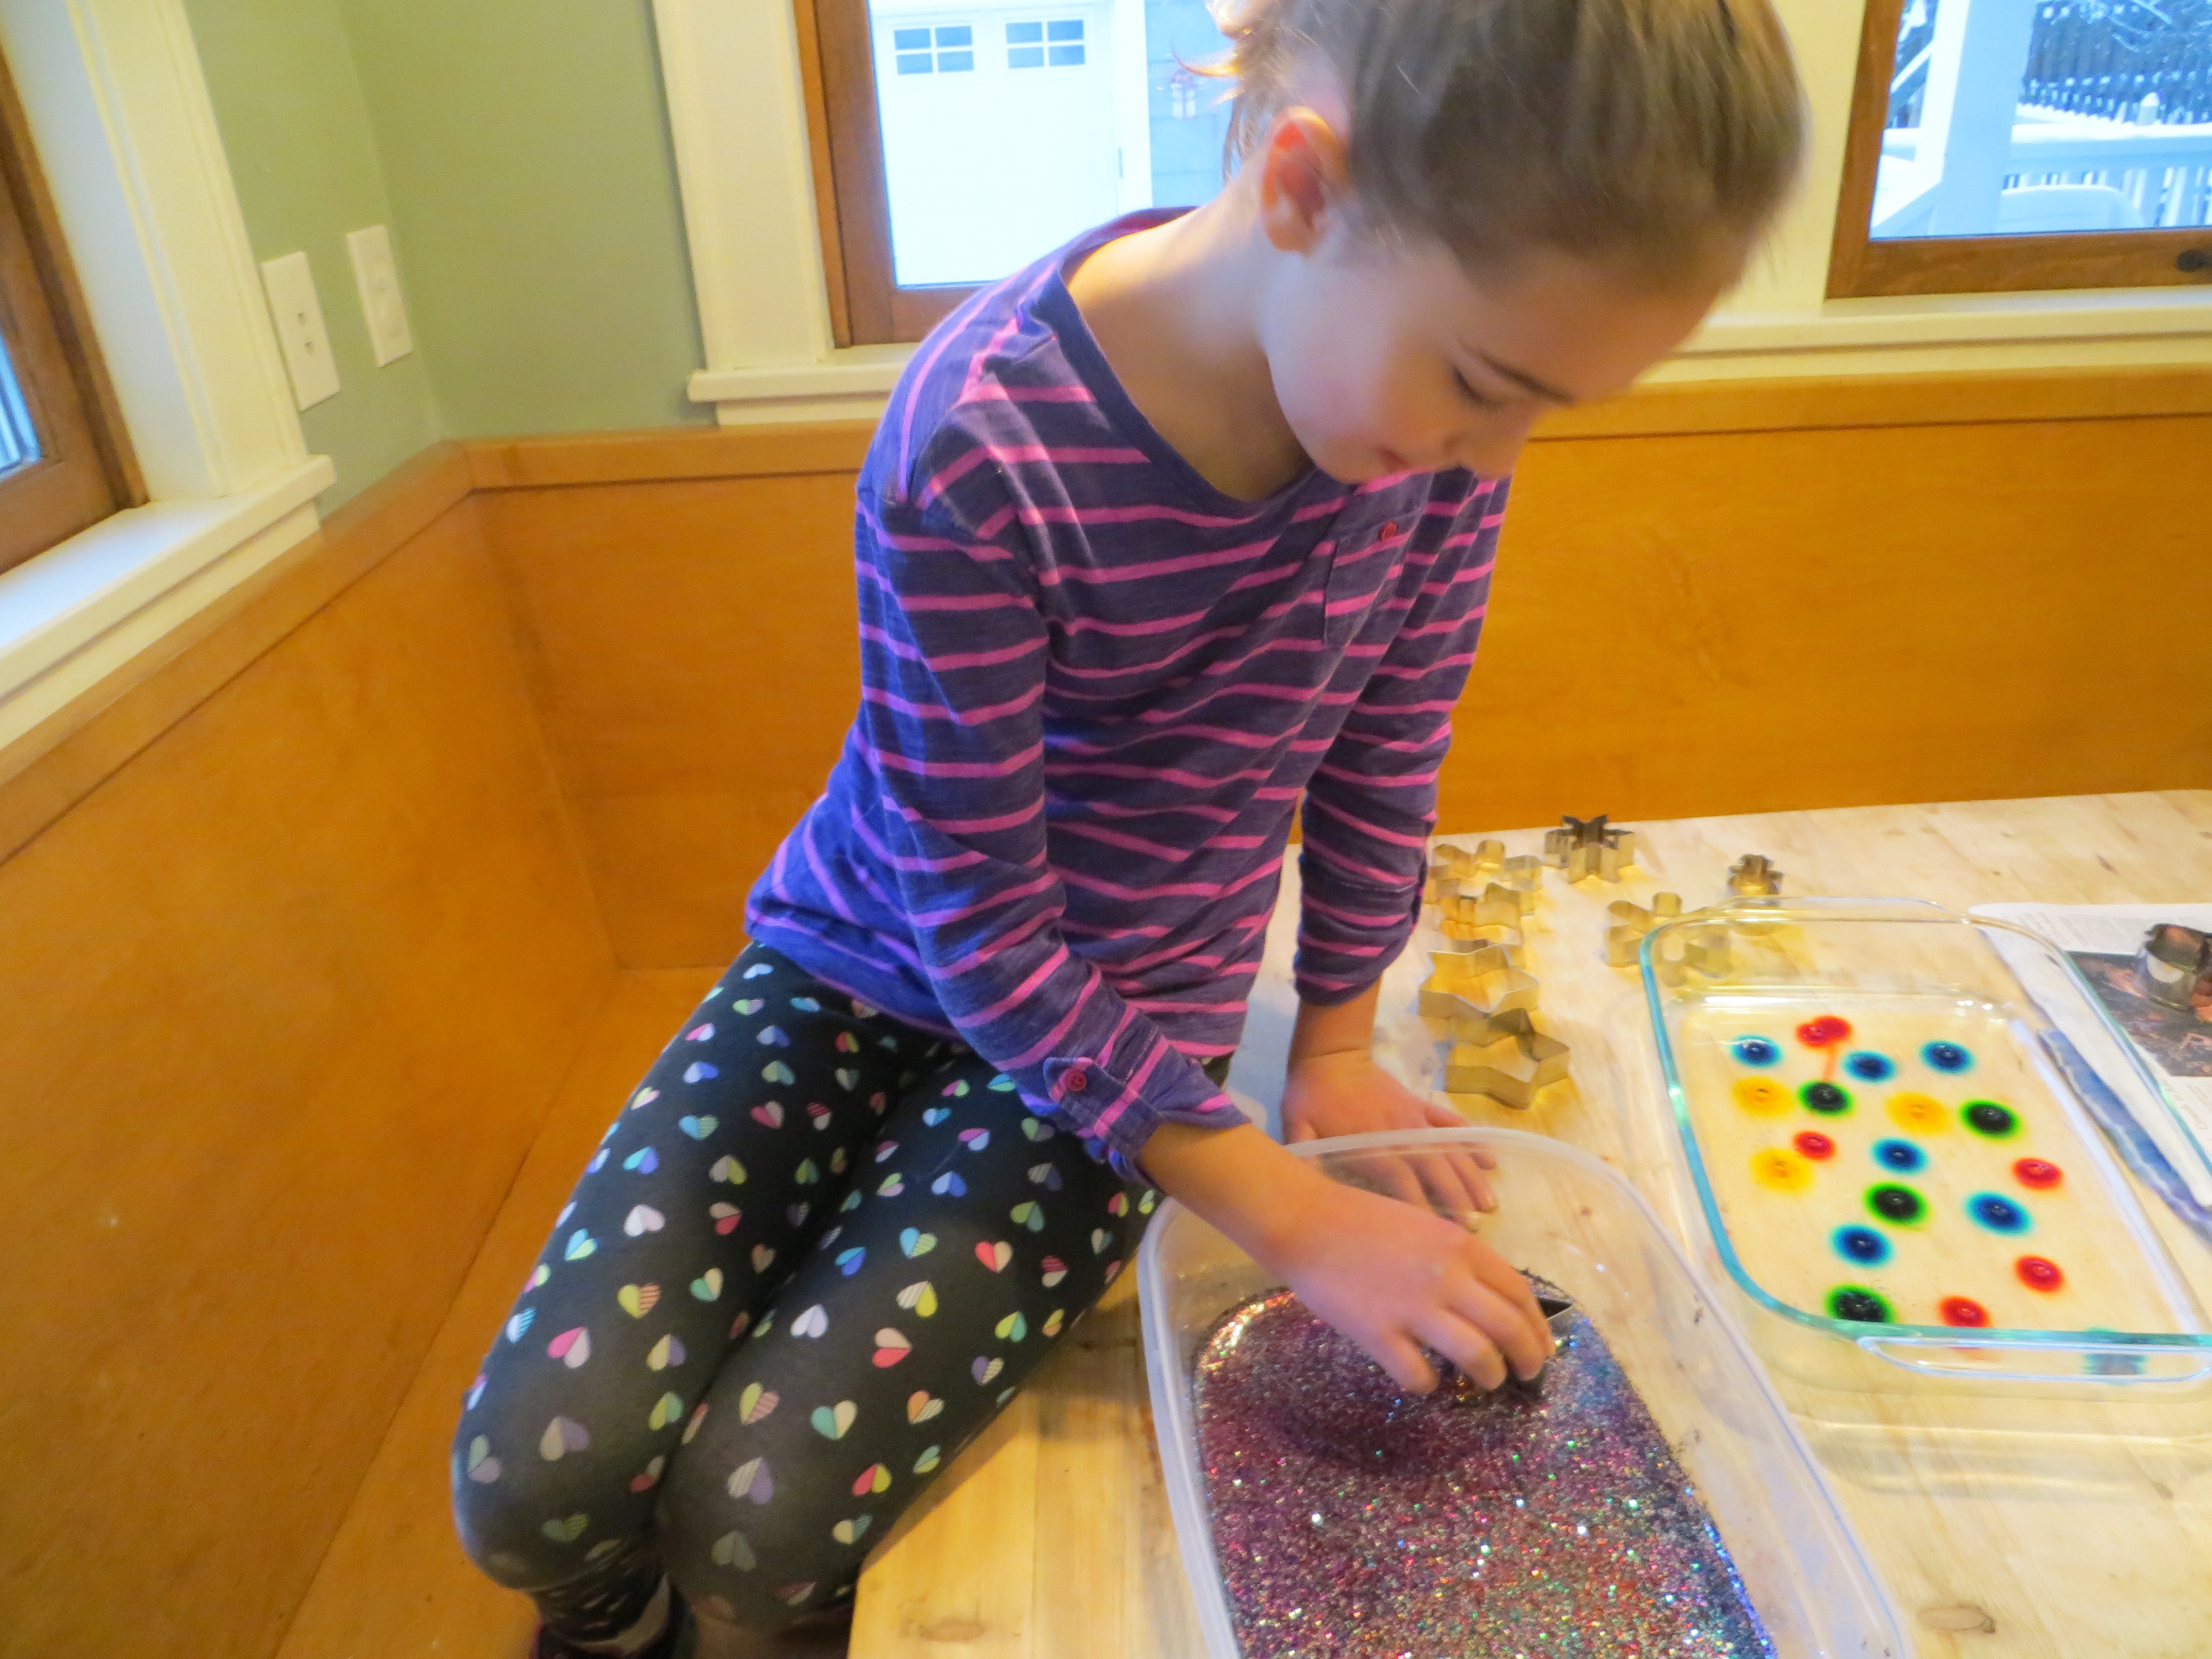
Step 3. Sprinkle glitter on the gelatin in one pan. What happens?

Step 4. Allow the gelatin to harden in both pans.
Step 5. In the pan with no glitter, use a straw to create holes in the gelatin, a few cm apart, scattered across the surface. It works best to poke a straw straight into the gelatin, but not all the way to the bottom. Spin the straw and remove it. Then, use a toothpick or skewer to pull out the gelatin plug you’ve created. This will leave a perfect hole for the food coloring. Very young children may need help.
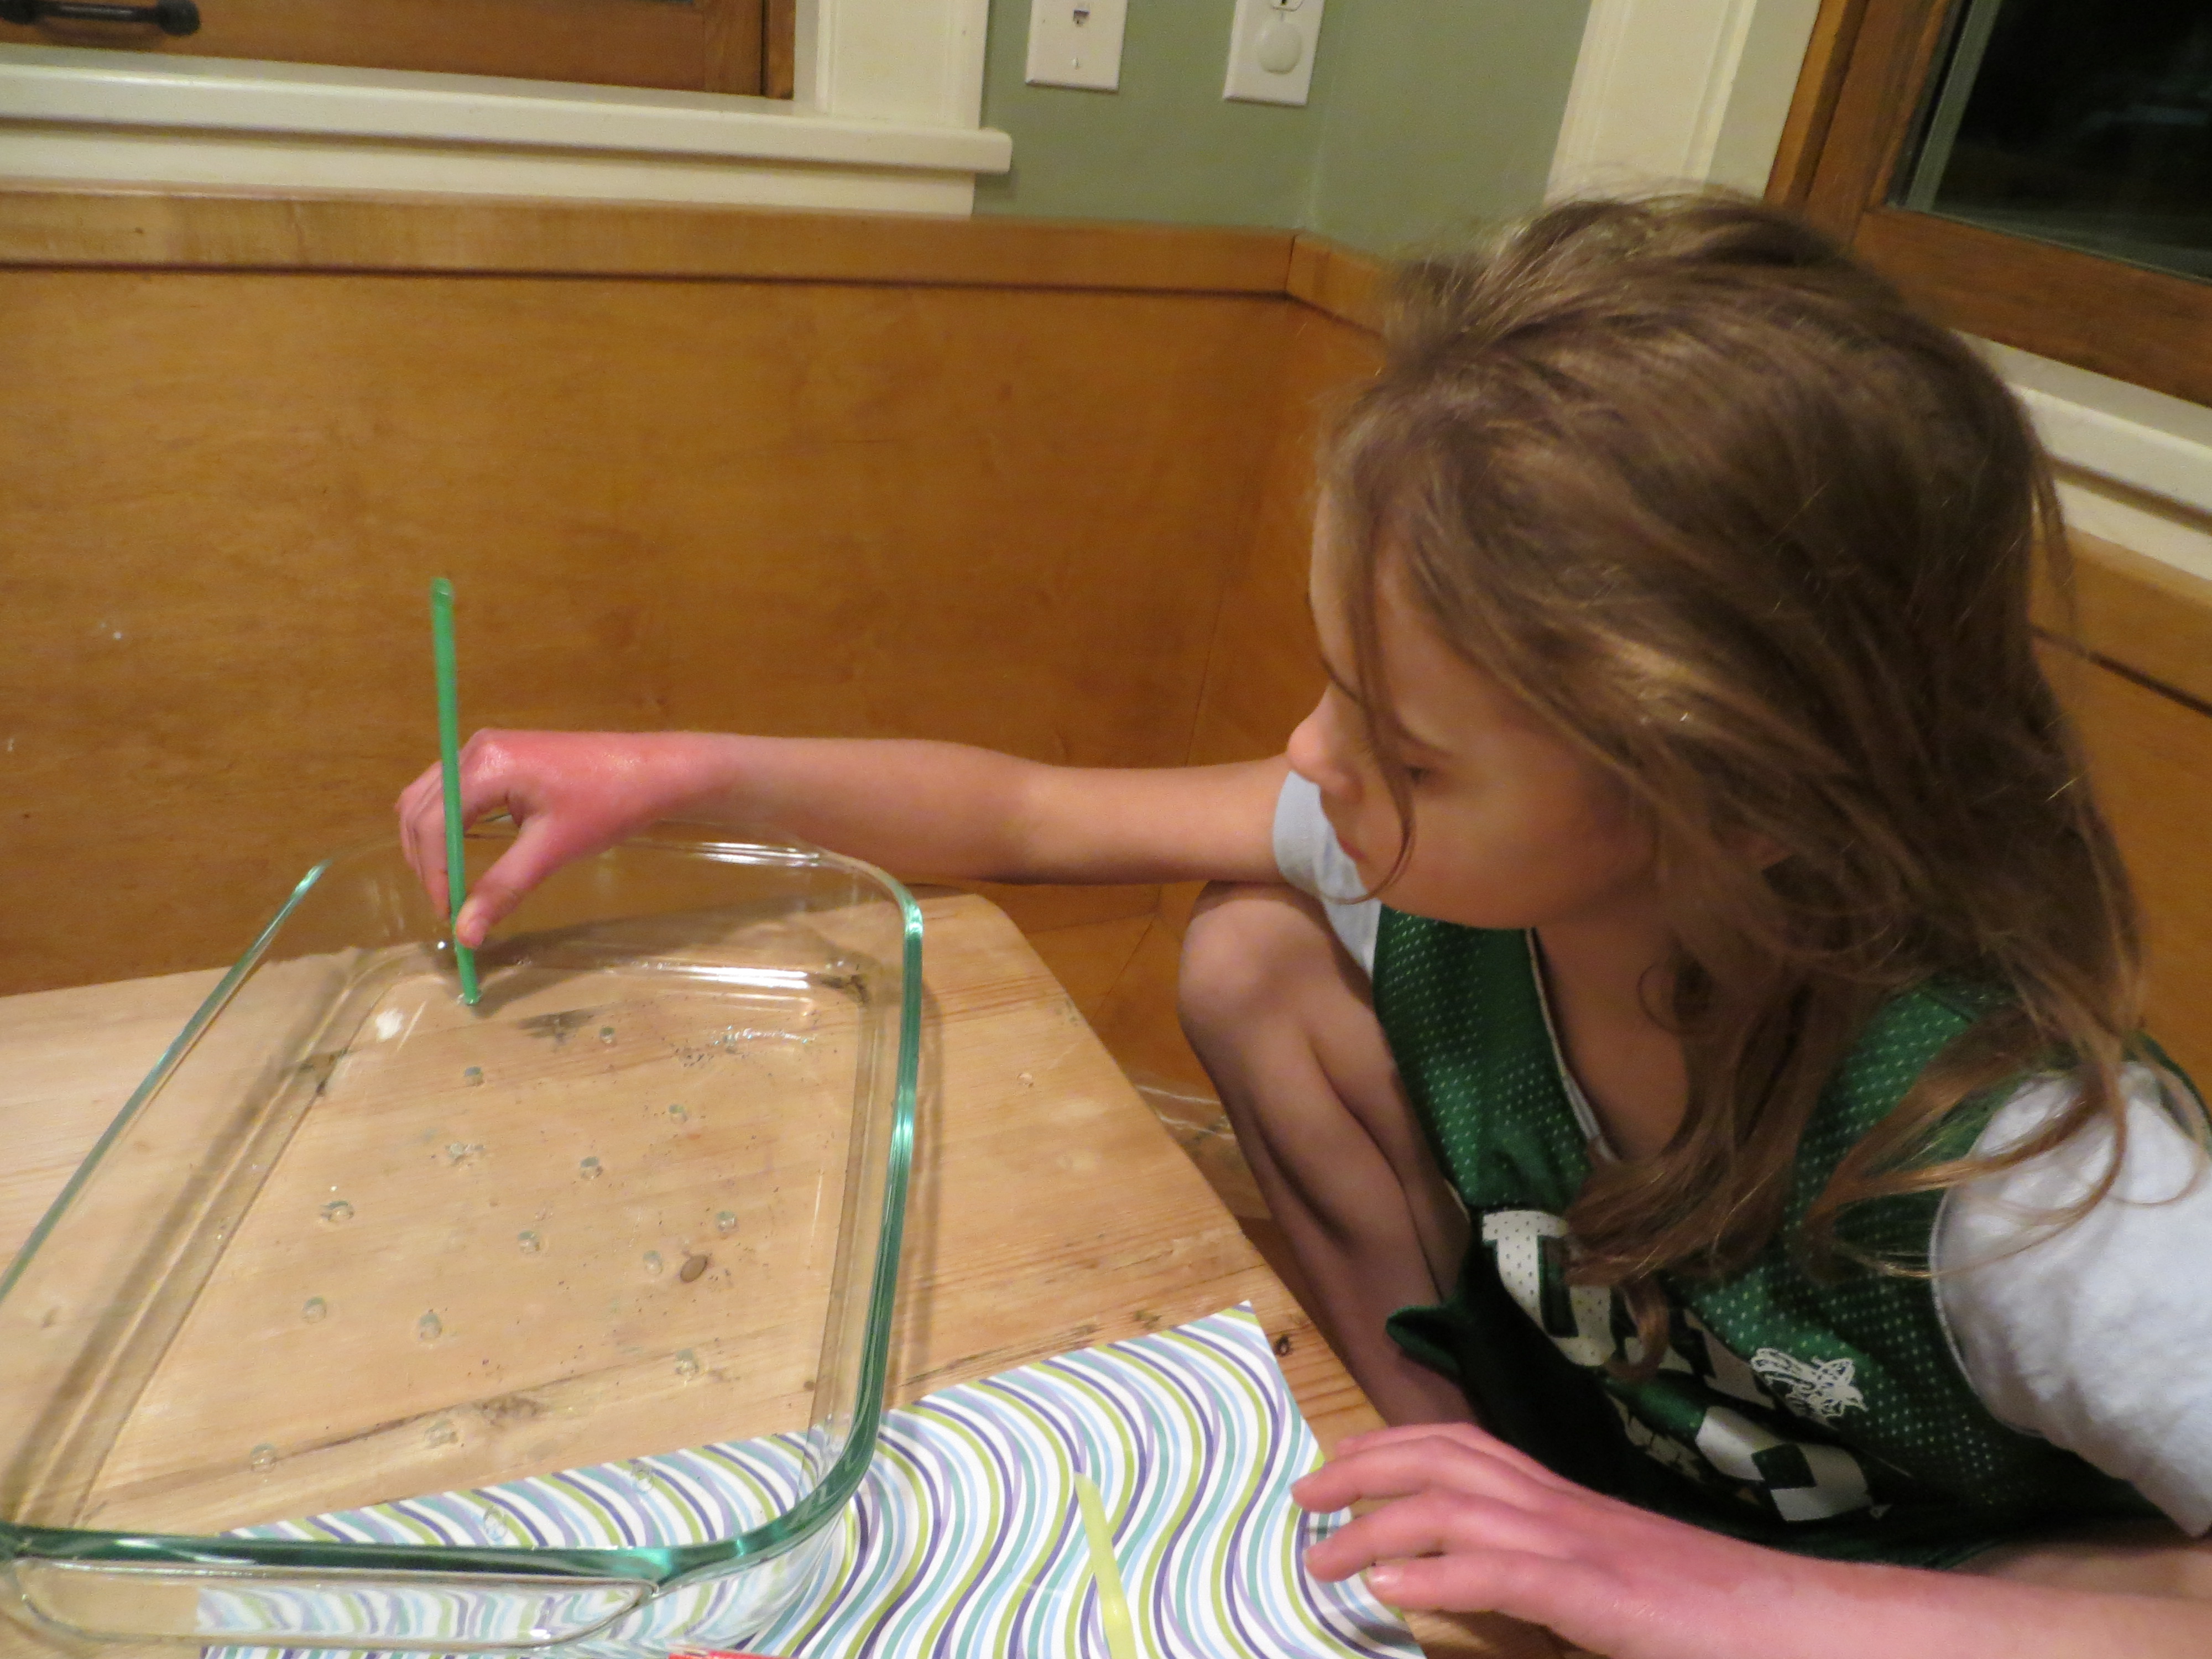
Step 6. Add a drop of food coloring to each hole in the gelatin.
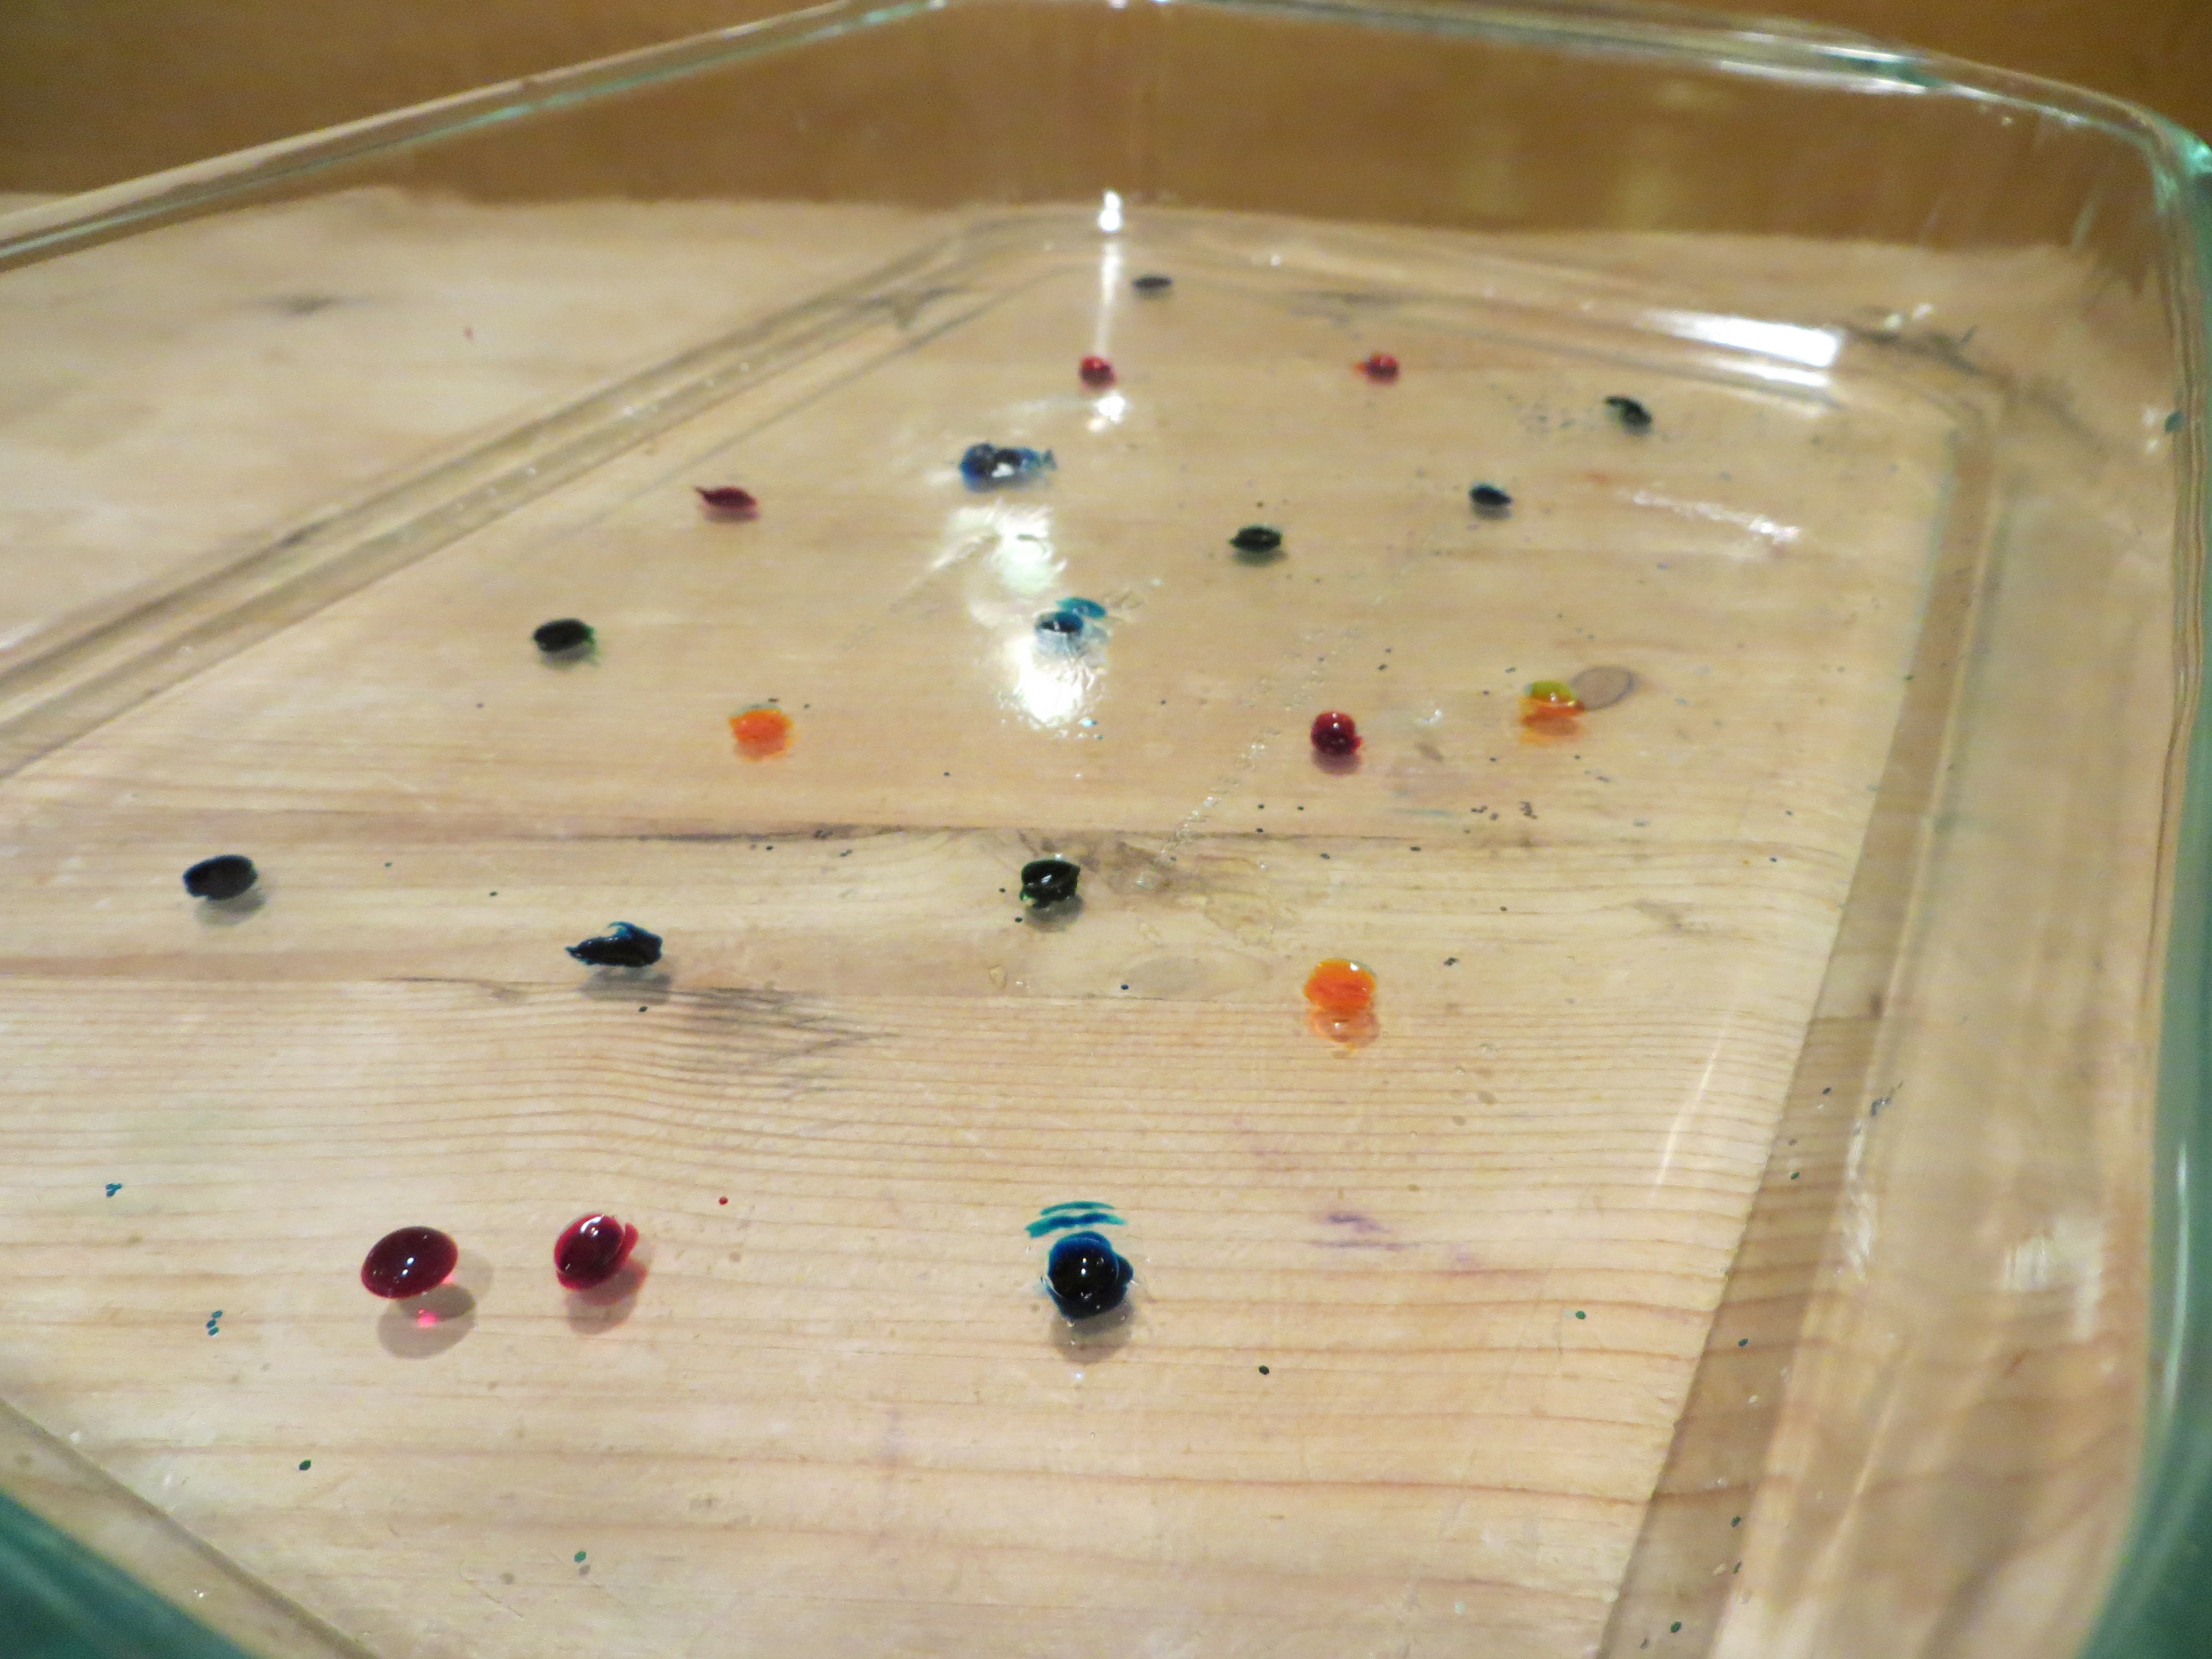
Step 7. Let the gelatin pans sit for 24 hours. Every so often, use a ruler to measure the circle of food coloring molecules as they diffuse (move) into the gelatin around them (read about diffusion at the bottom of this post.) How many cm per hour is the color diffusing? Do some colors diffuse faster than others? If you put one pan in the refrigerator and an identical one at room temperature, does the food coloring diffuse at the same rate?
Step 8. When the food coloring has made colorful circles in the gelatin, use cookie cutters to cut shapes from both pans of gelatin (glitter and food coloring), carefully remove them from the pan with a spatula or your fingers, and use them to decorate a window. (Ask a parent first, since some glitter may find its way to the floor!) Don’t get frustrated if they break, since you can stick them back together on the window.
Step 9. Observe your window jellies each day to see what happens when the water evaporates from the gelatin.
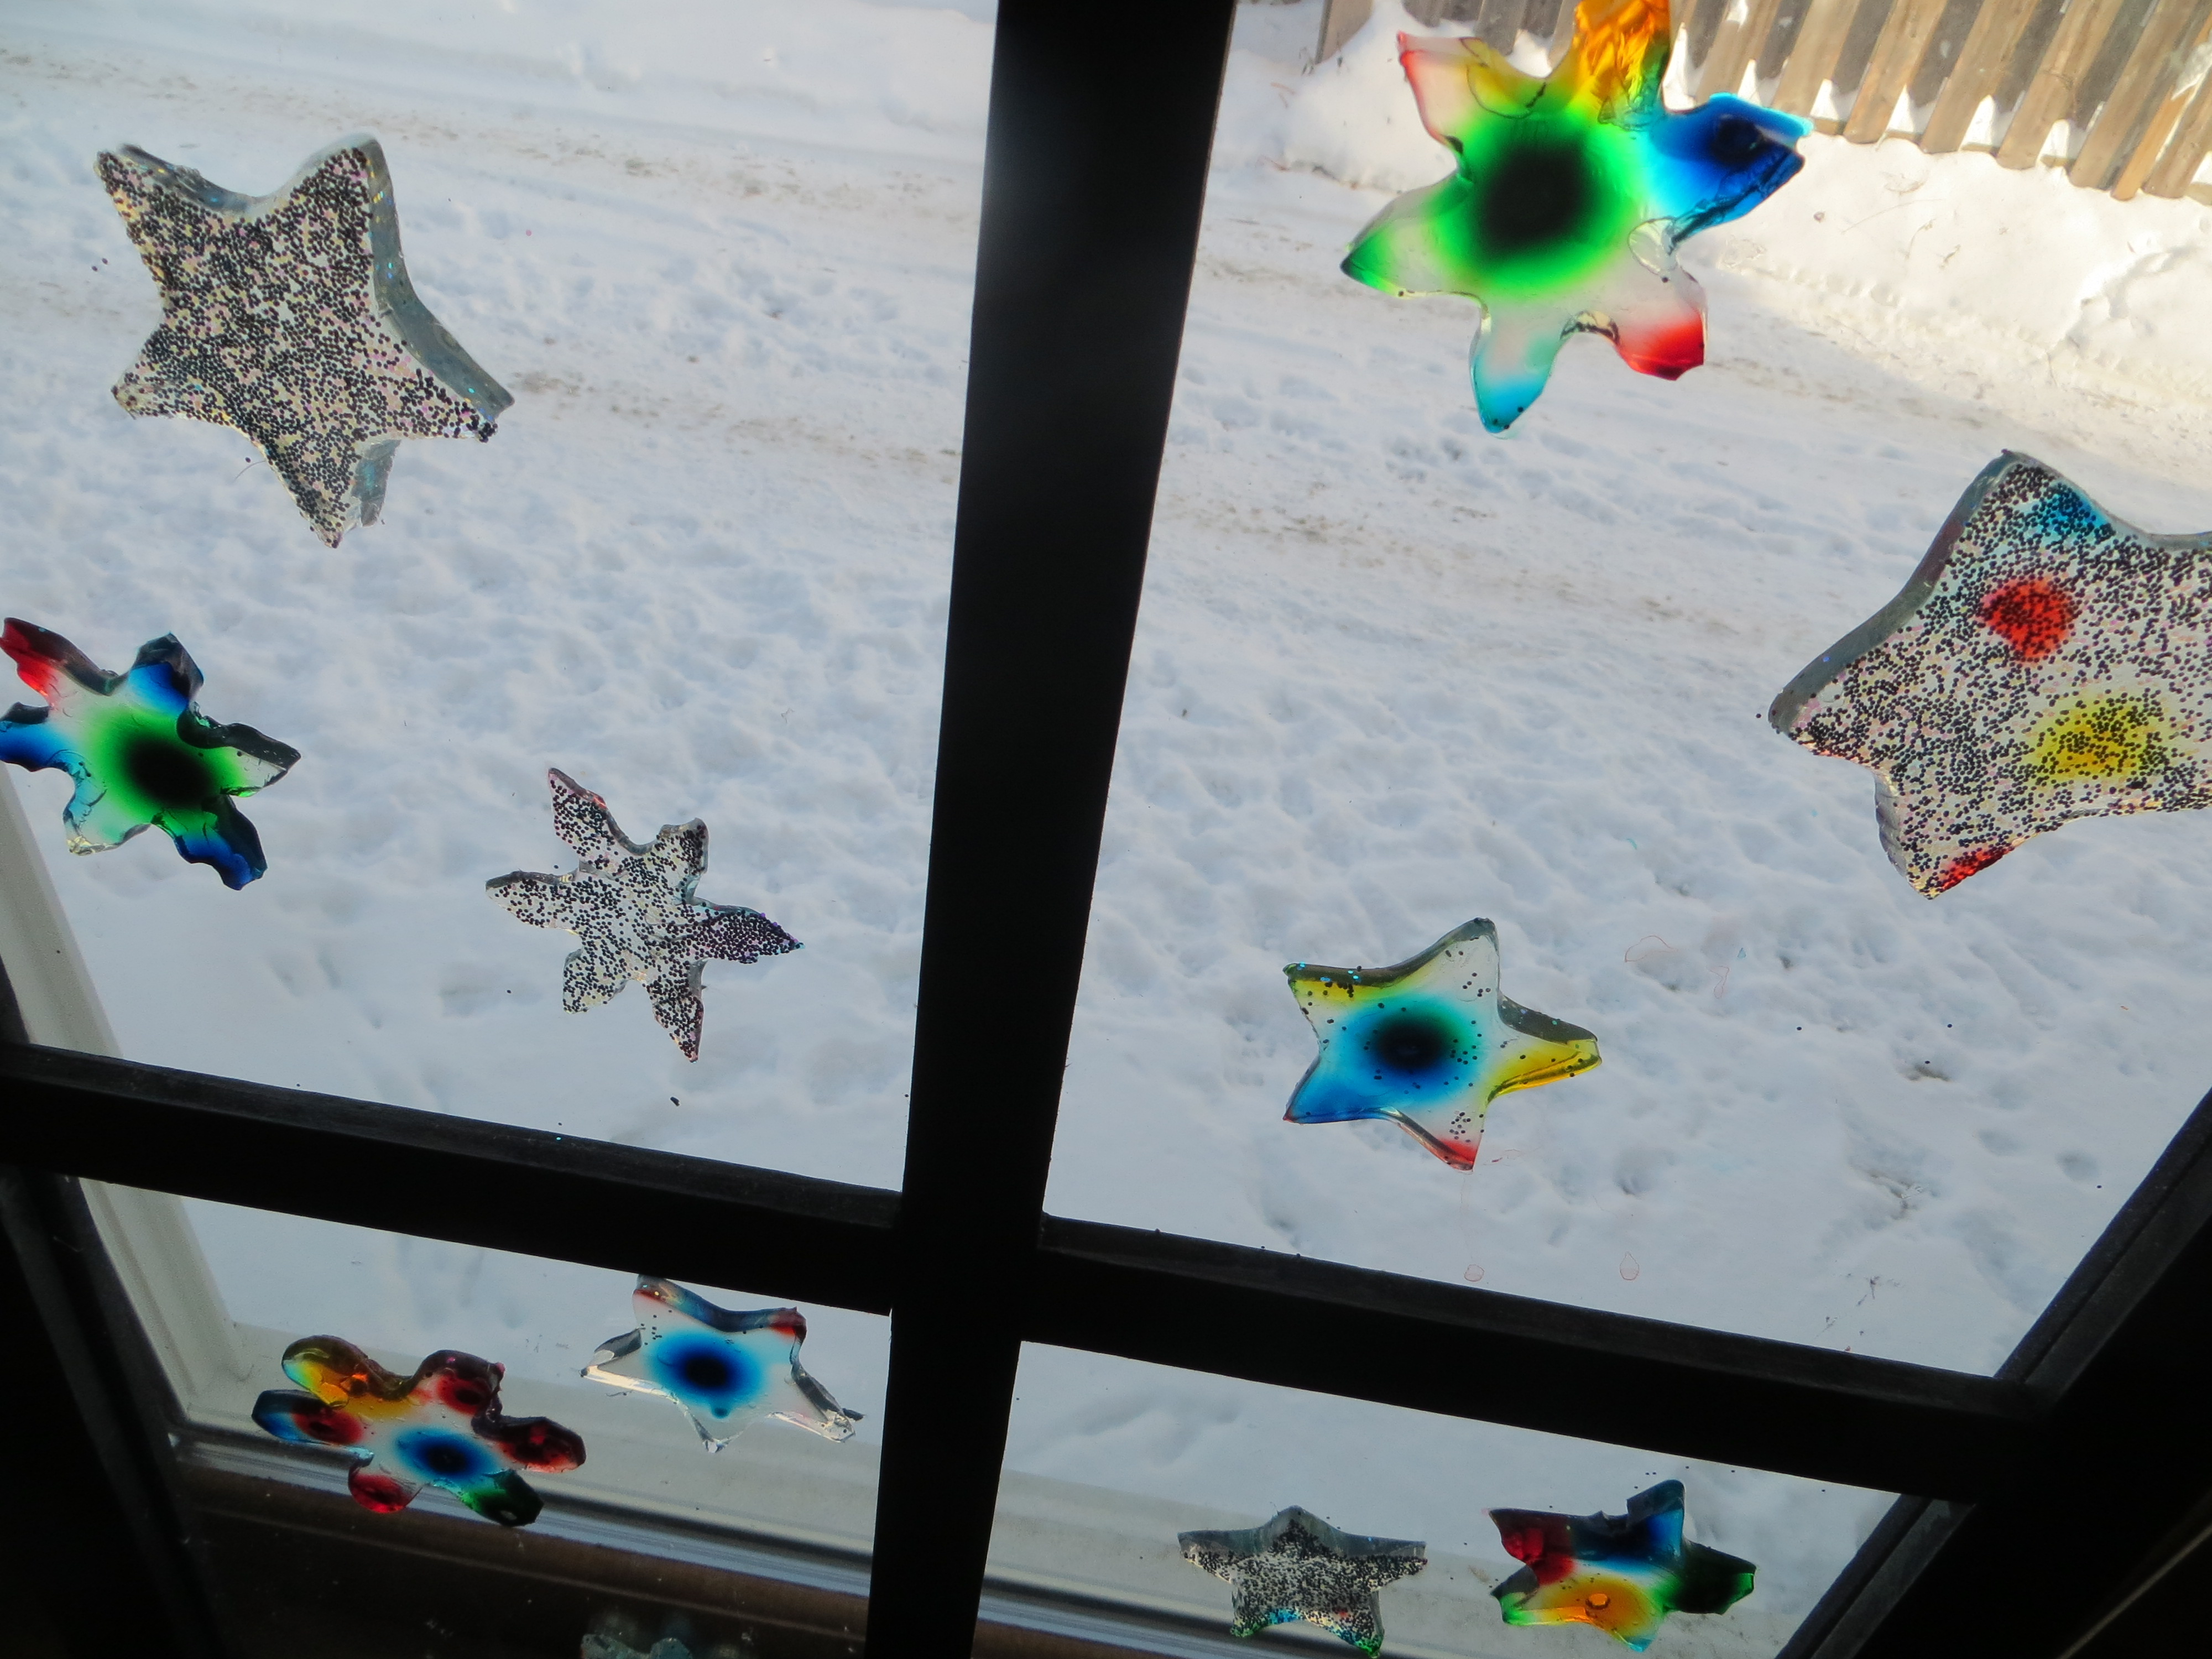 When they’re dry, peel them off the window. Are they thinner than when you started? Why? Can you re-hydrate them by soaking the dried shapes in water?
 The Science Behind the Fun:
Imagine half a box filled with red balls and the other half filled with yellow ones. If you set the box on something that vibrates, the balls will move around randomly, until the red and yellow balls are evenly mixed up.
Scientists call this process, when molecules move from areas of high concentration, where there are lots of other similar molecules, to areas of low concentration, where there are fewer similar molecules DIFFUSION. When the molecules are evenly spread throughout the space, it is called EQUILIBRIUM.
Lots of things can affect how fast molecules diffuse, including temperature. When molecules are heated up, they vibrate faster and move around faster, which helps them reach equilibrium more quickly than they would if it were cold. Diffusion takes place in gases like air, liquids like water, and even solids (semiconductors for computers are made by diffusing elements into one another.)
Think about the way pollutants move from one place to another through air, water and even soil. Or consider how bacteria are able to take up the substances they need to thrive. Your body has to transfer oxygen, carbon dioxide and water by processes involving diffusion as well.
Why does glitter float on gelatin? An object’s density and it’s shape help determine its buoyancy, or whether it will float or sink. Density is an object’s mass (loosely defined as its weight) divided by its volume (how much space it takes up.) A famous scientist named Archimedes discovered that any floating object displaces its own weight of fluid. Boats have to be designed in shapes that will displace, or push, at least as much water as they weigh in order to float.
For example, a 100 pound block of metal won’t move much water out of the way, and sinks fast since it’s denser than water. However , a 100 pound block of metal reshaped into a boat pushes more water out of the way and will float if you design it well!
What is the shape of your glitter? Does it float or sink in the gelatin?
Here’s a video I made for KidScience app that demonstrates how to make window gellies
Credit: My 11 YO daughter came up with the brilliant idea to stick this experiment on windows. I was just going to dry out the gelatin shapes to make ornaments. Kids are often way more creative than adults!
Butter Candles and Biofuel
- by KitchenPantryScientist
Biofuels are burnable energy sources produced by living organisms, like corn, algae, and even cows. Microorganisms and plants gather carbon from the atmosphere and incorporate it into the organic compounds that make up things like leaves, fruit, stems and wood. When animals eat plants and microbes, they store some of the carbon energy they’ve gobbled up as fat, like the milk fat used to make butter. Scientists call carbon stored in plants, microbes and animals “new” carbon. Old carbon is carbon tied up in fossil fuels like coal and oil, that’s been underground for millions of years.
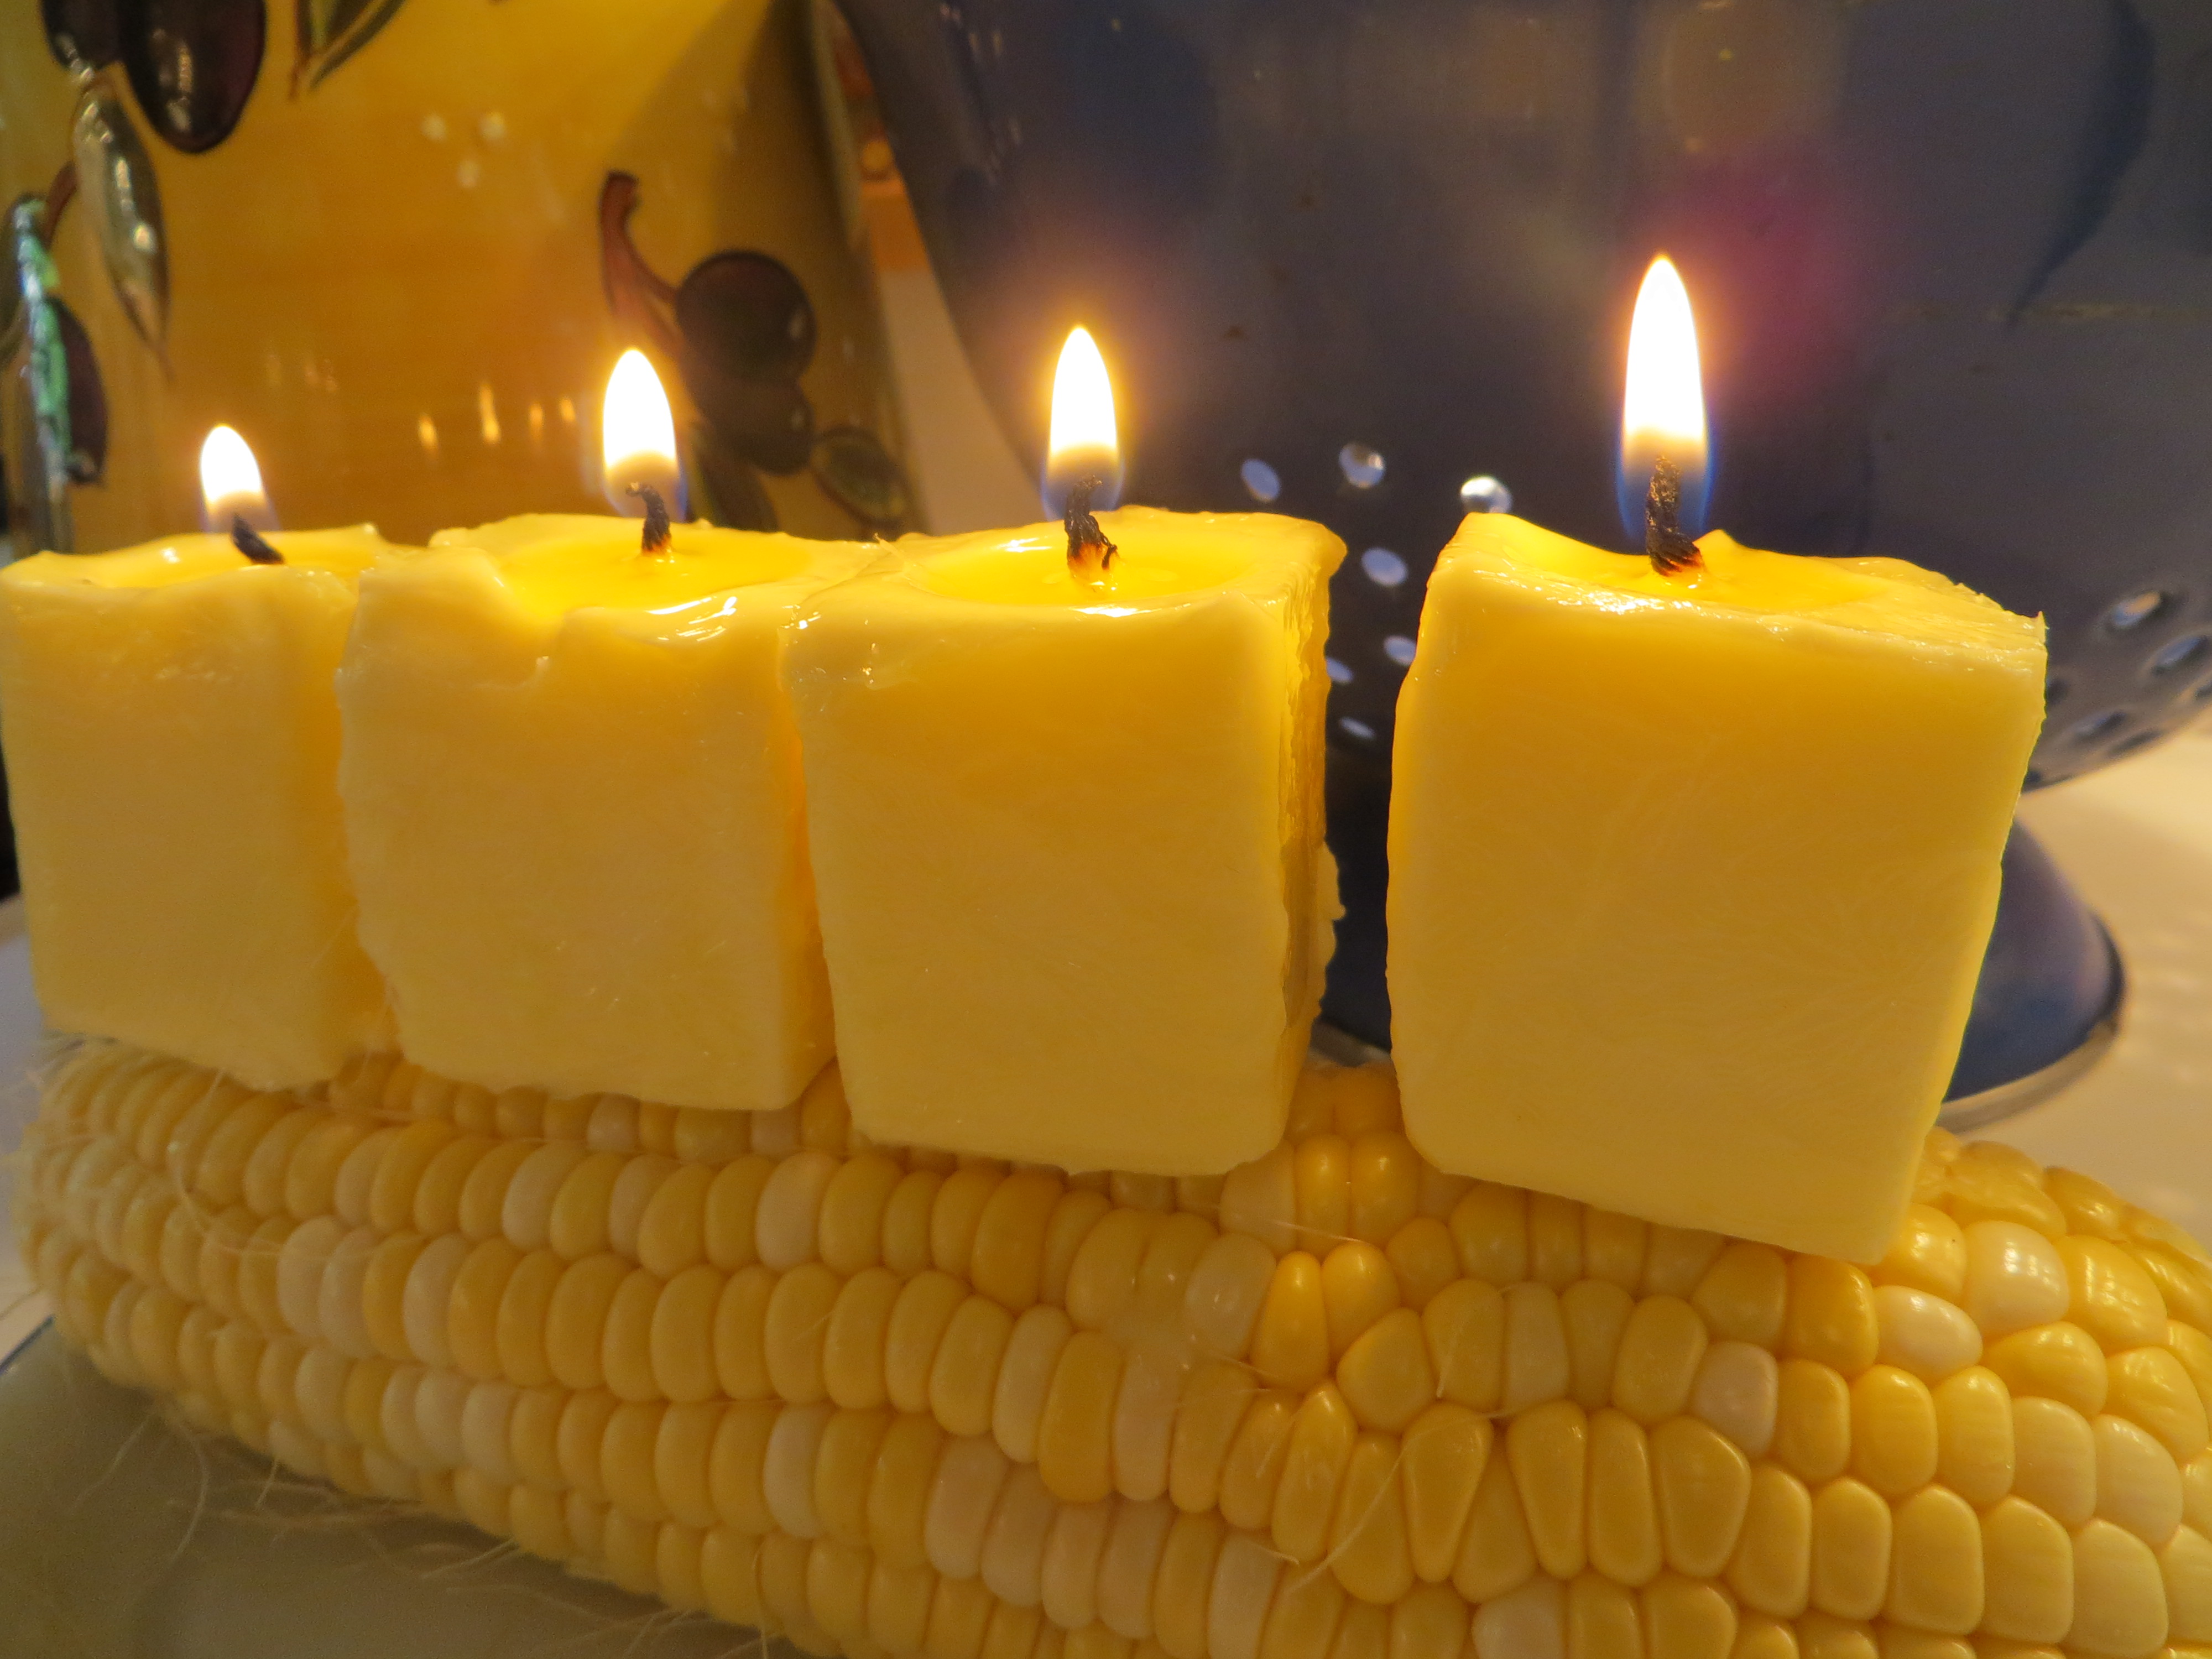
We used broken-off skewers to attach our butter candles to an ear of corn.
Although butter isn’t usually burned as a fuel, a Pennsylvania farm show recently converted their thousand pound butter sculpture into 3 days-worth of power for a local farm, using a methane digester. The New York State Fair turned its butter sculptures into biodiesel fuel. At home, you can make a stick of butter into a candle to see for yourself how an animal product can be used as a fuel.
To make butter candles you’ll need a stick of butter, a toothpick or skewer, some cotton kitchen twine and scissors.
1. Cut the butter into the size candles you want. Place your candles on a fire-proof surface, like a metal plate.
2. Cut pieces of string slightly longer than the height of your candles.
3. Use a skewer or toothpick to poke a hole from the top of your candle to near the bottom.
4. Push your string into the hold using your skewer or toothpick. Leave 1/4 inch or so sticking out. This is your candle wick.
5. Rub a little butter onto the wick. Light your candle. It may take a few tries, but soon it should burn like a wax candle.
*As with all candles, butter candles should never be left unattended. Be sure to place your candles on a surface like a candle holder that cannot catch fire.
What happens? The lit cotton wick starts to burn and liquefies some of the butter fat. The wick then absorbs the melted butter and pulls it up,via capillary action, to the flame. The flame starts to burn the fat vapors rather than the wick, in a combustion reaction. This reaction produces heat, water vapor and carbon dioxide gas, putting the carbon is back in the atmosphere.
Since burning food isn’t an efficient use of energy or money (it takes lots of oil to raise and care for a cow,) scientists are coming up with ways to turn animal fats and byproducts that can’t be used as food into biofuels. Some inedible plant foods can be reused as well. For example, some cars can run on used cooking oil. Can you imagine how much oil a fast food restaurant throws away each week?
Although butter will never replace candle wax, butter candles are a good way to introduce the carbon cycle and get kids thinking about how new fuels and cleaner-burning fuel will impact the future of our planet.
To make the corn candle at the top of this post, we attached the butter candles to an ear of corn with broken off wooden skewers.
The Kaye Effect
- by KitchenPantryScientist
Have you ever wondered why it’s so hard to get ketchup flowing out of a bottle, or why no-drip paint doesn’t drip?

Ketchup, no drip paint, liquid soaps and shampoos are all part of a really amazing category of fluids known as “shearing liquids.” These fluids are pretty thick when they’re sitting still, but they get thinner or more “liquidy” as they flow, because movement decreases their viscosity, or thickness, making them more slippery.
Back in 1963, an engineer named Arthur Kaye noticed streams of liquid shooting from the surface below a stream of shearing liquid he was working with. This strange, short-lived phenomena became known as the Kaye effect.
With a chair, tape, some dish soap and a plastic ziplock bag, you can do your own Kaye effect experiment at home and watch soap jets shoot like ski jumpers from the very slippery shearing liquid soap pile below
-Tape a plastic ziplock bag to a chair with one corner or the bag pointed toward a plate underneath. The bag corner nearest the floor should be around 20 cm (about a foot) from the floor.
-Fill the bag with liquid soap or dish detergent. We added a few drops of food coloring to ours.
-Cut off the corner of the bag closest to the floor with scissors to make a tiny hole for the soap to flow through (1mm.) You may have to make it a little bigger, but you want a very thin, steady stream of soap flowing to the plate.
-Watch for jumping streams of soap. If it’s not working, try changing soap and adjusting bag hole size and bag height! What happens if you put the plate below at an angle?
To learn more about the Kaye effect and other cool physics stuff, visit Dr. Skyskulls’ website. He’s the physicist who told me about this experiment and helped me work out the protocol.
Surface Tension in Space
- by KitchenPantryScientist
If you’ve done an experiment where you drip water onto a penny, or made Tie Dye Milk, you know what surface tension looks like here on Earth. How does it look in space?
Here’s an amazing video demonstrating how the surface tension of water looks in zero gravity on the international space station. Fascinating!
Photosynthesis Experiment
- by KitchenPantryScientist
Plants are wonderful chemical reorganizers. Using the sun’s energy and a process called photosynthesis, they can turn water and carbon dioxide into sugar (glucose) and oxygen.
Thanks to plants and other autotrophs like algae, Earth has an oxygen-containing atmosphere that can sustain animal and human life.
To watch plants make oxygen, all you need is a water plant like Elodea (available at pet stores), a large container, water and a few small clear glasses or test tubes.

Fill the large container with water and turn your small, clear containers on their sides underwater to remove all the air bubbles.
Cut a branch off of your plant, place it under water in the large container, shake off any air and put it under your small, clear container- stem side up. Invert the small container, allowing no air to enter it. Repeat the experiment with your other small clear container, but don’t add a plant. This is your control. If you’re using test tubes, you can put them in small cups or beakers so they don’t tip over. (See photo above.)

Place your experiment in bright sunlight or near a strong lamp and observe what happens. You should see oxygen bubbles form on the plant as it performs photosynthesis. In a test tube, you will eventually see some water displaced by oxygen.
What happens if you duplicate the experiment in a room with no light?
Tap water contains some carbon dioxide. How do you think the experiment would work with lake or pond water?
Egg Science: Standing on Raw Eggs
- by KitchenPantryScientist
Here’s the video we made last weekend for KidScience app that shows you how to stand on a carton of raw eggs without breaking them:
Remember, Force is pressure per unit of area. In the video, you’ll see what happens when you try to stand on eggs in high heels and the force isn’t evenly distributed.
Epic Fail: Sneeze Experiment
- by KitchenPantryScientist
One of the first things you learn when you do science is that experiments don’t always turn out the way you hope they will. And that’s OK. If at first you don’t succeed….
We tried to measure how far a sneeze would throw visible droplets by putting grape juice in our mouths and tickling our noses with feathers dipped in pepper. Sadly, no matter how hard we tried, we couldn’t seem to sneeze with grape juice in our mouths. Laughing so hard we spit the juice out was one unexpected outcome. We decided to try it again in the future using petri dishes spaced at intervals to avoid the grape juice problem.
Since there was no school today and it was ten degrees below zero (F), we tried throwing boiling water into the air to see if it would freeze before it hit the ground. Once again, our experimental conditions were less than perfect, and although some of the water froze into an icy cloud, the majority hit the ground with a splash. The experiment would have worked better at -20F, but it was still fun!
Ice Science Video
- by KitchenPantryScientist
Salt lowers the melting/freezing temperature of ice, which is the solid form of water. Here’s a fun experiment you can do to see for yourself how Sodium Chloride (table salt) makes ice melt and water refreeze on a string, allowing you to “magically” lift an ice cube from a glass of water.
Click here for detailed instructions and more about the science.
This video will soon appear on KidScience app‘s Premium version, which allows you to easily search for experiments and videos based on kids’ ages, type of science, what you have on hand, or how much time you have.