Tag: egg’
Five Ways Kids Can Decorate Eggs Using Science
- by KitchenPantryScientist
It’s fun to create colorful, swirling marbled designs on eggs, and there’s science behind the fun! Here’s a brief description of each. Click on the blue titles for more instructions and science explanations.
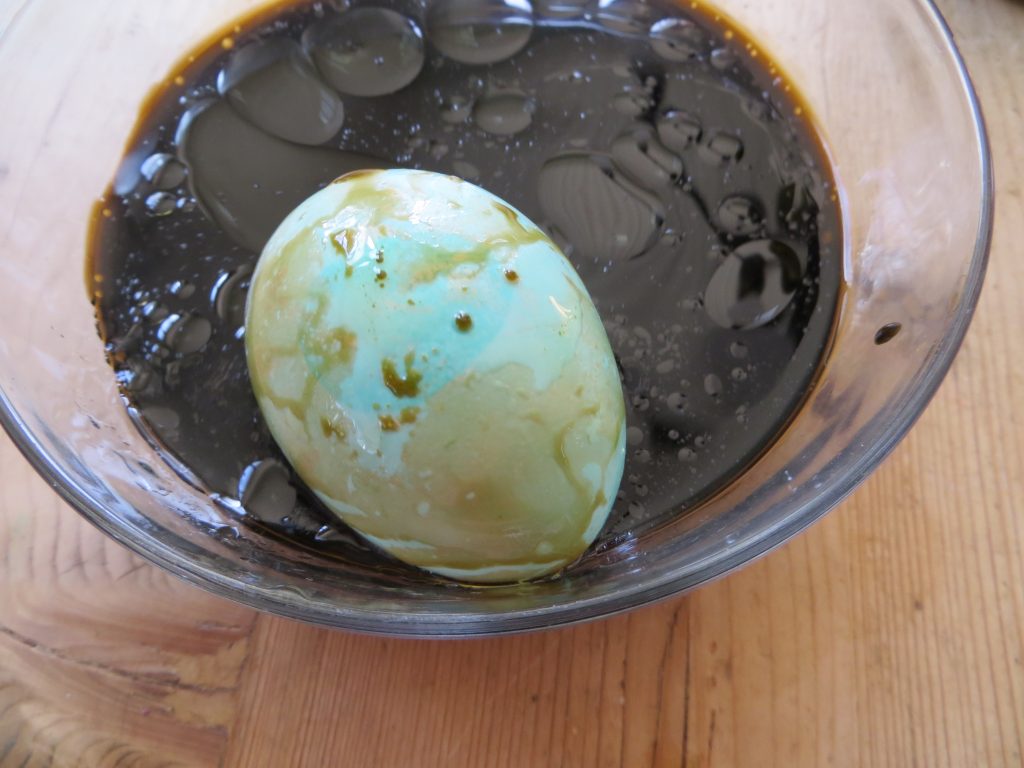
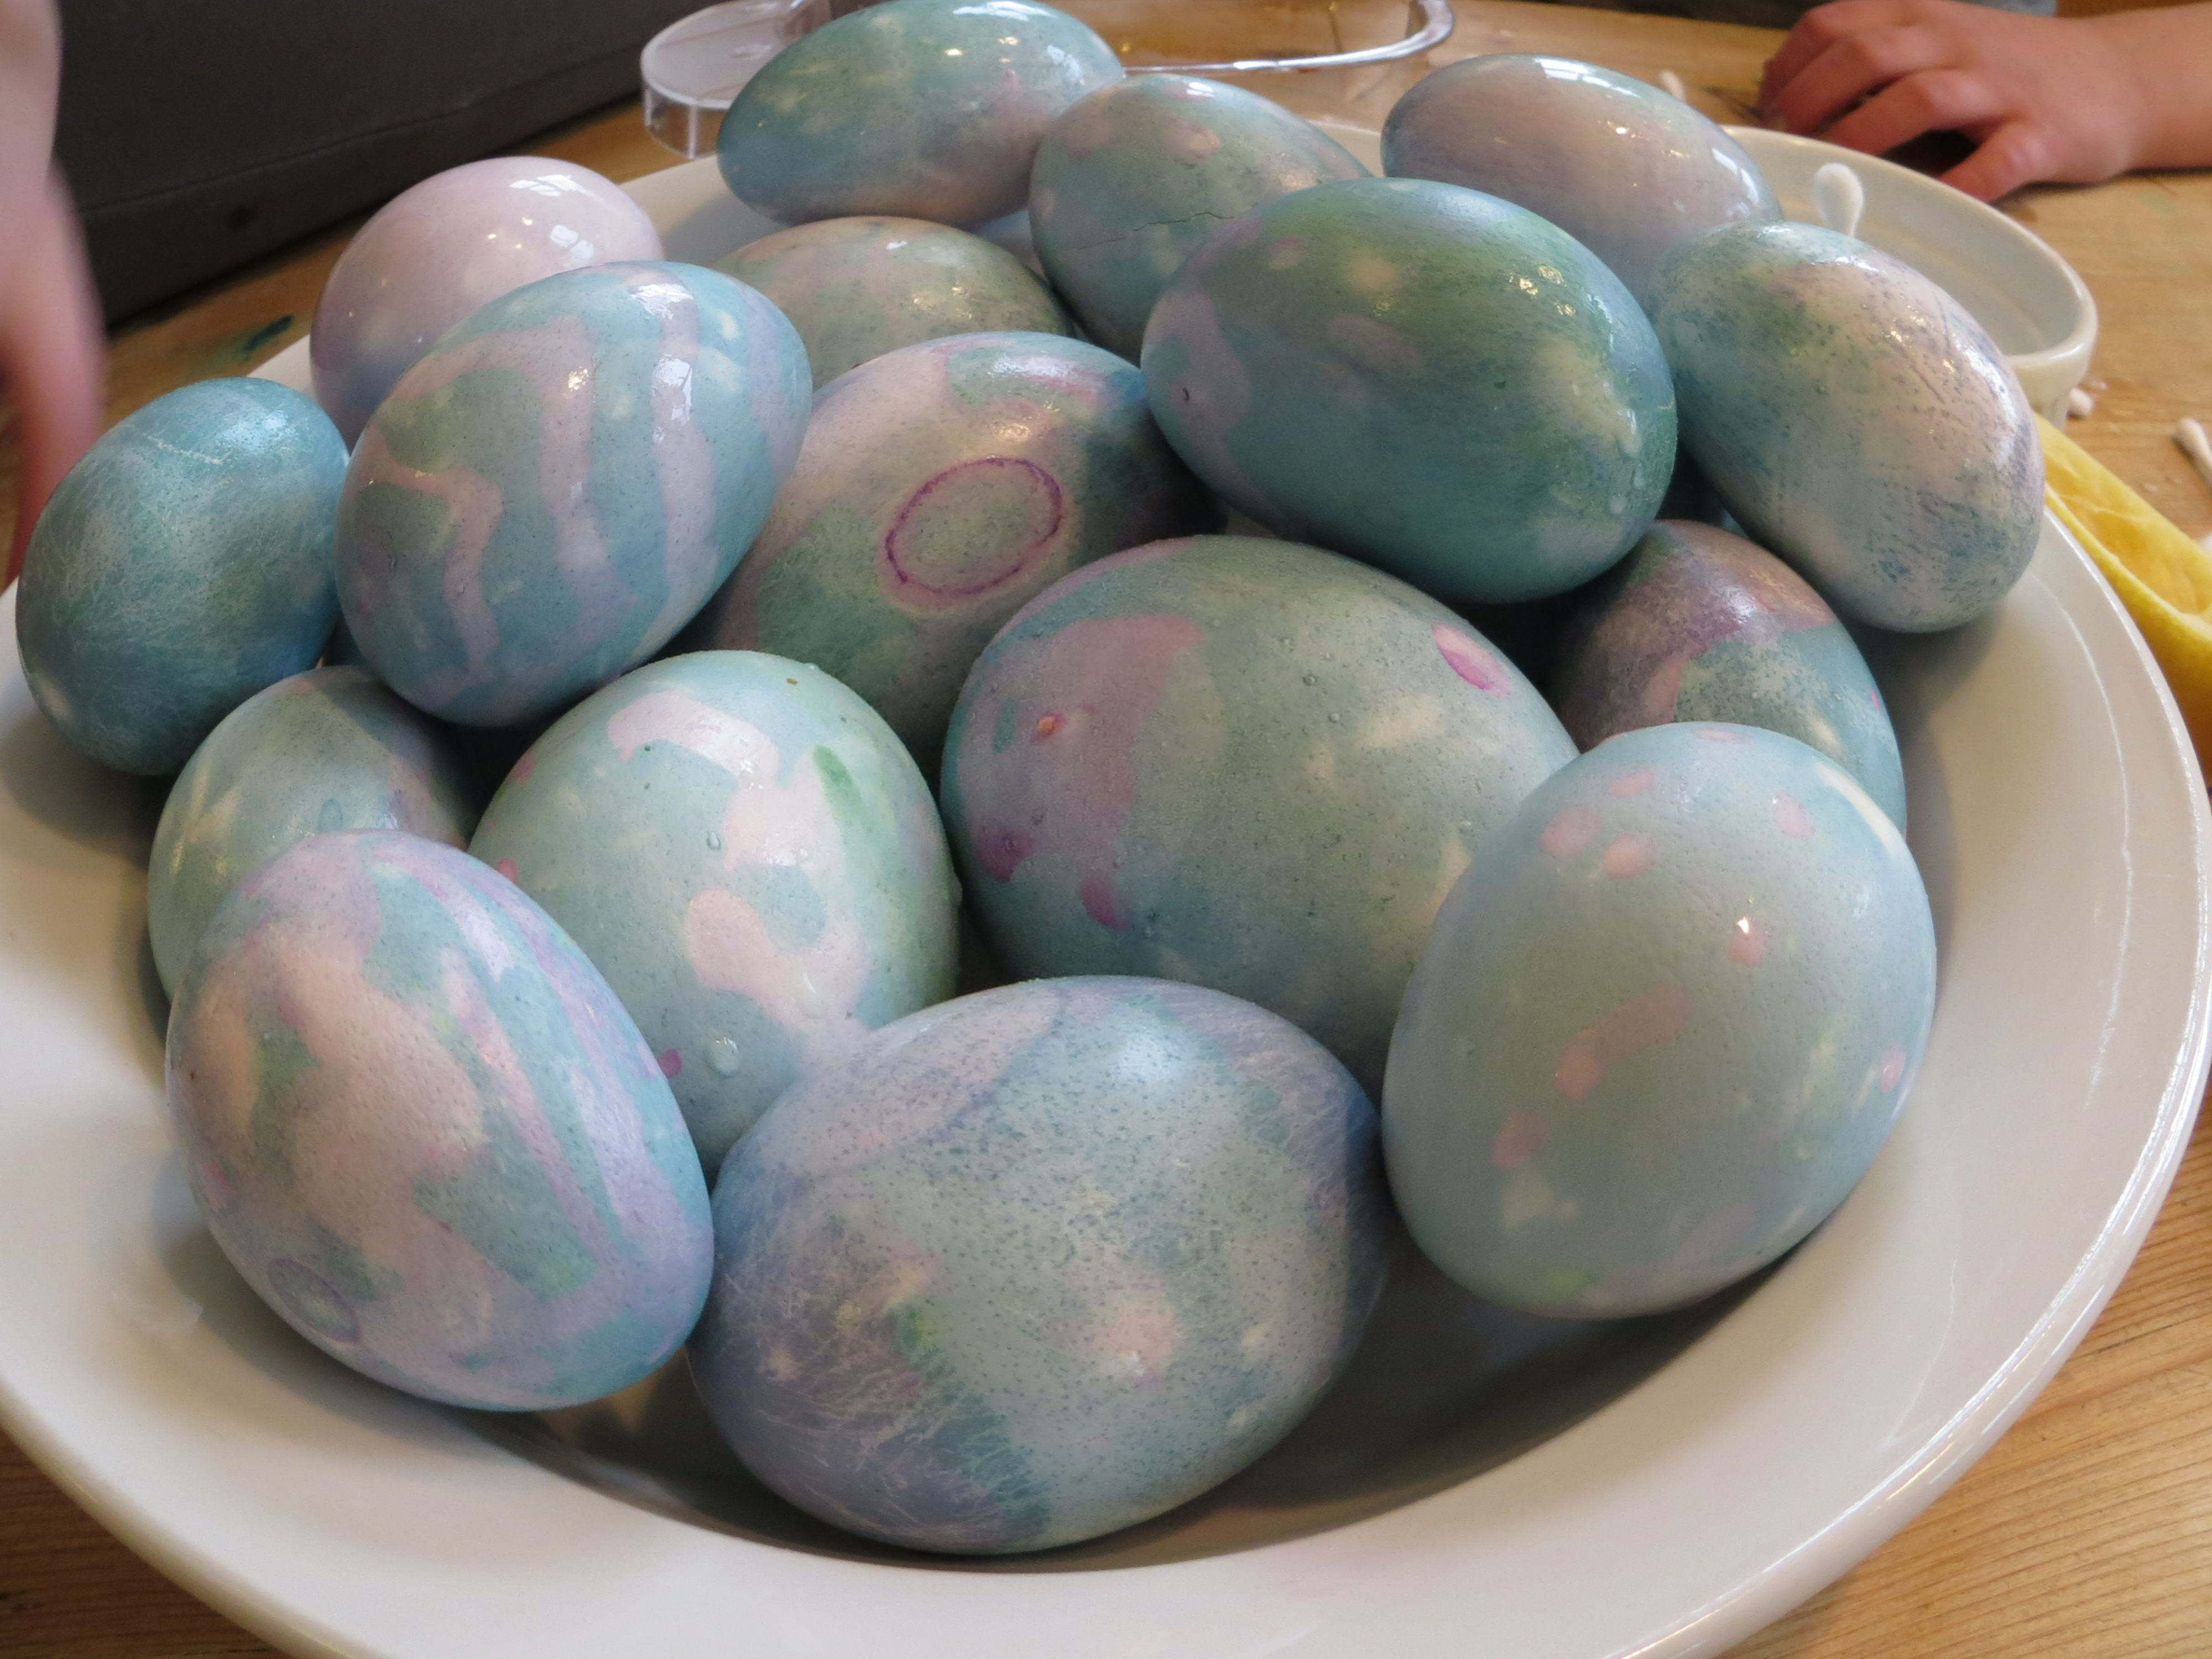
Olive Oil Marbling: You’ll need hard boiled eggs, olive oil, vinegar, and food coloring. We used green, yellow and brown food coloring to make robin’s egg colors.

Whipped Cream Faux Marbling: You’ll need hard boiled eggs, a shallow container, cool whip or whipped cream, food coloring, and a toothpick. (Project from Star Wars Maker Lab -DK Books)

Lemon-Painted Eggs: Dye eggs with cabbage juice and use lemon juice and backing soda to “paint” pink and blue designs on the purple eggs. (Project from STEAM Lab for Kids- Quarry Books)
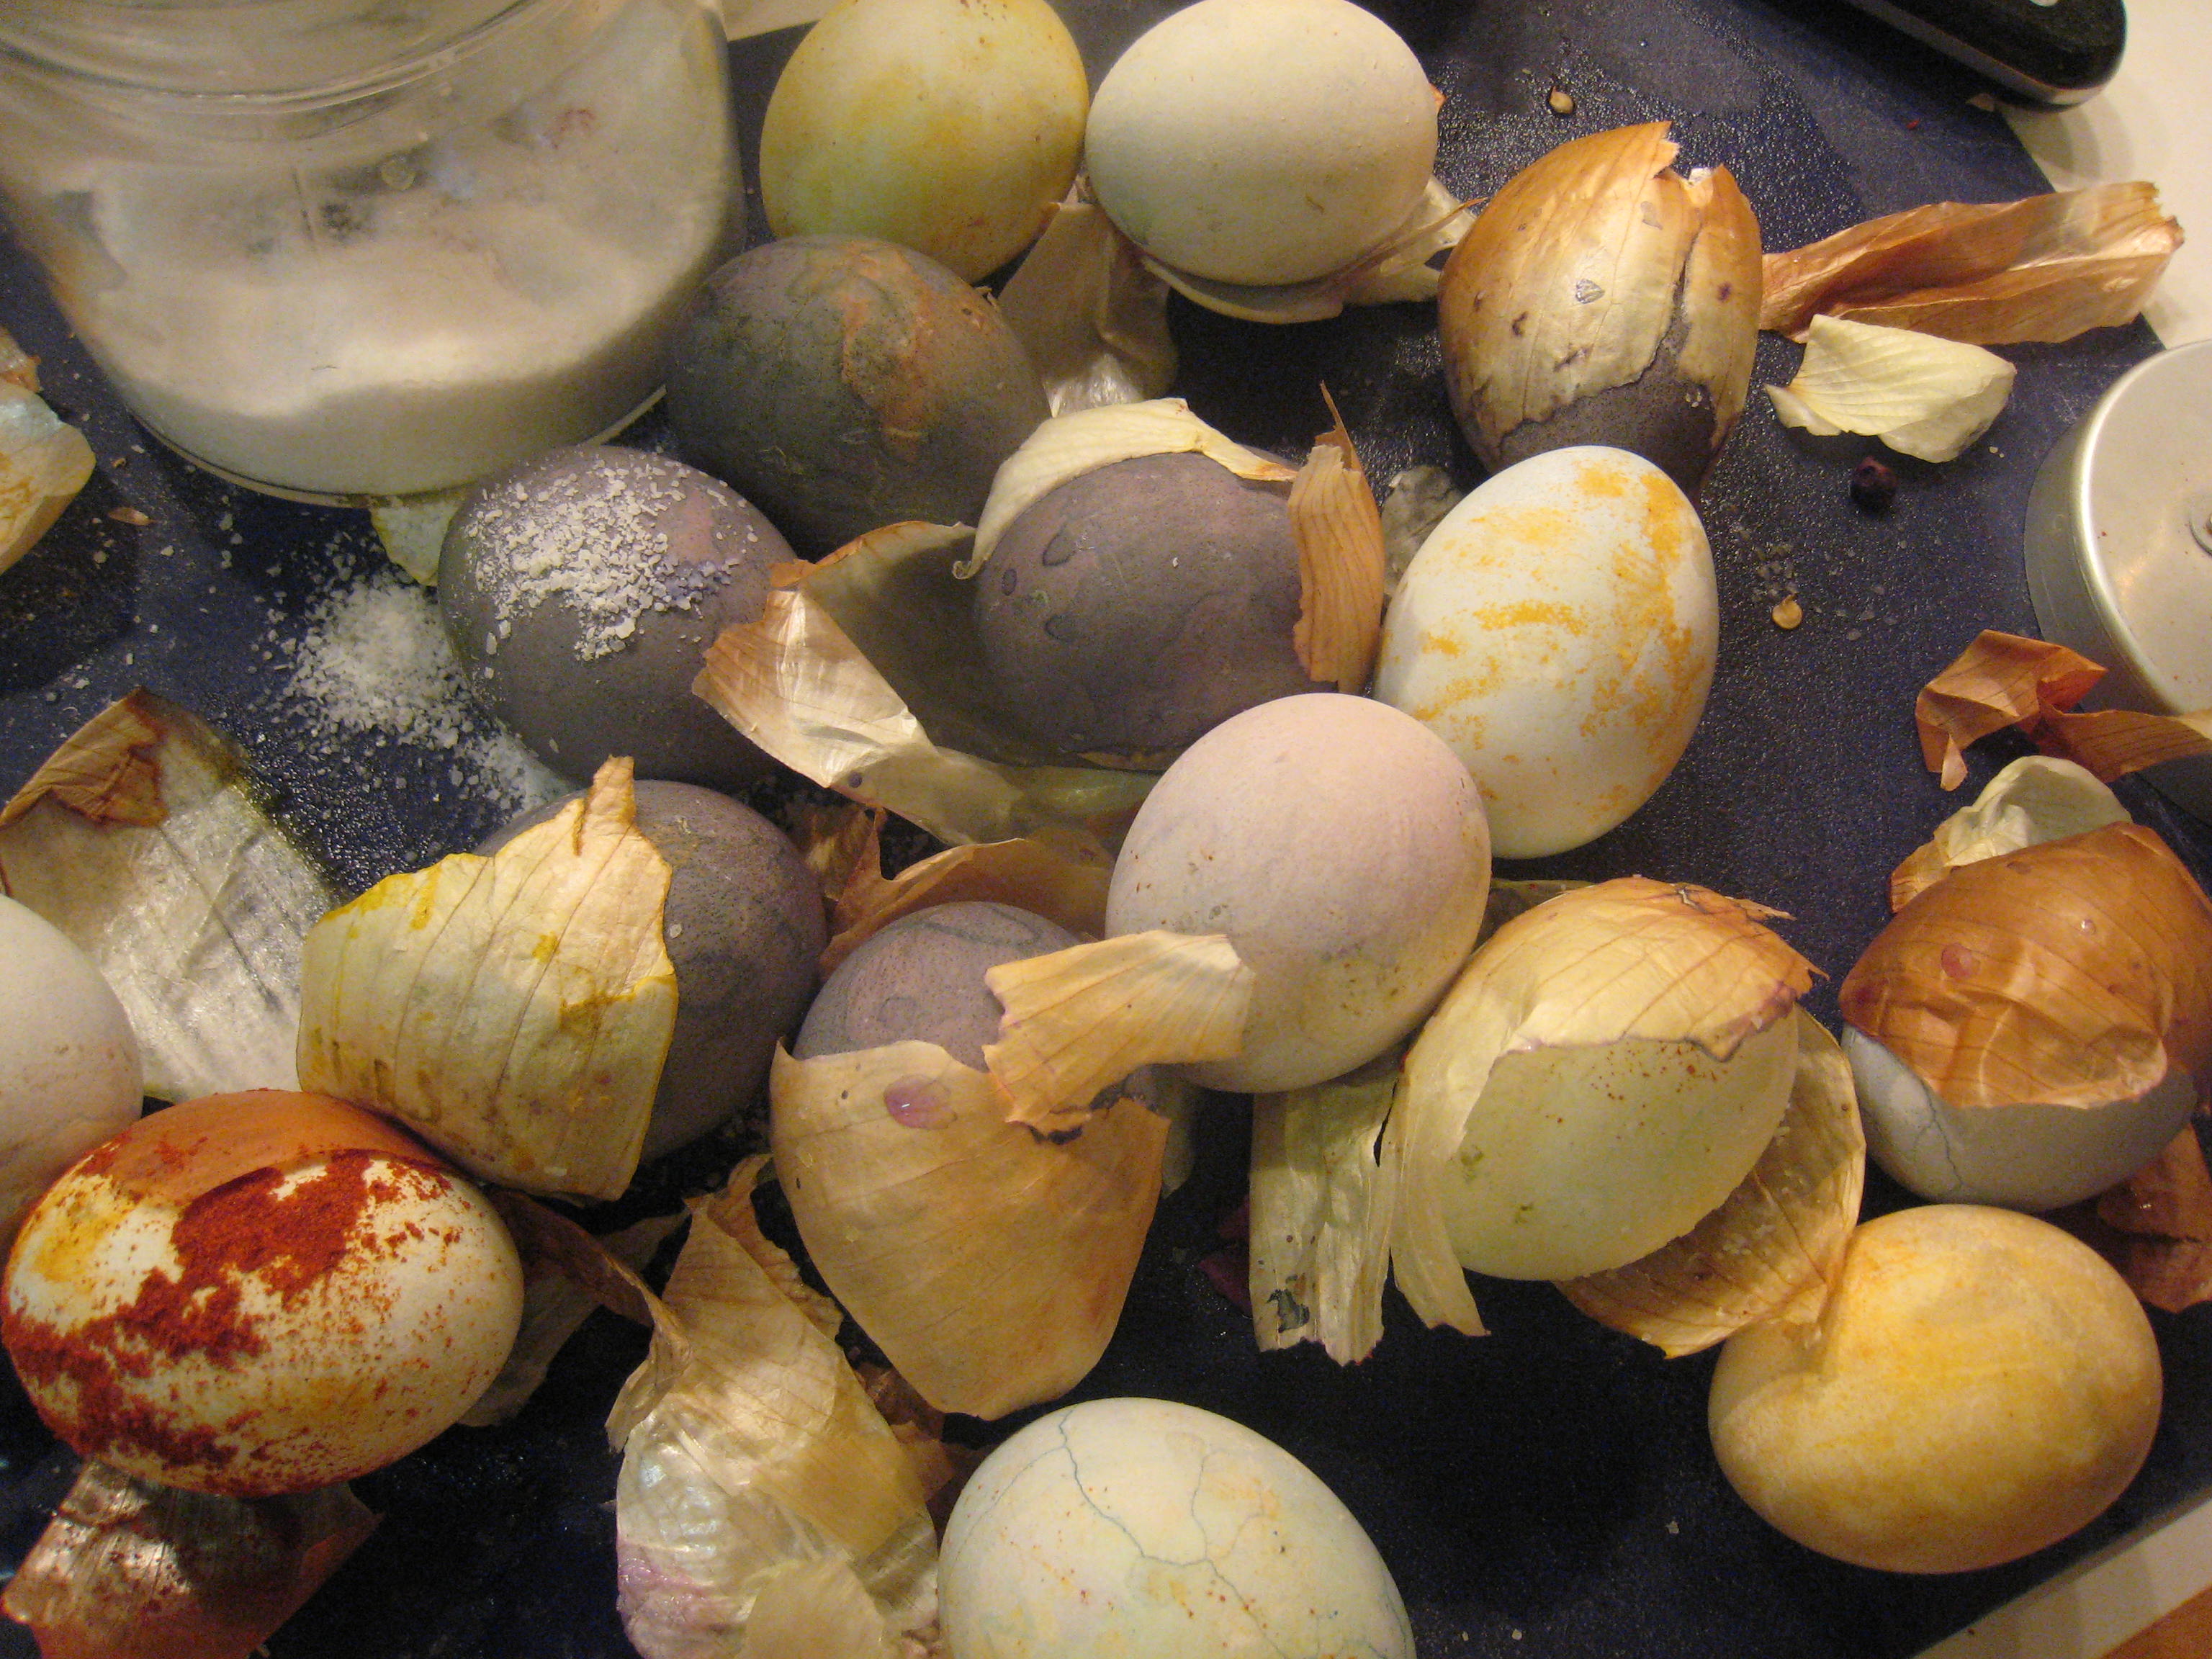
Natural Dyes: Experiment with fruit, coffee, tea, spices, veggies and even onion skins to create beautiful, natural egg dyes.
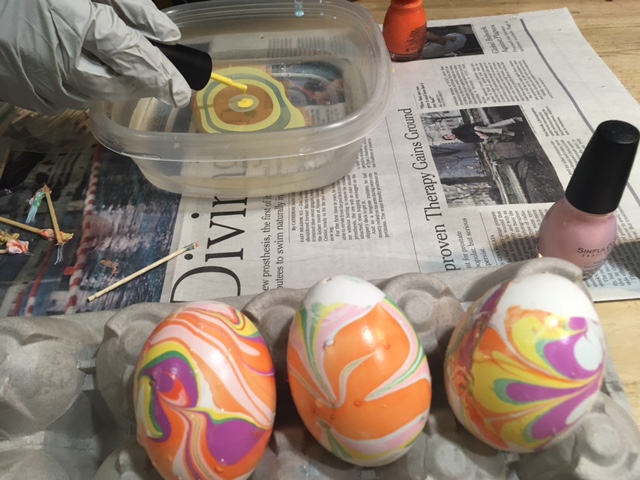
Nail Polish Marbling: This one is obviously inedible, but it’s a fun craft project! You’ll need eggs with the yolks and whites blown out, a container that can be thrown away, nail polish in two or more colors, and water. (Project from STEAM Lab for Kids-Quarry Books)

The science behind the marbling fun: Egg dyes and food coloring require an acidic environment to form bonds. That’s why you add vinegar (also called acetic acid) to water and dye when coloring eggs. Things that are less dense than water, like olive oil and nail polish, float on top of water, allowing you to create designs that can be transferred onto your eggs.
Olive Oil Egg Marbling and Epsom Salt Crystal Egg Geodes
- by KitchenPantryScientist
It’s simple to make gorgeous marbled eggs using olive oil marbling. Simply dye your eggs with food coloring and then marble them with a darker color. (Epsom Salt Egg Geode instructions are at the bottom of this post.)
KitchenPantryScientist.com
Hint: Wear gloves to avoid staining your fingers.
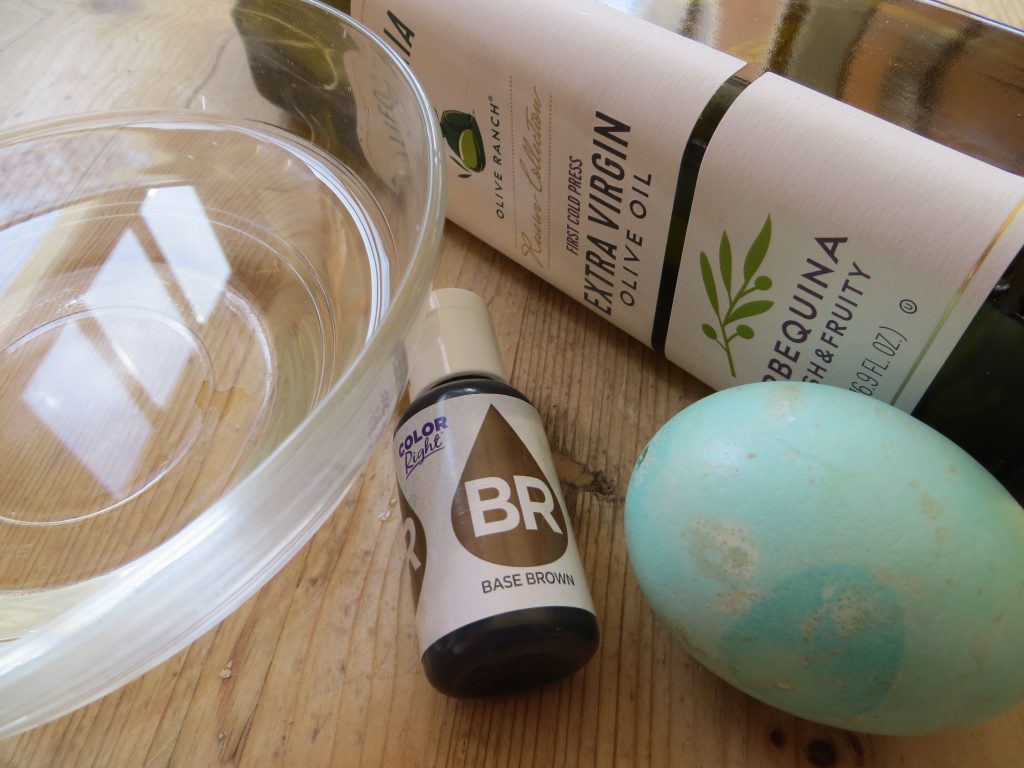
You’ll need:
-2 cups of warm water in a bowl
-hard boiled eggs
-olive oil
-vinegar
-food coloring (We used Wilton Color Right food coloring: 2 drops blue mixed with one drop of yellow in about a cup of water to make robin’s egg colors, and brown for marbling.)
1. Make base dye by adding a few Tbs. vinegar to two cups of water. To this, add a few drops of food coloring. Lighter colors work best for the base.
2. Dye the hard boiled eggs in the base color until they are the desired shade. Let them dry.
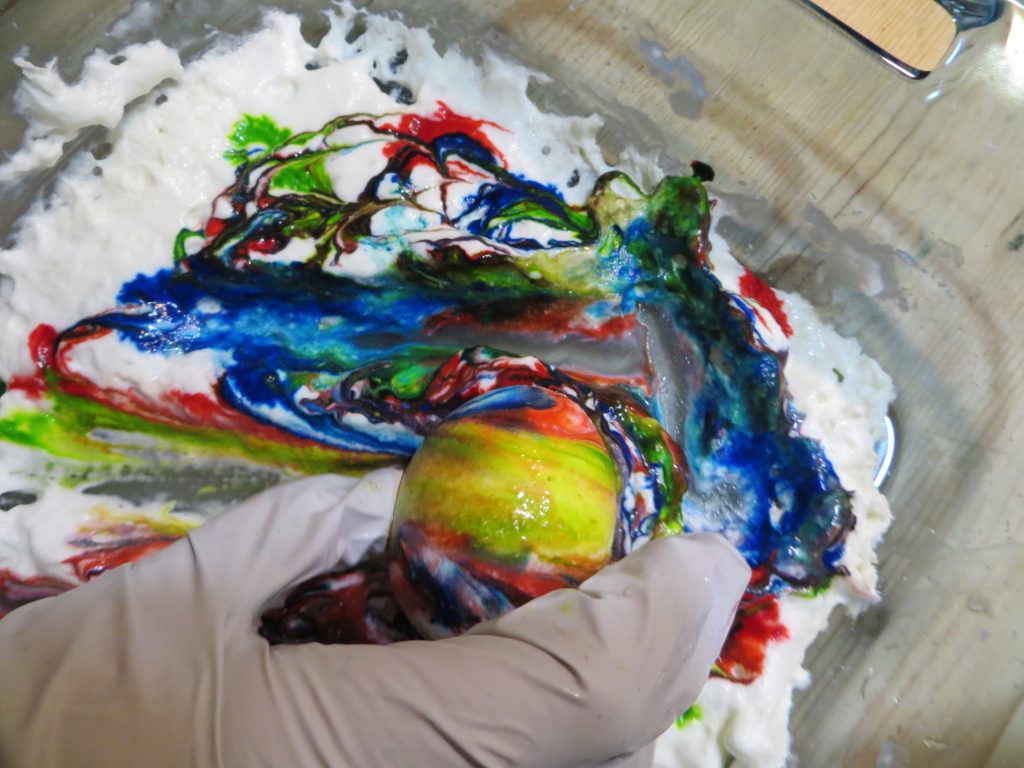
3. To a small bowl, add 1/2 cup water, a Tbs. of vinegar, darker food coloring, and 1/2 tsp olive oil. Add more oil if you want less dark color when you marble. Oil shouldn’t cover the entire surface.
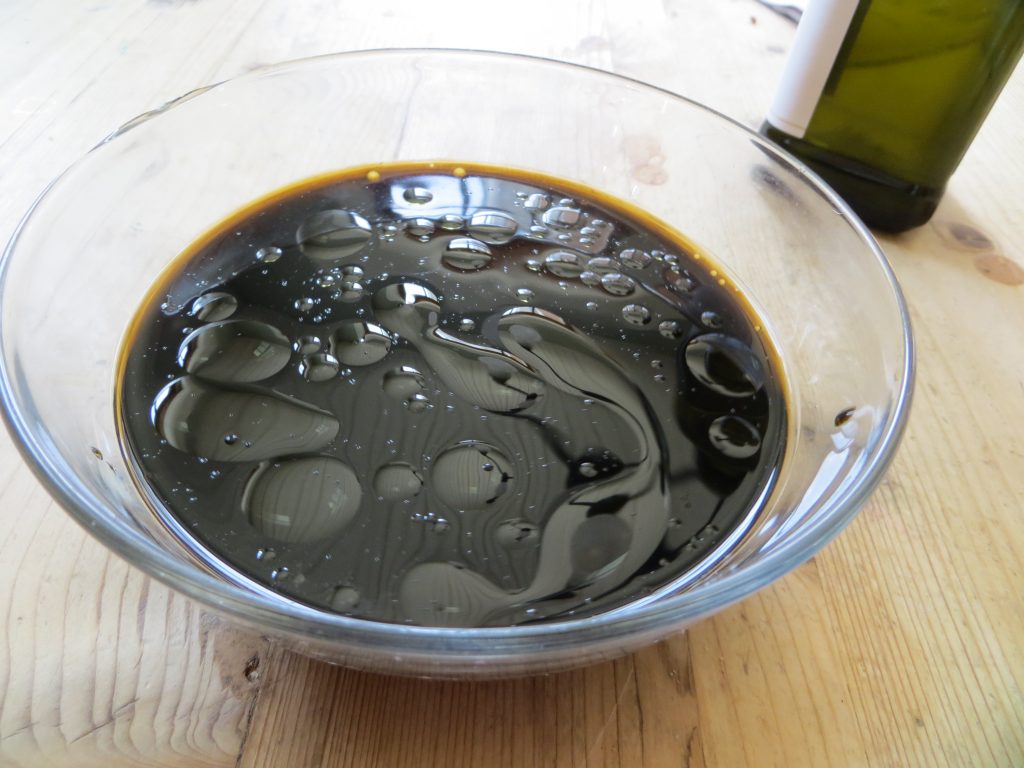
4. Swirl the oil with a toothpick or spoon and lower your egg into the water/oil mixture, swirling and spinning it. When you like the results, take it out and let it dry.
5.When the egg is dry, remove the excess oil with a paper towel.
The science behind the fun: Food coloring is an acid dye, so the vinegar (acetic acid) helps it bond to the egg shell. Oil is less dense than water and floats on top. When you put the egg in the oil-colored water mixture, the oil coats part of the egg, preventing it from being stained.
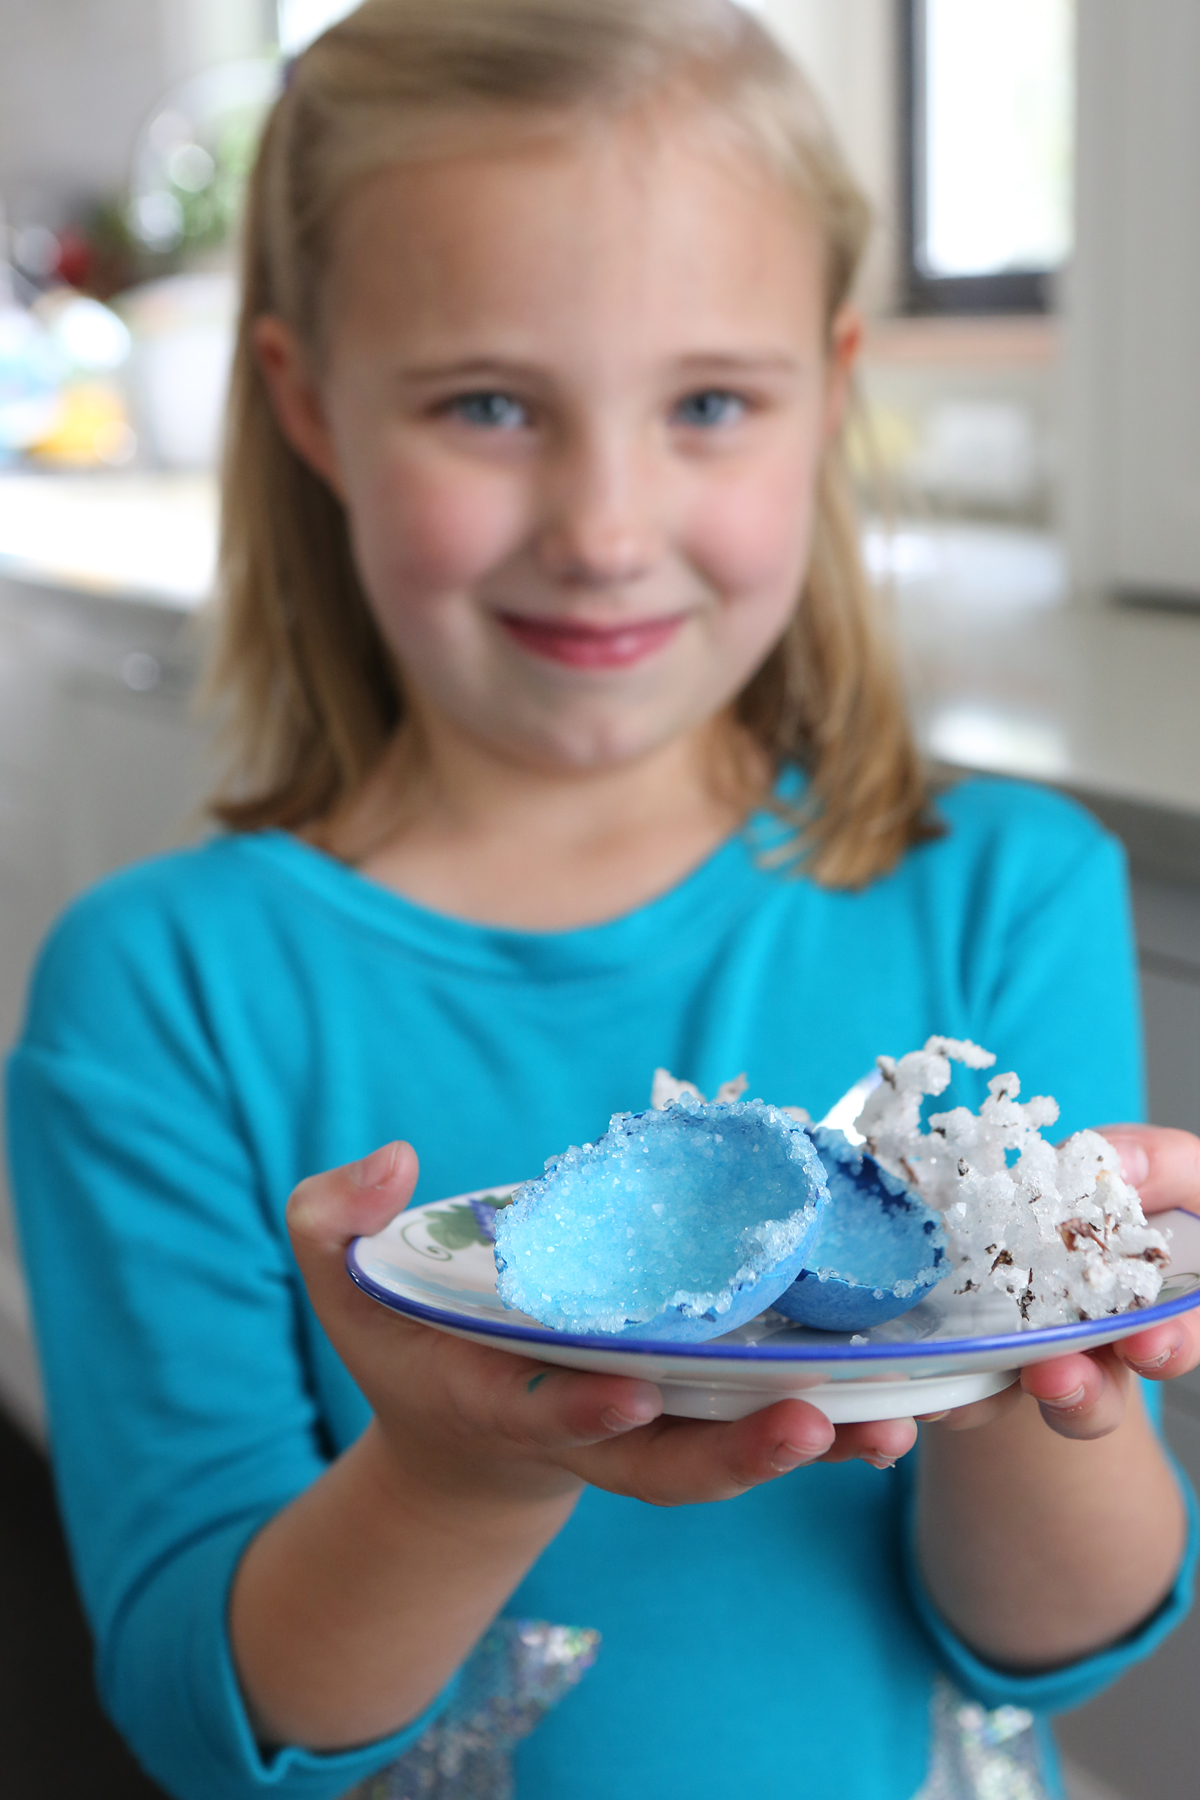
Epsom Salt Crystal Egg Geodes:
Have an adult cut a raw egg in half lengthwise, using a serrated knife. Wash the shell and dry it. Dye if desired.
Use a glue gun or school glue to coat the inside of the egg. Sprinkle in Epsom salt crystals and allow to harden or dry.
(Warning: Hot liquids require adult supervision.) To make the Epsom Salt crystals, dissolve 3 cups of Epsom salts in 2 cups of water by heating and stirring until no more crystals are visible. This creates a supersaturated solution. Allow the solution to cool slightly. Fill each half eggshell with Epsom salt solution. When long, needle-like crystals have formed, dump out the excess liquid and break the thin layer of crystals on top to reveal the ones in the shell.
Nail Polish Marbled Eggs
- by KitchenPantryScientist
Nail polish marbling is tons of fun and yields stunning results. However, it takes some eye-hand coordination, practice and patience, so I’d recommend it for ages 10 and up. My 11 YO loved it!
KitchenPantryScientist.com
Hint: You’ll have to work reasonably fast for good results. Gloves are a must, and do this in a well-ventilated area to avoid breathing too many nail polish fumes.
You’ll need:
-eggs with the raw yolks and whites blown out (We poked generous holes in each end of our eggs using a thumb tack, scrambled the inside with a toothpick and used syringes and balloon pumps to blow out the raw whites and yolks. It takes patience, and you’ll lose a few eggs to cracks.)
-a container that can be thrown away
-nail polish in two or more colors
-a toothpick
-water
1. Fill your container 3/4 full of water.
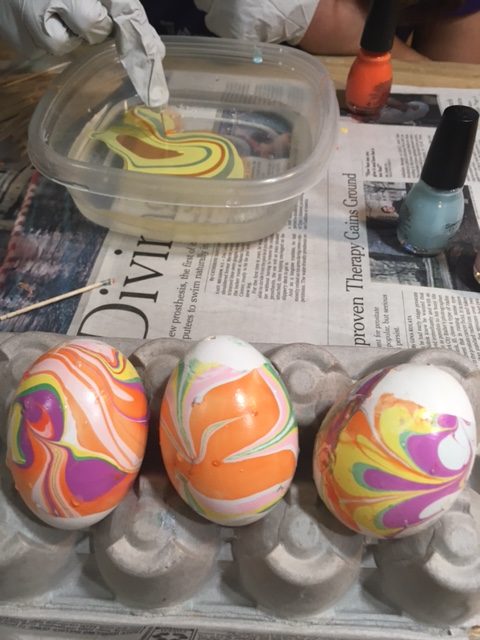
2. Drip nail polish, a drop at a time into the center of the water. Each drop should be in the center of the one before. Don’t worry if they spread out, just keep adding more. You’ll have to work fast, or the polish will dry on top of the water. It may take practice.
Kitchen Pantry Scientist.com
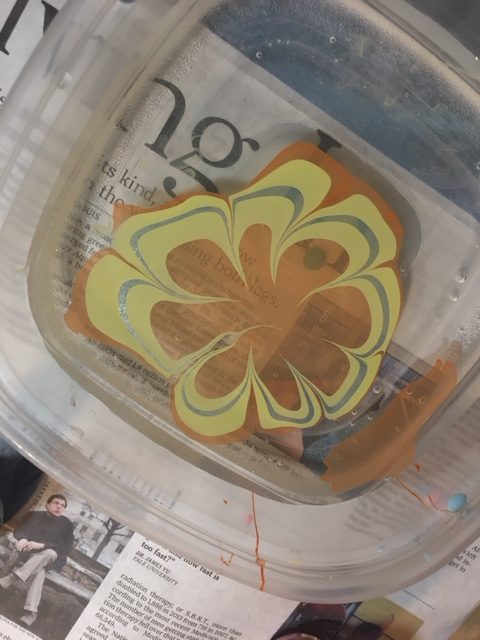
3. Use tip of the toothpick to draw designs in the polish. Start by pulling it out from the center or pushing it into the center.
KitchenPantryScientist.com
KitchenPantryScientist.com
4. When the design is ready, roll it onto your egg like you’re rolling a bandage around an ankle. Try to keep in smooth and in a single layer. If it looks bad, try another one. You’ll get the hang of it!
KitchenPantryScientist.com
5. Put the marbled egg on an egg carton to dry.
The science behind the fun: Nail polish is less dense than water and floats on top of it. It contains a solvent called acetate that evaporates very quickly into the air, drying out the polish.
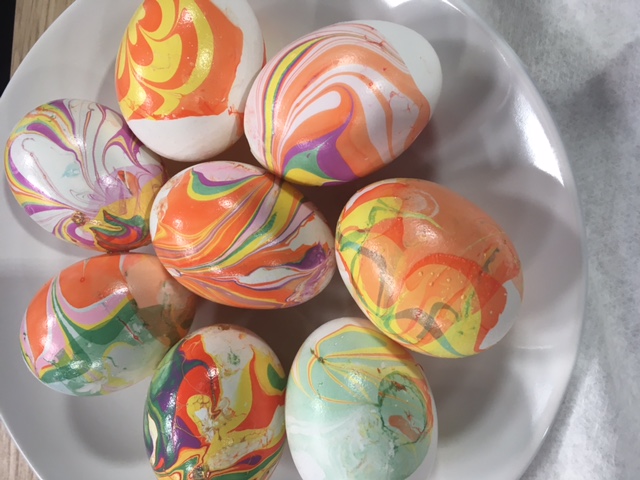
Edible Egg Marbling (with Food Coloring and Whipped Cream)
- by KitchenPantryScientist
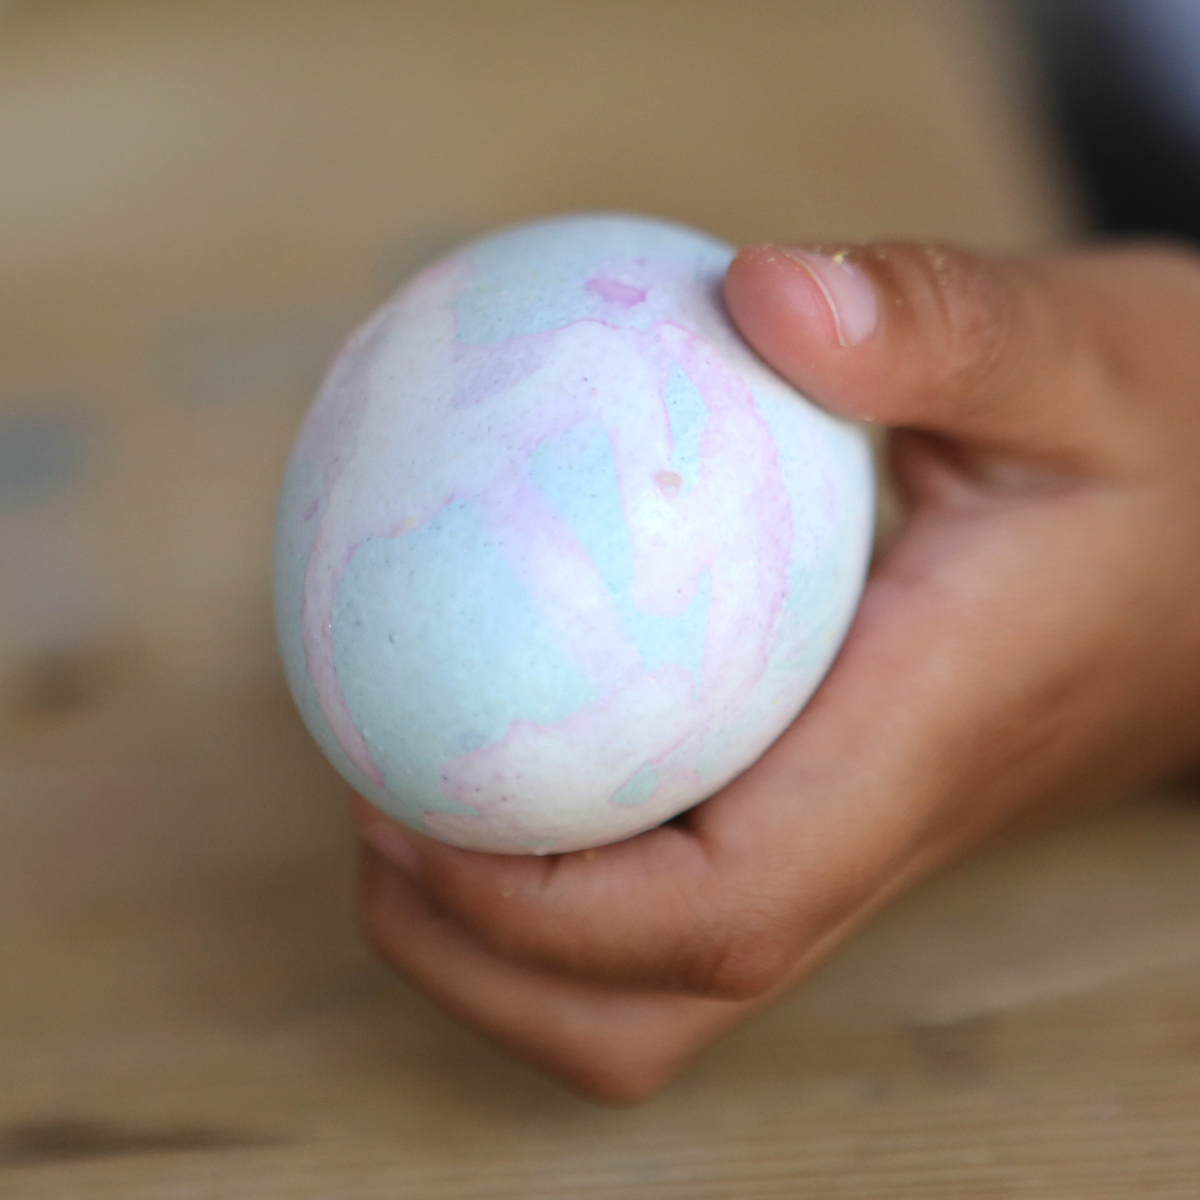
Want to take egg-dying up a notch the easy way? Marbling eggs using whipped cream and food coloring is a great project for little ones and the results are downright gorgeous!
KitchenPantryScientist.com
Hint: Wear disposable glove to prevent your fingers from getting stained.
You’ll need:
-hard boiled eggs
-vinegar
-a shallow container
-cool whip or whipped cream
-food coloring (neon, if you can get it)
-a chopstick or toothpick
1. Soak eggs in vinegar for 5 minutes.
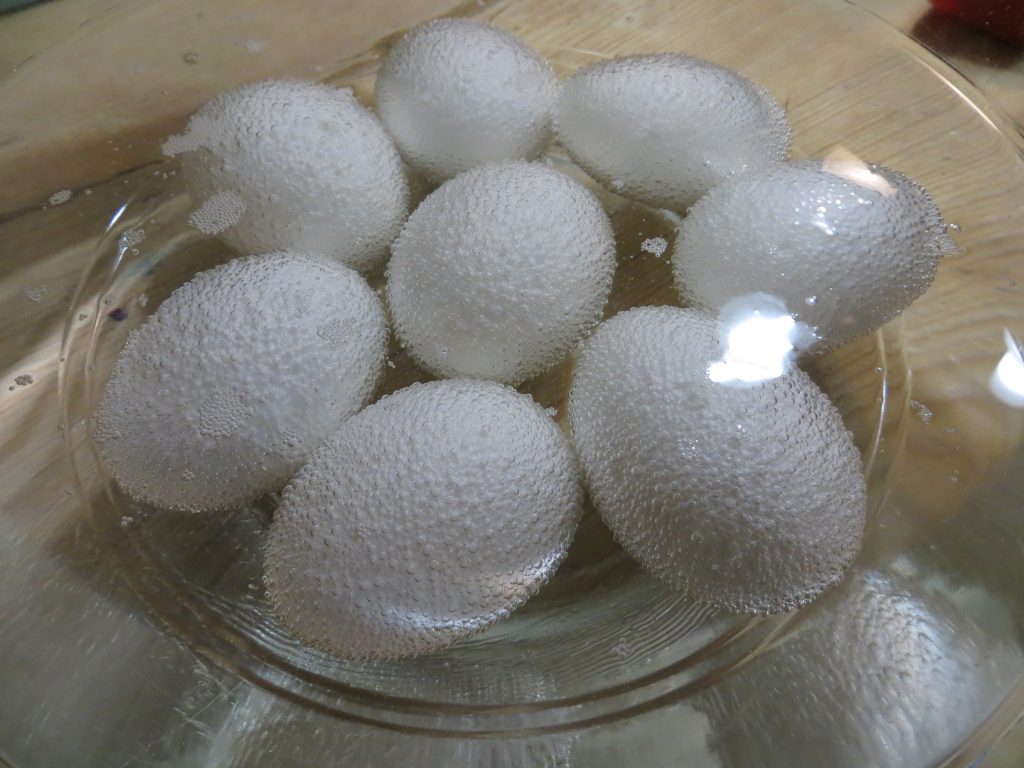
You’ll see carbon dioxide bubbles forming on the eggs as the vinegar reacts with the calcium carbonate in the egg shells.
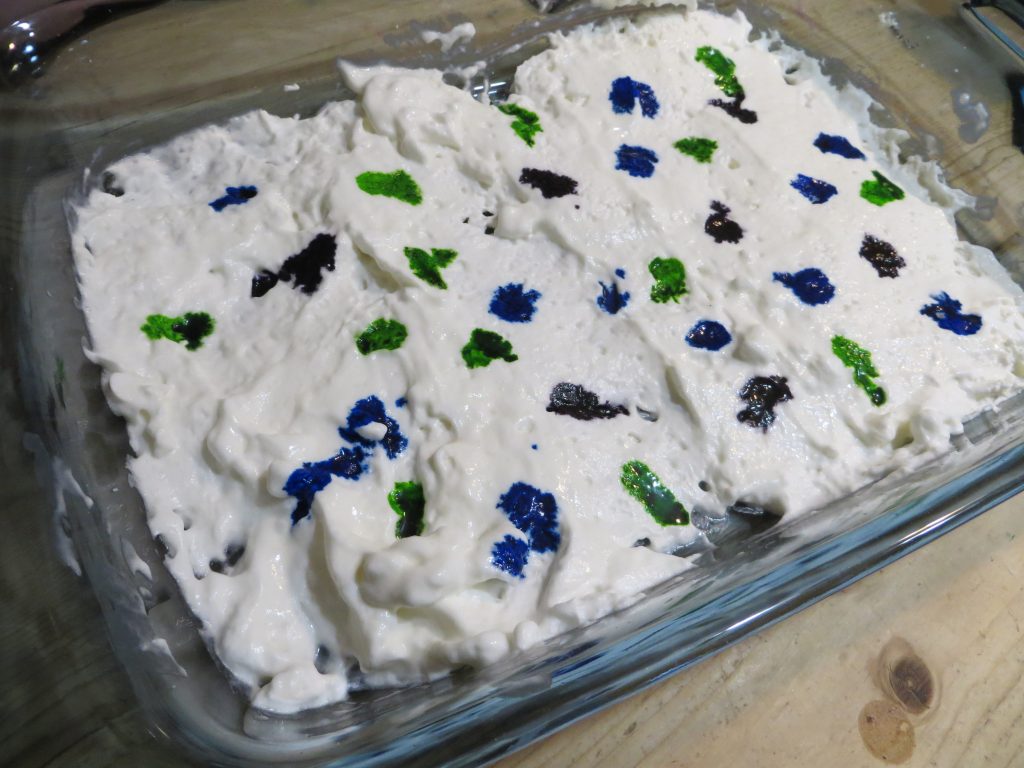
2. Spread and smooth a layer of whipped cream across the bottom of the container and drip food coloring all over the whipped cream.
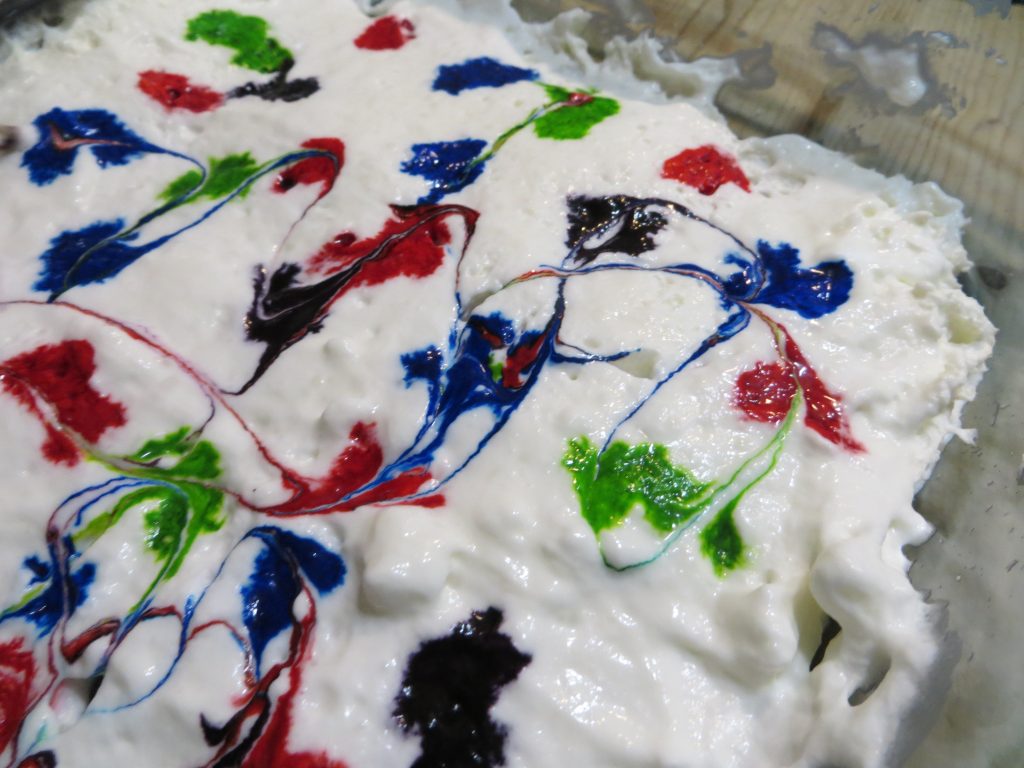
3. Swirl the drips into patterns using a toothpick or chopstick.
KitchenPantryScientist.com
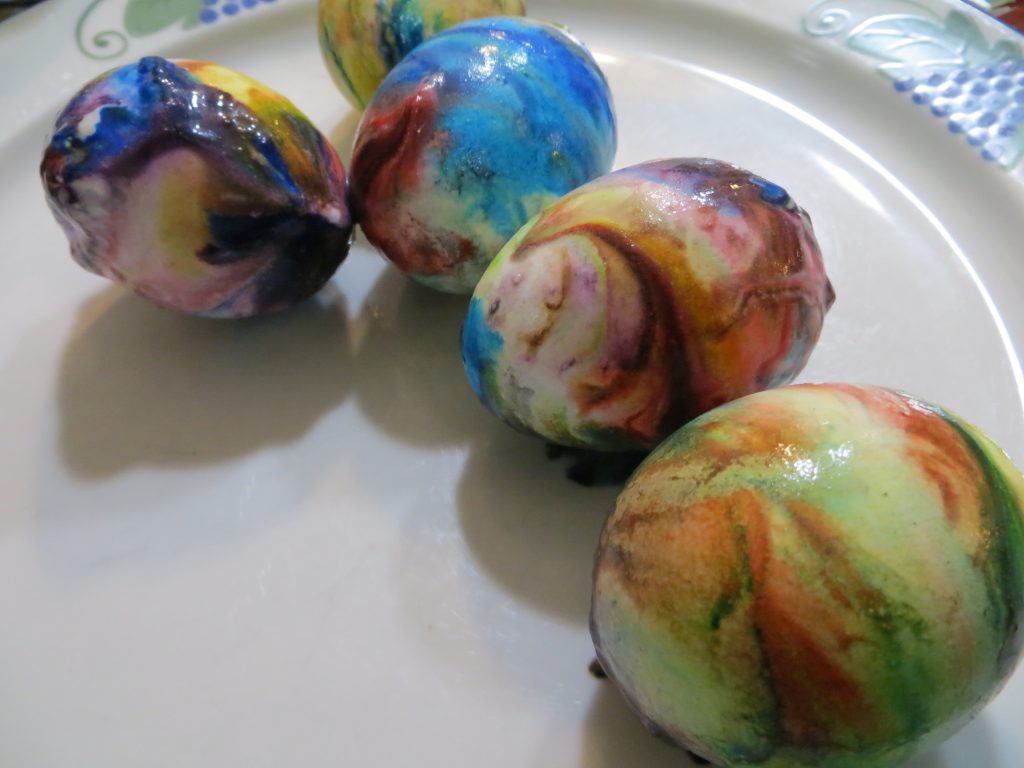
4. Remove eggs from vinegar, blot them with a paper towel and roll them through the food coloring. Put them on a plate to dry.
KitchenPantryScientist.com
5. When the eggs are dry, wipe the excess whipped cream and color from the shells.
KitchenPantryScientist.com
The science behind the fun: Food coloring is an acid dye, so the vinegar (acetic acid) helps it form chemical bonds with the egg shell, dying the egg.
8 Spring Science Eggsperiments
- by KitchenPantryScientist
Spring is egg season. You may prefer dyed eggs, hard-boiled eggs, deviled eggs, or even dinosaur eggs. No matter what kind of eggs you like best, you’ll love these eggsperiments that let you play with the amazing architecture of eggs, dissolve their shells and even dye them with the pigments found in your refrigerator. Just click on experiments for directions and the science behind the fun!
Grow alum crystals in eggshells to create beautiful geode-like works of art.
Egg Geode from Kitchen Science Lab for Kids (Quarry Books)
Dye eggs with spices, fruits and vegetables,
or dye them with red cabbage juice and use lemon juice and baking soda to paint them.
Dissolve eggshells with vinegar and play with osmosis when you make “Alien Monster Eggs.”
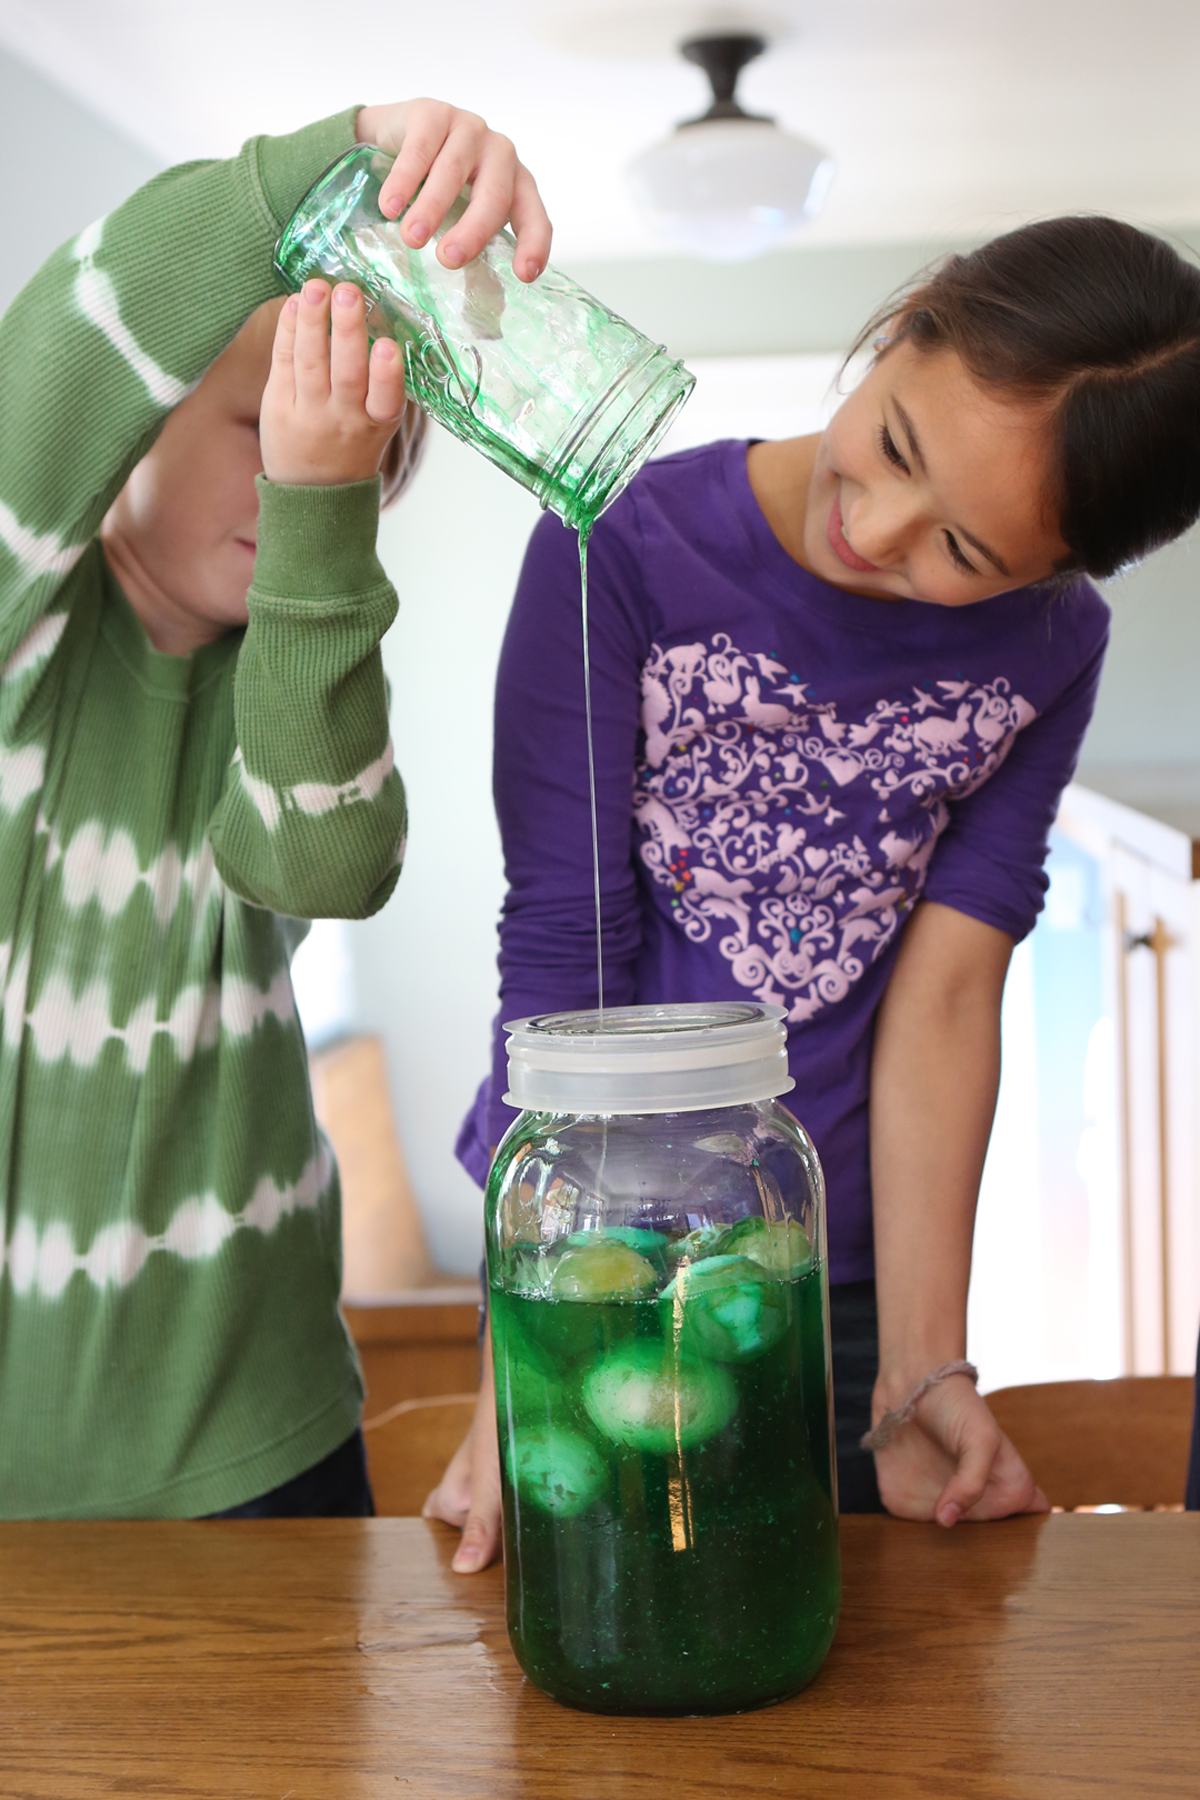
Alien Monster Eggs from Kitchen Science Lab for Kids (Quarry Books)
You can stand on a carton of eggs to test their strength.
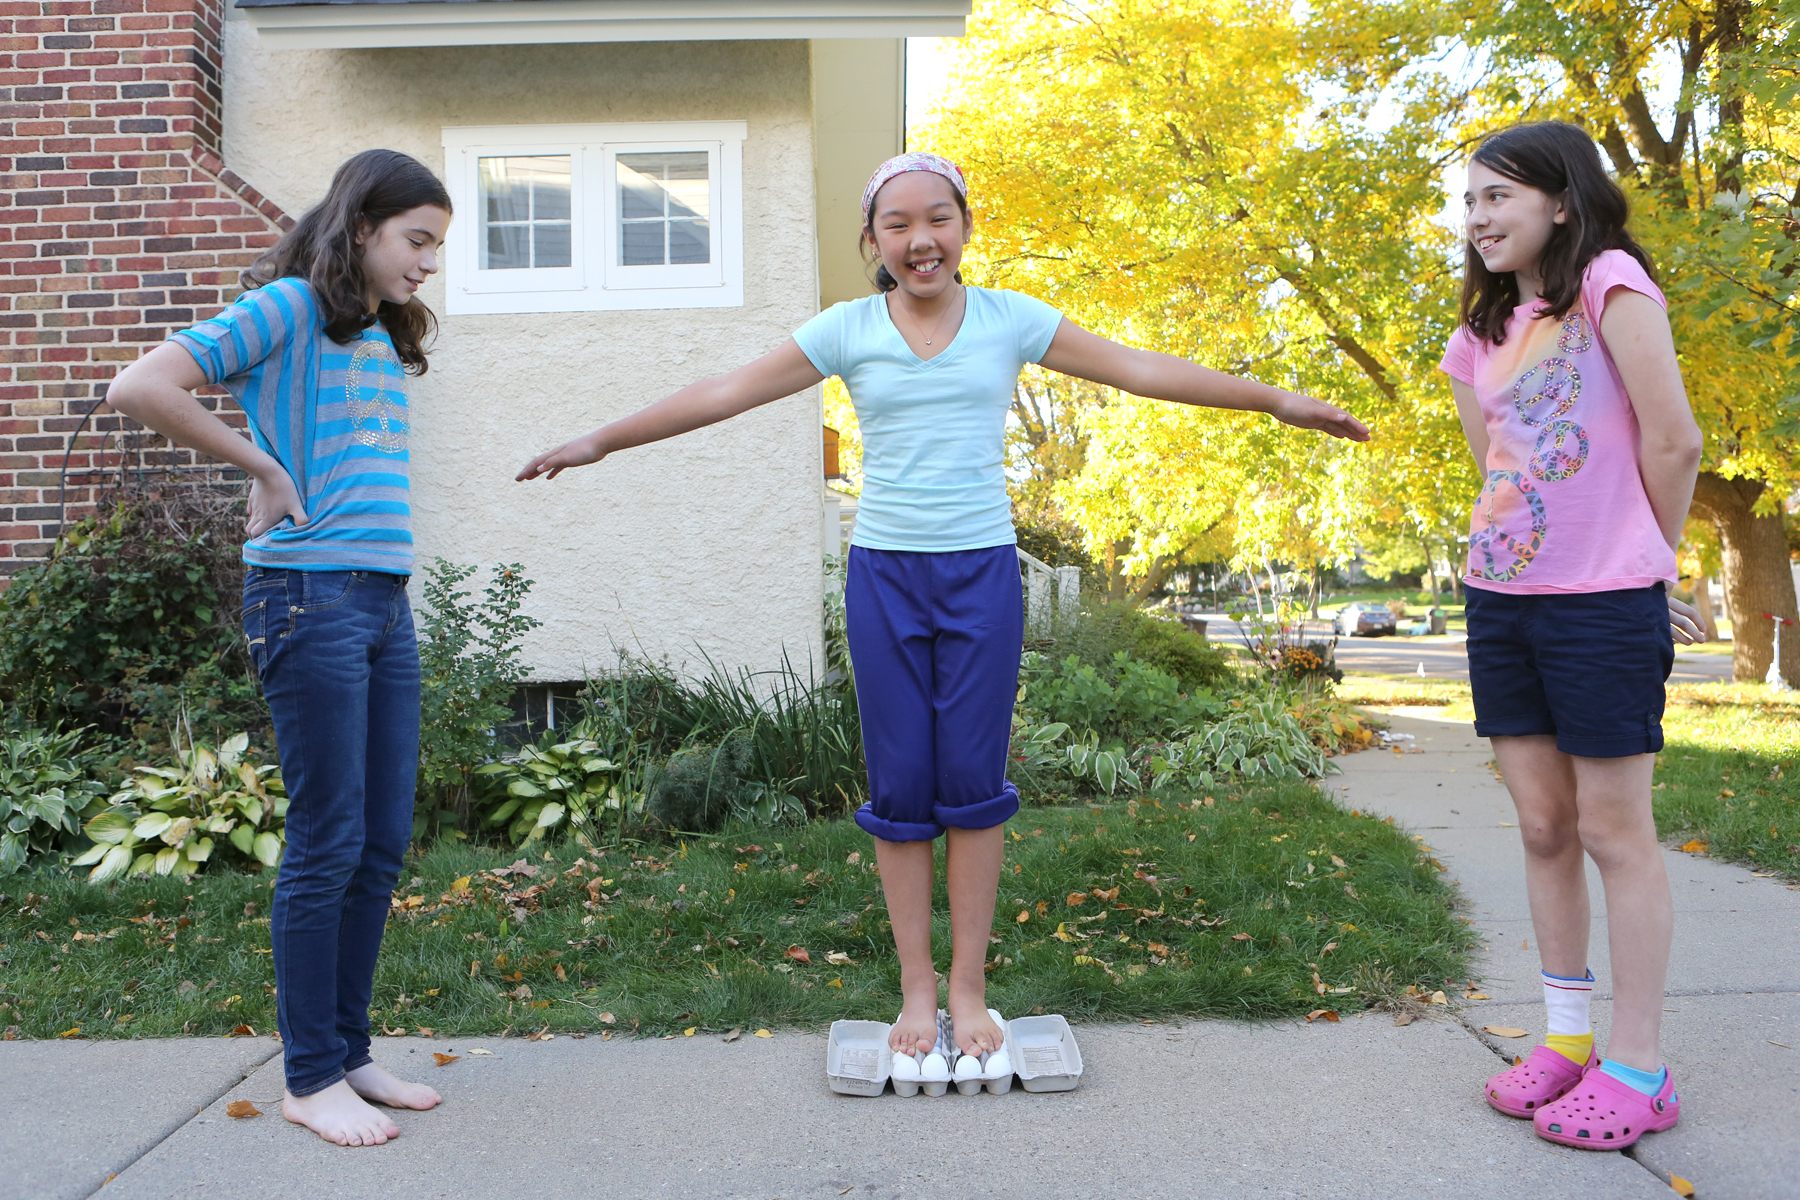
Standing on Eggs from Kitchen Science Lab for Kids (Quarry Books 2015)
For a fun physics experiment, throw eggs at a hanging sheet.
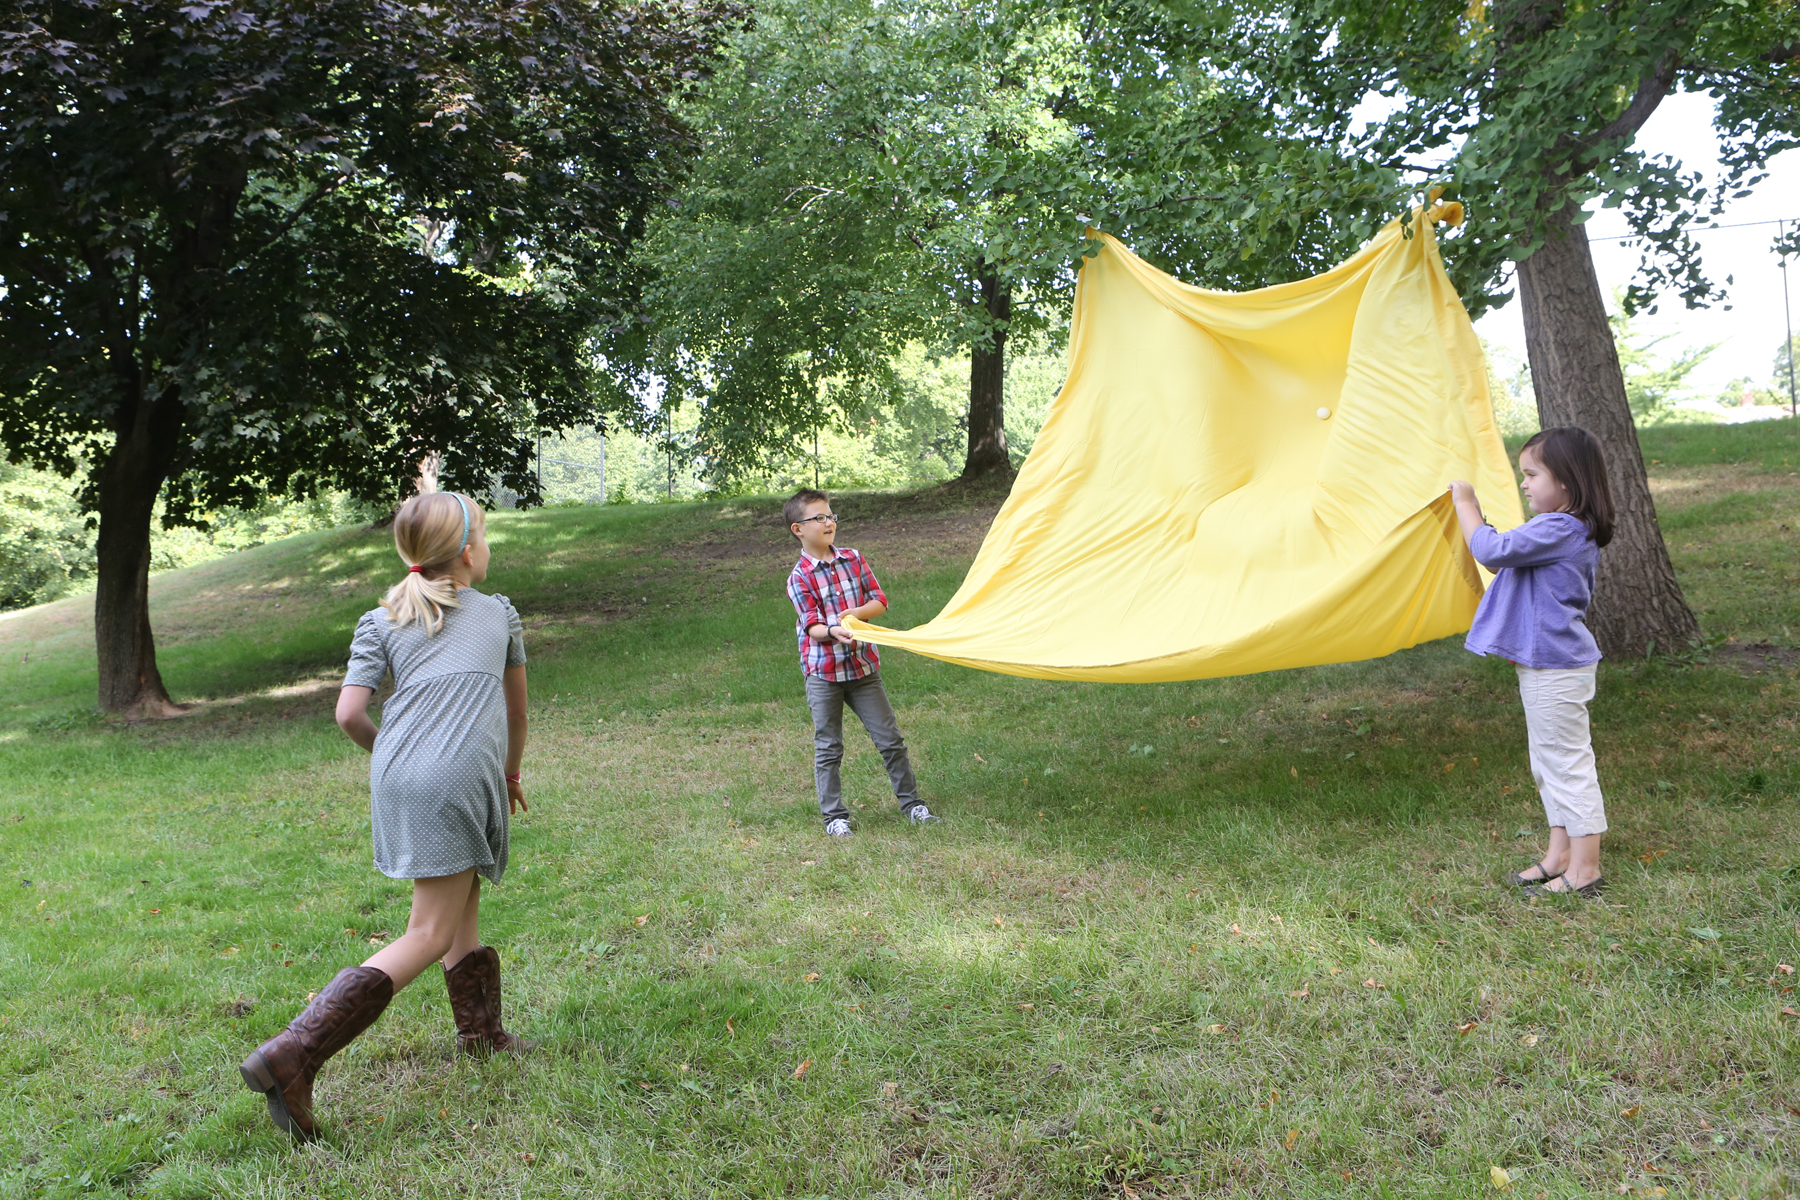
From “Kitchen Science Lab for Kids” Quarry Books
Make egg-eating monsters and watch atmospheric pressure push eggs up into a bottle.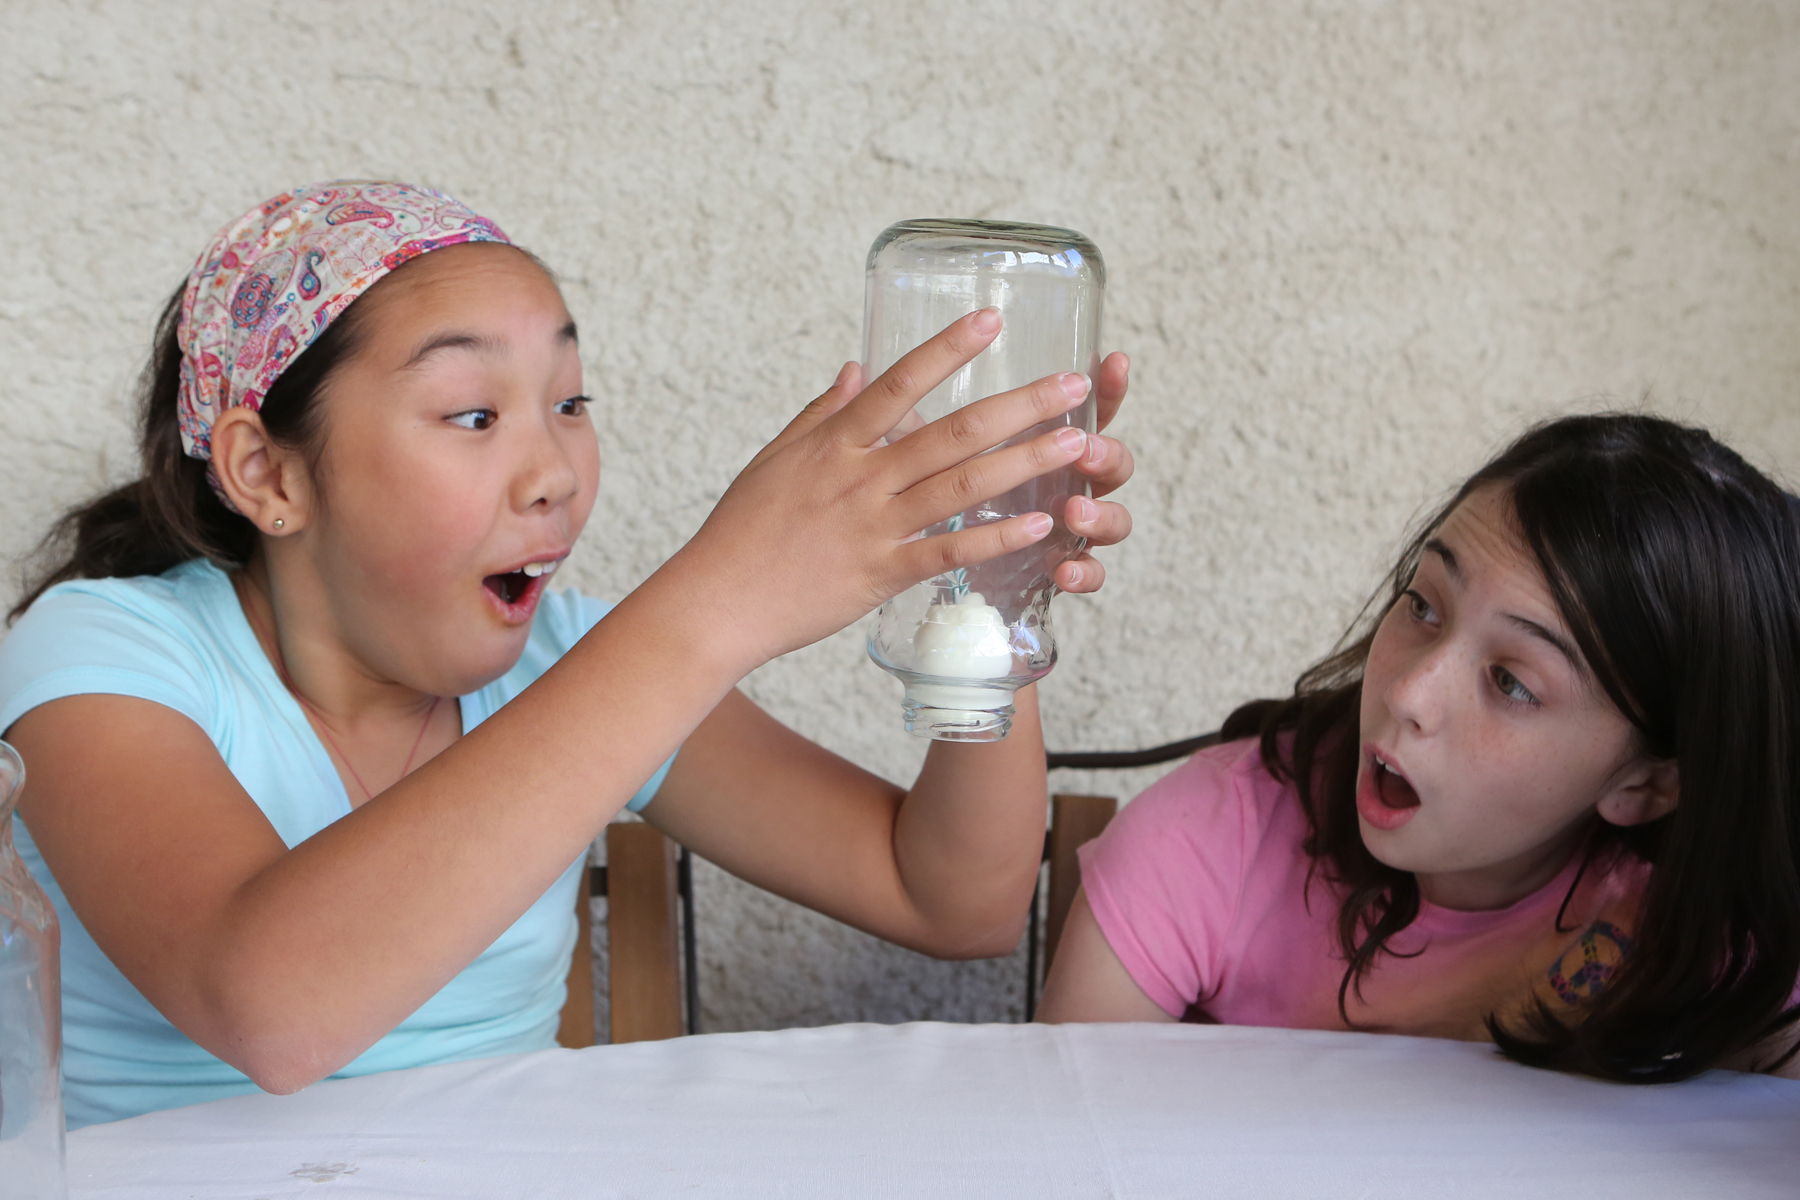
Egg drops are a fun way to test your engineering prowess.
And finally, here’s a little more about the science of hard-boiled eggs.
The Science of Hard-Boiled Eggs
- by KitchenPantryScientist
You can’t judge an egg by its shell, but you can use science to figure out whether or not it’s fresh.

Imagine an egg. It can be white or brown, since they’re identical except for shell color. There are two membranes inside an eggshell, separating it from the inside of the egg and helping to keep it safe from microbial invaders.
Under the membranes is the egg white, made up of proteins and water, and the yolk, which also contains fat and is enclosed in a sac. Tiny rope-like structures anchor the yolk between either end of the egg. The egg white contains a substance called lysosyme, which is a potent antibacterial. Eleven percent of an egg’s weight is made up by shell, 58% by white and 31% by yolk.
When a hen first lays an egg, the raw egg white contains carbon dioxide, making it look cloudy, and the proteins in the egg white are freshly folded into their correct protein shapes, so it will hold a nice shape in a pan. However, egg shells contain thousands of tiny pores, some big enough to see with the naked eye, and as an egg sits, it changes.
The contents begin to slowly shrink, and a small air pocket forms between the two membranes, usually at the large end. The egg’s pH, about 7.6 when first laid, rises as the egg ages and loses carbon dioxide. In just a few days, the pH may reach 9.7, causing the egg white to look clear and spread out more in a pan when the egg is broken.

The nicer shape and centered yolk of fresh eggs is why they’re recommended for frying. But why are older eggs better for boiling, and why does the yolk turn green sometimes?
Fresh eggs are harder to peel. When you boil an egg, it cooks from the outside to the inside, and its proteins become unfolded, or denatured. The denatured proteins are more likely to stick to the membranes on the eggshell of a fresh egg because the pH is lower. According to “FOODS, A Scientific Approach” by Charley and Weaver, eggs are easier to peel if their pH is greater than 8.7. In other words, old eggs that have lost carbon dioxide have a higher pH (are less acidic) and are easier to peel.
Sometimes, when you boil eggs, you see a greenish/gray/blue layer on the outside of the yolk. It’s the harmless product of a chemical reaction between the iron in the egg yolk and sulfer-containing proteins in the white. You can try to avoid it by using fresh eggs, using hot (not boiling water) to cook the eggs, by plunging eggs into ice water immediately after cooking, and by promptly removing the shells.

If you’ve heard of candling eggs, it involves shining a strong light through a raw egg to look at yolk position, air sac size and white clarity. You can also tell that an egg is older if it floats in water, due to the enlarged air sac.
Ideally, to cook perfect hard boiled (large) eggs, you put them in cold water, bring the water to a boil, remove the heat and let the pan stand with the lid on for 17 minutes before removing the eggs and plunging them into cold water. Alternately, boil large eggs for eleven minutes and put them in ice water to stop the cooking. For perfect eggs, prick the large end of your eggs with a pin to release the air in the air sac.
Egg Science: Standing on Raw Eggs
- by KitchenPantryScientist
Here’s the video we made last weekend for KidScience app that shows you how to stand on a carton of raw eggs without breaking them:
Remember, Force is pressure per unit of area. In the video, you’ll see what happens when you try to stand on eggs in high heels and the force isn’t evenly distributed.
March Eggs
- by KitchenPantryScientist
Between basketball games and homework this weekend, we stood barefoot on cartons of raw eggs and painted hard boiled ones with lemon juice and baking soda.
Why the eggfest? We’re making videos for some April KidScience app experiments!
Here are a few still shots of our lovely creations:

We soaked hard-boiled eggs in cabbage juice overnight. Then, we painted them with citric acid (lemon juice) and sodium bicarbonate (baking soda.) Click here for detailed directions and more about the science.
Incredible “Feets” with Eggs
- by KitchenPantryScientist
Would you be surprised if I told you that you could stand on a carton of raw eggs barefoot without breaking them? Or that you can squeeze an egg with all your might without even cracking it (provided there are no cracks in the egg and you’re not wearing a ring?) Here’s a video of us doing these eggsperiments on Kare 11 Sunrise news!
Chicken eggs have delicate enough shells that chicks can peck their way out, but their architecture is nothing short of amazing. Their arched shape makes them able to handle large amounts of pressure without cracking, which is extremely important, since hens must sit on them in order to hatch them out. Humans use arches too, for designing strong building and bridges.
Remove any rings you’re wearing, place a raw egg in a plastic baggie and wrap your hand around it evenly. Squeeze as hard as you can. Did you break it?
 If you’re feeling brave, open a carton of raw eggs, remove any that are cracked and make sure they’re all pointing in the same direction (pointy side up or round side up) and set them on the floor.
Remove your socks and hold on to a chair or someone’s hand. Carefully step onto the eggs with your entire foot. Remember: pressure is force per unit of area. The idea is to equally distribute your weight, and therefore the pressure, across all twelve eggs. Let go of the chair.
Did it work? How important do you think it is to keep your foot flat? What would happen if you tried the same experiment in pointy high-heels?
Remember to wash your hands after touching raw eggs so you don’t spread Salmonella bacteria around!
Egg in a Bottle
- by KitchenPantryScientist
For these experiments, you’ll need a glass bottle whose neck is a little smaller than a hard-boiled egg, medium- sized, peeled hard-boiled eggs, a banana, a birthday candle or two, and a long match or grill lighter. I’d recommend using the smallest eggs in the carton (extra-large eggs may not work) for this project. I went out to my recycling bin and discovered that my Trader Joe’s grape juice bottle is the perfect size. This experiment involves flame, so requires adult supervision, and may take a few tries, but it’s really fun when it works. Here’s a link to a demonstration I did (on Kare11 news) of this experiment that will walk you through the steps!

Peel the hard boiled egg, set it on the bottle, and let your children verify that it won’t easily squeeze through. Remove the egg. Cut a thick slice of banana as your “candle holder”, stick the candle in, and drop it into the bottle. Light the candle and set the egg on the bottle, making sure it forms a tight seal.

Now, sit back and watch what happens. Don’t pull the egg off when the candle goes out since it may take a while for the egg to be “pushed” into the bottle by the atmospheric pressure!
 What happens? When the candle goes out from lack of oxygen, the remaining air in the bottle cools rapidly, decreasing the air pressure in the bottle and creating a partial vacuum. The outside air, who’s pressure is higher, actually pushes the egg into the bottle as it attempts to equalize the pressure inside of the bottle.
It’s also really fun to do the same thing, upside down, and it’s a little less tricky. Put two birthday candles in the wide end of a hard-boiled egg. Light them and hold them under the inverted bottle to warm the air inside.
 Then, put the candle end of the egg into the bottle so it forms a seal.
 POP! Your egg will be pushed in by the atmospheric pressure as in the experiment above!
Have fun!