Category:Food Science’
Homemade Magic Orbs
- by KitchenPantryScientist
My 8-YO loves Orbeez, those water-thirsty polymer balls that go from the size of cookie sprinkles to the size of marbles after a quick soak.
I wondered whether we could make something similar from gelatin or agar.
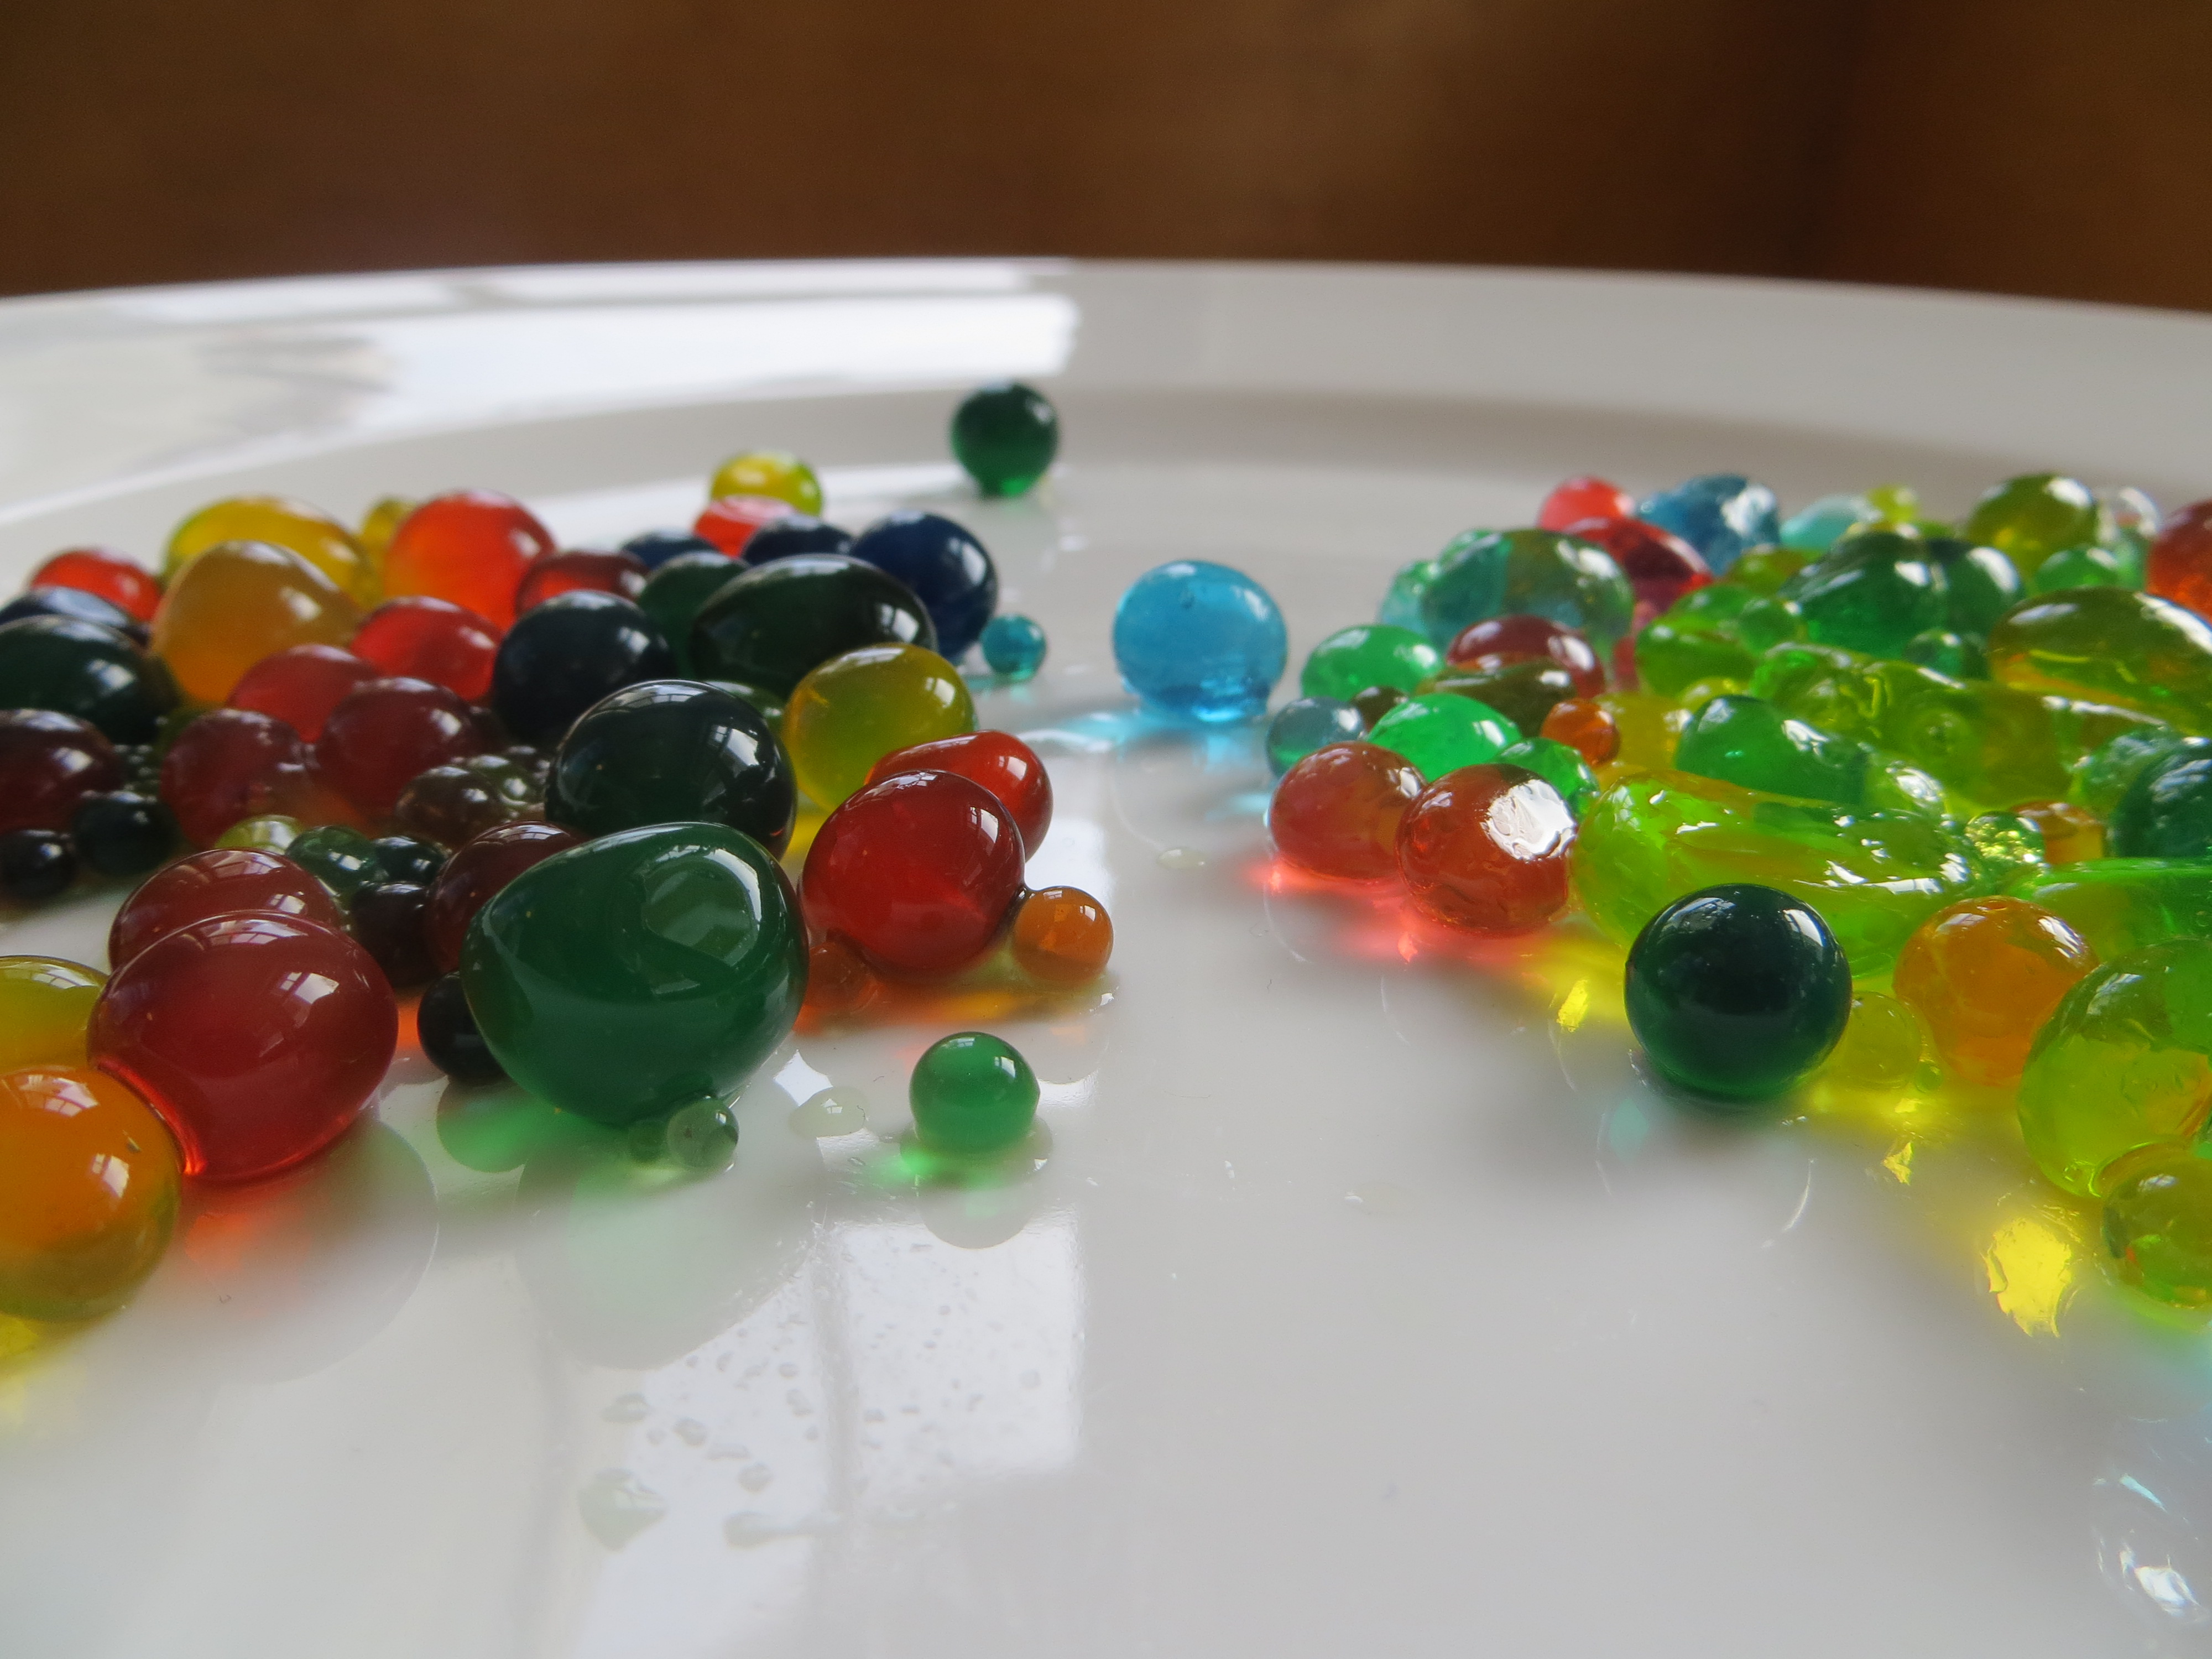
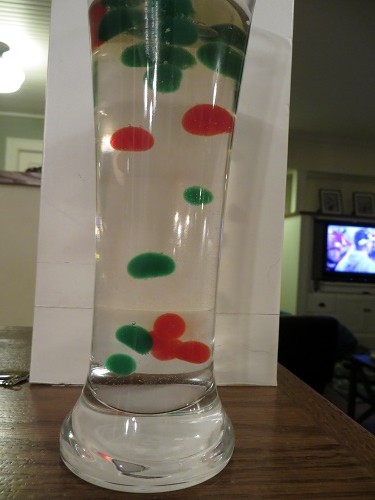
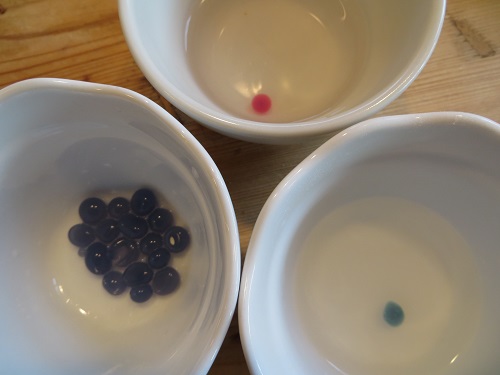
Homemade Magic Orbs- KitchenPantryScientist.com (agar orbs on left, gelatin orbs on right)
A quick search online showed me that some chefs use a technique called oil spherification to make tiny round morsels using everything from balsamic vinegar to fruit juice, mixed with gelatin and agar. It’s known to cooks as a “molecular gastronomy” technique, and takes advantage of the fact that water and oil don’t mix. Water-based droplets falling through chilled oil form into perfect spheres due to surface tension, and gelatin and agar added to the mix are colloids that solidify as they cool.
Magic Orbs forming in cold oil (KitchenPantryScientist.com)
We made some fun (inedible) orbs of our own, using the technique: standard orbs (from gelatin or agar and water), floating orbs (with agar and vinegar) and color-changing acid/base indicator orbs (from red cabbage juice and gelatin or agar.) Adult supervision is required for this project, since it involves hot liquids. The orbs may also be a choking hazard, so keep them away from toddlers. I demonstrated how to make them on Kare11 Sunrise News.
To make magic orbs, you’ll need
-unflavored gelatin or agar*
-water
-vinegar
-food coloring
-cold vegetable oil in a tall container. Chill oil in freezer or on ice for at least an hour, or until it is cloudy, but still liquid.
HINT: Orbs made with vinegar and agar shrink better than those made with gelatin (see floating orb recipe below!)
Standard colored orbs:
1. With adult supervision, dissolve 5 packets unflavored gelatin or 2 Tbs. agar in 1 cup hot water. Add 2 tsp. vinegar. Microwave and stir until completely dissolved.
2. Pour into smaller containers and add food coloring. When cooler, but not solid, add the melted, colored gelatin or agar to an empty glue container or squeeze bottle.
3. Drip gelatin or agar solution into the cold oil, a few drops at a time so it forms into marble-sized orbs and sinks. Drip two colors together to make multi-colored orbs! Allow to cool for 30 seconds or so and retrieve with a slotted spoon or strainer. Rinse with water and repeat, re-chilling the oil as needed until you have as many orbs as you want.
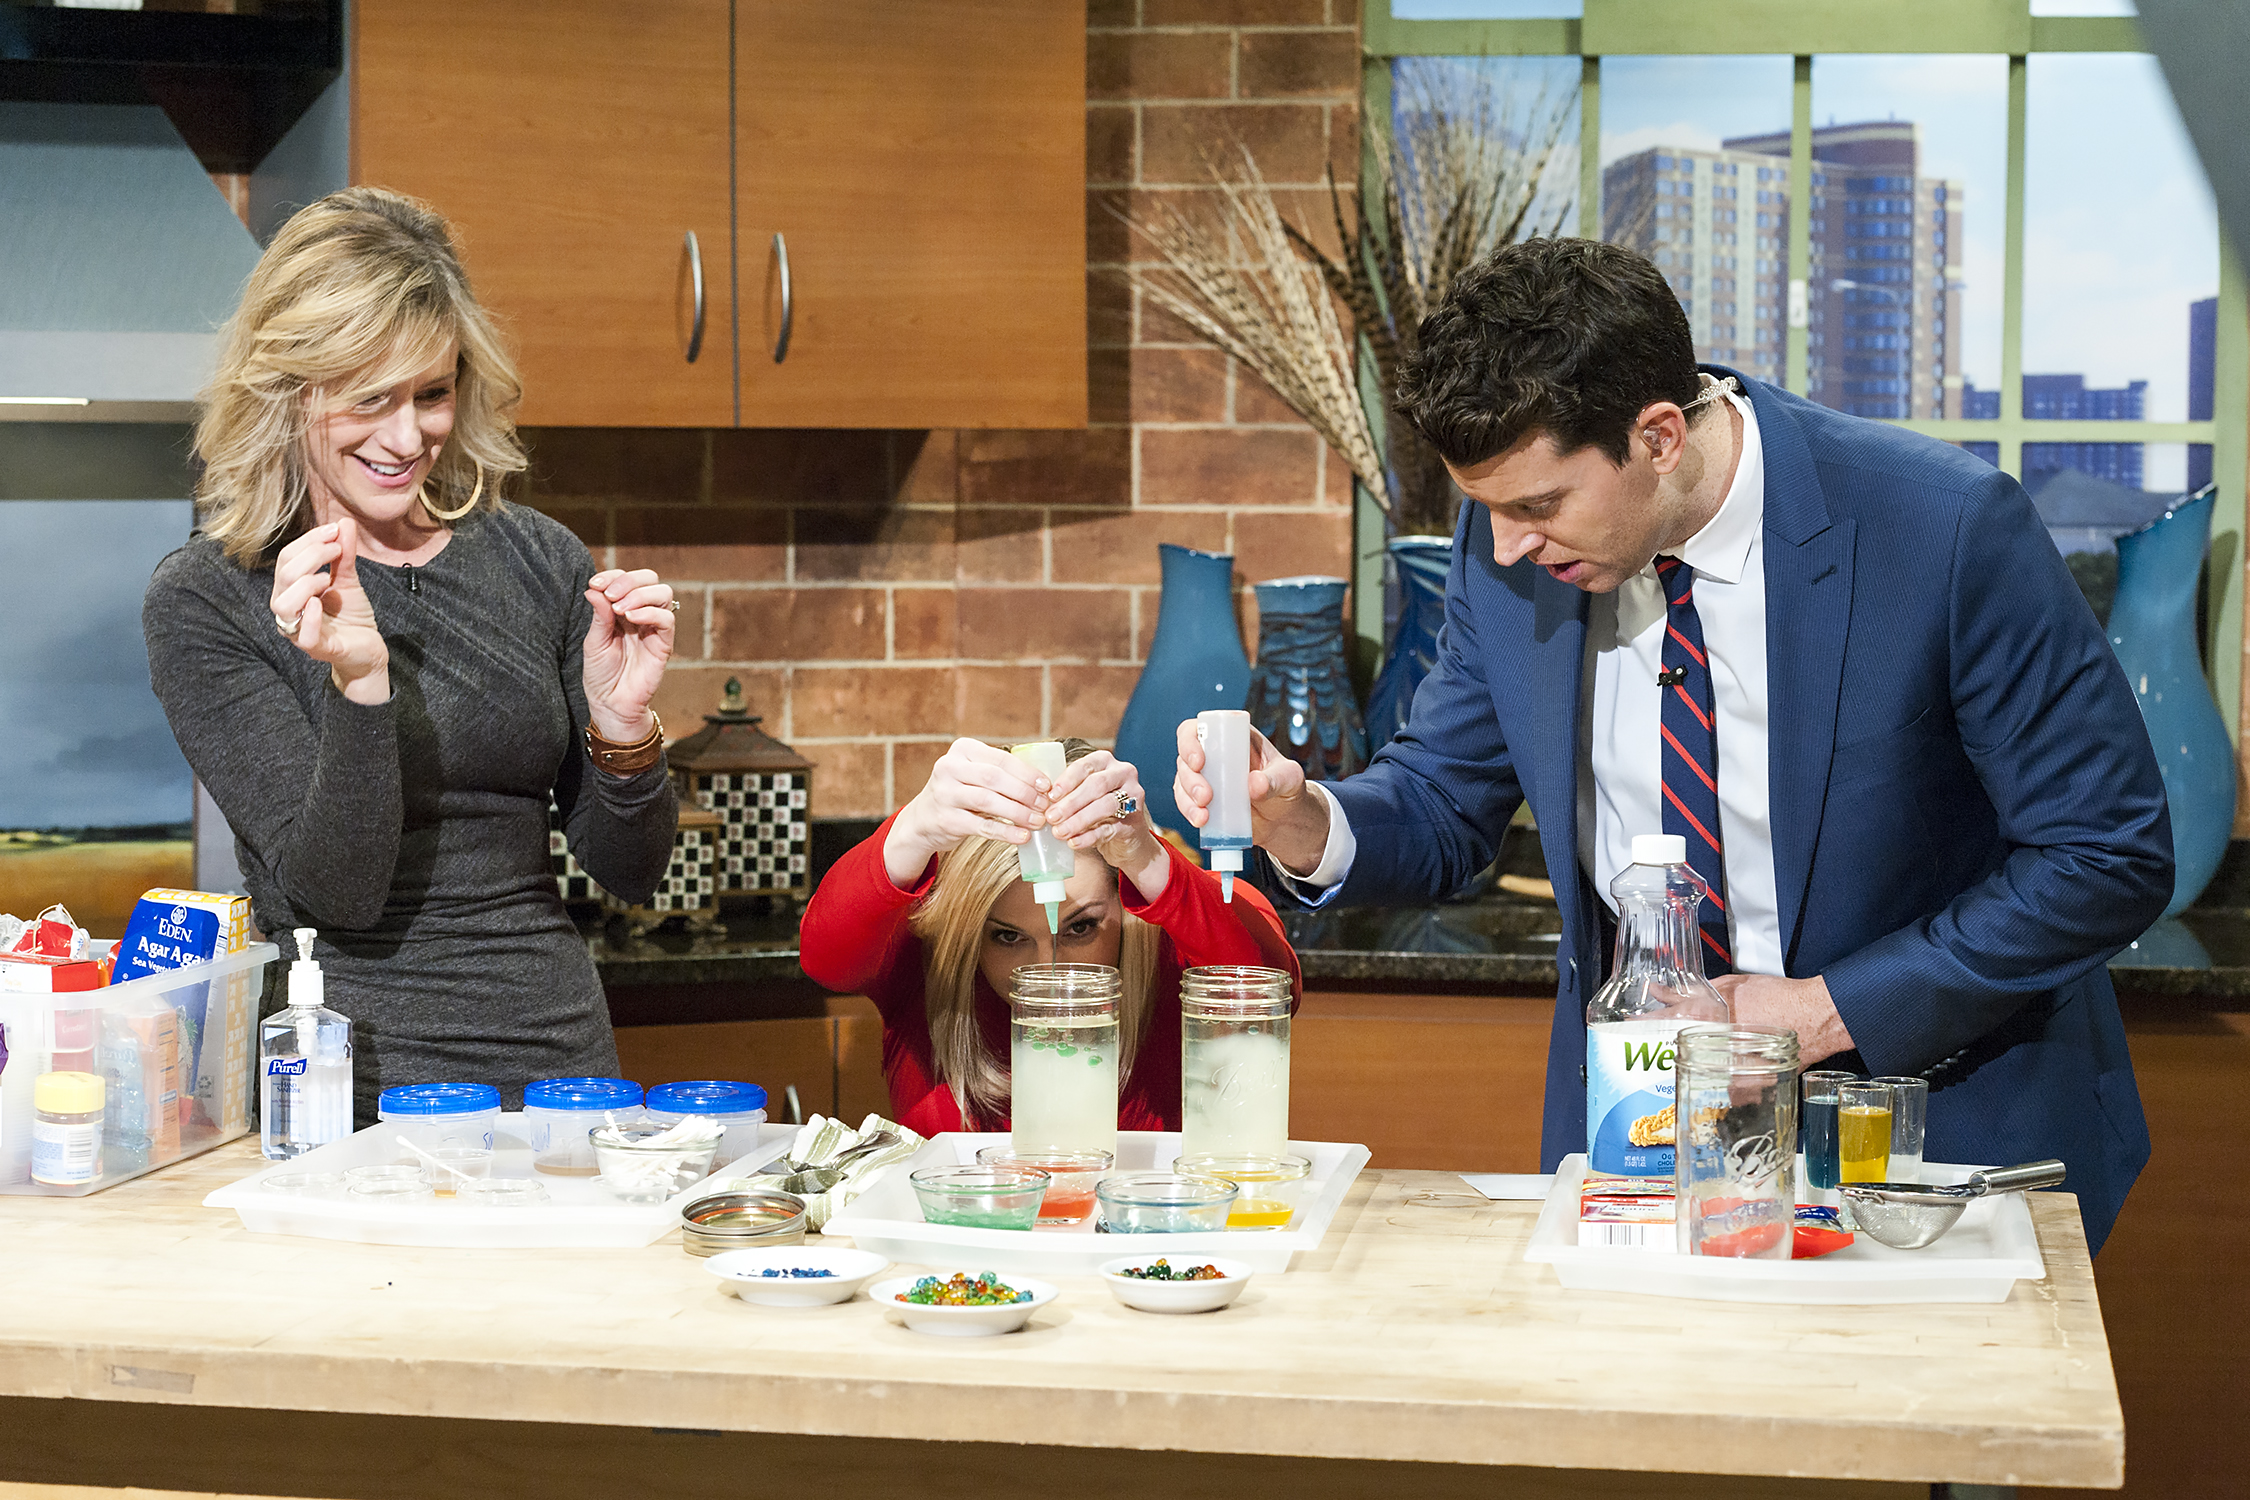
Making magic orbs on Twin Cities Live with Lindsey Brown and Steve Patterson (photo by Glenn Griffin)
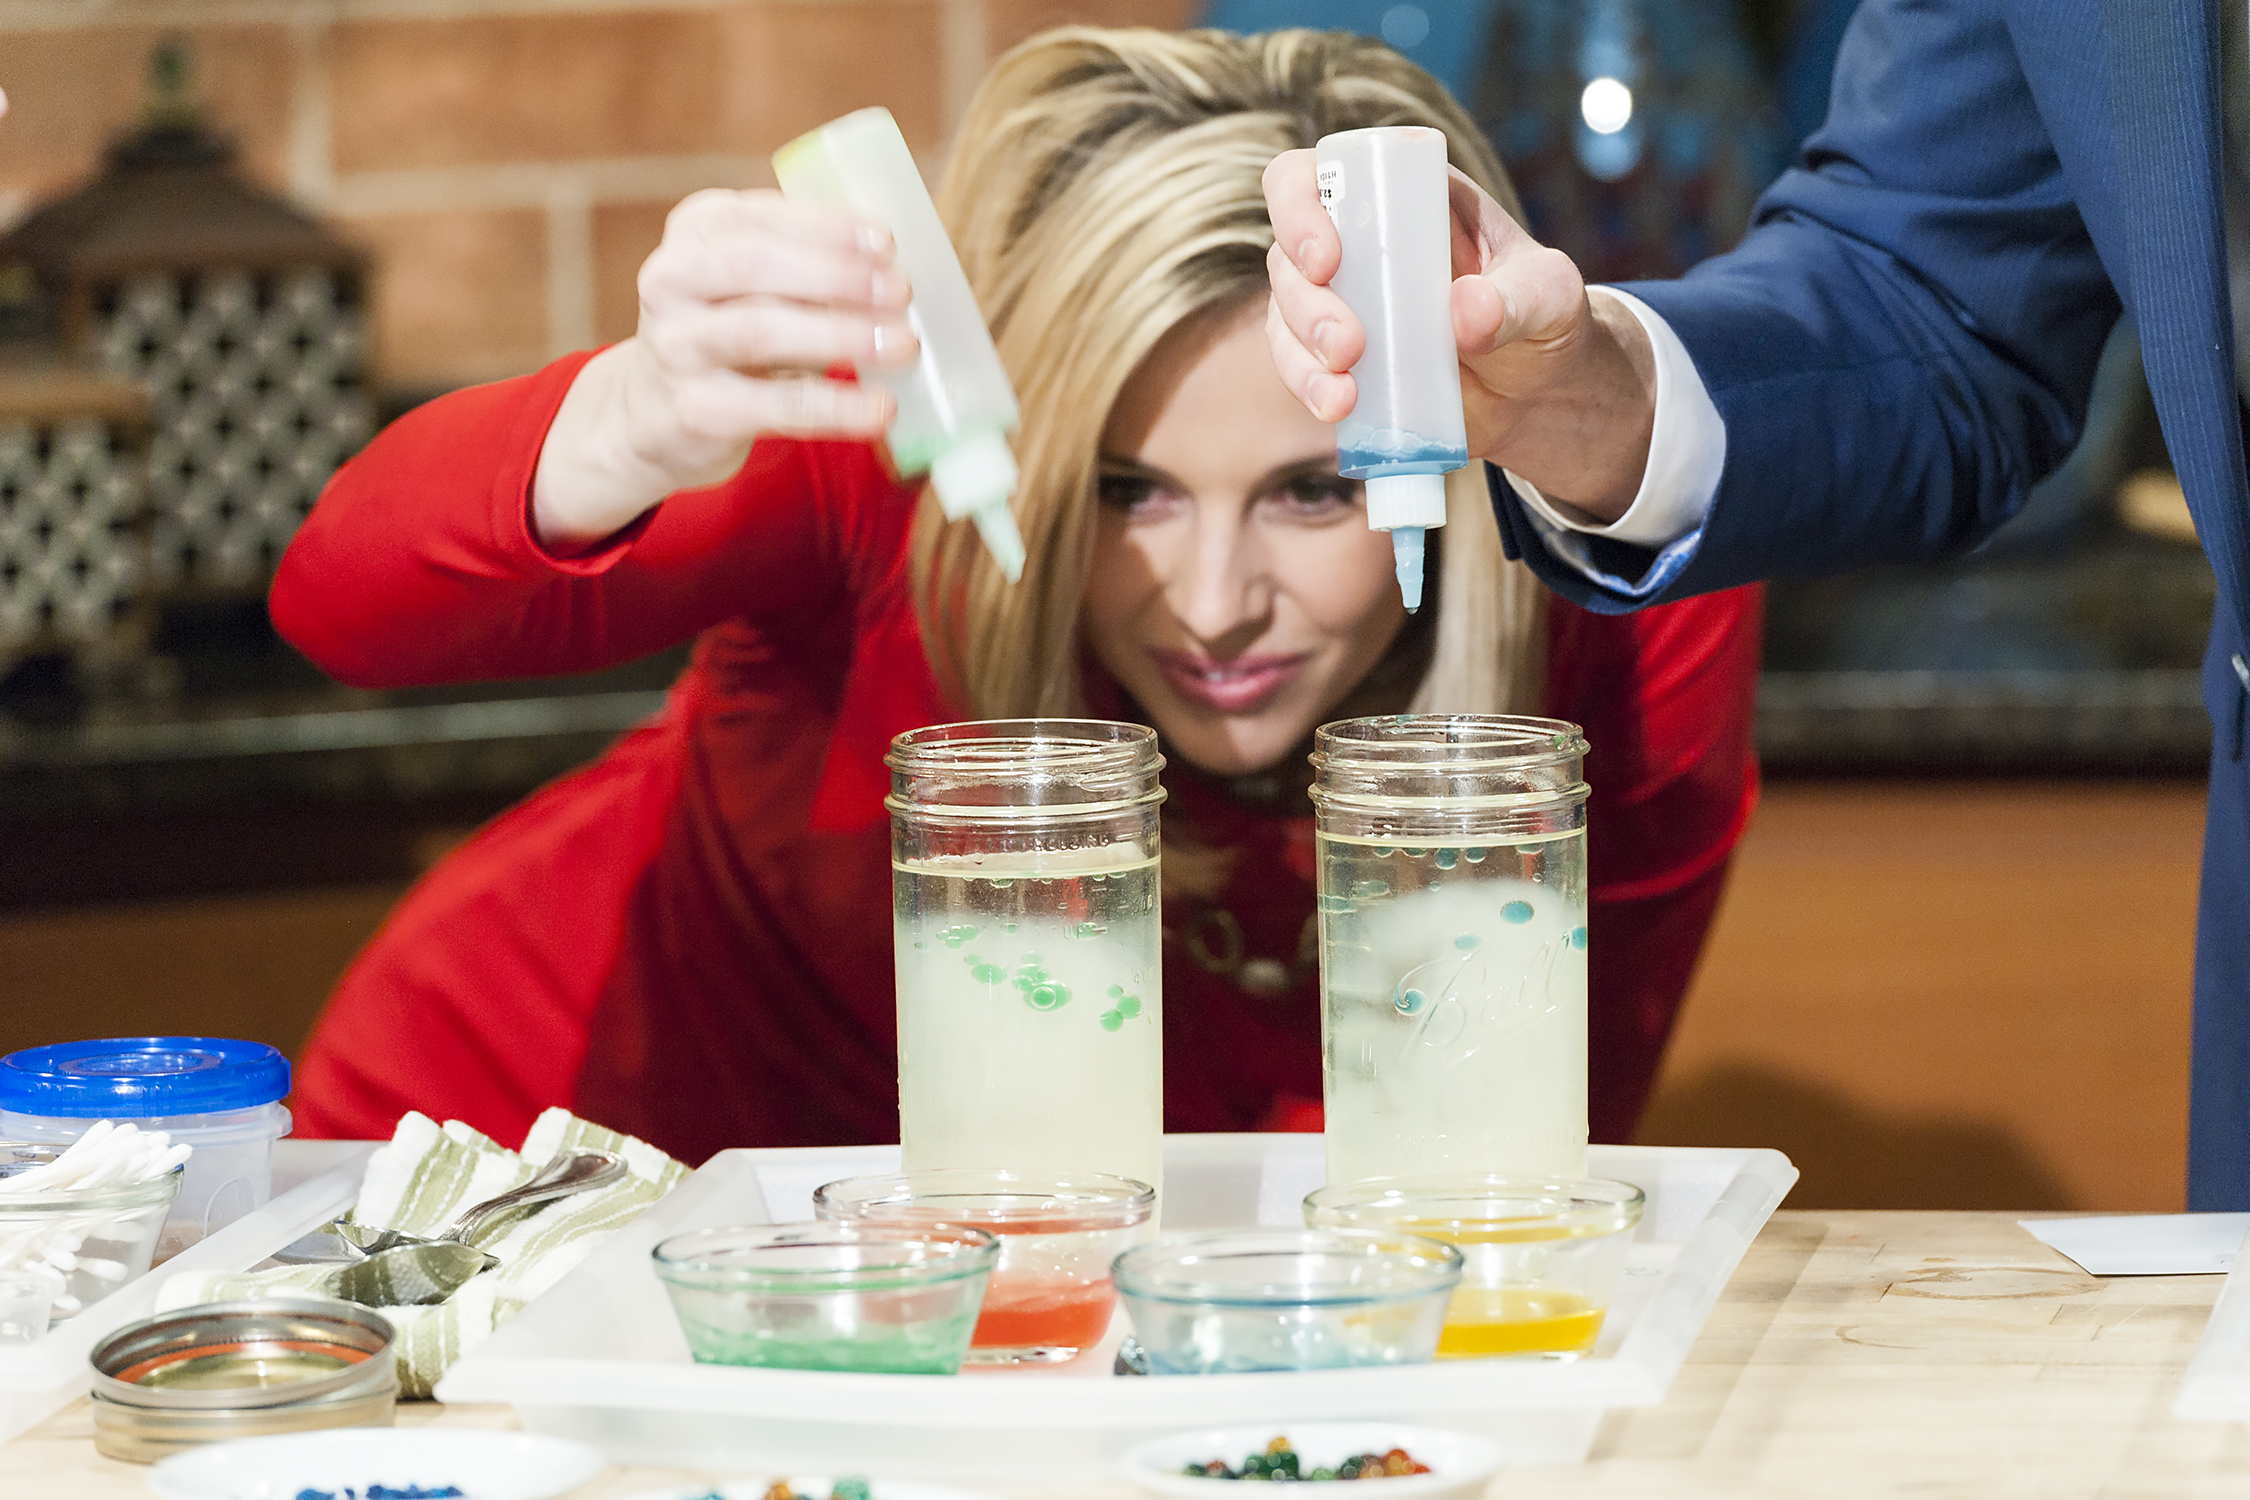
Lindsey Brown and Steve Patterson making orbs on Twin Cities Live (photo by Glenn Griffin)
4. Rinse orbs with water. Dry them out by setting them on a plate overnight if you want to see them shrink and then re-hydrate them with water. Orbs can be kept in a plastic bag in the refrigerator. (Keep away from small children, since they may be a choking hazard.)
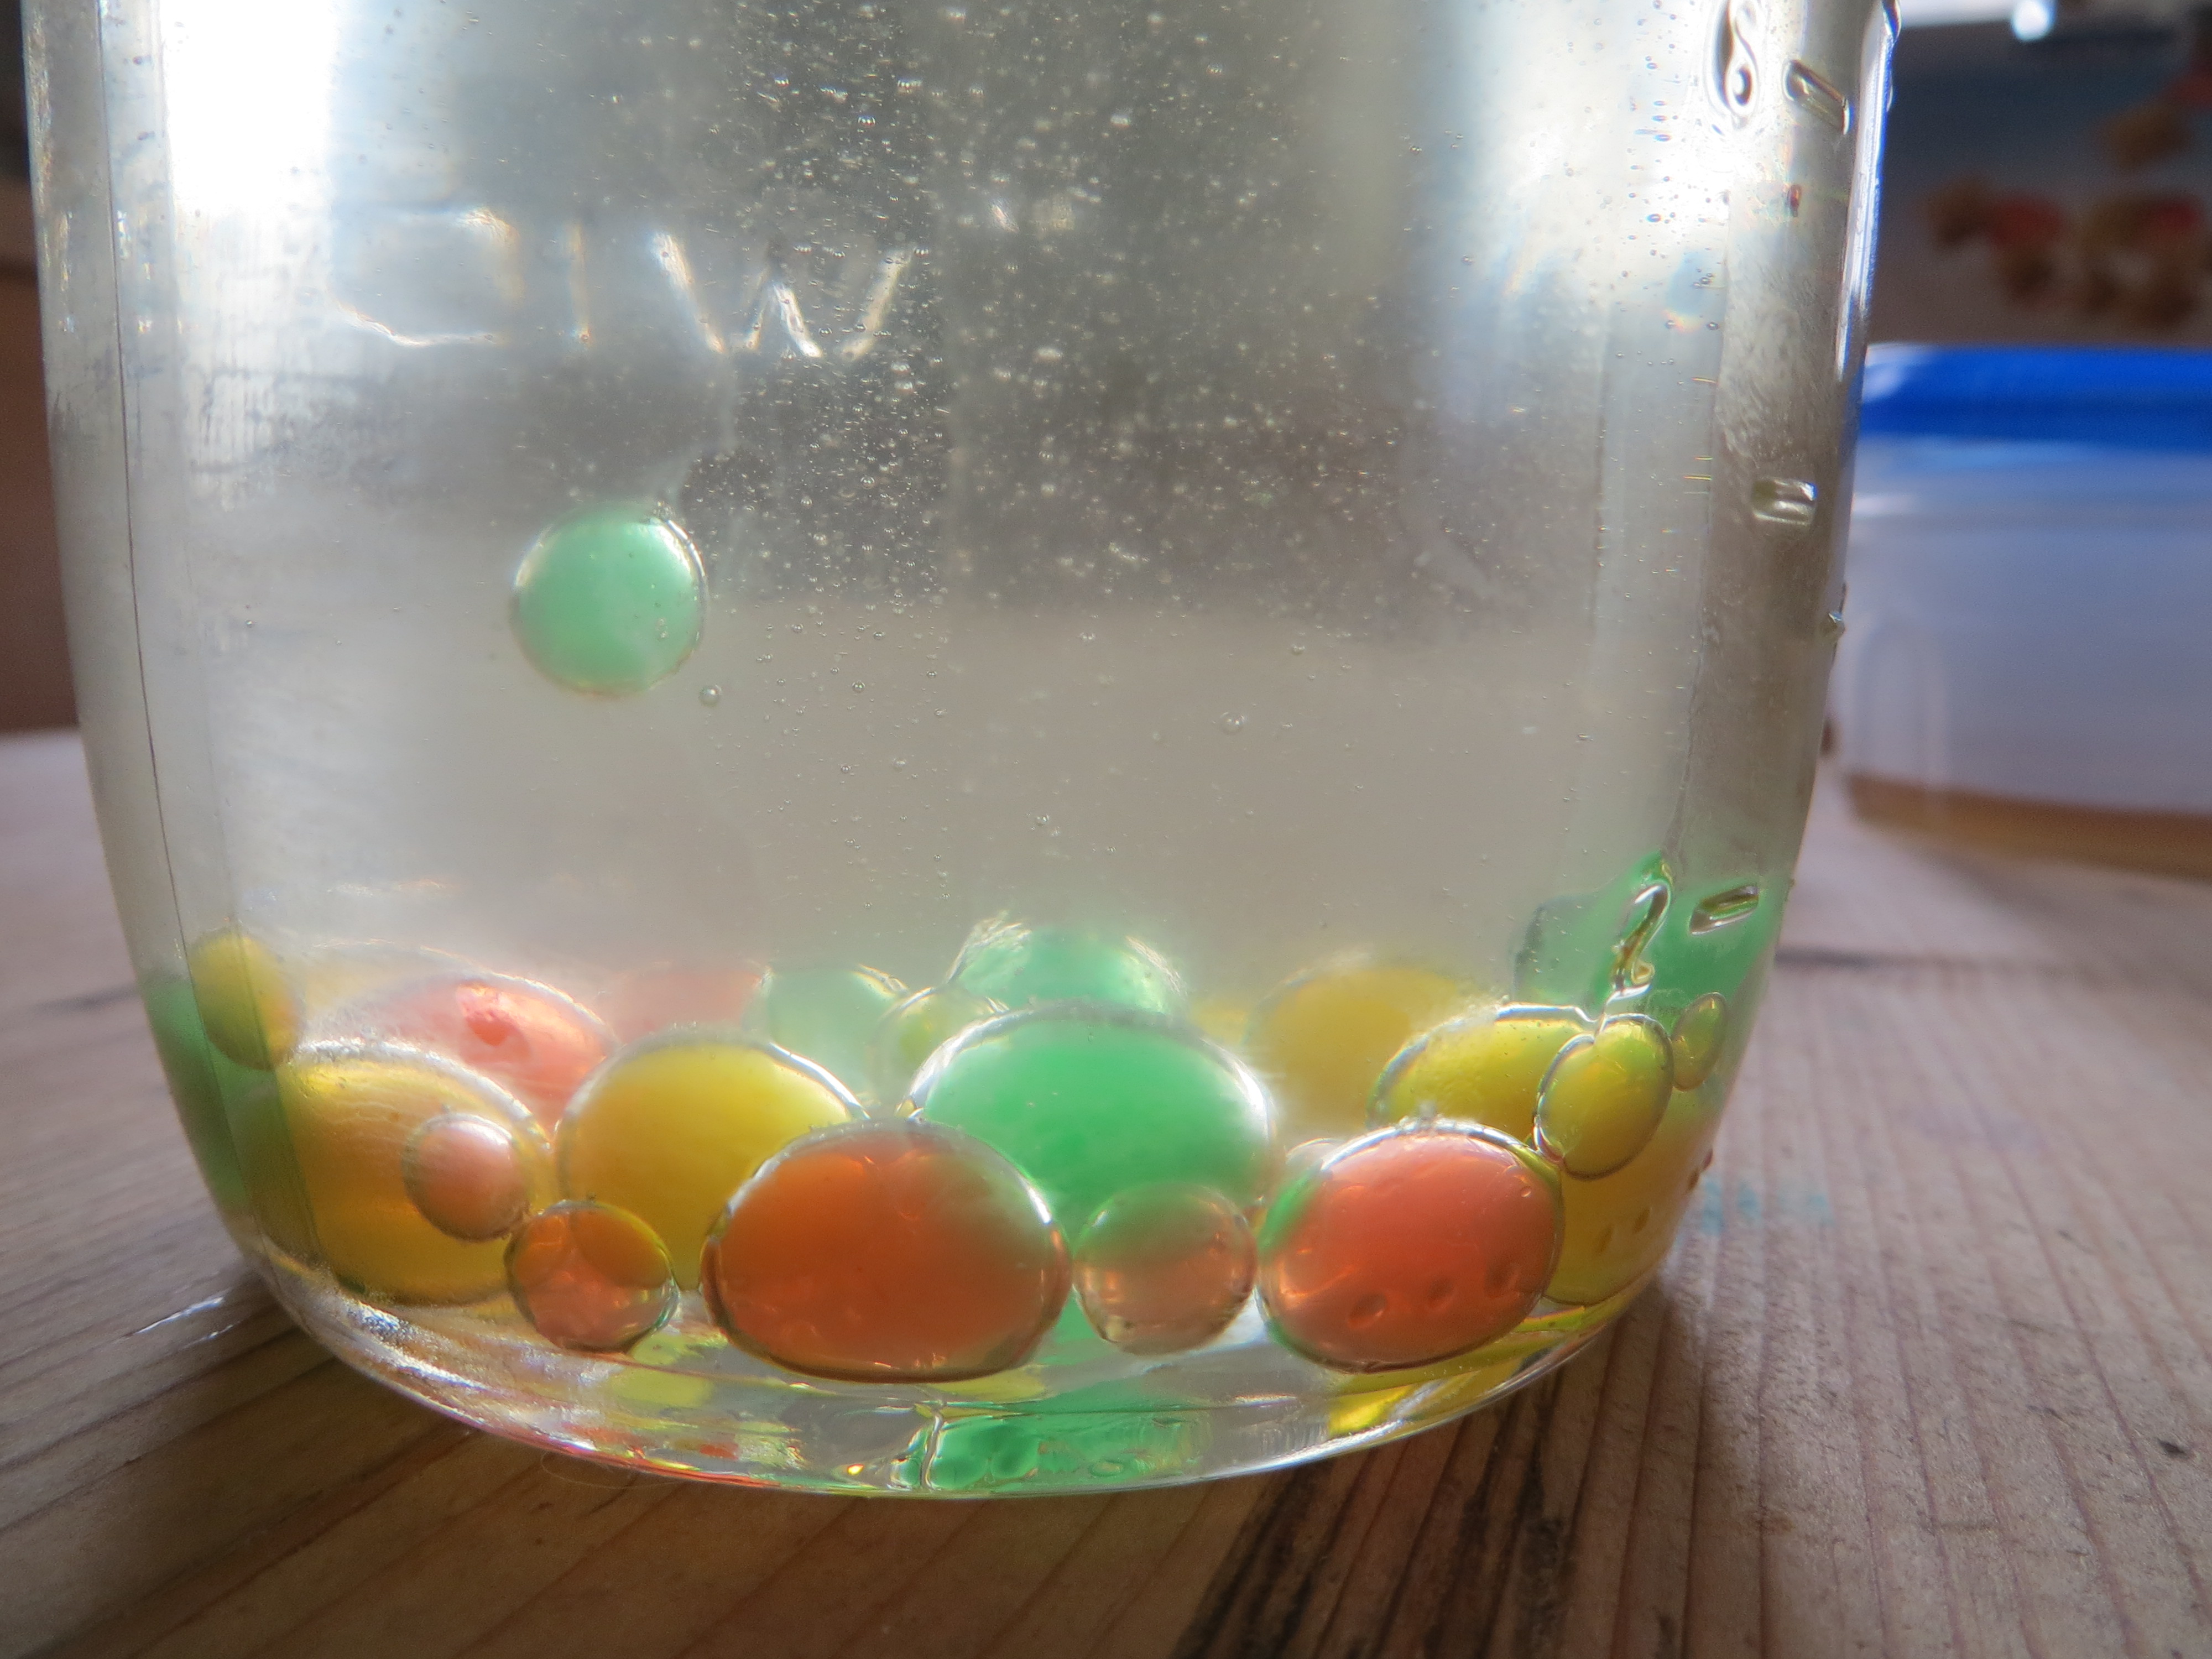
To make floating orbs, follow directions above, but make with 1 cup white vinegar and 2 Tbs. agar. They will sink and float when added to water with a few tsp. of baking soda mixed in as the vinegar and baking soda react to form carbon dioxide gas.
To make color-changing orbs, dissolve 2 Tbs. agar or 5 packs unflavored gelatin in 1 cup red cabbage juice (magic potion) and follow directions for making orbs. Then drop them in vinegar to watch them turn pink or in water containing baking soda to watch them turn blue!
Could you make homemade jelly beans using flavored gelatin using this same method? Try it!
*Agar, or agar agar flakes can be found in the Asian food section of many grocery stores!
Candy Science: Icy Worm Pond
- by KitchenPantryScientist
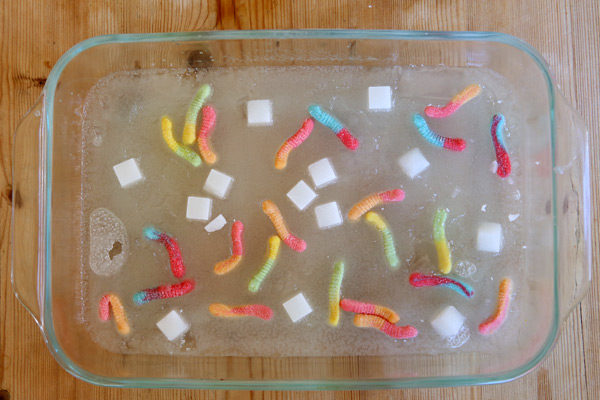
If you got any sour gummy worms for Halloween, they’re probably coated with sweet-sour powder made from citric acid and sugar crystals. Using the same science used to make rock candy, you can use sour gummy worms to crystallize sugar syrup and make an”icy worm pond.” It’s even more fun to add sugar cubes to your pond! After a few days, you can chip your worms out of the “ice” to see how they taste. I created this experiment for Imperial Sugar and Dixie Crystals. Check it out on their website (click here) for directions and to learn more about the science behind the fun!
If you don’t have sour worms, try coating other (non-chocolate) candy with sugar by dipping it in water, rolling it in sugar and letting it dry before you add it to your pond. It would be fun to do this experiment with Swedish fish, or lifesavers!
Can you make up an experiment using Halloween Candy? Comment on this post with the experiment you created and you could win a copy of Kitchen Science Lab for Kids*!
*Winner will be chosen at random.
Farm Science
- by KitchenPantryScientist

We learned about some of the crops grown in Kansas. This is winter wheat.
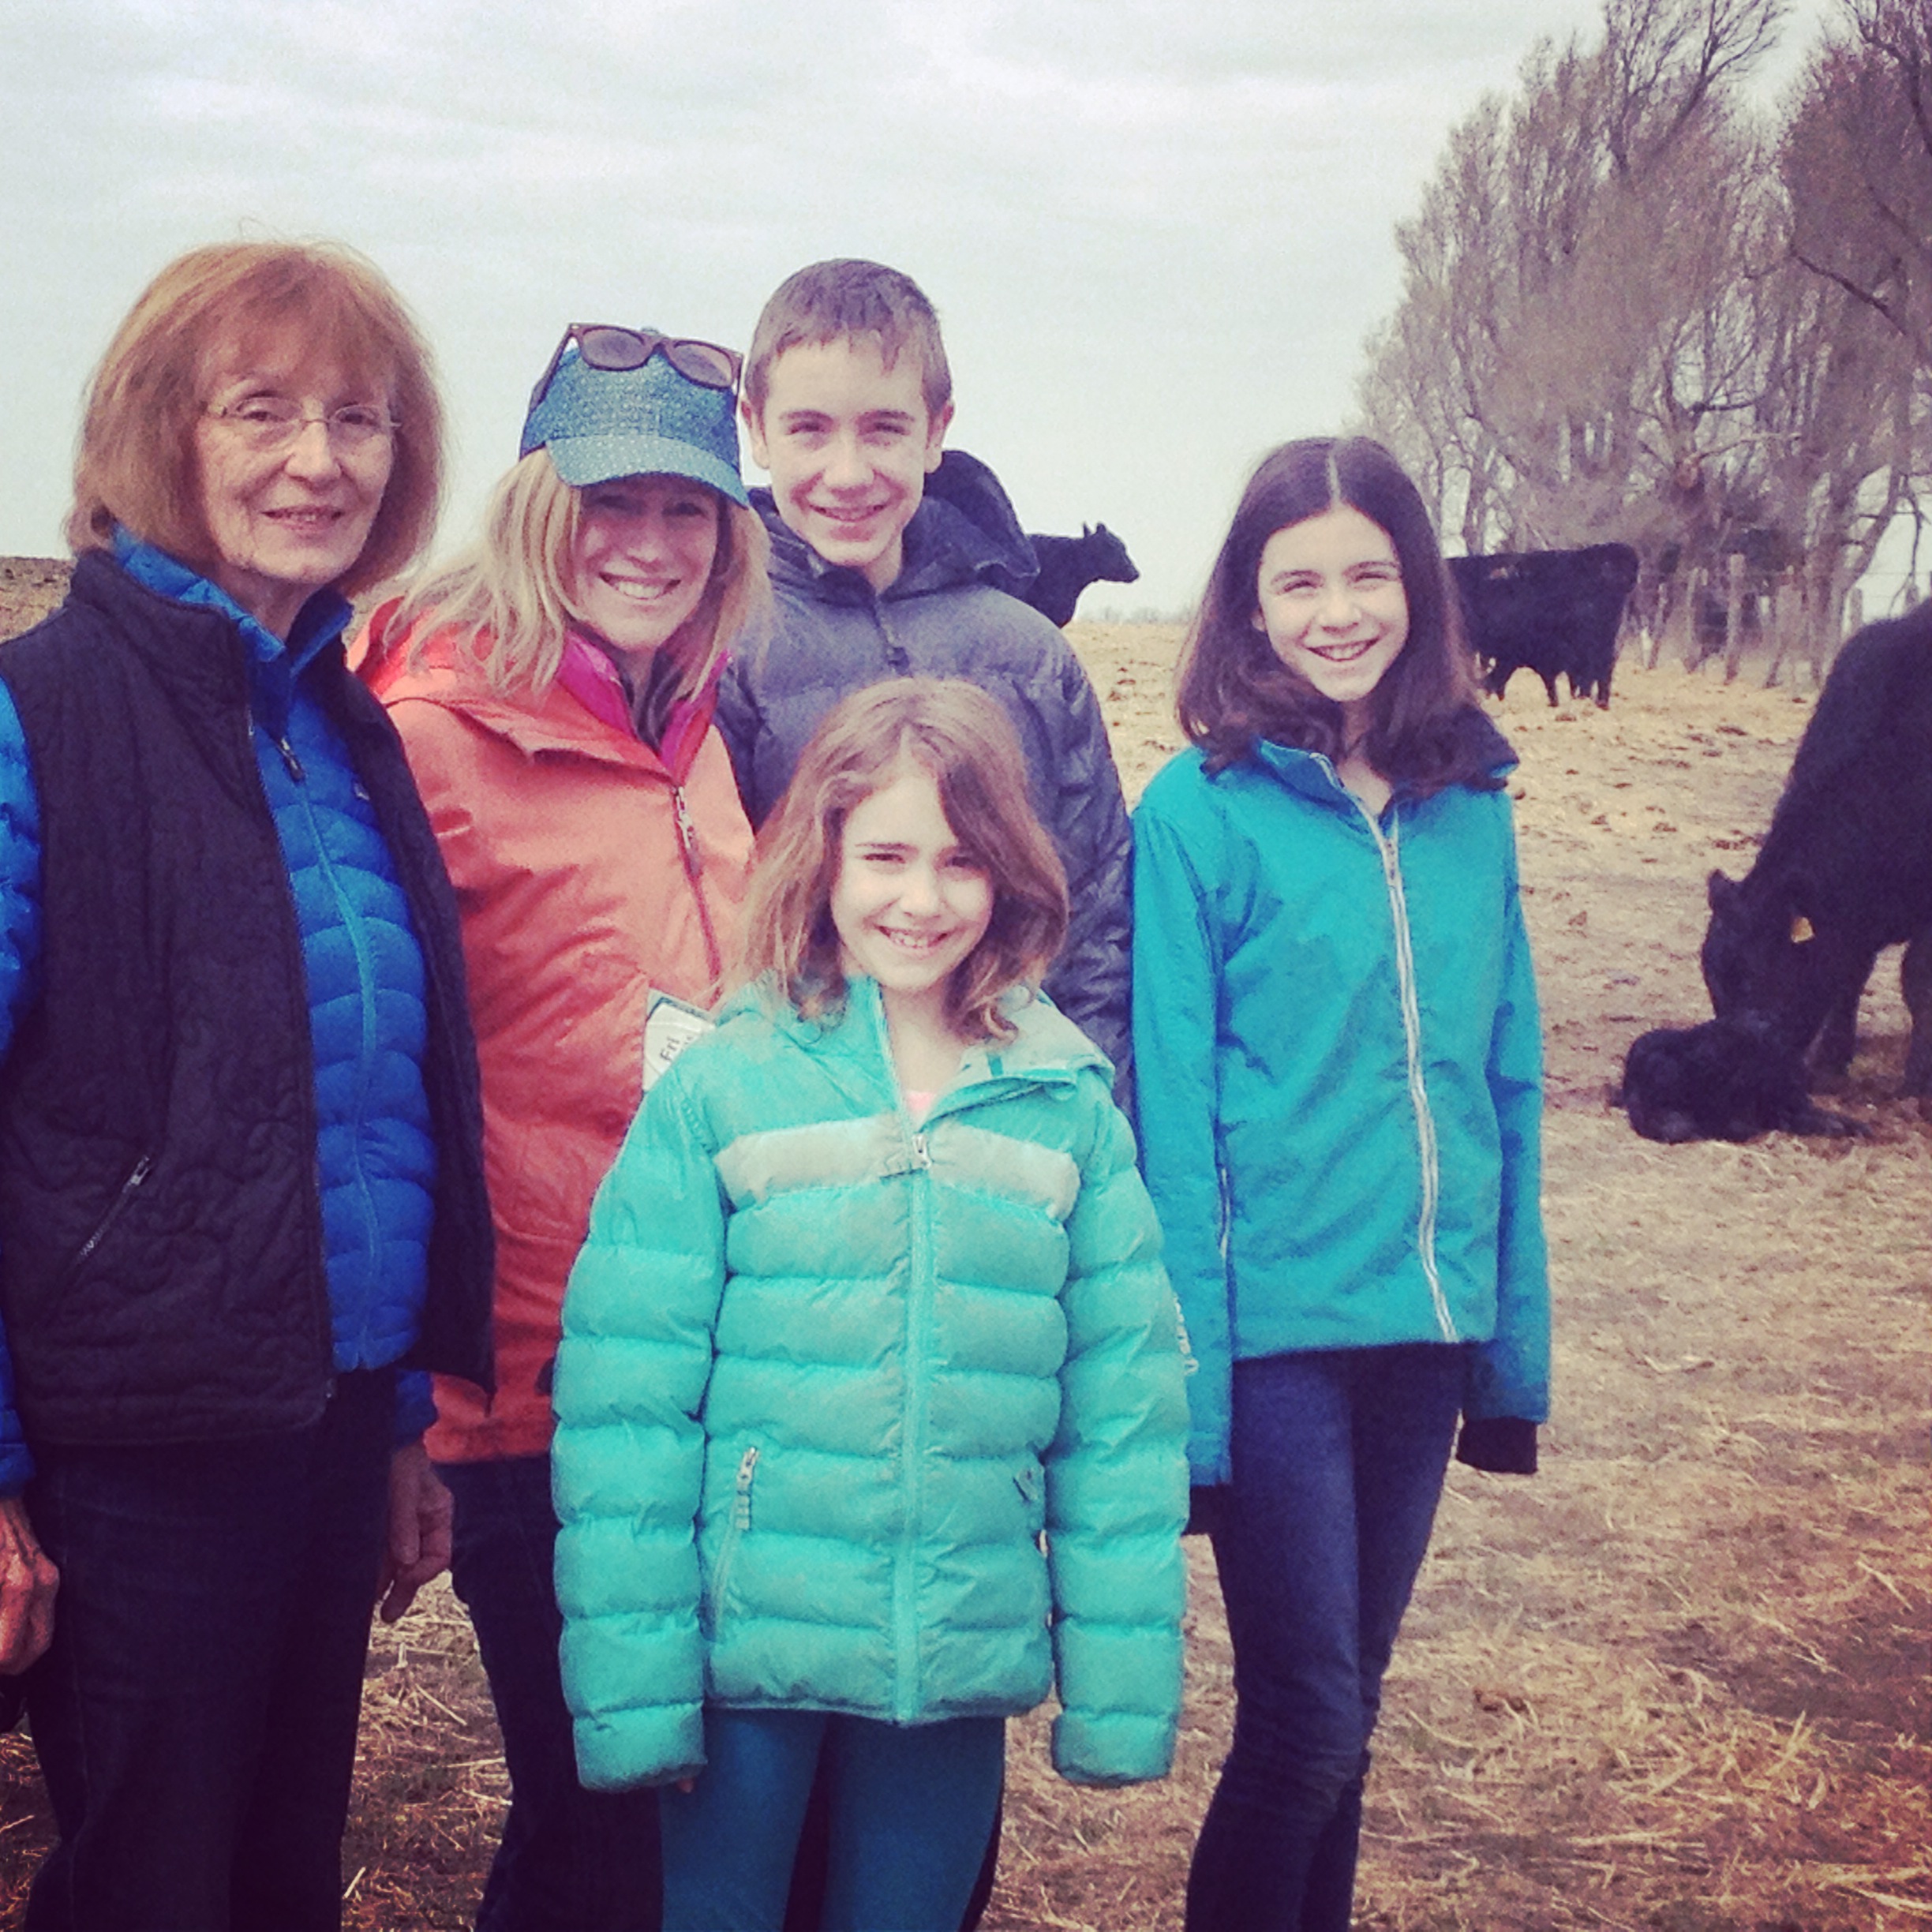
Farmers have always depended on science and technology to raise food and animals, and on a recent visit to my friend’s farm, we learned about how farmers use this knowledge every day.
Debbie Lyons-Blythe and her family operate a farm near Manhattan, Kansas, in the midst of the beautiful Flint Hills, and she muses about ranching and life on her blog Life on a Kansas Cattle Ranch.

Debbie gave us an amazing tour!
Not long after piling into Debbie’s pickup truck with my three kids and mom, we were lucky enough to roll down our windows and witness the birth of a calf from about 5o meters away.
It was fascinating, and we learned about how a calf’s mother always eats the placenta, licks the calf thoroughly to warm it up, and tries to get it on its feet as soon as possible, in case predators are lurking nearby. My kid were simultaneously amazed and queasy.
We watched as another calf was weighed and tagged and then left to see the rest of the farm. By the time we returned, the calf was standing on wobbly legs next to it’s mom.
A large percentage of Debbie’s farm is pasture, where the cattle spend the majority of their time. Like much of the country, Kansas was desperate for rain during our visit, and while driving around the farm, we saw an area that had accidentally caught fire earlier that week.

Here’s the solar panel, for the pump on a well. You can see the old windmill.
Luckily, there was a well nearby, powered by a solar pump, and they were able to control the blaze. Much of the prairie grassland is burned on purpose every year to prevent brush from growing up and allowing the growth of new prairie grasses. In fact, the great prairies of America’s Midwest wouldn’t exist if it weren’t for the burning that humans have instigated for centuries to keep grazing animals nearby! Here’s a nice article about it from NPR.
As we drove past several Angus bulls, Debbie told us that modern science, like DNA analysis of skin tags from hairs plucked from bulls, allows ranchers to learn a huge amount about the about the animals they are raising. They can even predict what kind of fats will marble the steaks harvested from the offspring of the cattle on their ranch.
We visited a nearby feedlot, where cattle are fattened on grain before they go to market as meat and learned that tiny wasps are often used to help control the flies that bother the cattle. Ranchers on horseback patrolled the lots, keeping an eye out for unwell animals. If a cow is sick, they remove it to a different pen, treat it, and give it a new ear tag if it’s been treated with antibiotics. This is how they keep track of animals for food labeling, which we had an interesting conversation about.

patrolling the feedlot to make sure the cattle are healthy
Personally, I like to know where the meat I buy comes from (called country of origin labeling), what the cattle have eaten and whether they’ve been fed antibiotics. However, Debbie told us that other countries have threatened to stop importing American beef if we label country of origin. She also suggested that many people don’t really care where their beef was raised, or can’t afford to buy antibiotic-free, local beef, which is absolutely true. We also learned that country of origin labeling comes from the ranchers’ pockets, so it’s an added expense for them. Clearly, it’s an important issue, that many people feel passionately about on both sides.
Although I’m opposed to feeding meat animals antibiotics to speed growth, measures must be taken to protect older cattle from anaplasmosis, a deadly tick-born disease endemic to parts of the Midwest. To keep “cattle that are breeding stock–they are older and are not to be consumed as beef,” safe, they are fed a very low level of antibiotics in their salt and mineral supplement throughout the summer during fly and tick season. The cattle are on pasture and eat the supplement by choice, according to Debbie. Hopefully, a vaccine for anaplasmosis will be developed soon, and antibiotic treatment will no longer be necessary.
We really enjoyed our visit to Debbie’s ranch, and look forward to seeing how farming and science move into the future together to feed a growing population. For an interesting article on feeding the world, read this great National Geographic article, A Five Step Plan to Feed the World, by Jonathan Foley.
The new baby and her mama are right behind us!
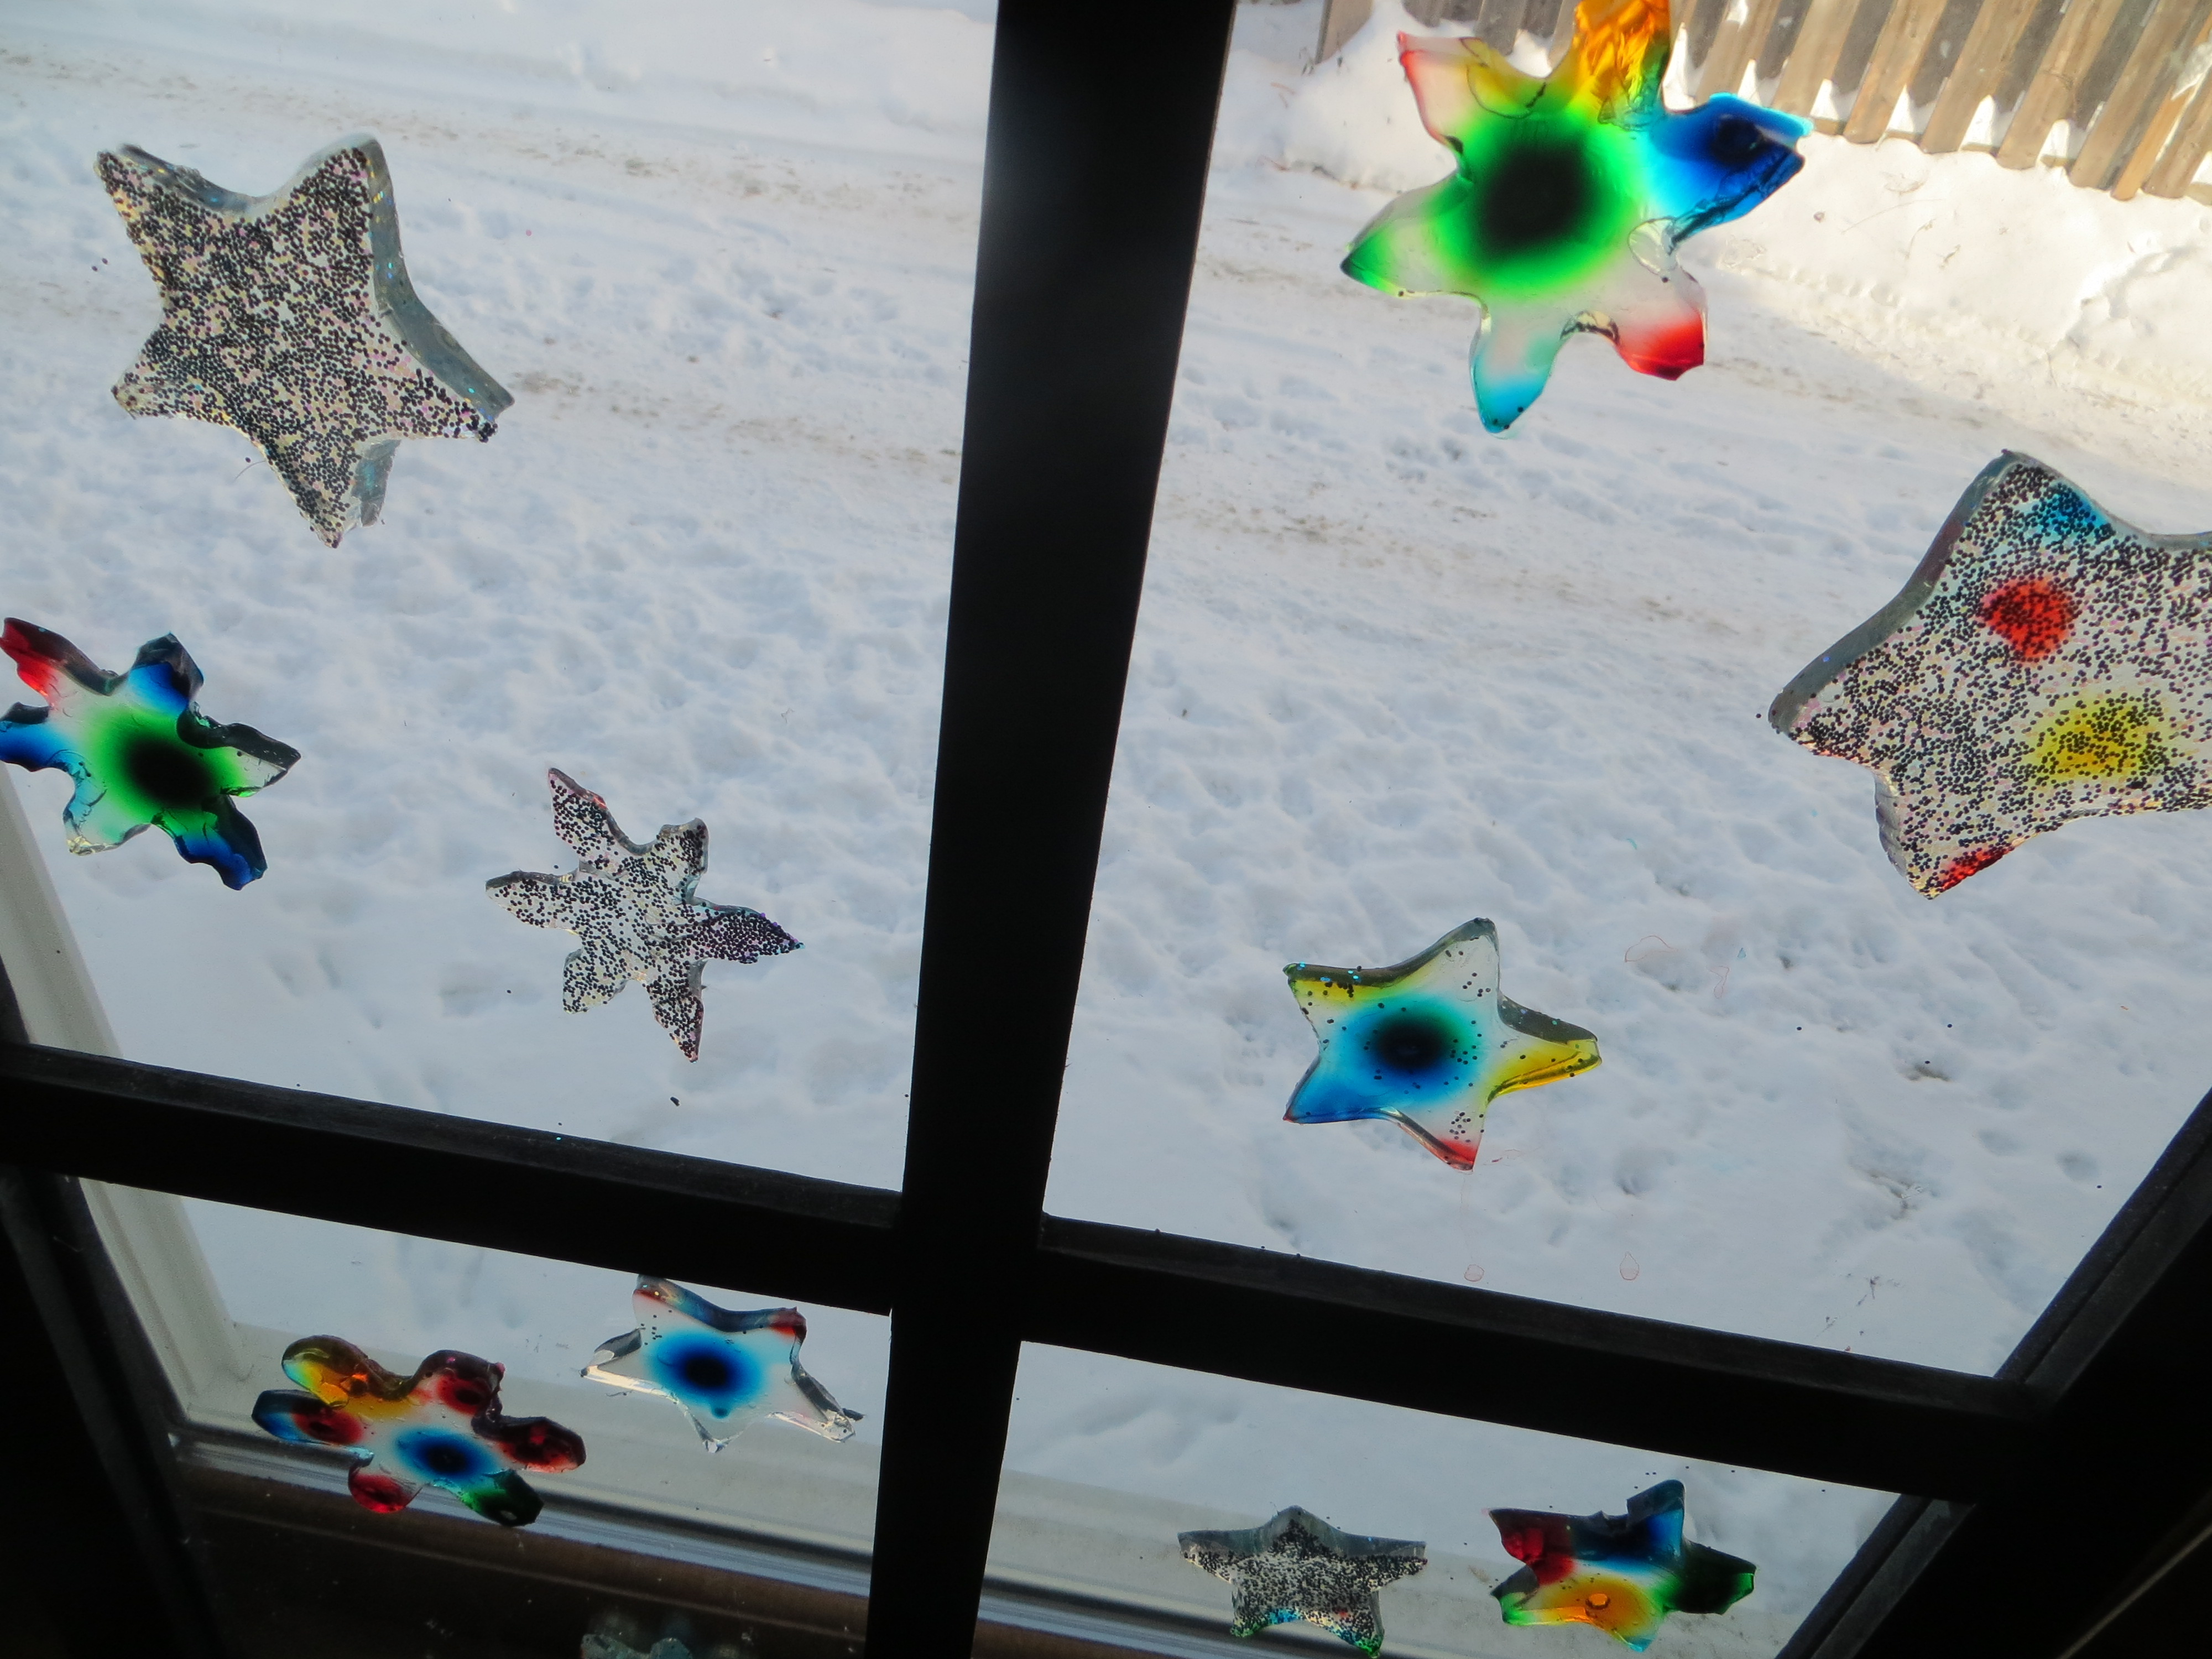
Homemade Sticky Window Gellies (Decorative Diffusion, Floatation and Evaporation Experiment)
- by KitchenPantryScientist
What happens when food coloring molecules move, or DIFFUSE through gelatin, the substance that makes jello jiggle?
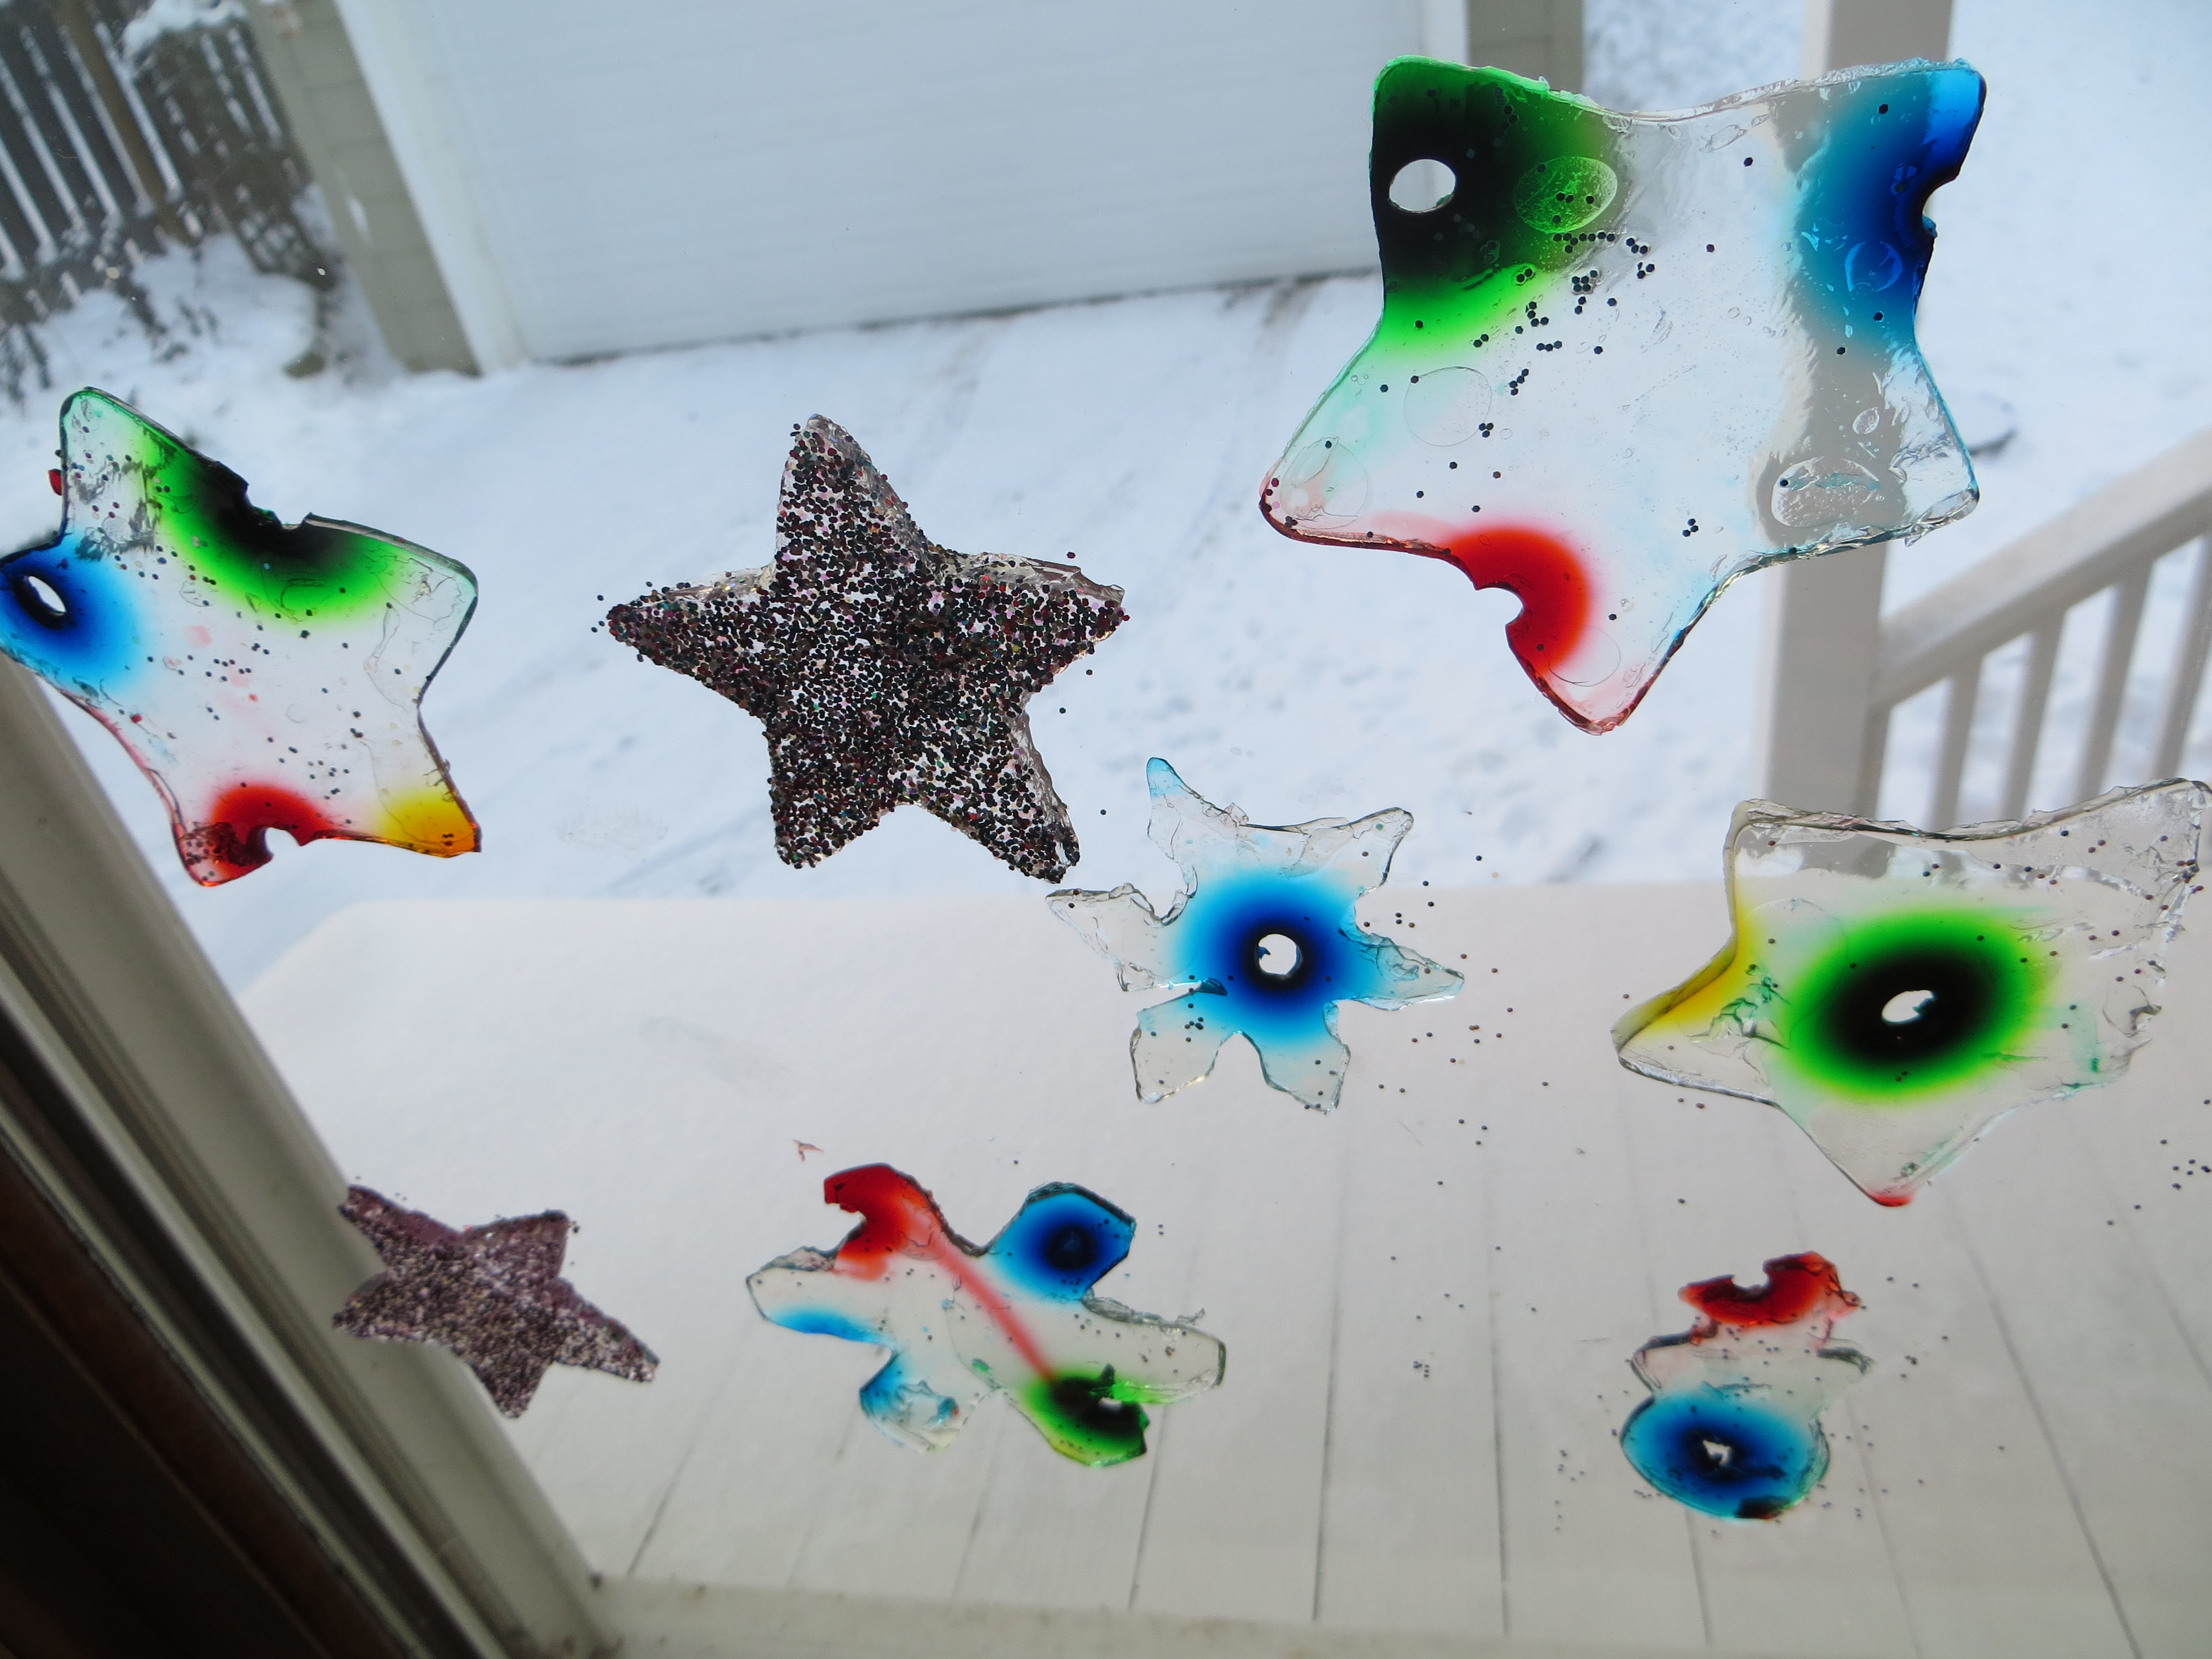
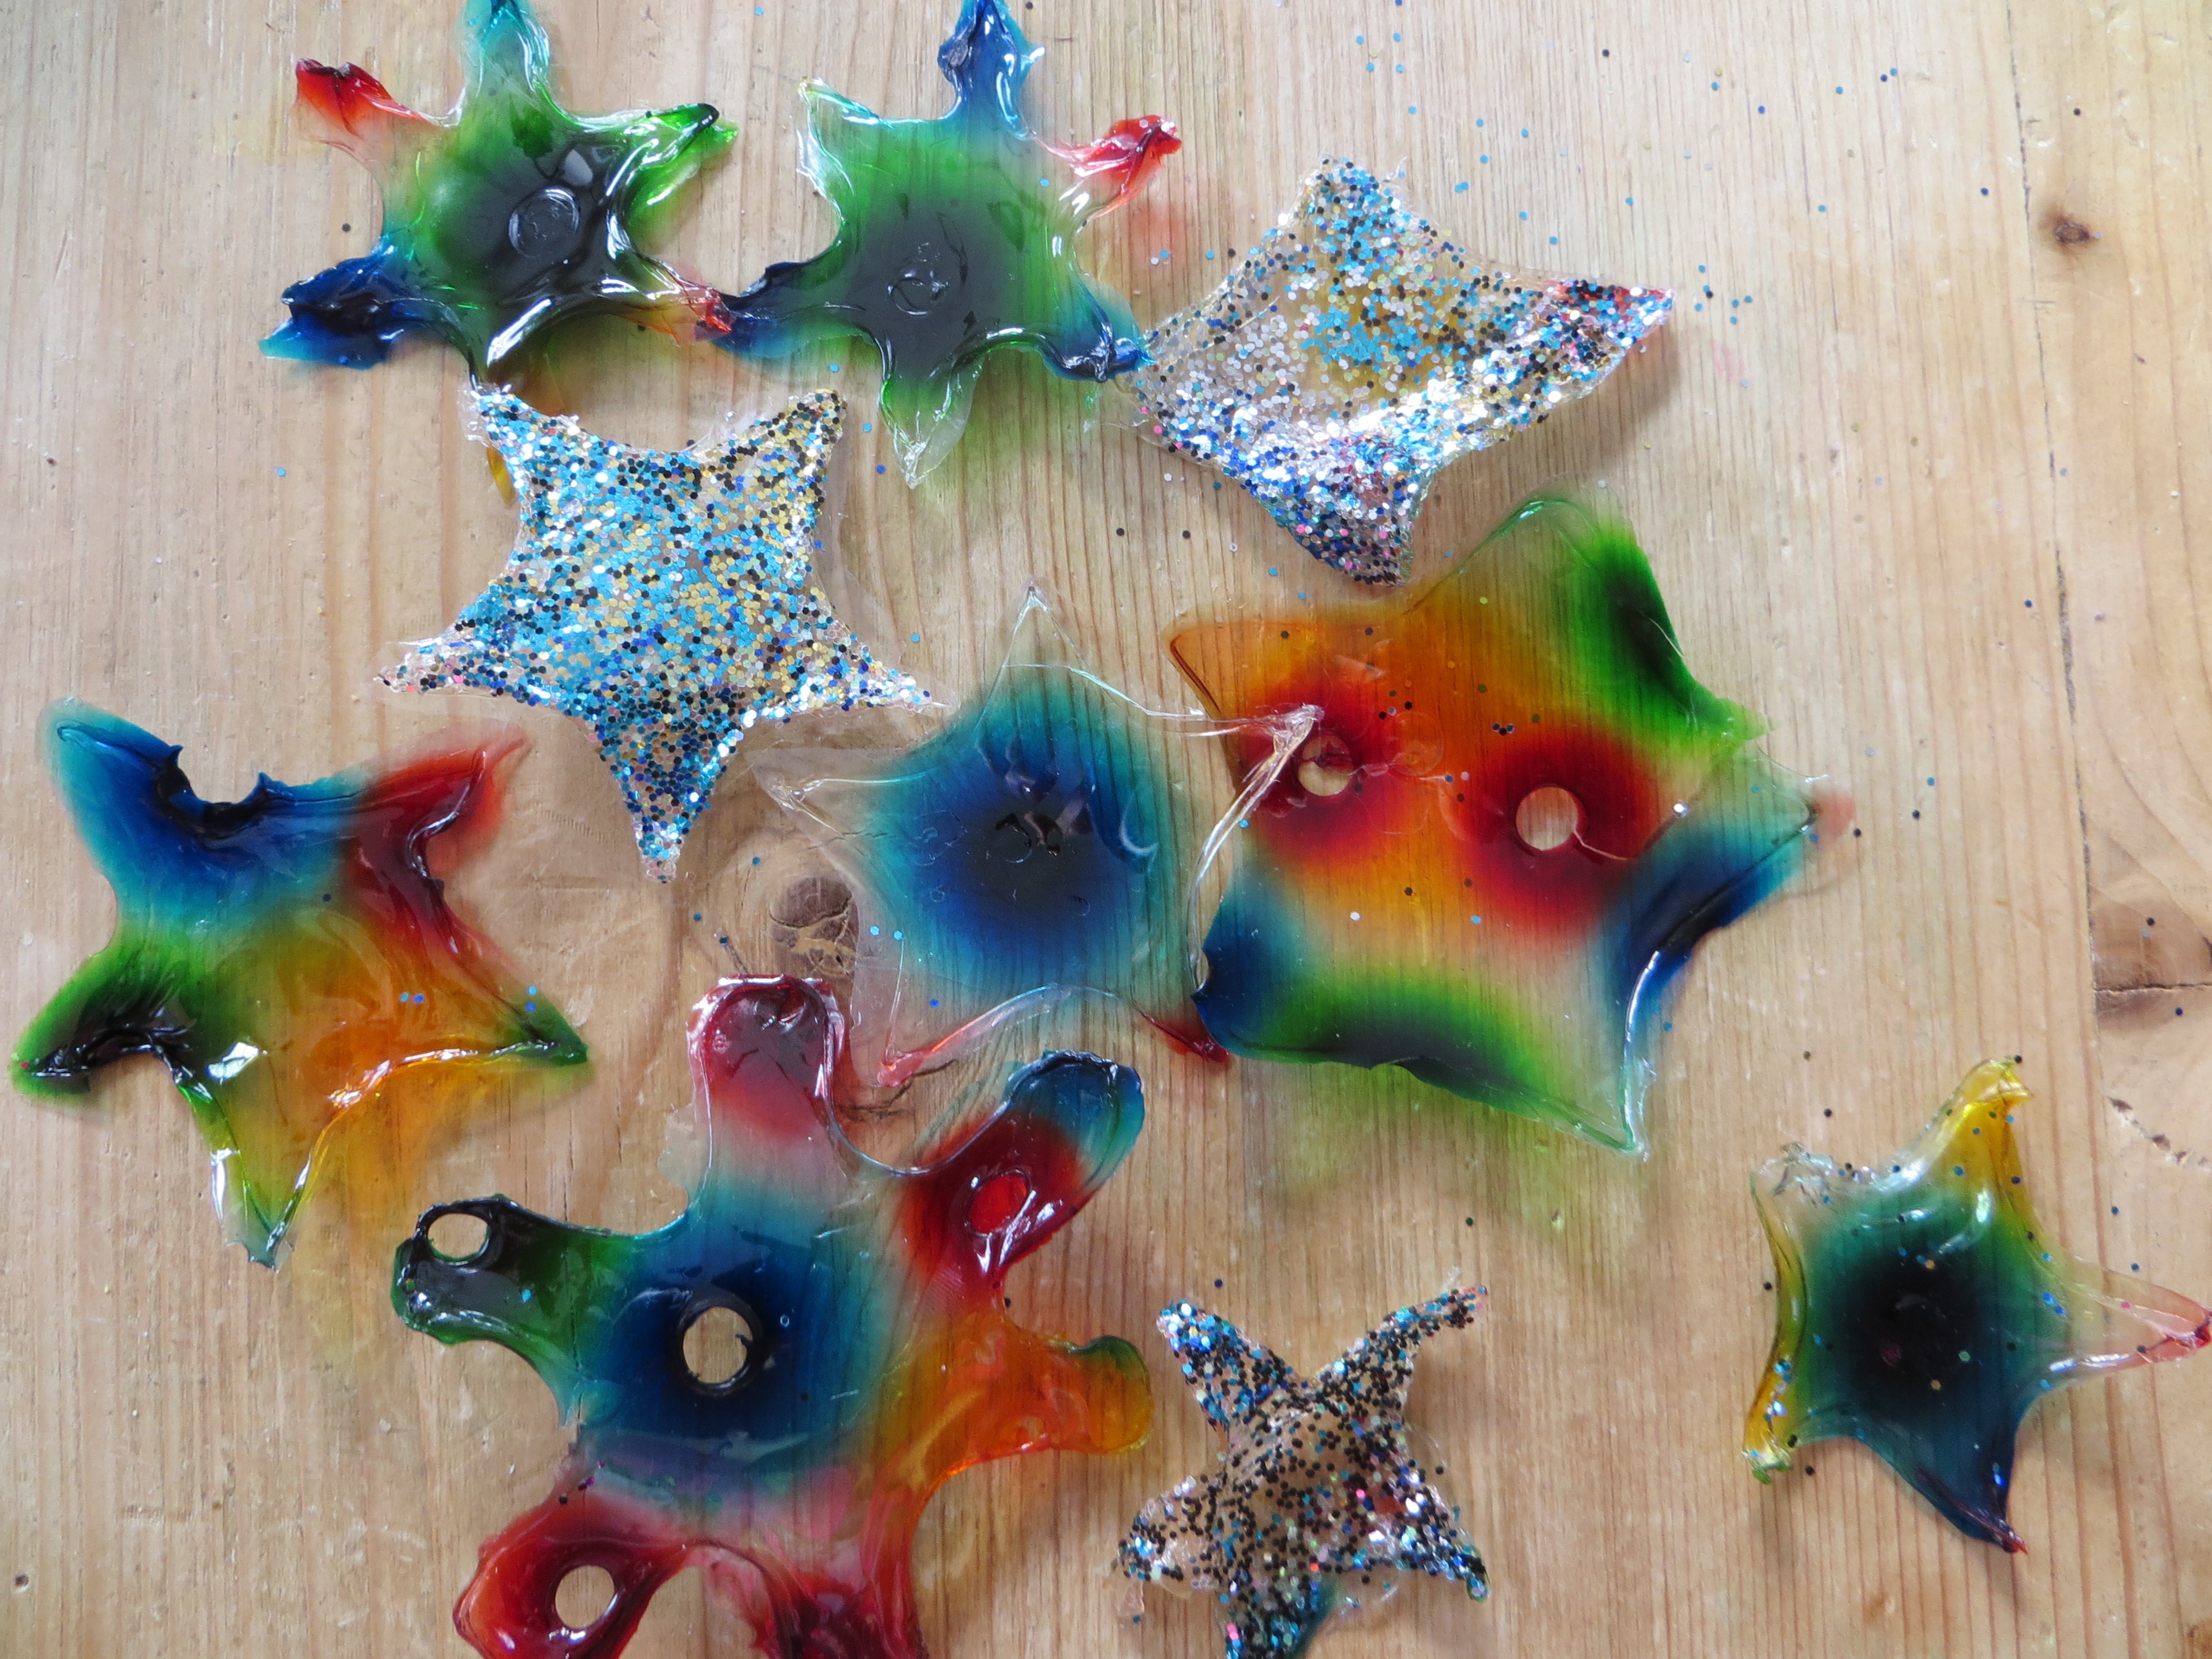
This creative science experiment that my kids and I invented lets you play with floatation physics by sprinkling glitter on melted gelatin, watch colorful dyes diffuse to create patterns and then use cookie cutters to punch out sticky window decorations. Water will evaporate from the gelatin, leaving you with paper-thin “stained glass” shapes.
You can watch us making them on Kare11 Sunrise News by clicking here.
You’ll need
-plain, unflavored gelatin from the grocery store or Target
-food coloring
–a drinking straw
-water
-a ruler
-glitter
*You can use the recipe below for two pans around 8×12 inches, or use large, rimmed cookie sheets for your gelatin. For a single pan, cut the recipe in half.
Step 1. Add 6 packs of plain, unflavored gelatin (1 oz or 28 gm) to 4 cups of boiling water. Stir well until all the gelatin has dissolved and remove bubbles with a spoon.
Step 2. Allow gelatin to cool to a kid-safe temperature. Pour the liquid gelatin into two large pans so it’s around 1-1.5 cm deep. It doesn’t have to be exact.
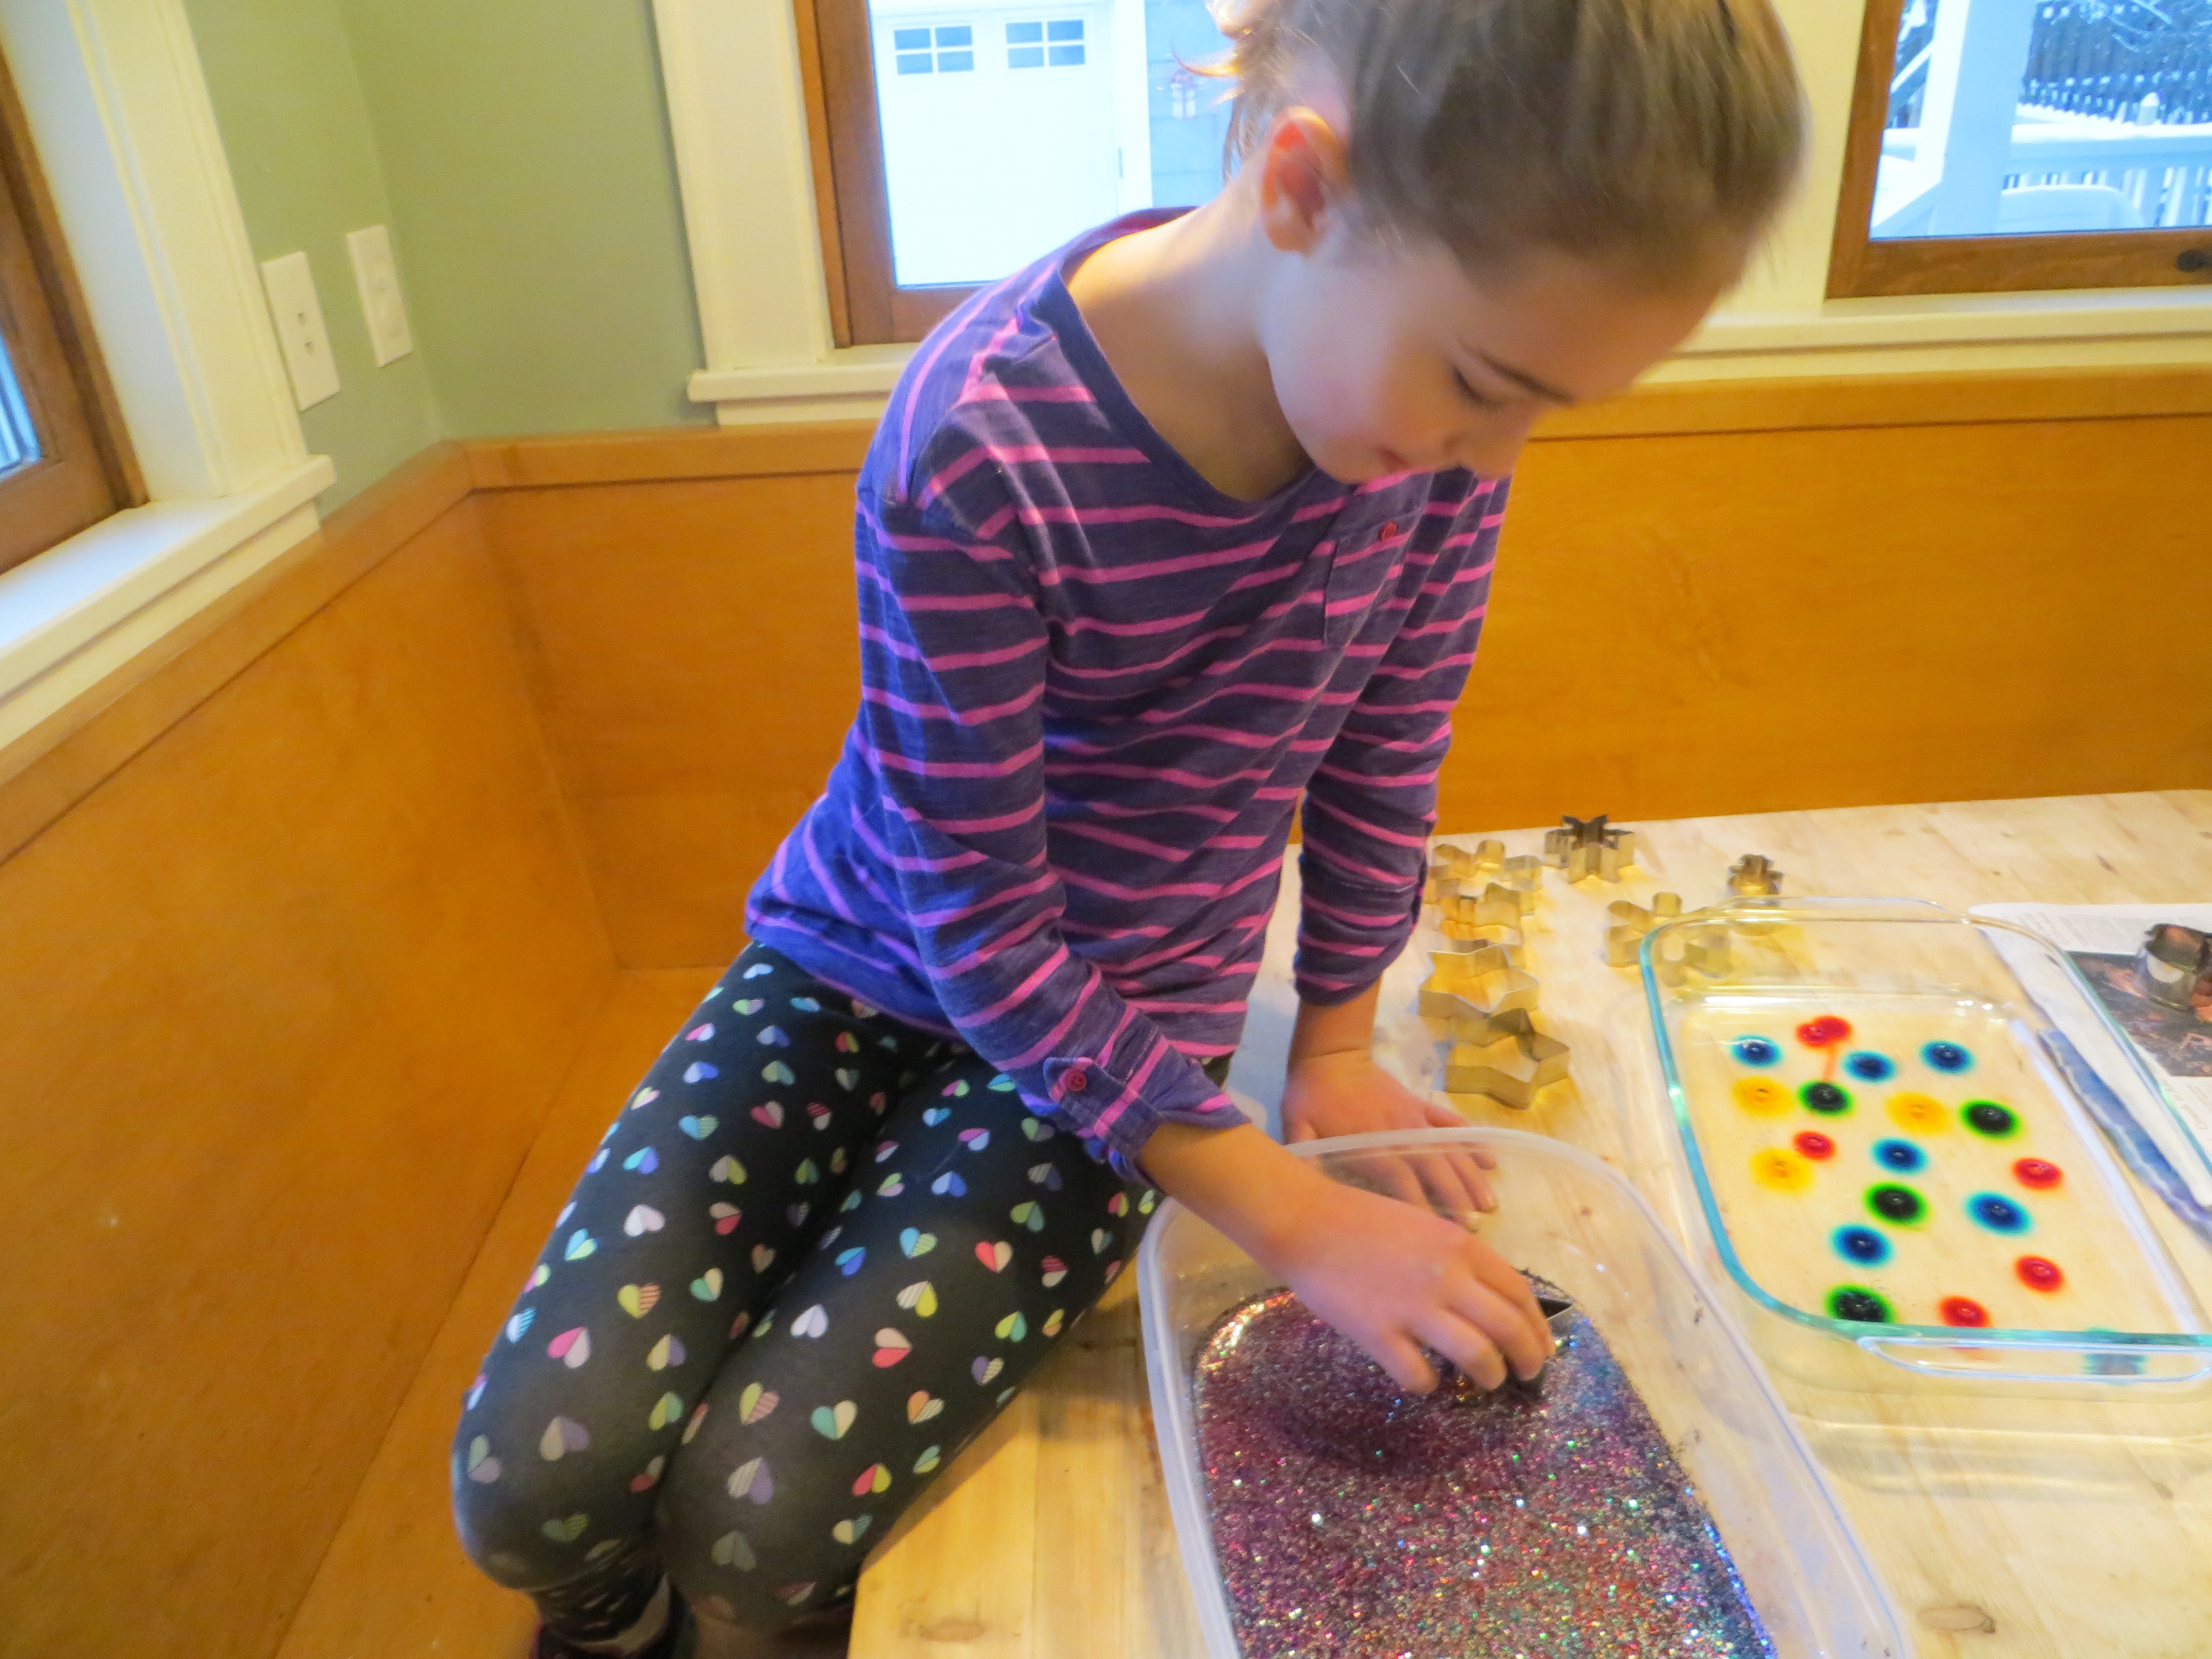
Step 3. Sprinkle glitter on the gelatin in one pan. What happens?

Step 4. Allow the gelatin to harden in both pans.
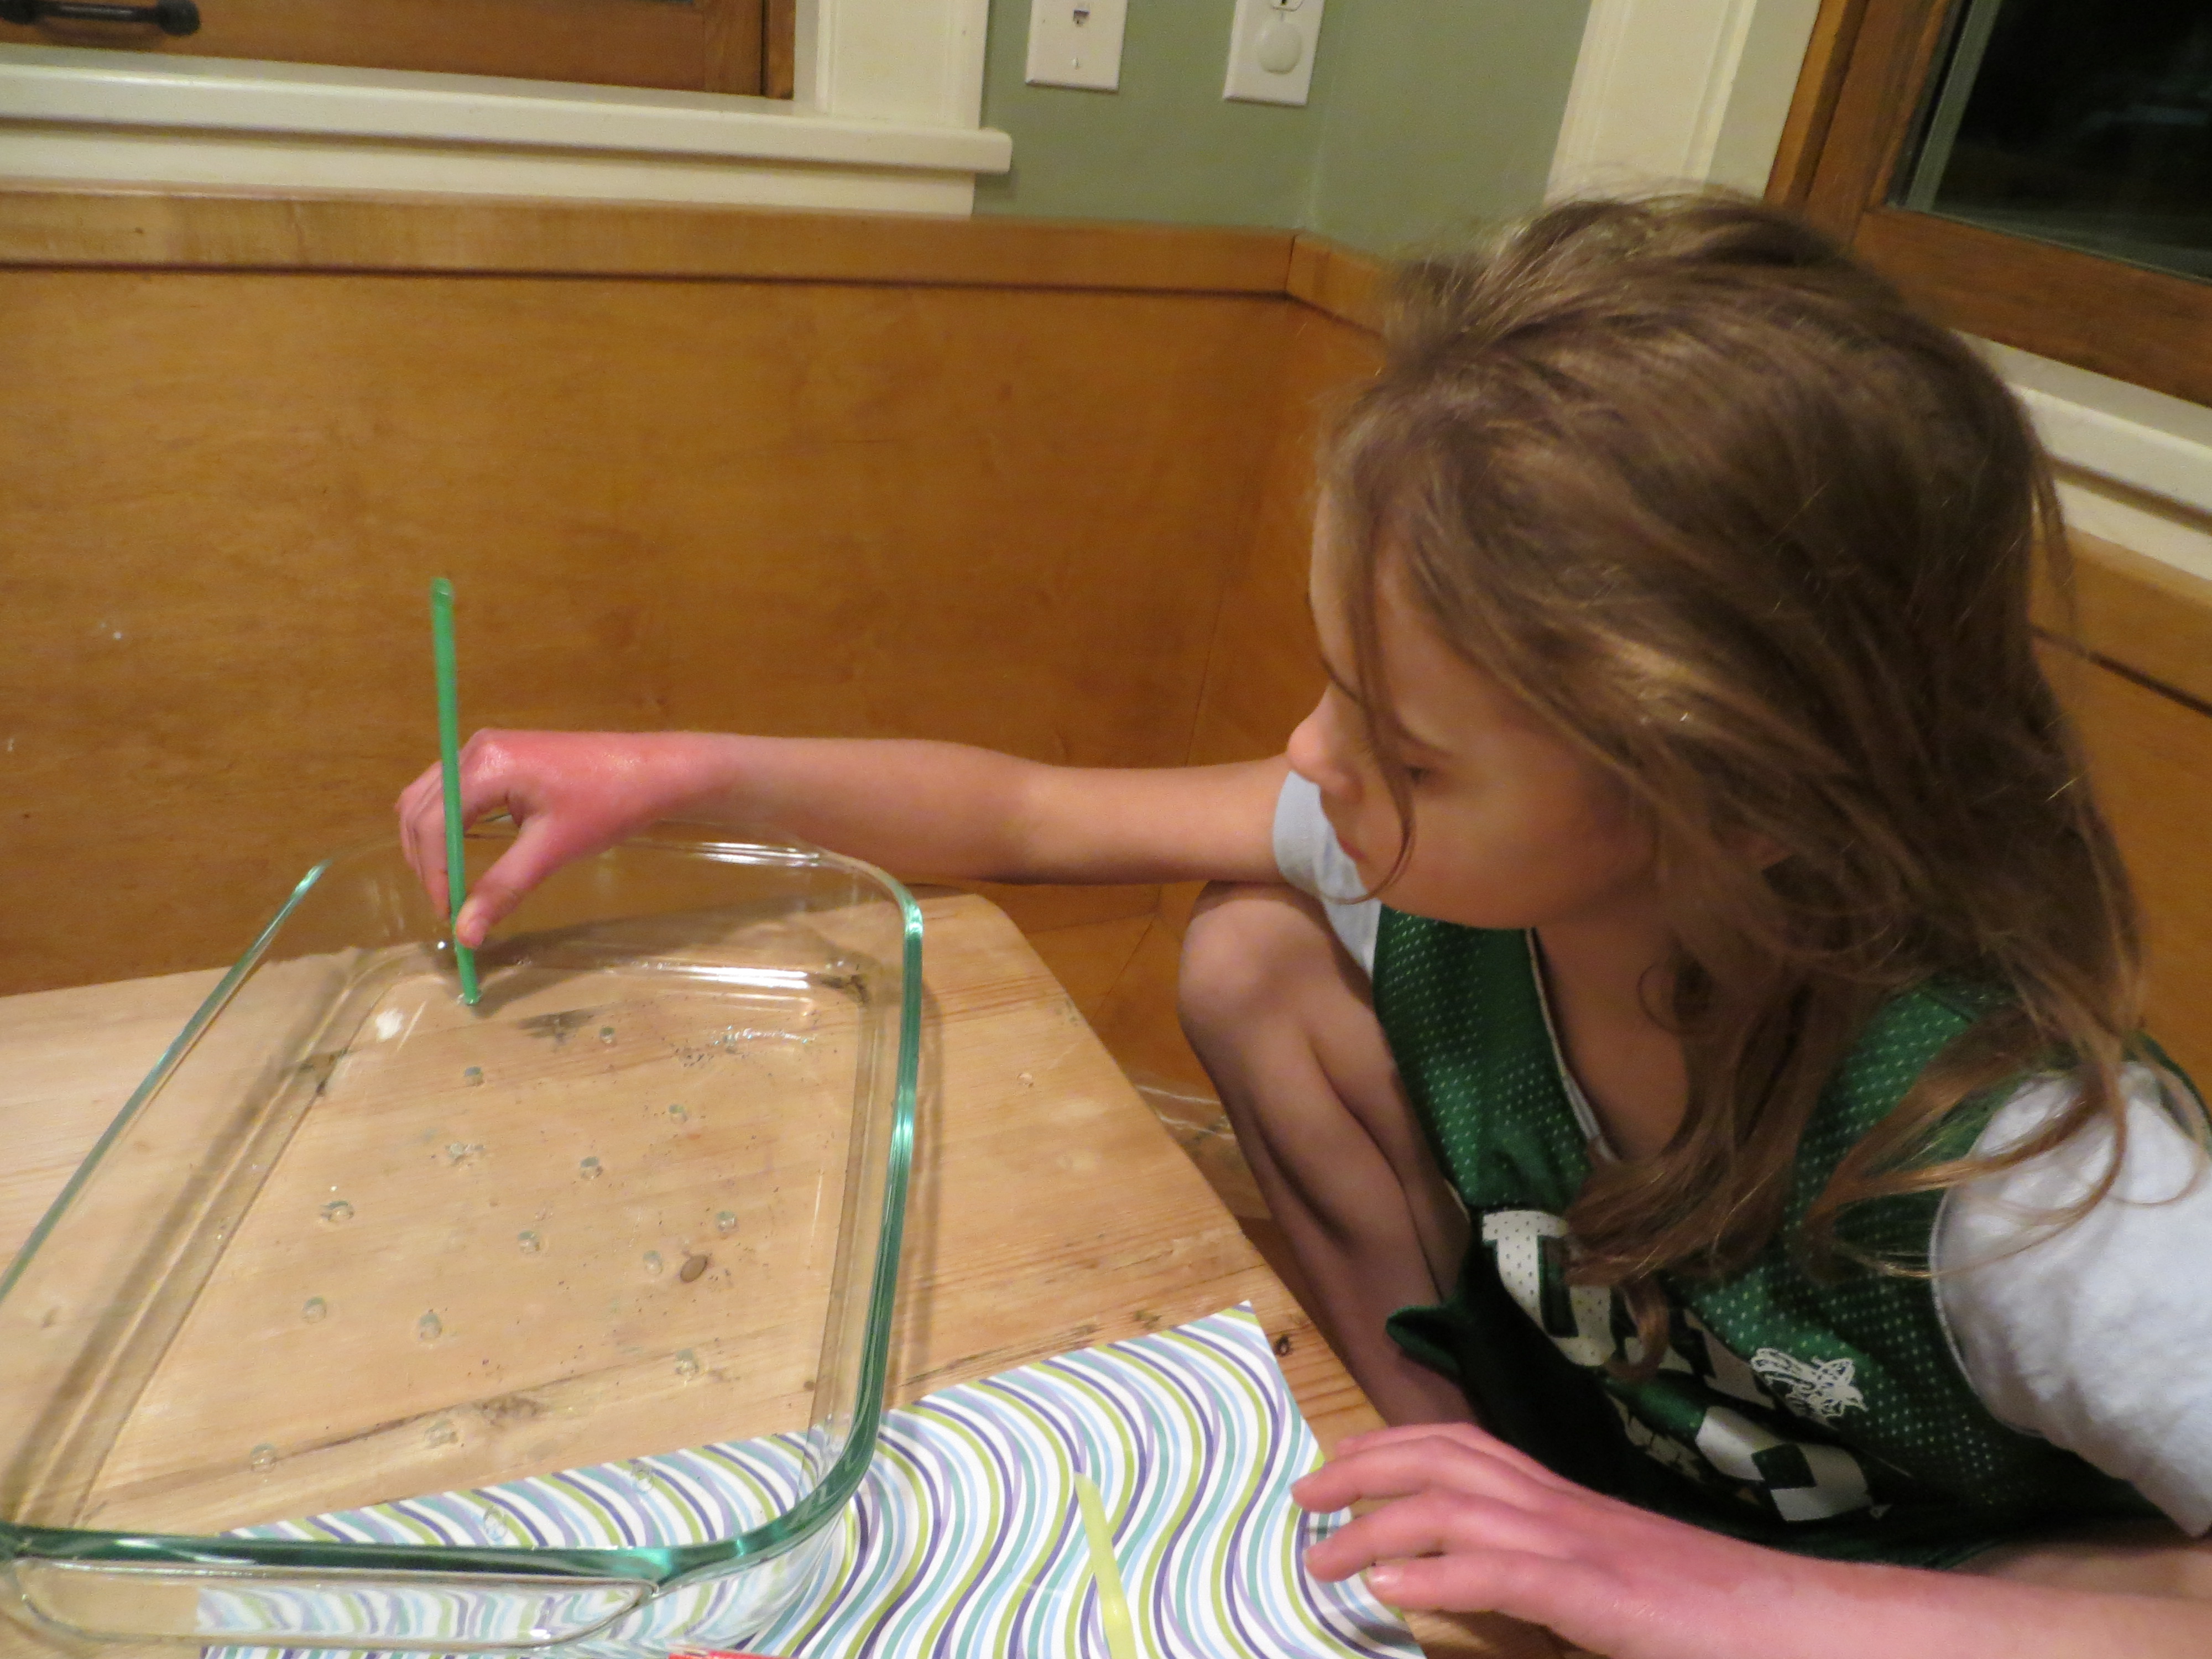
Step 5. In the pan with no glitter, use a straw to create holes in the gelatin, a few cm apart, scattered across the surface. It works best to poke a straw straight into the gelatin, but not all the way to the bottom. Spin the straw and remove it. Then, use a toothpick or skewer to pull out the gelatin plug you’ve created. This will leave a perfect hole for the food coloring. Very young children may need help.
Step 6. Add a drop of food coloring to each hole in the gelatin.
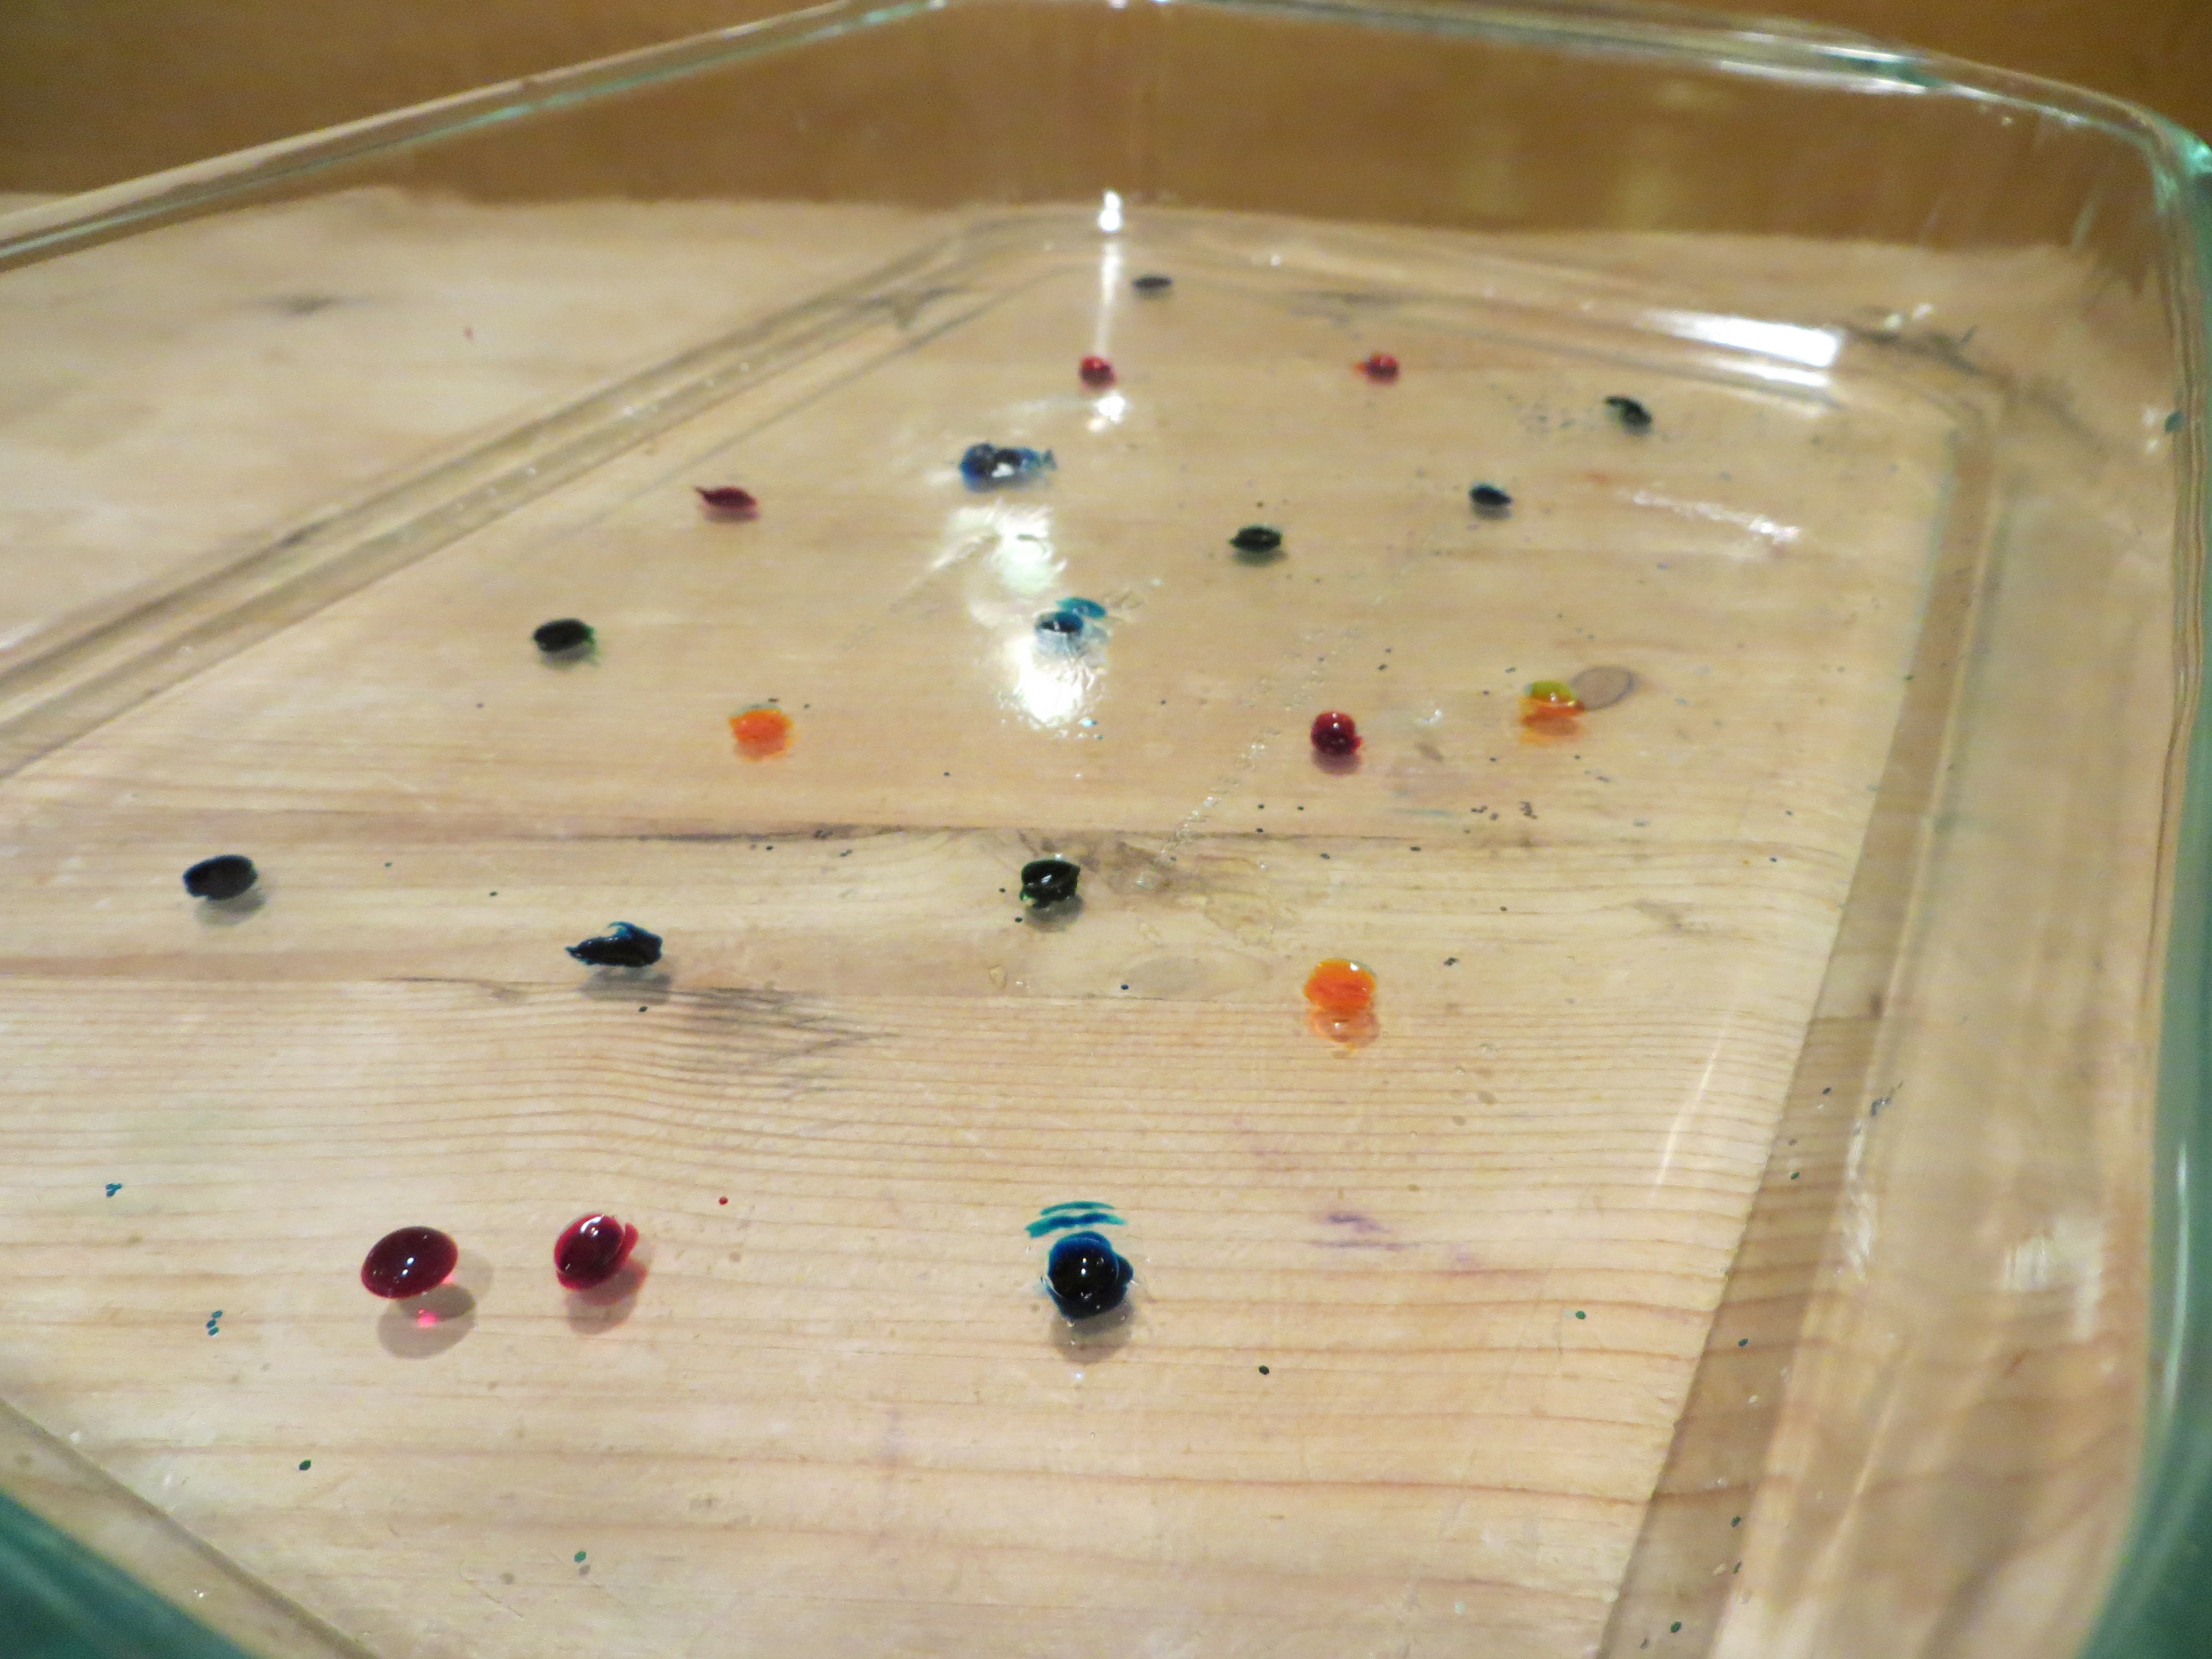
Step 7. Let the gelatin pans sit for 24 hours. Every so often, use a ruler to measure the circle of food coloring molecules as they diffuse (move) into the gelatin around them (read about diffusion at the bottom of this post.) How many cm per hour is the color diffusing? Do some colors diffuse faster than others? If you put one pan in the refrigerator and an identical one at room temperature, does the food coloring diffuse at the same rate?
Step 8. When the food coloring has made colorful circles in the gelatin, use cookie cutters to cut shapes from both pans of gelatin (glitter and food coloring), carefully remove them from the pan with a spatula or your fingers, and use them to decorate a window. (Ask a parent first, since some glitter may find its way to the floor!) Don’t get frustrated if they break, since you can stick them back together on the window.
Step 9. Observe your window jellies each day to see what happens when the water evaporates from the gelatin.
 When they’re dry, peel them off the window. Are they thinner than when you started? Why? Can you re-hydrate them by soaking the dried shapes in water?
 The Science Behind the Fun:
Imagine half a box filled with red balls and the other half filled with yellow ones. If you set the box on something that vibrates, the balls will move around randomly, until the red and yellow balls are evenly mixed up.
Scientists call this process, when molecules move from areas of high concentration, where there are lots of other similar molecules, to areas of low concentration, where there are fewer similar molecules DIFFUSION. When the molecules are evenly spread throughout the space, it is called EQUILIBRIUM.
Lots of things can affect how fast molecules diffuse, including temperature. When molecules are heated up, they vibrate faster and move around faster, which helps them reach equilibrium more quickly than they would if it were cold. Diffusion takes place in gases like air, liquids like water, and even solids (semiconductors for computers are made by diffusing elements into one another.)
Think about the way pollutants move from one place to another through air, water and even soil. Or consider how bacteria are able to take up the substances they need to thrive. Your body has to transfer oxygen, carbon dioxide and water by processes involving diffusion as well.
Why does glitter float on gelatin? An object’s density and it’s shape help determine its buoyancy, or whether it will float or sink. Density is an object’s mass (loosely defined as its weight) divided by its volume (how much space it takes up.) A famous scientist named Archimedes discovered that any floating object displaces its own weight of fluid. Boats have to be designed in shapes that will displace, or push, at least as much water as they weigh in order to float.
For example, a 100 pound block of metal won’t move much water out of the way, and sinks fast since it’s denser than water. However , a 100 pound block of metal reshaped into a boat pushes more water out of the way and will float if you design it well!
What is the shape of your glitter? Does it float or sink in the gelatin?
Here’s a video I made for KidScience app that demonstrates how to make window gellies
Credit: My 11 YO daughter came up with the brilliant idea to stick this experiment on windows. I was just going to dry out the gelatin shapes to make ornaments. Kids are often way more creative than adults!
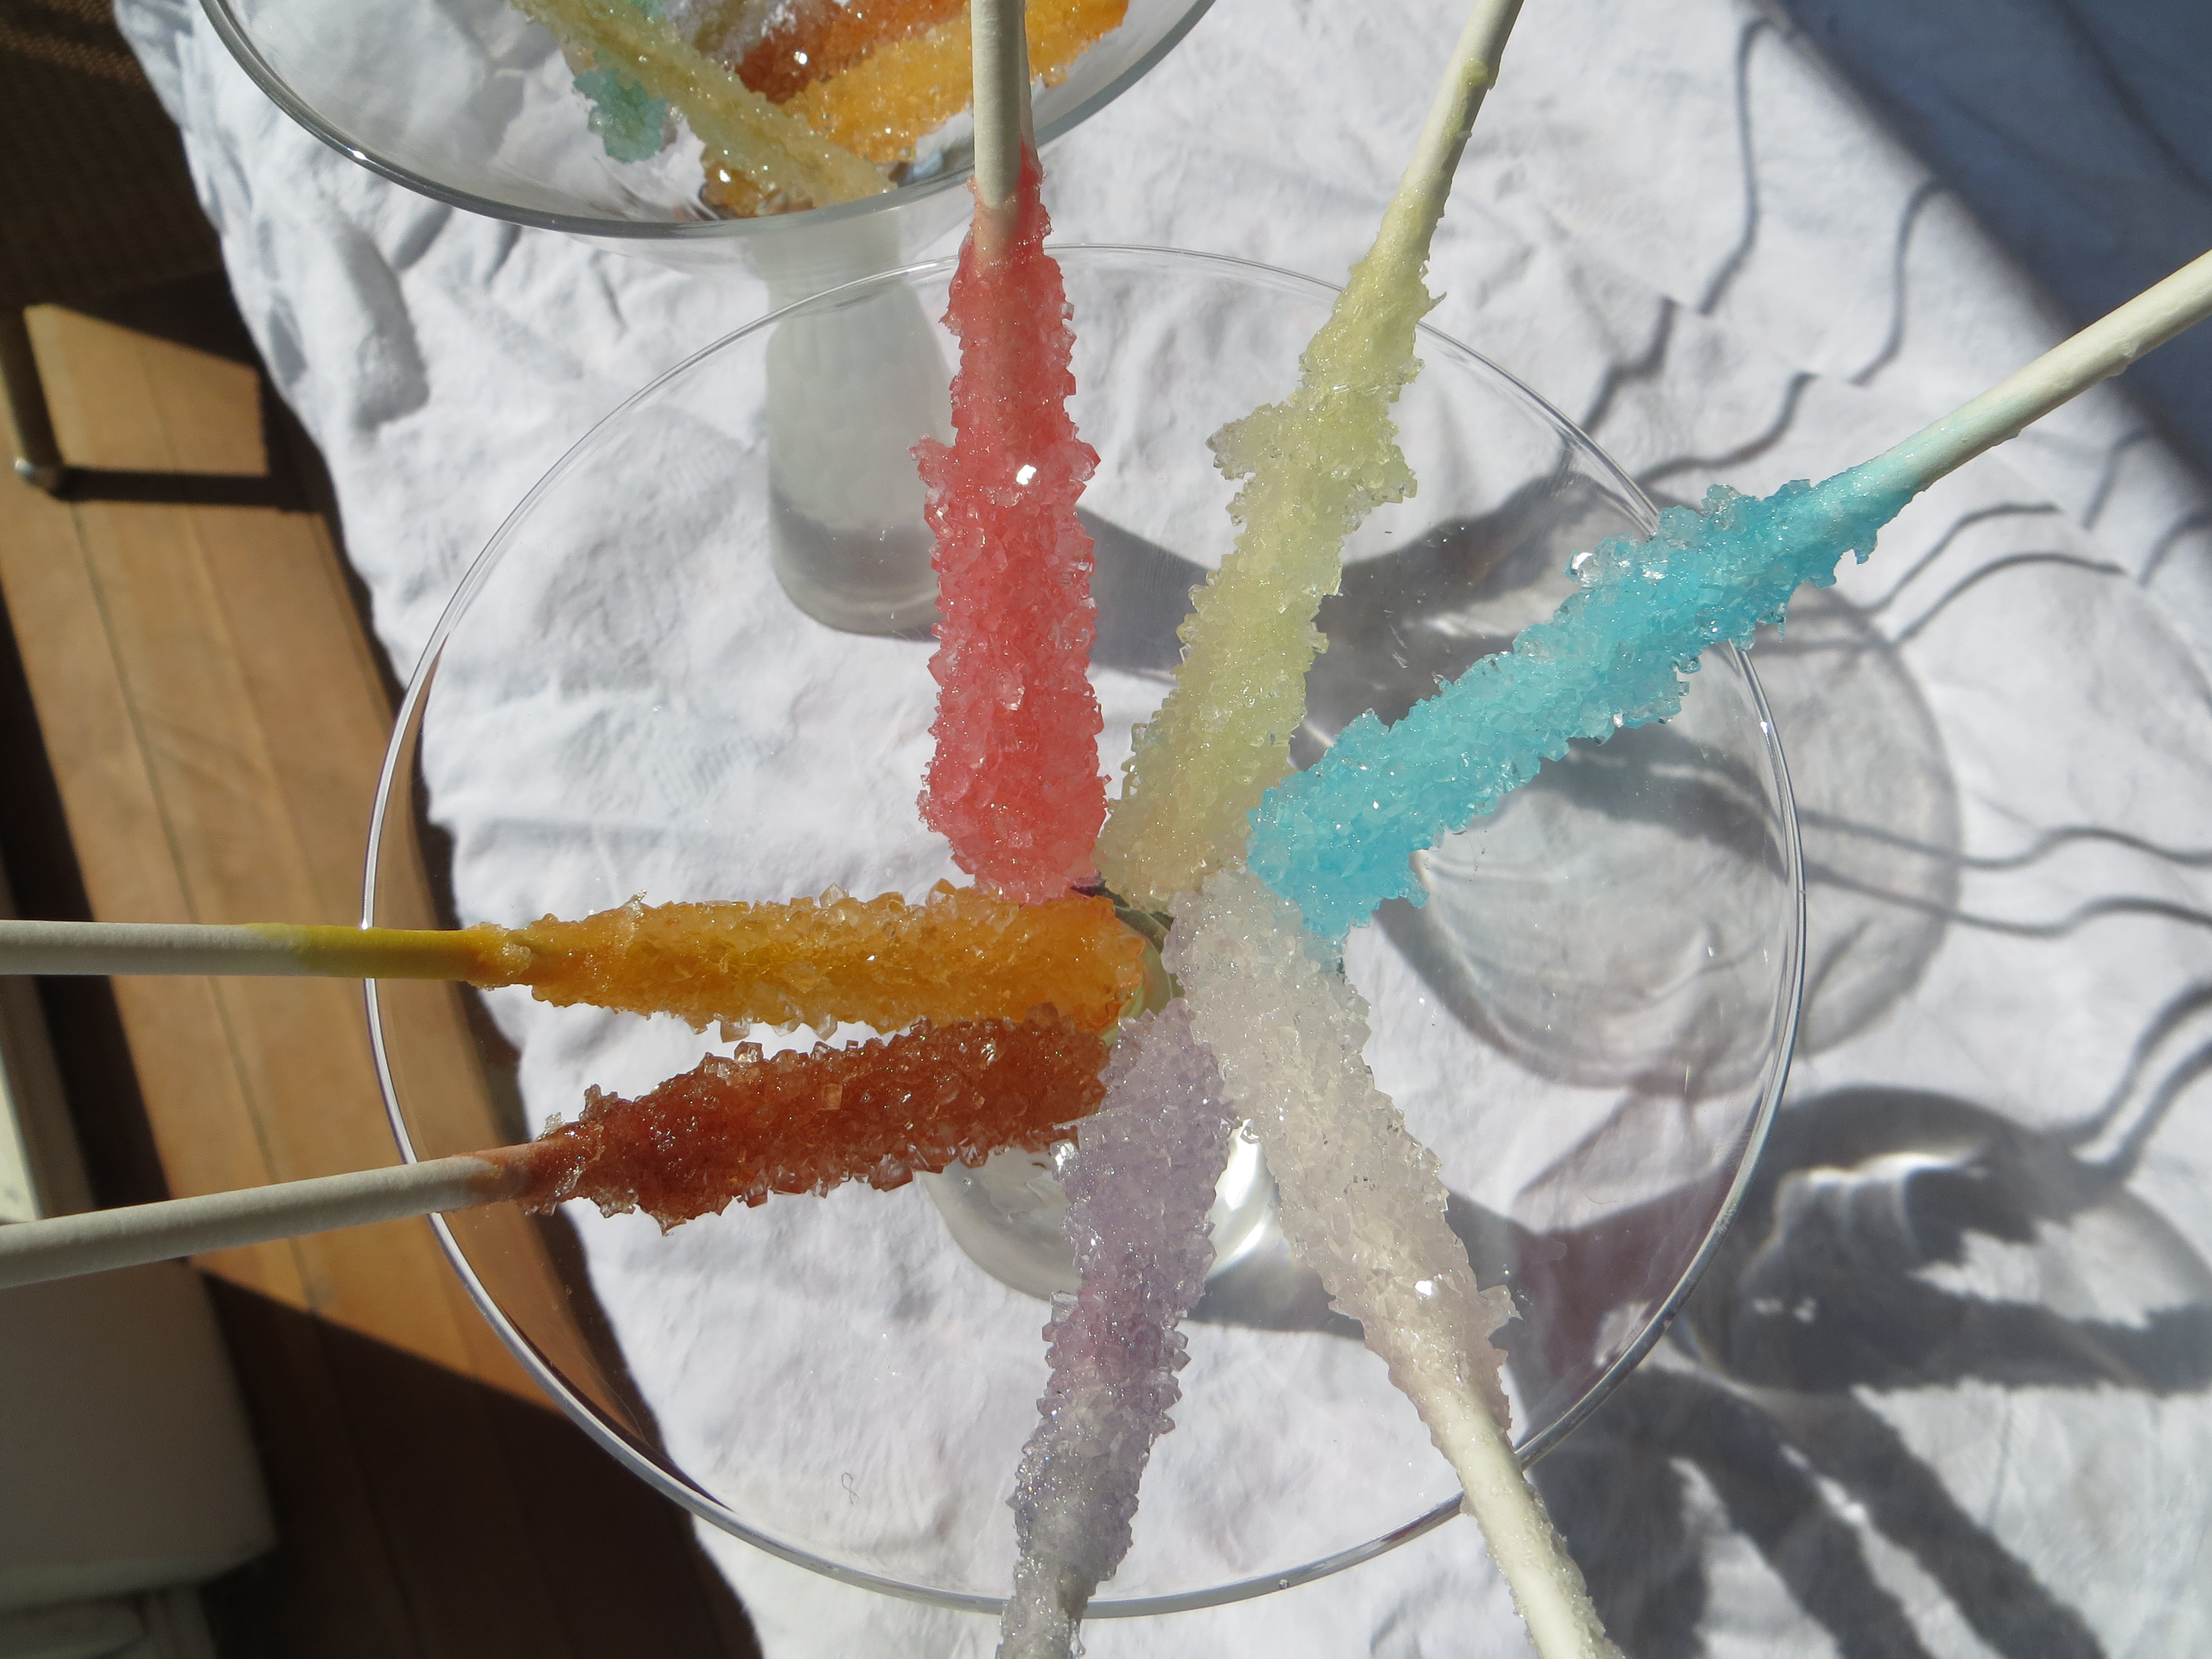
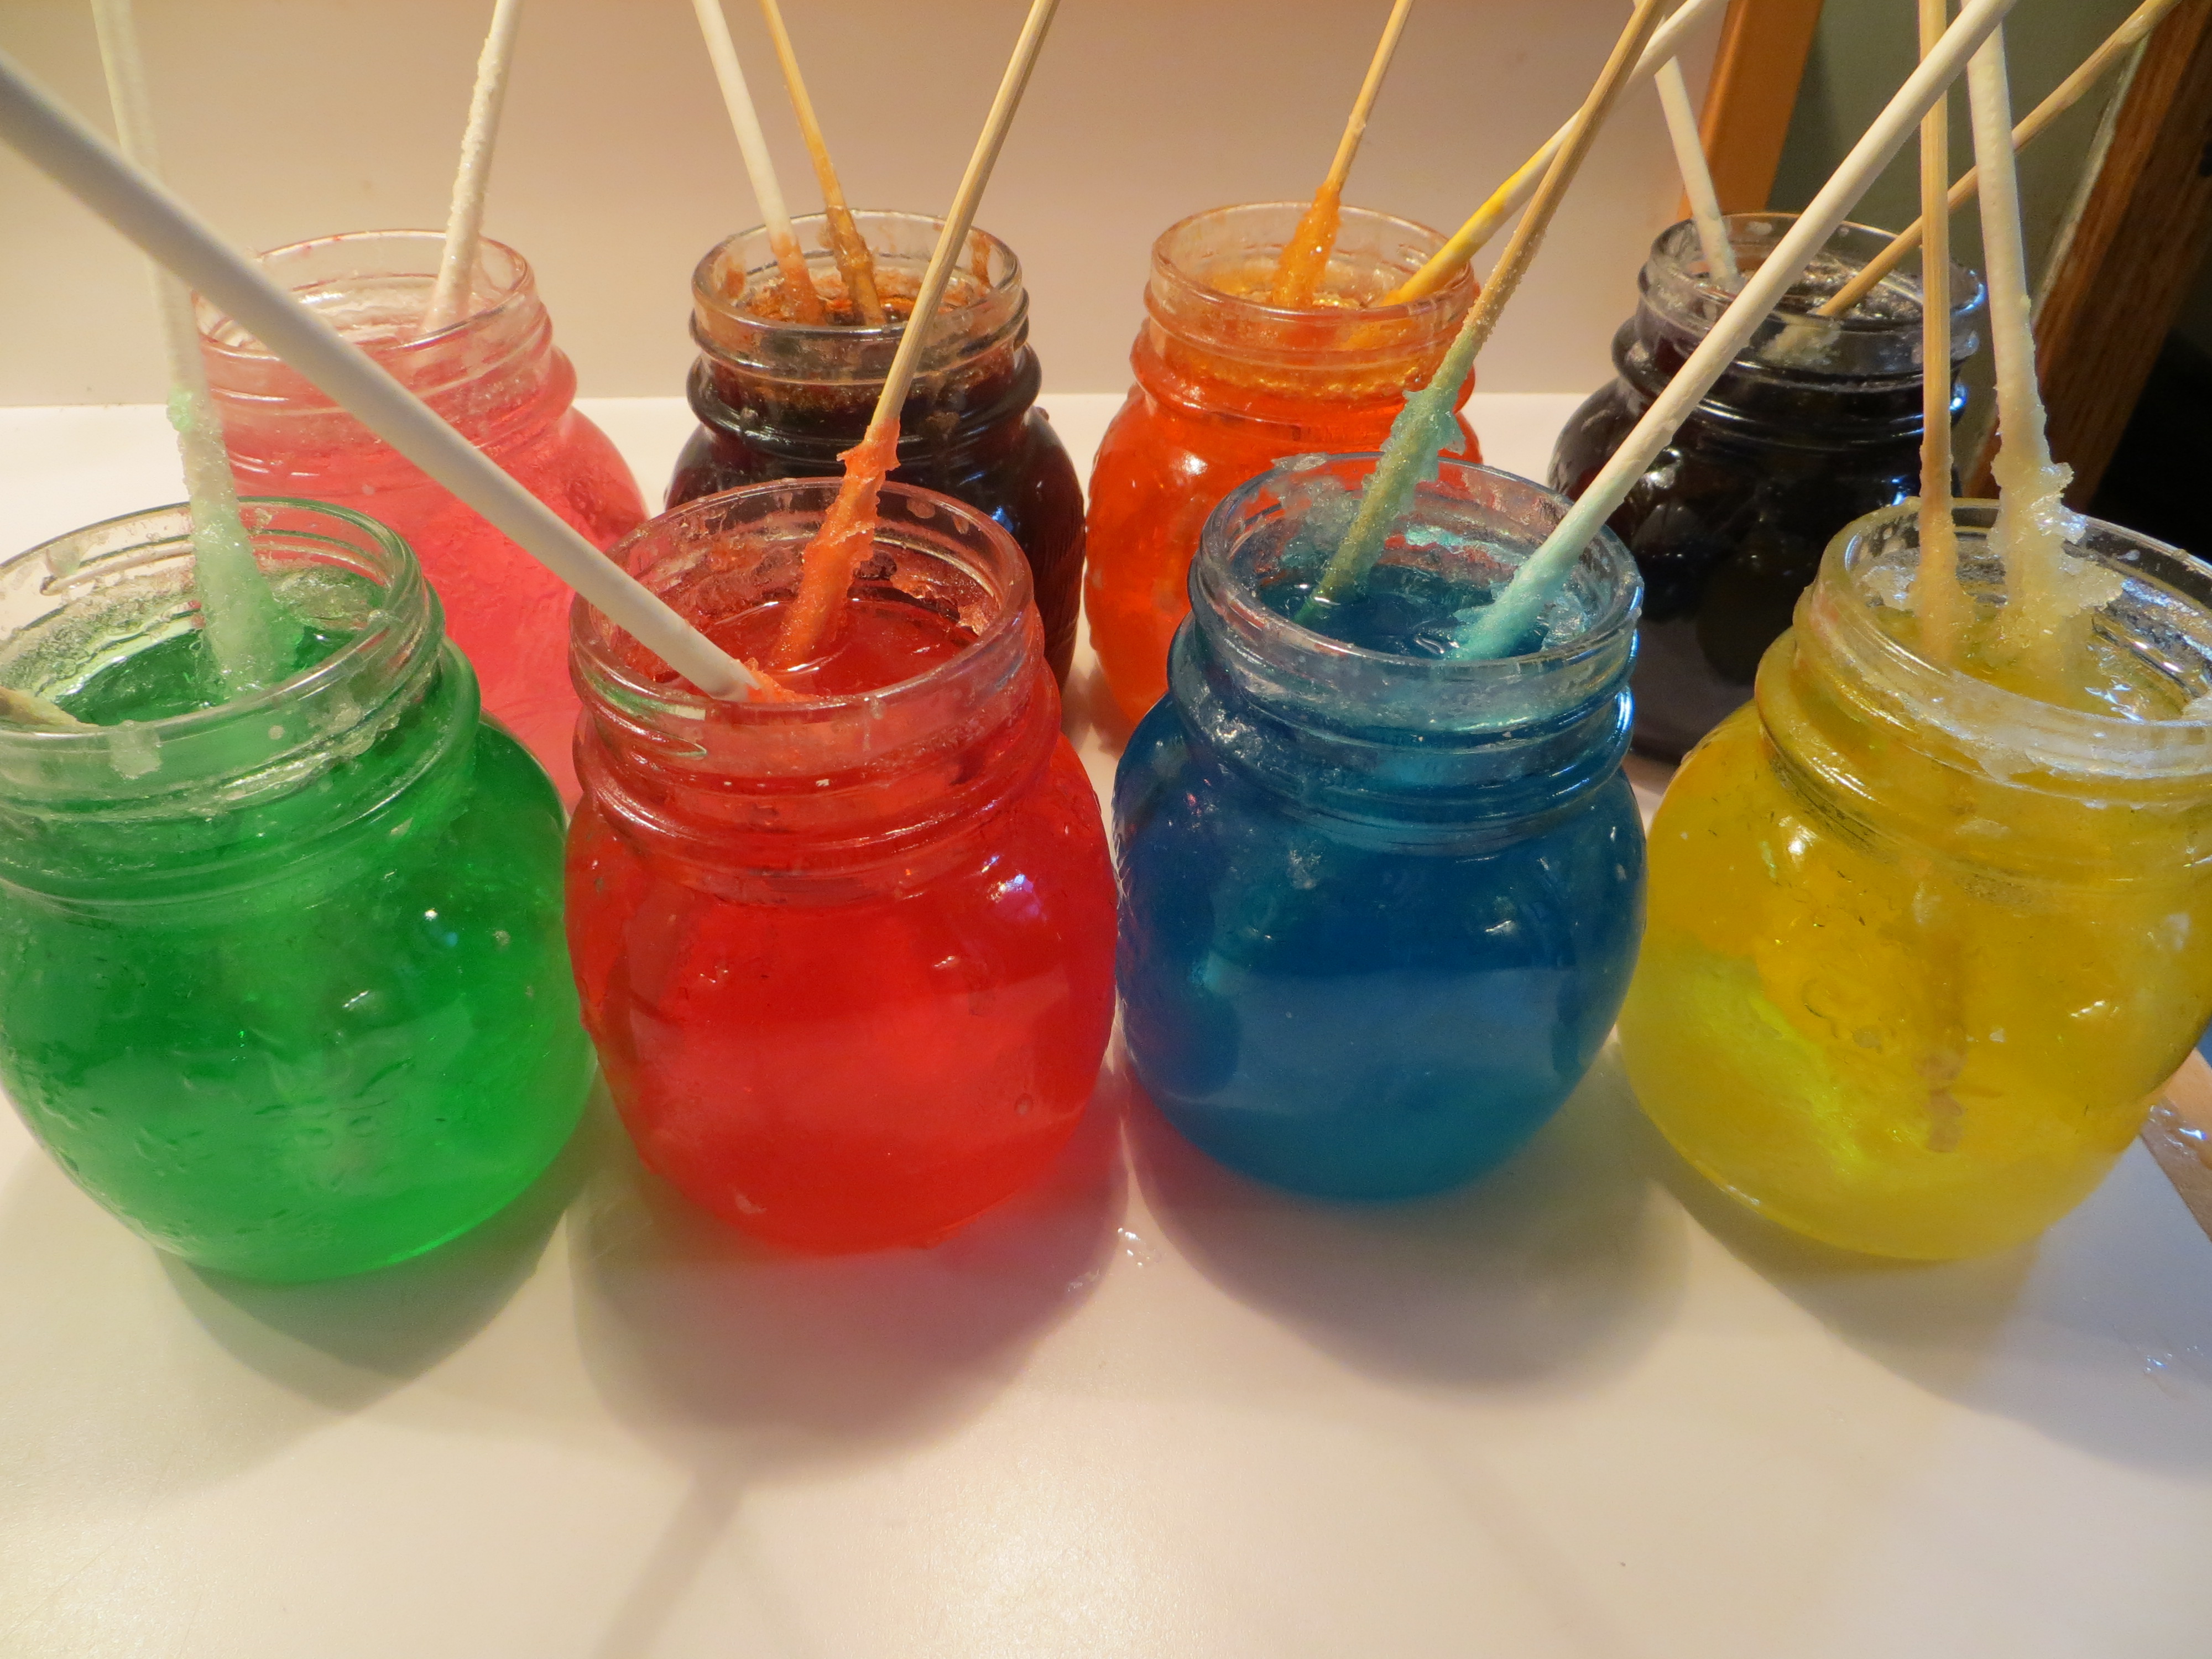
Science on a Stick: Rock Candy
- by KitchenPantryScientist
Got sugar? You can grow big, edible sugar crystals, commonly called “rock candy,” in your own kitchen. We thought they’d make a great science experiment to demonstrate at the Minnesota State Fair, where foods on a stick hold sway.
Like bricks in a wall, crystals are solids formed by repeating patterns of molecules. Instead of mortar, the atoms and molecules are connected by atomic bonds.
They can be big or small, but crystals made from the same atoms or molecules always form the same shape. Table sugar, or sucrose, is made up of a molecule composed of two sugars, glucose and fructose. The crystals formed by sucrose are hexagonal (six-sided) prisms, slanted at the ends.
To make rock candy on a stick, you’ll need: 5 cups white granulated sugar, 2 cups water, cake pop sticks or wooden skewers, and food coloring
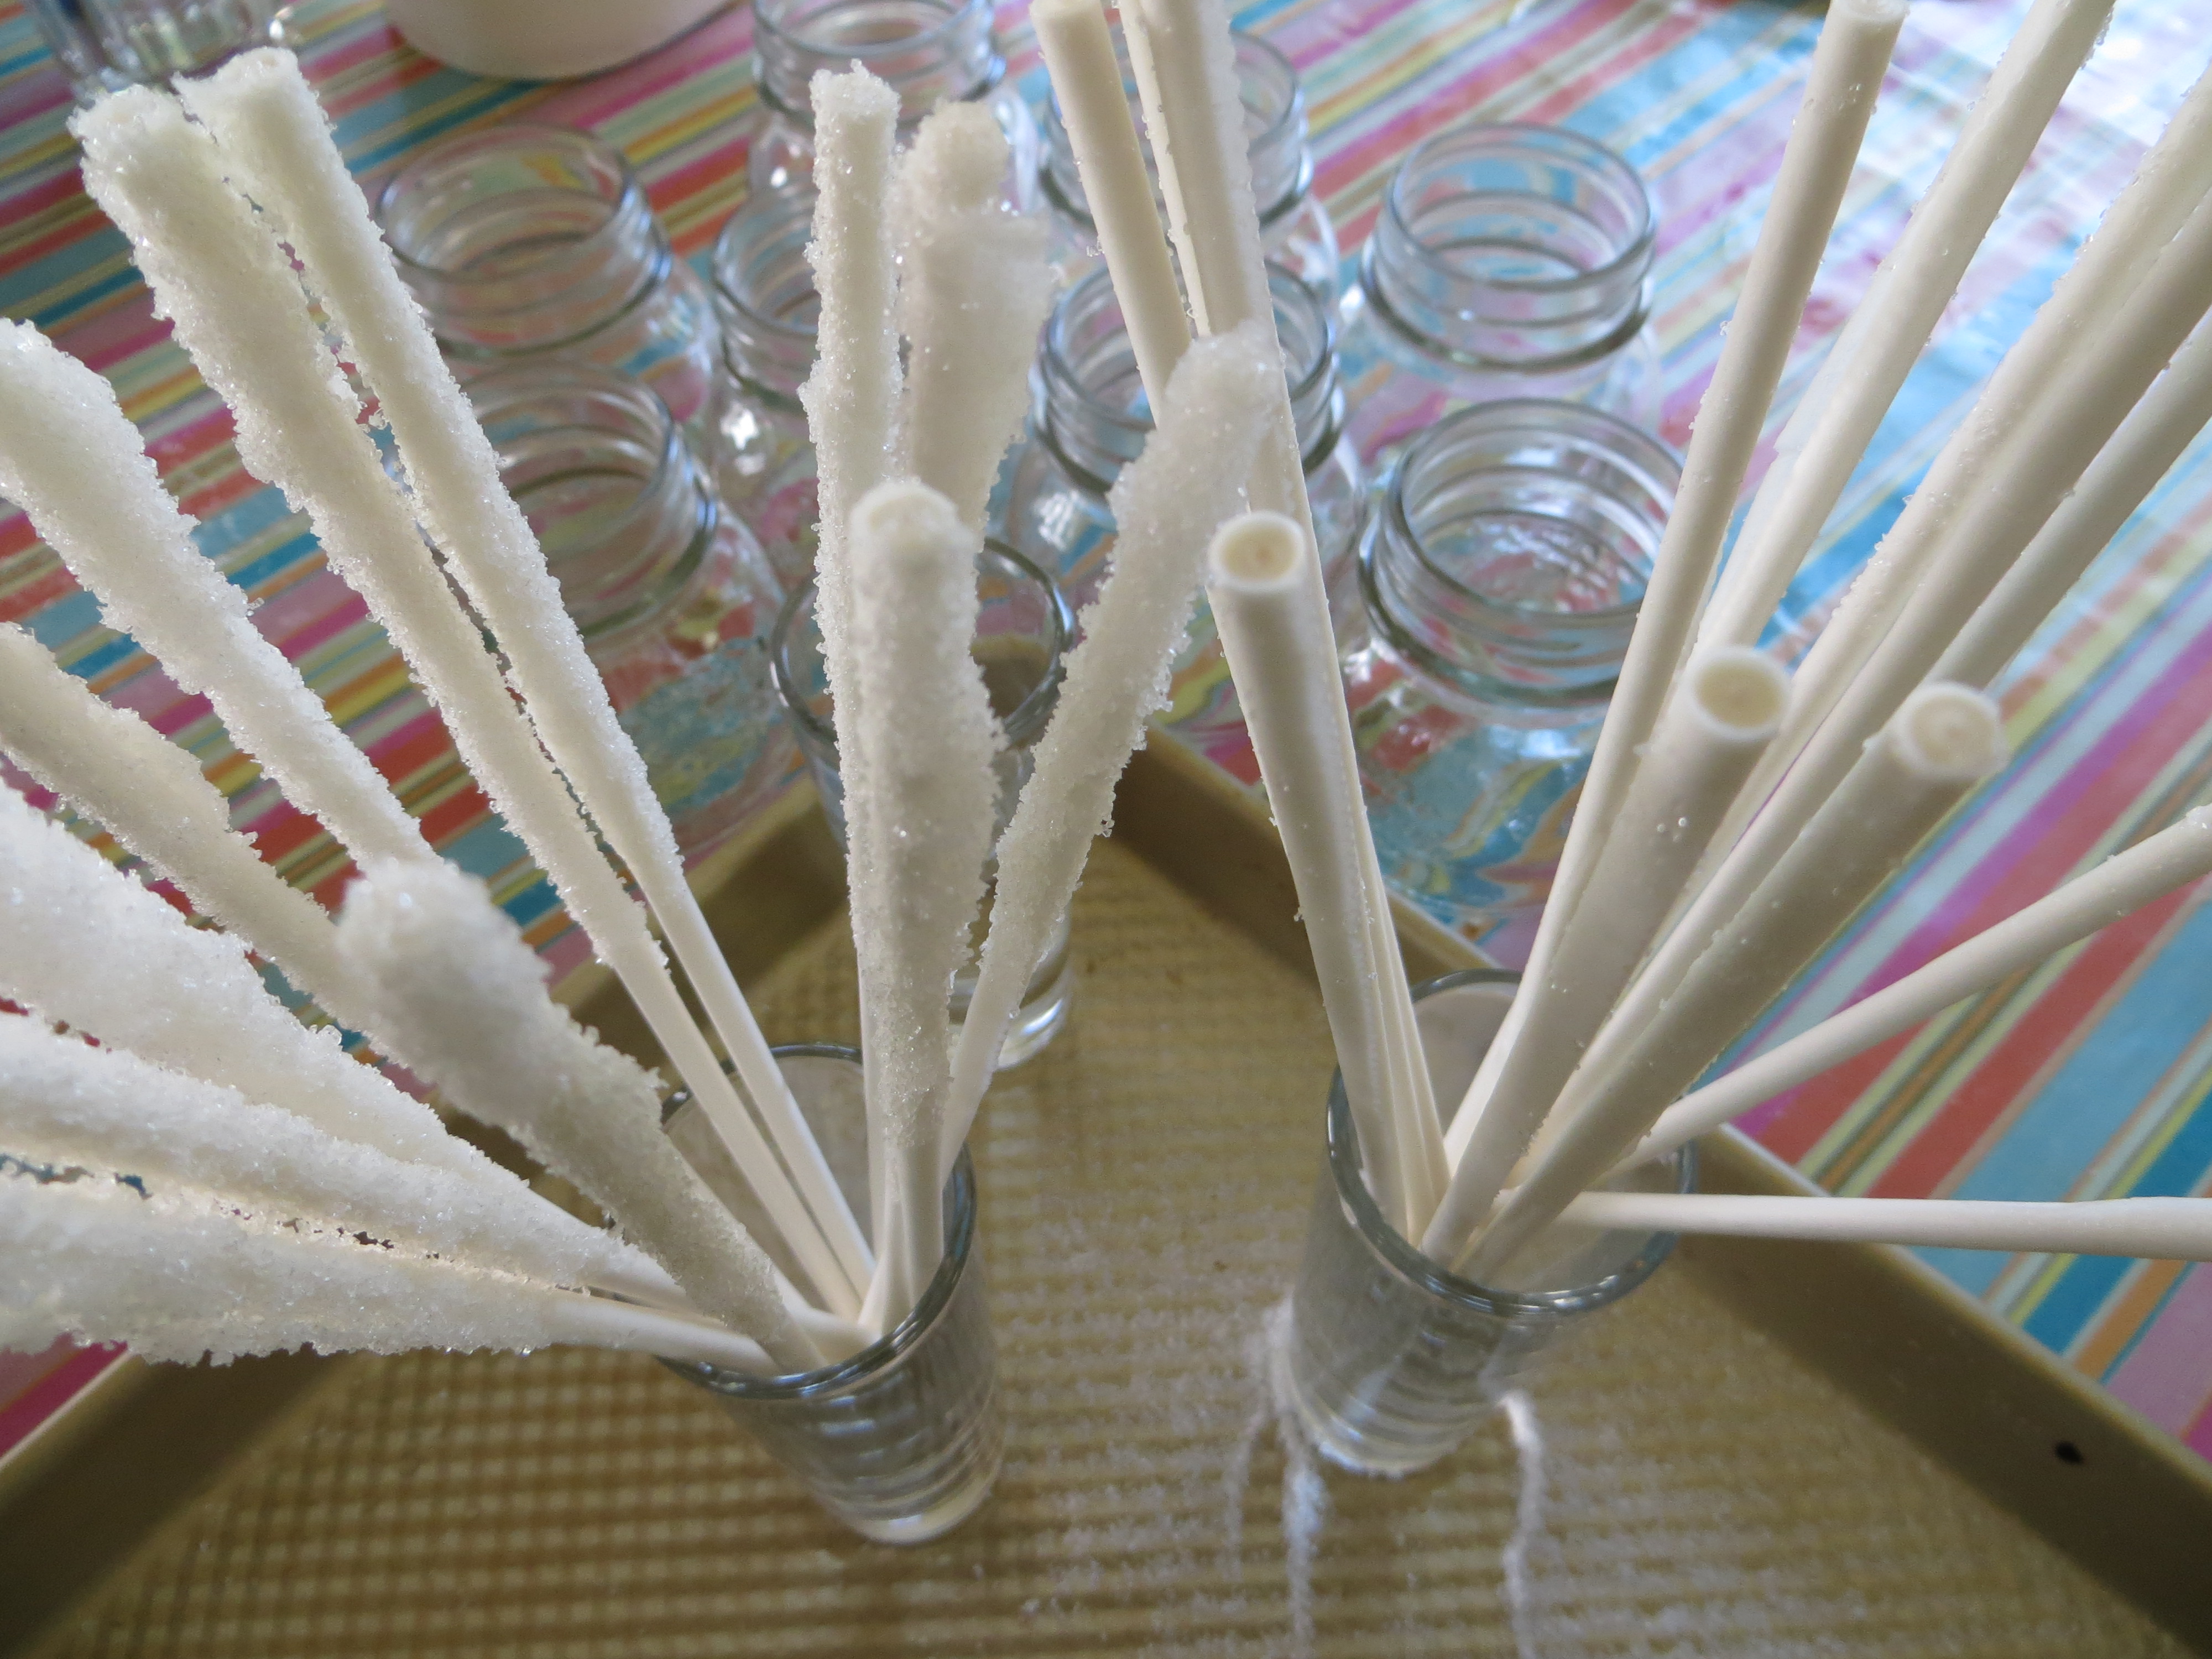
- Dip one end of cake-pop sticks or wooden skewers in water and then roll them in granulated white sugar. The sugar should cover 2-3 inches of the stick. Let them dry completely. These are the seeds for the sugar crystal growth.
- Boil 2 cups water and 5 cups sugar until sugar is dissolved as much as possible. It should look like syrup. This is your supersaturated sugar solution.
- Let syrup sit until it is no longer hot and pour into glass containers. Add food coloring and stir.
- When colored syrup is completely cool, set the sugary end of the sugar-seeded cake pops or skewers into the syrup and let them sit for about a week.
5. Gently move the sticks around occasionally, so they don’t stick to the crystals in the bottom of the glass. If the glass container gets too full of crystals, pour the syrup into a new container and move your stick into the cleaner syrup to grow more crystals. When the rock candy is done, drain the excess syrup and let them dry. Enjoy!

The science behind the candy? A supersaturated solution is one that is forced to hold more atoms in water or another solute than it normally would. Supersaturated solutions can be made using heat or pressure. Crystals start to form when a supersaturated solutions encounters a “seed” atom or molecule, causing the other atoms to come out of the solution and attach to the seed. In this case, the seed molecules were the sucrose molecules we dried onto the sticks.
The Science of Hard-Boiled Eggs
- by KitchenPantryScientist
You can’t judge an egg by its shell, but you can use science to figure out whether or not it’s fresh.

Imagine an egg. It can be white or brown, since they’re identical except for shell color. There are two membranes inside an eggshell, separating it from the inside of the egg and helping to keep it safe from microbial invaders.
Under the membranes is the egg white, made up of proteins and water, and the yolk, which also contains fat and is enclosed in a sac. Tiny rope-like structures anchor the yolk between either end of the egg. The egg white contains a substance called lysosyme, which is a potent antibacterial. Eleven percent of an egg’s weight is made up by shell, 58% by white and 31% by yolk.
When a hen first lays an egg, the raw egg white contains carbon dioxide, making it look cloudy, and the proteins in the egg white are freshly folded into their correct protein shapes, so it will hold a nice shape in a pan. However, egg shells contain thousands of tiny pores, some big enough to see with the naked eye, and as an egg sits, it changes.
The contents begin to slowly shrink, and a small air pocket forms between the two membranes, usually at the large end. The egg’s pH, about 7.6 when first laid, rises as the egg ages and loses carbon dioxide. In just a few days, the pH may reach 9.7, causing the egg white to look clear and spread out more in a pan when the egg is broken.

The nicer shape and centered yolk of fresh eggs is why they’re recommended for frying. But why are older eggs better for boiling, and why does the yolk turn green sometimes?
Fresh eggs are harder to peel. When you boil an egg, it cooks from the outside to the inside, and its proteins become unfolded, or denatured. The denatured proteins are more likely to stick to the membranes on the eggshell of a fresh egg because the pH is lower. According to “FOODS, A Scientific Approach” by Charley and Weaver, eggs are easier to peel if their pH is greater than 8.7. In other words, old eggs that have lost carbon dioxide have a higher pH (are less acidic) and are easier to peel.
Sometimes, when you boil eggs, you see a greenish/gray/blue layer on the outside of the yolk. It’s the harmless product of a chemical reaction between the iron in the egg yolk and sulfer-containing proteins in the white. You can try to avoid it by using fresh eggs, using hot (not boiling water) to cook the eggs, by plunging eggs into ice water immediately after cooking, and by promptly removing the shells.

If you’ve heard of candling eggs, it involves shining a strong light through a raw egg to look at yolk position, air sac size and white clarity. You can also tell that an egg is older if it floats in water, due to the enlarged air sac.
Ideally, to cook perfect hard boiled (large) eggs, you put them in cold water, bring the water to a boil, remove the heat and let the pan stand with the lid on for 17 minutes before removing the eggs and plunging them into cold water. Alternately, boil large eggs for eleven minutes and put them in ice water to stop the cooking. For perfect eggs, prick the large end of your eggs with a pin to release the air in the air sac.
Kitchen Science
- by KitchenPantryScientist
“Are you a good cook?” was the first thing Dr. Tsneo Suzuki asked when I sat down in the office next to his cancer research lab at the University of Kansas. I stared at the picture of his wife, who I later learned had passed away from breast cancer, and wondered whether I should be offended.
After all, I was in my twenties and had five years of molecular biology experience under my belt. But I understood why he asked the question. Once you figure out how to test a hypothesis, most science experiments involve following recipes, which scientists call protocols. Generally, if you can read directions and mix things together in the correct order, in the right proportions, you can do things like amplify DNA and clone genes into bacteria.
So I truthfully answered “Yes, I’m a pretty good cook,” and got the job.

Food preparation is like a science experiment. If you can follow a recipe, you should get something close to what you set out to make, because often the ingredients will interact with each other to make something new. This is the very definition of a chemical reaction. Everything you cook with, from water to baking soda, is just a collection of molecules.
Here’s a collection of some food science experiments on my website. Since I love to cook, I hope to add more in the future! Leave a comment if you have other favorite kitchen science experiments, and I’ll try to add them to the list.
Testing Foods for Starch– Add a drop of iodine and watch for color change to detect starch.
Crock Pot Microbiology: Making yogurt from scratch is a delicious experiment
Yeast Experiment: Pyramids, Pasteur and Plastic Baggies– Grow yeast in a plastic bag to see how they make bread rise.
Emulsions: Mayonnaise and Vinaigrette– Mix the un-mixable using surfactants.
Curds and Whey: Make glue and plastic from milk and vinegar.
Gluten Ball– Explore the protein that makes bread chewy.
Red Cabbage Juice CO2 experiment– Use the pH-sensitive pigment in red cabbage to illustrate how CO2 can acidify liquids (and why soda is bad for your teeth.)
Homemade Petri Plates: test surfaces around your kitchen and house for microbes. Use to test fingers before washing, after washing with water alone, after washing with soap, and after using hand sanitizer.
So remember, cooking can make you a better scientist, and doing science can make you a better cook.
Crock Pot Microbiology: Yogurt
- by KitchenPantryScientist
Microbes are always fighting for space.
Bacteria and fungi try to outnumber other tiny competitors using chemical warfare, among other things. That’s why many antibiotics (which kill certain bacteria) are actually produced by other bacteria. One reason foods like yogurt and cheese, which are made by beneficial bacteria like Lactobacillus acidopholis, don’t easily spoil is that these bacteria can turn milk sugars into lactic acid. This makes their environment toxic to some of their competitors, like pathogenic bacteria. Luckily, we humans aren’t harmed by lactic acid and can enjoy its tangy flavor.

To grow bacteria in labs, scientists have to take care of them the way you’d take care of a pet. You have to give them the type of food they like, the right amount of oxygen and moisture, and keep them at their optimal temperature.
The same principles apply to growing the bacteria that make yogurt. You prepare the bacteria’s food by heating some milk and letting it cool to a temperature that the bacteria can tolerate. Then, you add the bacteria and let them grow for about eight hours. During that time, the bacteria will happily divide, multiply and eat milk sugar. In the process, they’ll produce lots of lactic acid which changes the way the proteins and fats in the milk interact, forming a more solid food product.

We made yogurt in our crock pot, which turned out to be a lovely bacterial incubator. The end product was a little runny, but putting it through cheese cloth (or a coffee filter in a plastic bag with the tip cut off) gives you thicker yogurt. It is delicious! Here’s how we made it, thanks to directions from Stephanie O’Dea:
Ingredients: 8 cups (half-gallon) of whole milk , 1/2 cup grocery store yogurt (must contain live/active culture), thick bath towel, slow cooker

Turn crock pot on to low. Add an entire half gallon of milk. Cover and cook for 2 hours and 30 minute. Unplug your crock pot, but leave the cover on. Let it sit for 3 hours so your bacteria will not be overheated when you add them.
After 3 hours, put 2 cups of your warm milk in a bowl. Whisk in 1/2 cup of the live/active culture yogurt. Dump the bowl contents back into the crock pot and stir well. Wrap a heavy bath towel all the way around the unplugged crock pot as insulation and let your bacteria grow for 4-8 hours or until thickened. Refrigerate and enjoy with fruit, honey, or granola. As I mentioned, you can strain the yogurt if you prefer a thicker consistency, and your homemade yogurt will make a great starter culture for the next batch!

If you don’t have cheesecloth, you can strain your yogurt through a coffee filter in a plastic bag with a corner cut off.
Happy kitchen microbiology!
Thanksgiving Science Experiment: testing foods for starch
- by KitchenPantryScientist
Ever wonder how much starch is in your Thanksgiving dinner? Click here for a fun experiment that lets you test your favorite foods for starch using iodine from the medicine cabinet.

Remember to supervise small children if you do this experiment, since iodine should not be ingested! Happy Thanksgiving!
Gluten Ball
- by KitchenPantryScientist
Gluten is a hot topic these days, but most people aren’t really sure what it is.

Gluten is a protein found in wheat, rye and barley. It makes bread chewy and helps hold the bubbles that yeast makes in dough so that it can rise. (Here’s a fun yeast experiment!) Although some people have a disorder called celiac disease which impedes them from digesting gluten properly, most people can eat it without any problem.

You can easily extract a ball of gluten from flour using nothing but your hands and cold water, to see for yourself what this stretchy grain protein looks like. Just add a cup of water to a cup of flour, mix it together and knead it for about 5 minutes. (Add more flour if it’s too sticky to handle.)

Now, put the dough under COLD water and start “washing” out the carbohydrates so that mostly the gluten remains. Your hands will freeze, so you may need to take a break. If you keep going until the water coming off the dough is mostly clear, you’ll be left with a gluten ball.
Some types of flour have more gluten than others, and sometimes extra gluten is added to pizza dough to make it chewier! Try this with several types of flour to see what has the most gluten (or no gluten.)